


Thanks Paul but no worries for you because when I go to work tomorrow you will still be retired and can get stuff done. love the downtown deco buildings I have 2 that I still need to put together. Almost pulled the trigger on their buy 2 get 1 free sale this past weekend but just couldn't find that 3rd one that I loved. Thinking about moving onto prison area next as I think the group would really like to see that area done when I host our group in October.
Jumping to the prison area and finishing that would be the way to go. Funny I was going to work on a control panel area. I ordered the terminal blocks but ordered to wrong terminal block jumpers. Got to see if I can find some around here. I don't have much time to get part of the basement layout up and running before my Tuesday night get together.................Paul
Allan Miller posted:Installed interlocking rubber tile gym floor covering over my basement train room's tile floor to replace the large area rug which was discarded after my recent basement flooding. This will be easier to take care of if there is ever a future water event, and best of all it is very comfortable to walk on.
Allan,
1. Did you put the gym tiles right on concrete or is there some form of underlayment?
2. Any brand in particular or just the cheapest you could find?
I'm prepping my basement for a layout and was considering those types of tiles. I see deals all the time on Woot.com. I'm always hesitant to pull the trigger because I'm worried the cheap stuff wont be as comfy. Do I really need to spend a lot on fancy anti-fatigue mats, though?
I suppose if it is cheap enough, if it doesn't last it can easily be replaced, huh?
John D. posted:1. Did you put the gym tiles right on concrete or is there some form of underlayment?
2. Any brand in particular or just the cheapest you could find?
The tiles I bought are TrafficMaster Shock Absorbent Gym Tiles, which I bought at Home Depot. Thry are made of rubber and are laid directly on the basement's existing tile floor. I am using them in the train room only. The adjacent lounge area will have a new (very large) area rug.
These rubber tiles were not cheap. I used 8 packs of 4 tiles each (the tiles measure 24" x 24" each, and are 1/2" thick) and they sell for nearly $50 per pack, retail. I used 8 packs. I get a military discount from both Home Depot and Lowes, so did not pay the full price, but it still wasn't cheap. There are a number of less expensive brands available, but I wanted something of decent quality that hopefully will last a long time.
I estimated how many tiles I would need pretty accurately, but do need to buy one more pack later this morning.
As noted earlier, I laid these interlocking tiles directly on the tile floor, which was in fine shape with no flood-related damage, but hard on the feet after a while. The new rubber interlocking tiles were very easy to put down and they stay in place with no shifting or sliding. They also are very comfortable on the feet.
A photo is attached....
Attachments
Images (1)

Bryan, the subway station just looks wonderful!![]()
Paul, atleast you don't have to get on a ladder to paint it! LOL Looking good!![]()
John, nice looking engine's and good job on the DCC! Sounds great! I hope you got your gremlin!![]()
Allan, the floor looks nice and comfy!![]()
Allan Miller posted:John D. posted:1. Did you put the gym tiles right on concrete or is there some form of underlayment?
2. Any brand in particular or just the cheapest you could find?
As noted earlier, I laid these interlocking tiles directly on the tile floor, which was in fine shape with no flood-related damage, but hard on the feet after a while. The new rubber interlocking tiles were very easy to put down and they stay in place with no shifting or sliding. They also are very comfortable on the feet.
A photo is attached....
Thanks Allan! They look great.
My basement is bare concrete still. I saw this stuff at Home Depot that us 2x2 squares of plywood with a plastic diamond plate on the bottom. Keeps moisture from ruining the floor.
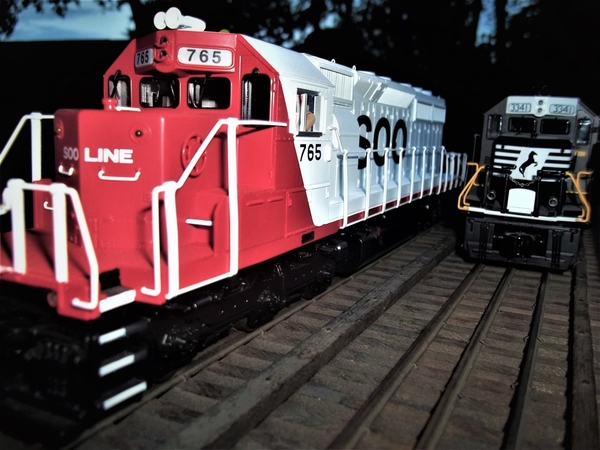

a boy named SOO...

Attachments
Images (5)


Need help. Tried to post a video on here but could not do it. It said error over the limit. What would I have to do to post the video. Thanks Paul
The station wasn't modeled after any real life station even though I used the Wall Street Signage. I just like to freelance my layout and create my own scenes.


Bryan, this is just spectacular! I love your wall posters too! Thanks for sharing .
jgtrh62 posted:Paul try republishing at a lower resolution, or publish to YouTube and then embed the video’s link in your OGR post.
Good advice, John. Pardon my ignorance, but what is the file size limit for an imbedded video in the forums?
100 Mb it's given on the notice when you press "add attachment".
Bryan, that subway came out fantastic. Best I've seen.


Attachments
Images (7)


The video /pic loading limit is 100mb.
Embedding is not loading. The video or picture remains on the host site, just viewed here. Embedding is only limited by the host site, not OGRF.
At 100mb you can usually fit 15-50 seconds or so of video depending on the resolution.
Loading pics can get glitchy at around 20 photos. I usually post twice for more vs losing all the data and time to a glitch; no matter how many mb are used up.
This morning I took a video of my Weaver TOFC consist so far. I still have 8 more to bring up from the basement. Anyways I tried to just post is as is and found out I was over the limit. I went to Youtube to learn how to download the video to there. I am not a computer person. But I believe I finally did it and hopefully it works. That is all I got done layout wise. I had yardwork to take care of first before I venture back down to the basement. If the video shows up enjoy. I got a migraine from this computer stuff and to top if off I posted it to the wrong topic and had to delete it LOL..............Paul
Paul you can actually post the video to the site and not just link it. In YouTube highlight and copy the address where the video is playing and then go to the insert/edit media button here on the forum and then in the general tab just paste the address in the source box.
paul 2 posted:This morning I took a video of my Weaver TOFC consist so far. I still have 8 more to bring up from the basement. Anyways I tried to just post is as is and found out I was over the limit. I went to Youtube to learn how to download the video to there. I am not a computer person. But I believe I finally did it and hopefully it works. That is all I got done layout wise. I had yardwork to take care of first before I venture back down to the basement. If the video shows up enjoy. I got a migraine from this computer stuff and to top if off I posted it to the wrong topic and had to delete it LOL..............Paul
cool, nice train Paul !! soon it will be long enough to stretch
from the basement, to the upstairs layout !!!
Bryan, say what. I had enough trouble doing it this way LOL I need simplicity.....Paul
Paul remember there have been numerous studies that as you age your brain will turn to mush if not taught new things. See I was just trying to help you out. When you host at the end of September I will write that all down for you and give you a demonstration.....that is if my shirts are still in your possession.
That be sure kind of you neighbor. As to the shirts that may be iffy. Would it be okay if they were used or sort of lived in. I am too old to learn computer skills. LOL....Paul
Bryan in Ohio posted:Paul remember there have been numerous studies that as you age your brain will turn to mush if not taught new things. See I was just trying to help you out. When you host at the end of September I will write that all down for you and give you a demonstration.....that is if my shirts are still in your possession.
HAHAHA! I am trying to wrap my grey matter around renovating a dozen old and disreputable E-Units. I keep breaking the tips of the fingers while trying to clean crud off them. It is also frustrating to try to keep the drum in place while fitting in the last 2 finger contact, and close the unit. The way I figure it, the more often I do this, the easier it should get. We shall see. Haven't figured out a good way yet to tighten loose switch levers.
John D. posted:Allan Miller posted:Installed interlocking rubber tile gym floor covering over my basement train room's tile floor to replace the large area rug which was discarded after my recent basement flooding. This will be easier to take care of if there is ever a future water event, and best of all it is very comfortable to walk on.
Allan,
1. Did you put the gym tiles right on concrete or is there some form of underlayment?
2. Any brand in particular or just the cheapest you could find?
I'm prepping my basement for a layout and was considering those types of tiles. I see deals all the time on Woot.com. I'm always hesitant to pull the trigger because I'm worried the cheap stuff wont be as comfy. Do I really need to spend a lot on fancy anti-fatigue mats, though?
I suppose if it is cheap enough, if it doesn't last it can easily be replaced, huh?
I've used the kids room's, puzzle edged, multi-colored cheapies and the "better" black ones both. There was no difference except the dovetails. They withstood motors, oils and transmission fluids soaked into the sponge pores, didn't go up in flames from welding or torch cutting slag. They stopped my feet from freezing and/or throbbing on cement, and served as a van mattress for napping before the oily messes too. Money well spent imo.
paul 2 posted:This morning I took a video of my Weaver TOFC consist so far. I still have 8 more to bring up from the basement. Anyways I tried to just post is as is and found out I was over the limit. I went to Youtube to learn how to download the video to there. I am not a computer person. But I believe I finally did it and hopefully it works. That is all I got done layout wise. I had yardwork to take care of first before I venture back down to the basement. If the video shows up enjoy. I got a migraine from this computer stuff and to top if off I posted it to the wrong topic and had to delete it LOL..............Paul
Brian's way of embedding doesn't always work for me, neither does the alternative, but it works more often than not... Sometimes YouTube includes some unwanted address code at the address beginning is the only issue.. But anyhow, at YT view the video, pause so it doesn't end and change videos while you work... hit share, then choose embed, copy that code and go to ogrf's composer and use the film icon, choose the embed tab (vs general) and paste. It takes a bit for embed to finish. (Longer if you had loaded directly vs embed). You can also have a video start midway fyi. If you pause and play around with YT share, you will eventually notice a "start" message and time box to fill in too (has the pause point time listed at first) Review addresses for both the normal and "start at: Xmin Xseconds" addresses to see the SIMPLE code string that tells the start time. You can enter this tiny extra string manually, or change just the time with a keyboard once you know where to, and have learned the MINOR text differences in the YT addresses.
My daughter and I got the low loft batting painted and the base layers of earth, dirt, turf and ground foam applied.... Movie is in "editing"..... Will probably be ready for viewing when we get back from Steamtown.
Added two photos from 2 days ago, even my daughter was amazed how fast this comes together.... total area length is about 8 feet.
")


")
")

Attachments
Images (6)
")
")
")
mike g. posted:chris a posted:No Mike, it really is "easy"... plus if you stick with using rigid insulation, or styrofoam under the batting you can easily cut off what you don't like and shape it either before or after the batting is applied. The inexpensive knives with the snap off blades cut through it easily. I also found one at Home Depot that is a large version, 1 inch wide heavy duty snap off blade, dewalt I think.... It's a great cutting tool to have around as the blade when new will extend about 4 inches out of the handle and it's extremely sharp for cutting through rigid foam...
So go for it, it's really a forgiving process, yields great results and no plaster and water mess, and waiting days for it to dry... You can start painting and applying scenery within a couple of hours of laying the batting on top of the expanding foam as it completely dries or cures in like 2 to 3 hours at the most.
Thanks Chris, I will be giving it a try! I watched that video you shared with me so I will watch it again and jump in and give it my best!
I have to second the "go for it".
"It ought to be law" to try it.
Find some garbage foam and make a cement loading ramp, small concrete bridge sides over a culvert pipe or ditch, a small silo or bin, a crossing shacks replacement, a siding bumper, etc. etc.
You'd be hard pressed to be any worse than mine Mike. I purposely didn't put too much effort into it because I wanted to see a "worse case scenario" of sorts. But it looked good enough to keep(for me anyhow)
Stacking layers for vertical walls vs uprights carved as walls like I did, is the closest thing to a no-no imo. The unnatural vertical plane is just too hard to hide.... In the examples: mostly carved green foam, and in the Ind.prk., just raw white styofoam, and styrofoam cut once or twice and assembled (balcony, porch, chimneys; toothpick rebar & white glue) The 2 buildings are from the ICRsR 382 model's box ....that you sold me. (And construction paper, silver pin stripe tape, q-tip box windows & doors, & match sticks, popsicle stick door. Yellow lower level windows are prismatic plastic so ground floor peeping-Tom's are foiled
)
FOAM BOX BOTTOM #1 (3 box side walls removed, one shortened{roof} squares were that way)
Painted flat black(hurry-hurry, slop n spread) then colored over with a brush wiped of excess paint (wet but not sloppy), some rock is highlighted at the tips with a light grey(brush nearly dry). All with cheap craft acrylics, about 90 cents each at Wally'sWorld. (All flats but the red brick...semigloss mixed with flat white)
FOAM BOTTOM #2 same as #1 except one side removed became a balcony.
& the as is STYROFOAM for a "DOCK" (IND.PRK.SOUTH text.)
Green foam, a castle base with a tunnel, from atop the red wall & down is foam. Mortar lines are just pressed in, but building brick by brick works too.
First try (bad shot)
Not too bad except for the vertical issue eh? The odd fitting of the "portal" here hides until you get low enough, but the rock detail is there without effort; which was my real curiosity...was the painting hard? No.
And if you don't like it, just take it to the sink and wash it off real quick. Or even weeks later, it just needs to soak longer. The longer it cures, the longer the soak takes before it loosens each coat.


Attachments
Images (5)

Lol, Mark Boyce once said "looks great"... I simply replied "No, it doesn't" ... The compliment threw me a curve and I knee jerked rather than thanking him like a human ![]() ..but that's how little effort these foam pieces take, (and my goal wasn't to impress, but instill confidence and empower others. The compliment foiled me in a way
..but that's how little effort these foam pieces take, (and my goal wasn't to impress, but instill confidence and empower others. The compliment foiled me in a way ![]() )
)
Go for it!
paul 2 posted:This morning I took a video of my Weaver TOFC consist so far. I still have 8 more to bring up from the basement. Anyways I tried to just post is as is and found out I was over the limit. I went to Youtube to learn how to download the video to there. I am not a computer person. But I believe I finally did it and hopefully it works. That is all I got done layout wise. I had yardwork to take care of first before I venture back down to the basement. If the video shows up enjoy. I got a migraine from this computer stuff and to top if off I posted it to the wrong topic and had to delete it LOL..............Paul
Paul, That is a great train!! Thank you for posting the video!
Paul, Great looking Train! Are you sure your not going to need another engine! LOL after you add 6 more cars?![]()
Chris, That sure looks wonderful! You and your daughter have done a great job in such a short time! It give me hope! LOL![]()
Making New Friends . . . one brush stroke at a time. (96 more passengers being painted. They are good listeners.)
I purchased two P8402 48 Figures from China on Ebay. The people lack crisp features and need two coats of paint to cover the plastic figures. At $9.99 for 48 figures or $19.98 for 96 figures, it is a good alternative as the Preiser 65602 24 Unseated People get harder to find.
I have taken my brown and gray suited men and added a lighter color to the Testor's "Dark Earth" and "Dark Grey", creating two more colors of clothing for the men. (See photo). I did the same thing with the dark Green, creating an "Avacado" color to go with the pastel colors I use for women's clothing. More colors give me the ability to use the figure more than once in a passenger car.
These P8402 Figures might be good for Brian's Baseball bleachers on his layout.
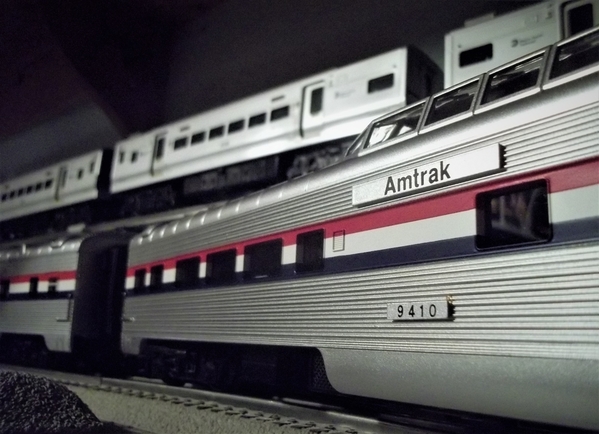
I will paint the hair on the figures once I know where in my cars they will be positioned. The Amtrak 21" Four-pack arrived today from Nichols Smith Trains. I was happy to see that the Baggage Car doors open, allowing me to put Freight, Postal Workers and my "signature" Woodland Scenics "Bicycles" in the car.
Sincerely, John Rowlen
Attachments
Images (3)


Chris, love the look of your project. 👍


nmp... tinkering around outside last night, great weather out !!!

nmp...
Attachments
Images (4)


Today I found a new spot for Brian's Beer/Train room. In my world here in southern NH, it is on top of Nicholas Smith train store. I know Brian has more trains than many train stores, but it gives him an option to run things he doesn't own yet. I considered Mike's suggestion of putting him next to Dotty's House, but Brian's girlfriend and parents might frown on that location.
I also found a new owner here for the Old Mystic Depot Restaurant. It's the people who own the Copper Door Restaurant in Salem NH. Great Bar & Food. The signage is done and so is the installation of the heavy Copper Door. I use the Handicap Remote button when I go there.


Attachments
Images (4)
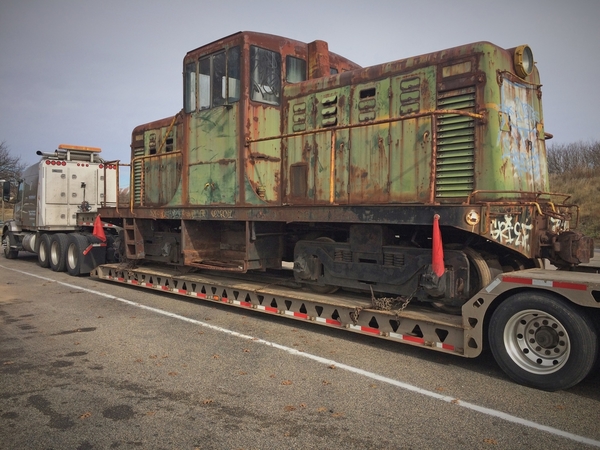
briansilvermustang posted:
nmp...
Hope that baby is going in for a restoration.
John, Sure looks like you have some fun a head! Please keep us posted!![]()
DECOYNH (MATT) Your right about the placement of Brian's Tavern! No need to stir u things at Brian's house! Also the new owners of the restaurant have done a wonderful job on the remodel! Really looks like a nice place to go on the weekend!![]()
I took the advice of a forum member and did a little reworking on my power station. Moved the plugs inside the box to keep everything nice and neat! Added my TIU and side receiver for the Z4000 and an old transformer I am sure I can use for something! LOL


Attachments
Images (4)
Looks like a plan, John!!!
Nice modification, Mike!! Don't spill that can on live wires!! ![]() I only say that because I'm a fumble fingers anymore.
I only say that because I'm a fumble fingers anymore. ![]()
Former Member
Watch the heat closed up like that, mike
Thanks Mark, No live wires right now, or the beer wouldn't be sitting there!![]()
BEARDOG, what do you mean heat? Do you think I am going to that much heat running 2 loops and a small yard?![]()
Add Reply
Sign In To Reply
