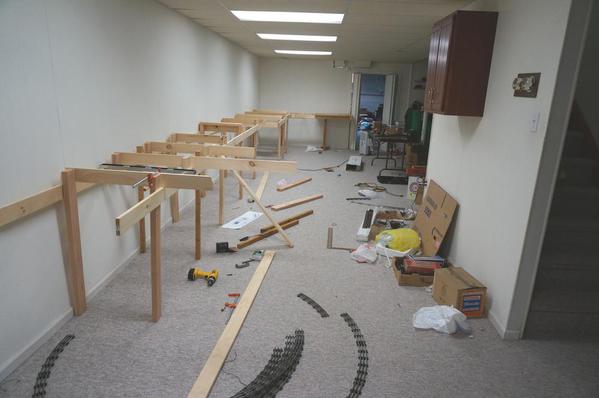
I removed all the track from the bench work after test fitting most of the track so I could start the hard shell process. I'm not sure how to convert the file to a pdf or photo so people without rr.track can see it.
Once again I've switched gears, and am back on wiring and control panels.
I'm so close to being able to open the new hidden yard. Wednesday I connected all the bus wires to the power supply. Today I prepped for the stopping zones by bringing the wires to a terminal strip. One wire is the power source. The other goes out to the stopping section. The empty terminals will be the legs that go to the panel switches.
I made this panel today. The wires are color coded and so are the tracks. Color symbol for number, just like resistors.
Tomorrow is going to be a big day. Both Matt and Jon are coming over.
Attachments
Not much done on, now C&S, Mullet kit today. Mounted windows in walls and doors...
side windows slide up and down in their frames (with a tweezer, probably after assy.),
although I do plan to not glue down roof, since there is an interior and I may need
to add weight. One job I don't like is using wire for the handrails, but wire provided
is softer than piano wire so one side is done.
didn't do much just been wanting to setup a website for the trains so I did. I hae been working on it all night. Uploading Pictures and Video's. Be nice the site has been up for about 5 hr's now.
http://mail.intergrated-it.com:90/
Right now it is piggy backing off of my companies Domain pointing to my mail server on a different port than port 80 Because a website I have been working on for someone is on port 80 there both WordPress sites and I am learning how to use Wordpress. so please be Kind.
John
Enjoyed looking at all the pictures in the gallery. Nice work.
Nothing, I worked on Elliot's layout today
Today, Sat., after too long further research, trying to identify a number on 28' side
door C&S caboose, I am told the CB&Q only had the one at N. Freedom, Wis. and
that all others were 30'? I did find photos of Q caboose with light green interior. However, I formed and installed all the wire handgrabs and rails on the model's ends and body, and did several paint touch-up on ends and doors. Glad the wire bending
is over.
Matt and Jon were here today. Matt did 11 more Tortoises while Jon and I continued to rewire the hidden yard. Not very glamorous stuff really, but it all needs doing. The pieces of the puzzle are falling into place.
It seems that the construction dust has taken its toll. Some serious track and wheel cleaning are in order.
Patrick I need you!![]()
Ran a MARX A-A Southern Pacific set around after an armature to driveshaft repair.
Looks like it slipped soon after it was bought, then put away for many years (after "whoever" chipped a driver trying to get it off to access the armature![]() ). Arrived by mail in 1952 anyway(postmark),and its has some of the cleanest cars I've ever seen.
). Arrived by mail in 1952 anyway(postmark),and its has some of the cleanest cars I've ever seen.
I always like to run tins on newly laid track ASAP(I hadn't). With the light weight, they reveal any bumps, twists, etc., in the track, very quickly. My elevation turned out very well. The largest deviation from level I can find is a .3 ..Flatter than the table its on ![]() .
.
cleaned track and the wheels of some forty freight cars. what a chore that can be!
added 27 ft of led rope lights under the layout.
Tuesday:
I have a challenge for N scalers. Lemme see your working windows? I just put sliding sashes in cupola windows of this O scale CB&Q caboose, and then put on the roof. The lower windows already raise up and down in their tracks. I have to put on the platform railings before I can paint the frame and then put body on frame followed by roof. I see a dim hint of light at the end of the tunnel.
After reaching the major milestone of opening the small helix and the new hidden yard late last night, I was back at it today.
I threw the 072 switch at the cutoff which changed the whole traffic pattern on the layout. What I discovered when I tried to run a train was, a couple of feeders were never connected to the power buss. Quick fix.
I also cleaned the wheels and rollers on a couple more engines, and dusted off their cars. More vacuuming in the hidden yard, still cleaning up the dust from sanding the backdrops. More test running. There are a few spots that need some attention, but all in all, things are running pretty well.
Attachments
Ordered some more stuff !!! received my DCS remote and TIU also Received AIU of course tested them on a loop worked great it almost instantly found the only mth engine I have ![]() and set it up cruised it around testing the loop 10's all the way around. strung up 27 ft of rope led lights under the layout since that will be my new home for a few days. a lot of wiring to do. received the powerhouse to TIU cable to power the track. Picked up a railsounds 4 sound upgrade for a few bucks so I put eh board in the 4004 it now has sound. still waiting for the tmcc to TIU cable a 072 remote switch and 2 left and 2 right 036 switches what I need to do is spend a day cleaning up the room it's getting out of hand
and set it up cruised it around testing the loop 10's all the way around. strung up 27 ft of rope led lights under the layout since that will be my new home for a few days. a lot of wiring to do. received the powerhouse to TIU cable to power the track. Picked up a railsounds 4 sound upgrade for a few bucks so I put eh board in the 4004 it now has sound. still waiting for the tmcc to TIU cable a 072 remote switch and 2 left and 2 right 036 switches what I need to do is spend a day cleaning up the room it's getting out of hand ![]()
Attachments
Bruce,
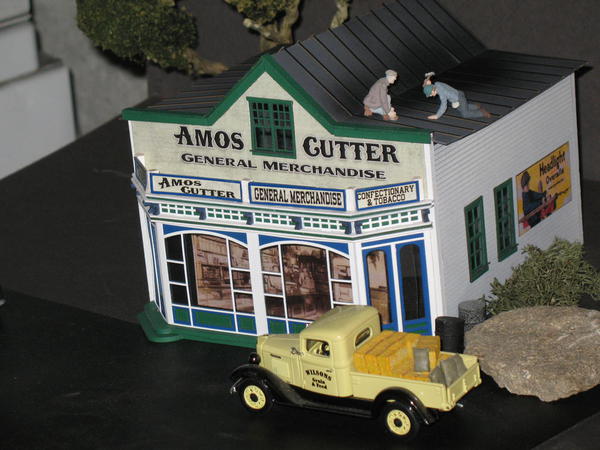
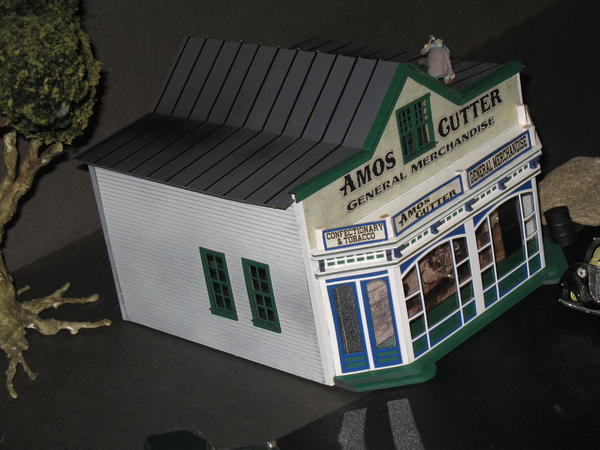
I saw your photos on Facebook. The general store turned out very nice! I like the metal roof.
Bruce,
I saw your photos on Facebook. The general store turned out very nice! I like the metal roof.
Installing Glenn Snyder shelves and of course ran out and had to order more.
Continuation of inventory over a week now and it's a PITA . Mostly my own fault for waiting so long to do one. Still staying happy.![]()
Bruce,
I saw your photos on Facebook. The general store turned out very nice! I like the metal roof.
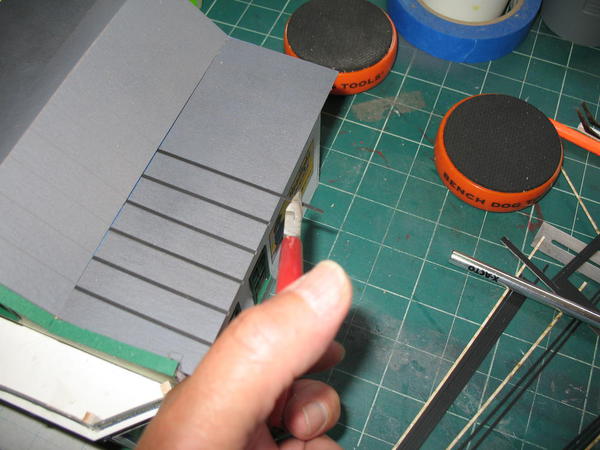
Well, simulated metal roof. I did one in styrene once, where there are slots in the roofing material, and the stand up strips are glued in the slots. Makes it easy to get them parallel to each other and perpendicular to the roof. Your looks looks like it would be harder to do, but looks very good. I think I see faint parallel lines for you to line up the strips on yours.
Cleaned the E-unit on my 1688. Now it reverses enthusiastically! ![]()
Mitch
Bruce,
I saw your photos on Facebook. The general store turned out very nice! I like the metal roof.
Well, simulated metal roof. I did one in styrene once, where there are slots in the roofing material, and the stand up strips are glued in the slots. Makes it easy to get them parallel to each other and perpendicular to the roof. Your looks looks like it would be harder to do, but looks very good. I think I see faint parallel lines for you to line up the strips on yours.
mounted the tiu and aiu wired up my tracks ran power to fixed input 1 and var1 hooked up tmcc. via a cable to the tiu programmed all the tmcc engines in and tested them and the mth engine and then tested the conventional loop all worked great ![]() started cleaning up wiring under the table. going to be running all the remote switches in the next few days that should be fun
started cleaning up wiring under the table. going to be running all the remote switches in the next few days that should be fun ![]() it's getting there it was nice to run all trains from 1 remote.
it's getting there it was nice to run all trains from 1 remote.
Blew whole day driving to and from a distant auction. Some three rail trains, and some two rail kits, a few nice to have, but not worth staying for and a late return, after a preview. Walthers gas electric and JC passenger car kits, and a number of unmemorable roadname freight car kits. Some O scale loco kits, but of the usual NYC and Pa. prototypes. Interesting were two huge scrapbooks full of old, including many prewar, O scale kit builder catalogs (including that Vanderboom catalog, again...still wonder if they produced anything in it). Tempted, but late drive was unappealing....
mounted the tiu and aiu wired up my tracks ran power to fixed input 1 and var1 hooked up tmcc. via a cable to the tiu programmed all the tmcc engines in and tested them and the mth engine and then tested the conventional loop all worked great ![]() started cleaning up wiring under the table. going to be running all the remote switches in the next few days that should be fun
started cleaning up wiring under the table. going to be running all the remote switches in the next few days that should be fun ![]() it's getting there it was nice to run all trains from 1 remote.
it's getting there it was nice to run all trains from 1 remote.
That's great! I just bought a DCS system recently, and while I don't have a permanent Layout, I have had some time to start learning how to use the DCS. I have 2 of my 3 MTH engines programmed. ![]() You are making great progress considering you have a large family in your home. My family is the reason I am slow getting going again, but family comes first, as I know yours does.
You are making great progress considering you have a large family in your home. My family is the reason I am slow getting going again, but family comes first, as I know yours does.
Bruce:
What a GREAT building!!!!
I started the bench work on my second layout. The first layout which is a prewar toy train layout is at the right of the stairs. The second layout will be hi-rail At this point it is a most wonderful layout because it is all in my head. Reality might be quite different. I have been accumulating Gargraves track this week and next I need to gather some Ross switches.
Attachments
I started the bench work on my second layout. The first layout which is a prewar toy train layout is at the right of the stairs. The second layout will be hi-rail At this point it is a most wonderful layout because it is all in my head. Reality might be quite different. I have been accumulating Gargraves track this week and next I need to gather some Ross switches.
Al, It certainly looks like a good start to me. Reality is always different, even if you have it all planned out on paper, or computer these days. Once a person gets building, new ideas will take shape. I am looking forward to seeing your progress as time passes.
I'm working on a new building, "The Idaho Hotel", from Bar Mills. Once it is finished I will put it on the layout which means moving a few others around and fix up the landscaping around it.
I added some wildlife
Sprayed the chassis this morning, after getting all platform railings and brake wheels on last night. Also began roof of this caboose. Next to apply walls and ends and it
may look like a caboose. Can't find a stove in my junkbox, so will have to chase one
of those. Roof is designed to lift off, so stove can be a late addition.
Now have four walls on the chassis and the roof is being fitted. It is removeable so
that is trial and error, like much of this kit. Today, the Fourth, I dug through some boxes not explored since a move some years ago, and found a stash of archbar and caboose trucks. Did not find underframe brake components I was looking for, but did find a lot of brake wheels, timely, since I broke one mounting it on this caboose.
Put Lionel's Rio Grande Ski Train ABA with the add-on cars on our layout last night. Its orange & black colors look like fireworks against the snowy winter section. Ran the Ski Train around twice or three times before it ground to a halt. The powered engine picked up something loose like a stone, don't really know, from between the tracks that jammed its gears. Surgery is scheduled today to remove the stone. It is real important to vacuum the tracks regularly!
Spraypainted a stack of 260 bumpers for future use. Today: To the hobby shop for some used O straights for a prewar Lionel bridge!
-MMM-
One lightbulb later, this prewar #57 streetlamp I got in the mail today is working just fine!

Mitch
Attachments
Matt came over today. I bought a couple of carts online, one for tools and one for electrical stuff, so we assembled and loaded them. Then we moved all the non-functioning engines to a spot I had cleared above the workbench.
While Matt worked on engines, I finally completed the stopping zone project in the hidden yard. I also unpacked the closed circuit camera system that will be used to monitor the trains down there. This is really getting interesting.
I thought some of those engines would never run right (everybody's rejects from eBay). But after lengthening the antenna, and adding a shield to the coil on the RS board, they were good as new.
After dinner, it was playtime. This is something new!!!![]()
I was running the freight, and shooting the video, while Matt ran the Empire Builder. Things were running pretty smoothly, until the Builder had to pass through an 072 wye right at the end of the video. There is an electrical problem when the passenger cars hit that switch. There is also a spot on one curve where some engines have signal issues. My train is out of frame as I juggle the camera and the cab-1, and try to put my other hand over the engine to get it to throttle up.
Elliot,
It is great to see the trains in action on your layout. I think the runs were great!


