Awesome signals! What a great project.
Nice work! Speaking of signalling, I'm looking for suggestions. I have uncoupling tracks placed before three of my turnouts. What realistic object might I use to signal the location of these uncoupling magnets so I can figure out where to energize them to uncouple cars? Thanks for your input.
Brian
I said a prayer for a dead PW accessory killed in an attack by a fan![]() .
.
A window fan got turned around and blew itself down landing nicely onto the upper level track.![]()
However the crossing gate below it, was in its vertical position, and just thin enough to fit within the fans grill. The blade played food processor on the boards. ![]()
I ate the last fudge-sicle while pouting ![]() (yep, thee last one
(yep, thee last one ![]() "look out, "it's" coming
"look out, "it's" coming ![]() ").
").
There's not enough left to glue it together, and the balance might be hard to achieve with a fast-hack, so I think the lights alone will do for a while.![]() It barely cleared Baby Madisons anyhow, & it could "tick" them on the down-bounce
It barely cleared Baby Madisons anyhow, & it could "tick" them on the down-bounce![]() .
.
I had just taken a vignette photo for a post and was torn between two title names. Ironic they could apply here too "Swan Dive" or "Duck and Cover"
Attachments
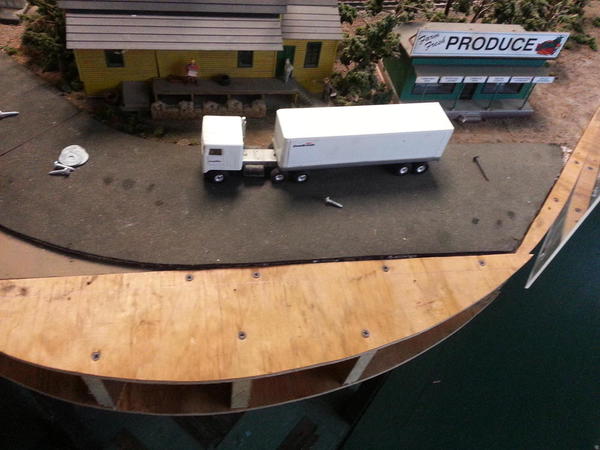
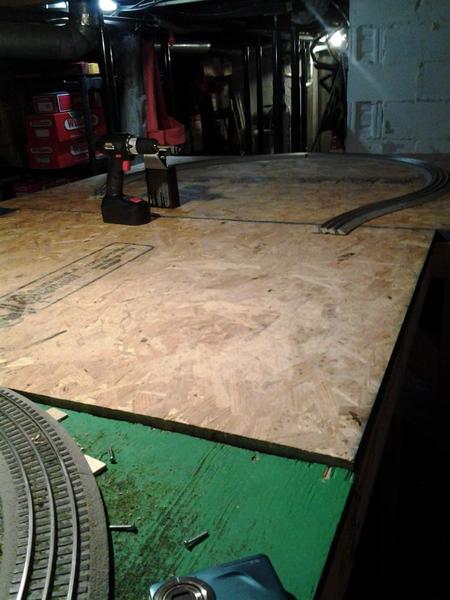
Last night, Howard Packer (AGHR_Howie) and I put a bench work extension on one of the layout corners so we can install a curved fascia panel to clean things up, plus provide a little more real estate for a realignment we're planning for the area. It's a work in progress we hope to finish up in the next couple of weeks.
Attachments
This is a Michigan loco road name. This is cool because it is hard to find Michigan Road Names. It is a MTH Premier 55’ All Door Boxcar from the 2016 Volume 1 Catalog. 20-93681. I purchased both yard numbers, 10011 & 10017. From Clyde, Owner of Stockyard Express, Oberlin, Ohio.
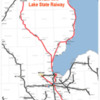
Lake State Railway Company (LSRC) is a Michigan - based progressive short line railroad that has been providing "excellence in transportation" since 1992. LSRC's approximate 300 miles of track run from Flint through its headquarters in Saginaw, up to Gaylord and Alpena. Lines also run to Midland, Bay City, and Paines.
Attachments
Adriatic posted:I said a prayer for a dead PW accessory killed in an attack by a fan
.
Owies. Don't think that'll buff out.
Oddly enow, I just resucitated one of those recently and just have to order a new light bar and lenses from Train Tender... ![]()
This took 45minutes, camera in hand, and supply round up...not counting eating fudgsicles, and was "free"...not counting eating fudgesicles ![]()
The metal frosting container/water tower, never looked so hot. While cleaning, a pop-sicle stick got stuck in the lids edge and I knew what to do. A smaller version of my last water tower with pop-sicle sticks as timber.
I cut the sticks to length with a saw blade. A tad short wont matter when I'm done. (there were some shorter sticks from orange cream-sicles too![]() ) The tips I'm saving for shingles
) The tips I'm saving for shingles![]() . There's a few extra photos in attachments too.
. There's a few extra photos in attachments too.
They just happen to fit well enough that the sides needed no trimming to keep from bowing into an oblong circle around "the inner form".
The backside of the stick is left unstained for better glue adhesion. I chose a stainless square since glue was involved, and it doubled as a press for 5 minutes.
Later the tape will be lifted and a similar cloth wrap, and epoxy, will go on the inside. But if your gentle, and left the container in place, this paper would be enough alone.
Note to glue along each board, leaving the seams flexible.
I think I'll be using it "upside down", with the lid, trimmed lower, as a base/ retaining band, but it could remain a roof too.
Heavier cribbing will replace the spindly legs.
Though not too concerned with it myself, for the scale folks wanting detail, I made those knots myself easily with a quick indention using a jewler's size Phillip's screwdriver. You could do lots more. There's also two boards that "banded", one end stained dark, then suddenly gets light at a straight 90°.
I scored across them at that point, and darkened that score with stain, to look like a seam at a plank repair, since both were up high.
The banding I've yet to choose. It may be wire (thicker than this) or silver automotive pin-stripe, weathered, for flat bands.
Consider this "Part 1".
Attachments
M. Mitchell Marmel posted:Adriatic posted:I said a prayer for a dead PW accessory killed in an attack by a fan
.
Owies. Don't think that'll buff out.
Oddly enow, I just resucitated one of those recently and just have to order a new light bar and lenses from Train Tender...
My light bar was missing too. I had found some red industrial jewel lenses for a switch panel that fit the hole, and a plastic lantern mounted to swing from the board connectors/webbing. The lanterns swing gave it a progressive balance from vertical, to horizontal, and back.
I'll look into parts, but I'm thinkerin' on tinkerin' too.![]()
Adriatic posted:This took 45minutes, camera in hand, and supply round up...not counting eating fudgsicles, and was "free"...not counting eating fudgesicles
I bow to your superior scrounge-fu! ![]()
Mitch
Rebuilt, painted and added a little more realism to a building. The building was completely torn apart when it arrived, roof destroyed, side wall had been removed and balsa wood broken off. I decided to disassemble as much as possible, pre built it based on where I thought the "parts" should be then glued it up. Not sure if this is the exact way the original owner had it but it looks good now. Need to add a few more items but it came back to life nicely


Attachments
trainroomgary posted:This is a Michigan loco road name. This is cool because it is hard to find Michigan Road Names. It is a MTH Premier 55’ All Door Boxcar from the 2016 Volume 1 Catalog. 20-93681. I purchased both yard numbers, 10011 & 10017. From Clyde, Owner of Stockyard Express, Oberlin, Ohio.
Lake State Railway Company (LSRC) is a Michigan - based progressive short line railroad that has been providing "excellence in transportation" since 1992. LSRC's approximate 300 miles of track run from Flint through its headquarters in Saginaw, up to Gaylord and Alpena. Lines also run to Midland, Bay City, and Paines.
Gary,
It is always fun to find cars from local railroads. Thank you for the information on a Michigan railroads!
My son and I went in to downtown Raleigh for a blue grass concert then check out the AMTRAK station and mainline. I met some Carolina Hurricane cheerleaders at the concert and we never made it to the mainline. Had a great time.
I Have to say it looks like everyone has been doing great work lately! Me I have been doing outside honey-do list. But that's ok, a happy a happy life!
This was a false report.
Adriatic postedI said a prayer for a dead PW accessory killed in an attack by a fan
Super glue to the rescue! 
It ain't pretty but it's alive again. ![]()
Due to low batt..um... Due to technical difficulties beyond our control, no new images will be presented this evening ![]()
I had 5 highly enjoyable minutes ( and that is all the time I had for trains today ) running a double Trainmaster loco consist. Both locos are powered Williams locos. First time I ever tried this and the locos worked very well in tandem.![]()
Adriatic posted:Super glue to the rescue!
It ain't pretty but it's alive again.
Due to low batt..um... Due to technical difficulties beyond our control, no new images will be presented this evening
Ya can't keep a good 252 down! ![]()
Mitch
Not much... But I did manage to "manufacture" a few pieces. The lumber is for the MTH sawmill. The pieces without the "C" are the originals. It is amazing how finicky the sawmill is about the lumber it produces. The other item is my personal uncoupler markers. After much research, I was unable to find any sufficiently prototype markers to use as uncoupler markers, so I fell back on rule #1, it's my railroad. Hopefully, these will make it easier for operators to uncouple cars for further movement and spotting. The most difficult part about making these was cutting the square wooden posts. I hot glued the plastic triangles to the posts, drilled holes for the posts and press fitted them to the layout. Enough for today.
Attachments
The shops have resumed work on 0-4-0T #490, with a new frame being manufactured and a universal motor under construction for power. Foreman worries about whether it will be completed in time, as the road wishes to avoid the expense associated with purchasing a motor and rectifier from RadioShack. Will see who wins this battle of wills, the road or the foreman.
This time of year unusual for me, I ran trains for a couple of hours this morning and a few more this afternoon. Testing the limits of my DCS signal, one 300 foot loop, right now 9 diesels pulling four trains with one of those, a 12 car passenger consist. Didn't build lashups just put everything facing forward and used the All button. Going to try and sneak a 5th train there ![]()
clem
Looks like "it's the season for running".
I invaded the renters room and ran my shelf layout calmly for an hour.
The DT&I SW has a PW F-unit's Magne-traction motor stuffed in it, and was really showing off once warmed up. I was having trouble going slow enough to not catch the other train on the shared main. So rather than lighten the switchers load and lower the voltage, I shut down the Virginian rectifier and reached for the engineers cap ![]() .
.
The #8111 "had it's dancin' slippers on" for sure, the motors high speed roots were showing, and before I knew it, I was pushing 19volts on the KW, and laughing just about as hard as I could as the little SW yanked 10 cars around the ceiling like they weren't there. At 150 scale mph, my inner "Gomez" was in full swing and 19.5 volts of insanity was on the line now. 19.75v! It didn't even tip its shell in the bends, but all 20volts proved too much as it hit the one downhill curve. She jumped the track fast enough to slightly bend the thick postwar railing slightly against the wall.
She's fine, but even a million pieces would have been worth that last twenty minutes ![]()
Wiring, wiring, wiring oh yeah and more wiring and testing, testing, testing oh yeah, and more testing.
Nice work Dobermann, I especially love the window curtain blowing in the wind.
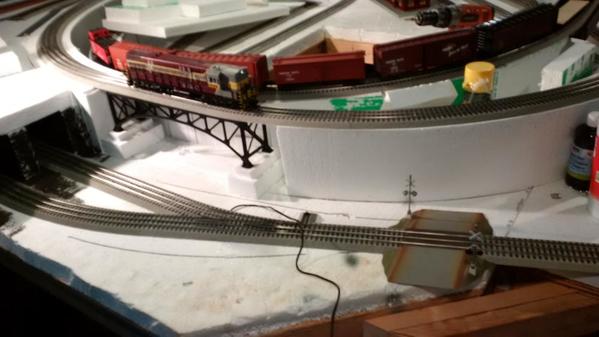
As for me bought a bunch of foam, cut out the foam, and started to dry fit the main level track plan together. Also let my friend come over and test run some of his engines on the subway line that he recently purchased. Seeing all the pristine foam reminds me a painter staring at a blank canvas before he starts his painting. Oh the possibilities.
Attachments
Bryan, layout is really taking shape fast. Is that the track plan starting to take shape or were you just experimenting.....Paul
It is the track plan although the upper right corner is a piece of flex track that I have to wait until final step to shape and connect. The plan is to lay it all out and then trace where everything is going. Then I am going to cut out the track area and raise it up a few inches so that way the surrounding area can be lower or if needed higher than the track.
I cut out an access pop up and installed a bridge where I will be installing a small gorge and mountain above the 2 track tunnel
Attachments
Ran trains. I ran 4 different engines on my 2 loop layout. Hadn't had the MTH WM 0-8-0 switcher on the track for a few months.
Discovered my #2037 is loose enough in the gearing and rods now that it skipped a tooth on the rear driver and locked up. This will be the third set of bushings in my life.![]() I'll likely do gears too, rear one for sure
I'll likely do gears too, rear one for sure ![]() .
.
All the night running, my control center needed a light, so off to the garage I went. When I returned, I had a 3.5" chrome map light from an old Ford van; like a flashlight on a swivel base. Still needing a switch I hit the junk box for a #90. This one had good contacts, but no bottom cover, which means the button can be pressed, then wedged into the hole to stay activated for a light. But looking high and low, turned up no red button for the switch case ![]() . I began thinking "shape and size" and ended up with this.
. I began thinking "shape and size" and ended up with this.
If you look hard you might guess what the button wheelie is ![]() ....
....![]()
Works fine for now, locks in place, wont run in there & hide either. I'll wire it "for real" when the sparks bother me ![]()
Attachments
Adriatic posted:Discovered my #2037 is loose enough in the gearing and rods now that it skipped a tooth on the rear driver and locked up. This will be the third set of bushings in my life.
I'll likely do gears too, rear one for sure
.
All the night running, my control center needed a light, so off to the garage I went. When I returned, I had a 3.5" chrome map light from an old Ford van; like a flashlight on a swivel base. Still needing a switch I hit the junk box for a #90. This one had good contacts, but no bottom cover, which means the button can be pressed, then wedged into the hole to stay activated for a light. But looking high and low, turned up no red button for the switch case
. I began thinking "shape and size" and ended up with this.
If you look hard you might guess what the button wheelie is
....
Works fine for now, locks in place, wont run in there & hide either. I'll wire it "for real" when the sparks bother me
A part here, a wire there, some glue, bailing wire to hold it up. A Frankenstein build!! What's next Mr Wizard? ![]()
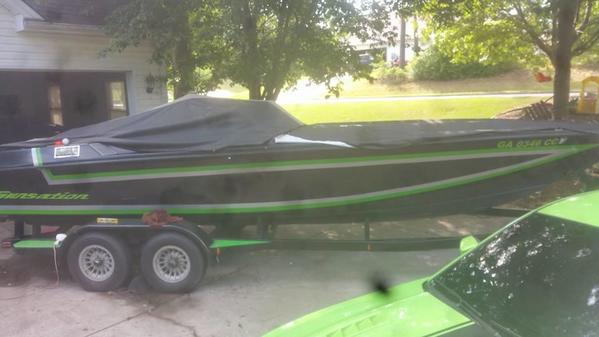
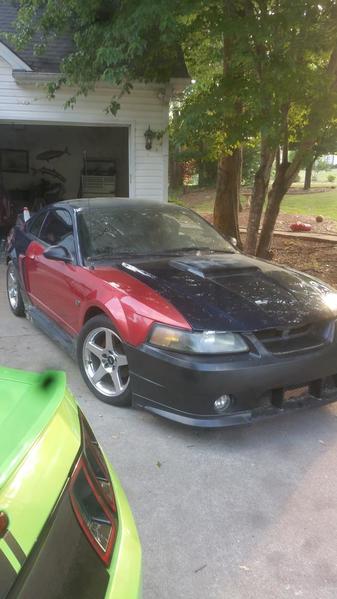
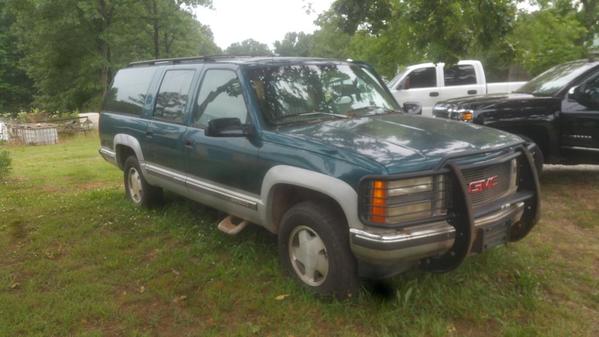
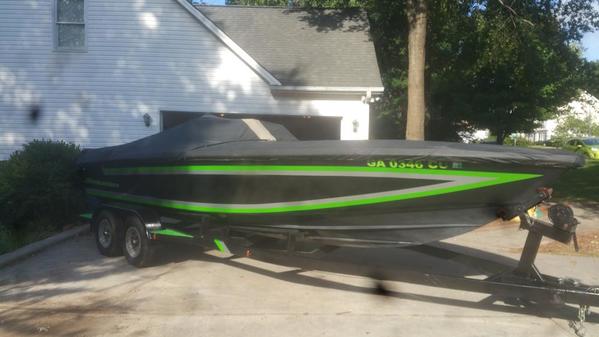
it's that time of year when Trains get pushed to the side for other projects. I did manage to go up there yesterday for about an hr and run trains. I removed all the trains leaving just one and ran the whole layout with the one grain train. I did notice something in doing that I think I might need to pull up some sections of track and add more feeders or more 180 bricks I seem to be low on power in certain areas. but here are my projects I have been doing other than trains. finished up graphics on the boat I picked up also finished up the cabin area completely all new materials minus the cusions. I am waiting for my cockpit seats to be redone now then it's time for the maiden voyage. so far new motor, cabin, cockpit, carpet thru out, new wiring , new lights , radio, batteries, I think it's easier to say what isn't new hull and deck, most people wouldn't have taken on this project but I worked for Sunsation when I was a kid and built this boat when it was new that's why I did it . new led lights on the trailer also. then I if anyone remembers my step brother wrecked my 2001 mustang roush in Dec. well it is now back together and running just needs paint. and I picked up a 93 suburban to pull the boat well last weekend my daughter blew the trans in it so I am now pulling it out to get rebuilt.
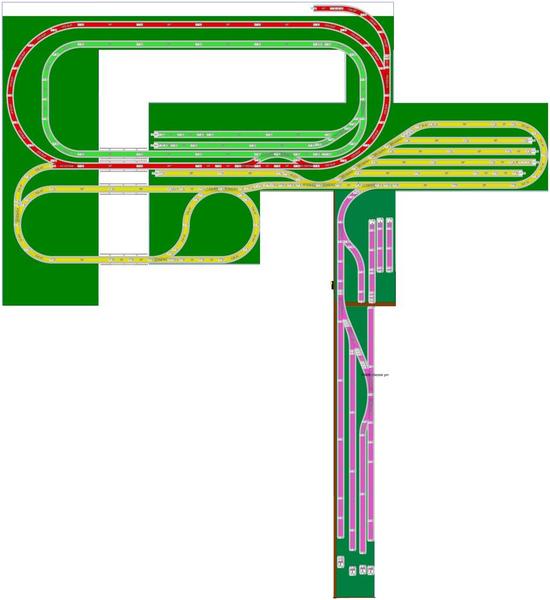
But to make it somewhat train related I also have been playing around with the idea of adding some 072 track to the layout so a rework in needed if I want that but didn't want to remove the existing tables so I reworked the layout with the existing layout in mind here's what I came up with .
Attachments
suzukovich posted:A part here, a wire there, some glue, bailing wire to hold it up. A Frankenstein build!! What's next Mr Wizard?
Mr Wizard![]() Now that's good TV
Now that's good TV![]()
There was a physics show with a crazy haired professor I liked a little better.The 70's I think. Show came on before Bob Ross's painting most often.
I'm just tenacious really. I was just reminded of this two days ago.
One 4th of July, going north, my 1 year old truck had a idler pulley go bad at 10pm in Saginaw on a holiday weekend. I was stuck for days and knew it. So with some grease from a 24hr carwash/gas station. I just beat the bearings out of a floor jacks wheel, and sandwiched the remainder of the pulley and new goodies in between two large washers to keep it all in place. It was intended to just get me to a hotel, but ran so well, I drove it to the UP of Mi, and around the UP for four days, then halfway back to Detroit till we came across a dealership with one in stock (Gaylord or Grayling?). Over 500 miles total. I wanted to complete the trip like that, but my pal couldn't risk the extra time; he had to work. I might have just waited and seen how long it lasted otherwise......Yep, tenacious ![]()
Not home yet but did clean, lube and run the Lionel Standard Gauge train I gave my son many years ago. I thought I would pack up my track and transformer and take them home-BUT, my son wanted them so I leave them behind. I like the transformer, a nice LW, but have two others. Maybe he will become a model railroader. Better late than never.
"There was a physics show with a crazy haired professor I liked a little better.The 70's I think. Show came on before Bob Ross's painting most often."
Bada bing, bada book! Beekman, I believe.
Brian
Oh no, before that Brian, but thanks.
The hair? More like the professor in "Back to the future". The personality somewhere between Spencer Tracy, and Peter Falk..
This was likely PBS, or collage funded and ran for many years. A real professor too. More classroom than entertainment factor some days. But the guys personality and obvious lust for your discovery of science, was intense enough to make it all worthwhile.
Adriatic posted:Oh no, before that Brian, but thanks.
The hair? More like the professor in "Back to the future". The personality somewhere between Spencer Tracy, and Peter Falk..
This was likely PBS, or collage funded and ran for many years. A real professor too. More classroom than entertainment factor some days. But the guys personality and obvious lust for your discovery of science, was intense enough to make it all worthwhile.
Julius Sumner Miller was the professor.
darlander posted:Adriatic posted:Oh no, before that Brian, but thanks.
The hair? More like the professor in "Back to the future". The personality somewhere between Spencer Tracy, and Peter Falk..
This was likely PBS, or collage funded and ran for many years. A real professor too. More classroom than entertainment factor some days. But the guys personality and obvious lust for your discovery of science, was intense enough to make it all worthwhile.
Julius Sumner Miller was the professor.
Bingo!![]() I loved watching that man teach.
I loved watching that man teach.![]()
The Atlas handcar (arrived today) will be donating its power truck to the Corgi PTC Birney car. In the back, a Geoffrey car is being converted to feature Derpy Hooves from MLP: FIM...
And, of course, Shop Superintendent Norma Bates Kitteh is on hand to make sure the job is done right! ![]()
Mitch
Attachments
(incidentally, if anyone wants the upper bit from the handcar, drop me a line.) ![]()
Attachments
I brought two projects home yesterday. The ALCO Erie diesels with the upside down number board. In nice shape but so far only runs in reverse so it will be the trailing unit until I get the E unit sorted out. Also picked up a dirty but nice pre-war Lionel set with a 224E engine that runs but needs some TLC. There are three car-a nice gray Sunoco tank car, a nice dark orange gondola and a tilting bed flat car for logs. All three need cleaned and lubed but the paint on all 3 is good. Have them on a track now with a box car and caboose that go along with them. Using my 2056 to pull them. After being away for a month my house and property needs attention but I have my priorities squared away and got the layout cleaned and running. Actually, after I got home I was totally stressed out from my long stay away and going out and buying some old trains and running my trains was good therapy. To see your son who you raised and educated, a grown man, brought down to where he could barely function by a stroke is very, very stressful and not much you can do. But he is fighting hard and coming back.
My thoughts go out to you and your son. Hope he makes a full recovery!
Mitch
Tom got the USATrack cuts done for the inner loop, and now that line is running. WooHoo!
btw, I just got a new iPhone, the 6S+ and the photo and VIDEO quality is superb. The Standard Gauge colors and designs just seem to really "pop". Highly recommended.
Can't upload pics right now, soon.
Cleaned up the pre-war 224E I brought home yesterday, greased and lubed it, hooked it up to its tender and it pulls like a champ !! Poor thing needs a front truck so will look at the Greenberg show next weekend. Noticed the pick up rollers show little wear. Had a nice consist of a 2679 box car, 2755 tank car, 2812 gondola, 2561 flat car, 2672 caboose.
Weathered a boxcar, organized the train room a bit, went to Staples and bought more cloud poster board for my sky backdrop. AND ran trains while weathering the boxcar. Love to watch em run!![]()


 I have been busy with other things, but Meanwhile I was doing lots of planning in my head for scenery. Today, I started more scenery for our logging camp area. Once I finish with setting out the log deck and litter all around, I will add the cables from the donkey up to the pulleys on the heel boom spar, and also the supporting cables for the spar. Then I will add more trees in front of the scene. I've been leaving space to get my hands in for adding these details. Then I'll add more trees. This was the first step.
John
Attachments
I entertained an old friend, Wade from Ana, Texas, one of the first I met when I joined the Lone Star Hi-Railers some years ago. He came out to Amarillo for family business and visited me. We ran four trains on the layout. I handled the switches and he ran the trains, including a 2-10-2 double heading a GP7. He wore the right ball cap for a visit with me. ![]()
Attachments
I worked on the fudg-sicle stick tank again. Pinstripe banding is ok, but it wont stick to the oil stain, and getting it to take weathering might be tough too. It's stuck to itself and actually still helped greatly to hold it together during assembly, below. Trestle mount for now. Maybe a pumphouse?
The white canopy glue isn't dry yet. It can take days or even weeks before it clears up.
My water is just two clear plastic discs cut from packaging. One has blue and green marker swirls on one side, dry brushed paint of red, two greens, and a tan paint.
I took the blue marker to four random chunks of scrap (3 wood and a pebble to be exact![]() ) and glued them all as a sandwich with canopy cement, to try and add some depth to it.
) and glued them all as a sandwich with canopy cement, to try and add some depth to it.
The camera misses little. This pic shows better how they hide from your eyes.
The bottom. Real simple, and tan got a heavier coat than the greens & red.
When I left off, there was a bare wood gap between the paper strips and not connected where two board formed a seam. I smeared a thin layer of JB weld along the circumference and along the two board seam (5 o clock below).
To perch the water on, 4 fireplace matchstick clippings
Not plumb, I kept the tops slanted to the inside to ensure the water-disc doesn't slip by and fall. And Im glad I did. The JBweld expanded ever so slightly. I could just see some light between boards now, when I couldn't before this. My perfect cut discs were an easy 1/32" too small now, I might redo them?.
The JB weld isnt hard as a rock being thin & all, but added a good firmness to the tube. Handling is pretty easy. The real firmness should come once the silver plastic frosting lid on the bottom is finally glued (? silicone?, hot glue?)
Ok, I wasn't happy with the water being "flat as glass", with no ripples, etc but I didn't want to play with silicone here.The white line/ring at the top disk needed blue marker on the edge to look right, vs white too.
.So I blued the edges, and for the surface, I closed the gap between the disc's spacers, and created a wavy edge, any varying depth it the view too. It looks much better wavy. (pebble spacer between the two discs) , I used super glue one one edge sloppily to unsure a little "white foam" at the waters edge.(some white is really clear stuff, but still wet, some white is dry)
Painting the walls blue below the clear disc, would improve things even more but this is good enough for me.
Note the top pinstripe is thinner, I ran out of the thicker of the two there, and the other sizes were too big.
Wavy looks better IMO.
Weathering is next.
Attachments
All ya need now is Billie Jo, Bobbi Jo and Betty Jo... ![]()
Mitch
Lot of great work being posted. With the arrival of an organ donor Friday. Saturday I performed heart transplant surgery on my Kitbash CB&Q U30B. PS2 board finally died after a gazillion miles and hours( original donor had been a very high mileaged SD70Ace). Then I performed muscle replacement surgery on my PS2 upgraded Weaver N&W C630. (replaced a frozen motor). Both patients are recovering nicely. Organ donor now listed in the FS thread.
Attachments
Took one of my Marx 666s and my Marx 0-4-0 windup for a bit of exercise on my layout, and a funny idea occurred to me: Does anyone have a spare lead or pony truck from a Lionel 671/681/2020 steam turbine loco knocking about? I think it would be amusing to convert a 666 from a 2-4-2 to a 2-4-6... ;-)
Mitch
I haven't done too much of anything for some time now. But I got to go to a number of very nice layouts over the past few weeks that kind of start a fire again to start doing something. which kind of got me. Especially seeing Bryans progress in person. The pics do not do it justice. So today I ventured to the attic with a couple of more car carriers. And while up there I ran a few trains. Pics of the two auto racks added. That makes 16 on the train now........Paul
Attachments
Paul,
Looks nice. Did you add any weight to the auto rack cars?
Practicing taking layout videos with my new iPhone 6S+.Taking train vids definitely has a learning curve. Here a shortie with just raw footage, this is of course far from how I want any finished product to be- but its a start- and its keeping me busy playing trains!
Special thanks must go out to my husband Tom, who has put in so much time and effort getting this layout built and running for me!
Attachments
Re-thinking and re-organizing, or life on the layout- please excuse my dust (on the train cars) and sawdust (and various construction bits of stuff) on the rug in these pics.
Decided today to move the small table holding the transformers and their cords to a more logistically and ergonomically-friendly spot. They are now in front, next to one corner table leg. Previously the table was on the side of the table near the wall outlet. Someday, I may add a sliding pullout shelf or something-or-other under the table top for all the controls. Not the most aesthetically pleasing, but for the present this works well enough.
What I do not have right now, is a good space for all the other cars and engine that are not being currently run. Some are placed against the front of the couch length under the layout table. It is what it is for now. The other Circus cars look like the leftovers of the train wreck in the film, The Greatest Show on Earth at the back edge of the couch. Poor things, and the animals have escaped!
Attachments
Carey,
Your layout looks good. Good start on iPhone videos. I too am new to it. I have the 6s not plus. It does a super job when I think back to the big bulky VHS camcorder we used 25 years ago to send videos of the kids in the mail to my in-laws. The only camera I own other than the phone is my old SLR I bought back in the '70s and the camcorder. Neither have seen the light of day in years
Paul, those auto carriers look great. Next time we go out to Ed's you should bring them.
I couldn't resist this entry today! Mr. Richard Melvin was at our home filming our layout: The Glacier Line today and yesterday. It was a wonderful experience! I have been in this hobby for well over forty-something years and this was an experience like no other. The Crew, Gregg Burks, Chris Toncheff, Rod Weinscenk, Joseph Coy, Connie Coy and I greatly appreciate the honor to be included in the OGR video series! We will be on OGR video #13. Thank you to Rich and OGR Publishing!
Running a magazine![]() . One heck of an excuse for visiting model railroads
. One heck of an excuse for visiting model railroads![]()
![]()
You made it up the "grade" John! ![]()
I'll give you the 1st "little engineers, that could" thumbs up ![]()
John C. posted:I couldn't resist this entry today! Mr. Richard Melvin was at our home filming our layout: The Glacier Line today and yesterday. It was a wonderful experience! I have been in this hobby for well over forty-something years and this was an experience like known other. The Crew, Gregg Burks, Chris Toncheff, Rod Weinscenk, Joseph Coy, Connie Coy and I greatly appreciate the honor to be included in the OGR video series! We will be on OGR video #13. Thank you to Rich and OGR Publishing!
John,
Thats really neat! I'll be watching for the video!!
Mark
Randy T, I have not added weight to the cars. I run them on 0-96 and 0-89 curves as they come out of the box. Bryan, that would be something to see all the auto racks running on that layout.......Paul
I hung some new cloud paper for the background of my layout.
After months of writer's block, I decided this week to just make a simple layout in my office while I worked on the larger one. I started a thread over in the layout section. Would love some feedback.
https://ogrforum.ogaugerr.com/t...-acres-office-layout
This will also be where I document the progress of this little layout and maybe some teasers of the larger one if I can get through my creative stall.
Finished dry fitting the upper level over the main level, playing around with different locations for bridges, got all my signage out and hung on the walls, and "thanks" to Paul for the suggestion on a double bridge over the gorge area I ordered 2 Atlas double track pratt bridges. btw Paul since it was your suggestion can I send you the bill?
Attachments
Looks great, Panther 97. The lights look great!
Mark Boyce posted:Looks great, Panther 97. The lights look great!
Thanks, Mark!
I got it!![]() ...I got it!
...I got it!![]() ... Aw man
... Aw man ![]() .... lost in the lights
.... lost in the lights![]() (
(![]() )
)
Adriatic posted:I got it!
...I got it!
... Aw man
.... lost in the lights
(
)
Bryan, glad I could give you input. But I think you owe me for my consulting fee. But if by chance you don't like them once you get them I will be more then happy to take them off your hands in lieu of money LOL...............Paul
mike g. posted:
Mike;
"how" is not playing, he is on the 15 day disabled list... Who is on first, What is on second, and I Don't Know is playing third. I'll give you the rest of the lineup tomorrow!!!
Panther;
That is one fine ball field - can almost smell the peanuts and cracker jacks.
Panther97 posted:
Looks great, love the lights!
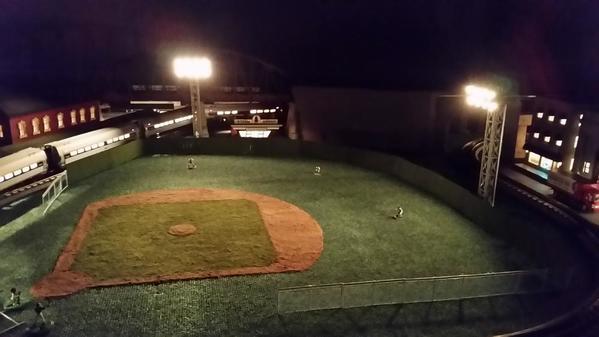
Is it to scale? If so, it must take up a huge section of the layout. A pal of mine wanted to build a regulation baseball field with stands in HO scale and once he did the math was shocked at how much room it'd take up even in that scale. He gave up on that soon after.
I painted..all this junk..even the rivets ![]()
2-Left over bridge portal tops glue together, with two dice cups and black pinstripe
An old platform, whats new it the garbage can/ash tray
Still needs 3-4 silver bars painted in, from the top, to bottom sections at the garbage opening.
A coffee spill, some butts, from wallpaper brush bristles, painted tissue is the garbage.
The can itself is an oil pressure relief valve for a vintage VW bug, with a washer glue on top
The is my new pole.
What kind of pole? I haven't decided yet.
It's a furniture leg rest and a chopstick, lots of hot glue in the base gives good ballast.
The cement texture is just plastic model fill putty, Testor's . Pressed on with my thumb, then made a semi-clean line across the top edge with a toothpick.
I need a few dots of yellow/red/blue/violet in a few of the green spots.
Attachments
"how" is not playing, he is on the 15 day disabled list... Who is on first, What is on second, and I Don't Know is playing third. I'll give you the rest of the lineup tomorrow!!!
Pat Kn posted:"how" is not playing, he is on the 15 day disabled list... Who is on first, What is on second, and I Don't Know is playing third. I'll give you the rest of the lineup tomorrow!!!
Pat,
Thank you for the YouTube link. There is something about that routine that is timeless!
Well now that the tear down of the layout is compete and the floor repaired it was time to start all over again the bench work is about complete for the new layout and the opening of the wall allowed me to keep the room more accessable, now I have to make some access hatches and fix and paint the walls and in just a few more weeks it will be time to lay track I am hopeing for a smooth time I did some recycle of the cases under the layout and have to find a home for everything durning construction 


Attachments
Very little....building a grain elevator kit, excruciatingly slowly, as it uses real metal corrugated siding...that I only trust two part epoxy for permanent bonding. Put a strip on...wait....put another on..wait...Not happening fast.
Looks great, love the lights!Is it to scale? If so, it must take up a huge section of the layout. A pal of mine wanted to build a regulation baseball field with stands in HO scale and once he did the math was shocked at how much room it'd take up even in that scale. He gave up on that soon after.
Thanks, everyone! It's not scale. The infield is very close to being scale for a Little League field. They outfield is short of being scale. When I measured for a scale regulation field I didn't have close to enough room. Then I tried to measure for a scale Little League field and I still didn't have enough room. Thus, I eyeballed it. LOL.
The field actually does take up a good bit of room. I had a section on my layout and couldn't come up with any good (and cheap) accessories for the area. I love baseball so I decided to build a baseball field.
I was out in the Pittsburgh Area during the week for a change and had time to make the short drive over to Delmont, PA and visited Scenic Express. Walking through the warehouse and seeing all the items in person is worth the trip if you can make it. Much better than going to a train show and a whole lot less crowded. I picked up some flexible rock wall panels and a lot of ideas. I highly recommend making the trip there if your passing through Pennsylvania.
Seems like wanting too and getting the time to is two different things. A bit of the morning allowed me to piece together some pieces of track I had in the basement to see what it would look like. I am trying for some interesting track patterns. A pic of my first idea. Switches in the pic may not be the ones I finally use. I just wanted an idea. So now I am getting ready to head out for lunch with a bunch of train guys.........Paul
Attachments
I know my wife and I are kinda odd mixing O Gauge trains and Legos but we have fun. Our Grandkids live out of town and we seldom see them so this is a way for them to see our lay out. Hope you enjoy the video. The link is below.
Regards,
Eddie
EddieZ posted:I know my wife and I are kinda odd mixing O Gauge trains and Legos but we have fun. Our Grandkids live out of town and we seldom see them so this is a way for them to see our lay out. Hope you enjoy the video. The link is below.
Regards,
Eddie
Your video is one of the best I've seen on here. Very well done.
Attachments
EddieZ posted:I know my wife and I are kinda odd mixing O Gauge trains and Legos but we have fun. Our Grandkids live out of town and we seldom see them so this is a way for them to see our lay out. Hope you enjoy the video. The link is below.
Regards,
Eddie
Really liked the video, Eddie!
Bryan, It is really looking like it is coming together nicely!!
I built a extension for my layout. My layout is a 6x8 with a 4x5 'L'. I added a 3x4 and a 4x5 end table to accommodated a O48 horseshoe. I'm really bad at explaining this so just look at the pictures. This is a big accomplishment for me because I have nerve damage from a motorcycle accident so I'm taking my time. I just need to paint it, add grass or ballast and get more track. I still need to wire for accessories, lights and maybe buildings. I mainly want to make a longer train yard, but now I'm seeing more possibilities. I made a few little goofs, but I can work around them.
Attachments
Bryan, what a fast transformation from when I saw the layout last time. You must be working 24/7 on it. Upper level looking good..............Paul
Len B posted:EddieZ posted:I know my wife and I are kinda odd mixing O Gauge trains and Legos but we have fun. Our Grandkids live out of town and we seldom see them so this is a way for them to see our lay out. Hope you enjoy the video. The link is below.
Regards,
Eddie
Your video is one of the best I've seen on here. Very well done.
Great video Eddie. You should check out this Lego train video.
DennyM posted:I built a extension for my layout. My layout is a 6x8 with a 4x5 'L'. I added a 3x4 and a 4x5 end table to accommodated a O48 horseshoe. I'm really bad at explaining this so just look at the pictures. This is a big accomplishment for me because I have nerve damage from a motorcycle accident so I'm taking my time. I just need to paint it, add grass or ballast and get more track. I still need to wire for accessories, lights and maybe buildings. I mainly want to make a longer train yard, but now I'm seeing more possibilities. I made a few little goofs, but I can work around them.
Denny,
It looks great! I am sorry about your nerve damage. I can relate a bit with arthritis making it a bit more difficult than before. My hat is off to you!
Thanks Mark, My son cut the plywood for me and I rented a miter saw to cut the 2x4's. I'm a new fan of miter saws. It's a definite challenge, but I had to see if I could do it.
Denny.
I have been looking at buying or renting a miter saw as well. I am going to start a new layout after our last daughter at home gets married and moved out this September. A friend told me he bought a chop saw and used that, but looking at one, I think the miter saw would be better.
Mark Boyce posted:Denny.
I have been looking at buying or renting a miter saw as well. I am going to start a new layout after our last daughter at home gets married and moved out this September. A friend told me he bought a chop saw and used that, but looking at one, I think the miter saw would be better.
Mark,
Buy the miter saw. By owning it, you will also gain the gift of "time" - bench work can be more than a weekend project. It is a handy tool to have in your shop arsenal.
Congratulations on the opportunity to gain space. Hopefully, you have set aside money for the layout as well as the wedding.
Dave
darlander posted:Mark Boyce posted:Denny.
I have been looking at buying or renting a miter saw as well. I am going to start a new layout after our last daughter at home gets married and moved out this September. A friend told me he bought a chop saw and used that, but looking at one, I think the miter saw would be better.
Mark,
Buy the miter saw. By owning it, you will also gain the gift of "time" - bench work can be more than a weekend project. It is a handy tool to have in your shop arsenal.
Congratulations on the opportunity to gain space. Hopefully, you have set aside money for the layout as well as the wedding.
Dave
Dave,
Yes, the money is there. Our house is paid for. Fortunately the young people are keeping costs down and trying to pay as much as possible themselves.
Bought some more woodland scenic ready-made trees at Hobby Lobby this morning (it's on the way to work). I have a hug box of super tree sprigs, and I intend on finally putting trees onto the layout. I have, I think eight of the big ready-made ones already. I'm still not sure when static grass application will start, but I'm doing at least one of the following this weekend:
- Getting bushes made with poly puffs and ground foam
- Putting static grass on the layout (I have 5 containers of the stuff)
- Making/putting in trees
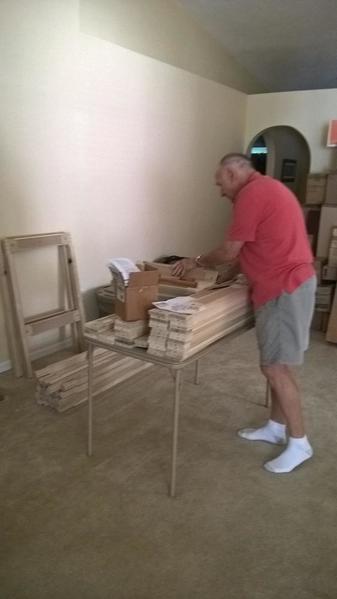
Mianne layout diagram and receipt of kit, have assembled most of it and started the plywood top (19/32) . Will be putting a fiberboard on top of that. Really liked the ease of assembly. Need to attach the clips to the ply, paint the fiberboard and start laying track. Predrilled holes for the wiring.
Mort
Attachments
mort1345 posted:Mianne layout diagram and receipt of kit, have assembled most of it and started the plywood top (19/32) . Will be putting a fiberboard on top of that. Really liked the ease of assembly. Need to attach the clips to the ply, paint the fiberboard and start laying track. Predrilled holes for the wiring.
Mort,
Good that you took photos of the earliest part of the build. When I started building my own layout (my first real layout ever) two years ago, I documented almost everything from the first steps. Seemed kinda silly at the time during the process, but I'm so glad I did it now, as I can go back and show non-modelers how much work really went into it. The finished result doesn't show all the work you went through to get there and non-model-builder types don't see that it didn't just start like it looks today...


