Lee,

That really is a lot of work in a short period of time.  'Looks great!

People that have not yet tried to put together a layout really have no idea how much planning, time, and effort that it takes to reach the point where you are today.  Congratulations on a job well done.

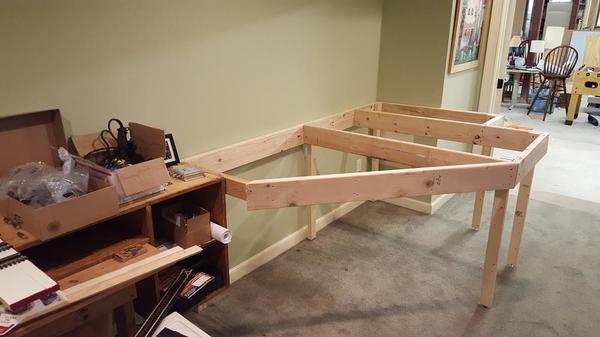
I started to build my current new layout exactly one year ago yesterday and I still have a long way to go.  I have attached a photo from July 25, 2016 and a photo from today (1 year and 1 day later).

I am pleased with my progress considering that I had a very demanding full time job up until I retired on June 1st of this year.

Thanks for sharing your photos.

Howard


Attachments

Images (2)
  • 7-25-15 003
  • IMG_4970
HMorgan125 posted:

People that have not yet tried to put together a layout really have no idea how much planning, time, and effort that it takes to reach the point where you are today. 


Great progress, Howard!

You are so right abut the planning and work, this is my first real layout I built on my own and yeah, it was a lot of work, far more than I ever thought it'd be...

Last edited by p51
p51 posted:

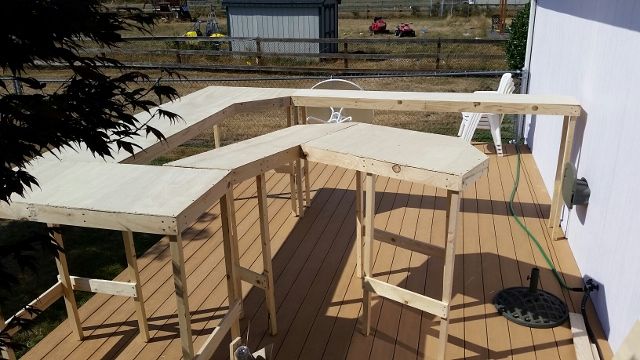
It’s hard to believe, but on this day 2 years ago, it was a weekend and I had started cutting plywood and 1X4s to build the bench work for the layout. By August 2nd, it was looking like this:

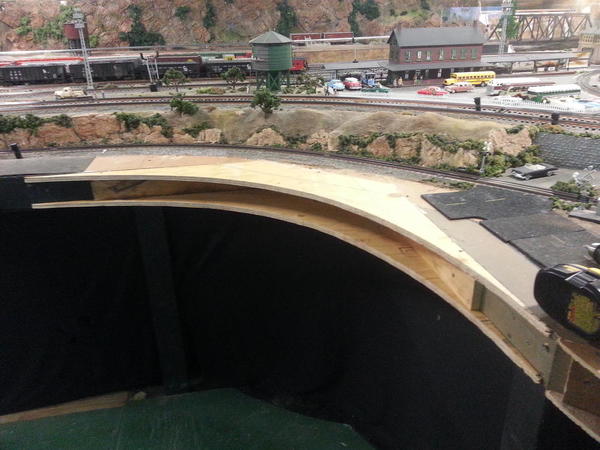
Now, compare this shot with one taken almost exactly 2 years later:

I plan on running some trains on those days, as I’ve made quite a bit of progress on this project. The one local guy who helped me out with the track and wiring has pointed out that I’ve made more progress in 2 years than most other modelers would make in a decade. From the other local layouts I’ve seen, I know he’s right about that.

Way to set the bar HIGH Lee! You have done a wonderful job. I just love seeing all your updates. One day I will be able to post updates for you to see. I just hope I can live up to what you and others have done on here. There is so much talent, its amazing!

p51 posted:
HMorgan125 posted:

People that have not yet tried to put together a layout really have no idea how much planning, time, and effort that it takes to reach the point where you are today. 


Great progress, Howard!

You are so right abut the planning and work, this is my first real layout I built on my own and yeah, it was a lot of work, far more than I ever thought it'd be...

Lee, you have done a lot. It looks good as does yours Howard. Your absolutely right about how much planning it takes. I think about it for at least two months if not longer. Then I attempt to draw it, but it's mostly in my head. I change my mind a lot, but when it comes time to build it everything goes in it's place. My 7ft extension didn't come out quite the way I envisioned it, but in the end I'm happy with it.

Last edited by DennyM
p51 posted:

It’s hard to believe, but on this day 2 years ago, it was a weekend and I had started cutting plywood and 1X4s to build the bench work for the layout. By August 2nd, it was looking like this:

Now, compare this shot with one taken almost exactly 2 years later:

I plan on running some trains on those days, as I’ve made quite a bit of progress on this project. The one local guy who helped me out with the track and wiring has pointed out that I’ve made more progress in 2 years than most other modelers would make in a decade. From the other local layouts I’ve seen, I know he’s right about that.

Lee, Its hard to believe it been 2 yrs.  The layout has turned out great( lot of work and dedication to accuracy ).  In the process you gave us a little education of little known RRs operating in NC before and during the war years. I am always looking forward to seeing updates and some more history lessons.  Thanks for sharing your journey.

 Lol, You better watch out, Tiger has that "you're gonna pay" look. Which is Scarry for me because of the resemblance to a kitty called Battle Cat. That tank would need to be full size to do any good with old BC if he claimed your layout. My pals TV room became unsafe for visitors without elbow high leather gloves. Think Loony Tunes Taz and add some stealth and attitude. No warning shots, just your blood suddenly running down to your fingers lol.

Took a break from wiring which I had been doing the last 2 days to put together this kit I got back in June.  It was from Pikesville Models and they had a small booth at York back in April.  This laser cut kit was supposed to be a S gauge hotel but I inquired if they could make one in O scale.  They said they would see what they could do and in June this was delivered.  The only difference was that when I saw their model at York I really thought it could be a prison which I really want for my layout.  The kit was EXTREMELY well built and not one item missing, broken, or out of alignment.  Laser etched part #'s made putting it together easy even after painting it.  Future plans for this scene will include a big chain link fence with barb wire at the top as well as a true exercise yard.  Results so far are below.

DSC_0946DSC_0947DSC_0948DSC_0949

Attachments

Images (4)
  • DSC_0946
  • DSC_0947
  • DSC_0948
  • DSC_0949
Bryan in Ohio posted:

Took a break from wiring which I had been doing the last 2 days to put together this kit I got back in June.  It was from Pikesville Models and they had a small booth at York back in April.  This laser cut kit was supposed to be a S gauge hotel but I inquired if they could make one in O scale.  They said they would see what they could do and in June this was delivered.  The only difference was that when I saw their model at York I really thought it could be a prison which I really want for my layout.  The kit was EXTREMELY well built and not one item missing, broken, or out of alignment.  Laser etched part #'s made putting it together easy even after painting it.  Future plans for this scene will include a big chain link fence with barb wire at the top as well as a true exercise yard.  Results so far are below.

DSC_0946DSC_0947DSC_0948DSC_0949

Very cool Bryan, Just like the real world, maybe we need more of these on a layout! LOL

Bryan in Ohio posted:

Took a break from wiring which I had been doing the last 2 days to put together this kit I got back in June.  It was from Pikesville Models and they had a small booth at York back in April.  This laser cut kit was supposed to be a S gauge hotel but I inquired if they could make one in O scale.  They said they would see what they could do and in June this was delivered.  The only difference was that when I saw their model at York I really thought it could be a prison which I really want for my layout.  The kit was EXTREMELY well built and not one item missing, broken, or out of alignment.  Laser etched part #'s made putting it together easy even after painting it.  Future plans for this scene will include a big chain link fence with barb wire at the top as well as a true exercise yard.  Results so far are below.

DSC_0946DSC_0947DSC_0948DSC_0949

Looks like your hands will be full until you get the fence up. Great Job.

Normally I would have delayed this to Saturday, but one of the AGHR Kids was at the club this afternoon, so I had an extra pair of hands to help align the gusset we test fit last Saturday. This time, the cleats were moved up so that both halves could be mounted in their correct places. Next step is to cut some support braces to go between the boards then place the curved fascia boards. May have it done this Saturday.


2016-07-27 19.29.48


Attachments

Images (1)
  • 2016-07-27 19.29.48

Pretty cool seeing everyone's progress on here, which has gotten me pretty motivated.  Finally purchased a Dremel to help cut some track and it has made everything so much easier and got my son excited to cut some track.  We were able to lay quite a bit of track the last two days.  Now I have to correct some of my grades and finish my elevated track, then build my expansion benchwork.  IMG_1025IMG_1028IMG_1030IMG_1033

T (my six year old son) was very happy to be able to push some cars around again. 

Attachments

Images (4)
  • IMG_1025
  • IMG_1028
  • IMG_1030
  • IMG_1033
DennyM posted:
p51 posted:
HMorgan125 posted:

People that have not yet tried to put together a layout really have no idea how much planning, time, and effort that it takes to reach the point where you are today. 


Great progress, Howard!

You are so right abut the planning and work, this is my first real layout I built on my own and yeah, it was a lot of work, far more than I ever thought it'd be...

Lee, you have done a lot. It looks good as does yours Howard. Your absolutely right about how much planning it takes. I think about it for at least two months if not longer. Then I attempt to draw it, but it's mostly in my head. I change my mind a lot, but when it comes time to build it everything goes in it's place. My 7ft extension didn't come out quite the way I envisioned it, but in the end I'm happy with it.

I got one for you guys.My cat chessie sleeps were I have my layout.He can be found sleeping right next to it.He some times come in and watch the trains.

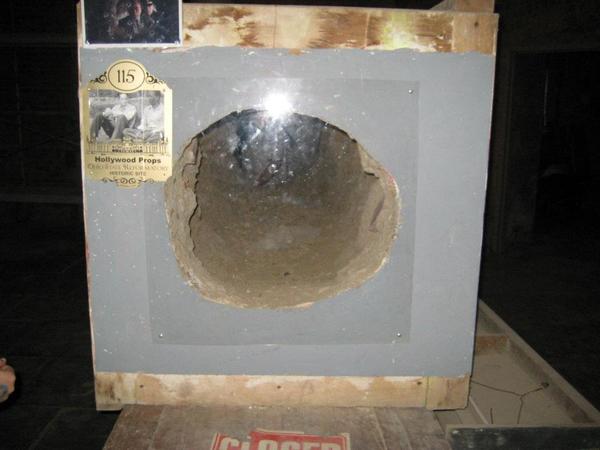
Thanks guys for the response on the prison project....although today it is back to wiring the yard.  I like the idea of trying to incorporate some real life prisoners in there.  Paul, I do have a creek that will be near by and planed on doing something to incorporate the Andy drainage scene from my favorite movie Shawshank.  Off topic I have toured that prison in Mansfield where they filmed the movie and even did the overnight ghost hunt a few times.  The scene your talking about crawling through the drain was filmed using chocolate syrup and the tunnel was only about 15 feet long.  prison

Attachments

Images (1)
  • prison

Today I set up and shot photos of the Wabash Valley Markle Mill elevator, and of the uncovered vertical shaft mine headframe finished before the elevator.  I have a number of machines around it: rock crusher, portable stamp mill, cable drum and hoist, and a Hart-Parr tractor and Case steam tractor to power them.   This mine complex is larger than that of the famous Matchless Mine of H.A.W. and Baby Doe Tabor in Leadville, Colorado.  Looking at the Matchless, it is hard to believe that "Haw" told her to hold onto the Matchless at his death, and she froze to death in that little shack honoring his request.  Photos done, I opened and began an American Model Builders "Farmer's Grain" elevator kit.  Prairie railroads can't have too many elevators, although I already do.

darlander posted:
Building a layout is like eating and elephant, one small bite at a time.  

Yeah, but it sure is a daunting process, isn't it? I must admit early on, I about drove myself nuts during the build. For every one thing I did, I could only see ten more things that now needed to follow. At one time I was even having nightmares about all the work I still needed to do to even get trains running.

I know the build is the thing that some people love doing (my Dad's not a model RR guy but he loves building stuff from scratch). Not me. I do deeply enjoy tinkering, tweaking and adding details to my layout now that it sort of looks quasi-presentable, but everything that got me to this place, for the most part, was simply work to me. I didn't enjoy the early stages of my layout build at all. The most I enjoy a build is for a structure or a car; those, I do enjoy.

But not the layout. It's just a giant pile of work until it starts looking like a layout and not a unfinished table in an odd shape with track nailed to it.

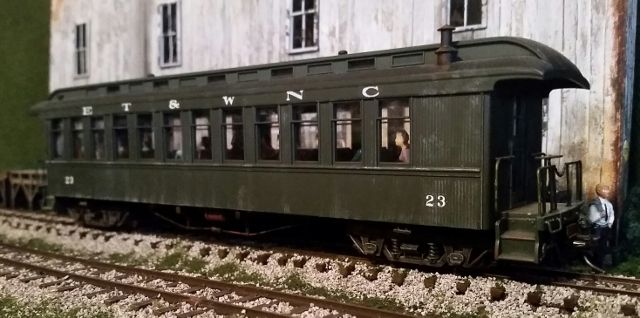
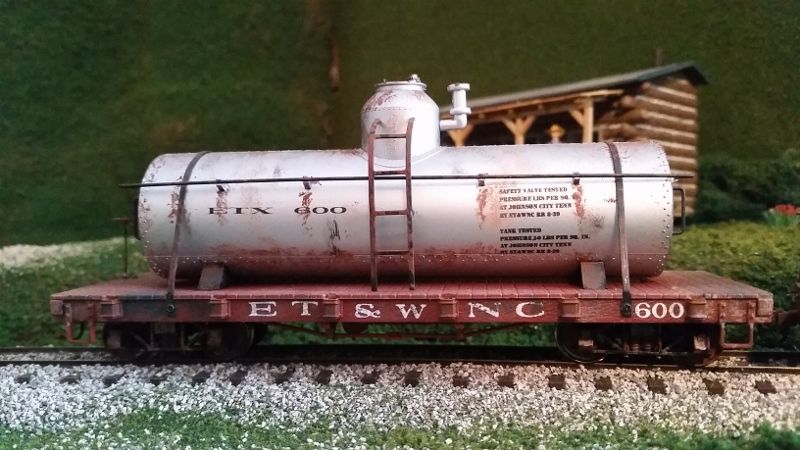
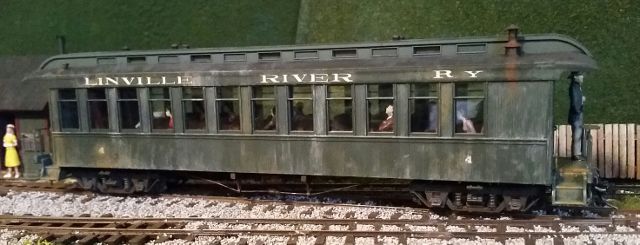
I went back through my layout's website and noticed several shots I have of rolling stock were from before I started my scenery. So, I grabbed my cell and got some quick shots of the same rolling stock to replace them with. I think they turned out okay for a cell.

I really need to break out my good camera and some lighting to get some really good shots, as I do have moderate photos skills for normal stuff...

I finished detailing two more Lionel Chesapeake and Ohio 21" passenger cars with Preiser Figures. I am working to finish my passenger cars so I can use the Acrylic paints while they are still good.   I am going to have to find another hobby shop for paints. My west side Cleveland shop just announced they are going out of business.  Finding supplies to finish my layout is getting more difficult.

Attachments

Images (6)
  • DSCN1263
  • DSCN1262
  • DSCN1261
  • DSCN1257
  • DSCN1255
  • DSCN1254

I tested my new to me Premier J 611.  MTH says it will run on O54. I can't get mine to.  The front drivers ride up the rail as soon as it goes into the turn, then it pulls the pilot wheels off the track.. I then tried to get it to sit on the rails of the O54, but could not get the front and rear drivers to settle down where they belong.  I then put a curve of Ross O64 on the floor and it was much happier.  I will have to increase the minimum curve on the tracks I plan to run it on when planning my new layout.  In an 11 x 11 room, it is doable but will be interesting.

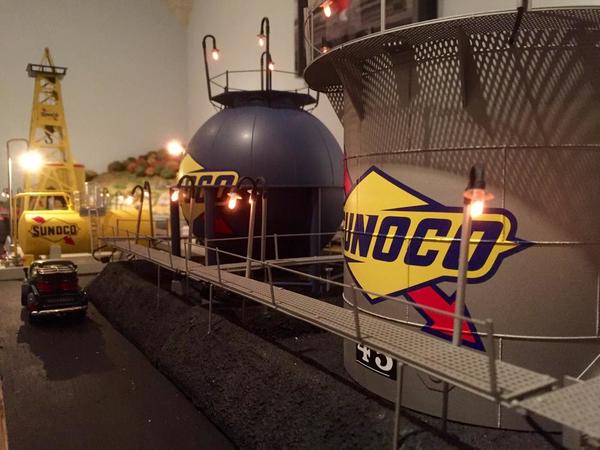
After months of little or no activity, I actually made it into the layout room for a few minutes nearly every day this week. Today I took 90 minutes and finally brought my Sunoco refinery online. I used a battery-powered soldering iron from Hakko to make quick work of the wiring - those things work surprisingly well.

My refinery / well site consists of several modern Lionel pieces and one MTH piece that I have slowly collected over the last several years. I have a set of 3 Sunoco cars from MTH's recent Railking release that should arrive next week and will take up their position on a siding that serves the refinery. Now if I can just sell enough refined product to my neighborhood to help offset the capital outlay to build my little refinery...  

SunocoEvening

Attachments

Images (1)
  • SunocoEvening

Mark, bigger curves are nicer and takes the problems out of derailments.  You stated MTH said it should run on 0-54. I know there have been discussions on radiuses before. So what is the manufacturer of the track you are using. Maybe it runs on MTH track. Larger curves use real state. Were you able to try running it on someone else's layout with 0-54 curves. Also are both lead and trailing trucks unrestricted with no binding on the curves......Paul 

I thin he runs FT.

You might want to look to see if it's wheels are over gauge Mark.

That and and guide slots needing some filing has helped me cheat the limits on a few items.

I sanded wheels till shiny and added a few more ounces of fishing lead to my Marx E7. The tarnish Marx wheels seem to develope so quickly has very poor traction. This engine varies from six cars no issues, to slipping with only 3 in about a month. I'm thinking about carving a slot for a traction tires now, as the motors strength doesn't seem to be any concern at all.


John Rowlen posted:

I finished detailing two more Lionel Chesapeake and Ohio 21" passenger cars with Preiser Figures. I am working to finish my passenger cars so I can use the Acrylic paints while they are still good.   I am going to have to find another hobby shop for paints. My west side Cleveland shop just announced they are going out of business.  Finding supplies to finish my layout is getting more difficult.

Nicely done on the interior. Are you talking about Parma Hobby that's closing or is closed?

jim pastorius posted:

Mark-I would seriously consider 072 for your engine. I put it on my 11x11 layout OK.

paul 2 posted:

Mark, bigger curves are nicer and takes the problems out of derailments.  You stated MTH said it should run on 0-54. I know there have been discussions on radiuses before. So what is the manufacturer of the track you are using. Maybe it runs on MTH track. Larger curves use real state. Were you able to try running it on someone else's layout with 0-54 curves. Also are both lead and trailing trucks unrestricted with no binding on the curves......Paul 

Adriatic posted:

I thin he runs FT.

You might want to look to see if it's wheels are over gauge Mark.

That and and guide slots needing some filing has helped me cheat the limits on a few items.

I sanded wheels till shiny and added a few more ounces of fishing lead to my Marx E7. The tarnish Marx wheels seem to develope so quickly has very poor traction. This engine varies from six cars no issues, to slipping with only 3 in about a month. I'm thinking about carving a slot for a traction tires now, as the motors strength doesn't seem to be any concern at all.


Gentlemen,

Thank you very much for your valued replies!

Jim, Yes I have seen before folks advising to use 072 on a layout if you can fit it in your space, and it will fit in 11 x 11.  In fact after I had commented on another topic I would be planning a layout with at least one loop wide enough for this locomotive in May, Matt Jackson (AGHRMatt) emailed me a couple quick and dirty twice around plans in that space at 088 and 096.  Thank you for the offer on trying it on yours.  I'll let you know,

Paul, Now that I think of it, MTH cites 052 for minimum curve not 054.  Yes, you are right that they can say that about their track system, but that doesn't necessarily mean it will work out on another manufacturer's track.  Now that you mention it, I do recall seeing folks comment about that before.  Why don't I remember things??  Thanks for the comment on the leading and trailing trucks.  Yes, I did look them over, and they don't seem to be binding.  I can slide them back and forth.  That is a very good point to look at closer.

Adriatic, Yes I have FastTrack on the temporary 4 x 8 table top.  I have an 048 loop and an 036 loop there.  I realized I wouldn't be able to run the J 611 on that layout, I only set it on the straight away, powered it up, and ran it back and forth on the straight to see that things were working as soon as I received it.  I don't do so well on the floor anymore.  My bad knee pops and my bad ankle gives me grief on the Carpet Central, so I only put the trains there as a last resort. 

I used Ross 054 and 064 for my tests yesterday.  I have one loop of GarGraves and one loop of tubular on the Ceiling Central RR.  I plan on using GarGraves and Ross on the permanent 11 x 11 layout, with some tubular in a switching yard with operating accessories.  Of course I would be running the J in that area, so I can use any old tubular I have in my track box.  You do have a good point that it is possible the wheels could be out of gauge.  I bought this locomotive from a young fellow I know on a FaceBook group, who put it up for sale after realizing this was more engine than he had room to run.  It doesn't have much time on it, so it could be out of gauge.  I will check into that. 

Thank you again for all the responses.  I don't know when I will bet back to this.  Yesterday was rainy I took advantage to do these tests.  Besides outdoor work, be have a wedding coming up soon.  I will keep you posted when I do get back to it.

  I opened  my screaming yellow baby Madison's for some bulb changes and hot glued the roof cardboard light blocking inserts up so it doesn't look like every car has its shades drawn. Then I pulled them behind the tmcc Kanawha jr till things started smoking in a bad place; That's odd, I havent got steam chest smoke. The motor stalled but it didn't stop trying! Headlight dim.  ????

  I flipped the smoke switch to off and it worked again. I repeated it a few times in disgust and reached for a rag and a screwdriver. Uncapping the innards I found the cloth wire insulation push out of the hole in the smoke chamber's top and the wire was shorted. I simply worked it back in place, spun the 3 body screws, gave it power and chuffed off.

   The excess smoke was from the smoke fluid wicking into the cloth insulation of the postwar element I gave it when the resistor burned out. When the heat of the shorted wire inside it hit the fluid in the insulation,, it smoked like mad. Nothing was close  to crispy and now the heat is in the pot again. I think the saturation helped it get blown out of the hole over time. I'll have to run it dry (OK on post war tablet type) , clean it and try a dot of super glue.

Last edited by Adriatic

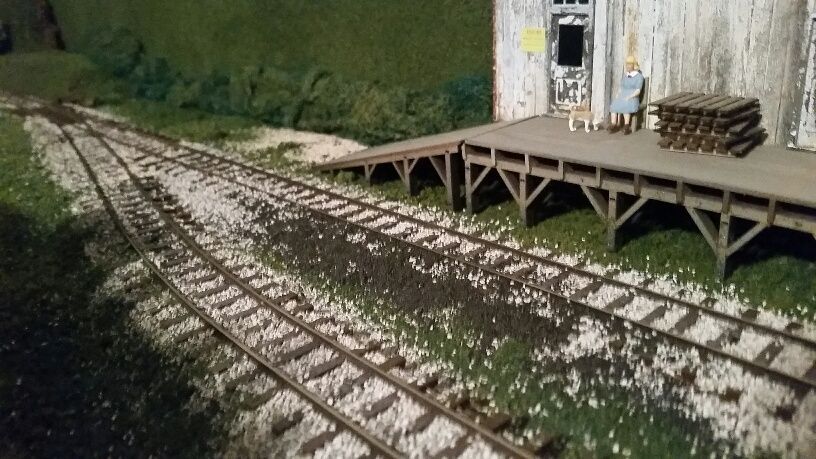
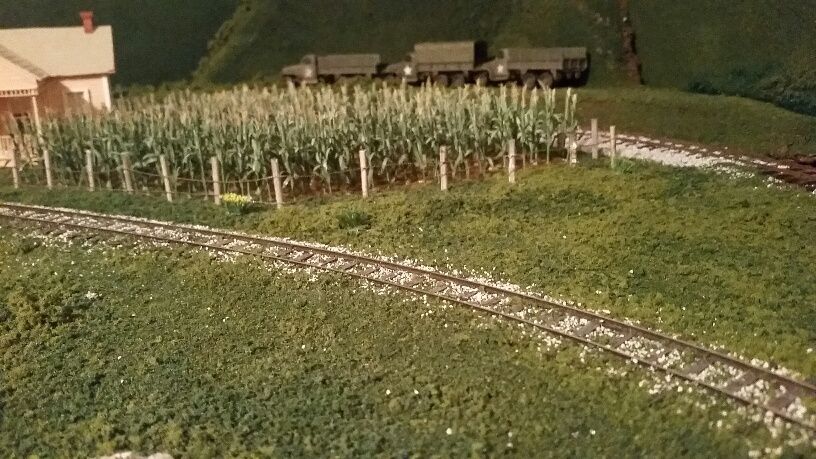
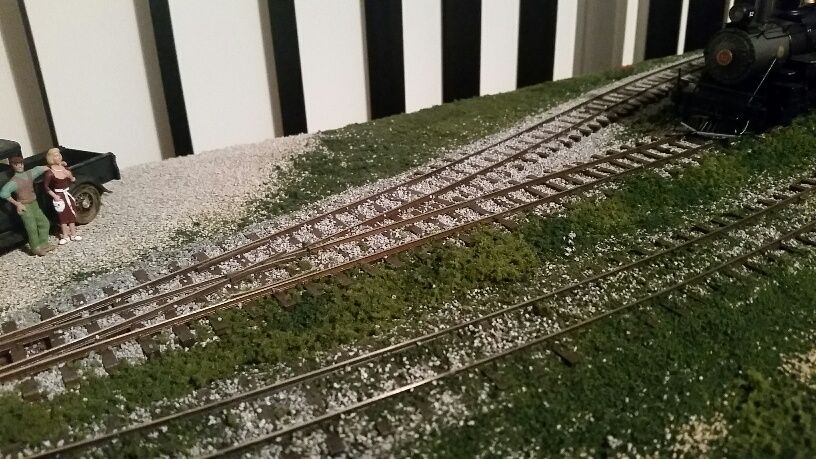
I've been going over my layout, at the spots where the ballast has exposed the cork roadbed underneath. Those spots are getting one of the following:

  • More ballast
  • Grass/weeds
  • Cinders

I never ballasted the areas around the turnout points, so they do look a little odd as I haven't found a way to get ballast in there without gumming up the overly-fragile Micro Engineering turnouts I have. I do badly wish, looking backing, that I'd painted all that cork a grey color before laying track...

I'm also now making some bushes for various places. Static grass is coming soon, then trees.

Last edited by p51

I just realized that 2 years ago today, this was the scene on my back deck, where I set up my bench work so I could be sure I could walk around inside it before I installed it into the room a weekend later...

Don't worry, there won't be too many more of these "two years ago today" posts...

water tower on photobucket *browse it in reverse last photo is the link.

I finished a tower for the fudgcicle stick and icing cup water tank. Im not sure if I can, or how to, attach anything from an Android so I linked to the fist of about 6 photos of it on my mini Christmas layout. Hopefully you can browse.

I found a fat square dowel and ripped the length with a hack saw. When I glued it, I tried to leave the rough cut from the hacksaw, exposed to view. The pipe is a dowel painted gold/brass, and the pump box is an old crate built from scratch before I was born. Those two pieces aren't glued yet and are crooked in the photos. I might go to a smaller pipe too. The tank is offset to allow for a catwalk along one side. The spout frame and a ladder are next.

Last edited by Adriatic

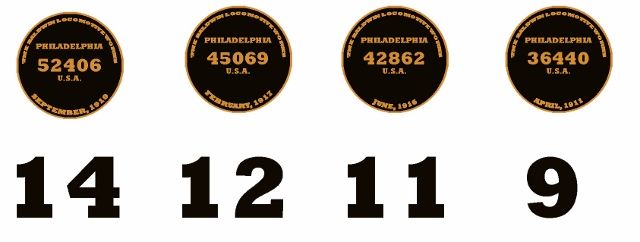
One of the few things Bachmann did on my ten-wheelers I didn't like is the crummy builder's plates. They made them opposite, with the background in bronze and the letters in black.

So, I printed several sets of these onto white decal paper, along with scale photos of the actual front number plates, though when they print out they're not as clear as they appear below. But still, they're much better than the ones that came with them. The numbers below them are for what road # they go with on my modeled ET&WNC. Yes, they're the correct serial numbers and dates for those specific locomotives.

I intend on adding them to my ten-wheelers this weekend:

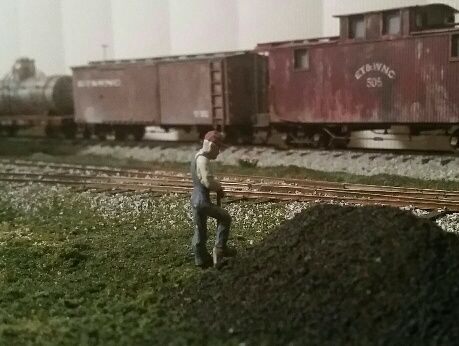
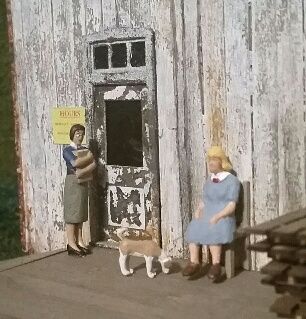
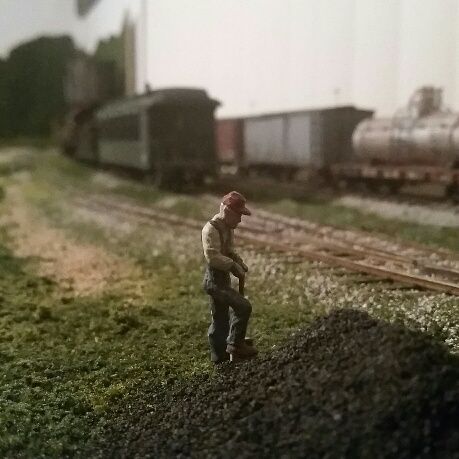
I put these two figures on the layout last night. The guy with the shovel is sort of in a moving pose, but he could be resting on that shovel, so it's good enough for a static pose for me. The female standing next to the door, I found at a comic book store under gaming supplies. She's actually too small for O scale, but can easily pass for a teenager or an older kid, who you would easily find working in East Tennessee during the war, at least I see it that way.

Last edited by p51

In the mode of my kids are driving me crazy. Thank God school starts next week. Today Just dropped everything for a mind dump and finished installing the back drops that arrived today via Fed EX. I need to order two more panels but this will work for now.

Before


1-DSCF3938-0021-DSCF5115

1-DSCF5121

After

1-DSCF5122

1-DSCF5123

1-DSCF5124

1-DSCF5130

and reused the old panels on this wall.

1-DSCF5125

1-DSCF5126


Attachments

Images (10)
  • 1-DSCF3938-002
  • 1-DSCF5115
  • 1-DSCF5121
  • 1-DSCF5122
  • 1-DSCF5123
  • 1-DSCF5124
  • 1-DSCF5125
  • 1-DSCF5126
  • 1-DSCF5128
  • 1-DSCF5130
Mark Boyce posted:

Suzukovich,

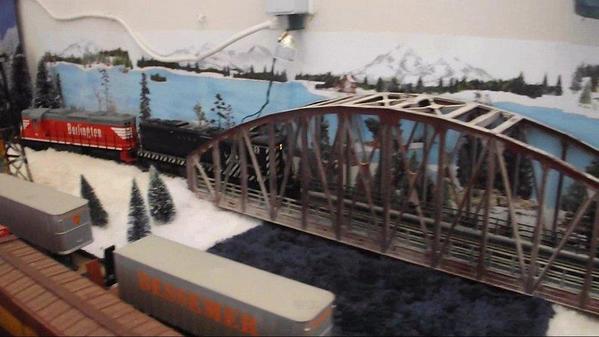
I took your advice and ordered two of those backdrops for our Christmas layout, my wife loves the opposite side for Christmas.

When I ordered from them , they had a village backdrop that was out of stock that I wanted to get. Its too bad that they couldn't have created that back drop to blend in with the winter mountain theme that I am using but, it will work where I want to put it..

suzukovich posted:
Mark Boyce posted:

Suzukovich,

I took your advice and ordered two of those backdrops for our Christmas layout, my wife loves the opposite side for Christmas.

When I ordered from them , they had a village backdrop that was out of stock that I wanted to get. Its too bad that they couldn't have created that back drop to blend in with the winter mountain theme that I am using but, it will work where I want to put it..

I agree.  

Mark Boyce posted:
suzukovich posted:
Mark Boyce posted:

Suzukovich,

I took your advice and ordered two of those backdrops for our Christmas layout, my wife loves the opposite side for Christmas.

When I ordered from them , they had a village backdrop that was out of stock that I wanted to get. Its too bad that they couldn't have created that back drop to blend in with the winter mountain theme that I am using but, it will work where I want to put it..

I agree.  

Mark, Thinking about it. I think for what we are using them for was not their intent when they came out with them..
Slow progress again on this American Model Builders "Laserkit" of a grain elevator.  It is too nice to sit at the workbench.  I am kitbashing it, eliminating the high loading ramp, which I have not seen in many prototypes,  and moving auxilliary buildings around to create a smaller footprint.  Although this one is smaller than probably all of my scratchbuilt ones.  I think the B.L.S. and Altoona elevator kits, which I don't own, build much larger models, too.

M. Mitchell Marmel posted:

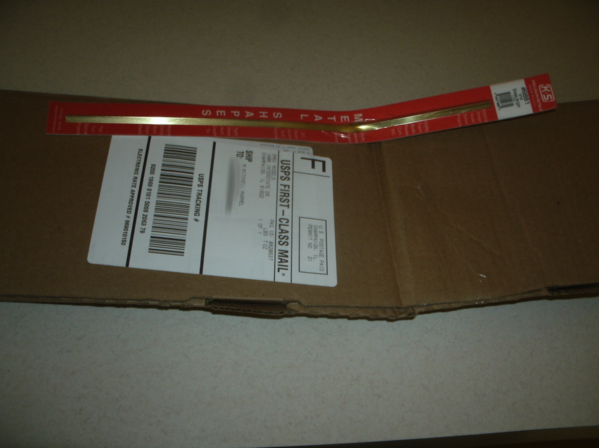
Omni Models gets top marks for customer service! 

I'd ordered a 3/16" brass angle piece for the 3424 Brakeman on Fastrack experiments, but...

bent-angle

Dropped 'em a note on eBay, and had an answer within minutes offering a refund or a replacement!  The replacement will be winging to me shortly! 

Mitch

Well at least the brass at Omni isn't trying to work some kind of angle    on someone they haven't met......et all yet; they could have told you to get bent.  

Lee - The old timer (he looks old to me?) needs a bucket to kick, or did I miss put the horse before the coal cart....or lift...or is he digging to China????

The heels make the woman look very petite. The heels on the shoe and style says woman, I think a teens would be a tad lower(?). It makes the other girl look like a big frumpy teen being talked to by a teacher 

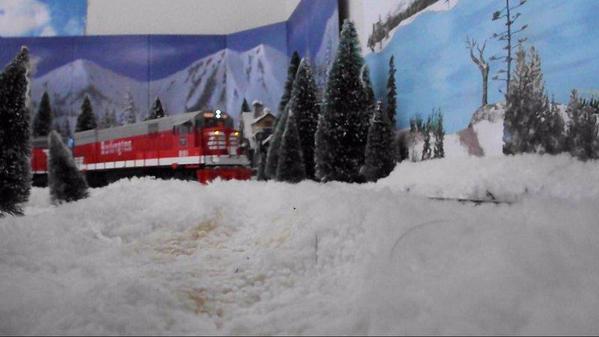
Lee - Great Northern  in the lead? 


I assembled wood and painted. The ladder to the water tower is done. I might separate it, cutting it to make two ladders

 The waterspout's frame is ready for details.. How large a diameter should a spout  really be?

Finished building my Scorpion Coaster from forum sponsor Coaster Dynamix.  Quick review of this project....I ordered from them on Monday night and received the kit on Thursday afternoon.  It does take awhile to finish this kit as I put in 7 hours last night and another 5 hours today.  Building the actually pieces doesn't take long and the directions are real easy to follow.  I was thinking this won't take long at all until the final couple of pages which took forever.  Of course this is the part that if you mess up the coaster won't make it around the track.  I did have to spend about an hour tweaking the angles until the coaster would make it all the way around but now that I have it locked in it runs smoothly and completely every time.  This will definitely be an eye catcher in my carnival area.

DSC_0952[1] 

Attachments

Images (1)
  • DSC_0952[1]
Adriatic posted:

Lee - The old timer (he looks old to me?) needs a bucket to kick, or did I miss put the horse before the coal cart....or lift...or is he digging to China????

Yeah, I'm looking for a good scale bucket, but they're not cheap as castings in that scale. That's a pile of cinders, not the spoils of him digging. Why he'd be digging a bunch of cinders for himself, well, maybe he's insane?

As for the female's heels, I have several books with civilian photos from the 40s, and the shoes look decent for a teen in the war era.


Bryan in Ohio posted:

Finished building my Scorpion Coaster from forum sponsor Coaster Dynamix.  Quick review of this project....I ordered from them on Monday night and received the kit on Thursday afternoon.  It does take awhile to finish this kit as I put in 7 hours last night and another 5 hours today.  Building the actually pieces doesn't take long and the directions are real easy to follow.  I was thinking this won't take long at all until the final couple of pages which took forever.  Of course this is the part that if you mess up the coaster won't make it around the track.  I did have to spend about an hour tweaking the angles until the coaster would make it all the way around but now that I have it locked in it runs smoothly and completely every time.  This will definitely be an eye catcher in my carnival area.


That's Cedar Point isn't it? On30 coming for the train?


Lee - If you can find a smooth thimble without the indentions it might work. I think with the size of that pile, a cart might be called for.

I got the Ye Old Huff N Puff, Old Log Brew reefer yesterday. (Thanks Mike)

I couldn't wait till I got the MO in the mail. It's nearly done already.

 I glued up the main framework, trimmed the details, and painted 90% of the parts in flat black down low and "rusty metal primer" for the roof and ends. ( Rusty metal primer dries to a semi gloss now ! ???  It's more brown, less red too) I tried all flat black, but I just didn't like it.
Fast dry paint and modern glues make this happen fast. I used Gorilla glue on the fat wood frame and gel super glue with an adhesion promoter on the little stuff.
  The kit had some minor issues with two eves boards being an inch short, the roofs angle was off (bad bevel cut; exacto-plane to the rescue), the brake wheel hole is much bigger that the thin wire shaft and the roofing was six, scored boards, short of the way it is on the instructions, which themselves aren't the greatest. I couldn't get over the gap in between the roof sections and seperated quite a few to scatter the gaps. The lack of any excess slats mentioned, meant I couldn't hide the gap under the top trim boards either. I'm thinking of giving the doors a frame with the extra wood from the eves. There will be an offset at the hinges; the doors are glued to the sides and the doors thickness will create an offset under the hinge, that a frame can fill. 

  I always wanted to try to build one, and now that I have; yes, I definitely would do another. At twenty bucks online retail, sans-trucks, it's hard to beat.

 Now if I could only find a model of the Casey Jones Cannonball!  

( Check your email Mike G)

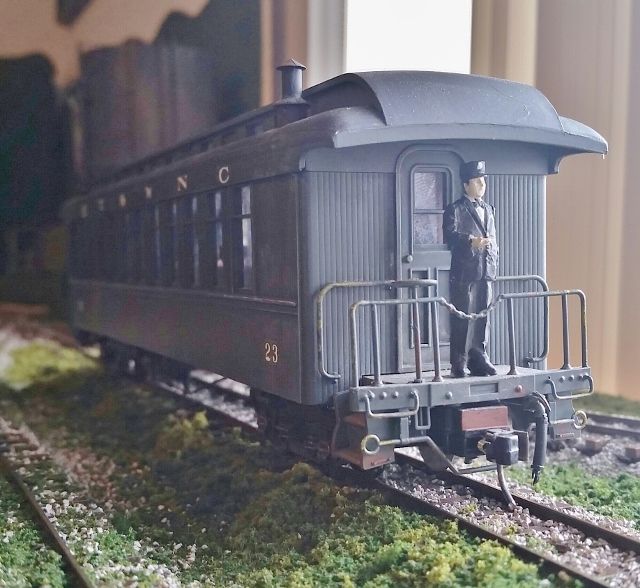
I found a vendor on eBay that had a bunch of those really good O scale pained figures from Arttista. They’re a little pricey but very good. I got a mother holding a little kid, two sitting women in housecoat/dress (typical for almost any era in the South), a shopkeeper with apron (for the gas station/general store), conductor in classic uniform (yes, the ET&WNC had them dressed like that), sailor in whites with a duffle bag (I have to begrudgingly acknowledge the war wasn’t only fought by soldiers) and a classic station worker with the sleeve covers and the bill on his head. They all will look right for the timeframe. I found that I had a decent amount of figures but one thing I’ve noticed is that many layouts looked deserted when they shouldn’t. I wanted to show a representation of enough people to make it look like people really lived there. Seven figures total and two will be standing on station platforms, the conductor is earmarked for the back platform of coach # 23 and the rest will be placed where they look best.


Went to Home Depot for one sheet of Homosote but it was $30 so I settled for 1/2" foam board. The FB sure isn't a sound killer-sounds like a drum head. Wanted some grey indoor/outdoor carpeting and found a remnant on sale the right size only $10.  So the top is down with the carpet on  top with a nice loop of track. The track is about 48" wide and 12-13 ft. long. Only thing to do is run another power lead to the back side and nail down the track. I will eventually put some litho buildings and vehicles on it. So now I have two standard gauge layouts.

Adriatic posted:


Bryan in Ohio posted:

Finished building my Scorpion Coaster from forum sponsor Coaster Dynamix.  Quick review of this project....I ordered from them on Monday night and received the kit on Thursday afternoon.  It does take awhile to finish this kit as I put in 7 hours last night and another 5 hours today.  Building the actually pieces doesn't take long and the directions are real easy to follow.  I was thinking this won't take long at all until the final couple of pages which took forever.  Of course this is the part that if you mess up the coaster won't make it around the track.  I did have to spend about an hour tweaking the angles until the coaster would make it all the way around but now that I have it locked in it runs smoothly and completely every time.  This will definitely be an eye catcher in my carnival area.


That's Cedar Point isn't it? On30 coming for the train?


Lee - If you can find a smooth thimble without the indentions it might work. I think with the size of that pile, a cart might be called for.

I got the Ye Old Huff N Puff, Old Log Brew reefer yesterday. (Thanks Mike)

I couldn't wait till I got the MO in the mail. It's nearly done already.

 I glued up the main framework, trimmed the details, and painted 90% of the parts in flat black down low and "rusty metal primer" for the roof and ends. ( Rusty metal primer dries to a semi gloss now ! ???  It's more brown, less red too) I tried all flat black, but I just didn't like it.

Fast dry paint and modern glues make this happen fast. I used Gorilla glue on the fat wood frame and gel super glue with an adhesion promoter on the little stuff.

  The kit had some minor issues with two eves boards being an inch short, the roofs angle was off (bad bevel cut; exacto-plane to the rescue), the brake wheel hole is much bigger that the thin wire shaft and the roofing was six, scored boards, short of the way it is on the instructions, which themselves aren't the greatest. I couldn't get over the gap in between the roof sections and seperated quite a few to scatter the gaps. The lack of any excess slats mentioned, meant I couldn't hide the gap under the top trim boards either. I'm thinking of giving the doors a frame with the extra wood from the eves. There will be an offset at the hinges; the doors are glued to the sides and the doors thickness will create an offset under the hinge, that a frame can fill. 

  I always wanted to try to build one, and now that I have; yes, I definitely would do another. At twenty bucks online retail, sans-trucks, it's hard to beat.

 Now if I could only find a model of the Casey Jones Cannonball!  

( Check your email Mike G)

Butch, Sounds like you had fun! I am glad, I know a guy that use to have a Casey Jones but not anymore!

p51 posted:

I found a vendor on eBay that had a bunch of those really good O scale pained figures from Arttista. They’re a little pricey but very good. I got a mother holding a little kid, two sitting women in housecoat/dress (typical for almost any era in the South), a shopkeeper with apron (for the gas station/general store), conductor in classic uniform (yes, the ET&WNC had them dressed like that), sailor in whites with a duffle bag (I have to begrudgingly acknowledge the war wasn’t only fought by soldiers) and a classic station worker with the sleeve covers and the bill on his head. They all will look right for the timeframe. I found that I had a decent amount of figures but one thing I’ve noticed is that many layouts looked deserted when they shouldn’t. I wanted to show a representation of enough people to make it look like people really lived there. Seven figures total and two will be standing on station platforms, the conductor is earmarked for the back platform of coach # 23 and the rest will be placed where they look best.


Great find Lee!

I started actually shaping my mountain. I covered my latticework with newspaper and spare adhesive. Then I started adding Great Stuff. 

The red box is where I have an access cut out, and I needed something to fill the hole so it would remain square. Underneath the box is one end of my removable access hatch. I covered both with plastic wrap so the foam won't stick to them. 

Two cans did not do as much as I thought!

imageimageimageimage

Attachments

Images (4)
  • image
  • image
  • image
  • image

Worked some more on the Bedroom Standard gauge layout and have it pretty much done-at least for now. want to put a few buildings on it and an old Ives semaphore. Did cut some indoor/outdoor carpeting in to strips and put it under the track on top of the carpeting covering the layout. removed the smaller piece of foam board at the one end when I discovered I had enough Homosote toput that down.  My poor O gauge layout has been neglected so will run it tonight. The high heat and humidity has let up so that makes it nice to run trains.

I got those figures really fast and added to he layout right away. Some are next o houses and such, but I really like how my main depot looks like it should, and I've bene wanting to put a conductor onto a coach for a long time now.

Not great cell shots, but it gives an idea.

As for the sailor, some of you might be surprised that an old Army officer would have that. I thought a sailor home on leave would really look the part. I plan to letter his sea bag with a fictional name and the ship name, Uss Indianapolis to illustrate the horrible costs of the war. When this young man hops on the train, his family will never see him again.


Add Reply

Post

OGR Publishing, Inc., 1310 Eastside Centre Ct, Suite 6, Mountain Home, AR 72653
800-980-OGRR (6477)
www.ogaugerr.com

×
×
×
×
Link copied to your clipboard.
×
×