


The 238E looks great!
Got a Williams Amtrak GP in Phase One livery on Consignment at Papa Bens on Bellaire Blvd in West Univetsity in the Houston area yesterday. Also had 3 Railking Amtrak ROW cars in orange. Store package them to survive a METRO bus trip back to the nortvside of town. No damage. Thanks.
Now back to thread theme. Took the engine and three cars, and did my off the self setup and upgrades. Lube/oil items. Then I had some Mode drop in BA9 one can purchase at Ace Electronics on Antione near 34TH. Next is to get some figures and accents one would find with such a train, like welding tanks, crates, et. al.
Trains and ham radio have been on the back burner due to sick relative. That situation has changed, and getting steam up to get trains and radios nack to operation.
Some Mexican friends came over with some of their friends. Everyone was fascinated by my Christmas train lay-out. And then we went out for ice cream. Two scoops apiece for 5 people =$6 US.
RSJB18 posted:Lot's of great stuff going on. Chris- the coaling tower looks great. Johan- nice work on the trailers. Brian- You've got a special gal there. CGW Patrick- the signals look nice.
I took another look at the motor for my M-10000. I couldn't get it to run the other day. I'm guessing the gears were a bit out of sync so I gave it a shot of power at 18V and it sprung to life! Just need to clean up the track and put it all together now.
Bob. Thank you. That M10000 is a really something what i like a own some day. I think i can buy a MTH Premier -version some day. 🤝 Johan


have a great weekend everyone 
Attachments
Images (4)


Chris a, did a nice job on the coaling tower.
Johan, I missed seeing them the first time but that is a nioce string of State of Maine box cars.
Gandydancer, nioce restoration on the 238E.
Today with the paint dry I glued the stairs to the loading dock. once dried I'll place the building against the backdrop. Tomorrow I'll run to Menards to get more PVC pipe to make more silos. Now I think I'll head to the attic to relax and run some trains for awhile. Pics Paul 2


Attachments
Images (2)
Just watching a mine Christmas present. S.B.R. FM Trainmaster #200 "Damon".


Attachments
Images (4)


PSU1980,
I used 110 trestles on Warrenville but cut the elevation rise in half by doubling up (instead of one different size at each track joint, I used two of the same size at each adjacent joint).
briansilvermustang posted:
have a great weekend everyone
As far as a pretty train, the orginal streamlined MKT/SL-SF is vastly underrated. To run it is doing something to the layout.
Got the Ogle Coaling tower back on the layout... Have to admit threading chain and making and closing rings made me feel like I was 100 years old !!!! Thank goodness for reading glasses, magnifiers, dental pick tools, unfortunately none of those things improve "steadiness"... LOL
Here are some photos, so that I don't take up a "whole page", only 1/2 the photos are in the post, the remainder are attached below... Yeah I know I took a lot of photos, after spending this many hours like a dog with a bone, I figured plenty of photos was my consolation prize.
Johan, I really like the details under the "hood" and covers of the FM Trainmaster, very cool !
Paul, looks like we're cutting up and assembling the same stairwell and railing parts... Plastruct ?
")
")
")
")
Attachments
Images (8)
")
")
")
")
")
")
")
")
Chris, it was well worth the effort! Yes, steadiness seems to have left me too! To think, I used to scratch build structures in N scale at one time boggles my mind! The Ogle coal tower is a highlight of your wonderful layout!
Wonderful work everyone!
Chris class act! The coaling tower looks amazing!
I got a little time in the train room today and added some power contacts for power on when the bridge is down and off to the open approach. Needless to say I have a new problem, when the engine hits the joint from the old power to the new power section the engine stops and starts up.
I am just scratching my head! I will try again tomorrow.
Mark, thanks very much. Yes at one point during this layout build I gave some thought to HO when I realized how much space it would take to build a layout like this. The few times I contemplated a "switch" to smaller gauge, I was always too sentimental to sell off my 3 rail trains that were given to me as gifts, and got me started back in the 60's... Now there's new aging issues that will ensure I don't ever go "smaller".
Fortunately I still have a pretty stable hand when painting details with brushes, we'll see how long that lasts....
Anyway, I should really have very little to whine about, I am enjoying a hobby I have been involved with since I was about 7 years old, it's incredibly rewarding and keeps me active in a pretty diverse set of activities.
Mike G: Glad to see your post, I was thinking about you over the Christmas holiday ! Hope the roof rafter project got done ????
This summer I purchase an MTH NYC 2-8-0 consolidation off the bay with the plan of assigning it to the DM&IRR. I had an extra set of DM&IR steam decals that needed a home. The DM&IRR had several consolidations during the steam era. This year, the Duluth and Northeastern (predecessor of the DM&IRR) consolidation #28 has been recently restored and lettered as DM&IR #332. It is currently pulling excursions between Duluth and Two Harbors, MN and has provided some inspiration for my project.
I am not a rivet counter but I could not live with the original pilot configuration of the MTH NYC 2-8-0. I am going to retain the original NYC number #1121 as the lighted number boards up front and on the tender backup light are a nice feature. But the pilot had to go!
I was pleased to discover that much of the pilot prow was constructed of brass. This meant I had a nice contact for soldering the new replacement. So this week I took the plunge and starting cutting away the old pilot prow in preparation for the design and construction of a new cow catcher. I used some scrap copper and 3/64 brass rod that I had to forge and reshape. I flattened the brass rod to some degree and hammered out end tabs. I constructed a wood frame to support the components during solder construction. I still need to solder the new cow catcher and footboards to the pilot before primer and finish coat. So far I am pleased with the fit. I may also need to redo the footboards on the tender. After that, I will remove the old NYC markings and add the appropriate decals.
Always fun to follow the Forum posts as see what everyone is doing.
Happy New Year to all!
Cheers, Dave


Attachments
Images (13)


Chris , just 2 rooms done about 30 more trusses to go!
Dave, sure is some nice brass work! Keep us posted!
Nice work Dave!
I haven’t done much. Knee replacement PT is going well, but Christmas activities took precedence
All right. This took two days. I rewired a 3472 milk can launcher. A coupler broke after a fall of 120 scale feet. I noticed the wiring was at the point of being dangerous. I gathered up all the needed parts and wiring. I put together another sliding shoe truck first. Next up was all new wires. Finally it was time to test. ![]()


Attachments
Images (4)


Videos (2)


Sorry about the repeats
chris a posted:Got the Ogle Coaling tower back on the layout... Have to admit threading chain and making and closing rings made me feel like I was 100 years old !!!! Thank goodness for reading glasses, magnifiers, dental pick tools, unfortunately none of those things improve "steadiness"... LOL
Here are some photos, so that I don't take up a "whole page", only 1/2 the photos are in the post, the remainder are attached below... Yeah I know I took a lot of photos, after spending this many hours like a dog with a bone, I figured plenty of photos was my consolation prize.
Johan, I really like the details under the "hood" and covers of the FM Trainmaster, very cool !
Paul, looks like we're cutting up and assembling the same stairwell and railing parts... Plastruct ?
Chris. Fantastic work, really. Hope you can post some new videos where we can see that beautiful tower. I like also that wall, behind the tower. 🤝
Johan
Chris- beautiful work. I like this shot through the TT bridge the best. Bob
While technically not "on the layout", I consider any train time, layout time, so I put a shelf together yesterday from some scrap shelving I had laying around so I could display more engines. Since I'm not going to stop buying engines any time soon, more shelves were the only solution. The CEO doesn't want more shelves on the walls so I get creative. ![]()
The wood is from an old pine TV stand that our neighbors were throwing out many years ago. We did use it for a TV stand for a while when my kids were little but I took it apart and kept the wood when it was no longer needed. I'll take free 3/4" clear pine any day of the week.


Attachments
Images (2)


RSJB18 posted:While technically not "on the layout", I consider any train time, layout time, so I put a shelf together yesterday from some scrap shelving I had laying around so I could display more engines. Since I'm not going to stop buying engines any time soon, more shelves were the only solution. The CEO doesn't want more shelves on the walls so I get creative.
The wood is from an old pine TV stand that our neighbors were throwing out many years ago. We did use it for a TV stand for a while when my kids were little but I took it apart and kept the wood when it was no longer needed. I'll take free 3/4" clear pine any day of the week.
Nice collection of engines and I totally understand working around the watchful eye of the CEO. I try to repurpose when possible as well.
Fendermain
chris a posted:Got the Ogle Coaling tower back on the layout... Have to admit threading chain and making and closing rings made me feel like I was 100 years old !!!! Thank goodness for reading glasses, magnifiers, dental pick tools, unfortunately none of those things improve "steadiness"... LOL
Here are some photos, so that I don't take up a "whole page", only 1/2 the photos are in the post, the remainder are attached below... Yeah I know I took a lot of photos, after spending this many hours like a dog with a bone, I figured plenty of photos was my consolation prize.
Johan, I really like the details under the "hood" and covers of the FM Trainmaster, very cool !
Paul, looks like we're cutting up and assembling the same stairwell and railing parts... Plastruct ?
Hey Chris,
Really nice work with the tower. It really looks like this was the perfect fit for your layout. Pat yourself on the back for all of the work with those chains. I know it was tedious to say the least. It looks like the results were well worth the time and effort. Unfortunately in this hobby most of the most gratifying results come from this type of effort. Thanks for posting.
Dave
Installed 400+ wood ties under the tubular track. Screen molding stained with black rit dye. I think I will forego ballast for now as it is a tinplate layout. Very difficult install at rear with scenery in place. Should have done this 25 yrs ago during the build. Experimented with 2 or 3 between metal ties. Two won.

 .
.
Fendermain
Attachments
Images (3)
 Enclosed is a picture of the "Lexington Park and Savannah" named for 2 places we lived but really so I could nick name it the "long and skinny" as you see its but 34" wide and 17 ft long to accomodate the space between the display shelves. By the way, these shelves are "repurposed" as well, my wife bought them out of a drug store in Dayton, Oh when we lived there that was redecorating. They were dirt cheap (basically free if we hauled them away) because they are really too slim for books, but they were built that way to accommodate the pill bottles. Hence re-purposed for my trains.
Great fun, I am in the process of adding details to my layout and building "mini-scenes" especially adding people.
Happy Holidays, Don
Attachments
Images (1)

Dave (LUVINDEMTRAINS): I have you to thank for this "perfect addition" to my layout, thanks also for the positive feedback. Yes, pleasure out seems to be directly proportional to effort put in !
So the weather is so mild and sunny here south of Boston, I decided it was probably one of the last days I could actually dullcoat and spray paint out in the sunlight !
I got one of my BAR State of Maine Boxcars very lightly weathered and faded with Pan Pastels and am about to do the other... With a build date of 1954, these would barely be "one year old" for the time period I am modeling, so I just want them to look barely run over the road, but not right out of the paint shop. The difference between done, and not done, is more noticeable to the human eye than the digital camera, but c'est la vie !
Bob, thanks for the comment on the photo "through the turntable bridge", I don't bring the camera and tripod back there very often, but as I was heading out "under the duck under" I decided to take that photo. Now I have some engine service track to change/modify. Since installing the coaling tower, I have decided to reverse the arrival track with the coal, sand service track... Eventually, I will add a "coal dump" house to the back of the new tower, just not now !
")
")
")
Attachments
Images (3)
")
")
")
Fendermain posted:Installed 400+ wood ties under the tubular track. Screen molding stained with black rit dye. I think I will forego ballast for now as it is a tinplate layout. Very difficult install at rear with scenery in place. Should have done this 25 yrs ago during the build. Experimented with 2 or 3 between metal ties. Two won.
.
Fendermain
Fendermain,
I did the same on Warrenville, except about 2,400 ties were used along with kitty litter ballast. About half was retrofitted, the rest as expansions occurred. Toughest retrofit was replacing all O27 curves with O42, O54 and O72 - talk about disrupting a layout!
I find that some of my accessories, particularly the operating fork lift and ice loader, mysteriously either don't work correctly and need tuning, or stop working all together.
For instance, recently the fork lift would not hold on to the pieces of wood to pick them up. This was a puzzle for over one month. Finally, I noticed the spring in the fork lift was slightly out of place (needed to be repositioned to catch on to a little notch), and that completely solved the problem.
Yesterday, preparing for relatives to see the layout, my ice loader completely stopped working while testing it before guests arrived. This morning, after trying various things, I discovered that the wires that connect to the controller had become disconnected. This was a very easy and quick fix.
Repairs like these, when successfully done, can be gratifying. Arnold
Lionelski posted:Fendermain posted:Installed 400+ wood ties under the tubular track. Screen molding stained with black rit dye. I think I will forego ballast for now as it is a tinplate layout. Very difficult install at rear with scenery in place. Should have done this 25 yrs ago during the build. Experimented with 2 or 3 between metal ties. Two won.
Fendermain
Fendermain,
I did the same on Warrenville, except about 2,400 ties were used along with kitty litter ballast. About half was retrofitted, the rest as expansions occurred. Toughest retrofit was replacing all O27 curves with O42, O54 and O72 - talk about disrupting a layout!
I checked out Warrenville. Quite impressive sir! Quite impressive! Yea, curve retrofit would not be fun.
Fendermain
Have installed Legacy system even though no engines yet, but programming all my TMCC engines and setting lashups and trying to find an unobtrusive home for the base and TMCC unit. Then everything off the tracks for a good cleaning, I have a track cleaning car but like to use 91% isopropyl alcohol to wipe the oil residue off as well as the wheels.
With TMCC I could address TR1 and TR2 as tracks but haven't found a way to do that in Legacy. So no fun today.
Thanks for the kind comment Fendermain

Attachments
Images (1)
chris a posted:Dave (LUVINDEMTRAINS): I have you to thank for this "perfect addition" to my layout, thanks also for the positive feedback. Yes, pleasure out seems to be directly proportional to effort put in !
So the weather is so mild and sunny here south of Boston, I decided it was probably one of the last days I could actually dullcoat and spray paint out in the sunlight !
I got one of my BAR State of Maine Boxcars very lightly weathered and faded with Pan Pastels and am about to do the other... With a build date of 1954, these would barely be "one year old" for the time period I am modeling, so I just want them to look barely run over the road, but not right out of the paint shop. The difference between done, and not done, is more noticeable to the human eye than the digital camera, but c'est la vie !
Bob, thanks for the comment on the photo "through the turntable bridge", I don't bring the camera and tripod back there very often, but as I was heading out "under the duck under" I decided to take that photo. Now I have some engine service track to change/modify. Since installing the coaling tower, I have decided to reverse the arrival track with the coal, sand service track... Eventually, I will add a "coal dump" house to the back of the new tower, just not now !
Chris. Really nice looking BAR -cars. The best looking box car ever. 👍
Johan
Johan, What a great scene, simple but so full of realistic details and weathering.. I love the old wooden crossbuck , seeing the light coming through the vertical boards in the shed building.... and backdrop that just draws you in. Yes I agree I have always thought these were some of the best looking boxcar paint schemes.
Ray, (SIDEHACK), not sure you will have the same issue(s), but I installed GRJ's TMCC signal booster on my layout with both Legacy and TMCC base units, and ran into some "issues" that seem to happen to some users of both systems. The fixes below worked well for me.
1. Had to plug my Legacy base directly into the duplex by itself, not through the rather expensive surge protecting power strip I purchased to plug everything else into, including the TMCC base unit.
2. Had to move my TMCC base unit down near the floor, I did have it on a shelf under the table top next to the Legacy base unit, looked great but had communication issues. The symptom was flashing red signal light on the TMCC flashing.... Wrote to Gunrunnerjohn, and he explained that I needed some physical separation between the base units.
Anyway, you may not experience any issues, but if you do, hopefully these hints will help.
Hi guys, I know its been awhile from my last post on here about my layout. But I did get out to the layout this morning after having a nice talk on the phone with Chris A. He gave me some great advice on a problem I was having that some of you may have read about.
Anyways I broke up my track sections near my lift bridge do to the fact I had a runaway train last week and it ran into the back of my Amtrak train. The good thing is there was no damage to either train. But anyways the problem I was having was my engine would come to a switch and stop then start up, I could not move it again till I shut off the power and turn it back on again. It was acting like it was missing the watchdog signal.
Well come to find out the little section right before the frog for the center rail was not getting any power. Makes since do to the fact if the train was going fast it would roll right over it! I soldered the little center rail to the frog that had power and problem fixed.
I took every engine I had and ran it over that area and no problem. Here are a couple pictures of my new sidings in there new locations!
Chris A. Thanks again you truly ROCK!


I hope you all have a great weekend and Go SEAHAWKS!
P.S. Great work on the Maine cars Chris!
Johan wonderful scene as usual!
You all are doing great work and I just love seeing what your all doing! Please keep up the great work!
Attachments
Images (4)
RSJB18 posted:While technically not "on the layout", I consider any train time, layout time, so I put a shelf together yesterday from some scrap shelving I had laying around so I could display more engines. Since I'm not going to stop buying engines any time soon, more shelves were the only solution. The CEO doesn't want more shelves on the walls so I get creative.
The wood is from an old pine TV stand that our neighbors were throwing out many years ago. We did use it for a TV stand for a while when my kids were little but I took it apart and kept the wood when it was no longer needed. I'll take free 3/4" clear pine any day of the week.
Bob, Great looking shelf's! But more important what a great selection of engines! Don't stop buying as the CEO will always forgive you! LOL
It looks like a BAR day! Nce work Bob and Johan.
Also, the shelves look great, Bob and Don.
Mike, I see a lot of silver there in those photographs! Very sharp looking! I'm glad you got back to it on the layout a bit.
I had planned to post photographs of my adaptation to the upper level of my under construction layout into a Christmas diorama. I didn't get the simple project done until the day after Christmas. I still haven't fanangled my way under the shelves to get the Polar Express out. (Recovery from Knee replacement is going very well, but it takes time.) So I substituted a Western Maryland engine and a couple of cars that were at easy reach. Surprise. ![]()
Now the bad part. I bought my wife a storage device for her zillions of photographs for Christmas. I tested it out before Christmas by copying the 47 photographs on my phone to it. It worked like a champ. However, now that I took a few photographs to the layout, I can't attach the ones I just took because the program thinks they are on 'the cloud'. It must be something with the goofy app, and I haven't had time to dig in with Christmas visiting including 3 trips to the nursing homes. Conclusion is, I will probably be posting the Christmas photographs in July! ![]()
![]()
Lew, I know; none of the above ever happened!!! ![]() Have a great evening everyone!
Have a great evening everyone! ![]()
Assembled the new consolidation pilot today. It's washed, primed and ready for finish coat. Happy to get to this point. Tomorrow: finish coat and begin stripping original road markings. Looking forward to getting it road ready and back in service.
Cheers to all, Dave


Attachments
Images (2)
That pilot looks great, Dave!
Mark Boyce posted:That pilot looks great, Dave!
Thanks Mark. It was a scary project. It's a big step to start hacking away on an expensive engine but I am pleased with the way it turned out.
Cheers, Dave
Noodling about with my AF prewar 3012 this weekend. Replaced sketchy internal solid wires with modern Lionel flex wire. Also did a bit of experimenting indicating that gi-raffe ramps will, in a pinch, activate the mechanical reverse. More on this as things develop...
Mitch
darlander posted:Mark Boyce posted:That pilot looks great, Dave!
Thanks Mark. It was a scary project. It's a big step to start hacking away on an expensive engine but I am pleased with the way it turned out.
Cheers, Dave
I would find it scary too, but looks like you can rest easy now!
M. Mitchell Marmel posted:Noodling about with my AF prewar 3012 this weekend. Replaced sketchy internal solid wires with modern Lionel flex wire. Also did a bit of experimenting indicating that gi-raffe ramps will, in a pinch, activate the mechanical reverse. More on this as things develop...
Mitch
Had to see the Gi-raffe Laboratory is hard at work developing the latest brainchild!! Instead of Igor, you have Norma Bates Kitteh as an assistant!
Dave, the modified pilot looks really good, nice work. Can't say I have ever seen a pilot design like that very unique. Glad I am not a cow.
Mike G: The photos of your layout are showing major progress, thanks for posting them. I like the change with the siding to provide more building real estate. Nice work diagnosing the power problem with the switch. The Seahawks need to get it in gear.
I finished my 2nd BAR boxcar, and then started extending another yard track from under the new coal tower to the turntable... It used to be the coal, sand and ash pit spur, but the new tower has a chute over it, so it's going to become the arrival, and secondary departure track.
chris a posted:Johan, What a great scene, simple but so full of realistic details and weathering.. I love the old wooden crossbuck , seeing the light coming through the vertical boards in the shed building.... and backdrop that just draws you in. Yes I agree I have always thought these were some of the best looking boxcar paint schemes.
Ray, (SIDEHACK), not sure you will have the same issue(s), but I installed GRJ's TMCC signal booster on my layout with both Legacy and TMCC base units, and ran into some "issues" that seem to happen to some users of both systems. The fixes below worked well for me.
1. Had to plug my Legacy base directly into the duplex by itself, not through the rather expensive surge protecting power strip I purchased to plug everything else into, including the TMCC base unit.
2. Had to move my TMCC base unit down near the floor, I did have it on a shelf under the table top next to the Legacy base unit, looked great but had communication issues. The symptom was flashing red signal light on the TMCC flashing.... Wrote to Gunrunnerjohn, and he explained that I needed some physical separation between the base units.
Anyway, you may not experience any issues, but if you do, hopefully these hints will help.
Thanks for the info Chris, kind of makes sense I'll keep these in mind as I go through this process.
mike g. posted:Hi guys, I know its been awhile from my last post on here about my layout. But I did get out to the layout this morning after having a nice talk on the phone with Chris A. He gave me some great advice on a problem I was having that some of you may have read about.
Anyways I broke up my track sections near my lift bridge do to the fact I had a runaway train last week and it ran into the back of my Amtrak train. The good thing is there was no damage to either train. But anyways the problem I was having was my engine would come to a switch and stop then start up, I could not move it again till I shut off the power and turn it back on again. It was acting like it was missing the watchdog signal.
Well come to find out the little section right before the frog for the center rail was not getting any power. Makes since do to the fact if the train was going fast it would roll right over it! I soldered the little center rail to the frog that had power and problem fixed.
I took every engine I had and ran it over that area and no problem. Here are a couple pictures of my new sidings in there new locations!
Chris A. Thanks again you truly ROCK!
I hope you all have a great weekend and Go SEAHAWKS!
P.S. Great work on the Maine cars Chris!
Johan wonderful scene as usual!You all are doing great work and I just love seeing what your all doing! Please keep up the great work!
Mike. Thank you Sir. 🤝
Johan
Mark Boyce posted:It looks like a BAR day! Nce work Bob and Johan.
Also, the shelves look great, Bob and Don.
Mike, I see a lot of silver there in those photographs! Very sharp looking! I'm glad you got back to it on the layout a bit.
I had planned to post photographs of my adaptation to the upper level of my under construction layout into a Christmas diorama. I didn't get the simple project done until the day after Christmas. I still haven't fanangled my way under the shelves to get the Polar Express out. (Recovery from Knee replacement is going very well, but it takes time.) So I substituted a Western Maryland engine and a couple of cars that were at easy reach. Surprise.
Now the bad part. I bought my wife a storage device for her zillions of photographs for Christmas. I tested it out before Christmas by copying the 47 photographs on my phone to it. It worked like a champ. However, now that I took a few photographs to the layout, I can't attach the ones I just took because the program thinks they are on 'the cloud'. It must be something with the goofy app, and I haven't had time to dig in with Christmas visiting including 3 trips to the nursing homes. Conclusion is, I will probably be posting the Christmas photographs in July!
Lew, I know; none of the above ever happened!!!
Have a great evening everyone!
Mark. Thank you. 🤝
Johan

Attachments
Images (1)
BAR GP7 #63 posted:
Realism is your strength. Like the BAR!
Brought a little of my tinplate onto the pike for a bit of exercise...
Inspired by: https://ogrforum.ogaugerr.com/...ains-have-a-caboose?
Mitch
Attachments
Videos (2)


Attachments
Images (1)

Johan, wonderful scene! Are those kit buildings in the background or is it just a backdrop? Either way it so real looking!
Mitch very cool with the tiplate!
Brian, very cool pictures for a Monday morning!
I plan on going out to clean more track today and maybe build that track cleaning car that I have been putting off! If I get it built I will share some photos!
Lew, Just wondering how you hide the control cable that goes to your crane?
One of my favorite movies is Trading Places. There is a scenario near the end of the movie that shows a New Year Eve party on a train. With that in mind, I put together a fictional Party train leaving Maine/ New Hampshire today for 2 nights in Boston to bring in 2020 and continuing on to NY City for 2 nights and returning home on Sunday 1/5/2020. The train consists of a PanAm Railways F-7 pulling a group Heavyweight pool Pullman cars, SF Baggage, (2) sleepers, a Dining car & an Observation car. A great way to visit to Northeast cities - ride on a train, eat on a train , party on a train, sleep on a train and sight see in the cities. Thanks to a couple OGR members for their help in letting me acquire the pool cars. My Pan AM is a little power house.
Attachments
Videos (3)


Hand drilling 2,200 holes to install the Nut, Bolt & Washer castings to hold my drift timbers in place. I have 500 NBW castings installed. I'm waiting for the 1,700 NBW castings that are on backorder from Grandt Line. 

Attachments
Images (2)


decoynh posted:BAR GP7 #63 posted:
Realism is your strength. Like the BAR!
Matt. Thank you very much. Love the BAR.🤝
Johan
mike g. posted:Johan, wonderful scene! Are those kit buildings in the background or is it just a backdrop? Either way it so real looking!
Mitch very cool with the tiplate!
Brian, very cool pictures for a Monday morning!
I plan on going out to clean more track today and maybe build that track cleaning car that I have been putting off! If I get it built I will share some photos!
Lew, Just wondering how you hide the control cable that goes to your crane?
Mike. Thank you. Those buildings are just backdrop buildings, expect that red brick buildind is a 3D printet. 🤝
Johan
Good Afternoon Everyone,
Today I finished up with three tenement apartment flats that will go on my "wrong side of the tracks" section on the layout. I built two of the kits(the two on the right) and weathered all three. Because the instructions were a bit sketchy I had to use the one that was built up for me, to figure most things out. I told myself that whenever I build a kit I would do something to alter the out of the box look, even if the alteration isn't major. The apartments with the slanted roofs still need chimneys and smoke stacks. The one that came with the kit is very difficult to cut so I gave up as I do like having ALL of my fingers.
I will show the apartments on the layout at a later time, with lighting and built up scenery.
Dave


Attachments
Images (5)


Trestleman1 posted:Hand drilling 2,200 holes to install the Nut, Bolt & Washer castings to hold my drift timbers in place. I have 500 NBW castings installed. I'm waiting for the 1,700 NBW castings that are on backorder from Grandt Line.
That is dedication to modeling! WOW! ![]()
Beautiful bridge too!
Dave, outstanding work on the tenement flats... the clapboard siding, the porch rails/posts/spindles, and weathering details are awesome.
Matt (DecoyNY): thanks for making and sharing the videos, the layout is looking great and I enjoyed the "narrative"....
Much appreciated Chris!
luvindemtrains posted:Good Afternoon Everyone,
Today I finished up with three tenement apartment flats that will go on my "wrong side of the tracks" section on the layout. I built two of the kits(the two on the right) and weathered all three. Because the instructions were a bit sketchy I had to use the one that was built up for me, to figure most things out. I told myself that whenever I build a kit I would do something to alter the out of the box look, even if the alteration isn't major. The apartments with the slanted roofs still need chimneys and smoke stacks. The one that came with the kit is very difficult to cut so I gave up as I do like having ALL of my fingers.
I will show the apartments on the layout at a later time, with lighting and built up scenery.
Dave
Dave. Excellent work. 👏
Johan.
BAR GP7 #63 posted:luvindemtrains posted:Good Afternoon Everyone,
Today I finished up with three tenement apartment flats that will go on my "wrong side of the tracks" section on the layout. I built two of the kits(the two on the right) and weathered all three. Because the instructions were a bit sketchy I had to use the one that was built up for me, to figure most things out. I told myself that whenever I build a kit I would do something to alter the out of the box look, even if the alteration isn't major. The apartments with the slanted roofs still need chimneys and smoke stacks. The one that came with the kit is very difficult to cut so I gave up as I do like having ALL of my fingers.
I will show the apartments on the layout at a later time, with lighting and built up scenery.
Dave
Dave. Excellent work. 👏
Johan.
Johan,
I appreciate any positive feedback I get from anyone but coming from you that means a lot.
Thanks,
Dave
That is going to look great on the "wrong side of the tracks"
mike g. posted:Johan, wonderful scene! Are those kit buildings in the background or is it just a backdrop? Either way it so real looking!
Mitch very cool with the tiplate!
Brian, very cool pictures for a Monday morning!
I plan on going out to clean more track today and maybe build that track cleaning car that I have been putting off! If I get it built I will share some photos!
Lew, Just wondering how you hide the control cable that goes to your crane?
Mike, I just drilled a big old hole in the deck and fed the flat cable through it and under the benchwork. Easy to do because there was no controller with this crane when I bought it so I just use toggle switches.
Trestleman, wow that's a lot of holes to drill! But you sure have a great looking layout! It really shows dedication!
Dave, wonderful job on the kits! The people on the wrong side of the track should be happy to live there!
geysergazer posted:mike g. posted:Johan, wonderful scene! Are those kit buildings in the background or is it just a backdrop? Either way it so real looking!
Mitch very cool with the tiplate!
Brian, very cool pictures for a Monday morning!
I plan on going out to clean more track today and maybe build that track cleaning car that I have been putting off! If I get it built I will share some photos!
Lew, Just wondering how you hide the control cable that goes to your crane?
Mike, I just drilled a big old hole in the deck and fed the flat cable through it and under the benchwork. Easy to do because there was no controller with this crane when I bought it so I just use toggle switches.
Lew, you wouldn't happen to have any close ups of the toggle switches you used would you! also how it come up from under the table?
My new shelf space has given me a chance to finally unpack a loco I bought over a year ago. MTH did a great job with this one. It's a conventional runner but still very nice. For BL-2 fans this is a must have! ![]()


Attachments
Images (3)


awesome Bob ![]() nice engine !! HMMMM....
nice engine !! HMMMM....
Wait......did I find one that you don't have????? ![]()
I am putting up more shelves... ![]()
briansilvermustang posted:
I am putting up more shelves...
![]()
![]()
![]()
![]()
![]()
mike g. posted:geysergazer posted:mike g. posted:
Lew, Just wondering how you hide the control cable that goes to your crane?
Mike, I just drilled a big old hole in the deck and fed the flat cable through it and under the benchwork. Easy to do because there was no controller with this crane when I bought it so I just use toggle switches.
Lew, you wouldn't happen to have any close ups of the toggle switches you used would you! also how it come up from under the table?
Mike, I'll get some pics in the morning. ![]()
geysergazer posted:mike g. posted:geysergazer posted:mike g. posted:
Lew, Just wondering how you hide the control cable that goes to your crane?
Mike, I just drilled a big old hole in the deck and fed the flat cable through it and under the benchwork. Easy to do because there was no controller with this crane when I bought it so I just use toggle switches.
Lew, you wouldn't happen to have any close ups of the toggle switches you used would you! also how it come up from under the table?
Mike, I'll get some pics in the morning.
Thanks guys, I'm following this too.. I have a N&W Gantry Crane which has no magnetic pickup.. I'm going to add one to mine, So I'm also interested in how you set up the controls!!
Trestleman, you certainly picked the right name. The trestle is fantastic, and with that detail I’m sure it is incredible in person.
Dave, the tenaments look great! Perfect for wrong side of the track!
Bob, I remember the demonstrator BL2! That is a fantastic paint scheme for sure!!
Another compliment for that gorgeous trestle. Really great work
So it turns out my graduated section is either too steep or my loco isn’t strong enough/too old. It won’t pull up the tender, milk, cattle, and lumber cars plus a caboose. I took off the milk and cattle cars and it will make it. The in-laws come into town tomorrow so hopefully I get some time to work on it the next few days
sidehack posted:That is going to look great on the "wrong side of the tracks"
LOL, thanks Ray!
Finally found out why I was having problems running Legacy with TMCC, seems I need to install a bridge (which is ordered) because I am running Powermasters. I could run engines and lashups but couldn't address, shut down or activate separate tracks with Legacy or even use the panic shut down which is not good. This should take care of all that.
Also cleaned half of my track today with alcohol and will finish the rest tomorrow. Then run the track cleaning car for a while.
And removed everything but track from one half the layout to ready it for some changes like adding a bridge and increasing some curves. WHEW!
Ray, your layout looks great right now. Can't wait to see the improvements you make.
Unboxed my first MTH engine, the RailKing Imperial UP4141, as well as got my DCS TIU out and started installation on the layout. I will be adding DCS in addition to the current TMCC. Also picked up the UP RailKing baggage car that carried the casket on the funeral train (not pictured).


Attachments
Images (2)
Just about layout ready. Restoration and assembly nearly complete. A prewar Lionel No. 297W Pennsy Torpedo set, circa 1936...

Attachments
Images (2)
Videos (1)

gandydancer1950 posted:Just about layout ready. Restoration and assembly nearly complete. A prewar Lionel No. 297W Pennsy Torpedo set, circa 1936...
Amazing... at 80+ years, it looks beautiful and runs smoothly and quietly. Great job ![]()
![]()
![]()
The torpedo looks great, Howard.
Brewcrew, the 4141 looks great! Congratulations
Tonight, I decalled my new Bachmann On30 trench 2-6-2T locomotive as a WW2 era stateside engine. This was a long process, one character at a time! Here is is with my Bachmann 50 tonner, also Army marked. I hit the areas of the decals with some dullcote, let that dry, then test ran it. I then programmed it on my DCC, with the new Road number. Next, comes weathering.
So, why that locomotive number? 5069 fits into the series for these engines as they came from Baldwin.
50 as I turned that age last month, 69 for the year I was born, 1969.
Seemed right as this was a birthday present to myself...
Sometime in the next day or two, I'm going to create a correct number plate with the right Road number, and add that to the smokebox. Then, I'll add some real call to the tender deck, and onto the footplate where it would have been in real life, after the weathering is done.
Attachments
Images (1)

new train year, just ahead...

Attachments
Images (2)


Lee, the decal work looks great on that nice engine!
Brian, Did Izzy get a boxcar for Christmas? ![]()
Over the holidays I completed the last part of my industry sidings area and had some fun modifying the Herman's Sauerkraut building with a new sign and re-lamped. All set to go with a fresh load of Old Bay. Working on finishing the raised city area next.
Have a Great New Year's!
Scott


Attachments
Images (3)
Apples55 posted:gandydancer1950 posted:Just about layout ready. Restoration and assembly nearly complete. A prewar Lionel No. 297W Pennsy Torpedo set, circa 1936...
Amazing... at 80+ years, it looks beautiful and runs smoothly and quietly. Great job

That looks great Howard. If you didn't say it was an original I'd think it was a modern repro set. Where did you find it? And I thought my UP Streamliner was in good shape. ![]()
Bob
Howard and Bob, you both have done great with those classics
Scott, excellent scene!
gandydancer1950 posted:
Thanks for the memories boost. I grew up with a similar set. Pictured below is my brother - Christmas 1939. Thank goodness he treated it kindly thru the years as this was taken 13 months before I was born. Unfortunately, I sold it when I was in high school. Dumb move on my part!!!
")
Cheers and Happy New Years to all!
Dave
Attachments
Images (1)
")
B&O Fan posted:Over the holidays I completed the last part of my industry sidings area and had some fun modifying the Herman's Sauerkraut building with a new sign and re-lamped. All set to go with a fresh load of Old Bay. Working on finishing the raised city area next.
Have a Great New Year's!
Scott
Need more pics of this layout, lol! Looks like it's something special.
Dave
chris a posted:
Dave, the modified pilot looks really good, nice work. Can't say I have ever seen a pilot design like that very unique. Glad I am not a cow.
The consolidation is back on the track sporting the new pilot. It's no longer a NYC machine but not yet lettered to the DM&IRR. That's my first project in the new year!

Chris, Yes it is a unique pilot but not to the DM&IRR. Knowing that, I had to make the change!

There are many other modification I could make but this project will satisfy me for awhile!
Wishing everyone a Safe and Happy New Years!
Cheers, Dave
Attachments
Images (2)

Dave / Mark,
Thanks for the comments, it's still a work in progress. I'm a year into the build as of next month and I'm not half way yet for my planned layout. The city has taken up a huge amount of time due to the structures as I didn't have many to start with and I'm using mostly kits. I've started the final section of the city and it looks like I'll have to build about 5 buildings for it. I'll post more as I move along. After this portion it's on to the railyard, and I already have a pile of kits for that. I should invest in some adhesive companies the way it's going.
Happy New Year!
Scott
Attachments
Images (1)
A more BAR stuff.

Attachments
Images (1)
I gritted my teeth, swallowed my pride such as it is when it comes to model train customization, grabbed my tube of Tamiya Putty and 3M Wet/Dry sandpaper, and continued to work on creating smooth-sided passenger cars for a Great Northern Empire Builder train set using LIONEL 15" TCA aluminum passenger cars as donors.
Most recently, this morning I sanded (again, after an yet another application of the putty yesterday) the five cars remaining and am screwing up the determination to return to this dreaded process.
Photos will follow once the cars are ready for paint. In the meantime, Happy New Year to all.
Getting ready to head out to a neighborhood party. The Party Train to Boston & NYC had a small glitch today as a coupler let go near Exeter NH today. Quick maintenance with some bailing wire got it going and everyone will be partying in Boston tonight.
Happy New Year to all my OGR friends and God bless you all.
Attachments
Videos (1)

Spent a little time this afternoon troubleshooting a issue with my MTH LIRR RS-3. It kept stalling and shutting down on one particular switch on my main line. I took the shell off and checked all connections. Checked both power pickups to common and all is well with the engine.
So I turned to the trackage. The spot in question has a UCS adjacent to a 5122 switch. I checked the spacing of the UCS contact and the frog which are 7.5" apart, exactly the same as the space between the pick up rollers on the RS-3. ![]() So obviously the engine is shutting down because it thinks the power to the rails has been shut off. To prove my theory, I ran the loco though the spot at a higher speed and it slides through the area and keeps going. At slow scale speed it stops.
So obviously the engine is shutting down because it thinks the power to the rails has been shut off. To prove my theory, I ran the loco though the spot at a higher speed and it slides through the area and keeps going. At slow scale speed it stops.
Work orders have been submitted to the MOW shop to re-locate the UCS contact a couple of scale feet to the south. ![]()
Hoping everyone has a Happy New Year! 
Bob
A few weekends back I bought a 1/2 sheet of 1/2" plywood to create an equipment shelf for beneath the layout and cut it to size - 26 1/2 x 17. I made it large enough to hold a TIU, AIU, PowerHouse 180 brick and TMCC command base - with some room to spare.
On Sunday I got the shelf installed and yesterday I got the TIU, AIU and PowerHouse set up:
")
")
I was running with an MTH Z-1000 - the PowerHouse upgrade should provide a bit more power. I also moved all the track wiring to a proper star wiring configuration, got three power drops in for a previously unpowered siding and phased all the power sources.
")
I have a bit more to do around wiring management, but definitely made good progress on getting the power reworked and the TIU off of a box on the floor.
Attachments
Images (3)
")
")
")
Matt, Nice run!! I'm glad quick maintenance got the train back on schedule!
Bob, I'm glad troubleshooting found the problem area. Will the maintenance crew work on double-time tomorrow or wait for straight time? Trains have to keep rolling!!
Luther, neat looking shelf installation!
Just "sweating the details" here in my engine service terminal.... Decided once the GGD Ogle coal tower was done that I'd alter the tracks beneath it, making the track under the tower the new "Arrival" track...
So today, I cut through the table top and fabricated a new ash pit for that track, as it seemed about as much work as trying to move the existing ash pit from the adjacent track... Put concrete sidewalk around this one, using cork roadbed.... Got it done and the major painting and weathering of all the concrete work is done, track is powered, and anchored and now goes all the way to the turntable... (it used to be coal and sand service spur)...
I have pretty well decided on rotating the ash pit conveyor 90 degrees and converting it to a "sand delivery conveyor"....
Also finished the 2nd BAR 40 foot boxcar and got them put back together after light fading and weathering.
Hope everyone here has a Safe, Happy & Healthy New Year !!!!
")
")
")
")
")
")
")
Attachments
Images (7)
")
")
")
")
")
")
")
Chris, you were very busy today! The ash pit looks great, as do the BAR cars!
Mark, Thanks very much.... You're right, I was really busy. Like most jobs, I grossly underestimated how long it would take me to do this, but I am pleased with the result and glad I took about an hour searching Bing and Google images for ash pit photos. I would have never done the concrete sidewalk pad around the perimeter until I started seeing both models and real pits with concrete pads... makes total sense once you see the prototypes. Now I am really close to having a green light to finishing the ground cover in the yard.
chris a posted:Mark, Thanks very much.... You're right, I was really busy. Like most jobs, I grossly underestimated how long it would take me to do this, but I am pleased with the result and glad I took about an hour searching Bing and Google images for ash pit photos. I would have never done the concrete sidewalk pad around the perimeter until I started seeing both models and real pits with concrete pads... makes total sense once you see the prototypes. Now I am really close to having a green light to finishing the ground cover in the yard.
Nice job!! Following!!
Chris, it is amazing the things you don’t notice until you really look into it! All jobs I do take longer than I would think. I’ll be glad to see the new progress
Mark Boyce posted:Bob, I'm glad troubleshooting found the problem area. Will the maintenance crew work on double-time tomorrow or wait for straight time? Trains have to keep rolling!!
We will see how it goes Mark. The crew is always willing to work. Depends on weather the CEO will allow it ![]()
Chris- great job on the ash pit and detailing. The engine yard is going to look great. I like the weathering on the SOM cars too. Gotta give it a try one day.
Bob
Chris, every time I view your posts, I get a severe case of layout envy! I greatly admire your work and your attention to detail. Your layout is truly inspirational. Thanks for sharing!!!
Cheers, Dave
mike g. posted:geysergazer posted:mike g. posted:Johan, wonderful scene! Are those kit buildings in the background or is it just a backdrop? Either way it so real looking!
Mitch very cool with the tiplate!
Brian, very cool pictures for a Monday morning!
I plan on going out to clean more track today and maybe build that track cleaning car that I have been putting off! If I get it built I will share some photos!
Lew, Just wondering how you hide the control cable that goes to your crane?
Mike, I just drilled a big old hole in the deck and fed the flat cable through it and under the benchwork. Easy to do because there was no controller with this crane when I bought it so I just use toggle switches.
Lew, you wouldn't happen to have any close ups of the toggle switches you used would you! also how it come up from under the table?
Mike, here are a couple pics. This works with the Post War 282 but the setup would be different for the modern re-issue (because it uses two DC motors, one for lift and one for swing instead of one motor with a clutch).
A simple hole through the deck sized for a bit of a squeeze-fit for the flat ribbon cable:

The OEM Lionel ribbon-cable is so flexible no strain-relief is needed. The extra wire is power for the lights I added. Ground for the lights is taken from the OEM ground wire.
I used what I had on hand for control switches. The important thing is that a MOMENTARY SPDT center-off toggle switch is needed to run the motor in forward and reverse. I used a DPDT version just leaving one side unused. Two SPST toggle switches are also needed to activate the electromagnet and to operate the clutch (the clutch shifting between hoist and swing):

I have since acquired some nice SPST toggle switches and one of these days I'll replace those Lionel slide switches.
From the backside:

One side unused. The center post goes to ground and the outside posts connect to the motor field winding wires. The PW282 uses a double field winding with two ends in common then in series with the armature and the other ends going to the control box. For a PW Gantry Crane that does it.
Attachments
Images (3)
Happy New Year Everyone, we ran trains yesterday and rearranged the visiting area for watching the new Videos by OGR, and other companies. It appears that everyone had a nice Christmas and 2020 should be our best year yet. 


Attachments
Images (5)
Bob, Dave and all those who hit the "like button"... thanks. Dave, the DM&IRR pilot came out really great, you totally captured the proportion of the prototype...
I really share the photos and "how I did it" details here with the hope that it helps fellow members find some new ideas and ways of doing things. For well over a decade I have been reading OGR threads/posts and studying photos and coming to the conclusion that if "they could do it, then I could probably do it also" if I keep an open mind, keep trying new techniques, and keep persevering. Besides the 1121 in the photo above Dave, the track/ballast weathering and vegetation work in that scene is excellent.... Thanks for the very kind words.
Along those lines: I weathered a bunch of wheel trucks and other rusty parts lately, and didn't want them to all look exactly like the last batch of 20... so I ended up mixing my previous "go to" base coat color which is Krylon Cover MAXX - RED/OXIDE Primer with Rustoleum Camouflage Dark Brown (which the spray paint I always have on hand to weather Ross/Gargraves track.....
I ended up spraying about equal parts of each into an empty tuna fish can and brush painting about 16 - 4 wheel trucks and wheel sets. It is a really good likeness to rusty weathered cast iron. What is also cool is since it's oil base flat, and really "thin" paint coming out of the spray can it flows well, dries fast and is chalky flat....... I just spray it into the small can out in the garage then bring it inside to do the brush work.
LEAPINLARRY: HAPPY NEW YEAR TO YOU AS WELL! Outstanding photos, I need to start planning for "train watching recliner" in my layout room....

Attachments
Images (1)
Guys: Thanks for the pictures, I am currently involved in our "east coast" family holiday trip so I am 1,155 miles from my layout, but I will get back to work next week. Chris, the coal tower and ash pit are just super, what real skills you have and it truly shows. Scott...having lived south of Baltimore in St. Mary's County, it appreciated the "Old Bay" boxcar and your work on the sauerkraut factory. However I was also intrigued by the PCC car on the elevated loop in the background and the elevated passenger platform. I remember the PCC cars that were still running on the "T" in Boston when we lived there in the early 80's. Did you build the elevated line and station or did you find a source that made them? gandydancer1950 thanks for identification of the 1936 set 297W, I also have a 238E and the freight cars but had no data on information as to what might have gone in an "outfit" as Lionel called them. Dave sent the catalog pictures and I can now see the full picture, thank you.
Well thanks everyone for their pictures, I try and stay connected through the site even when I am "remote" ![]()
Happy New Year
Don
Scott, nice looking urban scene.
Chris a, great work done on the coaling and sanding area. I like the idea with the lofting elevator for the sand.
Johan, you always post such great pics. You definately have a good eye for staging the pics.
Well I guess I have sluffed off through the holidays and time to get busy again. The project ahead of me is clening off the table so I can work on the area. Took pics of what I have to clean up. The biggest problem is figuring out where I can put ll the stuff. .....................Paul 2


Attachments
Images (2)
Some may recall the back story, I wasn’t able to setup my regular Christmas layout because of recovering from knee replacement surgery. Instead, I made this little diorama on my new layout that I started earlier this year. I only got the last item on it Christmas Eve. I haven’t had time to dig out the Polar Express, so this Western Maryland equipment is standing in.
And yes, I am going to PT as directed and am doing some exercises as I type on the phone. :-)
Attachments
Images (1)
Don,
The trestle system and elevated station are from Jim Robinson, aka Bridge Boss. Slight mods to make it all work and fit in. Baltimore actually did have an elevated trolley track right down Guilford Ave. to get over the Northern Central tracks on the street.
Thanks, Scott
Applied another primer coat to the five soon-to-be GN Empire Builder streamline cars and will examine them to determine where each requires more bodywork and undertake that this evening.
I have completed (ready for paint) two offset vista dome cars in addition to the continuing struggle to finish the current five cars' bodywork.
The fact is I am awful at bodywork as attested to by the inordinate amount of putty, sandpaper, and primer paint I've used thus far. When they are all ready for paint, I will post the total for each (as well as photos) used--it is a stunning quantity of each for such a modest project.
I just got the the weathering done on my new On30 2-6-2T "trench" locomotive, and put coal in the bunker and on the deck.
I found a GI figure that actually fits perfectly, with a hand even reaching in the right direction for the throttle. For now, he'll do just fine.
I also put gloss over the area where the water tanks would have been field, to make it look as if the tanks had just been filled up recently.


It was a lot of fun weathering this.
Attachments
Images (3)
Happy New Year once again!
Larry- One of the best train/ man caves on the forum.
Paul- looks like the days of moving the pile from table to table are over.
Mark- We will forgive the lack of a Polar Express Berk due to your physical condition this year. However, you do have excellent taste in alternate power.
Dave- I hadn't commented before but the pilot turned out great. Looks like a factory original.
Johan- Agreed, your subject matter is always spot on.
As for me- the MOW crew was cleared to work on the Holiday so the track work on the main line was completed. The UCS track was reversed to create more live rail between it and the switch. Testing with the suspect engine was successful and the RS-3 runs through the area without shutting down. ![]()
Bob


Attachments
Images (2)


Videos (1)

Thank you Bob!! Here are some additional photographs


Attachments
Images (5)
Mark, the Christmas diorama on the upper level looks great... Love the back drop ! Glad the knee is coming along. We don't heal like we use to.
Paul 2: Thanks for posting the photos of the table top in disarray.... I am glad I am not the only one whose layout area looks like Ground Zero after the explosion when I am working. I'm amazed how much stuff I can get out and create a disaster in just a day or two ! I never had the nerve to take and post a photo "before clean up".....
That "trench loco" is really cool. I visited some narrow gauge RR's in Maine, but never saw an engine like that very unique.... Great idea with the gloss. I was thinking about doing something similar in my engine yard with semi gloss black to represent oil spills.
I ran trains last night, got so involved I never saw the ball drop. Today I finished fine tuning the tracks leading into the turntable, ran the TT empty and then test ran my Berkshire on and off from both ends to ensure everything was lined up and running... Just glued down a bunch of low loft batting in the engine yard, so once the glue dries i can start laying down dirt, cinders, coal & ballast in the wet latex paint.
Bob, I'm glad you got that trouble spot fixed. ![]()
Lee, The detail and weathering is tremendous! ![]()
Paul, Well you have until January 18th to clean up the mess! ![]()
Mark, that is a very nice Winter Wonderland you created. ![]()
Chris and Lew, thank you very much!!
Terrific work gentlemen.
I turned the heat on for the train building and I got hit in the head by an idea. I recently purchased a 20 Amp meter and a 20 VAC meter. I thought I would put them in the next control panel. Today's lighting bolt said "Build a meter tower." I took lots of measurements. I put this together in three hours.

Just before dinner of blackeye peas, greens, and ham, I built three more end bumpers.

I'll stain them tomorrow.
I created a TO-DO list to keep work on schedule. Next, replace two lazy switches.
Attachments
Images (2)
To make room for my room change for my new layout, I'm throwing out a bunch, a huge bunch of boxes... Really exciting work........ lol
Woodson posted:To make room for my room change for my new layout, I'm throwing out a bunch, a huge bunch of boxes... Really exciting work........ lol
Woodson, if there's anything in those boxes, just mail them to me.
sniff It's 7:26 PM sniff I've run out of excuses sniff I have to start dismantling my 2019 Disney Christmas lay-out sniff
I played with my grandson.
Attachments
Images (1)
Vincent Massi posted:Woodson posted:To make room for my room change for my new layout, I'm throwing out a bunch, a huge bunch of boxes... Really exciting work........ lol
Woodson, if there's anything in those boxes, just mail them to me.
No they're empty... No old postwar boxes.. Just newer stuff......
Bill, the meter tower and barricades look great.
Vincent, so soon? What will come after the Disney layout?
Galley Proof, That photograph of your grandson is priceless! The layout sounds and looks great too
Vincent Massi posted:sniff It's 7:26 PM sniff I've run out of excuses sniff I have to start dismantling my 2019 Disney Christmas lay-out sniff
Awww! .....U could cheat a liddle bit.....![]()
![]()
Went over to Harbor Freight to pick up some items for the impending rebuild of the JRM Museum layout later this month.
NYE, I got a pleasant surprise from the A&M RR. I was thinking I was going to curl up in an empty coach seat with a good book and be ready in case I was needed. Instead, I was firmly told I had a reserved table to myself in the dining car, so, after a good prime rib dinner, I toasted the New Year with bubbly...

(sorry about the blur; my flip phone doesn't do very good interior pics.)
Mitch
Attachments
Images (1)
geysergazer posted:Vincent Massi posted:sniff It's 7:26 PM sniff I've run out of excuses sniff I have to start dismantling my 2019 Disney Christmas lay-out sniff
Awww! .....U could cheat a liddle bit.....
sniff Thanks, Lew. sniff But I have to set up a short-term Thomas the Tank Engine lay-out in order to see all the stuff I've been buying at yard sales and open-air markets for two years. Then I hope to begin constructing "The Knights of Atlantis" on January 10, the day after I (hopefully) buy a new diesel.
Mark Boyce posted:Bill, the meter tower and barricades look great.
Vincent, so soon? What will come after the Disney layout?
Galley Proof, That photograph of your grandson is priceless! The layout sounds and looks great too
I'm planning to set up all the Thomas the Tank Engine stuff I've been buying on sale for two years because I honestly don't know what I've got. Then I hope to begin constructing "The Knights of Atlantis" on January 10.
M. Mitchell Marmel posted:Went over to Harbor Freight to pick up some items for the impending rebuild of the JRM Museum layout later this month.
NYE, I got a pleasant surprise from the A&M RR. I was thinking I was going to curl up in an empty coach seat with a good book and be ready in case I was needed. Instead, I was firmly told I had a reserved table to myself in the dining car, so, after a good prime rib dinner, I toasted the New Year with bubbly...
(sorry about the blur; my flip phone doesn't do very good interior pics.)
Mitch
Sounds sweet, Mitch... Happy New Year 🎉🎉🎉 Hope you brought something home for the staff ![]()
![]()
![]()
P.S. was it really your flip phone’s fault or was that a post-bubbly photo???
RSJB18 posted:While technically not "on the layout", I consider any train time, layout time, so I put a shelf together yesterday from some scrap shelving I had laying around so I could display more engines. Since I'm not going to stop buying engines any time soon, more shelves were the only solution. The CEO doesn't want more shelves on the walls so I get creative.
The wood is from an old pine TV stand that our neighbors were throwing out many years ago. We did use it for a TV stand for a while when my kids were little but I took it apart and kept the wood when it was no longer needed. I'll take free 3/4" clear pine any day of the week.
Nice collection, Bob, especially that lower shelf - can’t go wrong with PRR and D&H!!! Looks like you’re going to have to scrounge some more shelving material - how long is that M-10000 ![]()
![]()
![]()
Apples55 posted:Sounds sweet, Mitch... Happy New Year 🎉🎉🎉 Hope you brought something home for the staff
The kittehs got a nice chunk of ham each for their NYE treat. ![]()
P.S. was it really your flip phone’s fault or was that a post-bubbly photo???
I refuse to answer on the grounds I mighta been slightly pixelated. ![]()
Mitch

P51, great job..and that scene is so real
p51 posted:I created a number plate for my trench loco, now she's done...
You may have answered this earlier on OGR, but for what is a trench loco used? In NH and other Northeast logging areas, I've seen geared locos like Shays for use on somewhat temporary railways and even large 2-8-0 Consolidations on permanent railways. Nice job with detailing.
paul 2 posted:Scott, nice looking urban scene.
Chris a, great work done on the coaling and sanding area. I like the idea with the lofting elevator for the sand.
Johan, you always post such great pics. You definately have a good eye for staging the pics.
Well I guess I have sluffed off through the holidays and time to get busy again. The project ahead of me is clening off the table so I can work on the area. Took pics of what I have to clean up. The biggest problem is figuring out where I can put ll the stuff. .....................Paul 2
Paul. Thank you. I added a more green around the layout and try take a some pics, before a brand new backdrops coming. 🤝
Johan

Happy New Year everyone !!!

Attachments
Images (3)


RSJB18 posted:Happy New Year once again!
Larry- One of the best train/ man caves on the forum.
Paul- looks like the days of moving the pile from table to table are over.
Mark- We will forgive the lack of a Polar Express Berk due to your physical condition this year. However, you do have excellent taste in alternate power.
Dave- I hadn't commented before but the pilot turned out great. Looks like a factory original.
Johan- Agreed, your subject matter is always spot on.
As for me- the MOW crew was cleared to work on the Holiday so the track work on the main line was completed. The UCS track was reversed to create more live rail between it and the switch. Testing with the suspect engine was successful and the RS-3 runs through the area without shutting down.
Bob
Bob. Thank you very much.🤝
Johan

Attachments
Images (1)
Vincent Massi posted:Mark Boyce posted:Bill, the meter tower and barricades look great.
Vincent, so soon? What will come after the Disney layout?
Galley Proof, That photograph of your grandson is priceless! The layout sounds and looks great too
I'm planning to set up all the Thomas the Tank Engine stuff I've been buying on sale for two years because I honestly don't know what I've got. Then I hope to begin constructing "The Knights of Atlantis" on January 10.
Vincent, That all sounds like a great plan. I’ll look forward to seeing both!!
decoynh posted:p51 posted:I created a number plate for my trench loco, now she's done...
You may have answered this earlier on OGR, but for what is a trench loco used?
This is gonna sound like a wise-acre answer, but for actual trenches.
Baldwin built almost 200 of these for the US Army (and many more of a 4-6-0 type that looked much like this for the Brits) to use behind the lines in WW1. As they were used somewhat near the trench lines, they of course got called, "Trench" engines.

The above engine is the first they built. They had white lettering until they got to France, which was painted over in black. They remained grey through the Great War and most stayed in Europe to be used up by civilian operators after the war.
Sadly, it appears that only one exists today (and only the running gear and frame), but it's been loving restored after being moved back from its Australian exile to a tourist RR in France:
Davenport, ALCO and other makers built copies of the Baldwin design, most of which stayed in the US. One is prominently displayed at the Infantry Museum at Fort Benning, though in a totally wrong paint color (the Army never painted these in OD green)…
My model is painted as a post-WW1 version, which really should be a Davenport, to be honest. They had all kinds of markings in stateside posts through to the late 40s in a few places. Getting the decals straight was an utter pain but it was worth the effort to me...
There is also an outside-framed 2-6-2 Alco type, of which at least one survives in working order at the Festiniog Railway in North Wales.
A restored Baldwin 4-6-0 is (I think) currently at the Leighton Buzzard Light Railway, and the FR also has a much-modified Baldwin petrol-mechanical in occasional use
Today’s job was to find and deal with, a short circuit caused by perished wiring on my Lionel 24xx coach set
Hi everyone, I handed out a lot of likes for all the wonderful work being done! I wish I had time to comment on everyone's projects but I don't as I am still nursing a sick puppy!
Lew, thank you for all the great information!
Mark, wonderful winter wonderland! Nice work!
Chris, you sand pit looks great!
I sure hope to get time to tomorrow to comment more as my better half will be here with me to help with Tank! I hope you all have a great night and don't work to hard on your layout, instead sit back and enjoy your trains running!
hello Mike, IZZY wanted to say she hopes Tank feels better soon !!
GET WELL SOON TANK ![]() have a good night Mike...
have a good night Mike...
Mike, Thank you. I just shutdown from running the RS3 and an F7 AA set on the winter wonderland with Annie.
Annie joins Izzy in wishing Tank gets well soon. Today was Annie's twice a week morning chemo medicine with Black Forest ham. Black Forest ham makes all the difference. The medicine makes her sleep most of the day, but she was alert for train running this evening. She is doing much better than when she got the chemo daily.
Earlier today she went out and took her bone with her.

Attachments
Images (1)

What'd I do? My iPhone 5s has been sick for some time so it was time for a new phone, an iPhone 8. So I tested it for low-light pics:

Happy to report, significantly better! ![]()
Attachments
Images (1)
Lew, the iPhone 8 shows off your handiwork much better. We have iPhone 6s which my wife complains about until I mentioned getting new ones, and she is fine with it again...for now! LOL
sniff Got all my stuff down from my Disney Christmas train lay-out sniff
geysergazer posted:What'd I do? My iPhone 5s has been sick for some time so it was time for a new phone, an iPhone 8. So I tested it for low-light pics:
Happy to report, significantly better!
Sharp-looking trains and excellent photography!
Thanks for all the likes on my previous reply showing the equipment shelf I added - much appreciated!
GeyserGazer - Controls for the 282 look good. You commented on another thread about getting the spring collars back on the 282. I got a pair of Bonney B21 pliers but they were too big - I have a set of smaller pliers somewhere that I use to open up E-Units - they may be a better fit.
Paul 2 - Seems I am in a constant state of bench cleaning!
P51 - thanks for the info on the trench locomotive - I was curious as to why made it a trench type as well.
Bill - nice work on the bumpers - that gives me a few ideas.
The new year is off to a good start. New Years eve I soldered up some wiring harnesses / forks and ring ends and ended the evening enjoying some running time.
Yesterday I had a landmark day - with the wiring done I got three accessories on the layout by lunch! The first is a 415 Fueling Station to keep my new LV ALCo fueled up and hauling freight.

The ALCo was under the tree Christmas morning - a gift from my wife.
I also got an MTH semaphoreand the Lionel Bluetooth radio station installed. I really like the radio station - I can stream from music from my phone while running trains.

I wired the light for the 415 and the semaphore into the new AIU. I started moving to MTH for motive power last fall and installed DCS over Thanksgiving. I just added the AIU earlier in the week so this was my first attempt at adding accessories to it. Installation went really well - I have been impressed with MTH's offerings. I am using the semaphore as a train orders indicator.
Attachments
Images (2)
Mark Boyce posted:Lew, the iPhone 8 shows off your handiwork much better. We have iPhone 6s which my wife complains about until I mentioned getting new ones, and she is fine with it again...for now! LOL
We had to do something because we no longer have a land line and the 5S had that bad battery issue and was shutting down at random times. Not good when you need to keep up with Dr appointments and that sort of stuff. The 8 is obsolete enough to be cheep enough....ish. It's all good because better model railroading pics. ![]()
geysergazer posted:Mark Boyce posted:Lew, the iPhone 8 shows off your handiwork much better. We have iPhone 6s which my wife complains about until I mentioned getting new ones, and she is fine with it again...for now! LOL
We had to do something because we no longer have a land line and the 5S had that bad battery issue and was shutting down at random times. Not good when you need to keep up with Dr appointments and that sort of stuff. The 8 is obsolete enough to be cheep enough....ish. It's all good.
We are having similar issues with the battery. I was looking at the 8 also. Enhanced layout photographs would be a definite advantage. I’ll look forward to seeing great photographs of the Plywood Empire!!!
Ground cover, and more ground cover.... Spent most of the day covering the engine service facility tracks... Getting really tired of looking at painted plywood and cork roadbed. I know the paint and glue is still wet, but couldn't resist the temptation to take a few photos.
Nice work everyone ! Going to the recliner now.
")
")
")
")
Attachments
Images (4)
")
")
")
")
After putting away all of our Christmas stuff, inside and outside, including my Standard gauge stuff, I started work on 2 tunnel portals I need for the American Flyer S gauge alcove I've been working on.
Pics of said portals will follow once they are completed.

Modified the sound file on my Premier GS4. Now has the crossing signal available as both whistle and single note air horn.
Long day on the BRM RR. Early this morning I finished an upgrade to my control panel. I added two more circuit breakers. One is for separate track voltage for the future 3rd level. Four outputs from a ZW and a VW are protected.

And then... I put a front truck with coupler on a #1055 ALCO. Next, I cut a close fit hole in the body. I ran several laps to be sure the hole was wide enough. I'm testing paint schemes on a computer.
 Coupler truck installed.
 Paint me!
Bill
Attachments
Images (3)

Bill, Wise use of time wiring in breakers to protect your equipment! I'm glad the ALCo project is coming along, and agree that one is crying out to be repainted!! I'll look forward to seeing what you come up with!!
Picked up this K-line Plymouth yesterday. I bought it from forum member Steve @L.I.TRAIN. I met him at his club, TMB Train Masters of Babylon and got a guided tour of the layout. It's a beauty for sure! They are having several open houses this month so check them out if you are in the area.


Attachments
Images (3)


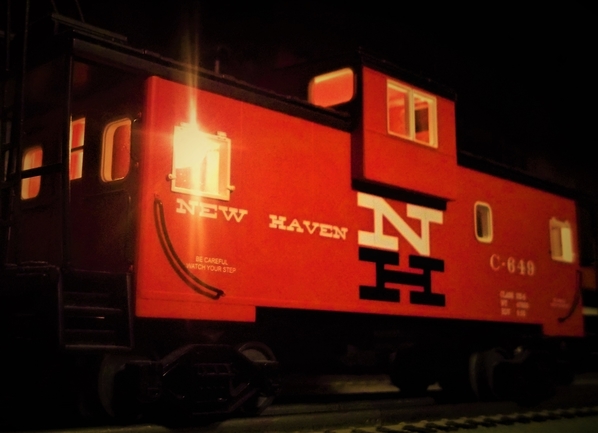
Attachments
Images (2)


Bob, the Plymouth looks great plying the rails!
Brian, New Haven day!!!
briansilvermustang posted:
I fantasize sometimes that NH stands for New Hampshire & not New Haven
I have worked to prepare for the laying of indoor outdoor carpet, all must be removed!
Attachments
Images (2)

What'd I do? Figured out what's what with K-Line aluminum passenger cars. The PER just acquired a retired business car in PRR livery and management wanted the trucks switched out. It turns out these cars are the same design as Lionel PW extruded aluminum cars so its pretty simple to take one apart.
You just remove the 2 screws that attach each vestibule to the floor, remove the vestibules and slide the floor endways until it is separated from the extruded car shell:


The car interior is attached to the floor by tiny screws from underneath.

The underside details must be removed (one screw at the left end in this pic) to access two of the interior retaining screws:

Here is the bare floor re-inserted to show the design. The ceiling indirect lighting can be seen as well as the wire that plugs into the floor wiring.

And there you have it:

Ready for dinner service.
Attachments
Images (6)
briansilvermustang posted:
Brian, gotta' love that McGinnis livery.
Testing of vintage metal Athearn, Varney and wood Silver streak freight cars video:
https://www.youtube.com/watch?v=gWXZwukFsu8
Neighborhood kids came over to run trains.


Attachments
Images (4)


So I spent 8 hours redoing the industrial area on my layout today. It had a Lionel coal loader, saw mill, ice depot, and barrel loader. The coal loader was my least favorite and finicky. It didn't really fit on a layout where all the steam is oil fired. Plus the entrance to the area was some old Lionel 027 switches. I traded the coal loader and dump car (both late 40's pieces in EX- condition with original boxes and paperwork) for a couple Ross 031 switches. Ripped the area apart, redid the track work, wired, ballasted, weathered the rails, laid new parking areas for the buildings, and put down a groundcover base. I'll reinstall the accessories, old buildings, and a new building tomorrow. Should only take a couple of hours. Then it's done sans details (cars, figures, and such). Not bad for 8 hours of work today.


Attachments
Images (2)
Lou, sure is alot of work. But sure is looking good! I hope you will post more pics when you get it done!

RSJB18 posted:Picked up this K-line Plymouth yesterday. I bought it from forum member Steve @L.I.TRAIN. I met him at his club, TMB Train Masters of Babylon and got a guided tour of the layout. It's a beauty for sure! They are having several open houses this month so check them out if you are in the area.
Bob Thanks again and enjoy the Plymouth Switcher. Thanks for the kind words about the club.
Steve
Lee, now that is spooky! I'm glad it's at your house.

Attachments
Images (1)
decoynh posted:briansilvermustang posted:
I fantasize sometimes that NH stands for New Hampshire & not New Haven
here you go Matt...

Attachments
Images (1)

Working on project of two MTH die cast girder bridges (pictures coming after finish), I have two leftover sides, painted it with flat/primer spray can. Now in C&NW gondola car. It look perfect. Plan add some brackets on it. Some of you guys know C&NW is known as Cheap & Nothing Wasted. 😉


Attachments
Images (5)
Johan, wonderful scene! Love the worker out there busting his butt!
Brian, nice NH Caboose!~ I still think you have one of everything if not more!
CGWFOREVER, What a great idea! You did a great job on your new load for you gondola!
Well this morning I went out to the train room and put together new to me a 1940's era crane! I really like it and think it will work great in conjunction track crane! Here are a couple pictures, The only thing is I am going to need to find a wiring diagram for it.


Attachments
Images (2)

unboxing some more Amtrak today...

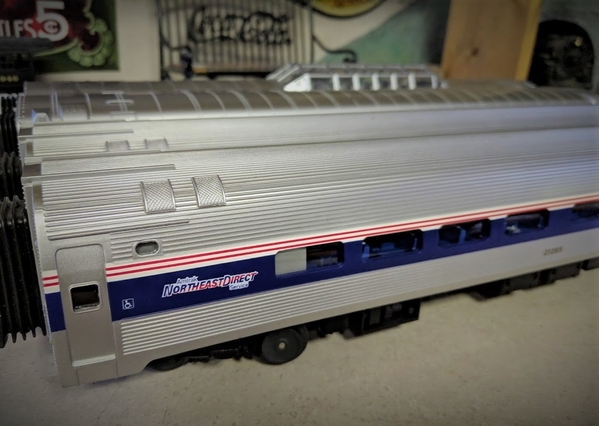


Attachments
Images (7)


Brian do like your Amtrak!
Lou1985 posted:So I spent 8 hours redoing the industrial area on my layout today. It had a Lionel coal loader, saw mill, ice depot, and barrel loader. The coal loader was my least favorite and finicky. It didn't really fit on a layout where all the steam is oil fired. Plus the entrance to the area was some old Lionel 027 switches. I traded the coal loader and dump car (both late 40's pieces in EX- condition with original boxes and paperwork) for a couple Ross 031 switches. Ripped the area apart, redid the track work, wired, ballasted, weathered the rails, laid new parking areas for the buildings, and put down a groundcover base. I'll reinstall the accessories, old buildings, and a new building tomorrow. Should only take a couple of hours. Then it's done sans details (cars, figures, and such). Not bad for 8 hours of work today.
Lou, that is looking quite different already! I agree if an accessory or building doesn't work out for you, do something else!
Finished a new subway station. Now time for football!
Attachments
Videos (1)

Strap Hanger, those are nice looking subway trans and I see a lot of patrons waiting on the platforms! You deserve a break for football!
mike g. posted:Johan, wonderful scene! Love the worker out there busting his butt!
Brian, nice NH Caboose!~ I still think you have one of everything if not more!
CGWFOREVER, What a great idea! You did a great job on your new load for you gondola!
Well this morning I went out to the train room and put together new to me a 1940's era crane! I really like it and think it will work great in conjunction track crane! Here are a couple pictures, The only thing is I am going to need to find a wiring diagram for it.
Mike. Thank you. 🤝
Johan
I've been contemplating a major change to my layout for a while. Well.....contemplation time is over....commence with the demo......
The grade up to my elevated loop on the right side is very steep. As a result I can't really run trains up and down around the oval unless I'm pulling only a couple of cars and manage the throttle the whole time. So I decided to remove the grade and convert the track to a freight spur that will serve a small factory building on grade level. The elevated section will become a spur to park a couple of cars or a short passenger excursion train along the cliff. I will keep the left side as is so I can still move trains up and down between the two levels.
This will give me another switching option on the grade level and more operational variety overall.
I pulled up the tracks and cleared the ground cover and started laying the new track this afternoon. I'll get the grade level done first and then work on the upper level which will be a bit more involved.
I ordered a Ameri-town building on the OGR site this morning. It will be set up next to the new spur.


Attachments
Images (10)


hmmm, I see future expansion or hidden storage in the next room... ![]()

Attachments
Images (1)

briansilvermustang posted:
hmmm, I see future expansion or hidden storage in the next room...
LOL. CEO may not agree. Walls don’t always come with tunnel rights.
Unfortunately that's a foundation wall. Excavation would be required.......
And no...the CEO would not approve.
Don't think the local building officials would be amused either. 🤪
tried... ![]()
![]()
RSJB18 posted:And no...the CEO would not approve.
Don't think the local building officials would be amused either. 🤪
Excuses... excuses ![]()
![]()
![]()
YEP !!! ![]()


looks great Lou !

how about a siding down this roadway for some street running...
Attachments
Images (1)

Bob, looks like a great project! So is there a less steep access to the upper level since you said you would make it a spur?
Brian, some folks just don’t like an adventure! LOL
Lou, Wow, what a transformation!! It looks great!
Add Reply
Sign In To Reply
