
Morning everyone, Sorry I don't have time to comment on all the great work! But I handed out a lot of likes! I haven't had any train room time so nothing for me to tell you. But I did get a chance to put together a priority list of things to do. I hope to start on the list if I ever get back out there! LOL

Brian, I really want to come to your house! Plus Great looking Auto-Ramp! LOL

Everyone have a great week and please find time for your layout and trains! But this time run them a little longer for me!

John Rowlen posted:

Painting Preiser 65602 Seated People 24 pack.

These are a few of the pictures for the post on painting the Preiser 65602 figures.  I am showing pictures and leaving notes today on issues I want to discuss as I revise this final post. 

The Four Unpainted Sprues sell for an average of $37.50 (US) in Preiser 65602 24 pack.  If Preiser painted them, the five factory packs total over $150.00 for the 24 people.  This is why I paint my own figures.

Tamiya XF-15 "Flesh" flat acrylic paint.  Paint should dip downward and run up into the brush by capillary action.  When paint pushes downward only, like a drumhead, it is time to stir or shake the paint and rinse the brush.

Quality brushes yield a quality paint job.  I have used Atlas brushes for years and recently switched to Tamiya brushes at $10-12.00 each.  87153 - Ultra Fine,  87154 - Extra Fine,  87155 - Fine.  As the number increases, the bristle length is longer.  Ultra Fine for ties and repairing final inspection errors.  Extra Fine for most painting of figures,  Fine for painting the interior of passenger cars.

The 24 figures have received the first coat of XF-15 Flesh flat acrylic paint.  Mold parting oils can cause open white unpainted spots to appear on the flesh of the figures.  Check for needed touch-up.  Avoid too heavy a coat of paint on faces - the eyes can be filled in and detail lost due to too much paint.

Paint neck ties, walking canes and Ultra Fine details of clothes after flesh is dry.  (Opps, sloppy painted ties and brown cane and purse will be trimmed by white shirts and blue dresses in next step.)

Paint shirt on either side of neck tie.  Paint Coat on either side of dress shirt, or paint dresses.

Paint hair and shoes.

There are very fine lines molded into the Preiser 65602 figures for hairlines and act as guides when painting.  The similar figures from China do not have these fine lines, or eye and face details, and need an extra coat of paint to cover the China figures.

I will be updating this post until all ideas are recorded.  Any questions are welcome.  Picture updates of the 24 figures will be pictured here as I paint them, step by step: ties, shirts, coats, hair, then shoes.  

UPDATE: 2/16/20 - I painted Women in BLUE clothes.  Next box will be Pink, Yellow, Green and Lavender pastel colors I mixed.  The men will have light grey and tan suits.  Hair colors will be Earth Red, Sandy Blonde, and Rust Red with some Grey for older figures.  It is time to pull figures off the Sprues to continue painting.  I use an emery board to sand the sprue points off the figures.  (The Dremel Tool is to severe and creates a scratching that does not paint well.)

The figures are off the sprues and getting painting of clothes, hair and shoes.  Anyone can do this painting of Preiser 65602 Seated People when taken one step at a time.  It is time to do the final inspection and touch up.

UPDATE: 2/17/20 - I have started the second box of 24 Seated People in Pink and Grey clothes. The Pink are ready to come off the Sprues.  Yellow will be next.

Have a good week.

Sincerely, John Rowlen

IMG_1580

Those look good John 

26532A26-0CE2-471B-B2F7-5F95624501A255AFC88C-F328-48E1-839C-91D76E5A6DD006872065-2992-4AA7-8A50-F7328E1968E15602E891-455C-4388-A61E-3B5AD4506F3BA59A07BC-41A2-4DBD-9972-3D4B507D811B1A42D7D0-87B6-4A4D-BC93-2D7C7D61900E091B38C6-BD35-4F07-BBAC-056EA3C70060CF7248FB-0DF9-4729-B92B-D814556B9FDCC00F13DE-6573-4653-B23A-81BE39A015F3This will be my next rail car to be added to the roster. It’s a gondola car with a UH-34D Helicopter in it. The Helicopter is a 1/48 Revell model kit and the gondola is a vintage Atlas O scale. I will repaint it and I’m going to decal it in Nickel Plate Road. I’m now waiting for parts and decals for the gondola 

Attachments

Images (9)
  • 26532A26-0CE2-471B-B2F7-5F95624501A2
  • 55AFC88C-F328-48E1-839C-91D76E5A6DD0
  • 06872065-2992-4AA7-8A50-F7328E1968E1
  • 5602E891-455C-4388-A61E-3B5AD4506F3B
  • A59A07BC-41A2-4DBD-9972-3D4B507D811B
  • 1A42D7D0-87B6-4A4D-BC93-2D7C7D61900E
  • 091B38C6-BD35-4F07-BBAC-056EA3C70060
  • CF7248FB-0DF9-4729-B92B-D814556B9FDC
  • C00F13DE-6573-4653-B23A-81BE39A015F3

My steeplecab project is on hold for the nonce.  Instead, I'm working on using the trucks to repower my oldest O scale trolley (in both senses of the world; the car itself dates back to the early 1940s, and I've owned it since 1978 or thereabouts).   Still deciding whether to mount the steps back on the carbody, or mount 'em on the trucks in the interest of sharper turning radii.   Floor is a former GG-1 floor, heavily sculpted.  

If anyone is interested in a set of chain drive scale flange trolley trucks (front), drop me a line.   

GEDC1827

Another concept occurred to me this evening:  I've got derelict Atlas Brill shells and derelict RailKing bump and go chassis, so why not combine the two?  

GEDC1828

This may look rather goofy, but long-wheelbase four- and six-wheel radial trucks were tried under double truck carbodies back in the day. 

https://www.midcontinent.org/r.../builders/3-axle.htm

They didn't work out terribly well, but it does make for a unique looking model... 

Mitch 

Attachments

Images (2)
  • GEDC1827
  • GEDC1828
Last edited by M. Mitchell Marmel
Mark Boyce posted:

Looking good John, Paul, SuperChief!

Bob, Thank you!

Paul, what paint do you use for concrete?

Super Chief, how did you make the great looking road?

Hey Mark,

Thanks! The road was made with a mixture of water putty and black paint. Once we had a base, we used some weathering chalk to give it some wear. I made the mistake of trying to seal with water/Elmers mixture we were using to put the ground cover down. We had to start over with the chalk. I hate using a spray sealant inside, but it looks like that's our only option. 

Mornin' all!

LeeD- the cars and heelo look great.
Lee P51- very nice. I bet that train was fun to break up at the other end of your layout.
Alex- Nice wiring. I bet we'd all like to see more pix of your layout. Looks nice.
Mitch- I see the evil wheels are turning again.....

I spent a little time in my shop painting the building last night. Put the first coat of white on the rest of the windows and did a coat of red on the caps at the roof. I took a couple of pix to share today and didn't see this until I looked at them on my computer this morning.

Interesting study in how lighting changes the way we see colors. I have a lighted magnifying work light on my bench. The light in this is a 5000k LED. The overhead lights in my shop are 3500K fluorescent. Notice how the two panels look different under the different lights. The light sources being different is not an issue but the color temperature of the lights is. Be mindful of this when adding lighting over your layouts. This topic has been discussed numerous times on the forum and is something to consider.

Color temperature is measured in degrees Kelvin. Lower numbers are in the warm end of the spectrum (red), higher are in the cool end (blues). I'm sure we all remember ROYGBIV from school....

Right wall under fluorescent, left under the LED

2020-02-17 20.51.16

right under the LED.....

2020-02-17 20.51.21

The lights over my layout are 3500K so the colors will look like what I want when I put the building in place.

Bob

Attachments

Images (2)
  • 2020-02-17 20.51.16
  • 2020-02-17 20.51.21
Last edited by OGR CEO-PUBLISHER

All I got to do yesterday was look over some colors for the trim on the building I posted Sunday.  The colors on the box are gray with a little red on the keystone shapes and the doors.  I decided I didn't want gray.  Lee Drennen suggested the same color as the mortar, and I see that is about the color Bob used above.  I hope I get a chance to paint them today and see how they look.  For the use of this building as a company store, it wouldn't be very fancy.  Now comes the decision on the stone foundation which is identical to Bob's just above.

Now comes the decision on the stone foundation which is identical to Bob's just above.

Mark Boyce

Mark- going by the approximate "age" of the building I'm probably going to paint it gray. For the architecture used on the model, the block would probably have been granite. I might play around with some black washes after its painted to age the foundation.

Bob

WE took a break from the layout on Saturday and went over to the North Carolina Transportation Museum for the day.  The Virginia Museums J class 611 is wintering with us. It is going through its annual inspection. This is done by volunteers dom both museums and others with a liking for the locomotive. . The J is in the roundhouse with some friends, ie Atlantic Coast ine 10 wheeler and in the foreground, the Seaboard "Russian" Decapod. 

IMG_0006

There was a nice presentation and slide show covering the most recent restoration to operation and some of the trips the locomotive has made on recent excursions including its time at Strasburg during Fall 2019. To complete e the experience we went on a tour of  the cab. And yes , we climbed the engine steps using both sets of handrails. So here is what the inside looks like and heres me at the throttle, 

IMG_0018IMG_0021

A couple more photos of the J in here winter home

IMG_0008IMG_0011IMG_0024

The Museum has a train ride which runs the length of the Museum Grounds. The consist was powered by an N&W GP-7 in passenger colors and several Norfolk Southern coaches which are restored from the trains such as the Powhattan Arrow. 

IMG_0066

The Backshop building is now fully open and there are extensive displays of Railroad equipment, carriages, fire engines, automobiles , milk trucks and even a Piedmont Airlines DC3 being restored bt a group of enthusiasts who were not old enough to have experienced flying Piedmont Airlines .The DC-3 was named "Potomac Pacemaker" All Piedmont ships carried names in a Pacemaker series. The airline was run more like a railroad with airports referred as stations and there was a published timetable for routes with intermediate stops.

The museum has a full annual schedule of activities during the year and is worth your visit. Its right off of I -85 in Spencer North Carolina.  

Attachments

Images (7)
  • IMG_0006
  • IMG_0018
  • IMG_0021
  • IMG_0008
  • IMG_0011
  • IMG_0024
  • IMG_0066

Well back to some layout work. I started with some foam structural work for the various levels of the railroad. . I sort of had the udea of a highway bridge coming out of the upper level and crossing over the lower level. I can see a couple of buidings , warehouse and shop type buildings on the right side of the bridge in the team yard on the lower level. I like the idea as a scene break between the yard and the rail lines leading to bridges that cross the water feature. 

Heres a ffew pics l

IMG_0018[1)IMG_0019[1)IMG_0020[1)

Attachments

Images (3)
  • IMG_0018(1)
  • IMG_0019(1)
  • IMG_0020(1)
RSJB18 posted:

Now comes the decision on the stone foundation which is identical to Bob's just above.

Mark Boyce

Mark- going by the approximate "age" of the building I'm probably going to paint it gray. For the architecture used on the model, the block would probably have been granite. I might play around with some black washes after its painted to age the foundation.

Bob

Bob, I think gray with an 'aging' wash is a good idea.   There would have been no reason for anyone to have painted them on a real building for this purpose.  I'm hoping to get some painting done later today that I can post.

LIRRSteamer :  Loved the pictures from the No Carolina Museum, esp those of the 611 loco, thanks for sharing.

For me...I was able to continue on my shelving project with the fun part.  Started putting trains on the shelves!

shelving with trains

From Top:

Lionel 256 with 710/710/712 NYC Passenge Cars.  The "Big Mogul" outfit from 1924-1929

Lionel 259 E (Gunmetal) with 654 Oil and 657 Caboose.  Outfit from 1936-37 (missing 651 flat)  Sharing shelf with Lionel 248 (late Black) with 1679 litho box, 1680 litho tank, and 1682 litho caboose (factory promotional set - circa 1940)

Lionel 262 with 615 Baggage, 613 Pullman, 614 Observation from 1932-1934 sharing shelf with Hornby type 51 clockwork and goods set from the 1950's

Lionel 249E with "Ives Transition" cars, 1717 litho gon, 1719 litho box, and 1722 litho caboose - uncataloged set from 1938 sharing shelf with 6376 Circus Animal Car and the Hornby Brake Van (Caboose)

Lionel 224 with 2440 Pullman's and 2441 observation from 1947  Sharing shelf with 152 Lionel electric with 901 "Lake Shore" gondola and 801 Wabash caboose from outfit 290 of 1926

Finally my "ready track" shelf where I am currently keeping loco's I run on the layout but can't store on the layout. Then include 2332 GG1, 2240 Wabash A-B F-3 , 2338 Burlington GP-7, and 1776 "Jerima O'Brien GP-7

So one shelf to go ... maybe i will leave it empty to encourage" future" buys !!!!

Happy Tuesday

Don McErlean

Attachments

Images (1)
  • shelving with trains
Last edited by OGR CEO-PUBLISHER
Don McErlean posted:

LIRRSteamer :  Loved the pictures from the No Carolina Museum, esp those of the 611 loco, thanks for sharing.

For me...I was able to continue on my shelving project with the fun part.  Started putting trains on the shelves!

shelving with trains

From Top:

Lionel 256 with 710/710/712 NYC Passenge Cars.  The "Big Mogul" outfit from 1924-1929

Lionel 259 E (Gunmetal) with 654 Oil and 657 Caboose.  Outfit from 1936-37 (missing 651 flat)  Sharing shelf with Lionel 248 (late Black) with 1679 litho box, 1680 litho tank, and 1682 litho caboose (factory promotional set - circa 1940)

Lionel 262 with 615 Baggage, 613 Pullman, 614 Observation from 1932-1934 sharing shelf with Hornby type 51 clockwork and goods set from the 1950's

Lionel 249E with "Ives Transition" cars, 1717 litho gon, 1719 litho box, and 1722 litho caboose - uncataloged set from 1938 sharing shelf with 6376 Circus Animal Car and the Hornby Brake Van (Caboose)

Lionel 224 with 2440 Pullman's and 2441 observation from 1947  Sharing shelf with 152 Lionel electric with 901 "Lake Shore" gondola and 801 Wabash caboose from outfit 290 of 1926

Finally my "ready track" shelf where I am currently keeping loco's I run on the layout but can't store on the layout. Then include 2332 GG1, 2240 Wabash A-B F-3 , 2338 Burlington GP-7, and 1776 "Jerima O'Brien GP-7

So one shelf to go ... maybe i will leave it empty to encourage" future" buys !!!!

Happy Tuesday

Don McErlean

I have a few of the same cars as you and didn't know what set they were from. My In-laws had them packed away in a box along with a gateman, crane, and log-dump car. This find is what got me back into trains 4 years ago. My F-i-L didn't recall when he got them.

Bob

Attachments

Images (6)
  • 2014-12-19 18.03.50
  • 2014-12-19 18.04.05
  • 2014-12-19 18.04.20
  • 2014-12-19 18.05.05
  • 2014-12-19 18.07.30
  • 2014-12-19 18.34.23
Last edited by RSJB18

This morning I painted black where the lkoading docks are going to go. Decided to add a back board to the wooden deck so I have more area for glue. Then I did some thinking and while I have to wood sitting around I opted to make a rook for the wood dock. Cutting up a bunch of braces for the roof I am waiting for everything to dry so I add paint to them. Pics....................Paul 2

DSCN0081DSCN0082DSCN0083DSCN0084

Attachments

Images (4)
  • DSCN0081
  • DSCN0082
  • DSCN0083
  • DSCN0084

Little more done this afternoon. Back plate glued and painted and is now ready to be glued to the flat. Once the supports for the roof dried I painted them concrete color. Then I stained the balsa wood in between the supports. When that dries I am going to use aluminum paint for the top of the  roof. Pics..............Paul 2

DSCN0085DSCN0086


Attachments

Images (2)
  • DSCN0085
  • DSCN0086

Canadian Pacific Detailing

I put the Lionel Canadian Pacific Baggage Car together and took some pictures through the small windows.  The doors do not open on this longer CP baggage car.  The details can be seen better by eye than camera. 

I am opening the CP Observation tonight to see the space constraints in the Dome.  The Vista Dome has a lower floor under its Dome.  The Observation does not have the extra room.  I will also plan turn the Dome Floor with seats and face them forward.  They were installed by the factory in the wrong direction.  The Dome Floor is correctly made.

I have five boxes of 24 Preiser 65602 rough finished, not inspected, to begin selecting people for the Dome.  As I select them, I will inspect and correct them if needed.  

I discovered that the Dome Seats were turned the wrong way by the factory installers.  The opening to the stairs in in the rear and lines up perfect when the Dome Floor is rotated.  I did have to lower the seats though by 3/8" by removing the lifter post under the seats.  See the post on the Observation.

Have a good evening.

John Rowlen

Attachments

Images (11)
  • IMG_1589
  • IMG_1590
  • IMG_1591
  • IMG_1592
  • IMG_1593
  • IMG_1594
  • IMG_1595
  • IMG_1596
  • IMG_1597
  • IMG_1598
  • IMG_1600
Last edited by John Rowlen

Mods are watching this thread more often because of the alerts we keep getting.  They deleted several posts here because discussion keeps meandering on topics that don't talk about "What did you do on your layout today".  This topic is not intended to discuss tinplate trains and their rarity/value nor is it intended to talk about home repair projects.  Honestly, I don't like to put it this way but those folks that keep insisting on turning this into a "coffee pot" thread are soon going to no longer be able to post here.....you all have been warned several times.  Please help us keep this thread on topic...if you have personal comments about life events...everyday challenges, etc., that are unrelated to the topic, then use email to let your fellow friends know.

Last edited by OGR CEO-PUBLISHER
cabinet Bob posted:

I tore down Menardsville #1 and started  a new layout. I'm still thinking what to do, but I'm sure it will be all industrial. Time will tell..

Bob, so is Menardsville #1 the one you have been posting with all the building additions that I have commented it should be Menards City?  This layout looks smaller, but it could be just that with buildings removed the table looks smaller.  I'll look forward to seeing the new layout take shape!!

I picked up something I've been looking at for a long time...a brand new flux capacitor! (400 gigawatts!).  For the 'what did I do on my layout' part of this, I've moved my two main lines over from the ZW to the Z4000, and some of the accessory/lighting as well.  Now, I have an opportunity to rearrange my power distribution, just need to get under and trace the wiring.

20200217_175226

Attachments

Images (1)
  • 20200217_175226
Mark Boyce posted:
cabinet Bob posted:

I tore down Menardsville #1 and started  a new layout. I'm still thinking what to do, but I'm sure it will be all industrial. Time will tell..

Bob, so is Menardsville #1 the one you have been posting with all the building additions that I have commented it should be Menards City?  This layout looks smaller, but it could be just that with buildings removed the table looks smaller.  I'll look forward to seeing the new layout take shape!!

Mark: This is the original Menardsville that was pictured in the Christmas Catalog 2 years ago. it become a hodge podge of different scenes that I didn't like, so out with the old and in with the new.. I'm designing as I go..I'm maybe thinking of a lift bridge between Menard City and Menardsville. the only problem is I need to cut a hole in the wall... time will tell..

cabinet Bob posted:
Mark Boyce posted:
cabinet Bob posted:

I tore down Menardsville #1 and started  a new layout. I'm still thinking what to do, but I'm sure it will be all industrial. Time will tell..

Bob, so is Menardsville #1 the one you have been posting with all the building additions that I have commented it should be Menards City?  This layout looks smaller, but it could be just that with buildings removed the table looks smaller.  I'll look forward to seeing the new layout take shape!!

Mark: This is the original Menardsville that was pictured in the Christmas Catalog 2 years ago. it become a hodge podge of different scenes that I didn't like, so out with the old and in with the new.. I'm designing as I go..I'm maybe thinking of a lift bridge between Menard City and Menardsville. the only problem is I need to cut a hole in the wall... time will tell..

Bob, Ah ha!  Now I get it!!  Thank you!!  Yes, time will tell is what I say too.  What I plan usually gets changed as we go!

Mark Boyce posted:

Looks good, Ray.  So where is the hotel facade going to sit?  I see it now blocking the air conditioner and know that is just temporary.

Mark,

That is where it is going, the AC will just have to blow above it, but I have a split system downstairs and am only using 2 of the 3 unit connections so thinking seriously of running the 3rd one up to the train room, this will give me heat and AC. Right now using electric baseboard for heat. Don't like a window unit anyhow.

Last edited by sidehack


               went out to the train room and started cleaning up,

                                           and to see where I left off working on the layout...


             Izzy is inspecting frame work for the second level...


                 she is standing in the lower level return loop peninsula,

                                            which will have a lot of tracks for staging trains...


           here you can see that trains will be constantly climbing a 1-2% grade up...

                                         the top shelf is the upper level...

                      there will be another main level between these levels...


Attachments

Images (4)
  • mceclip0
  • mceclip1
  • mceclip2
  • mceclip3
Last edited by briansilvermustang
cabinet Bob posted:

I tore down Menardsville #1 and started  a new layout. I'm still thinking what to do, but I'm sure it will be all industrial. Time will tell..20200219_181301

Hi Cabinet Bob, That much available real-estate is creatively exciting to see. Are you fired-up for the adventure of it?

Its been a while since I dove-in and changed any significant area of the layout>>>IMG_5405IMG_9787photo 3

FrankM

Attachments

Images (3)
  • IMG_5405
  • IMG_9787
  • photo 3
Last edited by Moonson

Frank, always great scenes of your work.

Matt, nice video.

Ray, your hotel and elevated line are coming along great. Let me know when you finish so I can book a hotel room and got to sleep with the passing trains.

Cabinet Bob 9 (Dad), I knew it was only a matter of time before the real estate boom would come to an end. I am doing the same thing with my basement layout. But I also am including a single track loop for a little mainline running.

Mark, you are doing a nice job on the building. Sometimes it comes down to trial and error when it comes to paint color.

Today a late start but this afternoon I now have the loading docks glued into place. Also got a coat of aluminum paint on the roof. Once that dries and looks okay I'll glue it over the wooden dock. Not doing a roof over the other loading dock. Pics................Paul 2

DSCN0087DSCN0088DSCN0089DSCN0090DSCN0091


Attachments

Images (5)
  • DSCN0087
  • DSCN0088
  • DSCN0089
  • DSCN0090
  • DSCN0091
paul 2 posted:

Frank, always great scenes of your work.

Matt, nice video.

Ray, your hotel and elevated line are coming along great. Let me know when you finish so I can book a hotel room and got to sleep with the passing trains.

Cabinet Bob 9 (Dad), I knew it was only a matter of time before the real estate boom would come to an end. I am doing the same thing with my basement layout. But I also am including a single track loop for a little mainline running.

Mark, you are doing a nice job on the building. Sometimes it comes down to trial and error when it comes to paint color.

Today a late start but this afternoon I now have the loading docks glued into place. Also got a coat of aluminum paint on the roof. Once that dries and looks okay I'll glue it over the wooden dock. Not doing a roof over the other loading dock. Pics................Paul 2

DSCN0087DSCN0088DSCN0089DSCN0090DSCN0091


Paul

your loading dock is shaping up nicely 

Canadian Pacific Observation

Wow.  I had to do several things to the Dome Floor in order to add Preiser 65602 Seated People.  1.  The Dome Floor is installed in the wrong direction.  I had to unscrew light bars and Dome Floor, and then rotate the Floor 180 degrees.  It is properly manufactured, but installed improperly.  2.  The Seats are too high.  I had to break off the seats and then grind the lifter post off the bottom of the seat,  I then re-installed the lowered seats with Krazy Glue.  I left one side of the original seats in place, until I had aligned the lowered seats with the original seats.  I then did the remaining side and aligned the lowered seats.  ( I will need to do this to the Vista Dome Car too.  It will make the Dome cars match.)

I cut the Bar-Lounge wall lower, to allow a view into the Lounge from the left side of the car.  This Observation has four staterooms, the Lounge and a rear sitting area.  The left side is 3/4 hallway wall and not very interesting.

I still need to install people in the staterooms and rear sitting area.  I included pictures of the Dome Seat alteration.  The pictures show the Preiser 65602 Seated People that have also been ground down to sit lower in the newly lowered Dome Seats.  They are missing feet and ankles.

Have a good evening.

Sincerely, John Rowlen

IMG_1608


Attachments

Images (21)
  • IMG_1608
  • IMG_1609
  • IMG_1610
  • IMG_1611
  • IMG_1612
  • IMG_1613
  • IMG_1614
  • IMG_1615
  • IMG_1616
  • IMG_1617
  • IMG_1618
  • IMG_1619
  • IMG_1601
  • IMG_1602
  • IMG_1603
  • IMG_1604
  • IMG_1605
  • IMG_1606
  • IMG_1607
  • IMG_1612
  • IMG_1608
Last edited by John Rowlen

Well today I started drilling out the new control board that arrived yesterday.  Still not 100% sold on having the grids, but it will be nice to have something to play with as I continue the build.  Also started working on a tunnel.  Had to remove the ceiling will likely use some thinset as the husky stacks are cutting it too close for comfort.

Attachments

Images (2)
  • New Control Panel: Likely wont be the final product, but Sings.com under $30.
  • New Tunnel

Just got done painting the roadbed on a new Forbyate Railroad.  Gonna let the paint dry tonight and put the track and ties down tomorrow & wire it up over the weekend.  Going for a classic Lionel store display layout-like look for this one.  I’m really enjoying the simple time I’m having putting this together.  Ignore the placement of the buildings and such, I’m getting brainstorms as I put this together on the fly.  No real plan here except to enjoy myself.  Half the fun has been hunting down the accessories for it.  My last layout had none.

10B2E36D-9EB8-44CE-A90C-1F1E9E2CC6EA

Attachments

Images (1)
  • 10B2E36D-9EB8-44CE-A90C-1F1E9E2CC6EA
TACOROG posted:

Well today I started drilling out the new control board that arrived yesterday.  Still not 100% sold on having the grids, but it will be nice to have something to play with as I continue the build.  Also started working on a tunnel.  Had to remove the ceiling will likely use some thinset as the husky stacks are cutting it too close for comfort.

The panel looks good.  What material did you line the tunnel with?  It looks like stones molded or cut into the surface.

As we all know, finding a clever name for a project is half the battle. 

So, since this particular offense against the laws of Nature is part Atlas and part Rail King,  here's a progress report on the "Ratlas"...  

You may wonder what's with the masking tape? 

GEDC1830

I'm doing further mockery, er, mocking up.  

GEDC1831

Turns out that if one attaches the Atlas bumpers to the Rail King chassis, one gets bumpers of the correct overall length that actually work as per specifications!  Win!   

I will be trimming off the Atlas actuator bars; the tape is just to hold 'em while I mock up the layout.  

Next up:  Rigging the Railking reversing headlights to play nice with the Atlas shell...  

Mitch 

Attachments

Images (2)
  • GEDC1830
  • GEDC1831
Mark Boyce posted:
TACOROG posted:

Well today I started drilling out the new control board that arrived yesterday.  Still not 100% sold on having the grids, but it will be nice to have something to play with as I continue the build.  Also started working on a tunnel.  Had to remove the ceiling will likely use some thinset as the husky stacks are cutting it too close for comfort.

The panel looks good.  What material did you line the tunnel with?  It looks like stones molded or cut into the surface.

Hi Mark, 

   I used a latex mold from bragdonnet.  Then did a coat of white resin followed by a coat of 610 foam all from alumilite.  Took a while to get the combinations correct.  If anyone goes this route I highly reccommend using alumilite UMR for a mold seperator.  Here are some photos of the beginning of the other mountain.Innter with Rockshell 

Attachments

Images (2)
  • shell: Made from Poly porch screen and 610 foam
  • Innter with Rock: This is before the painting and shadowing.  Ill get some photos of the completed project this weekend
TACOROG posted:

Well today I started drilling out the new control board that arrived yesterday.  Still not 100% sold on having the grids, but it will be nice to have something to play with as I continue the build.  Also started working on a tunnel.  Had to remove the ceiling will likely use some thinset as the husky stacks are cutting it too close for comfort.

Alex, when I built the control panel I wanted it as small as possible but still have everything needed so like many of us I used a schematic rather than an actual copy of the layout. Yes you need to get used to it but that doesn't take very long. It is just big enough to hold all the switches and light bases in the back. Then made smaller ones for some other locations. Used a piece of leftover masonite and autyo pinstriping tape to color code it. The panel is mounted with a piano hinge so as can flip up to work on.

Just to give you more to think about.

IMG_8704IMG_8707

Attachments

Images (2)
  • IMG_8704
  • IMG_8707
Last edited by sidehack
sidehack posted:
TACOROG posted:

Well today I started drilling out the new control board that arrived yesterday.  Still not 100% sold on having the grids, but it will be nice to have something to play with as I continue the build.  Also started working on a tunnel.  Had to remove the ceiling will likely use some thinset as the husky stacks are cutting it too close for comfort.

Alex, when I built the control panel I wanted it as small as possible but still have everything needed so like many of us I used a schematic rather than an actual copy of the layout. Yes you need to get used to it but that doesn't take very long. It is just big enough to hold all the switches and light bases in the back. Then made smaller ones for some other locations. Used a piece of leftover masonite and autyo pinstriping tape to color code it. The panel is mounted with a piano hinge so as can flip up to work on.

Just to give you more to think about.


This is a very very good point that soon I will need to start to think about.  The printout ended up quite a bit larger than expected 23"x12".  While building the layout it isn't getting in the way to much once everything is done it will likely be a bit of an eye sore also its made of some sort of lightweight acrylic so will need a lot of reinforcement.  Im sure like most things I do it will be done twice more.  First for concept, then I improve it, then I restart it and do it a completely different way.

Matt Kramer posted:

Just got done painting the roadbed on a new Forbyate Railroad.  Gonna let the paint dry tonight and put the track and ties down tomorrow & wire it up over the weekend.  Going for a classic Lionel store display layout-like look for this one.  I’m really enjoying the simple time I’m having putting this together.  Ignore the placement of the buildings and such, I’m getting brainstorms as I put this together on the fly.  No real plan here except to enjoy myself.  Half the fun has been hunting down the accessories for it.  My last layout had none.

10B2E36D-9EB8-44CE-A90C-1F1E9E2CC6EA

Matt

that is a very neat and tidy layout you have and a great idea 

Morning everyone, sure has been a lot of great work being done. I sure sucks not checking things out for a couple of day as it takes a lot to get caught up on things! LOL

Paul 2 your loading docks sure turned out wonderful!

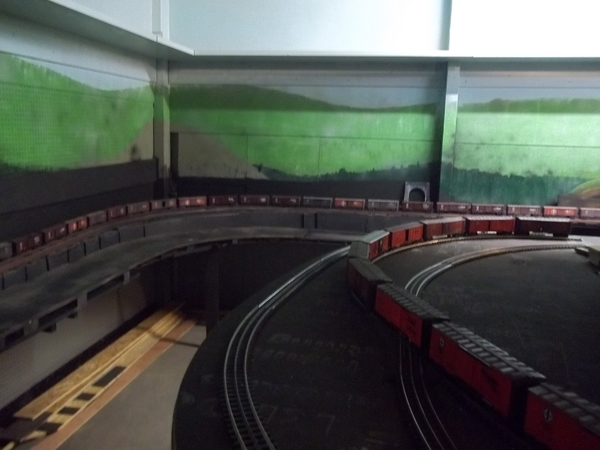
Super Chief Nice job on the road! I sure like the scenery of your layout!

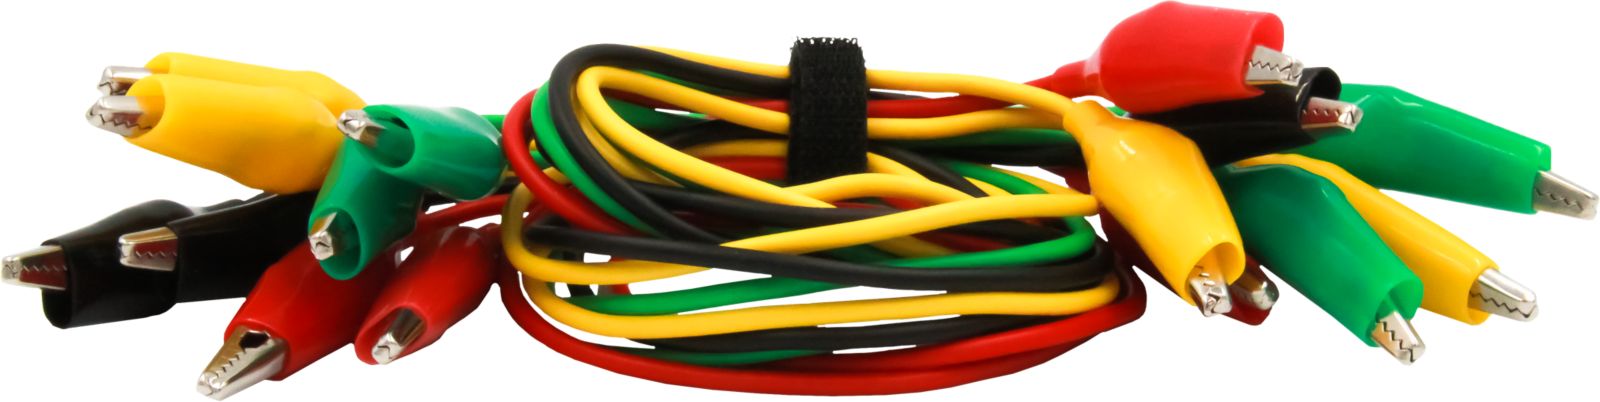
Alex, that sure is some great looking wiring and the top of the layout looks interesting also!

Lee, D, Great work! I love the 

Bob, thanks for the tips on lighting! I know for me if I don't like it I just turn the lights off! LOL

B&O Fan, Outstanding job on the Men's Clothing store!

DAD, WOW! What an undertaking! I sure hope things go smooth for your rebuild and that you post photos as you go along!

Ray, Things sure are looking great! The elevated track system is great and your looking good on the hotel!

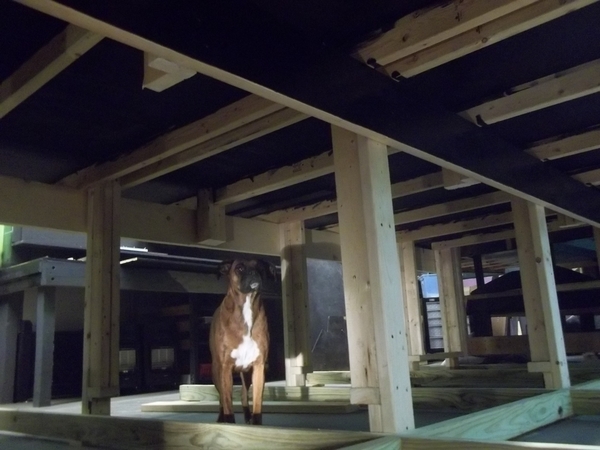
Brian, It sure is nice to see you and Izzy back to the layout! Its going to be fun fallowing you as you continue on your build!

John, as the norm for you Outstanding work! You must have enough cars to move everyone from the east to the west coast !

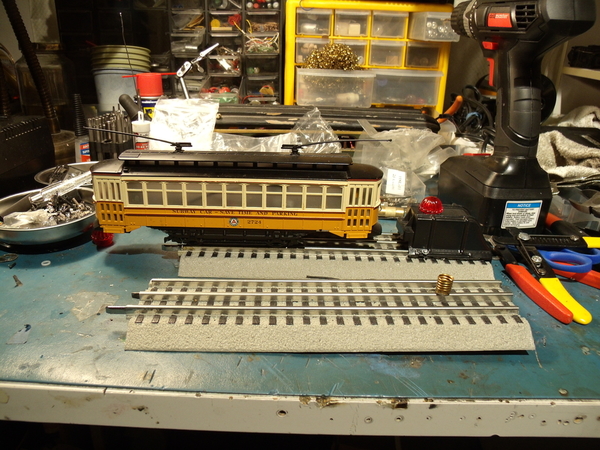
Well I figured out that if I get up at 2 or 3 AM it gives me a couple of hours to work on quite things in the train room before its time to make noise in the house! I have run into a problem with my sidings as when I go across the second switch from my crane siding the engine looses power. I have power to the switches, but only one side is showing a ground. Then when I do get out and come around it looses power entering the siding and the track in that area has the same problem. If I check power from center rail to one outside rail I have 18v if I check it on the other outside rail I only have like 5.3v. I don't know if it matters but it has my brain fried! LOL

Well either way I hope everyone has a great Friday and upcoming weekend! Don't forget to find time to have fun on your layout and with your trains!

Larry, Great video and what an Amazing layout! Thank you so much for sharing! Worth watching a couple of times!

Ok Guys I need some help here, I went out to try and figure out whats going on with my layout and for some reason I have continuity between the center rail and the outer rails. If my brain is correct that should not be happening! Can someone explain it to me?

Thank you so much, actually there was a video crew from a local TV Station, CDE TV, a local cable channel featuring my model railroad for a TV show. So, while they were doing their work, I tried my I-phone 10R to see what might happen as it accidentally became a video instead of a simple picture. I need a lot of practice. Mike g, SIDEHACK, your layouts are super to. Happy Railroading 

mike g. posted:

Larry, Great video and what an Amazing layout! Thank you so much for sharing! Worth watching a couple of times!

Ok Guys I need some help here, I went out to try and figure out whats going on with my layout and for some reason I have continuity between the center rail and the outer rails. If my brain is correct that should not be happening! Can someone explain it to me?

Mike,

Double check your wiring to the new sidings. I'm guessing you reversed a pair along the way and you have a hot/ common swapped.

Bob

mike g. posted:

Ok Guys I need some help here, I went out to try and figure out whats going on with my layout and for some reason I have continuity between the center rail and the outer rails. If my brain is correct that should not be happening! Can someone explain it to me?

Mike, I can't help you there as 3-rail is not my thing, but I'm wondering if you're going to the big Monroe show this weekend?

I'm probably going, depending on my wife's mood tonight and in the morning...

Mike g :  If your using the old tubular track with metal ties, you need to check the insulator that is between the center rail and the tie.  This is nothing more than a small piece of cardboard on the original Lionel track and as the track gets older can either fall out or sometimes gets saturated with track cleaner fluid and becomes conductive.

Don McErlean

Johan, wonderful job on the Box car! But I have to say Amazing work on the scenery!

John  & Bob, good news. The CEO gave me the weekend off so tomorrow I will be pulling everything from the track and vacuuming and running a magnet over everything. At which time I will recheck and if I still have the same problem, under the layout I go! LOL

Lee, Sorry no train show for me, Have to figure out what my wiring problem is!

Paul 2Wonderful job on the loading dock roof! Do you plan on putting LED's under it for night time use? Also the Silos are looking good! What color are you going to paint them?

So no train updates as I have been busy, but as I stated above I will let you all know tomorrow if I get it figured out or not!

Lionel Canadian Pacific Vista Dome

I switched to the Canadian Pacific Vista Dome after working on the Dome Observation.  I had to lower the Dome Seats to accommodate the Preiser 65693 Seated People I painted.  The interior has three coats of paint plus some touch-up.  I will add people to the Vista Dome next.  After finishing the Domes, I will move on to other CP cars.

Have a good evening.

Sincerely, John Rowlen

IMG_1620

Attachments

Images (9)
  • IMG_1620
  • IMG_1621
  • IMG_1622
  • IMG_1602
  • IMG_1603
  • IMG_1604
  • IMG_1612
  • IMG_1620
  • IMG_1620
TACOROG posted:
Mark Boyce posted:
TACOROG posted:

Well today I started drilling out the new control board that arrived yesterday.  Still not 100% sold on having the grids, but it will be nice to have something to play with as I continue the build.  Also started working on a tunnel.  Had to remove the ceiling will likely use some thinset as the husky stacks are cutting it too close for comfort.

The panel looks good.  What material did you line the tunnel with?  It looks like stones molded or cut into the surface.

Hi Mark, 

   I used a latex mold from bragdonnet.  Then did a coat of white resin followed by a coat of 610 foam all from alumilite.  Took a while to get the combinations correct.  If anyone goes this route I highly recommend using alumilite UMR for a mold separator.  Here are some photos of the beginning of the other mountain.Innter with Rockshell 

That's really great!  Thank you for the information, Alex!

John Rowlen posted:

Lionel Canadian Pacific Vista Dome

I switched to the Canadian Pacific Vista Dome after working on the Dome. h

IMG_1620

john, another excellent outcome with the vista dome coach.  Also, the highlighted sentence in today's post alerted me to the cause of my OGR forum equilibrium being off; i.e., I missed your post yesterday on the dome observation car you'd done.  The passengers in the dome, especially, look very good and your efforts lowering the seats and anatomical adjustments were well worth the effort.  Your paint work on the interiors and painted detail of the add-on passengers really brings these cars to life.

PS:  Shame on LIONEL for not using the correct dome on such a premium set; particularly, since the UP Excursion domes are a much closer representation to the prototype Budd domes on the CP pax.

PPS:  Please note that while I used a "reply with quote" for this post, I edited out much of the original post since the cut material was not needed.  Simply highlight the text to be removed, and select 'cut" on the drop down menu.  Photos can be "cut" much the same way.  Just a thought for those who simply click "reply with quote" with no editing.


Well, today, I continued work on a project of moving my layout to our basement, which I had to do to free up the back bedroom in the event our son has to move back in with us. The new layout is my previous S gauge layout, with a good sized 042 Lionel O gauge loop added. Today I was working on some buildings and running my Century Club 773 Hudson with a train of modern-era Madison cars my wife bought me for Christmas. Sorry that the original version of this post dragged off-topic on other things on my mind. I'll endeavor to keep on-topic and concise. 

Last edited by freddok
Don McErlean posted:

Mike g :  If your using the old tubular track with metal ties, you need to check the insulator that is between the center rail and the tie.  This is nothing more than a small piece of cardboard on the original Lionel track and as the track gets older can either fall out or sometimes gets saturated with track cleaner fluid and becomes conductive.

Don McErlean

Paul

I’m really liking that grain area your layout is going to look very good 

Last edited by lee drennen

Morning guys,

John, Nice work on the Vista Done car!

Paul, Your city and streets are looking outstanding! 

Patrick, thanks for the information. If you get a chance can you shoot a couple photos of your install showing the wire hook up!

So everyone I went out to the train room already and removed everything from the tracks and still have continuity between the center rail and the outer rail. So I did some checking under the layout and traced wires, But I was smart and started at the power supply. Come to find out and I don't know if this is normal or not but when the handle on my Z4000 is down in the off position with nothing attached to it there is continuity between the red and black post. But as soon as I raise the handle it goes away. 

I posted the question about it in the electrical section so I hope someone will answer my question. That way I can put things back together and start working on my dead areas on my sidings. I think I am going to un hook all the sidings and start over with the wiring.

Well its Saturday and I hope everyone has a great weekend and finds time for there layout and trains!

lee drennen posted:
Don McErlean posted:

Mike g :  If your using the old tubular track with metal ties, you need to check the insulator that is between the center rail and the tie.  This is nothing more than a small piece of cardboard on the original Lionel track and as the track gets older can either fall out or sometimes gets saturated with track cleaner fluid and becomes conductive.

Don McErlean

Paul

im really liking that grain area your layout is going to look very good 

Lee, why did you "reply with quote" of Don when you are complimenting Paul?  Confused.

I enjoy your photos of your modeling and descriptions of your work.  That's why this post has me stumped.

Last edited by Pingman

Mike g: Glad you are finding the problem. One more bit of advice. If you are going to isolate the sidings via the old fashioned fiber pin and toggle switch approach be sure to check the toggles before you wire them in.  I used just hardware store toggles (made in China) and ran into one that had connectivity regardless of the switch position. So it’s good to check. A couple of moments with a multi meter could save you lots of time. 

Best of luck. 

Don McErlean

Mike g, I picked up these colors for the silos at Menards. Metallic will be for the tanks at the lubricant plant. Chiffon Cream will be for the silos at the bakery. The other color ( middle color )  will be for the silos at the flour mill. This afternoon I managed to find enough glue to glue the silos together. These are done till I get the tops from Plastruct. Then I can take them outside and paint them all. Probably will start laying out the track for this area. I have a good idea of what I want to do so I can get most of the track down with the switches I have but I have to order some more from Ross with switch motors because there will be at least three I will not be able to reach to hand throw them. Pics.............Paul 2

DSCN0096DSCN0095DSCN0097DSCN0098

Attachments

Images (4)
  • DSCN0096
  • DSCN0095
  • DSCN0097
  • DSCN0098
mike g. posted:

Johan, wonderful job on the Box car! But I have to say Amazing work on the scenery!

John  & Bob, good news. The CEO gave me the weekend off so tomorrow I will be pulling everything from the track and vacuuming and running a magnet over everything. At which time I will recheck and if I still have the same problem, under the layout I go! LOL

Lee, Sorry no train show for me, Have to figure out what my wiring problem is!

Paul 2Wonderful job on the loading dock roof! Do you plan on putting LED's under it for night time use? Also the Silos are looking good! What color are you going to paint them?

So no train updates as I have been busy, but as I stated above I will let you all know tomorrow if I get it figured out or not!

Mike. Thank you very much.🤝

Johan

Paul 2, Nice colors for the silos! I am guessing you used super glue to affix them together!

Mitch, nice job on the Ratlas!

Don, if I were you I would just send the videos to Bob and have him post them on your behalf! LOL

Well guys I went out and worked on my layout for part of the day. First this morning and then again this afternoon. I am in the process of making sure all my sidings are isolated from each other and the 2 main lines, then I will be under the layout checking and rechecking the wiring and fixing anything I have to!

I sure hope everyone had a great day today and found time for some fun!

Canadian Pacific Vista Dome

Over 12 hours later,  after correcting paint issues on the roughed-in Preiser 65602 120 figures I recently painted, I now have a completed Canadian Pacific Vista Dome Coach.  Each figure used had to be inspected and corrected if necessary.  It is a slower process from the previous Santa Fe 21" passenger cars I finished.  The people for those cars were completed and inspected last year while watching March Madness Basketball.  I just grabbed the figures and fit them into the cars.

I still need to do the lower level of the Dome Observation.  The upper Dome level of that car is finished.  It is time to rest my eyes.

Have a good evening.

Sincerely, John Rowlen

IMG_1623


Attachments

Images (14)
  • IMG_1623
  • IMG_1624
  • IMG_1625
  • IMG_1626
  • IMG_1627
  • IMG_1628
  • IMG_1629
  • IMG_1630
  • IMG_1631
  • IMG_1632
  • IMG_1633
  • IMG_1634
  • IMG_1635
  • IMG_1623
Last edited by John Rowlen
lee drennen posted:

Lee, why did you "reply with quote" of Don when you are complimenting Paul?  Confused.

Carl. Sorry I’m getting old I think I was very tired you can remove it if you want again I’m sorry 

Lee, I'm a fan of your posts.  If I did it, and I probably have, I'd chalk it up to a senior moment.

John Rowlen posted:

Canadian Pacific Vista Dome 

Sincerely, John Rowlen

IMG_1623


John, are the stacked boxes, I count 11 or so, at the rear of the table empty boxes of Preiser figures, or more to paint?

Last edited by Pingman
lee drennen posted:

Lee, why did you "reply with quote" of Don when you are complimenting Paul?  Confused.

Carl. Sorry I’m getting old I think I was very tired you can remove it if you want again I’m sorry 

Lee, don't worry at all about it. Carl doesn't appreciate that some of us here aren't perfect and that we sometimes make liddle Oopsies. FWIW I understood what you were saying.

Completed two buildings today for the waxhaw division. A Korber switch tower will be installed at the entance to the Union Sttaion Trackage on the Upper level. I have also put together a Lionel Maintenance shed that I picked up back in the 90s. Not sure exactly about placement but considering a couple of spots. Will try them out and see how they look. 

Hello and greetings,

I have followed this forum for many years, being a fan of O-Gauge Lionel. I am finally realizing my dream of having a train room. I have a 12' by 24' insulated room. It has been 7 years since my collection has seen the light of day. It is a small collection. Mostly scale. So, the attached picture shows how well the space acted as a catch all room. Sharp eyes will see some interesting things on the left side of the picture. On the right side you will see alternating 18" x 36" press fit shelving. This will be the base support of the train table, at 37 1/2" height; ply and roadbed to add an inch or so. The shelving underneath will be a blessing, with cardboard banker boxes occupying the spaces. Anyway, here is the first picture of the endeavour.

Train Room1


Attachments

Images (1)
  • Train Room1

Dave, Your 12' X 24' should give you a good starting point, for some reason they always seam to want to grow! LOL I have the same size room I built just for trains and plan on running a line out the window around the wife's rock garden! LOL

Scott, looks like a fun project! Reminds me I have one in storage that I am going to have to get out one day and get it on the layout!

Well guys its 4:48 AM here in the west coast, Time for me to get out to the train room and get back to my wiring and siding problem fix! I will check in later and hope to have good news on the project!

I hope everyone has a great Sunday and fun with there layout and trains!

Sans tender decals (still waiting on those) the Santa Fe FrankenHudson lives. It consists of the boiler from a MTH Premier Santa Fe Hudson #3464, the chassis and running gear of MTH Premier Santa Fe Hudson #3463, tender chassis, trucks, and toolboxes from a MTH Premier Santa Fe Blue Goose Hudson, and the tender shell from a Lionel 3751 class Santa Fe Northern. PS3 steam kit and LED lights. This is my 3rd Premier Santa Fe Hudson (I have 3463 and 3460 Blue Goose as well). I really like this model. 


Up with UP posted:

This will be the base support of the train table, at 37 1/2" height; ply and roadbed to add an inch or so. The shelving underneath will be a blessing, with cardboard banker boxes occupying the spaces. Anyway, here is the first picture of the endeavour.

Clever idea for benchwork!  I may just  swipe borrow that idea for future endeavors.  ^.^ 

Mitch 

Last edited by M. Mitchell Marmel
Lou1985 posted:

Sans tender decals (still waiting on those) the Santa Fe FrankenHudson lives. It consists of the boiler from a MTH Premier Santa Fe Hudson #3464, the chassis and running gear of MTH Premier Santa Fe Hudson #3463, tender chassis, trucks, and toolboxes from a MTH Premier Santa Fe Blue Goose Hudson, and the tender shell from a Lionel 3751 class Santa Fe Northern. PS3 steam kit and LED lights. This is my 3rd Premier Santa Fe Hudson (I have 3463 and 3460 Blue Goose as well). I really like this model. 


Gee Lou, it is a shame that you had to buy all of those engines to make just one (LOL). 

Fantastic job. The talent on this forum is incredible!

Lou, sharp looking engine for a steam engine! LOL I only have one steam engine and that's cause my grandson found it in the trash somewhere and gave it to me and said grandpa if you get it running you can keep it for your train room. So it always sits on the layout!

Mark, I did get an early start and I needed it! LOL

Mitch, Nice work, I am sure you will get it to up to your standards!

Well guys as you know I got up early to get out to the train room to try and figure out my troubles. Well I figured it out, Bob was right it was a miss matched wire. But I didn't find it till I added so many extra drops and replaced the curve where the engine kept stopping! Once I found it everything was a go and I guess it doesn't hurt to have extra power drops! LOL Here is what it looked like before I got a chance to clean things up.

IMG_20200223_144207028IMG_20200223_144216658

After I got everything cleaned up I took every DCS engine I have which is 4 lol and ran them all on all tracks and there was no problem with any of them. So needles to say I am happy, just sucks it took me all day, but now I can move on with my list!

I hope everyone had a great weekend!

Attachments

Images (2)
  • IMG_20200223_144207028
  • IMG_20200223_144216658
mike g. posted:

Lou, sharp looking engine for a steam engine! LOL I only have one steam engine and that's cause my grandson found it in the trash somewhere and gave it to me and said grandpa if you get it running you can keep it for your train room. So it always sits on the layout!

Mark, I did get an early start and I needed it! LOL

Mitch, Nice work, I am sure you will get it to up to your standards!

Well guys as you know I got up early to get out to the train room to try and figure out my troubles. Well I figured it out, Bob was right it was a miss matched wire. But I didn't find it till I added so many extra drops and replaced the curve where the engine kept stopping! Once I found it everything was a go and I guess it doesn't hurt to have extra power drops! LOL Here is what it looked like before I got a chance to clean things up.

IMG_20200223_144207028

After I got everything cleaned up I took every DCS engine I have which is 4 lol and ran them all on all tracks and there was no problem with any of them. So needles to say I am happy, just sucks it took me all day, but now I can move on with my list!

I hope everyone had a great weekend!

BOW

30 + years as an electrician it's always the wires.......

Happy to help Mike. Even from 3000 miles away.

Lionel Canadian Pacific Dome Observation is finished. 

After lowering the Dome seats and grinding the bottoms of the Dome Observation figures, it is finished.  Today I spent about 8 hours selecting, inspecting , repairing and installing Preiser 65602 Seated People in the Canadian Pacific Dome Observation main floor.  Between blowing my nose and wiping my eyes, I was able to get this car completed.

So far the Baggage,  Vista Dome Coach, and Dome Observation are completed. Three cars down and four to go.

I have 31 boxes of left over Preiser 65602 figures and three new boxes left to start.  I figure I have purchased 172 plus Preiser 65602 because the Man feeding the baby occurs twice in some Dome Cars, especially Atlas O California Zephyr and Amtrak Dome Cars.  If I check all my 21" passenger cars for this Man with a baby, I will know exactly how many boxes I purchased.  (This is a project for some snowy day or when Heck freezes over.)

I am taking the night off and getting a good night's rest.

Have a good evening.

Sincerely, John Rowlen

IMG_1636

Attachments

Images (13)
  • IMG_1636
  • IMG_1637
  • IMG_1638
  • IMG_1639
  • IMG_1640
  • IMG_1641
  • IMG_1642
  • IMG_1643
  • IMG_1644
  • IMG_1645
  • IMG_1646
  • IMG_1647
  • IMG_1636

My pleasure Mike!

After a honey do day, I put my new MTH SW-8 in the shop for some service. Cleaned up everything, shell, body, wheels, etc. One of the dirtiest "new" engines I've ever seen. The shell was very grungy. Some dish soap and scrubbing later....

2020-02-23 16.22.412020-02-23 16.22.50

The sound wasn't working so fearing the worst, I examined the board, no burned components, next I checked the speaker, found a broken wire....easy fix!

2020-02-23 16.26.16

Dirt...

This was off of the wheels after running my Dremel with a wire wheel on everything. Contact cleaner gets all of the residue off.

2020-02-23 16.56.55

Everything needed grease and oil, back on the rails, all good now

2020-02-23 17.33.202020-02-23 17.37.102020-02-23 17.37.252020-02-23 17.37.37

Attachments

Images (8)
  • 2020-02-23 16.22.41
  • 2020-02-23 16.22.50
  • 2020-02-23 16.26.16
  • 2020-02-23 16.56.55
  • 2020-02-23 17.33.20
  • 2020-02-23 17.37.10
  • 2020-02-23 17.37.25
  • 2020-02-23 17.37.37
Videos (1)
2020-02-23 16.37.26
RSJB18 posted:
mike g. posted:

Lou, sharp looking engine for a steam engine! LOL I only have one steam engine and that's cause my grandson found it in the trash somewhere and gave it to me and said grandpa if you get it running you can keep it for your train room. So it always sits on the layout!

Mark, I did get an early start and I needed it! LOL

Mitch, Nice work, I am sure you will get it to up to your standards!

Well guys as you know I got up early to get out to the train room to try and figure out my troubles. Well I figured it out, Bob was right it was a miss matched wire. But I didn't find it till I added so many extra drops and replaced the curve where the engine kept stopping! Once I found it everything was a go and I guess it doesn't hurt to have extra power drops! LOL Here is what it looked like before I got a chance to clean things up.

IMG_20200223_144207028

After I got everything cleaned up I took every DCS engine I have which is 4 lol and ran them all on all tracks and there was no problem with any of them. So needles to say I am happy, just sucks it took me all day, but now I can move on with my list!

I hope everyone had a great weekend!

BOW

30 + years as an electrician it's always the wires.......

Happy to help Mike. Even from 3000 miles away.

Really! It’s true!  In telecom we used to say, how can a two wire circuit be so hard to troubleshoot?  Then work on a four-wire circuit!!  Wow!


Bob the switcher looks good, sounds good!

Last edited by Mark Boyce

Looks like you guy’s been all weekend. Everyone’s work looks great. 

Mike. Glad you got you problems solved

Bob. Think you will have it running good before SWSAT? 

Mitch. Glad your making some progress on this can’t wait to see it running 

Ralph. What a great run layout looks good 

John. You are a people person for sure lol 


B6C950A1-4479-46CF-ACA5-6F53A2791992E023F85F-F648-460C-9439-0A92D8AC910AAE1EB98A-8B76-4754-9B84-CA277D7E6792E5153432-86E2-4489-92D1-A3F830B8C8EB0256F3FD-5452-497C-A0E5-D711022FC4C18D4EEBCF-D815-426C-AF2F-3ACD926042E9Well this weekend I got some cars decaled. I really like the Tichy Train Decals better the K4 are nice but not forgiving very thin decal paper there not for the faint hearted. These cars are old AHM that I Custom painted. I still have to add the ladders and parts to the Reefer car I will be putting ice hatches on the roof. I also have to find a Piggyback hitch and ramp plates for the flat car 

Attachments

Images (6)
  • B6C950A1-4479-46CF-ACA5-6F53A2791992
  • E023F85F-F648-460C-9439-0A92D8AC910A
  • AE1EB98A-8B76-4754-9B84-CA277D7E6792
  • E5153432-86E2-4489-92D1-A3F830B8C8EB
  • 0256F3FD-5452-497C-A0E5-D711022FC4C1
  • 8D4EEBCF-D815-426C-AF2F-3ACD926042E9
Last edited by lee drennen

John Rowlen, congratulations on finishing your third CP scale car with Preiser figures.  The numbers of figures in stunning, at least to me.  

Also, I applaud your photo posting technique--post a single large image with the text and put thumbnails for your readers like me to view if we choose to--and I always do.  Makes your post much easier to scroll through while enjoying the photos.  But , when you are explaining a technique or sequence, you include a pertinent photo with the text.  I have, in the past, lazily simply posted everything in the text when I should have used your technique shown above.

Hi all. I know it looks worse than yesterday. You may notice some banker boxes on the right. I have 35 years of various copper conductors used for various reasons. Anyway I am trying to get the "gold" segregated and the "detritus" out of the way. A sharp eye looking to the left will see some Orange and Blue boxes coming in to view.

Attachments

Images (1)
  • Train Room 2
Lionelski posted:
Lou1985 posted:

Sans tender decals (still waiting on those) the Santa Fe FrankenHudson lives. It consists of the boiler from a MTH Premier Santa Fe Hudson #3464, the chassis and running gear of MTH Premier Santa Fe Hudson #3463, tender chassis, trucks, and toolboxes from a MTH Premier Santa Fe Blue Goose Hudson, and the tender shell from a Lionel 3751 class Santa Fe Northern. PS3 steam kit and LED lights. This is my 3rd Premier Santa Fe Hudson (I have 3463 and 3460 Blue Goose as well). I really like this model. 


Gee Lou, it is a shame that you had to buy all of those engines to make just one (LOL). 

Fantastic job. The talent on this forum is incredible!

Actually the the 3464 boiler, 3463 chassis, and Blue Goose tender chassis, trucks, and toolboxes came from the same source. Just had to get the Lionel tender shell and PS3 kit, then assemble everything into one unit 😉.

Good morning everyone, It Monday and start of the work week. I hope its not to tough on everyone! LOL

Ralph, Great looking train and wonderful scenery!

John, Outstanding work on the Dome Observation car! I know your little people will be waiting for you but get some rest!

Bob, Nice job on the clean up! When you get a chance can you post some photos or even a video on how you hook up the power on your upside down engines to clean the wheels?

Lee D, Every time you post one of your new cars you do I am amazed at your skills! What wonderful work you do!

David, Everyone has to start somewhere. Don't worry you will get it sorted out in time! Then the fun really begins! 

Well I am not sure if I will get train room time today, but if I do its going to be spent hooking up switching motors. I moved a couple switches and added a couple for my sidings so now I have to move the tortoise switch machines to the new locations. I also have to install a couple MTH switch machines until I can buy more tortoise switch machines!

I hope everyone had a great weekend and are ready for Monday! Remember try to find time for your layout and trains! But most of all have fun!

Good morning all! Well Menardsville Industrial site is going along well. With a loop around the layout and also a reversing loop, things  are getting there. Today I ran my first train around to make sure everything  works, and it did !!! Now for the buildings and trees ( just for Playtrains )  lol... more pictures to follow..Bob20200223_16532920200223_171915

Attachments

Images (2)
  • 20200223_165329
  • 20200223_171915
mike g. posted:

Good morning everyone, It Monday and start of the work week. I hope its not to tough on everyone! LOL

Ralph, Great looking train and wonderful scenery!

John, Outstanding work on the Dome Observation car! I know your little people will be waiting for you but get some rest!

Bob, Nice job on the clean up! When you get a chance can you post some photos or even a video on how you hook up the power on your upside down engines to clean the wheels?

Lee D, Every time you post one of your new cars you do I am amazed at your skills! What wonderful work you do!

David, Everyone has to start somewhere. Don't worry you will get it sorted out in time! Then the fun really begins! 

Well I am not sure if I will get train room time today, but if I do its going to be spent hooking up switching motors. I moved a couple switches and added a couple for my sidings so now I have to move the tortoise switch machines to the new locations. I also have to install a couple MTH switch machines until I can buy more tortoise switch machines!

I hope everyone had a great weekend and are ready for Monday! Remember try to find time for your layout and trains! But most of all have fun!

Thanks Mike I can’t wait to get them working on the layout 

Mike G., congratulations and salutations, finding the needle in a hay stack is sometimes easier than finding an electrical short issue. Now being retired has given me more time to complete the wiring on my layout, and I to am checking the wiring on all my switches. There’s a mixture of Atlas O, and Ross Custom switches, no other brands. All are connected to ASC’s working through the Cab 2. The layout is 22 years old, and to be able to depend on the Route Button on the Cab 2, all switches need to work perfectly. 40 Turnouts, some paired to work together. So, although it’s a labor of love, it’s got to be done.  Lee Drennen, your layout with trucks and rolling stock looks great, RSJB18 Bob, happy birthday to your Layout, it’s very interesting, Briansilvermustang, Wow, you have great trains, John Rowlen, you have a Lot of Patience, talent, and a Bunch of Passenger cars, Wow, Trumptrain, your layout is full of B&O, and beautiful scenery, very colorful, Geysergazer Lew, your wit & wisdom is fun to read when you post pictures of model and Real trains, fantastic, Don Mcerlean, Thank You for the compliments on my feeble attempt at videos, the answer is I transferred my video from the iPhone to my IPad pictures. Then go to the attachments and merely picked the video picture and placed it on the write up. I am simply an ameteur. Cabinet Bob, now that’s a nice layout, reminds me of the display layouts in stores and looks to be a fun to run pike, very nice. Everyone, have a great week, Happy Railroading 58023C99-8207-4602-AEFC-B2B39C0369E3DDCB3A5D-5A82-4188-95AE-97F4F46B1374A9BC37B5-0F48-45CA-9FFA-1D54607B4922

Attachments

Images (3)
  • 58023C99-8207-4602-AEFC-B2B39C0369E3
  • DDCB3A5D-5A82-4188-95AE-97F4F46B1374
  • A9BC37B5-0F48-45CA-9FFA-1D54607B4922

Lots of great things everyone has been doing on the layout!!

Well, we finally got the plywood and everything else moved to make way for the 30" wide shelf on wall Number 2!!  Don't worry about that baseboard heater.  The power is disconnected.  I left it in case a future owner would want it.  There is enough heat comes in that room through the door and window opening to the laundry room.  

2020-02-24 18.33.55

Attachments

Images (1)
  • 2020-02-24 18.33.55

Greetings to all that are following my progression. I can now touch the wall at the left corner of the first pics. I am starting to pull the Lionel boxes out with several being in their original shipping box. Today my picture is looking back at where I took the first pics. This is looking south. Although not readily clear is my Legacy Zephyr and a two pack of UP 18" Aluminum cars sitting on a shelf bench. Next to them is a laptop that was playing SuperTrain1979 tv series. Below, my telescopes and accessories are finding a temporary home.

At this point, I am open to any suggestions or critisism of my contribution to this thread. Maybe I'm not the right one. Thank you.


Attachments

Images (1)
  • Train Room 3

Lionel Canadian Pacific "Sherwood Manor" Sleeper #23 is finished.

For a simple passenger car to detail, this car took my entire day.  The Sleeper is called a 10-6 by Lionel.  It has no room walls in the 10-room section, and the seats are over-sized and dwarf the passengers. The six staterooms are three spaces with only one window per space.  Only the people on the Stateroom couch are visible through the windows.  The smaller seat is not seen, except at an extreme angle as the train passes. 

The Canadian Pacific name plate stripe keeps buckling and loosening.  I finally had to run a little Krazy Glue on the edge of an Excel knife under the name strip and press the stripe down.

Here are a few pictures.  Four of the seven cars are done. There are two coaches and the station sound dining car to complete.

Have a good evening.

Sincerely, John Rowlen

IMG_1651

Attachments

Images (14)
  • IMG_1648
  • IMG_1649
  • IMG_1650
  • IMG_1651
  • IMG_1652
  • IMG_1653
  • IMG_1654
  • IMG_1655
  • IMG_1656
  • IMG_1657
  • IMG_1658
  • IMG_1659
  • IMG_1660
  • IMG_1651
Up with UP posted:

Greetings to all that are following my progression. I can now touch the wall at the left corner of the first pics. I am starting to pull the Lionel boxes out with several being in their original shipping box. Today my picture is looking back at where I took the first pics. This is looking south. Although not readily clear is my Legacy Zephyr and a two pack of UP 18" Aluminum cars sitting on a shelf bench. Next to them is a laptop that was playing SuperTrain1979 tv series. Below, my telescopes and accessories are finding a temporary home.

At this point, I am open to any suggestions or critisism of my contribution to this thread. Maybe I'm not the right one. Thank you.


David, I think you are posting in the right place.  I would consider what you are doing now is room prep and you are orienting us to you space and challenges.  That is all part of what you are doing on your layout.  I posted something similar above moving things to open the space to continue construction.  Please keep posting!

Up with UP posted:

At this point, I am open to any suggestions or critisism of my contribution to this thread. Maybe I'm not the right one. Thank you.


Your posts have been, IMO, entirely appropriate for this thread.

If you notice, in the lower right hand corner there is a link "Take Action" and the drop down menu for that link includes "reply with quote" which is what I used to include a portion of your last post.  The link also includes a link to report the post to the moderators.  If any of your posts offended someone or violated a forum policy, it's likely that someone would have used the "report the post."

Enjoy yourself here.

After a few years of dabbling, have been putting serious effort into my first "serious" layout. What began as a lark -- could I make a weatherproof trainbox to put on my front yard as a holiday display? - and a 3x4 display is morphing/molting/evolving into this:

IMG_2270

7x8 and modular (two 3x4 and two 4x4 tables) so I can move it lock, stock & barrel to the yard come holiday time; will also prove handy if (who'm I kidding: when) I want a more dramatic permanent setup. Right-rear quadrant is where table power is distributed, connected to a 30 foot trunk line running to the house, through a window, and to the control board (everything currently bolted to the wall) and power supplies. This'll let me & the kids power-up and run conventionally the outdoor spread from the comfort of an indoor sofa.

Tonight, finished wiring the switches in synchronous pairs (6 switches; 3 controllers) for each siding as well as the interior track's transition track. Also wired on/off switches for 2 power blocks (1 for each siding). Had 1 switch acting janky but a quick peek under the hood revealed an over-tightened screw. One quarter turn later, we were off to the races.

Tested and rec'd the A-OK. Yay.

Next up: power blocks (1 for each quadrant) for accessories; then I start framing out the new enclosure, mock up a tunnel covering the sidings, and test some new weather seal ideas.

As was said about anything good in the old neighborhood: this thing's a p!issah!

- The Other Guy

Side note: I decided to keep all track wiring on rather than under the table; I'm a fairly athletic 40 year old guy but getting under this thing on a regular basis is a pain. Another layer will eventually cover the entire table, wires and all, and I figure a few ungainly bumps are more than acceptable compared to the alternative.

- TOG

Attachments

Images (1)
  • IMG_2270
Last edited by The Other Guy

TOG, That is quite an innovative concept you have; not of building modules, but providing for the electrical ability to move the layout outside to run from inside.  On the front of the layout it looks like you used some kind of window or door latch to fasten the modules together.  How much effort is it to take it down and put back up, mainly track alignment and wiring connections?  I ask as I am contemplating the issues of building modules that I would take down in the event I get more space in another room or move to a different house.  For me, it would probably be a one time disassembly/reassembly.

Hi Mark,

Can't think of a better compliment that "innovative;" genuinely appreciate the kind words. Answers in order:

Mark Boyce posted:

On the front of the layout it looks like you used some kind of window or door latch to fasten the modules together.

Yep, that's it. Cheap, available everywhere, and provides enough tension to keep the tables from sliding away from each other when I'm leaning on them. They don't do jack for keeping things level but that's not their job.

IMG_2273

Mark Boyce posted:

 How much effort is it to take it down and put back up ...

Well, this is when it becomes a projection, as I haven't had the pleasure of trying it yet . But having done something similar 3 years running with two 3x4 tables, I figure about 90 minutes, from in-the-house to out-on-the-lawn with 1 preteen/teenaged helper . This time is for moving the table, connecting the track, and framing out the enclosure. There's added time to re-apply "loose" ornamentation but haven't factored that in here.

Mark Boyce posted:

… mainly track alignment …

Other than at the crossover points from 1 quad to the next, track will be screwed down. Rather than table alignment, it's table leveling - especially where the 4 tables meet in the center - was the real bugaboo. I solved this with 4 sliding latches connecting one table to its 2 adjacent tables. Once connected, I know the tables dead-set level in the center and I only need to shim any floating legs underneath. These latches don't do jack for keeping things from separating but that's not their job.

IMG_2275

Mark Boyce posted:

… and wiring connections?

Wiring was based on 3 principles. First, avoiding OW! MY BACK! and putting them on rather than under the table. Second, any wires connecting directly to the track are done once and, once done, aren't touched again unless something's broke. And last, any power leaving the "power quad" for other quads is connected by a bus bar. In this way, separating each quadrant is as easy as unscrewing a few posts. In this photo, the bus bars are attached to the "power quad" (headed West ) and the wires to running East are feeders to the switch (power and controller) and track.

IMG_2271

Hope this makes a bit of sense. Any additional questions, don't hesitate to ask. And for added fun, here's a pic of my last year's TrainBox display, outside in the snow. Took about an hour to get it out and up.

IMG_3216

- The Other Guy

Attachments

Images (4)
  • IMG_2271
  • IMG_2273
  • IMG_2275
  • IMG_3216

The Other Guy, Thank you for the detailed answers and photographs.  'Innovative and low-tech!'  I like it!!  After working 43 years in electronics (mostly power and telecom utilities) I don't want the hassle of a highly engineered layout.  

Avoiding OW! MY BACK!  At 63, I agree 100%!  OW! MY KNEES as well!  

The view from the window looks great!!

Last edited by Mark Boyce

Helpful hint of the day:

When testing a whistle button using postwar whistle tenders, make sure they're upright or upside-down.  If they're on their side, the whistle relay might connect and blow the whistle constantly.   Electronic horns, of course, do not have this problem. 

Pardon me while I go put on a dunce cap and join the Amalgamated Association of Morons, Local 6 7/8.

"WE ARE MORONS, TRIED AND TRUE!  WE WILL DO OUR CALL FOR YOU!  NYEHHHHH!"   

Mitch 

Just finished several 55-gallon drums, and dozens of Jerry cans.

0225201945-01

This Tamayia kit included several German cans, so I glued them in rows together, with American cans on each end, so it wasn't obvious.

The empty drums are made by Tichy Train Group.

I added some hand cranks to a couple of the barrels, but I don't remember who made those.

I also designed a small open sided structure, which will sit roughly where all these drums are sitting. It will provide cover for a workbench, and several loose items on the layout, including most of these drums and cans...

Attachments

Images (1)
  • 0225201945-01
Last edited by p51

Lionel Canadian Pacific Coach #111 interior painting is done.

I now have to resume painting more Preiser 65602 Seated People for this and another Coach from the 2-pack.  The dining car is scheduled to arrive tomorrow.   The Seats and toilets and sinks have three coats of paint.  I think this set of seven cars will be the last for a while.  It will be interesting to see if the shipping schedule for the Alaska cars is slowed due to the health issues in China.

Have a good evening.

Sincerely, John Rowlen

IMG_1665

Attachments

Images (9)
  • IMG_1661
  • IMG_1662
  • IMG_1663
  • IMG_1664
  • IMG_1665
  • IMG_1666
  • IMG_1667
  • IMG_1668
  • IMG_1665

Since l got in caboose roofing material, and the siding, l started on the four cabooses, two Great Western (ex_FEC), and two Colorado Midland.  To correctlly shape the GW caboose roofs, requires wood carving. This l do like soldering or oil paintings: on a scale of 1 to 10,  measured in negative numbers.  While l have only done one end on one roof, it is looking good. Considerable material has to be removed from the basswood roof stock. .

colorado hirailer posted:

This l do like soldering or oil paintings: on a scale of 1 to 10,  measured in negative numbers. 

A kindred spirit; my nemesis is sanding and filling grooves in streamlined aluminum passenger cars to create smooth sides to replicate the prototype I'm modeling.  I've consumed enormous quantities of wet/dry 3M sandpaper, body putty, and primer to do just six cars.  

Morning guys sorry I didn't get here yesterday so its going to make for a little longer response.

Dad, Your on a roll! Next thing you on we will be seeing streets and truckers on the layout!

Bob, thanks for the information. I will have to get some or just build some!

Larry, Thank you Sir! I really thing a lot of what you say! By the way I really love the car with the full rear window!

Mark, Glad to see you got the lumber moved. Now it gives you a clean canvas to start your art project on! AKA Layout!
Jim, nice collection of cars for your layout! I am glad you like the Wabash cars!

Jon1443, New Year, New Layout! But man that sure is some old stuff! LOL

Ray, things are really looking great! Sure is going to look a lot better then the AC unit!

UP With Up, your right on track! Your working on getting your layout up and running and I would thing that counts here on this thread!

John, All I can say is Wonderful work! Everyone else has pretty much covered your skills!

Paul, Cool scene! Nice to see you were able to get more people to come out besides just the Taxi cab drivers!

Well yesterday I was up early and had a chance to get out to the train room. I didn't feel like crawling under the layout to work on the switches so I took a page out of Bob's book and printed up some brick walls and put up a needed retaining wall along the back of the layout! Here are a couple photos.

I hope you all have a wonderful Wednesday and find time for your layout and trains!IMG_20200225_054959371IMG_20200225_072416411IMG_20200225_072400489

Attachments

Images (3)
  • IMG_20200225_054959371
  • IMG_20200225_072416411
  • IMG_20200225_072400489
John Rowlen posted:

Mike,  The retaining wall looks great.  I have an area to cover similar to yours.  How did you print the walls?

Sincerely, John Rowlen

Yes I'm painting people.  I just ordered seven more boxes from Questmark on eBay.  I'm going to paint while I watch March Madness.

Hi John, here is a link to the website. You have to create an account ands you get so many free downloads a day.

https://www.textures.com/

Its called BrickFacade0044_1_M.jpg

 I hope this helps.

Attachments

Images (1)
  • mceclip0

Carl, using Evergreen .015 clear styrene, cut with both scissors and X-ACTO blade. When I built this I purposely made the inside windows flush with the walls in anticipation of gluing in the styrene, so was able to take care of 2 at a time in most cases.have been down this road before. Glued in with Canopy glue. First time I used this and am very happy with it.

Mike g, good choice of brick for the retaining wall. Looks great.

Ray, the hotel is really looking good.

Today I went back to working on the machine shop. Added another coat of wash to the inside walls and when that dried I painted the inside top of all the walls concrete color. When that dries I am going to start to glue all the walls together. Painted the base of the unloading shed concrete. I found another piece of Masonite to make a base for this building because it is larger then most downtown deco buildings and it is on the heavy side. Tormorrow my silo tops come in and I can go back to that. Pics........Paul 2

DSCN0108DSCN0109DSCN0110DSCN0111DSCN0112

Attachments

Images (5)
  • DSCN0108
  • DSCN0109
  • DSCN0110
  • DSCN0111
  • DSCN0112

Excellent choice for the walls Mike Couldn't have done better myself.
Ray- the hotel is looking good
Paul- More great work.
John R- more people painting????
ME? Maybe I will get back to my machine shop later......I packed up about 20 boxes to free up some room in the basement, and sent them to the attic for storage. Then I realized that the attic is full too

Unpacked these two beauties that I bought from @Mike A recently.

2020-02-26 17.30.052020-02-26 17.30.15

Bob

Attachments

Images (2)
  • 2020-02-26 17.30.05
  • 2020-02-26 17.30.15
mike g. posted:


Mark, Glad to see you got the lumber moved. Now it gives you a clean canvas to start your art project on! AKA Layout!
Jim, nice collection of cars for your layout! I am glad you like the Wabash cars!


Well yesterday I was up early and had a chance to get out to the train room. I didn't feel like crawling under the layout to work on the switches so I took a page out of Bob's book and printed up some brick walls and put up a needed retaining wall along the back of the layout! Here are a couple photos.

mike g. posted:

Thank you, Mike!!

Your walls look great!

Bob, I have that problem, I have things to put away, but the attic, garage, and shed are full.  

Ray, the aged concrete is still sold. When I order it I get the flat aged concrete. Minuteman Scale Models bought the Scale Coat line from Weaver when they were closing. I just got some recently as of the end of last year. Right now I am using the bottle but I have gotten it in spray cans to spray some silos I did awhile back........................Paul 2

Working on a small structure for the layout, a place where the Army railroaders can have all their tools out, and I can show all the small little detail items that don't really fit Outdoors. The roof, on one side, will be supported a frame of wood timbers, which will be done later, hopefully tomorrow.

0226202132-01

I think I've done a lot of progress considering that just a couple of hours ago, this was just plastic still in the containers.

Attachments

Images (1)
  • 0226202132-01
Last edited by p51

Walking the dog the day before yesterday, I spotted this foam thing laying in the lot behind the rental furniture shop; especially noting the outer radius was about 24-25"-ish. Once home, it was a little large in dia and height for my space, so the hacksaw was.searched for, found, and robbed of the blade. (I have new blades...for the next, "real" cuts )

IMG_20200224_153214

I hacked out corners, etc, before I thought to photograph...the stack shows it pretty well.IMG_20200224_153304IMG_20200224_153521~3IMG_20200224_153534~2IMG_20200224_153609

And so it began...

(split post...more asap)

Attachments

Images (5)
  • IMG_20200224_153214
  • IMG_20200224_153304
  • IMG_20200224_153521~3
  • IMG_20200224_153534~2
  • IMG_20200224_153609
M. Mitchell Marmel posted:

Helpful hint of the day:

When testing a whistle button using postwar whistle tenders, make sure they're upright or upside-down.  If they're on their side, the whistle relay might connect and blow the whistle constantly.   Electronic horns, of course, do not have this problem. 

Pardon me while I go put on a dunce cap and join the Amalgamated Association of Morons, Local 6 7/8.

"WE ARE MORONS, TRIED AND TRUE!  WE WILL DO OUR CALL FOR YOU!  NYEHHHHH!"   

Mitch 

Actually, Mitch, that's an intelligent post that explains an important point.


p51 posted:

Working on a small structure for the layout, a place where the Army railroaders can have all their tools out, and I can show all the small little detail items that don't really fit Outdoors. The roof, on one side, will be supported a frame of wood timbers, which will be done later, hopefully tomorrow.

0226202132-01

I think I've done a lot of progress considering that just a couple of hours ago, this was just plastic still in the containers.

Lee, congrats on that great article in OGR!


Lionel Canadian Pacific Dining Car started.

I have completed the interior painting of the two Canadian Pacific Coaches #111 and #122.  I need to paint more Preiser 65602 Seated People for these cars.  I have three 24-packs at home and seven in-transit from Questmark2 in Germany.  The white Preiser figures have excellent detail molded into them when compared to the Chinese beige figures.

The Dining Car wood table bases are painted with two coats of Flat Earth Red,  The table tops have two coats of Flat White and need a total of five.  I am mixing a new batch of Earth Red and Flat White for the seats and seat backs that I will cut and glue in place.  Adding the seat backs improves the look of the Dining Car.  It will take another week or so to paint and add people to the coaches and Dining Car so I may be absent for a time.

Update:  I painted the seat cubes with two coats of newly mixed paint.  The .040 1/4" strips of Plastruct Styrene have been painted and will be cut for seat backs tomorrow when I am more alert.  After gluing them to the back of the cubes, the seats will get another coat of the tan paint to fill in cracks between the backs and the cubes. 

2nd Update:  Woke at 3:00 A.M. and cut seat backs and glued them in place.  I just need to give a final tan coat of paint to the seats.

Have a good week.

Sincerely, John Rowlen.

IMG_1677

Attachments

Images (14)
  • IMG_1672
  • IMG_1673
  • IMG_1674
  • IMG_1675
  • IMG_1677
  • IMG_1678
  • IMG_1679
  • IMG_1682
  • IMG_1683
  • IMG_1686
  • IMG_1684
  • IMG_1695
  • IMG_1690
  • IMG_1677
Last edited by John Rowlen

The silo tops came and they are glued in place. Bought enough tops to do the flour mill and the lubricant plant. For the Bakery Silos I am going to add a roof with a small buiding running the length of them. All the walls of the macchine shop are glued. I'll let it set overnight before starting the next step on it. Pics..........Paul 2

DSCN0117DSCN0118DSCN0119


Attachments

Images (3)
  • DSCN0117
  • DSCN0118
  • DSCN0119
John Rowlen posted:

Lionel Canadian Pacific Dining Car started.

I have completed the interior painting of the two Canadian Pacific Coaches #111 and #122.  I need to paint more Preiser 65602 Seated People for these cars.  I have three 24-packs at home and seven in-transit from Questmark2 in Germany.  The white Preiser figures have excellent detail molded into them when compared to the Chinese beige figures.

The Dining Car wood table bases are painted with two coats of Flat Earth Red,  The table tops have two coats of Flat White and need a total of five.  I am mixing a new batch of Earth Red and Flat White for the seats and seat backs that I will cut and glue in place.  Adding the seat backs improves the look of the Dining Car.  It will take another week or so to paint and add people to the coaches and Dining Car so I may be absent for a time.

Update:  I painted the seat cubes with two coats of newly mixed paint.  The .040 1/4" strips of Plastruct Styrene have been painted and will be cut for seat backs tomorrow when I am more alert.  After gluing them to the back of the cubes, the seats will get another coat of the tan paint to fill in cracks between the backs and the cubes.

Have a good week.

Sincerely, John Rowlen.

IMG_1677

John...do you paint standing figures also...are they available from Preiser unpainted?  Nice work on the seated figures...

M. Mitchell Marmel posted:
Matt Kramer posted:

The county commissioner’s henchmen posted a new billboard on the layout today. Lol!

boss-hogg-billboard

There, I fixed it.   

Mitch 

Thank you Mitch!  Of course now I'm on the hunt for an O scale General Lee... 

A tall order because Warner Bros. has suspended the merchandising rights for Generals due to the Confederate flag on the roof supposedly not being politically correct nowadays.  Lame.

Last edited by Matt Kramer

Making Headway on the shed.

0227202227a-01

I tried to figure out how to do an interior, and then it dawned on me to do the same thing I did with one of my flag stops. I found a wood pattern online, printed it out exactly the size of each interior wall, fitted it for the windows and doors which I cut clear, and used white glue to glue them to the interior walls. It's not perfect, but if you look through the window, it'll look okay. I'm going to put some furniture and other things inside the shed, and probably run a light inside, to make it look like a lantern.
Note the Betty Grable pin-up on the wall. You can't easily see it in this photo, but next to it is a 1943 calendar. Laying down in front, you can see the screen door I made. I'm going to use veil material attached to the back side of that, and leave the main door wide open but the screen door in place. I'm also putting screens on the lower two windows.

After this, I just need to paint all the trim and windows, put glass in the windows and screens on the doors, then make the other end supports for the other side of the roof. All the really tricky parts are done now.

Attachments

Images (1)
  • 0227202227a-01
Last edited by p51
Matt Kramer posted:

Thank you Mitch!  Of course now I'm on the hunt for an O scale General Lee... 

A tall order because Warner Bros. has suspended the merchandising rights for Generals due to the Confederate flag on the roof supposedly not being politically correct nowadays.  Lame.

(nods) A quick check on the Bay shows 1:43 diecasts of the General are big bucks.  I'd recommend buying an inexpensive '69 Charger diecast and rolling your own... 

Mitch 

Paul,  Preiser makes a few Unpainted packs of Standing People.  The Preiser 65600 has 16 figures including four hikers.  I may do this pack as I finish my layout.

Most of my people painting has been for my passenger cars.  The Preiser white blanks have better features than the people from China.

I have paid more for my blanks, but the work I do is to last a long time.  Hopefully.

I just finished adding the seat backs to the Canadian Pacific Dining Car.  Now I need to paint more 65602 Seated People for the two coaches and the dining car.

Update:  I have just painted a fourth pack of Preiser 65602 that arrived today.  That makes nine more 24-packs since finishing the Santa Fe 9-car passenger set.  I used some on the Canadian Pacific Observation, Vista Dome and 10-6 Sleeper.  The ones I am finishing are for the two Canadian Pacific coaches and Dining Car.  The Baggage car is also completed.

Sincerely, John Rowlen

IMG_1686

Attachments

Images (5)
  • IMG_1686
  • IMG_1690
  • IMG_1688
  • IMG_1695
  • IMG_1698
Last edited by John Rowlen
p51 posted:

Making Headway on the shed.


I tried to figure out how to do an interior, and then it dawned on me to do the same thing I did with one of my flag stops. I found a wood pattern online, printed it out exactly the size of each interior wall, fitted it for the windows and doors which I cut clear, and used white glue to glue them to the interior walls. It's not perfect, but if you look through the window, it'll look okay. I'm going to put some furniture and other things inside the shed, and probably run a light inside, to make it look like a lantern.
Note the Betty Grable pin-up on the wall. You can't easily see it in this photo, but next to it is a 1943 calendar. Laying down in front, you can see the screen door I made. I'm going to use veil material attached to the back side of that, and leave the main door wide open but the screen door in place. I'm also putting screens on the lower two windows.

After this, I just need to paint all the trim and windows, put glass in the windows and screens on the doors, then make the other end supports for the other side of the roof. All the really tricky parts are done now.

LIGHTBULB!

Great idea Lee. I was pondering the same issue with what to do with the interior of my building. Now to find some office interiors....

Bob

RSJB18 posted:
p51 posted:

I tried to figure out how to do an interior, and then it dawned on me to do the same thing I did with one of my flag stops. I found a wood pattern online, printed it out exactly the size of each interior wall, fitted it for the windows and doors which I cut clear, and used white glue to glue them to the interior walls. It's not perfect, but if you look through the window, it'll look okay.

LIGHTBULB!

Great idea Lee. I was pondering the same issue with what to do with the interior of my building. Now to find some office interiors....

Glad I could offer a new idea, Bob.

I did the same on a small depot when I was building the layout originally. It was a simple thing, didn't take long and looks fine. In this case, I did the same thing by adding wall stuff to the wall print. You can see where the corners meet that I didn't have them go all the way to the seam, though. I didn't make that mistake again on the shed...

Mind you, these are just for the walls (wallpaper, boards, and anything hanging on the walls like pictures). The rest is 3D like it should be. For example, the chair inside this depot is actually there, it wasn't printed in 2D...

Last edited by p51

I haven't posted since January.  Not much time in the train building.  I had another bi-annual operation and recovery has been a bear. 

I gathered some track and lots of wood scraps to begin "The Third Level" of the Bald Rock Mountain Railroad.  This will help me make the elevation smooth with precision cut , and better looking, risers.  I use my hands along with my brain.  It is not as steep as it looks.  The new level will be 11 3/4 inches high, rising from 5 1/2 inches over a 43 inch run.  All my engines can climb it.  Initially the third level will be a 3ft by 4ft loop with room to expand.  I need a good nap now.

Peace.  Out.  Bill

3rd level elevation


Attachments

Images (1)
  • 3rd level elevation
Last edited by Odenville Bill

Add Reply

Post

OGR Publishing, Inc., 1310 Eastside Centre Ct, Suite 6, Mountain Home, AR 72653
800-980-OGRR (6477)
www.ogaugerr.com

×
×
×
×
Link copied to your clipboard.
×
×