
IMG_4463IMG_4461IMG_4460IMG_4465IMG_4478IMG_4466IMG_4480IMG_4483

This didn't happen today but last week. Dad needed another bridge to span across the walk way on his new layout for the commuter line. He said, "Let's get out the Erector sets and build one." Using a plan in the erector books we built a "rolling lift bridge." He did get it working this week with one of the erector motors. I know this is something different from O gauge (it's actually Gilbert of course) but I thought y'all might like seeing it. Happy railroading and happy new year!

This is awesome! Thanks for sharing.

@chris a posted:

Progress continues on the Pennsy Block Walls  -   I think I have gotten the new walls as close to matching the existing walls.  I'll have to wait till the acrylic washes completely dry, but it's "close enough"...


Also weathered 1 of 2 arch viaducts.   Kind of wish I had done them both, so tonight I primed the second one and will weather it while I have all the same colors out.   


Chris,

I really like how you save instructions so you can repeat the process at a later date. The retaining walls look good. I like how they enhance the scene but not take away from it because of your color choices. It's nice to have available real estate. I'm sure you'll come up with something great for that area.

Dave

Whilst knocking about eBay in search of a Vulcan switcher shell, I recalled I had a couple of junk switchers knocking about the living room.  So, a bit of drilling and milling later, this former L.A.S.E.R. shell (my guess, based on the interior chrome plating) now adorns the Vulcan chassis... 

GEDC2426GEDC2427

End rails are on order from Trainz.  Those are LED markers, as yet unhooked-up. 

In addition, I got an email from my client, who is still enjoying the American Flyer trains I restomodded for her last year...

Mitch

Attachments

Images (2)
  • GEDC2426
  • GEDC2427
Videos (1)
IMG_2282
@Seth Thomas posted:

@Mark Boyce

I should have an Erector motor if you need one.

My Erector story goes at my grandparents winter visit with my red metal Erector box in arm I had a bad fall across the hot metal floor furnace and all the nuts bolts washers and smaller girders ended up in the bottom of the gas furnace. On my arms and Hands I had the burn scars for the longest time. But those scares never hurt as much as the loss of my Erector pieces….

@Berkshirelover726 very nice bridge by you and father.

John, Thank you very much for the offer.  I really have nothing in mind for the Erector set other than as a keepsake, so to speak.  I have no idea which set I had, but this one just seemed like I should get it.  Wow, that was a really bad accident you had with your set!!!

Chris, the coloring and weathering on your stone walls looks great like your earlier work!

Jrstengel, your tunnel portal looks great too!

Mitch, the scrounger comes through again! 

@Mayor Magoo posted:

Happy New Year to all!

Had some time off during the holidays so was able to get some train work/play in.  Besides running trains --Added figures, street lights and trees.

20220101_161317


Great pics Mayor MaGoo.

Here is a pic of my utility pole worker. I made him from a common Plasticville citizen, a gas station worker if I recall, and a loose small rubber band.

IMG_7149

Attachments

Images (1)
  • IMG_7149
@Seth Thomas posted:

@jrstengel

Morning!

Last January  I paid lots of $ for three single portals to make a double.  I truly love your hand made double portal.  
After  I enlarged your photo I still think it’s great 😊

John

I had a similiar dilemma with double portals, so I  decided to make my own with foam and small rocks from underneath the deck.  It's not a work of art, but it's functional

Portal 2

Portal 1

Attachments

Images (2)
  • Portal 2
  • Portal 1

I've been busy on the layout for the past week or so.

I started by making and adding railings to a "floating" piece of track between a small mountain and the viaduct:

IMG_7139

IMG_7140

This made an earlier railed section of track look shabby - so I redid it:

IMG_7158

If you like the way these railed sections look, I updated my early (8/13/21) Blog post on www.Warrenvillerailroad.com to include a "How To" with several follow along pics. This post is entitled "Avoiding the Floating Track Look" - check it out.

After seeing how these two sections turned out, I no longer liked the way a railed section of elevated track in front of Cape Warrenaveral and Main Street looked, so I removed it to re-do it.  BUT, when I took it down I liked the unobstructed look without this section of track so I decided not to put it back at all. This resulted in track and trestle work. Here is a pic of an added Arch Under bridge needed to support some of the new track work.

IMG_7153

It also resulted in me completely re-doing Main Street as it looked shabby too. Here is the new wide open view:

IMG_7147

Attachments

Images (9)
  • IMG_7139
  • IMG_7140
  • IMG_7137
  • IMG_7158
  • IMG_7147
  • IMG_7163
  • IMG_7165
  • IMG_7153
  • IMG_7153
@Seth Thomas posted:

@jrstengel

Morning!

Last January  I paid lots of $ for three single portals to make a double.  I truly love your hand made double portal.  
After  I enlarged your photo I still think it’s great 😊

John

@Seth Thomas

Thank you! I am learning a lot as I go. I have another one to make for the back side so I should be able to apply what I have learned so far and make some improvements. Tough learning a new skill at 68.


This didn't happen today but last week. Dad needed another bridge to span across the walk way on his new layout for the commuter line. He said, "Let's get out the Erector sets and build one." Using a plan in the erector books we built a "rolling lift bridge." He did get it working this week with one of the erector motors. I know this is something different from O gauge (it's actually Gilbert of course) but I thought y'all might like seeing it. Happy railroading and happy new year!

Berkshirelover726,

Thanks for sharing this project and great pics - the smile on your Dad's face says it all.

The Gilbert Erector set i had as a youngin' was one of my favorite toys - the only one that I still have. 4 more boxed sets have been added over the last several years - still fun and challenging.

When initially building my RR I used my stash  of #6 turnouts which are usually fine in most places.  However the more I ran trains of 80' passenger cars through the medium switches the more the angular appearance at the coupling bothered me.

So, where I had the space, I just finished replacing twenty one of #6 mainline tangent switches with #8 and #10 tangent and curved switches.  What a difference when I run  a train of 80 footers through the longer turnouts.

Gotta see where else I can squeeze in some of the larger switches.  Those gentle switches help to project the serpentine appearance of scale length passenger trains.  I still have a dozen or so of #6 mainline switches in tight or out of the way areas that will remain.

When planing a RR with long cars, consider looking to see where you can use # 8's or #10's.  They really help to develop the prototypical "look".   Especially up front n' center.

The original intention of this pike was multiple branch lines where #6's were fine.  However with the addition of a couple of name trains that I just could not resist,  those turnouts wore out their welcome.

Last edited by Tom Tee

Tom Tee, congratulations on the extensive changeouts you completed. Perhaps you and some other folks can provide some guidance. On my layout I’m using O tubular. Prior to starting this project I purchased some gorgeous 18” passenger cars. After I set up a test loop I found that the cars did not get along with the O22 turnouts. The overhang looked horrible and they derailed after coming in contact with the lantern. I don’t understand the  switch numbers you mention; nor how much space they save/use. I have been looking at the Ross Switches website but so many indicate “image not available “. Any guidance this group can provide as to what will work with tubular will be greatly appreciated.

Tom Tee, congratulations on the extensive changeouts you completed. Perhaps you and some other folks can provide some guidance. On my layout I’m using O tubular. Prior to starting this project I purchased some gorgeous 18” passenger cars. After I set up a test loop I found that the cars did not get along with the O22 turnouts. The overhang looked horrible and they derailed after coming in contact with the lantern. I don’t understand the  switch numbers you mention; nor how much space they save/use. I have been looking at the Ross Switches website but so many indicate “image not available “. Any guidance this group can provide as to what will work with tubular will be greatly appreciated.

Jay- I'm no expert on Ross switches but at a minimum you would need to adapt the tubular to Ross. Also what radius curves are you running? You can contact Ross directly for advice too.

The numbered switches that Tom is using are a different animal from radius switches. His layout is 2-rail also.

Bob

IMO the 022 switches have their limitations.   The Ross switches are available with low profile motors which will clear overhanging equipment.

The diverging leg of a switch crosses at a device called a "Frog".  Called that simply because it looks like the frog we all dissected in Biology with its arms and legs stretched out and pined in place.

The angle at which the "arms" are spread apart is the degree of the RR frog.  The angle can be expressed in a ratio number.

Ratio numbers transcend scale.

If at any point of the diverging rails you can mark a point where the inside edge of the rail head is one inch apart then measure to the sharp end of the frog point in inches and that measurement is the frog number.

Example:  If your mark at the aforementioned 1" mark is 6 inches from the sharp point of the frog your switch is a #6.

You do not even need a measuring device.  It is units of measurement.  Be careful to make your separation measurement  mark  from the inside flange edge of the diverging rail heads.

An 022 switch has a full curve section as it's diverging leg.  Not commonly listed as a number switch.  However here is where the can be a hybrid nomenclature.   My early 89" / 120" radius curved switches use a number 10  Right of Way brand frog.   However, the Signature large radius switches use custom formed fully formed curved frogs.

Probably too much information but it can be  starting point...

As Bob mentioned I do run both two and three rail.  My three rail is all Ross switches.  An excellent product.  My two rail portion also uses several Signature Switch radius switches where a diverging track leaves a right of way in mid curve.  Not prototypical but hey prototypical RRs are not built on a sheet of plywood either.

It's all fun and games with our toys.  The more serious you take this hobby the less you will be smiling.

Jay, if other than the lantern interference, the 022 switches are serving you well  consider removing the lantern and seal the socket...or...flip the switch motor to the other side of the switch, an easy screw driver job...or...remove the switch motor completely and operate the offending switch from under the platform with a Tortoise style switch motor.

Definitely keep those 18" cars!  

Last edited by Tom Tee
@jrstengel posted:

@Seth Thomas

Thank you! I am learning a lot as I go. I have another one to make for the back side so I should be able to apply what I have learned so far and make some improvements. Tough learning a new skill at 68.

John, I hear you about learning new skills.  I'm 3 years younger than you and besides new skills, I have been working on some skills I once had, but have been dormant for almost 30 years.  You will get the hang of it, and so will I!

Bob, that burn barrel really looks great!  It reminds me of burning papers back home.  Pulling newspapers apart and wadding them up slightly gave a nice big blaze when a few were put in together.  Also, we had a burn pile over the hill from the house in an area dad mowed with his '53 Gravely.   It had all the branches that fell or were cut and lumber scraps from over the course of a year.  He would pick a still, summer morning to pour his dirty motor oil on the edge of the pile and throw in a match.  After a few seconds; Whoosh!

Ski, Ah!  I'm glad to see the nice bridges supporting the tracks that were in mid air!  Looking good!

Removing and packing away Christmas decorations before the deep freeze and snow came the night before last slowed my progress to a crawl.  I'm hoping to get something done today.

I know I've seen the O-Scale Camper set on their layouts, so I thought I'd share this.

In the video below the  camping scene next to the lake is the Woodland Scenics O - Scale Camper Figure set sku A2754 that I modified for illumination of the fire pit and lantern. For the fire pit I used Evan Designs Fire LED Kit Pico 7-19 volts and powered it with the Woodland Scenics Just Plug Light Hub. Since the output from Just Plug is 22-24 volts, I used the adjustable light dimmer on the light hub to adjust the voltage down to 16 volts. I drilled a hole in the bottom of the WS fire pit just large enough to insert the Evan Fire LED's snug enough to not to require adhesive. For the lantern I used a WS Just Plug Nano LED. I drilled a hole through the log and into the lamp just large enough for the LED to fit snugly. Drilling the hole was a little tricky, because you don't want to accidently go all the way through the lantern. Using tweezers I pushed the nano LED into the hole, it fit perfectly. There you have it, an illuminated camp sight. It was fun and satisfying project and turned out to my liking.

Looks good Scott. I'll post an update on mine later.....waiting for glue to dry.

Bob

Wow, here we are on page 1082 on a thread close to our hearts, about layout Question, with answers and thoughts from some of the best folks in the business, a novel in the making. Tom Tee, thanks for sharing your ideas and talents on this and other threads of this OGR Forum, beautiful pictures and videos and verbiage by lots of folks. This is really a thread for new folks to learn the in snd outs of model railroading, Wow. Today, just a few pictures of my layout, which is a work in progress, and I’m getting ready to wire up my Hobo Water Tower, among lots of other accessories. Happy Railroading Everyone 9D0DC095-E219-40DB-91A8-1231C7C18606BF71DF7C-D34F-47E9-AAAC-F80953B6919652C1C8DA-C3CE-4CC8-82CB-36B01BBF4ABB779139B3-E9B4-4EA5-84FA-2C99CE09F897621A5613-CF51-4687-BECE-41E2AB49E33A04711EEE-02E6-4CCC-88A9-64B0FFDCDCE0

Attachments

Images (6)
  • 9D0DC095-E219-40DB-91A8-1231C7C18606
  • BF71DF7C-D34F-47E9-AAAC-F80953B69196
  • 52C1C8DA-C3CE-4CC8-82CB-36B01BBF4ABB
  • 779139B3-E9B4-4EA5-84FA-2C99CE09F897
  • 621A5613-CF51-4687-BECE-41E2AB49E33A
  • 04711EEE-02E6-4CCC-88A9-64B0FFDCDCE0

Finished the burn barrel, I added some "kindling" too,  and got it set on the base. The spot where the wires drop through the board is hard to reach so I added a 6' length of 4-wire.

2022-01-08 16.25.112022-01-08 16.25.162022-01-08 16.26.332022-01-08 16.26.38

THEN.......I was dropping it onto the layout and a loose wire appeared in my hand! One of the wires in the fire kit rectifier BROKE!

Sent and email to EvanDesigns.....waiting for a reply.

Going for the single-malt now.......

Bob

Attachments

Images (4)
  • 2022-01-08 16.25.11
  • 2022-01-08 16.25.16
  • 2022-01-08 16.26.33
  • 2022-01-08 16.26.38
Videos (1)
2022-01-08 16.26.07
@RSJB18 posted:

Finished the burn barrel, I added some "kindling" too,  and got it set on the base. The spot where the wires drop through the board is hard to reach so I added a 6' length of 4-wire.

THEN.......I was dropping it onto the layout and a loose wire appeared in my hand! One of the wires in the fire kit rectifier BROKE!

Sent and email to EvanDesigns.....waiting for a reply.

Going for the single-malt now.......

Bob

After your single malt Bob...........you ought to take a few minutes and post this video on that " Imagineering thread. 

Realy nice look with that lighting.

@RSJB18 posted:

Finished the burn barrel, I added some "kindling" too,  and got it set on the base. The spot where the wires drop through the board is hard to reach so I added a 6' length of 4-wire.


THEN.......I was dropping it onto the layout and a loose wire appeared in my hand! One of the wires in the fire kit rectifier BROKE!

Sent and email to EvanDesigns.....waiting for a reply.

Going for the single-malt now.......

Bob

Bob, BUMMER! I did notice that the fire kits are pretty delicate with small gauge solid wires. Hopefully Evan Designs will take care of you. How was that single malt? Would that be beer or scotch?

The burn barrel looks awesome, and I really like the caboose the way it turned out!

Bob, BUMMER! I did notice that the fire kits are pretty delicate with small gauge solid wires. Hopefully Evan Designs will take care of you. How was that single malt? Would that be beer or scotch?

The burn barrel looks awesome, and I really like the caboose the way it turned out!

Scotch.....

Heard back from Evan. A new kit is going out Monday. Sucks that I have to take the barrel apart.

Thanks Scott.

Bob

I finally began publicly posting my YouTube videos on my YouTube channel that I had made previously.  During Christmas break 2020, yep 2020, I decided to try and run and film all the engines on my railroad.  I uploaded all the videos but just never made them public as I hadn’t got though my roster.

https://youtu.be/t7oI87fLC_I this is the link to video 10.  I have about 40 more to go that will make their way to YouTube over the next several days.

Enjoy

John

@Steamfan77 posted:

Great job on the yard office Bob! The burn barrel looks fantastic, excellent effect. The lighting is really nice. Well done.

Fantastic projects guys all around. Inspirational to see so much high quality work.

Andy

Thanks Andy- I was able to take the barrel apart today with minimal damage so it should go back together quickly when I get the new LED's.

@jbmccormick posted:

I finally began publicly posting my YouTube videos on my YouTube channel that I had made previously.  During Christmas break 2020, yep 2020, I decided to try and run and film all the engines on my railroad.  I uploaded all the videos but just never made them public as I hadn’t got though my roster.

https://youtu.be/t7oI87fLC_I this is the link to video 10.  I have about 40 more to go that will make their way to YouTube over the next several days.

Enjoy

John

I love the cork mountain John.

Pro tip- you can insert Youtube videos directly into the post by using the insert/edit media icon (looks like a piece of film), in the tool bar. Just copy the link from Youtube and paste it into source box.

Bob

@RSJB18 posted:

Finished the burn barrel, I added some "kindling" too,  and got it set on the base. The spot where the wires drop through the board is hard to reach so I added a 6' length of 4-wire.

2022-01-08 16.25.112022-01-08 16.26.33

THEN.......I was dropping it onto the layout and a loose wire appeared in my hand! One of the wires in the fire kit rectifier BROKE!

Sent and email to EvanDesigns.....waiting for a reply.

Going for the single-malt now.......

Bob

Bob,

  Nice job on that barrel...Happy New Year, too.

Tom

Finally finished my TIU melted banana terminal repairs.  The Chinese terminal  knockoffs from Amazon required some work. I needed to drill out the round connectors from the TIU board because the Chinese  knockoff posts were slightly larger. Also, the female holes of the banana nut connectors weren’t as snug as the original TIU posts, so I needed to pry the connectors a bit to make them snug,


Here is the original melted posts due to loose connections -  

8B9CC6B9-6427-4D3F-8DD6-8B1F368B8041

Thankfully, the melted plastic wasn’t too difficult to pry off the TIU cover without breaking it. I made sure to carefully work small pieces at a time to remove the melted posts.


Here are the first two newly installed terminal posts. You can see how the new terminal posts are slightly larger than the original ones  (bottom) used by  MTH. Yes, that top one was installed incorrectly reversed (red to black, etc). Fortunately, I caught it after taking this photo and reversed it to properly connect red to red and black to black -

6ACB9BCB-7087-4FDE-94C0-FBD46EDBD694

I reconnected it to my layout, tested all tracks, and am pleased to say that everything is working fine. Hopefully, everything remains tightly secured and I can avoid melted terminal posts in the future.  I’m tempted to solder the connections to the posts if I notice any melting in the future.  All in all, not too difficult of a repair.

Attachments

Images (2)
  • 8B9CC6B9-6427-4D3F-8DD6-8B1F368B8041
  • 6ACB9BCB-7087-4FDE-94C0-FBD46EDBD694
Last edited by Strap Hanger

Good evening OGR members, although this thread is meant for what we did on our layouts today, I’m just wondering if any of our members were affected by the bad storms, snow, tornado’s, floods, fires, or freezing weather. I haven’t seen Mike g. post any thoughts lately, thinking Washington state was hit hard by flooding and others, so, those in harms way are in my prayers. Our area of the country just had a big snow storm, something we hardly ever see. Happy Railroading Everyone A66EABD1-559D-47F7-B717-845D7F632A5C

Attachments

Images (1)
  • A66EABD1-559D-47F7-B717-845D7F632A5C
@leapinlarry posted:

Good evening OGR members, although this thread is meant for what we did on our layouts today, I’m just wondering if any of our members were affected by the bad storms, snow, tornado’s, floods, fires, or freezing weather. I haven’t seen Mike g. post any thoughts lately, thinking Washington state was hit hard by flooding and others, so, those in harms way are in my prayers. Our area of the country just had a big snow storm, something we hardly ever see. Happy Railroading Everyone

I sent Mike a message this morning with the same thoughts.  No reply yet, I hope he and his family are ok with the devestating floods in the Pacific North West. Nothing in the midwest but a little cold.

I created another Penn Central "geep" - a GP9 to go along with the GP7 I did a while back. I went with the Red/White logo this time just for some variety. I had a GP9 body shell laying around so I did it up and swapped it for another locomotive. Both are MTH. The GP7 is Premier and the new GP9 is Railking.

PC GP9_20220109_203902641

Attachments

Images (1)
  • PC GP9_20220109_203902641
@Ralph M posted:

I created another Penn Central "geep" - a GP9 to go along with the GP7 I did a while back. I went with the Red/White logo this time just for some variety. I had a GP9 body shell laying around so I did it up and swapped it for another locomotive. Both are MTH. The GP7 is Premier and the new GP9 is Railking.


Awsome picture and a great era to model.

@Dave Ripp. posted:

I sent Mike a message this morning with the same thoughts.  No reply yet, I hope he and his family are ok with the devestating floods in the Pacific North West. Nothing in the midwest but a little cold.

Mike sent me a photograph yesterday of his snow.  The deck is 3 feet off the ground, and the snow goes up to about 2/3 the way up the railing.  That sounds like 5 feet to me.  The most we ever had was 40 inches, but I was much younger then.  He didn’t mention floods, but I know our 40 inches in ‘96 melted fast and we had flooding. They keep getting hit with more and more snow, so Mike is whipped.  Unless something happened today, he is okay.

@Ralph M posted:

I created another Penn Central "geep" - a GP9 to go along with the GP7 I did a while back. I went with the Red/White logo this time just for some variety. I had a GP9 body shell laying around so I did it up and swapped it for another locomotive. Both are MTH. The GP7 is Premier and the new GP9 is Railking.

PC GP9_20220109_203902641

You do nice work Ralph.   The red and white logo looks good.

That Railking GP9 must be the  " Scale "  model.  It looks good with the Premier GP7.

@Mark Boyce posted:

Mike sent me a photograph yesterday of his snow.  The deck is 3 feet off the ground, and the snow goes up to about 2/3 the way up the railing.  That sounds like 5 feet to me.  The most we ever had was 40 inches, but I was much younger then.  He didn’t mention floods, but I know our 40 inches in ‘96 melted fast and we had flooding. They keep getting hit with more and more snow, so Mike is whipped.  Unless something happened today, he is okay.

Great to here Mark. Better snow than rain lot's of flooding in Washington state. Hopefully his property is high and slopes away from his house and building.

Mostly I made a mess...  Tend to pull boxes out from under and set them on top and look through stuff... Next thing I know, you can't see the surface of the layout... something about being a train hoarder I guess... But I did get lights going recently...

260297099_1763012733905002_7037325654244229367_n

From what I can see of the layout Dennis  , everything looks good.

...........and you look like an organized train hoarder.

Ran trains for a bit yesterday. I noticed that my Menards F7 was jumping the track coming out of a turnout. The front wheel is riding up the rail and jumping. I need to shim the track just after the turnout to keep the wheel flanges inside the rail. There is a slight dip in the section of track and I think that's causing the wheel to ride up and out.

Some of my K-line MP-15's have done the same thing so I may have stumbled on the cause. Having the remote in hand made it easier to see what was happening instead of having to go back and forth to the transformer.

2022-01-07 17.40.49

Attachments

Images (1)
  • 2022-01-07 17.40.49

Morning guys, first off, I want to thank you all for your thoughts about me. I am doing fine just whooped working with all this snow we have got and trying to help people why can't help themselves! It really sucks as there are people running around charging an arm and leg to help folks on fixed income. I do it for free as that is what my dad instilled in me! Here is what we have been dealing with and then on to some train stuff! LOL Mind you my deck railing is 6' tall and the snow pile is what was on the ground and the snow I had to take off the roof.

IMG_20220104_180306IMG_20220105_075017

Now on to some train stuff, last time my grandkids were here I was informed there were no people of color on my layout. My grandkids are part Hispanic, so I spent a few nights right before bed painting some new people of color so they would fit in. My bad!

IMG_20220101_092611

I also had an hour or so to add ground cover to the area I had to widen out for the overhang of my new steam engine. Here is what I have so far!

IMG_20220101_092900IMG_20220101_092909

The Kids and grandkids came for Christmas after the new year, and we had a great time. They gave me one of the best out of the blue gift for my train layout! I have been looking for a Greyhound bus but everyone I found was way out of my price range and low and behold that's what I got from the grandkids!

IMG_20220102_105208

I hope you are all well and having fun with your trains and layouts! Please be safe and it might be a couple days before I get back as I have a few more people to take care of. Now all we have to worry about for us is landslides as we live on top of a hill and if it slides it blocks the road!

Attachments

Images (6)
  • IMG_20220104_180306
  • IMG_20220105_075017
  • IMG_20220101_092900
  • IMG_20220101_092909
  • IMG_20220101_092611
  • IMG_20220102_105208
@mike g. posted:

Morning guys, first off, I want to thank you all for your thoughts about me. I am doing fine just whooped working with all this snow we have got and trying to help people why can't help themselves! It really sucks as there are people running around charging an arm and leg to help folks on fixed income. I do it for free as that is what my dad instilled in me! Here is what we have been dealing with and then on to some train stuff! LOL Mind you my deck railing is 6' tall and the snow pile is what was on the ground and the snow I had to take off the roof.

IMG_20220105_075017

Good to heard form you Mike. The bus and ground cover look good.

That is a lot of snow. I've been watching it pile up on the Skykomish Wa. camera on Virtual railfan.

Bob

A few updates from the past few weeks. Saturday we ran trains. This is my 4 year old who loves trains right now more than anything. Trying to feed this as much as possible.

Over Christmas, we built a couple of flats and now need to install them. One has lights (video) the other still needs (pic). They also need some weathering. 


IMG_2215

Attachments

Images (2)
  • mceclip0
  • IMG_2215
Videos (1)
IMG_4234

Lots of good projects, folks!  Yes winter is train time in the north, unless it snows a lot.  🤨

Besides taking inventory and organizing the train room to be better set up for scenery building, I started an Altoona Model Works Branchline Station kit.  The instruction sheets are very well done.  I'm following it exactly as directed.  So far it is a simple box of Masonite sheathed with thin clapboard siding sections.  It has gone together well with Ailene's glue as suggested in the instructions.  The next step is to paint the shell, the roof sections, and the doors, windows, and trim.  I'll use Western Maryland gray with red trim.

8DF0FF95-85A7-44C2-8142-BBC7658FDA5D

Attachments

Images (1)
  • 8DF0FF95-85A7-44C2-8142-BBC7658FDA5D
Last edited by Mark Boyce

Hi guys I hope you all had a great day!

Bob, thank you and just so you know the snow is sucking right now! LOL You wouldnt happen to have the link to the Skykomish camera would you?

Terry, 30' is a lot of wire to pull in one day! Looks outstanding!

SuperChief, Great looking work on the flats! Take all the time with your son in as much as you can, it really builds great memories!

Mark, Looking good! I am looking forward to seeing the painted product!

Nothing new from me today as there was more driveways to clear! I hope you all have been able to find time to have fun with your layouts and trains!

Dave,  I like the weathering on the fences.   you might try roughing up the edges of the boards where the large holes are.  Maybe use a razor saw, or fine tooth saber saw blade.  They should have roughed up the mold where the boards are "broken"...    Great job with the decals.   Personally I like the GoodYear sign

Nice job on the telephone poles, Terry.   

Mark,  the Branchline Station Kit is moving along well.

Mike G:   Glad to see "you come up for air",  that relentless snow can be physically and mentally exhausting.  Reminded me of the 2014/2015 winter we had in Boston with 118 inches of snow in about 8 weeks.   Just never stopped. 

I went back scrubbed down the Pennsy Block Walls with some alcohol and water, (just wasn't happy the color mismatch).   Mixed up a new batch of final wash, added more Raw Sienna to the Burnt Sienna.  Glad I did, the color match now is very close.

Got my Union Station LED's over the front doors and windows hooked up today.  I have two chandeliers 2" high x 1.25 inches diameter to install tomorrow.   I like the viaducts I weathered so much, I tore out the hand carved rocks I had at the other end of the layout, and started "cutting" in the viaducts between the upper and lower level at that end.     

Attachments

Images (5)
  • DSC07731
  • DSC07735
  • DSC07732
  • DSC07733
  • DSC07737

Glad to hear from you Mike.
Terry, the lines between the poles are a nice detail.

SuperChief, great times with a future modeler!

Mark, looks good, looking forward to the paint scheme.

Dave, the fence looks great. Maybe a picket or two that are at an angle? A fence with that many gaps is bound to have a few cockeyed boards. I like the signs on the fence,  nice touch.

Chris, the color is almost a dead match, well done. Station lighting looks great.


Andy

Last edited by Steamfan77
@mike g. posted:

Hi guys I hope you all had a great day!

Bob, thank you and just so you know the snow is sucking right now! LOL You wouldnt happen to have the link to the Skykomish camera would you?

Here's the link to the channel on Youtube. They have cameras all over the country. I can spend hours watching the action.

https://www.youtube.com/channe...kT9bq-1N2BvrsBjhNlag

@RSJB18 posted:

Here's the link to the channel on Youtube. They have cameras all over the country. I can spend hours watching the action.

https://www.youtube.com/channe...kT9bq-1N2BvrsBjhNlag

Wow, that's a lot more than at Horseshoe Curve, Altoona, the closest one to me.

Mitch, is the Frankenswitcher going to get a new paint job?  Razerback?  Something else?

Terry Luft, I like the sag on the wires.  Having worked for the power and telephone company most of my 43 years working, I always wonder what is the best way to get a good looking sag in line wires.

@Terry Luft posted:

I couldn’t find a prototype for this but it seems like a reasonable way to get the phone lines across the canyon. In any case it’s the Central Valley in California, Frank Norris “Octopus”, country so the SP can do whatever it wants.A2ED7821-BF60-4DF1-8587-EC996A46D048

Terry,

I'm with you on this. I know I have seen this done on stone arch bridges but I'm sure there is a prototype somewhere for what you have done. Either way, it looks good and it's your railroad.

Dave

@mike g. posted:

Morning guys, first off, I want to thank you all for your thoughts about me. I am doing fine just whooped working with all this snow we have got and trying to help people why can't help themselves! It really sucks as there are people running around charging an arm and leg to help folks on fixed income. I do it for free as that is what my dad instilled in me! Here is what we have been dealing with and then on to some train stuff! LOL Mind you my deck railing is 6' tall and the snow pile is what was on the ground and the snow I had to take off the roof.

IMG_20220105_075017Mike,  please be careful with all that gratis snow shoveling.  At our average ages our bodies are not prepped for that kid of strenuous work.   "A man has got to know their limitations".

I just replaced a 28 YO Ahrens 24" snow blower for  new Ahrens 24" with better features at half the 1994 price from HD.

After several  volunteer years, we stopped gratis  clearing of out neighbor's drives.  Didn't even get a wave or a thank you.

@mike g. posted:

Morning guys, first off, I want to thank you all for your thoughts about me. I am doing fine just whooped working with all this snow we have got and trying to help people why can't help themselves! It really sucks as there are people running around charging an arm and leg to help folks on fixed income. I do it for free as that is what my dad instilled in me! Here is what we have been dealing with and then on to some train stuff! LOL Mind you my deck railing is 6' tall and the snow pile is what was on the ground and the snow I had to take off the roof.

IMG_20220104_180306IMG_20220105_075017

Now on to some train stuff, last time my grandkids were here I was informed there were no people of color on my layout. My grandkids are part Hispanic, so I spent a few nights right before bed painting some new people of color so they would fit in. My bad!

IMG_20220101_092611

I also had an hour or so to add ground cover to the area I had to widen out for the overhang of my new steam engine. Here is what I have so far!

IMG_20220101_092900IMG_20220101_092909

The Kids and grandkids came for Christmas after the new year, and we had a great time. They gave me one of the best out of the blue gift for my train layout! I have been looking for a Greyhound bus but everyone I found was way out of my price range and low and behold that's what I got from the grandkids!

IMG_20220102_105208

I hope you are all well and having fun with your trains and layouts! Please be safe and it might be a couple days before I get back as I have a few more people to take care of. Now all we have to worry about for us is landslides as we live on top of a hill and if it slides it blocks the road!

Mike, great pics of the snow storm...wow!  The new ground cover looks great!

It's good to see the addition of the "Greyhound" bus to your layout.  I know you've been looking for one for a while...

@Terry Luft posted:

I couldn’t find a prototype for this but it seems like a reasonable way to get the phone lines across the canyon. In any case it’s the Central Valley in California, Frank Norris “Octopus”, country so the SP can do whatever it wants.A2ED7821-BF60-4DF1-8587-EC996A46D048

Terry, I believe this is a realistic representation.  It reminds me of an incident that my dad encountered when he was a young cable splicer for the telephone company he worked at for 38 years.  I ended up at the same company at age 40 until retirement.  At that time the company had telephone cable on the PRR bridge that crosses the Allegheny River at Freeport, Pennsylvania.  Dad was called out to cable trouble after dark.  He was out on the bridge splicing cable and there was a wind whipping down the river.  That was okay, but he said it was really unnerving when a PRR freight came across the bridge.  Now there is fiver optics in conduit.

Well after reading the discussion about having an inventory, I decided I should probably figure out what I have. Not done yet, but I think I bought way too much stuff for my grandkids.   I have a pretty good handle on the engines but rolling stock is another matter. Still have a couple of more shelves to do but in 3 years I think I will have accumulated 30 engines and 140 cars.  When I did my count, if I had a 6 car coal hopper set, I counted that as one. Same with passenger car sets, that is a one. Diesel ABA is also one. Funny I started out buying steamers and now have only 3. I still have a couple more diesels on order (BN) and one of the Big Boys. I am not going to count my post war or 027 cars and engines. Those are for "under the tree".

I guess my question is when do you know you have enough stuff?  OK my absolute limit would be needing to rent a storage unit to keep trains - for me that IS TOO MUCH. So far I have been good at selling off items that did not fit what I wanted to do. Two I am stuck on - A Pennsy GG1 and passenger set and a Norfolk and Western Passenger set waiting for a scale J class 611.  As much as I love the history of the Eastern railroads, I am finding myself building roads Chicago and west, so the Eastern roads do not seem to fit. Nevertheless, I am likely to hold on to the Pennsy and N&W roads as an homage to the GG1 and "J". 

And on another note, the CEO asked me if I could turn one of my buildings into a US Marine Corp recruiting office. My oldest spent 9 years in (enlisted and out as a Staff Sgt) and I agree it would be a nice touch.  Anyone done that?  I know we have several Marines on the forum.   

Jeff

Morning guys, first off I want to say sorry as this could be a little long as I have been lazy not recognizing everyone's work!

@luvindemtrains Dave, Nice job on the fence! Iam with Bob I too like the Goodyear sign! I am thinking about redoing the picket fence around my park down the road!

@chris a Chris, Outstanding work on the walls the look great! I really like the viaducts for me maybe one day! LOL The lighting outside your station looks perfect! I can't wait to see the chandeliers inside! Yep your correct about the snow!

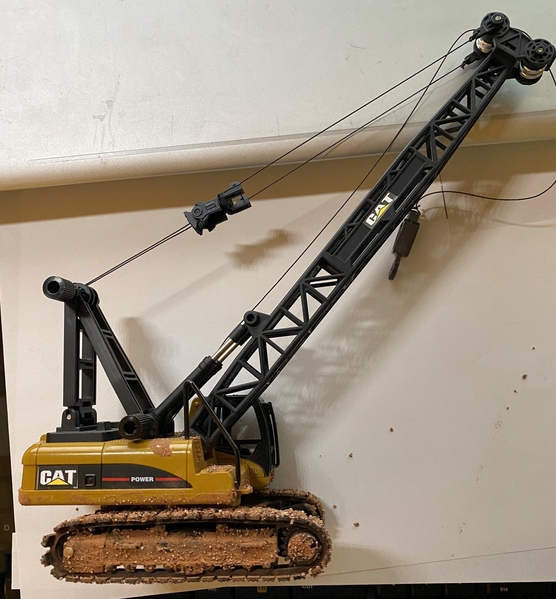
@WesternPacific2217 Scott looks alot better as a CAT! Great work!

@RSJB18 Bob, thanks for the link!

@M. Mitchell Marmel Mitch, its amazing what you come up with and build!

@Terry Luft Terry, great scene and like I said before that sure is alot of wire! LOL

@Tom Tee Tom, I agree with you totally! I had a guy call me at home and said I forgot him! He didn't even ask for help. He just excepted it!

@Capetrainman Paul, Thank you! Down the road I plan on putting lights in it like Scott did!

@ScoutingDad Jeff, maybe one day I will do an inventory but for now I think I have enough! I am only missing a couple passenger cars and maybe a baggage car for my new steam engine so I can make it look like the Polar Express! As for the Marine recruiting station, Go for it! and tell your son Semper Fi!

Well guys nothing from me as yesterday I was dealing with diverting water from the garage and train room from all the snow melting! LOL If it isn't one thing it's another. But I have a great plan today, after running to town later I plan on grabbing a cold one and spending the rest of the day running trains as it is just pouring outside!

I hope you all have a great day and please find time to have fun with your layout and trains!

@ScoutingDad posted:

Well after reading the discussion about having an inventory, I decided I should probably figure out what I have. Not done yet, but I think I bought way too much stuff for my grandkids.   I have a pretty good handle on the engines but rolling stock is another matter. Still have a couple of more shelves to do but in 3 years I think I will have accumulated 30 engines and 140 cars.  When I did my count, if I had a 6 car coal hopper set, I counted that as one. Same with passenger car sets, that is a one. Diesel ABA is also one. Funny I started out buying steamers and now have only 3. I still have a couple more diesels on order (BN) and one of the Big Boys. I am not going to count my post war or 027 cars and engines. Those are for "under the tree".

I guess my question is when do you know you have enough stuff?  OK my absolute limit would be needing to rent a storage unit to keep trains - for me that IS TOO MUCH. So far I have been good at selling off items that did not fit what I wanted to do. Two I am stuck on - A Pennsy GG1 and passenger set and a Norfolk and Western Passenger set waiting for a scale J class 611.  As much as I love the history of the Eastern railroads, I am finding myself building roads Chicago and west, so the Eastern roads do not seem to fit. Nevertheless, I am likely to hold on to the Pennsy and N&W roads as an homage to the GG1 and "J".

And on another note, the CEO asked me if I could turn one of my buildings into a US Marine Corp recruiting office. My oldest spent 9 years in (enlisted and out as a Staff Sgt) and I agree it would be a nice touch.  Anyone done that?  I know we have several Marines on the forum.   

Jeff

Jeff, I have inventoried my engines and cars.  I find myself with almost the same number as you; 27 engines and 137 cars.  Some were rather expensive and others were not.  I too think that is enough.  However, I have a couple of engines on order, both early B&O diesels I saw on the tracks near my home growing up.  I do have a few I plan to put up for sale as I don't run them and my interests have changed.  I bought a few thinking, get them while I can for grandchildren.  Well, we still have no grandchildren so who knows.

Thank your son for serving in the Marines!  My maternal grandfather was a Marine in the Philippines around 1910 and again in France in WWI.

I need to update my inventory but I'm so busy buying stuff that I don't have time......

Latest addition is an MTH LIRR SW-8 w/ PS-2. Should have it next week.

@Jim Van Every- a couple of neat projects. Looking forward to seeing the finished products.

@mike g.- I like your plan for the afternoon. After all the snow shoveling you have been doing you deserve the break.

@ScoutingDad- you have it backwards- you need a storage unit too put household c#*p in so that you have more room for trains.

Bob

Last edited by RSJB18

RSJB18:  I am seeking a little advice.  I am thinking of formulating an update to my inventory, the last one is (embarrassingly nearly 20 years old and hand written on notebook paper) although I do mark off all my acquisitions in one of Greenbergs pocket price guide books.  I just wondered, what media are you using for your inventory and are you taking pictures of each item?  Is there a commercial software product to use ?  I also am facing the daunting task of what our Scandinavian friends call " death planning" and none of my children (1) or grandchildren(2) have any real interest in continuing the collection.  Thanks

Don

I use excel and just have a simple list at the moment. I intend to add more details as I update it to include TMCC addresses, and maintenance history.

RSJB18:  I am seeking a little advice.  I am thinking of formulating an update to my inventory, the last one is (embarrassingly nearly 20 years old and hand written on notebook paper) although I do mark off all my acquisitions in one of Greenbergs pocket price guide books.  I just wondered, what media are you using for your inventory and are you taking pictures of each item?  Is there a commercial software product to use ?  I also am facing the daunting task of what our Scandinavian friends call " death planning" and none of my children (1) or grandchildren(2) have any real interest in continuing the collection.  Thanks

Don

Hi Don, share your dilemma, no one to take an interest in the family, and picture this collection on the side of the street as FREE.  This because they have no idea what thing are worth, even in today's world.  The itemized list somehow should have an estimated worth / date so this hopefully doesn't happen. It will take considerable time , to do this list,   Any suggestions ?   I'm at a loss here. RP

There's plenty of software out there to do inventory although it may not be geared toward model railroading. I did a search for "collection inventory software in the cloud" and got some worthwhile candidates. But I have no recommendations, nor do I know what such an application would cost. Having it in the cloud seems like a good idea so that it can be accessed from anywhere including your phone.

I have been using a simple Excel spreadsheet for more than a few years now.  It works fine, I am sure there are "fancier" software options but Excel is easy to use, free.  I have added columns for "sold date", sold to, and sold price as I started thinning the herd several years ago.   Mine starts with the Manuf. Item #, then a description with Road Number so I can check the list and make sure I don't buy a "duplicate".   And yes I found I had at least 3 or 4 of the same cars when I first got serious about the inventory.   The columns then move onto Cost & Year of Purchase, and from whom, or where purchased... OGR forum, eBay, local Show etc.    It's worth the effort in my opinion, as I took it to my insurance representative along with some sample photos and he confirmed that I'd have no problem, if I ever needed to open a claim.   And yes, in the event of my unforeseen demise, it would definitely make life easier on my two children. 

I have also been using excel.   Created a tab for engines, passenger, rolling stock, cabooses, etc.   Then each tab with sections, MTH, Lionel, K line, etc.   Similar to other posts.  Part #, Description, Road #, Road name, purchase price, where purchased etc.    Having the separate tab for engines I then print the engine list as I have a column for Legacy ID # I assigned it.  Then keep on a clip board out by the layout to easily figure out engine ID.

I want to thank everyone who responded to my question (originally to RSJB18) about the inventory.  I appreciate all the advice and experience.  I think I will likely try Excel at first as I am familiar with that system from my engineering job.  Makes sense to try and see how hard that might be.  Great advice all and thank you for responding

Best wishes

Don

Richard Pardo...I agree, my nightmare is that the collection goes in the trash w/o anyone even being aware that it could have significant value.  As I said above, I am going to try Excel at first to get started and see how hard it is to do.  My experience with Excel is that one you have the columns set up, it can be fairly easy.  The nice thing about it is that you can put in the collectors value (for example) in dollars and then it can sum that column for you to give you totals.  That at least might give my survivors an idea of the value.

Don

Still in process of pulling up track on my one mainline and yard, and rearranging all that, and part of my inner mainline to move everything to accommodate fitting in my Menards Cripple Creek 2 Bay Engine House so I have one bay access for each independent line into it. Major work in progress to fit that into a small layout but it will be worth it, it will be the focus building on my layout.

@mike g. posted:

Morning guys, first off, I want to thank you all for your thoughts about me. I am doing fine just whooped working with all this snow we have got and trying to help people why can't help themselves! It really sucks as there are people running around charging an arm and leg to help folks on fixed income. I do it for free as that is what my dad instilled in me! Here is what we have been dealing with and then on to some train stuff! LOL Mind you my deck railing is 6' tall and the snow pile is what was on the ground and the snow I had to take off the roof.

IMG_20220104_180306IMG_20220105_075017

Now on to some train stuff, last time my grandkids were here I was informed there were no people of color on my layout. My grandkids are part Hispanic, so I spent a few nights right before bed painting some new people of color so they would fit in. My bad!

IMG_20220101_092611

I also had an hour or so to add ground cover to the area I had to widen out for the overhang of my new steam engine. Here is what I have so far!

IMG_20220101_092900IMG_20220101_092909

The Kids and grandkids came for Christmas after the new year, and we had a great time. They gave me one of the best out of the blue gift for my train layout! I have been looking for a Greyhound bus but everyone I found was way out of my price range and low and behold that's what I got from the grandkids!

IMG_20220102_105208

I hope you are all well and having fun with your trains and layouts! Please be safe and it might be a couple days before I get back as I have a few more people to take care of. Now all we have to worry about for us is landslides as we live on top of a hill and if it slides it blocks the road!

Excellent that you have kindness in your heart to help others as you do!!!!!!!    Next , try getting the KIDS involved in this hobby. I'm doing this with 2 nephews , under 2 , and 8 yrs old . They love the trains and hopefully it will continue. Best wishes , and stay healthy .  R P

@SuperChief posted:

A few updates from the past few weeks. Saturday we ran trains. This is my 4 year old who loves trains right now more than anything. Trying to feed this as much as possible.

Over Christmas, we built a couple of flats and now need to install them. One has lights (video) the other still needs (pic). They also need some weathering.


IMG_2215

GREAT. The look on his face says it all.  Have fun and stay safe.  R P

Morning guys I hope everyone is doing well!

@Jim Van Every Jim, quite the undertaking for a horse & Mule car! But it looks like you have a great start! Wonderful looking tanker!

@FECRailroaddog What an outstanding transformation! I love the look of a real neighborhood garage!

@Richard Pardo Richard, thank you sir! I have tried to get the grandkids into the trains, they will come out watch them run, I even try to get them to run them their self's. But in 5 minutes they are back on their tablets! I guess if I had the Wi-Fi controller, they might be into it! LOL

Well guys my grand plan for grabbing a cold one and just running trains went out the window at a face pace yesterday! No train running today, I am really hopping for tomorrow!

Everyone have a great day and please have some fun with your layout and trains!

Richard Pardo...I agree, my nightmare is that the collection goes in the trash w/o anyone even being aware that it could have significant value.  As I said above, I am going to try Excel at first to get started and see how hard it is to do.  My experience with Excel is that one you have the columns set up, it can be fairly easy.  The nice thing about it is that you can put in the collectors value (for example) in dollars and then it can sum that column for you to give you totals.  That at least might give my survivors an idea of the value.

Don

Don, that is what I did with Excel.  It isn't very fancy, but it gives the value I paid for everything.  My wife has a general idea of value, but certainly not specifics.  It would definitely help her or my daughters!

don.mcerlean

Relative to the question about inventory. I too have been using Excel with columns for item number (manufacturer) and description, date purchased, price, from whom and any comments relative to repairs or where the item is located. I also use the same spreadsheet for the circuit assignment(s) for the transformers. Each item has a hyperlink to a photo of the items. The photos are organized by year of purchase with a separate folder for materials like light bulbs. It's a lot easier when the spreadsheet is updated when a purchase is made.

I have been continuing to paint the rails on the tinplate track.Rail Painting January 2022

Attachments

Images (1)
  • Rail Painting January 2022

don.mcerlean

Relative to the question about inventory. I too have been using Excel with columns for item number (manufacturer) and description, date purchased, price, from whom and any comments relative to repairs or where the item is located. I also use the same spreadsheet for the circuit assignment(s) for the transformers. Each item has a hyperlink to a photo of the items. The photos are organized by year of purchase with a separate folder for materials like light bulbs. It's a lot easier when the spreadsheet is updated when a purchase is made.

I have been continuing to paint the rails on the tinplate track.Rail Painting January 2022

Victor, I have been contemplating painting my rails.

It looks IMO to be quite a daunting task.  How do you paint your rails ? 🤔

I finished-up a postponed project ... to improve a MTH Country Church. I added these extra features:

* Cut and glued small pieces of "stained glass" acetate to all its gothic-style windows for a better, church-y look. I purchased the acetate sheet online from a vendor in the UK; several designs were available. I chose one without liturgical symbols or  images of saints for a "generic Protestant" look.

* Installed two add'l light bulbs to the interior in order to "light-up" the stained glass windows. The MTH factory-installed single light bulb was not enough illumination.  Now when the train room is darkened, the stained glass glows!

* Replaced the plastic cross atop the steeple with a fancier crucifix; a jewelry piece, actually.

* Installed a small transformer as a power supply for the sound board.

* Installed a sound board that plays the sound of a church bell and a music excerpt from "Here Comes the Bride."  I placed a small speaker in the attic space of the building for playback. I can activate the sound effects with a Lionel #90 control button mounted on the nearby fascia board.

* These add-ons make the church an accompaniment to a wedding in progress at the Pergola on the lawn outside, where the bride and groom, the dog of the groom, the wedding party, a priest and two nuns, and family/friends as the audience are present. A Caddy convertible is parked nearby with strings of tin cans attached to the rear bumper.

I know -- it's not a "railroad" accessory with RR-related sounds and motion. Nevertheless, it contributes to the acoustic environment of a scene, athough a visitor wouldn't recognize these improvements at first glance.

Mike Mottler     LCCA 12394


@Jeff, thank you for the kind words. I have not made a video, but it is on my to do list at some point. I feel like the layout is a little “unfinished” and needs a ton of scenery work done, but I have been more active with some recent projects.
I really enjoy running a point to point layout. I get to follow the train around and throw some switches here and there. And there are many switching opportunities for freight runs.

Andy

(tries inventorying collection) (gives up after 15 gi-raffe cars)  Nobody'd believe me anyway. 

Mitch

ONLY 15!

@Don McErlean- another idea is to create a photo library of your inventory. I like Victor's idea of adding links right on the spreadsheet.

I finished-up a postponed project ... to improve a MTH Country Church. I added these extra features:

I know -- it's not a "railroad" accessory with RR-related sounds and motion. Nevertheless, it contributes to the acoustic environment of a scene, athough a visitor wouldn't recognize these improvements at first glance.

Mike Mottler     LCCA 12394

Sounds like a nice project. Please share some pix when you can. The scenery makes the RR. I have an old sound board for a church, too bad I don't have room on the layout for one.

@FECRailroaddog- The gas station looks great. Nice customization work. Or is it kit bashing

Still waiting for my replacement fire kit. Shipping delays...... So to pass the time I bought a new diesel.

LIRR SW-8, MTH w/ PS2

2022-01-14 21.09.432022-01-14 21.18.13

Bob

Attachments

Images (2)
  • 2022-01-14 21.09.43
  • 2022-01-14 21.18.13

Dallas Joseph - RE Painting rails - I am using rustoleum paint in a can ("satin black" and "rusty metal primer") and brushing it on the entire rail. After letting the paint set a little, say 30 to 60 minutes, I pass a paper towel strip wrapped around a block of wood over the rail tops so the top surface can conduct electricity. I am using clean paint thinner to wet the paper towel (not too much thinner, just dip part of the strip in the thinner and wrap tightly around the wood block).  That keeps from removing too much paint. This tip was posted by someone else earlier - thank you very much. I found the best way was to paint the outside rails first with the red color, clean and let dry, then the center rail with the black paint since I could then touchup any excess red paint that got on the ties or turnout surfaces with the black at the same time.  It does take a while and is a little tedious but there is no need to hurry when one is retired!

Oh Mark , I don't know where you are getting this idea from.

I'm innocently just sitting in my layout area printing up meager little fast stick price stickers and trying to figure out where your little lady likes to get gift cards for her  shopping needs.

I'll never tell where she gets them! 

Dallas Joseph - RE Painting rails - I am using rustoleum paint in a can ("satin black" and "rusty metal primer") and brushing it on the entire rail. After letting the paint set a little, say 30 to 60 minutes, I pass a paper towel strip wrapped around a block of wood over the rail tops so the top surface can conduct electricity. I am using clean paint thinner to wet the paper towel (not too much thinner, just dip part of the strip in the thinner and wrap tightly around the wood block).  That keeps from removing too much paint. This tip was posted by someone else earlier - thank you very much. I found the best way was to paint the outside rails first with the red color, clean and let dry, then the center rail with the black paint since I could then touchup any excess red paint that got on the ties or turnout surfaces with the black at the same time.  It does take a while and is a little tedious but there is no need to hurry when one is retired!

Victor, My wife and I trying to get the hang of this retired thing.  I retired two years ago, but went through 2 orthopedic surgeries and recoveries, and am now starting to get around.  My wife just retired at the end of October.  Just yesterday, she told me she was glad to see me painting a kit so she wouldn't feel guilty doing some sewing. 

@Steamfan77 posted:


@Jeff, thank you for the kind words. I have not made a video, but it is on my to do list at some point. I feel like the layout is a little “unfinished” and needs a ton of scenery work done, but I have been more active with some recent projects.
I really enjoy running a point to point layout. I get to follow the train around and throw some switches here and there. And there are many switching opportunities for freight runs.

Andy

@Steamfan77  I understand what you are saying about having a lot of work to do before thinking the layout is "good enough" to post. I found the rough build history found on layout pages to be really interesting. Even on my own layout.  looking back I am surprised at the changes and the amount of progress. I cannot imagine anyone having a negative comment about an awesome work in progress - unless of course the video is taken in vertical format - that usually garners several comments. Best

On my next layout, I think I am going to end up with one or two point to point sections. One for a Shay hauling timber up and down. The other for an MTH European set with scale wheels unless I can manage to work in a full 2 rail scale line.

@Mark Boyce posted:

I'll never tell where she gets them! 

Victor, My wife and I trying to get the hang of this retired thing.  I retired two years ago, but went through 2 orthopedic surgeries and recoveries, and am now starting to get around.  My wife just retired at the end of October.  Just yesterday, she told me she was glad to see me painting a kit so she wouldn't feel guilty doing some sewing. 

Hi Mark

I have enjoyed reading your posts. Adapting to a retired lifestyle is not for the faint-hearted. It is so much different than spending 10+ hours per day in an professional career. Now that my wife has retired and just about recovered from a serious illness, we can do some traveling. The train stuff always interested me but until retirement and building a train room, there was no way to enjoy it. I did start purchasing a few years ago without any real idea what the layout would look like. For the most part, I was able to utilize the items purchased. I am doing more work with the church in an effort to be more useful. At age 72, I don't need any significant challenges. Hopefully you will or have fully recovered from the orthopedic issues and can enjoy the spousal company as well.

I revisited the painting of the bridge I built after I received some encouragement and direction from Dave (Luvindemtrains). I’m much happier with this version. I installed it this afternoon. Thank you again for your help Dave! I will add the ground cover behind the abutments and add the stream under the bridge. The areas of green simulate moss. There is a lot more on the prototype as this is a north facing surface, and sees no direct sunlight.
Andy

5DDABF85-CF00-455A-B804-3256580726BB87A0363F-F00C-4ACA-BB4F-A1494F8FAD7E71343233-4175-4EFB-B25F-7E3C63FEFA4BB39626B0-317B-4858-80FD-EBDDCEA9CB510773DCF2-5F64-4D1A-95E4-9A7395F2BBF2C11622FB-3A98-40AF-B8AD-3857488A37E4

Attachments

Images (6)
  • 5DDABF85-CF00-455A-B804-3256580726BB
  • 87A0363F-F00C-4ACA-BB4F-A1494F8FAD7E
  • 71343233-4175-4EFB-B25F-7E3C63FEFA4B
  • B39626B0-317B-4858-80FD-EBDDCEA9CB51
  • 0773DCF2-5F64-4D1A-95E4-9A7395F2BBF2
  • C11622FB-3A98-40AF-B8AD-3857488A37E4
Last edited by Steamfan77

Haven't posted since the Mesa was completed. With the Holidays and work, I spend what free time I have (or steal) working on the scenery. Although I check the posts often, forgot all about posting my own adventure. Here is where it is at today. Currently working on fencing to keep the cows off the tracks!

Attachments

Images (1)
  • Layout 1.15.22

Andy- that bridge is going to be beautiful when it's done (it already is). Love the LIRR S2

Dave- neat project, love the attention to detail.

Larry- A different view of your beautiful layout.

I had mentioned an issue with my Menards F7 derailing over a switch last week. I was able to fix it this afternoon by adding a shim under the tie closest to the left switch to lift up the outside rail of the exiting track. Seems to have solved the problem. I forgot to take a pic before I repaired the ballast.

2022-01-15 16.01.332022-01-15 16.01.39

I also ran my LIRR SW8 for a bit. Great engine, I'm very happy with it.

Bob

Attachments

Images (2)
  • 2022-01-15 16.01.33
  • 2022-01-15 16.01.39

Dallas Joseph - RE Painting rails - I am using rustoleum paint in a can ("satin black" and "rusty metal primer") and brushing it on the entire rail. After letting the paint set a little, say 30 to 60 minutes, I pass a paper towel strip wrapped around a block of wood over the rail tops so the top surface can conduct electricity. I am using clean paint thinner to wet the paper towel (not too much thinner, just dip part of the strip in the thinner and wrap tightly around the wood block).  That keeps from removing too much paint. This tip was posted by someone else earlier - thank you very much. I found the best way was to paint the outside rails first with the red color, clean and let dry, then the center rail with the black paint since I could then touchup any excess red paint that got on the ties or turnout surfaces with the black at the same time.  It does take a while and is a little tedious but there is no need to hurry when one is retired!

Thanks Victor.

Your method and material has given the track a really nice look sir.

Yup , no sense in getting in a hurry in retirement .  Sometimes I guess I forget that I don't have to satisfy a production number anymore.

Hi Mark

I have enjoyed reading your posts. Adapting to a retired lifestyle is not for the faint-hearted. It is so much different than spending 10+ hours per day in an professional career. Now that my wife has retired and just about recovered from a serious illness, we can do some traveling. The train stuff always interested me but until retirement and building a train room, there was no way to enjoy it. I did start purchasing a few years ago without any real idea what the layout would look like. For the most part, I was able to utilize the items purchased. I am doing more work with the church in an effort to be more useful. At age 72, I don't need any significant challenges. Hopefully you will or have fully recovered from the orthopedic issues and can enjoy the spousal company as well.

Thank you, Victor!  Travel.  We would like to, but my wife’s mum lives across the road and panics even if we go for part of the day.  Oh well, if we never do it, that’s okay.

Its been a fun discussion!  I stopped on the scenery until I get to Lowes or Home Depot for some extruded styrofoam.  In the meantime, I have built the shell of the Altoona Model Works Branchline Station.  I painted all the parts, but forgot to take a photograph.  I’ll catch you up on that between trips out with the snowblower.  😉

Great work by everyone !   Too many posts and photos to reply to each one.   Been busy tying up loose ends.  Got the chandeliers installed in Union Station, and installed more cross hatch window dividers in the large arch entry.

DSC07757

DSC07758DSC07759

Decided while the front center of the layout was under construction update with the Pennsy Block retaining wall upgrades, I should take the opportunity to install new Kadee Uncouplers on the Mine Run.   Managed to come up with a "set - up" that produces pretty reliable and repeatable  "delayed coupling" action which I want to have to spot hoppers under the Coal Tipples, so I figured just make up a bunch of assemblies that are completely super-glued together and ready to install on either Gargraves or Ross track sections that are fully ballasted.  This is working well, all I have to do is drill out the glued ballast, and install two flat head countersunk #6 steel screws which hold the bar magnet assemblies in place while the siliconized latex caulk applied to the top of the ties holds everything in alignment.   The small metal strips are from the Green File Folders that one uses in old school file cabinets to hold and organize manila folders.  It's perfect size stock for this job, dirt cheap and easy to cut to length.  DSC07760DSC07762DSC07761

Attachments

Images (6)
  • DSC07757
  • DSC07758
  • DSC07759
  • DSC07760
  • DSC07762
  • DSC07761

Guys and Gals,

The original poster that started this thread has been missing in action for quite some time.  For the past several months members have been emailing us asking why he isn't posting any longer.  Doing some research we found that he also is no longer a subscriber as well as not posting regularly.  We decided to try to contact him but after several tries with no response we came to the conclusion that something may have happened.  Frankly, with all that is going on health-wise in the world today, I was worried so I did some research and did not come up with any notices.  With that in mind we felt that this thread deserved to be authored by an active and well known and liked member.  During a discussion with Alex Malliae I brought up this topic and told him that we were considering trying to find someone to author the thread and then it occurred to me that Alex would be perfect for the job!  So ... I asked if he would be interested.  He responded in the affirmative but expressed that he did not want the OP to be upset with him nor anyone else on the forum for stepping up to the task of overseeing the thread.  With that said, I made one more attempt to communicate with the OP but to no avail so we have made Alex the author to this thread.  I realize some of you may not agree but we are not going to make everyone happy however we felt that a popular thread such as this deserved an author that was active on the forum and openly involved in the hobby.  We realize that there are other (and a lot smaller) threads that may have authors that are no longer with us but this thread is in a different league.  I certainly hope that you will agree with us that Alex is up to the task of supporting this thread with some of his posts and will lead the thread into many more years here on the forum.  All that we ask of you is to keep on topic and keep off topic discussion between yourselves via profile email.  This thread is intended for posts that show and tell what you have recently done on your layout.  Thanks for your support!

Alan, i thank you for making me the author of this awesome thread. I will chime in from time to time, I'm always extremely busy , but i make it my business to check in here at least 3 to 4 times per day, sometimes even more.

I'm honored to be a part of this forum !

Thanks, Alex

Chris, the additions to the station look great. Can we see a video of the uncouplers in action?

Alex, I’m with Bob, what are you up to on your layout?

Andy

Andy,  I shot some video about 11 months ago, when I started installing the 805 couplers and 809 uncouplers.   I'll shoot some more, but the 809 uncouplers,  in this video were the first ones I built this way.  Ordered a bunch of different Neodymium magnets, set up a test track on the bench, and then when I started getting repeatable results, I installed them in the yard.   If you go to the 2:45 time mark in the video, you can see how the "delayed" coupling works with this set up.   The 809 is mounted where the small piece of wood and blue masking tape is.

Make sure to check the resolution in the YouTube settings,  it was shot at 1080p which helps see what's going on.  Everytime I log on it defaults to a lower resolution playback.

https://www.youtube.com/watch?...GGTLLGd50&t=179s


Last edited by chris a

Hi Bob and Andy

unfortunately I had to stop progress on my layout for a two  of reasons. First is, I’m extremely busy with Lionel repairs and upgrades. Second is we pretty much have become empty nesters and our current home is way to large for us. We are still up in the air if we will buy a smaller home or not. Wherever we end up there will be a layout built.

The layout is still up and running , I use it to test my repairs and upgrades. It’s only benchwork , and track.  There’s no scenery. Sometime in the next week or two , I will post a video of the layout.

Thanks , Alex

@Alex M posted:

Hi Bob and Andy

unfortunately I had to stop progress on my layout for a two  of reasons. First is, I’m extremely busy with Lionel repairs and upgrades. Second is we pretty much have become empty nesters and our current home is way to large for us. We are still up in the air if we will buy a smaller home or not. Wherever we end up there will be a layout built.

The layout is still up and running , I use it to test my repairs and upgrades. It’s only benchwork , and track.  There’s no scenery. Sometime in the next week or two , I will post a video of the layout.

Thanks , Alex

No worries Alex. Life does get in the way from time to time. At least your work is train-centric.

Bob

Alex Malliae is the perfect choice to head up this continuing thread, he’s very knowledgeable on all aspects of this hobby, from repairing our trains, to professionally building a beautiful train layout, awesome choice. Thank you Alan for making this change on the largest thread on the OGR Forum. It just keeps getting better. Happy Railroading Everyone

@Alex M posted:

Alan, i thank you for making me the author of this awesome thread. I will chime in from time to time, I'm always extremely busy , but i make it my business to check in here at least 3 to 4 times per day, sometimes even more.

I'm honored to be a part of this forum !

Thanks, Alex

Alex,

I know that you will do a great job heading this epic thread (a never miss one for me - I check it out at least once a day and contribute when I can).

If you and the Mrs. decide to move, I wish you the best of luck house hunting - I hope that you'll find the perfect attic, basement or bonus room for the new rendition of The JADA Railroad.

Question; is JADA the initials of family members or is there another meaning?

Alan, Thank you for recognizing this thread as special and doing due diligence in trying to learn the OPs status.  I think Alex is a great choice!

Alex, thank you for accepting! 

Chris, the chandelier really looks great in the Union Station!

I did not get out to get Styrofoam for scenery, and will now wait until later in the week.  Here is my Altoona Branch Line Station painted ready for windows, doors, trim, and roof.  I saw a good photograph of the color scheme posted on Facebook by an HO Western Maryland Rwy modeler.  He is making his models white with red trim, but I think a light gray with burgundy trim looks more like the photographs.  I painted this one, but after looking at it, decided to make the next coat a lighter gray.  I actually like the results.  It looks like it has been painted in recent years, but not a fresh paint job like the HO modeler is doing.  I need to go back and lighten up the gray on my Atlas switch tower I built while recuperating last summer.

2022-01-16 16.18.47

One thing I am going to change on this building is the unpainted wall inside the bay window.  The solid wall piece makes for a strong structure, but I think I will cut out the section of wall below the window which will still be seen once the windows and roof are on.  I don't plan to add an interior now, but will make the roof removable like I did with the signal tower, so I can get in there if I need to.  I will mount an LED light on the center rafter while I am building now.

Attachments

Images (1)
  • 2022-01-16 16.18.47
@Alex M posted:

Hi Bob and Andy

unfortunately I had to stop progress on my layout for a two  of reasons. First is, I’m extremely busy with Lionel repairs and upgrades. Second is we pretty much have become empty nesters and our current home is way to large for us. We are still up in the air if we will buy a smaller home or not. Wherever we end up there will be a layout built.

The layout is still up and running , I use it to test my repairs and upgrades. It’s only benchwork , and track.  There’s no scenery. Sometime in the next week or two , I will post a video of the layout.

Thanks , Alex

Hi Alex. I’m in the same boat, but there is no need to stop working on your layout.  We became empty nesters last year and are still unsure what to do. Our house is rather large and multi level, which may not be too great on the knees as we advance in age and ultimately enter retirement. However, for now, it looks like we’ll be in a holding pattern and the empty bedrooms make great additional office/work rooms as well as additional space for a new train layout. In fact, when the better half told me I could use one of the empty bedrooms for another train layout, it pretty much sealed the deal for staying a little longer, LOL! Good luck on whatever you decide with your transition.

@chris a posted:

Chris, the additions to the station look great. Can we see a video of the uncouplers in action?

Alex, I’m with Bob, what are you up to on your layout?

Andy

Andy,  I shot some video about 11 months ago, when I started installing the 805 couplers and 809 uncouplers.   I'll shoot some more, but the 809 uncouplers,  in this video were the first ones I built this way.  Ordered a bunch of different Neodymium magnets, set up a test track on the bench, and then when I started getting repeatable results, I installed them in the yard.   If you go to the 2:45 time mark in the video, you can see how the "delayed" coupling works with this set up.   The 809 is mounted where the small piece of wood and blue masking tape is.

Make sure to check the resolution in the YouTube settings,  it was shot at 1080p which helps see what's going on.  Everytime I log on it defaults to a lower resolution playback.

https://www.youtube.com/watch?...GGTLLGd50&t=179s


Chris,

I remember your original posting about this and I watched your video when you originally posted it as well. Where exactly did you install the magnets? Also, does it matter where you install the uncouplers? My apologies if you already discussed this.

Dave

That is going to turn out really nice Mark. The cart is a great idea for a mobile work surface and storage area.

Thank you, Jay!  It is a necessity since I have no space for a workbench.  I sit on the rolling stool and can reach other tools and materials on shelves under the layout.  You would think we live in an apartment 😄  No it’s a small split entry, but we are storing a lot of our older daughter and son-in-law’s furniture and piano while they remodel a 110-year old house.

Add Reply

Post

OGR Publishing, Inc., 1310 Eastside Centre Ct, Suite 6, Mountain Home, AR 72653
800-980-OGRR (6477)
www.ogaugerr.com

×
×
×
×
Link copied to your clipboard.
×
×