Every model railroad question I ever had was better discussed and resolved on the OGR Forum than anywhere else. For that, and much more, I am grateful. I would like to pose a design question for all of you civil engineers that will go a very long way in helping me to resolve some thorny design issues. 


I have come to the conclusion that I must construct a double deck layout to achieve the design goals for the "New Munoz Lines," model railroad. The requirements I have set for myself are daunting, but the resolution will require two decks . . . . . . . Sigh


I would like to build very strong benchwork and it must be modular. The layout itself cannot be supported by any walls and will be approximately 16' x 30'.  It must be a free standing island design.  I would like to solicit suggestions from you about how to support the upper deck, install good lighting for the lower deck, and avoid view blocks on the lower deck that would obscure the enjoyment of the scenery and trains. I am thinking 2' x 4' vertical members as the backbone with strong vertical brackets installed on the 2' x 4's that would hold metal shelf supports. The upper deck would be supported by the metal shelf supports and the fascia for the upper deck would be sufficiently high to "hide" the lighting for the lower deck. If anyone can draw a sample module showing the benchwork design/support system, perhaps 3' x 5', I would be very grateful !! Many thanks.

Eliot "Scrapiron" Scher


Original Post

Replies sorted oldest to newest

Some general ideas for double-deck layout design:

* The upper shelf would be narrower than the lower shelf (over most of its length) so it doesn't excessively overshadow it.

* The lower shelf should not be so wide that it makes access to the upper shelf overly difficult.

* Supports for the upper shelf should preferably be minimum vertical depth for aesthetics and space efficiency.

* Clearance between the upper and lower shelves should strike a balance between good access and good viewing for both levels, and efficient use of space.

As part of your design process, I would suggest that you experiment with improvised shelves of different widths at different elevations, to determine basic dimensions that suit you. These dimensions will have a bearing on designing the support structure. 

What minimum radius are you aiming for in your 16' x 30' layout space? Would you anticipate having one duck-under/movable bridge section?

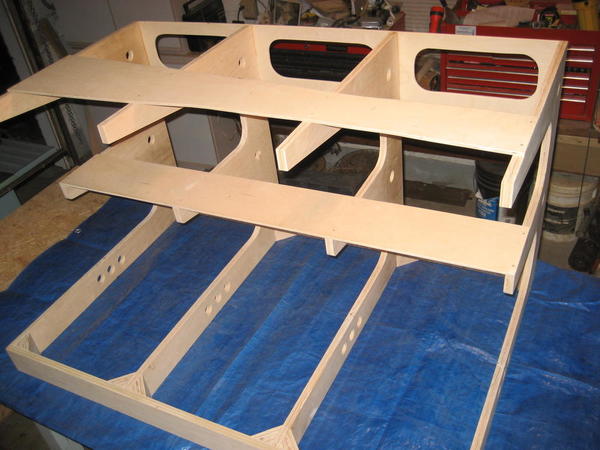
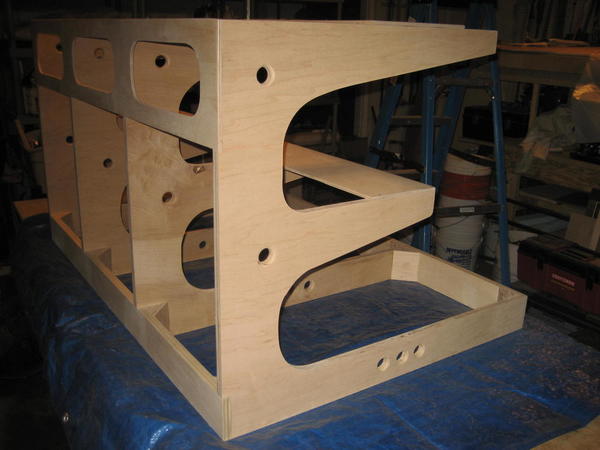
I"m not sure this is what you're looking for, but here's a few early construction pictures of how I did my levels. Basically I cut plywood cookie cutter style to fit the tracks and elevated them with 1X2's.  Some of the 1X2's will be covered by hillsides and any exposed supports will be blended in somehow or replaced with something fancier.  I secured the roadbed to the supports with 1 1/4" drywall screws.  Make sure, if you're double tracked, to place the screws between the the tracks in case you want to make changes.  That way you don't need to move track to replace or move a support.  Guess how I learned that!!  Since it is double tracked, the weight of the structure plus the curvature around the layout is all it needs to be secure.  After 14 years it hasn't moved unless I move it.  You can even put a drop of carpenter's glue under a few supports to help secure it.

For wiring I just ran the feeders below the main bench work to bus wires.  Again, the wiring will be behind scenery eventually.  Anywhere not covered by scenery I secured the wires behind a support and down through the bench work.  Hope this helps!

P2263562P2263563MTH BridgesNW Area

Attachments

Images (4)
  • P2263562
  • P2263563
  • MTH Bridges
  • NW Area

The most important factor in the design in my opinion is to plan for sufficient lighting.  I was not happy with strip leds.  Some of them began to dim after considerable use.  Ultimately, I reverted to nice track lights with leds in them.  I wish I had left a little more room.  Since you are planning for an island type, you will probably have more of the lower covered up than some of the posted plans, thus lighting is crucial.  Good luck. 

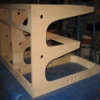
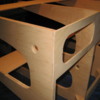
Actually all the parallel edges and inset recesses were cut on a table saw.  All the arm tips were cut on a chop saw.  All the curvatures  were cut with a Bosch jig saw then cleaned up with a spindle sander.  The recess notches were cut with a table saw and trimmed with a jig saw.

The angled lower edge of the 2nd and 3rd level fingers were cut with a chop saw.

This type of fabrication will produce a fair amount of scrap which will be needed for risers.

Something to consider:  Cut a notch out of the side or end of a 4 X  8 or a 5 X 9 table and inset your table saw and / or chop saw with the deck flush with the plywood.  Now you will now  have a nice cutting table for fun cuts.

Keith, I'll take that wager. 

At a show one time someone asked if I used a C.A.D.  My wife responded "No, he uses a T.O.M."

Anything I build can be done with very common big box tools.

Another way to incorporate a table saw with a table is to use a pair of 10' long mid height leg braces which would extend 2' off the end of a 8' long table at a height which a contractors table saw could be set to provide a flush take off surface.

I used this at the entrance of my shop where I could back up a vehicle and rip panels as I pulled them off the truck bed.  Makes for a convenient one man operation.

Last edited by Tom Tee

Emdalco10,  Thank you.

Check out earlier posts on John's build thread.  He shares all the details.

The decking is 12 mm Birch multi ply. the inner fascia is 3/8" Lauan bendable plywood, the outer fascia is 1/8" Birch.  Any thing can be used for the fascia mount.

Joinery depends on situation.

In this situation the basic bench work is Mianne kit build.

If you purchase your plywood where they have a shop they can rip if for you to supply 3 1/2" strips which are the building blocks of modules the way I build them.

Using a straight strip as a straight edge you can temporarily attach it or clamp it to your deck material and use it as a guide against which you can run your jig saw with a fresh sheet metal blade.

You can also attach a trammel to the jig saw to cut circles.

To cut gentle curves you can tack down some 1" X 1" white plastic trim for free flowing edges to use as a jig saw guide.

TT Arch bridge template

I use this method for long fantasy arch bridges

IMG_9076


Cherry Valley Copy [2) of CV%20Rework%20001[1]1 1/4" X 1/4" lath can be used as a jig saw guide

You will be able to make the above cosmetic curves with jig saw to make the 24' long gentle S curve shown on right, below.IMG_0165<<Cherry Valley Club 2007

Your only real limit is your imagination.

Attachments

Images (5)
  • TT Arch bridge template
  • IMG_9075
  • Cherry Valley    Copy (2) of CV%20Rework%20001[1]
  • IMG_0165
  • IMG_9076

Daryl, by and large I do not use screws.

18 ga brads over polyurathane adhesive or clamps over Titebond wood glue adhesives.  Brad the urathane adhesive between rough surfaces or sloppy fits and wood glue (sometimes with dowels) and clamps between flat surfaces.

If and when you do use screws consider to never ever use drywall screws for lumber construction.  Only use construction screws with wood.

Go slow with new 32 tooth sheet metal blades.  They will give you a clean cut.

Last edited by Tom Tee

Hi Tom

Lots of food for thought.

I’m building an O scale double deck layout and the first section was made up of assembled lengths of pine and is very heavy and was very slow to build.

I’m hoping your method might be both lighter and faster and of course, sectional making it easier to move if needed.

My only concern is obviously it’s more expensive though the store I buy my ply from custom cuts to any size and delivers.

Daryl

The level of skill and patience required to cut those supports without CNC is beyond the abilities of most ( they look perfect ). Your comment about drywall screws is spot on.  Drywall screws are for drywall only, they have a smaller shank with a larger head and are heat treated which make them very brittle.  Cabinet shops sell screws which are more ductile with a square head drive.  Another option is T25 construction screws which are also ductile and available at all big box stores. For wood glue I like titebond 3 ultimate because of the slow setup time so I don’t feel pressured to make the connection. For polyurethane I prefer locktite PL Max because it does not skin over like most other construction adhesives in a tube so working time is about 20 minutes, again no pressure to make the connection.

If you can swing an orbital sander to go along with your jig saw you would have all you need to make Tom's plywood brackets. The hardest part is laying out the cuts. Exterior deck screws work well and you might also check out pocket screws for use with plywood.

I think the hardest part is the steady hand to cut the lines straight in the first place!

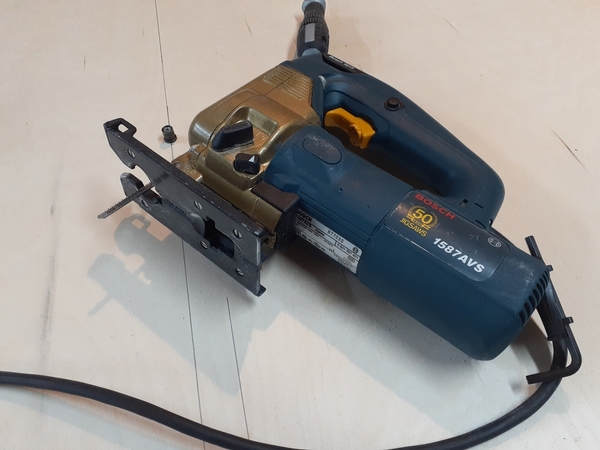
I have used several different jig saws and in that process I found the Bosch to allow plumb cuts and ease of following a line.  

However there you will have wonderful assistance with a table saw.  Portable ones can be had for a low number.  Chop saws will also provide excellent service for layout construction.  Entry level equipment can be had for a modest amount.  After construction put it on Craig's list.  Or even  find some on C.L.

Ryobi tools can last longer than they have any right to.

The trains and layouts you see on board here represent thousands of dollars, why try to put something together with less than helpful tools?   Bite the bullet and go for it.

It never made sense to me to be called out to help with a layout where there were trains kissing $10,000 in value on rickety train table literally nailed together, some with small finish nails. 

One layout I disassembled by hand, just pulling the pieces apart.

A good starter layout can be had with a fold up 5' X 9' ping pong table.  You may even find one on Craig's list.

Ed,

1587 AVS.  you can find  them used for half what I paid.

I would not get one of their entry level saws.

The newer ones have a quick change blade feature.  Folks lacking experience stumble with the blade change twist lever on my two 1587 saws.

I had a cabinet maker cue me in on the Bosch.  He allowed me to use his and there was no turning back.  Sweet tool.

Last edited by Tom Tee

Add Reply

Post
The Track Planning and Layout Design Forum is sponsored by

AN OGR FORUM CHARTER SPONSOR

OGR Publishing, Inc., 1310 Eastside Centre Ct, Suite 6, Mountain Home, AR 72653
800-980-OGRR (6477)
www.ogaugerr.com

×
×
×
×
Link copied to your clipboard.
×
×