


Excellent testimonial on the benefits of running trains to calm one down from daily life!


@Laker80 posted:
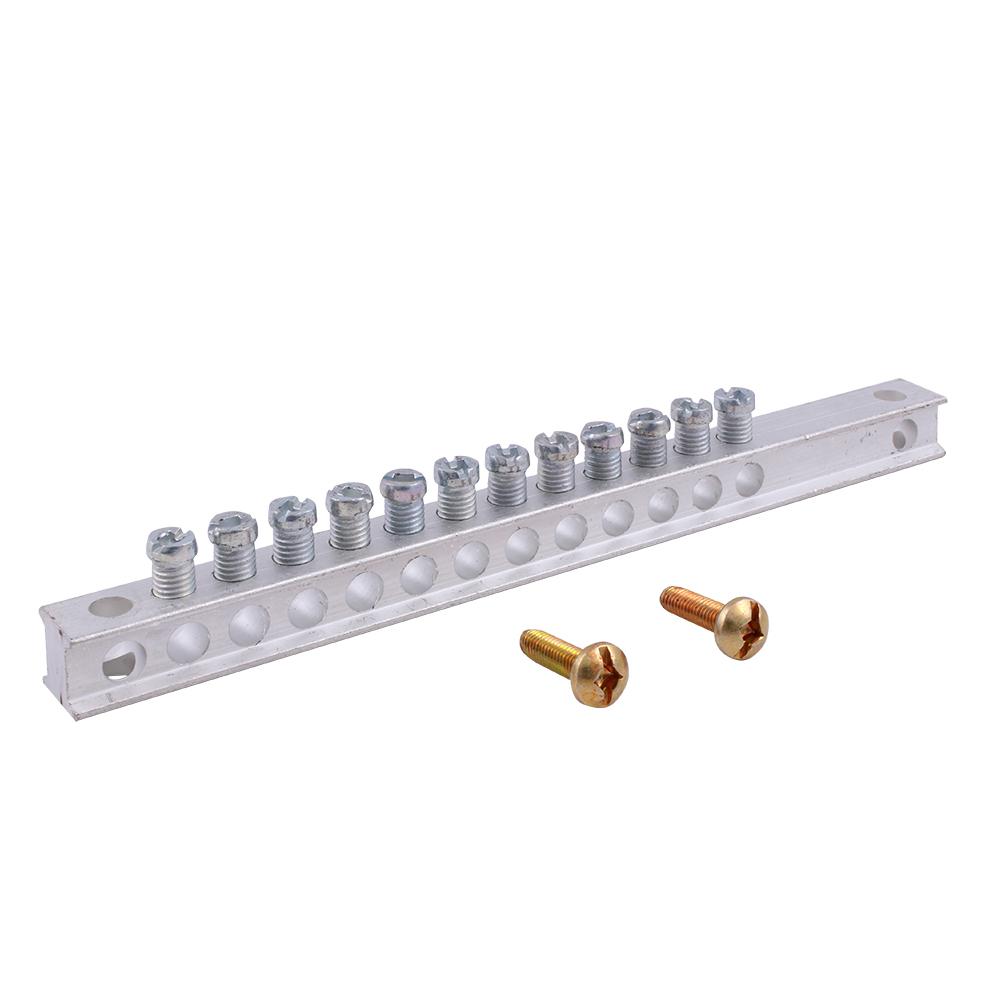
Forgive the electrical idiocy of this post but I want to wire up some accessories to run off the transformer. Can I hook the transformer up to this bar and then bring the wires for the buildings in on the other side or do I need something else?
I do exactly that all the time. The only pain is each set of screws is only one contact. Radio shack offers one with a jumper bar so that you can take two of these and make one all hot and the other all ground easily. In this case if you run hot to one end and ground to the other, then make jumpers for time you add a device, you will be just fine.
Mth makes a purpose built distribution block for hooking multiple accessories up, but I never bought one due to the price.
The MTH unit may be easier because you just run a pos and neg wire from your transformer/accessory power source to the red and black posts and then simply connect your accessories to each pair of screws, but they do cost more. They come in both 12 and 24 port versions, depending on how many accessories you plan on having (they can add up quickly).

Attachments
Images (1)

I bought the two of the MTH 24-port items Richie mentioned above. I will use one for each of my two Z4000 outputs. I won't use near that many ports, but may go over 12 and the price difference is very little.
Richie that actually looks nice. I have two bus bars by my transformer that I could replace with that and clean the wires up a bit.
I did it sloppy and just looped the wire around the terminals but I plan on getting a crimper and some connectors to clean it up a bit. I like having the terminal blocks too. I can fit the short lead wires from the building to the block and then run a lead from that back to the bus bars.
the main thing was it was kind of fun doing and odds are my son will know more about basic wiring by the time he’s six than I did at 26 ![]()
Hi Mark,
Are you already using the 14v or 10v accessory outputs on the Z4K for something else ?
@Richie C. posted:Hi Mark,
Are you already using the 14v or 10v accessory outputs on the Z4K for something else ?
Richie, I am not, but I think I will be using them for my DZ1000s and a few lights. I never used switch machines or lights before, and I have had trains since the late '60s. This is still a work in progress in my head. Probably why they kicked me out with an early retirement after 43 years with power and telecom utilities. ![]()
@Laker80 posted:Richie that actually looks nice. I have two bus bars by my transformer that I could replace with that and clean the wires up a bit.
I did it sloppy and just looped the wire around the terminals but I plan on getting a crimper and some connectors to clean it up a bit. I like having the terminal blocks too. I can fit the short lead wires from the building to the block and then run a lead from that back to the bus bars.
the main thing was it was kind of fun doing and odds are my son will know more about basic wiring by the time he’s six than I did at 26
IMHO, it can be a much cleaner looking installation, especially using red and blue U-shaped crimps. Also, if you get the 12 port and then run out of ports, rather than buy the more expensive 24 port, you can just get another cheaper 12 port and use one of the original 12 ports to jumper over to the red and black terminals on the new 12 port one. You lose a port, but it may be worthwhile.
@Mark Boyce posted:Richie, I am not, but I think I will be using them for my DZ1000s and a few lights. I never used switch machines or lights before, and I have had trains since the late '60s. This is still a work in progress in my head. Probably why they kicked me out with an early retirement after 43 years with power and telecom utilities.
Got it.
I always feel uneasy when someone is using a dual output, 400 W, $350.00 transformer to power a few lights and accessories, when something smaller and less expensive might work and those outputs can be used to supply track power. ![]()
I have no experience using switch machines either, but you might want to check the power requirements for those and add up how many you will be using and see if the 14v and/or 10v terminals will be sufficient for them. They are each rated at 3A, which isn't a lot, but some accessories operate in the milliamp range and it's unlikely that you would be using everything all at once, anyways.
I have a couple more yard accessories that I’ll run off the transformer but I’ll probably use the 4.5 volt LED power supply from Menards for the rest of my (future) buildings.
I am about to begin installation for an O gauge tubular track set up. It'll be on a shelf 7' off the ground. I am going to install a "fence" of upright metal rods and heavy fishing line in case of derailment-but will be running the train; an MTH Berkshire 2-8-4 w/ eight vintage passenger cars, SLOWLY.
Aside from other obvious concerns I may be overlooking (suggestions?);
I'm thinking of using 1/2" ply as the base to lay the track on.
Is is necessary to put down a cork between the track and board? My concern is not sound/noise but the well being of my locomotive longterm.
Thank you for your advice,
Chris (first timer)
Attachments
Images (2)


Richie, Good point about adding up watts for switch machines, lights, and accessories. You are right, many wouldn't operate at the same time, but it is easy to add one more item, and pop!--there goes the circuit breaker!
Laker80, the Menards supply sounds like a good choice for lights.
Chris, My shelf looks about like your first photograph. I didn't plan ahead enough to attach track to the shelves before hanging it on the walls. My ceiling is only 7' 4" high, so there isn't much head room to screw down the track. I laid down cork to quiet things a bit, but I think it helps the loose track from shifting from side to side. Make sure your plywood is wide enough in the corners. Mine isn't so each curve has about half the width of GarGraves track suspended in the air. I have seen some folks cut curves in their corner plywood, others cut triangles.
everyone is digging the freightsounds car
early Christmas gift for myself
the best thing about Covid has been starting this train table. We’ve had a lot of fun nights running the trains, hauling action figures, dolls, and matchbox cars, and just listening to the train chug around the loop.
I think I’m going to add another loop so we can run two trains easier. Probably just add a foot to the back of the two sections and make a larger version of the outside loop, nothing fancy but I think we’ll get more joy out of running two without having to pay attention to them. Although the Lionchief remotes do a pretty good job of holding speed and keeping distance for the most part... oh well... those are 2021 projects
Attachments
Videos (1)

Laker, watching the children was more fun than watching the trains. And that is coming from a guy who has loved trains for 6 decades!! It’s been a long time since we had children that young! There is always a positive experience with something bad. Another loop sounds great!
@Mark Boyce posted:Laker, watching the children was more fun than watching the trains. And that is coming from a guy who has loved trains for 6 decades!! It’s been a long time since we had children that young! There is always a positive experience with something bad. Another loop sounds great!
Yeah, seeing their reactions and enjoyment is what it’s all about. Plus, my son enjoys helping me when I add things. Simple things like handing me tools seems to really help him feel like he’s contributing which is awesome.
@Laker80 posted:Yeah, seeing their reactions and enjoyment is what it’s all about. Plus, my son enjoys helping me when I add things. Simple things like handing me tools seems to really help him feel like he’s contributing which is awesome.
Your son will not forget! My dad was never interested in trains, but I was always around when he was repairing something. He taught me the names of the tools, how to handle them, how to hand them to him safely, and I saw firsthand what they were used for. He always told me I was helping him so much handing him tools. Memories from 55, closer to 60 years ago. Now he is 90 and still in good health.


It looks great!
I love it! Keep building and enjoying the journey man.
I don't know anything about it but what you are doing is so cool! Wing it, make something up, drill some holes in a copper plate and screw it down then stamp #'s above each switch-done!
I got some blocks from amazon that look like these with a bigger gap between the posts that have a flat metal jumper that goes on one side to bridge the posts together and a snap on cover if thats what you want they were available in different sizes as to number of terminals. they work very well.
I’m going to try the Korber Flag Company building kit next. Then I’ll fill in my town with a couple woodland scenics buildings and try roads and some topography... pick, pick, pick away...
@Laker80 posted:
I use bus bars from Home Depot, use one bar for each transformer post. You can attach them underneath the layout with a couple of drywall screws and connect them to the transformer with one wire and run about a dozen wires off of it to whatever needs that power.
https://www.homedepot.com/p/GE...it-TGK12CP/202046232
Jerry
I used the same exact one you have pictured (from Home Depot). Hooked up these lights. Never worked with wires or electricity in my life! I did look online to see how to run the wires (from transformer to the thing then to the lights) and I'm the High Exalted Ruler of all idiots so you can do ti! See, I can't even spell "it" correctly!! Oh, and I also managed to re-wire two of the light towers with the help of my friends on this forum.
Enjoy!
Chris
Attachments
Images (1)

That picture of your son looking at the train tower is priceless.
I've been working on this in fits n starts for about 8 months. It all started with these beat up vintage train cars I found on Craigslist . . . then I was gone; hook line and sinker! Restored the beat up cars, bought the MTH Nickel Plate loco, built the shelves in my studio, laid the 1960's vintage track from my childhood (still had it in my garage - new I was saving it for something). There's more to do. It's always growing.
Chris
Attachments
Videos (1)

@Polentz posted:I've been working on this in fits n starts for about 8 months. It all started with these beat up vintage train cars I found on Craigslist . . . then I was gone; hook line and sinker! Restored the beat up cars, bought the MTH Nickel Plate loco, built the shelves in my studio, laid the 1960's vintage track from my childhood (still had it in my garage - new I was saving it for something). There's more to do. It's always growing.
Chris
Wow that looks fantastic! Beautiful locomotive and cars too.
@Polentz posted:That picture of your son looking at the train tower is priceless.
It's fun. It's OUR layout. I try to take any realistic idea he has and put it into the table. He picked most of the buildings and hangs around and helps me as I explain what we are doing if I'm wiring something in, cleaning the track, or just tinkering around.
@Foxer55 posted:This is great! I just started out myself within the last year or so and this site is great. In my case I want to use the platform as a Christmas centerpiece that goes up once a year and then goes back in the store room. I've found that using lighter wood works. I'm using a platform slightly smaller than 4 X 8 and I'm using 1/4 inch plywood built over a frame of 1 X 2s. I could actually build an incredibly strong platform with 1/4 plywood over a 1 X 2 frame that would be very light compared to a typical platform.
I feel like last year was a great time to start because of free time but an awful time to start because of the difficulty getting materials (benchwork and train related).
Foxer55, where did you purchase the stone print apron around your layout and is it paper or cloth? It looks great.
@Laker80 posted:It's fun. It's OUR layout. I try to take any realistic idea he has and put it into the table. He picked most of the buildings and hangs around and helps me as I explain what we are doing if I'm wiring something in, cleaning the track, or just tinkering around.
Laker 80, Very Well Played! Played is where we come from, right? give them a train they can learn from, an Idea they can Build on, a clean slate they can create a layout idea. "Teach a kid to play with trains and tis a seed planted to grow on"
Salute Laker 80... Kindred spirits


Attachments
Images (2)
@Polentz posted:I'm thinking of using 1/2" ply as the base to lay the track on.Is is necessary to put down a cork between the track and board? My concern is not sound/noise but the well being of my locomotive longterm.
You will NOT be disappointed if you add sound deadening! If you're using Fastrack, it will be VERY loud directly on plywood! I'd look into something like the foam underlayment used under wood floors, it will make a significant difference in the noise level. At a 7 foot level, the track noise would be right up "in your face".
So I’m thinking about making the jump and getting legacy. I figured I’d get it now before I build a new panel to mount my switches and throttle on. Is the 6-14295 legacy 990 the only component I’ll need? I have a fairly small set up with a gw180 power supply. Will I need anything other than the base legacy part?
I’d like to set it up and get a nice used O36 diesel in the near future.
The #990 command set (and a Legacy or TMCC engine) are all you need.
Make sure your home's electrical system is a grounded system and that you plug the command base's power supply into a grounded receptacle. Assemble the antenna and connect the command base's "one wire" to the outside rail(s) of the track and you are basically done.
Then it's just a matter of following the instructions to program your engine into the remote. There are a few steps that need to be followed but you'll get the hang of it.
There are several videos out there (including some by Lionel) that show how to set the unit up and program engines into and I'd suggest you watch them before installing your unit.
The #990 Legacy Command Set is all you need to add to a conventional layout to run TMCC/Legacy if that's what you're asking.
so we took some track from the layout and made a floor loop. My son is having a blast and it’s a lot easier for him to put things back on the track when it’s all on the ground. I going to tack it down to some plywood for him.
I have more free time in the winter and this will free me up to make the layout a little nicer and a little less kid friendly. I’m going to try adding some small elevation changes and I am going to work on adding a bus wire. Then maybe I’ll start adding ballast and other beautifications.
PS that Lionchief is an absolute tank! It’s almost toddler-proof.


Attachments
Images (2)
Add Reply
Sign In To Reply

