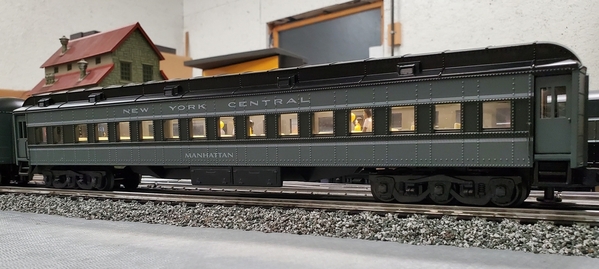
I replaced the K-Line incandescent "Streamlighting" with LED strips. This reduced the track current draw by 90%. I used 5m, 300 LED strips and Rod Stewart's constant-current regulators. Similar regulators from JW&A (Gunrunner John) or Royz Trains would work just as well.
Beginning the conversion procedure is the same for all cars:
1. Remove the plastic undercarriage detail piece.
2. Remove the two screws in the floor plate at each end of the car.
3. Remove the vestibule at the front end of the car. A screw in the top of the vestibule attaches it to a boss molded into the car's roof. A hole is provided in the vestibule floor, through which a screwdriver can be inserted to reach the vestibule screw.
4. Disconnect the red and black wires (to the Streamlighting board) from the block on the car floor. These wires connect to pins on the block and are readily lifted off the latter.
5. Remove the car floor and truck assembly.
6, Cut the red and black track power wires off (they will be reused) at the Streamlighting circuit board.
7, Remove and dispose of the Streamlighting circuit board.
(Here's the Streamlighting circuit board in a diner carbody. It is removed and not reused.)
(Removing the vestibule attachment screw![]() (The track power pin block on the coach floor
(The track power pin block on the coach floor![]()
For the 18" "Heavyweight" cars, the LED strip should be cut to 7 LED triplets (approximately 14") long per passenger car. It is best to connect the strip to the constant-current regulator before installing it in the car. Wires from the strip to the card (#26 AWG) should be at least 1½" long, but anything over 2½" is overkill. The red and black track power wires, just detached from the Streamlighting board, should also be connected to the regulator card. As the car's wires are #22 AWG and the connection holes in the regulator card are smaller, some strands need to be cut off before the wires will fit the regulator card holes.
(Strip & regulator ready for mounting![]()

The regulator card will be attached to the carbody roof, just inside the vestibule. Place the regulator card so that the side closest to its capacitor and regulator IC faces the inside of the car, with the opposite side of the card located at the two cylindrical posts that host the screws attaching the base plate to the body. In the case of the dining car, the regulator card is placed between the orange partition and the vestibule, with LED feed wires passing through the slot in the partition at the car ceiling (see second picture below). Attach the card to the carbody roof with double-sided tape or hot glue.
(Strip and regulator mounted in a coach carbody roof. The regulator card orientation is incorrect in this car.)
Once the regulator card is fixed in place, the LED strip can be attached to the car roof, with one side tight up against the screw bosses molded into the car roof, formerly used to hold the Streamlighting board. It's a good idea to tack the strip in place with hot glue, at roughly 4" intervals, if there is any doubt as to the holding ability of the strip's adhesive backing. Note the dollops of hot glue along the strip in the picture above.
(Strip installed in diner carbody roof. Note that the wires to the regulator pass under the orange partition at the front of the car.)
Setup of the regulator is simple. Connect an AC track power transformer to the red and white track power wires, with a multimeter inserted in one of the two circuit wires to measure AC current. Turn on power, set the transformer to 16-18V, and adjust the trimpot on the regulator board for approximately 35 mA AC current from the transformer to the constant-current regulator. This corresponds to 5 mA per LED triplet. The illumination intensity seems to be about right at this current level, but differing train room lighting situations and painting of car interior furnishings may necessite greater or lesser current settings.
Reassembly is essentially the opposite of disassembly:
1. Place the floor plate back on the carbody. Be sure that the cylindrical posts near the car center slip through the plastic floor, on each side. Attach the two 2 screws that hold the plate to the carbody at the rear end.
3. Reconnect the track power wires to the pins located atop the block at the front end of the car floor.
4. Place the front end vestibule, noting that its two tabs mount between the car base plate and the carbody posts. Secure the vestibule in place, then attach the two screws that hold the plate to the carbody at the front end.
5, Reinstall the plastic undercarriage detail piece.
(Front end of coach showing regulator (incorrect horizontal orientation) and track power wire connections, before vestibule reinstallation![]()
Here's a completed coach, on the rails:
Separate posts will cover the Baggage, RPO and Observation cars, which have unique issues.


