


- John, in case of a stubborn pin insertion I find that cleaning the initial cut end with a 1/16" drill bit hastens assembly.


I have a little awl and reamer that I open them up. I try to not get carried away so the pins still fit tight.
using a slip switch. . . I know you love wiring. The one I wired required two DZ- relays.
If you come up with a better wiring diagram .. please share!
Nope, I'm planning on two DZ relays for my two double slips, only way I see to power all the pieces. They're going to be the most wiring intensive part I suspect. With switching the powered rails and non-derailing on all the entry points, it'll be a busy section right under those two! ![]()

Attachments
Images (1)

Wait a minute!! Am I understanding correctly that these columns are DECORATIVE????
That drill trick to clean out the burrs inside a cut rail came just in time for me. I just finished laying all my track!! 🤪
I have used an awl and a sharp tapered punch tip but the drill is much quicker. Only go in half the length needed so there is still a good squeeze on the pins. I seem to have a batch of N.O.S. GG track that has tighter I.D. than my last batch.
Double slip wiring. Wired as if it was two switches.
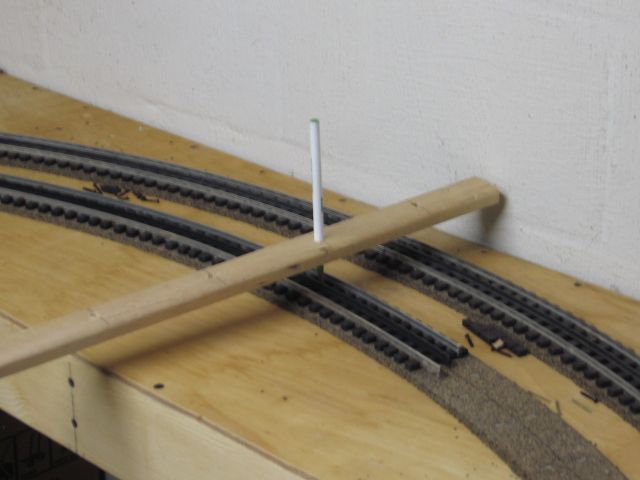
Edit / add: As you work a curve, with flex track, the three rails will be different lengths. Adjust/cut as needed.
@Mark Boyce posted:Wait a minute!! Am I understanding correctLt that these columns are DECORATIVE????
My question as well. Short work for a Sawzall ![]()
@Mark Boyce posted:Wait a minute!! Am I understanding correctLt that these columns are DECORATIVE????
That drill trick to clean out the burrs inside a cut rail came just in time for me. I just finished laying all my track!! 🤪
Mark:
I use a small Phillips screw driver that fits the hole in the rail.
As I explained earlier, even though the columns are decorative, removing them would require work on the wood and carpeted sections of the floor, neither of which I have extra material for. It just didn't seem worth it to rip them out when it's actually kinda' cool to have them to build around.
You could paint them green and call them beanstalks
I'm thinking more along the lines of giant redwoods. I just have to find someone that can paint convincing tree bark on them. I'm considering a road through the one nearest the walkway, that would be a cool touch. ![]()
A trick we used to do when selling homes with small rooms was to use a flat wall paint color called Ivory Linen. It is like slightly aged piano keys. Interior decorators used this for staging small room homes because the eye does not readily focused on that color. The walls became visually recessive. Used the same color in enamel for the wood trim.
However in reality I found the John's columns to be a non issue when working on the layout.
As I mentioned earlier, Johns RR has a lot of what I call eye candy. Any one descending into the train room is first greeted on the landing with a wall filled by scores of beautiful engines. Then after a 180 degree turn this overwhelming RR empire strikes you. There is this very interesting track arrangement mounted on the grey roadbed framed by meandering bench work which could appear as a growing organic entity expanding and embracing the columns in a very nicely finished rec room, it all becomes a stylistic complement. Once the third dimension of the second level is finished there will be an increase in definition. The ascending grade wrapping around the back side adds topography to the valley of the scene.
I guess a good question for John would be what kind of comments do visitors have? Both RR people and non RR people. Outsiders perspective may provide an interesting insight. We all may be making too much of the columns.
IMO, this is a project any one of us would love to have.
Well, I have to say, many of the rave reviews have been for the benchwork, and I can thank Tom for pushing me in that direction. A number of people have come over just to see how that was done and were planning on looking into enhancing their layout with curves like mine.
Hey John,
Put a bunk bed and a hotplate down there, and there will be no need for you to ever go upstairs again. :-)
You been talking to my wife? She keeps saying that! ![]()
So, how does one get A table built by these professionals?
John, I totally agree once you had the room with the columns all the hassle, mess, and attempt to close in the flooring and ceiling to look like the column wasn't there is not worth it even if you wanted to do it. I just never heard of decorative columns in a house. I guess I am just used to columns being in the way no matter what a person wants to use the room for. I'm afraid I am in the 'Crappy Basement Layout' league. I was never sure if the basement was crappy, the layout was crappy, or both. ![]()


@Mark Boyce posted:John, I totally agree once you had the room with the columns all the hassle, mess, and attempt to close in the flooring and ceiling to look like the column wasn't there is not worth it even if you wanted to do it.
My original layout plan stopped just short of the columns, so I figured they might support a backdrop of some kind. However, someone came in and talked me into an extension that went beyond the columns! ![]()
![]()
@Mark Boyce posted:I just never heard of decorative columns in a house. I guess I am just used to columns being in the way no matter what a person wants to use the room for.
I was a bit surprised to find they were decorative, I actually expected them to be functional. However, since this place is truss construction, the spans are not a problem, and the columns are totally hollow. I briefly considered hacking them off, but then decided against it. I'd also have to consider how stupid the half-columns would work without these still standing. Also, I just didn't want to have to project of removing them and cleaning up all the issues they left behind...
Considering the recent spike in lumber prices that seems like a rather small stack of money.![]()
Good point Tom, let me finish counting here...

Humm...sitting in that position...that pile of gold bricks...begs the question...did he just produce that pile?
I'll come out of retirement to build a layout for him!
If he's pxxxing gold bricks, I want to get to know him! ![]()
@Mark Boyce posted:I just never heard of decorative columns in a house. I guess I am just used to columns being in the way no matter what a person wants to use the room for.
Mark, a pair of columns either smooth or fluted are a common design demarcation between two different living ares in today's homes here in this area at least.
Usually we RRers have to contend with concrete filled 4" support columns. I have one in the middle of one set of whisker tracks.

Another column was used to mount light switches:
Attachments
Images (2)
Yes Tom, what you have is what I am used to. Half our basement level is garage, with a column like yours between the two car stalls. A lot of houses have columns in finished basements.
A little more progress yesterday. Got all the switches and track back in place on the lift-bridge and finally made the cuts and allowed the bridge to be free! Also laid the inner loop on this part of the table, but still have to add the passing siding, the switches are hanging in space now. Had to order another case of Gargraves track, I'm running out and still have quite a lot of track to lay. ![]() I counted up ordering exactly what I need, but since individual pieces cost more, it only costs about $30 to do the whole case and have some left over.
I counted up ordering exactly what I need, but since individual pieces cost more, it only costs about $30 to do the whole case and have some left over.
A view I haven't seen for a while, the liftbridge can be raised now! ![]()

All the track on the liftbridge has been nailed down (OK, screwed down) and cut to allow bridge operation.

The inside loop is now complete, just have to add the passing siding at the far end inside the 3rd track.

Attachments
Images (3)


well done John!
Nothing is so easy as the job you imagine in your head.... Oh, I can do THAT...
Really taking shape now, John.
Datza nice![]()
![]()
![]()
![]()
Every new section I find that the paper plan is only a reasonable facsimile of what actually gets put on the table. Funny how all the stuff on the paper never fits like you think when you start actually laying track. ![]() This is the first time I actually tried to use a layout program, and I have mixed feelings. On one hand, I did get what looked to be what I wanted on the paper, so that was the good side. However, when I start laying track, I found out that a lot of the stuff that looked good on the paper didn't exactly work out in real life. I've gotten somewhat more cautious about assuming that my paper plan is all going to work out. In the places where I was using O72 sectional track... it didn't really work out at times. When one of the first track loops deviates from the exact shape of the plan, the ripple effect is enormous, and you end up changing a lot of other stuff, if only a bit, to make everything come out as you planned.
This is the first time I actually tried to use a layout program, and I have mixed feelings. On one hand, I did get what looked to be what I wanted on the paper, so that was the good side. However, when I start laying track, I found out that a lot of the stuff that looked good on the paper didn't exactly work out in real life. I've gotten somewhat more cautious about assuming that my paper plan is all going to work out. In the places where I was using O72 sectional track... it didn't really work out at times. When one of the first track loops deviates from the exact shape of the plan, the ripple effect is enormous, and you end up changing a lot of other stuff, if only a bit, to make everything come out as you planned.
So, if I had any advice for someone doing a new layout using a track planning program, I'd say either follow the plan to the letter or plan on alterations all along the way. I think the "flexibility" of flex track is the Achilles Heel of of using a track planning program. The ability for the program to "smooth" the track makes it look better than it is. Also, it's easily possible to end up with sharper curves than you intended that look "fine" on paper until you try to put the track down.
This is the biggest layout I've tackled, so it's been a learning experience all along. The journey continues... ![]()
The track looks smooth, John! I found the same issues using software for a track plan for the first time. Since I only looped twice around, and left plenty of room between track for grades and scenic features, I didn't have much of the ripple effect, but I do know what you mean. My plan only called for flex track at key points where things didn't quite fit with sectional, and it all worked out. Of course my plan has only a fraction of the track yours has.
How do you like the Mianne lift bridge? What is the headroom clearance? I am assuming you only have it raised partially or you layout is higher than I thought.
Awesome work John. Very motivating for me to get my behind in gear!!!!
Joe Gozzo
Mark Boyce - I own a Mainne Lift gate and love it. One word of caution to note. My table is 36" (actual leg length to bottom of table) and my lift gate does NOT go up anywhere near high enough for my 6' tall body to walk under. My wife who is 5'6 has hit her head because she is just a tad too high. I installed Foam Pipe Wrap on the three beams on the gate as HEAD Protectors. The height of your table is going to dictate how high it can go up. The slides are the similar to those on cabinet drawers. Hence if they are 36" long and have to overlap by 8-10" you do not get 6'. If your table height is 48" you just added over a foot to the raised height. Overall I love the gate and would not trade it. My one complaint is the short cord used to go to the control. If your gate is wider than a foot you can't reach it from both sides. Hence why John and others installed switches. I also will be installing switches.
@Mark Boyce posted:How do you like the Mianne lift bridge? What is the headroom clearance? I am assuming you only have it raised partially or you layout is higher than I thought.
The top of the layout table is 41" and the clearance under the liftbridge is 62" from the ground. Yes, I have to duck a little, but I don't have to crawl!
@Trainlover160 posted:Awesome work John. Very motivating for me to get my behind in gear!!!!
Great, it's a race! ![]()
John! That’s great news. Glad you’re getting a place to play.
Marty, I just had to stop spending all my time on repairs and upgrades and take a little time to do work on the layout. Still quite a ways from running trains, there will be a lot of wiring coming next!
Curtis and John, I thought it was low. I agree it is better than a duck under or crawl under. It could be what John Armstrong called a nod under. Yes, switches on both side are a must. Thank you!
John, You have discovered the short coming of track planing programs. Ya done good quite soon! It took me several layouts to walk away from them. They are OK for a basic island multi looper but industrious efforts bring out their limitations. Using spiral easements on all curves of any degree needs hands on touch, templates and trammels for large intricate pikes where there really is no room for error which can Domino the right of ways.
@Tom Tee posted:John, You have discovered the short coming of track planing programs. Ya done good quite soon! It took me several layouts to walk away from them.
Yep, being somewhat of a computer geek and using my computer for many tasks, this looked like a natural. It was actually very beneficial in any case, just not the do-all solution I was expecting. Actually, my Fastrack plans usually worked out right on the money, because every piece was a fixed size and curve. Throw in all the variables of flex track and the plan goes out the window.
I realized after the first track sections were laid that I was going to be doing a lot by the seat of the pants. I'm sure I don't have near the fine track work that you produce, but I can see that it's very difficult to capture all the little nuances of track work exactly in the program without a ton of work. I'd rather put that work into actually getting the track down.
I'm still stunned that from what I started with for my original plan how this mushroomed into what I have now. I probably have twice the track and switches that I ever expected to use.
Add Reply
Sign In To Reply
