George, I see two ways of looking at it. Research and plan everything ahead of time, adjusting as you come up with new information or things don’t fit, or planning and then just going with it no matter what new information arises. I know you won’t be happy with the second way.
I propose you cheat. The mills here had the charging side raised but they had an inclined track going to it. I didn't have the real estate for that on my layout. So I'm taking a page out of Valley Mould's book. Here's my solution:
http://www.stahlseite.de/eec10.htm
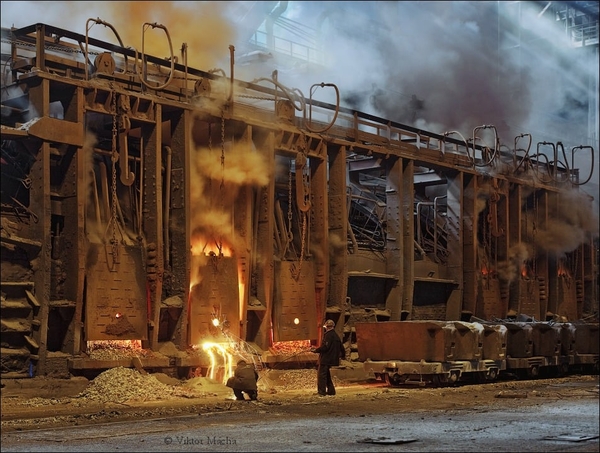
This picture shows a ladle pit. The hot metal car can't pour into a ladle without the height difference. So they dug pits in the ground, held the ladle in the pit with crane, and poured the iron from the hot metal car in the ladle. Then off to fill castings.
So I say raise your charging side as it should be. But the charging floor won't run from the furnace to the wall. You'll leave a cut for the hot metal cars to come in on the ground level (and stay there) and you'll have a ladle pit next to the tracks towards the end of the building that the rails enter so you can empty your hot metal cars into the ladle and then from the ladle, into the open hearth. It's not a perfect solution but it is a logical one.
It looks like a very similar setup was used at Sheet and Tubes Campbell Works here. They had the hot metal mixer set away from the open furnace on the ground level but still under the same crane runway. Maps suggest the tracks went into the mixer building and ladles were filled just like in the above photo and then poured into the mixer before the open hearth called for liquid iron. Scrap for charging would also have been lifted by crane. I don't have photos of this yet. But the maps support my guess as to how they did it.
Hopefully this written explanation makes sense. If not, I can draw something on paper tomorrow.
Updated 12/3/2021:
I've had to revisit the idea and I am not going to make the changes in the previous post. Doing so will take me further away from the prototype. I think it's more important to accept the minor inconsistency with the terrain around the Open Hearth instead of changing the entire landscape to something a bit more contrived and inaccurate.
George
George, man, it's really coming along nice. That open hearth is gonna be something special. Talking about switchers, we did buy (unfortunately all MTH which we'll run in conv mode), the green version and got a black and yellow one, but it was non powered and on a flat car. So, we purchased a Wheeling Pitt powered switcher and swapped shells amd put the WP switcher on the flat car. when i get down to GA, I'll send you some pics.
I was watching that cool 80's video. Geez that brought back memories - like i was right there again. The smells came rushing back too. I see the quality control lab on your dwg. Spent 12 yrs there before moving into operations at the hot mill.
When u finish this layout, you get the guys over and i'll bring the bourbon and we'll christen her properly and tell some WSX stories.
Covid was a setback. This Christmas drop ceiling, track lighting, vinyl floor, ceiling fan, and hopefully start the 2 false walls. Hoping to start table construction in the spring.
Keep plugging George. She's a beauty
Tom
Tom, thank you very much for your kind words. I think the christening is a great idea - once we've driven the golden spike.
I know what you mean about the smells. That mixture of HCl and palm oil (used to retard rust on coil ends) never truly gets out of your nostrils or your memory, does it?
I'm really looking forward to tackling that Quality Control building. What an imposing, eccentric, and ornate building in the middle of that massive, bare-bones steel mill! Art-deco fittings, glass-block, and brick - unique! Unfortunately, that is waaay down the "to-do" list.
Might be time for an update on the "To-Do" list and, of course, the end-of-year summary for the Panhandle is coming up.
George
Mark and Bill - thank you so much for weighing in on proposed changes. It is a great deal of help to have folks react and kick back ideas to me. Ultimately, I am much happier with the original direction of the build.
George
Can’t wait to see this and other features George. Problem solving comes with the territory for all of us, but I like your process, well reasoned and thought out. The suggestions were sound too. Great input from the forum members as always.
Andy
@Steamfan77 posted:Can’t wait to see this and other features George. Problem solving comes with the territory for all of us, but I like your process, well reasoned and thought out. The suggestions were sound too. Great input from the forum members as always.
Andy
Most kind, Andy.
George
Updated 12/4/2021 (PM):
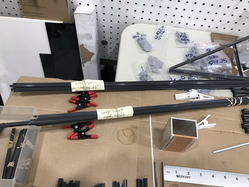
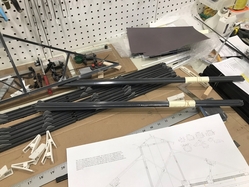
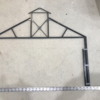
I cut a lot of ABS structural pieces today! As you recall, I have one complete Open Hearth roof truss and 9 in process. I started cutting pieces for those trusses. Here's what I got done:
- Main roof diagonal supports (4 per truss; 36 total). These are Plastruct 90005 1/4" ABS angle shapes. They were a bit tricky as they had to be cut at a 30 degree angle in 4 different directions. Yes, that's hard to visualize and even harder to do without creating scrap.

- Uprights to support the roof diagonals (4 per truss; 36 total). These are also Plastruct 90005 1/4" ABS angle shapes. Fortunately, these were cut at 90 degrees - nothing tricky about the cut.
- Ventilator diagonals (Plastruct 1/8" ABS angles); these were straight 90 degree cuts. I made 24 of them.
With a build this complex, I find it useful to rubber band and label parts.
More when I know it. 
George
Attachments
Updated 12/6/2021:
More cutting, followed by more cutting, and then some more cutting of ABS and styrene. ![]()
George
Updated 12/7/2021:
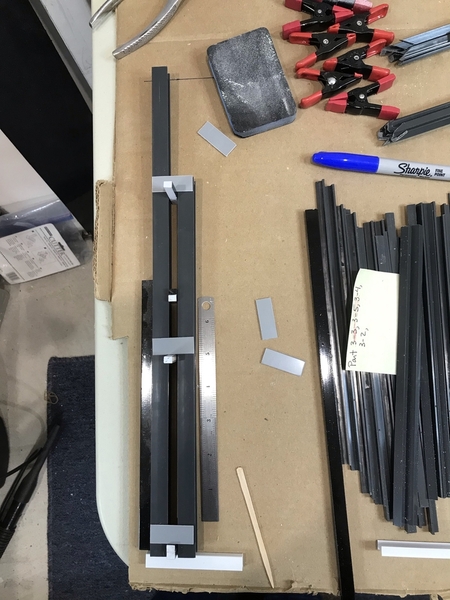
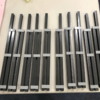
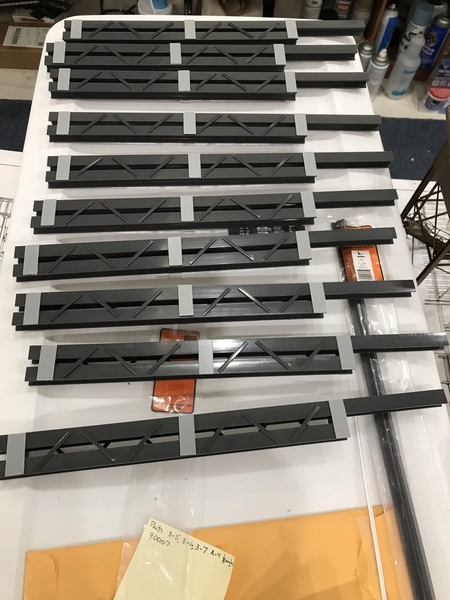
Today I cut some of the very large "H" columns that will be used to support the outer walls of the Open Hearth. This is a photo of the jig I am modifying to make assembly easier. Each support will have 2 "H" columns joined by 6 rectangular gussets. The outer column is 15" (60 s') high. The inner column is 11.25" (45 s') tall and will support a crane rail.
There will be 11 such outer supports in the building.
More when I know it. 
George
Attachments
Updated 12/11/2021:
I have finished 10 of the 11 outer column assemblies for the Open Hearth (pictured below). I ran out of gussets.
Each outer "H" column is 15" (60 s') tall while the inner "H" column is 11.25" (45 s') high. The top of inner "H" column will support a crane rail.
More when I know it. 
George
Attachments
Updated 12/12/2021:
I had the columns and one of the roof trusses so I thought I'd do a test fit and take a photo.
I must say that even I am surprised at how large this building will be when completed. ![]()
George
Attachments
That is going to be a large building for sure!
@Mark Boyce posted:That is going to be a large building for sure!
Yes. I think I've lost my mind. ![]()
George
Yikes!!
@G3750 posted:Yes. I think I've lost my mind.
George
😆😆
Updated 12/14/2021:
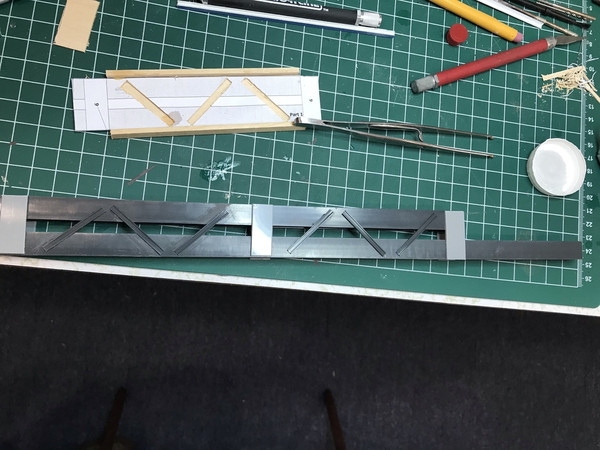
Today I have been working on adding structural detail to the outer column assemblies. Here's my first effort along with a jig I designed for the task.
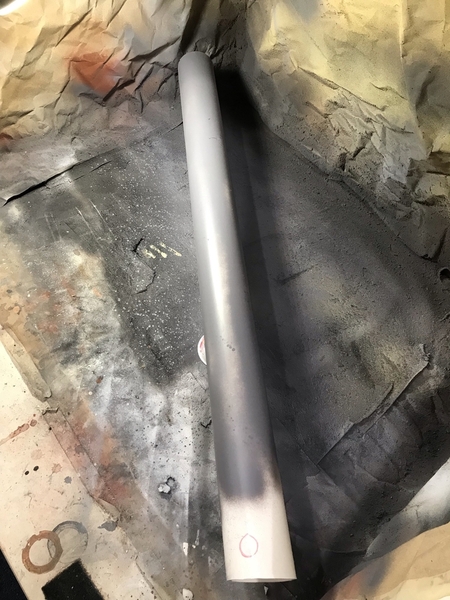
I have also been painting the Open Hearth's smokestacks. Here's one in the paint booth. The red circle indicates the hole for the smoke pipe (plastic tubing).
More when I know it. 
George
Attachments
Exciting times! The progress is looking good.
I can see you are getting a lot done George! Looks good!
Updated 12/18/2021:
All 10 column assemblies have received their cross-brace "lace-work" on both sides. I still have one outer column assembly waiting on gussets. It might be time to turn my attention back to finishing the roof trusses (for as long as I have parts). I'm waiting on some parts for that assembly as well.
More when I know it. 
George
Attachments
@G3750 posted:Updated 12/18/2021:
All 10 column assemblies have received their cross-brace "lace-work" on both sides.
Man these are beautiful. I was planning on just doing large columns for my structure but I love the way these look. I might have to go back to the drawing board!
@BillYo414 posted:Man these are beautiful. I was planning on just doing large columns for my structure but I love the way these look. I might have to go back to the drawing board!
Thank you, Bill!
George
George, I agree with Bill they look great!! You are raising Bill's standards I see. ![]()
Looking good George, coming along nicely.
Andy
I find myself blocked on several projects for a lack of parts, so I thought I'd take the opportunity to do a sort of "round-up status" report. As usual, I am attacking (or at least dreaming) on many fronts. Currently in play:
- Weirton Steel Open Hearth is under construction. I have a bunch of Plastruct on order and very little in hand. I am looking into the details of the oven construction and planning its dimensions. The smoke generator for the stacks is here and operational. I’ve completed the proof of concept with it and the ventilation system. The smokestacks and their lights are here; I still need the safety cages and ladders to proceed. Smokestacks are in the process of being painted. The Arduino and some of the components for controlling the mill’s operation are here. I am exploring the electrical connection of components and researching the programming of the simulation. This is a huge project.

- “H” line pole fixture has been completed. Eventually, you may read of this project in print. In the meantime, I am having it merit judged at the January NMRA division meeting (never done that before - don't know what to expect).
- Steubenville PRR Station: I just placed a large order for detail parts with Scale City Designs. One of the parts is the PRR umbrella style platform roof support. Some information from a Panhandle modeler friend revealed that the supports were 18' 8" apart. I am going to use a 20' separation between supports. Even so, my 65" (260 s') long platform will require 14 supports. By the way, the prototype platform was much longer. The windows for this building were 3D printed earlier this year. I hope to start this project in spring of next year.
- Highland & Superior: All 6 of the HO houses for this area behind and above the Steubenville station are complete. I still need to figure out the hillside, street, and tunnel next to the station before I get that going. But I want to start that early in 2022.

It's always good to have several projects in the works! You never know when one or more projects will stall for one reason or another.
@Mark Boyce posted:It's always good to have several projects in the works! You never know when one or more projects will stall for one reason or another.
Which is exactly what I'm experiencing at the moment. ![]()
George
Sounds like a solid backlog. Do you get to find out the opinions the day of the NMRA meet? or does that take some time?
George,
Can't wait to see your open hearth. I also have one planned for my layout on a 3X7.5 foot peninsula. Luckily the individual furnaces are small in size compared to the actual building, about 12 feet by 28-30 feet long . I'm thinking that I have enough room for 5-7?? Furnaces on the charging floor.
@BillYo414 posted:Sounds like a solid backlog. Do you get to find out the opinions the day of the NMRA meet? or does that take some time?
I suppose I'll be told immediately, but I don't know for sure.
George
@third rail posted:George,
Can't wait to see your open hearth. I also have one planned for my layout on a 3X7.5 foot peninsula. Luckily the individual furnaces are small in size compared to the actual building, about 12 feet by 28-30 feet long . I'm thinking that I have enough room for 5-7?? Furnaces on the charging floor.
Wow, 5-7??? Just to give you an idea, I originally planned for 2 furnaces in my 30" x 50" main building. The Weirton Steel furnaces are pretty big - 7 doors for each furnace on charging floor. The gas/air pipes or tunnels to the stacks are not included in that size. But based on what you're doing, I am going to take another look at the spacing.
George
George,
if you google "open hearth furnace " and look at the books category, you will find a number of early 20th century periodicals that are free to peruse or download. They contain a lot of technical information and the steel industry, but most is easy reading. Takes a bit of digging but you can find info on the dimensions of the furnaces and support structures.
@third rail posted:George,
if you google "open hearth furnace " and look at the books category, you will find a number of early 20th century periodicals that are free to peruse or download. They contain a lot of technical information and the steel industry, but most is easy reading. Takes a bit of digging but you can find info on the dimensions of the furnaces and support structures.
Thanks Bill. Apparently, I just haven't hit the right one. I have been looking at my father's 1957 edition of "The Making, Shaping, and Treating of Steel", various YouTube videos, and other documents. As to references, I have specific photographs of the Weirton Steel Open Hearth and have been estimating dimensions from that.
Anyway, now that I have started to focus on the oven itself (my attention prior has been on the exterior dimensions and smokestacks, I expect we will get this figured out.
George
George,
Thanks for the updates. I really like how you plan out your projects and keep us updated. Glad to hear all of the homes are done for the Highland/Superior project. I know the construction of the steel mill comes with a lot of research and time.
Dave
@luvindemtrains posted:George,
Thanks for the updates. I really like how you plan out your projects and keep us updated. Glad to hear all of the homes are done for the Highland/Superior project. I know the construction of the steel mill comes with a lot of research and time.
Dave
Thank you, Dave. The planning is a holdover from my professional life as a project manager (for the last 20+ years).
I tend to move from project to project, attempting to make some forward progress. Eventually, I get blocked by something (like a lack of skills, unclear thinking or a shortage of parts or material) and switch to another project. The 3 HO Albion catalog houses for Highland & Superior are a good example. They were pretty difficult laser-cut wood kits. Fortunately, a massively skilled friend (The Shadow) who is currently without a layout offered to build them and did a spectacular job. When the 3rd house arrives, we will look at constructing the street, hillside, Panhandle tunnel, and other scenic effects. The whole scenic area is roughly 10' x 2' and might require additional bench work be built before I can address it.
Right now, the Open Hearth is taking up a fair amount of time. I've cut styrene and ABS for as many roof truss and column assemblies as possible. At present, we are blocked for a lack of Plastruct (on order). In the meantime, I am planning the size and positions of the ovens (a folded U shape) within the mill. Thanks to third rail, I am seriously considering 4 ovens instead of 2. There's some selective compression involved (5 oven doors vs 7), but the added smokestacks justify the modification, I think.
George
Updated 1/1/2022:
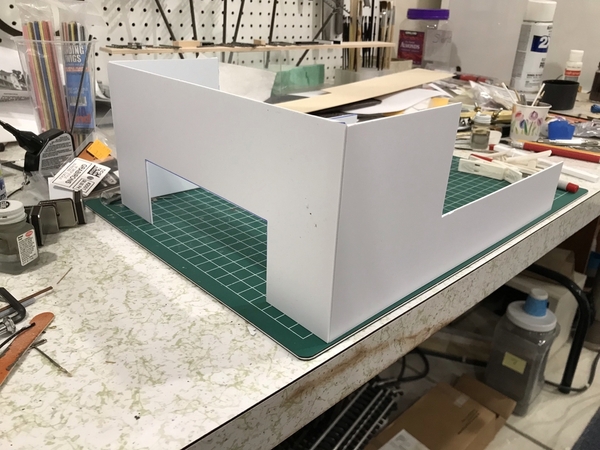
Work continues on my Open Hearth mill. I finally decided on dimensions for the ovens and cut 2 sides and an end. Some of my Plastruct order came in and I picked enough styrene sheet and ABS 1/8" angle to continue.
In this first photo, I have glued Plastruct rod for use as a corner brace.
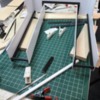
This photo shows the back (Pouring) side of the oven and the two sides that will extend under the Charging Floor.
More when I know it. 
George
Attachments
Updated 1/3/2022:
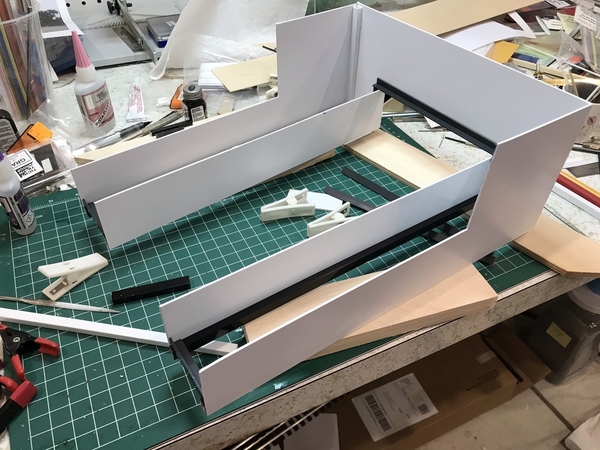
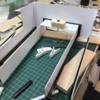
Work continues on the Open Hearth furnace, specifically the oven itself. Below, the view is towards the front of the oven. The 2 long sections will be below the Charging Floor. The section above them will receive a front wall and roof with 5 doors. I am making use of some surplus Plastruct rods (painted) as stiffeners for the 0.060" styrene walls.
Here's another view showing a bit more of the bracing.
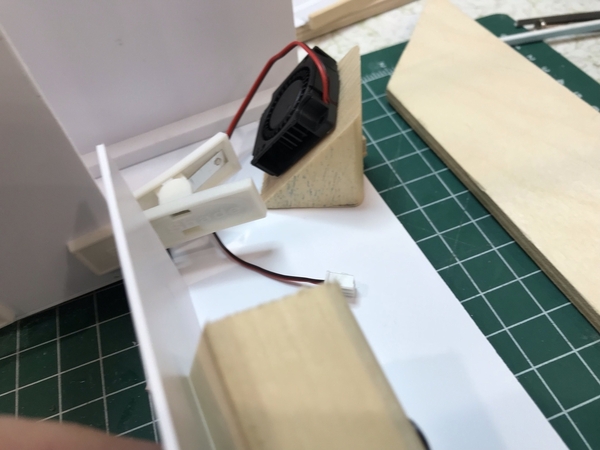
This photo shows the floor of the "hearth" itself. The wood block contains a Seuthe smoke unit (12 VDC).
Finally, here is a shot of the small fan that will pull air in from one of the long arms (a "checker" or regenerative furnace) and blow it out towards the front of the oven. There will be 2 such fans.
More when I know it. 
George
Attachments
That's pretty awesome that you're building the entire furnace! I didn't realize that was the plan. It's very impressive. I was planning to only model what's visible from the outside, so to speak.
So that fan just direct the smoke? Where is it directing the smoke?
@BillYo414 posted:That's pretty awesome that you're building the entire furnace! I didn't realize that was the plan. It's very impressive. I was planning to only model what's visible from the outside, so to speak.
So that fan just direct the smoke? Where is it directing the smoke?
Thank you. The plan is to have the fan direct the smoke here...
We'll see how well I pull it off.
George


