Here are some photos and progress updates on my Fastrack shelf layout. I use a wheelchair, so everything has been planned ahead of time to enable me to reach as much as possible without barriers. Thus, I’m literally working from the top down and the outside in. The whole layout—from concept to creation—is a series of calculated compromises.

I can’t take credit for the big stuff: I hired the construction work and paneling, and am assisted by an individual who used to build layouts for clients in the Southeast (before retiring). Bobby Allen lives near me, so I was able to lure him into helping for a reasonable fee.

Last year, I added a 28 x 10 addition to my detached garage for the train room.  The upper walls were finished with beadboard to give the room an old-time train terminal atmosphere. Later, the upper walls can display some railroad memorabilia. I grew up in Central PA less than an hour from Altoona, so I'm partial to the PRR.

The background mural was formed with Homasote panels (aka Masonite) with radiused corners. I had never attempted a such a large painting project, but I watched a couple of YouTube how-to videos, then took a whack at it. Using acrylics and inexpensive brushes, I dabbed thousands of “trees” to create mountain slopes.  After a short but steep learning curve, the work went quickly. The “clouds” were created with an airbrush. Again, YouTube proved invaluable.

I had a stack of 1x6 primed lumber left over from another project, so it was ripped lengthwise into 1x3s to build the benchwork. This size proved more than adequate for strength. The framing sits at a height of 32 inches off the floor and is anchored directly into the wall studs. The cantilever design gives me almost uninterrupted space underneath the benchwork for my legs. It’s extremely sturdy, with all joints glued and screwed together.

Because of my limited ability to reach, the benchwork is only 26 inches deep. The exception is an area that extends out to hold a Millhouse River Studios 24” turntable (already delivered and ready to set up). Due to the limited amount of space, I’ll probably have to scratchbuild or kitbash a small roundhouse.

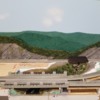
In addition to painting the backdrop, I created a long 3D “flat” along the rear wall to represent a railroad cut through a hillside. It’s made of polystyrene foam strips cut with a hot knife, then glued to panels of Homasote screwed to the wall on ½ inch spacers. The “excavated cut” is 21 feet long (about 1,000 scale feet) and more than 14 inches high, yet it’s only one and a half inches thick. The foam was covered with plaster mixed to the consistency of a smoothie, then sprayed with washes of acrylic paint. My goal was to work fast and not worry too much about fine detail or even geological accuracy. Its sole purpose is to create a little dimensional depth without sacrificing space, just like any backdrop scene. I used rattle cans of red oxide primer and gray primer to give the “rock” some tone, then dry-brushed the high spots lightly with white paint. Spray adhesive was used for all clump foliage and vegetation. The project went much faster than I thought it would, with a total cost of under $200 for all materials.

Currently, ½-inch plywood has been tacked down with a few screws so that the track can be mocked up. Later some of the elevated areas will be built over open grid benchwork.

That’s it for now--more updates to follow as work progresses.

Attachments

Images (7)
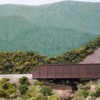
  • 1: The basic backdrop in place. A through-truss bridge (liftout) will span the entryway.
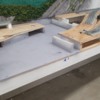
  • 2: One corner of the layout will have an integrated workbench--mocked up temporarily.
  • 3: Polystyrene strips form the "excavated cut" backdrop
  • 4: Early mockup of Fastrack
  • 5: Two coats of plaster and washes of black acrylic--voila, rock!
  • 6: The end result, with Woodland Scenics clump foliage and coarse turf applied to adhesive spray.
  • 7: 1000 scale feet of foam "rock"
Last edited by BruceG
Original Post

Replies sorted oldest to newest

What a great start!  And the rock formations are super.  Looking forward to following your progress.

Suggestion:  when you update this thread with new info and photos, edit the thread's title to include the date of the update.  Doing alerts readers that new material has been posted by you.

Thanks for the info and photos.

Last edited by Pingman

Thank you for all of the supportive feedback! To answer Rob Johnson's question, I do plan to feature the PRR in the Alleghenies, but I've decided to let the character of the layout develop on its own over an extended period. This is because my primary "audience" and players (aside from myself) will be my two grandsons, Tucker and Jesse. Tucker is 7 years old but Jesse is not yet 1, so he'll primarily be a "watcher" for quite a long time. 

And this was also my rationale for choosing to go with O scale and Fastrack. I found it to be comparatively trouble-free and kid-friendly. I don't want the boys (or any other children who visit) to hear the words "You can't touch that." I want to encourage them and let them create their own backstories with the miniature world I'm creating.

sidehack posted:

Bruce, great job on painting the walls, very nice and those rock walls are fabulous only wish I could replicate them on my layout. Keep us informed on your progress.

Is that because there's nowhere on your layout for an escarpment? Honestly, I'm no artist and you would be astonished at how easy and fast that rock wall went up. If interested, I can supply more photos and a quick step-by-step. This is my first layout--first rodeo, so to speak, although I've been studying the hobby and tinkering for probably decades, and have built models for decades.

Bruce: When you feel you are ready, please consider doing a full feature article for O Gauge Railroading magazine. What you are doing looks great to this point, and an article about building a layout that conforms to your wheelchair requirement may be very inspirational to others who have physical restrictions that can be overcome with a bit of creative thinking. Just get in touch with me when you feel you are ready, and be sure to continue documenting the layout construction with a good series of hi-resolution images.

BruceG posted:
sidehack posted:

Bruce, great job on painting the walls, very nice and those rock walls are fabulous only wish I could replicate them on my layout. Keep us informed on your progress.

Is that because there's nowhere on your layout for an escarpment? Honestly, I'm no artist and you would be astonished at how easy and fast that rock wall went up. If interested, I can supply more photos and a quick step-by-step. This is my first layout--first rodeo, so to speak, although I've been studying the hobby and tinkering for probably decades, and have built models for decades.

Bruce I would have answered you as yes more pics on how you did them but in reading Allan Millers post you may want to save them for a great magazine article, I can hardly wait. Anyway super job.

Allan Miller posted:

Bruce: When you feel you are ready, please consider doing a full feature article for O Gauge Railroading magazine. What you are doing looks great to this point, and an article about building a layout that conforms to your wheelchair requirement may be very inspirational to others who have physical restrictions that can be overcome with a bit of creative thinking. Just get in touch with me when you feel you are ready, and be sure to continue documenting the layout construction with a good series of hi-resolution images.

Thank you, Allan. I'd be delighted. I have already sent a message to your magazine email contact. 

BruceG posted:

Here are some photos and progress updates on my Fastrack shelf layout. I use a wheelchair, so everything has been planned ahead of time to 

In addition to painting the backdrop, I created a long 3D “flat” along the rear wall to represent a railroad cut through a hillside. It’s made of polystyrene foam strips cut with a hot knife, then glued to panels of Homasote screwed to the wall on ½ inch spacers. The “excavated cut” is 21 feet long (about 1,000 scale feet) and more than 14 inches high, yet it’s only one and a half inches thick. The foam was covered with plaster mixed to the consistency of a smoothie, then sprayed with washes of acrylic paint. My goal was to work fast and not worry too much about fine detail or even geological accuracy. Its sole purpose is to create a little dimensional depth without sacrificing space, just like any backdrop scene. I used rattle cans of red oxide primer and gray primer to give the “rock” some tone, then dry-brushed the high spots lightly with white paint. Spray adhesive was used for all clump foliage and vegetation. The project went much faster than I thought it would, with a total cost of under $200 for all materials.


Bruce,

I never saw this method or style before, it looks great and is going into my "scenery" file

Since my first post several weeks ago, I have been working on the next major step in my Fastrack layout. To recap briefly, I use a wheelchair and have some major limitations regarding access and reach. The majority of my layout is only about 2 feet in depth—not a lot of room to work with!

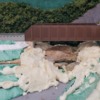
There are few things more entertaining on a model train layout than watching trains as they cross bridges. My setup will feature a 48-inch lift-out bridge across the entry to the room (a future project), and I also wanted a creek or river somewhere along the layout. These features look more realistic using lowered benchwork, but because I need to roll my wheelchair (the front, at least) under the benchwork to reach everything, the river section could only be lowered a few inches. Furthermore, because of my limited reach, I knew that I would have to complete the entire area, including scenery, before putting the track and bridges down permanently.

The Bridges: Two would be required, one being a double-track. To save time and money, I chose to use relatively inexpensive bridges available from retailers: a 10-inch Lionel girder bridge, and a 24-inch Menards through-truss bridge. I was pleased with the quality of both, but unfortunately the truss bridge simply overwhelmed the scene with its size. It just looked too tall and boxy, especially on my narrow benchwork. Many of you will cringe, but I decided to whack the truss members off to create something that resembles a concrete bridge with steel railings. (I saved the truss members, which are nice renditions.) It’s not prototypical, but I can live with it.

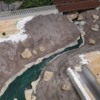
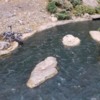
The Creek: Making a water feature look natural in a confined space is a bit of a challenge. I decided to use forced perspective to create a winding creek that has a hidden origin. The most fun aspect was incorporating some real rocks that my grandson collected when he was about four years old. They were locked into place using expanding foam. I also used Creek Bed Ready Rocks from Woodland Scenics.

As the photos show, I combined several proven scenery methods. Layers of foam board insulation were covered with Rigid Wrap plaster cloth and a thin layer of Hydrostone plaster mixed with brown pigment. Ground cover and clump foliage were built up in layers to achieve the desired effect. The creek bed was painted, then covered with five separate pours of clear resin, topped with wavelets made with Liquitex gloss gel.

Although much of the effort appears to be hidden by the bridges, I’ll have a little gimmick for visitors to get them to take a closer look: Find the troll!

Attachments

Images (7)
  • River 1
  • River 2
  • River 3
  • River 3b
  • River 3c
  • River 4
  • River 4b

Bruce, You have done an excellent job on the creek scene.  I have one of the single track Menards through truss bridges awaiting my layout build also.  Yes, they are tall!  Taller than I expected when I ordered online, but I think it will work for my 30" deep 11 x 11 room.  It definitely would have dominated your scene.  You did a nice job modifying it.  The water looks great!!  I'll look forward to seeing more!!

Bruce, your layout looks great!

If you don't mind though, I'll set the record straight on Homasote vs. Masonite- not the same at all. Homasote is a sound deadening material like compressed cardboard usually about 1/2" thick. Model railroaders have used it for track underlayment for years. Makes a horrible mess when sawn!

Masonite is a thin 1/8" or 1/4" hardboard manufactured panel that model railroaders use for back drops and fascias. I assume you used masonite for your backdrops, since homasote would not bend without kerfing it.

Pingman posted:

Bruce, why did you choose to describe your layout as a "shelf layout?"  

Carl, somehow I missed your question, so please accept my apology for answering almost two months later. We all have bigger concerns on our plates these days, but that's not an excuse.

So to finally answer, I think it qualifies as a shelf layout because of the shallow depth of the benchwork and the fact that it's braced to the wall with a completely open floor below. It's also an around-the-room layout. I guess I'm building a hybrid.

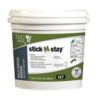
Thanks, Don. Yes, the ground cover includes some real dirt. I had some work done to my gravel driveway last summer, and later scooped up some dirt around the edges (where stuff gets washed to the side during our Georgia downpours). I made sure it was fully dried, then sifted it. For an adhesive I used Stick and Stay. It's used for flooring such as tile or vinyl, and a full quart costs only $13 at the big box stores. It's fairly thick (it can be thinned slightly with water, I discovered), and I just gobbed it on with a cheap bristle brush. When the real dirt and pebbles were sprinkled on, they stuck. After it dried overnight, I locked everything down with diluted white glue, applied with a plastic eyedropper (this actually goes faster than you'd expect). I also sprinkled on some Blended Turf from Woodland Scenics, and misted everything with a spritz of gray primer from a rattle can. I try to keep things basic and inexpensive. 

Here's another view of the creek, without the bridge.  

Attachments

Images (2)
  • Adhesive
  • The Creek

Hi Bruce, it looks like your on your way to a really terrific layout.  I really like what I've seen so far and I look forward to following you thru the rest of it.  Everything seems to be coming together in a great way, I really like your scenery and if you happen to have a plan of your track plan, I'd love to see what you have in mind.  You're doing a great job so far and the creek scene is really great.  Keep up the great work and thanks for sharing with us.

Add Reply

Post
The Track Planning and Layout Design Forum is sponsored by

AN OGR FORUM CHARTER SPONSOR

OGR Publishing, Inc., 1310 Eastside Centre Ct, Suite 6, Mountain Home, AR 72653
800-980-OGRR (6477)
www.ogaugerr.com

×
×
×
×
Link copied to your clipboard.
×
×