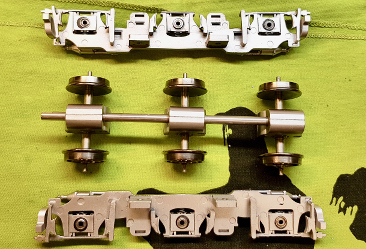
After a long, long wait at last the CB&Q E5A and E5B-unit arrived! My first O-scale locomotives I actually purchased as new. Was a real "Wow"-moment unpacking them. The first unit to come out of the box was the B-unit. Track tested it and everything was as it should be, it slowly gained speed with great sound. Next was the A-unit. The wheels just touched the track and the digital system shortened out. Made a reset on the digital system and tried again. The A-unit lit up and the sounds went on for a quick second before the digital system indicated a short cut again. Before the third try I took the engine to a short test and programming track. Put the engine on the track and it started idling. Sounds and light went on, tried some functions and everything seamed to work. When I gave the engine a notch to move forward, it shortened out again. My heart sank. Is it the motor? Something with the decoder? The wheels? With some mustered courage, I first compared the trucks on the A-unit with the B-unit if anything deviated between them. Everything looked identical. Did electrical measurements and nothing came up.
I decided to take the locomotive apart and hopefully through an elimination process find out what's going on. In the manual it's recommended to start with the tank.
Four screws later and the tank is loose.
Some of the steeps where bent, they're just mounted with one small screw and easy to straighten out.
To loosen the floor from the body there is four screws underneath each truck. On the front truck they where hard to unscrew with the truck in place, so I removed the four screws that holds the truck to the bolster.
The body and chassis came apart easily, the only thing to watch out for is the small pieces of the handrails sticking out on the inside of the body. I bent out the body a bit to free it. The only thing left is the light connection.
The body and chassis are separated. I bench tested the motor with a DC-transformer, no problem there. The sound started up as well. All the parts and screws are laid out well visible and in order to avoid the "one screw left syndrome" after assembly. On thing that struck me when I put back the engine on the test track, was that the wheel axels move in the trucks a bit between the bearings. When I moved the chassis side vice on the track the analog transformator lit up indicating a short cut, but just in one direction. I then tested the front truck, no short cut. The rear truck on the other hand indicated a short cut.
To remove the rear truck was quite easy. I first desoldered the wires. Next step was to use an Allan Key to losen the truck from the universal joint. The last step where the four screws attaching it to the bolster.
The rear truck from underneath. I removed the pickups and measured for short circuit again. Bingo!!! Something is off with the wheel to the left on the picture.
Found the culprit. A somewhat dislocated and bent brake bracket. Since the axel can move a bit between the bearings the wheel flange can either run free or touch the brake shoe. It's quite a logical explanation on the erratical short circuits.
When a small thing makes big trouble. I straightened out the brass part, and it fit snuggly back. I checked all the other brake assemblies on the trucks but they seamed to be all right.
I re-soldered the cables and added a new shrink tube around them. Taking a lot of pictures during disassembly helps when memory comes up short. Reassembling the locomotive was quite easy.
I know Sunset made prolix tests on the E5/E6 before shipping them out, especially for us overseas customers. The packing was really good. I guess the shipment process is another story, with ruff handling of the boxes. Ending up with bent and dislodged delicate details.
I got some Ideas how to improve the E5s when I reassembled the A-unit, but that will be for another day. Now I'm just happy to operate my all time favourite diesels.


