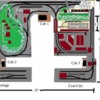
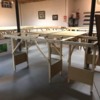
I finally have a space walled out for a train layout.  The pic shows the proposed decking for the layout. My concern is to maximize the approx. 12' width of the main room which in this case has the room divided into three equal sections that measure 4' each. Two of those are for trains and the middle is for operators. Since my arms cannot reach to do work 4' away along the walls, I was looking at topside creepers. Has anyone used these for a 4' reach? How comfortable are they to work from? Can all work be done, track, scenery, painting etc. What is the practical reach/limitations. Please all pros/cons welcome.

Also if anyone had a better way to divide that space up to maximize train decking that would also be greatly appreciated. I have tried a 2 foot path along the south wall giving access to both sides of that section, However that seems too small for humans to move and takes away backdrop effectiveness.

Again all ideas Welcome!

Thanks in Advance

JohnBasic Room Dimensions

Attachments

Original Post

Replies sorted oldest to newest

Maybe I'm missing something but since (with what appears to be a lift-out bridge of some sort) you essentially have an "around-the-room" layout, I'm curious as to why the layout needs to be 4' wide, which is a long reach. Generally, layouts that have legs that are that wide do so because they are dogbones and need the extra width for curves that come back the opposite way, but that does not look to be the case in your track plan.

It seems to me that you could fit as much track, structures and scenery as one could reasonably use or want in a 30"- 36" wide layout and not have the hassle of long reaches and having to use (and store) a topside creeper.


I use my topside creeper a lot.  It's a valuable tool!   I have tables 40" high X 4 ft. sometimes 6 ft. wide. See trackplan.  By moving the topside creeper around I can reach anywhere. You do need some maneuvering room to roll it, and it folds for storage- but is a lot more difficult to fold than they want you to believe. 

I just leave mine up, until I am done w/ scenic work for awhile, then I fold it and it fits under the layout.


TrackPlan Final [2)

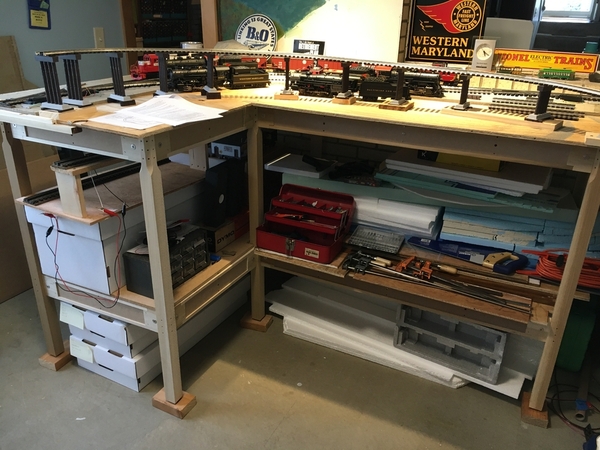
Make sure the legs have space under for (a) a floor broom, and the (b) the legs of the topside creeper to roll under them.  Leave spaces wide enough for the creeper to fit it by angling if necessary. 

Benchwork 5Benchwork 1


Attachments

Images (3)
  • TrackPlan Final (2)
  • Benchwork 5: Forward supports of the creeper fit into any of these places.
  • Benchwork 1: Braces are far enough off the floor to sweep under the legs.
Last edited by Mike Wyatt

Hi Richie,

Yes I could have a bridge that removes/lifts to allow access to center area. And As of now I am just trying to maximize floor space as I have heard many people say all layouts could be bigger. Since this is my first rodeo in such a large space. (prior set ups were 4x8 layouts back in the 1960's) My goal is to not make huge mistakes out of the gate.  I also am not the most creative when it comes to thinking 3d with having track elevated or below grade. From your comments I would be better off without creeper. What is a good maximum reach to shoot for in your opinion? I am 6' tall and looking at a deck height of 36" to 45". Height of layout is another consideration that I welcome all opinions on, as this will impact the reach/width considerations.

Again Thanks


John

I agree with Richie  C. My original layout was all 4’ wide, and it didn’t need to be. I am 6’ 3” and I needed a chair to reach the back. Relying on a creeper may limit shelving under the layout. I just added a 38” x 13 foot extension to my layout, and it is much more manageable . Also allows for wider aisles. JohnA 

An important question that no one asked John is "what type of trains do you have, and what kind of curves do they require?"  Also, what kind of runner are you?  Do you just let your trains run in loops, do you like switching, are you a scale guy or traditional?

If John has traditional trains and is ok with their appearance on O42 curves or smaller, he can do a LOT more on benchwork 48" wide than he could limiting himself to 30" or 36".  And that might justify the inconvenience of needing a topside creeper for scenery, maintenance, and the occasional derailment.

Depending on the exact track plan, he might be able to increase the surface area within arms' reach by using "bulges" that protrude into the aisle in some areas (for turnback loops, industries, etc.) and "bites" that go in toward the wall where there is no track, to facilitate access.

There are a LOT of ways to do a walk-in around the walls layout in the generous space you have.  The main thing is, what kind of trains do you have, what kind of curves do they require, and how do you prefer to operate them?

I have a topside creeper.  Happy to own it, as having access hatches and crawling underneath to get to them is a hassle.  Some things to consider, however...

Shop around - prices vary widely.  Climbing it and bending over can be a challenge, doubly so when handling a heavy or bulky item or trying to do precision work (and don't forget to have all tools and supplies within reach - don't ask how I know this).  A major consideration is making sure you have the ability to maneuver it around - the front legs protrude about 4 feet, so moving it near walls and around corners can be tricky - need to plan ahead for this.  Also, when not in use it requires a significant amount of space for storage - you don't want to break it down every time. 

Although it's a great tool, in hindsight I would design the layout to eliminate long reaches as much as possible.

Last edited by Mallard4468
@Mallard4468 posted:

Isn't 5' 12" the same as 6'?  

 Another case of not proofreading for fat finger typos on that silly little smart phone screen.    I stand corrected as I am really 5' 11" tall.  Thank you for pointing it out, Mallard!  When cutbacks in my working years called for the elimination of the "second pair of eyes", I was always disappointed because I knew I would make mistakes.    I corrected the original post! 

Last edited by Mark Boyce
@Mark Boyce posted:

LOL, John!!!  Thank you for adding to the humor.    I am the first to laugh at myself once something is pointed out!   

I work in IT (for a little while longer, at least).  We like to express our age in hexadecimal.  In hex, I'm still in my 30s, and hex 40 sounds so much younger than 64.

And I know all about fat-fingering stuff and a second set of eyes...

@Mallard4468 posted:

I work in IT (for a little while longer, at least).  We like to express our age in hexadecimal.  In hex, I'm still in my 30s, and hex 40 sounds so much younger than 64.

And I know all about fat-fingering stuff and a second set of eyes...

I'm with you!  I'll be 40 in hex this fall!!    Sorry John 'Ageis21' for letting my mistake take us down a rabbit trail.

The TopSide Creeper is a cleverly made slanted ladder that enables One to comfortably reach over 4 feet depending on your arms length, to easily reach those hard to get to spots. I purchased one from Micro Mark, the freight was killer. My only issue, I had built my tablework before ordering this ladder and finding the bottom of this would not fit around my layout, so I sold it to another Hobbiest.  I think it is a really creative device in helping us have fun building, cleaning, working on our layouts. One thing that plagues me, is space to store all these creative ladders, etc. I decided on pop ups, scenery pull outs, to get to all of my hard to get to spots.  Great thread, a great ladder, Happy Railroading Everyone 

Everyone thanks for the input and personal experiences. As for being 5 foot 12 inches. I also have made several fat finger mistakes on a data general S200 computer or Dec PDP8 Ok so I am not in my forties unless we go to the hex of it all.

At this moment most of my trains are 1954 to 1960 ish. So those are ok with tighter curves. However over the years I have acquired some larger locomotives and cars. Even in the older cars I have a set of passenger cars that are on the long side. which when I ran them years ago as young train engineer, looked out of place on 031 curves. As for running trains I would like a mix of continuous run/reverse loop and industry with loading/unloading etc. Yes that probably is asking too much in this space, which is the reason to maximize the useful area. With that said, should I be planning for the scale and 072 curve minimum? Does the chicken/egg concept apply when looking at layout planning. Do I make a layout and fit decking to it or does the decking dictate the layout? I get the size of the trains should have a minimum curve standard set. Is it ok to "hide" Sharp curves in tunnels? Is it just a perspective of how the trains look on the track or is it also a performance issue with longer cars not handling the tighter curves and causing derailments? Speaking of derailments, do they happen often? And if so how are they dealt with in a large/long tunnel?  And is it out of the question to have a switch/turnout in a tunnel for derailment issues?

Thanks for all the comments, no problem getting some humor in the thread as this is a hobby that is fun and even the threads should be fun to read.

Hi John - My comments were made based on your plan showing a bridge connection between the two legs near the furnace end, which would make it an "around the room" layout and let you reduce the layout width to a more manageable 30" - 36" and eliminate the need for a topside creeper. In addition, you can run large radius curves like O-72 which will let you run as big of an engine as you might want. 

Of course, having that bridge either as a liftout or hinged vertically or as a gate or possibly installing a powered Mianne lift-gate, has it's own set of issues.

If you don't have that bridge connection, then you will need the 48" width to accommodate dogbone curves coming back the other way and your curves (and equipment size) will be reduced,  so I think that's the first thing you have to decide.

Personally, I didn't want the hassle of a liftout and my ceiling was too short to accommodate a Mianne liftout, so I went with an open dogbone layout and 48" wide legs and smaller (O-36 outer and O-31 inner) curves and am fine running smaller semi-scale command equipment. In addition, manufacturers seem to be making more and more larger engines that can run on smaller curved layouts - that LC+2 Big Boy has been calling my name for awhile now.

BTW, I'm 4' 22". 

John you're absolutely NOT asking too much.  You have an amazing, large space that most on this Forum would LOVE to have!  It sounds like you don't have many "scale" length trains that NEED O72 curves.  This is a good thing!  (I have the opposite problem... scale-sized trains and too little space! )  Honestly if I had as much space as you do I would never get out of the planning stage, simply too many possibilities!!

If you want a variety of routes for continuous running, reversing loops, etc., probably some parts of your benchwork will have to be wider than 36".  This isn't a problem if the wide areas bulge outward into the aisle, and especially not if the adjacent areas along the wall narrow down to facilitate access.  That's what I was referring to as "bulges" and "bites."  The example below might give you some ideas.  My room is 18 x 10 and the squares are 1' x 1'.  The "bulges" were dimensioned to accommodate O54 curves which are probably a little too big for this room.  You would still need a Topside Creeper to reach the lower left-hand corner.  The narrow area at left was going to be a dead-end yard.

The above graphic was made using a software called RR-Track but since then I've switched to SCARM.  I think it does a better job with 3D rendering AND you can run your railroad in a simulation with up to 3 trains moving at once!  I strongly recommend one of these software programs to plan your railroad.

Personally I wouldn't build a new layout today with O31, or even tubular track except for nostalgia reasons.  O36 is the new O31; it's what they are including in train sets, and even some "starter set" locos require it, so that's the absolute minimum.  Quality track in this size is available from Atlas.  Every other size is available from Ross, a well-regarded brand.  I think "traditional" O gauge looks and operates very well on O42, and a reverse loop will fit on a surface 4 feet wide.  Of course with the space you have, you can probably work in a few gentle "scenic" curves made out of O72 or flexible track.

Because of the length of run that you have, a multi-level layout could easily be built with gentle grades to go from one level to another.  Your possibilities are really unlimited.  Eventually I would get design software, but I would begin by just sketching on graph paper, and then use the software to see whether the geometry is feasible.  There are a lot of people on the Forum who are good at designing layouts, and even some who do it professionally for a fee.  Get ready for a fun adventure!!

Attachments

Images (1)
  • mceclip2

Richie, LOL  I think most of us are way beyond an age to do that!  It's hilarious!! 

John,

My opinion is make the decking fit the layout.  Much as Richie said, you can bulge it out some in places for curves just as long as you keep your aisles within a minimum width.  I am going with the lift out bridge, though I would rather not, because I know it will be a point of trouble with my questionable construction skills.  The price of a Mianne lift was out of the question for me.  I think hiding sharp curves with short tunnels or high scenery is great as long as you provide for access when murphey derails your trains there.  072 curves are great, but I had to go with 054 because the layout occupies about 8 1/2 x11 of my 11 x 11 room.  They are more than sufficient for my  2-8-0s and 15" passenger cars.  How long are your passenger cars?

At work I had some exposure to a UNIVAC System 80.  At home a Tandy computer with an 8080 processor.  I remember servicing acoustically coupled 300 baud modems that were as big as a large shoebox with about 6 or more cards that plugged into a motherboard.  I do not remember what mainframe they were tied to, but it predated the System 80.  

I love my creeper.  I no longer have a layout building business but i have used the creeper on some 20 or so layouts.  Right now it is the mainstay tool for construction of our 20x40 ON30 layout,  And yes 4 feet wide is to wide for a wall module, great for an island module but not against the wall.  Russ  


Attachments

Images (1)
  • 53540765
@leapinlarry posted:

...I purchased one from Micro Mark, the freight was killer. ...

I don't recall who I bought mine from, but shipping cost was a big variable - there are many sources for this item, so shop around and look for the lowest total cost.

I felt sorry for the delivery guy - it arrived in a big, heavy, unwieldy box that was held together with shipping tape.  But since it's just a box of parts, it arrived unscathed.  Unless you have help (young and strong), you'll probably want to open the box on your porch and carry the parts to where you're going to be using it.  And don't assemble it in the garage and then try to carry it to another place in the house - you'll end up like the guy who built a boat in his basement!

Last edited by Mallard4468

Hi All,

Great comments from everyone! I am leaning towards a bridge to connect the two sides at the entrance of the layout. Now with Richie’s comment on height restrictions for a “draw bridge” I’ll have to measure ceiling height and factor in table height for clearances including any added light fixtures. Btw any lighting tip?

also all the other great suggestions about designing layout then the decking with maybe running two sections one for scale and the other for older models!

What to watch out for in planning bench work legs and that even with a topside creeper 4 foot against the wall was not recommended.

i have to admit I am a creature of gadgets so topside creeper maybe a purchase to help with bulges and other hard to reach area’s

Mark, since we are so close I should be able to give you a hand and learn for myself what is involved in that lift bridge building. Is yours a single or double track and how long is it?

Again thanks for all the great ideas and what to avoid!


John, the gap I need to bridge is 26 inches long.  I have two tracks separated by 6 1/2 inches in elevation.  The gap is only a few feet from the twice around crossover point.  Bob 'RSBJ18' suggested I build a temporary simple lift out so I can run trains until I have time to make the swing up bridge or bridges.  I made this quick liftout which shows the separation between the tracks.  I will need two separate bridges to swing up.  The upper track is 50 inches above the floor and I have full 8-foot ceilings, so vertical clearance isn't a problem.  Another Forum member sent me a picture of the type of hinges to use.  I have never built a swing up bridge, but have looked closely at photographs of what others have done.  I would be glad to have you come and see what I'm doing.  Two heads are better than one.  I could come up and help you also.  As I recall, it took me just an hour to get to your house.  My guess is it will be winter before I get to building the bridges.  I haven't even decided what types to use.

2020-07-07 20.08.12

Attachments

Images (1)
  • 2020-07-07 20.08.12

My layout is primarily hung 200' along the wall with maybe a dozen strategic legs at wide points and on four peninsulas.  Not using legs really frees up the under layout space.  The room is essentially clear from base board to base board.  Most of the benchwork is less than 34" deep which is fine for my 4' 25" height.   At a few spots the edge is 5' plus from the wall.  The lack of legs and the far reach make the Topside Creeper an essential.

There is a space over a storage shelf where I can roll the Creeper upright out of the way for quick use.

I also got the Bottom Side Creeper too.  Now that creeper really needs wide leg spacing.  When I use it for service calls I find most guys have a lot of legs closely spaced.

Check out truck supply warehouse stores.  The Topside Creeper is primarily used for servicing tractor trailer motors.

Also, I used Split pipe insulation at several spots on the Topside Creeper where there are raw edges.  Without the pipe insulation you can damage some skin and clothing.  The assembly kit lacks washers for a good seat and protection of the finish.  A simple add on.

Last edited by Tom Tee
@Mark Boyce posted:

John, the gap I need to bridge is 26 inches long.  I have two tracks separated by 6 1/2 inches in elevation.  The gap is only a few feet from the twice around crossover point.  Bob 'RSBJ18' suggested I build a temporary simple lift out so I can run trains until I have time to make the swing up bridge or bridges.  I made this quick liftout which shows the separation between the tracks.  I will need two separate bridges to swing up.  The upper track is 50 inches above the floor and I have full 8-foot ceilings, so vertical clearance isn't a problem.  Another Forum member sent me a picture of the type of hinges to use.  I have never built a swing up bridge, but have looked closely at photographs of what others have done.  I would be glad to have you come and see what I'm doing.  Two heads are better than one.  I could come up and help you also.  As I recall, it took me just an hour to get to your house.  My guess is it will be winter before I get to building the bridges.  I haven't even decided what types to use.

2020-07-07 20.08.12

Hi Mark,

The 26 inch span certainly makes it easier to support and stable. That is an interesting idea of two different height bridges. Hope to get together soon before snow flies, lol.  This will certainly pose some challenges with two bridges at different heights. Do you drop this on alignment pins for rail alignment?

Hope to see you soon

Aegis, the creepers come with with multiple weight limit categories.  Micro only offers the one size fits all light weight piece, they apparently are not aware of 0 scalers diets.  I had to loose 22 lbs to  safely use mine.  Truck outlets offer stronger units.  Mine is kind of suitable,   but for daily use over the years I would rather have purchased the stronger truck Creeper.

@Tom Tee posted:

Aegis, the creepers come with with multiple weight limit categories.  Micro only offers the one size fits all light weight piece, they apparently are not aware of 0 scalers diets.  I had to loose 22 lbs to  safely use mine.  Truck outlets offer stronger units.  Mine is kind of suitable,   but for daily use over the years I would rather have purchased the stronger truck Creeper.

Well I am not on the O scalers diet yet, still on the seafood diet. I see food and I eat it! My weight is around 230 lbs. So anything rated 200lbs or less is not on my shopping list.

Thanks for the info!

John

MOKATX layout South elevated Y001I have my layout height @27in for table top.  This allows for easy reach across the layout without any creeper.  I do have long arms, which helps, and stand 6ft3in.  Also, the 27in height makes reaching the bottom for wiring, etc. an easier task.  Lie on a standard auto creeper and everything is in easy arm's length, easier on the neck.  Also, kids can view better, obviously.  And, with the upper levels of track I have, the are still reachable with plenty of headroom for my "upper expansion" for large classification yard and more engine facilities.  Even with the "upper" being above the highest of "lower" tracks, it will be only 60in in height, max.  True, my layout is not along the walls, can be reached from both sides.  But lower initial height can be a benefit with future expansion.  Besides, I like looking downward on my layout and running trains.  I have one lift bridge, two tracked with crossover start, and is still under construction..... aren't we all....  I know the pics do not show it clearly, but the TT and Roundhouse/Backshop area are on a peninsula with passenger yard reachable from open area at end and from TT area, and second lift out on purple line to enter right side aisle.  Thinking on how I can make the high bridge and "Y" track possible lift-outs to reduce/eliminate the current duck under.  If I wish to have an eye level view, I simply sit in a chair, and relax.  Hope this gives some good information.

Jesse100_5900100_5901100_5907100_5902

Attachments

Last edited by texastrain

John, Tom Tee certainly does the cantilever off the walls the best I think I have seen.  He shared some of his photographs for suggestion to some of my responses.  He has honed his skills and techniques over the years for sure!  Since I am somewhat carpentry challenged and have minimal tools, I chose to buy meta wall brackets rated at 1000 pounds.  I wouldn't have had to install them on every stud, but I didn't need that many since I only used them on two 11-foot long walls.  The other wall is brick, and I didn't want to fool with them there.  Besides, I already had bought some Mianne benchwork, so I used it along the brick wall and out in the freestanding part of the layout that allows for room access from the two doors.  The brackets are 19 inches long and I extended them with 1x3s to make for 30-inch deep benchwork.  I used carriage bolts that are about 2 1/2 inches long if I recall correctly.  The whole table is solid as a rock, although I am only 170 pounds dripping wet.  I like having no legs in the way on those two walls, although I put in plywood for shelving on the Mianne lower supprts.

2020-03-14 19.48.032020-03-21 19.35.142020-07-24 17.20.492020-07-07 19.24.24

Attachments

Images (4)
  • 2020-03-14 19.48.03
  • 2020-03-21 19.35.14
  • 2020-07-24 17.20.49
  • 2020-07-07 19.24.24
@Aegis21 posted:

Hi Mark,

The 26 inch span certainly makes it easier to support and stable. That is an interesting idea of two different height bridges. Hope to get together soon before snow flies, lol.  This will certainly pose some challenges with two bridges at different heights. Do you drop this on alignment pins for rail alignment?

Hope to see you soon

Thank you, John.  I just drove screws into the sides of the table so this unit sits down between them on narrow strip wood attached to each side.  The plywood has a slight bow on one corner, so I just fastened a short stip of wood to the tables, which I twist over to cinch the corner down.  The whole thing is intended to be temporary as Bob suggested, so I didn't put a lot of effort into it.  It works, but I would rather have two lightweight bridges to swing up for a permanent solution. The photograph on the above post shows how the track goes up and over itself for two trips around the small room. 

Yes, I agree we need to get together before snow flies for sure.  We will figure out a time in the fall.

@Tom Tee posted:

Material call out for the support knees is a sheet of 3/4" plywood.  First rip three  3 1/2" X 8' for future cross members then cut the balance into 32" x 37" thirds.  From each third you will get two knees.

There will be three football shapes which can be sliced up for risers.

Hi Tom,

Thanks for the info. These look like they work fantastic. One other dimension of you don't mind, the height of the support at the top end furthest from the wall of the knee itself 

Thanks John

@texastrain posted:

I have my layout height @27in for table top.  This allows for easy reach across the layout without any creeper.  I do have long arms, which helps, and stand 6ft3in.  Also, the 27in height makes reaching the bottom for wiring, etc. an easier task.  Lie on a standard auto creeper and everything is in easy arm's length, easier on the neck.  Also, kids can view better, obviously.  And, with the upper levels of track I have, the are still reachable with plenty of headroom for my "upper expansion" for large classification yard and more engine facilities.  Even with the "upper" being above the highest of "lower" tracks, it will be only 60in in height, max.  True, my layout is not along the walls, can be reached from both sides.  But lower initial height can be a benefit with future expansion.  Besides, I like looking downward on my layout and running trains.  I have one lift bridge, two tracked with crossover start, and is still under construction..... aren't we all....  I know the pics do not show it clearly, but the TT and Roundhouse/Backshop area are on a peninsula with passenger yard reachable from open area at end and from TT area, and second lift out on purple line to enter right side aisle.  Thinking on how I can make the high bridge and "Y" track possible lift-outs to reduce/eliminate the current duck under.  If I wish to have an eye level view, I simply sit in a chair, and relax.  Hope this gives some good information.

Jesse

Jesse, There is always a different way to skin a cat! Like the option of a low deck and either looking down or sitting down to view the scenes from different viewpoints

Your layout is certainly ambitious and looks like tons of fun and action

Get work!

John

@Mark Boyce posted:

Thank you, John.  I just drove screws into the sides of the table so this unit sits down between them on narrow strip wood attached to each side.  The plywood has a slight bow on one corner, so I just fastened a short stip of wood to the tables, which I twist over to cinch the corner down.  The whole thing is intended to be temporary as Bob suggested, so I didn't put a lot of effort into it.  It works, but I would rather have two lightweight bridges to swing up for a permanent solution. The photograph on the above post shows how the track goes up and over itself for two trips around the small room. 

Yes, I agree we need to get together before snow flies for sure.  We will figure out a time in the fall.

Hi Mark, Two lightweight single track bridges that swing up has it's challenges for sure. However  I'm sure we can put something together that will be very functional and fit into the scenery. 

Also I appreciate your cantilevered design with pre-made brackets and wood extensions , nice work! 

Last edited by Aegis21

Add Reply

Post
The Track Planning and Layout Design Forum is sponsored by

AN OGR FORUM CHARTER SPONSOR

OGR Publishing, Inc., 1310 Eastside Centre Ct, Suite 6, Mountain Home, AR 72653
800-980-OGRR (6477)
www.ogaugerr.com

×
×
×
×
Link copied to your clipboard.
×
×