While needing to search for a tender for the kitbashed loco I just finished, I turned to

the Mullet River C&S caboose that I had built from a kit.  One of the instruction

omissions was that nothing was said after you assembled the three parts that made up the roof.  I didn't think those loose parts would stay on in operation, so I glued the

three parts together, and found, as expected, that the rafters across the ceiling would

not all line up with the notches in the walls.  So I trimmed the ends of the rafters so

roof lies flat. Before putting it back on, I painted a casting of a pot bellied stove, made

a pipe to reach the roofs smokejack, and installed it.  The roof now fits tightly, held

on by springy metal ladders I installed rather than building those in the kit.  I also

drilled a hole in one of the Lionel Vanderbilt tender's drawbars, to bring it closer to

the engine, and a wire from tender to drawbar came unsoldered, and was too short

to resolder without soldering an extender on that, which was done.  Had gotten the

tender out to add decals, but no time for that.

This morning I finished decalling the repainted Lionel Vanderbilt tender, with my

ficticious home road's decals, cleaned off the workbench, and set up the light box.

Then I shot comparison photos of my three versions of the entry level Lionel 0-8-0: the switcher with Elesco and flying pumps and a kitbashed Vanderbilt tender, the 2-8-0 Great Western #60 2-8-0 just finished, and an original out of the box Lionel 0-8-0, which may become a Mikado.  (lemme know if you can tell the difference) #60 lacks a tender so am looking for a base to use to create one.

"Finished" the design of my second (small) layout and ordered the track from Nassau Hobbies to take advantage of their "May Sale".  ("finished" as I keep tweaking something on the plan on a weekly basis.)


The attached layout will take up the remaining limited space that I have in a room that currently has a completed "full time" Christmas O guage corner layout.


I am limited to a 58" x 117" board and with "Moonman's" layout assistance I am beginning to put together an 1950s upstate New York themed Lionel and MTH passenger and freight layout using Lionel Fastrack.


'Probably take at least 2 years to get everything up and running as planned.

Attachments

Images (1)
  • NYC 58 deep layout

What have I done for the past week? Not a thing.

I just got back a few hours ago from a cruise through the inside passage from Seattle to Skagway, Alaska and back. My wife and I spent an entire day at the White Pass & Yukon RR and she didn't throw my overboard afterward, so I guess I did something right that day.

I have a wicked case of trying to get my 'land legs' back right now, though. The whole house feels like it's slowly rocking back and forth. I have no idea how pro sailors cope with being on land after being at sea for months.

Will be posting shots once I cull through the 800+ photos the two of us took on the trip...

Here is what I did today:


image

image

image

image

image


I set up two tables in the basement, pulled out the 2  very lightweight O42/O54 modules and set them up.


Connected up DCS, TMCC/Legacy and Z4K.


Time to test some engines for next weeks outing.


Two Williams GG1s upgrade with ERR, check! (I have two more needing repairs as well :-(


MTH Liberty Liners needed lube job.


MTH PRR MP54 also needed lube.


MTH starter set 4-6-0 needed lube. (I like taking that engine out because its smoke output is massive!)


MTH Dreyfuss Hudson checked out.


K-Line K4s good.


K-Line Hudson, suffering from stuttering chuff.  May need to go to backup.


MTH P5A checked out fine as well.


Wanted to check Lionel Y3, but only had O54 circle.


Lionel Legacy system was sputtering.  (but thats another thread)


At any rate I had a lot of fun just running in the little circle.


i got a couple marx m10005 sets on the bay this week.  1 lit up but neither were moving.  i got the lighted engine running and swapped this with another engine in my "keeper" train.  I also got the 2nd 10005 engine going after i replaced the oversize front wheels and bent the tin a little to keep the gear from rubbing against it.  i also fixed the wiring on my marx tower.  

Hi-
The throw rod (throw bar) on our Ross wye switch broke where it connected to one of the switch point rails. I had to take up (remove) the switch to work on it. I used epoxy (we'll see how well it lasts). After 24 hours, I reinstalled the switch yesterday. Today I tested it with a heavy engine (SP cab forward).
It seems fine so far. I controlled the engine with the Z-4000 hand remote in my right hand and took the video with the iPhone in my left hand. Sorry if it's a bit shaky.
John

Attachments

Videos (1)
trim.BE8E7522-2E7E-4A10-8DD1-78E2631DC87B

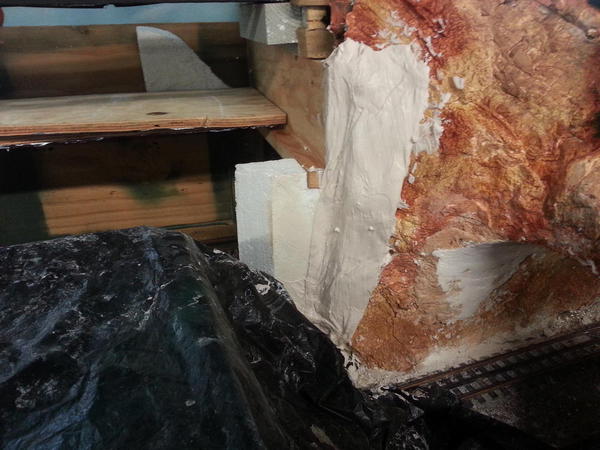
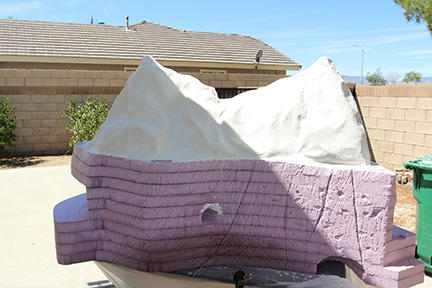
Working on "Munchausen Falls" a little today after closing for the day. Added some plaster to the ends surrounding the "Falls" front insert. The insert was in the other room drying after  small coat of plaster cloth. Looks like we're going to re-do the top section out of lighter material so it will be easier to deal with should it have to be removed.


2015-05-30 17.46.29

2015-05-30 17.46.22

Attachments

Images (2)
  • 2015-05-30 17.46.29
  • 2015-05-30 17.46.22
Originally Posted by Mark Boyce:

Jhainer,

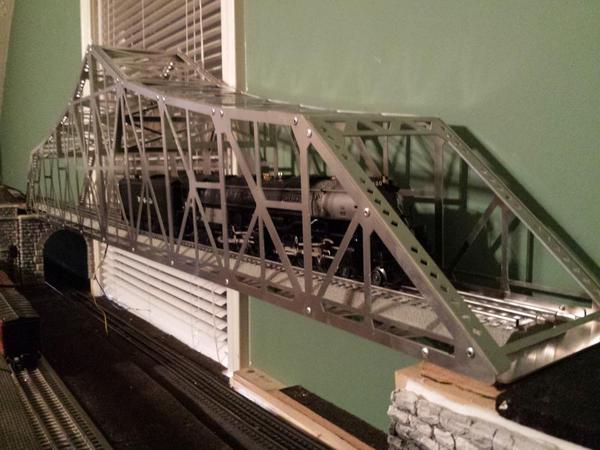
The bridge looks great!  I didn't know it came with lights, but I see one very well in the first photo!  Yes, it needs lights on top, don't want a Piper Cub flying down the river to an abrupt stop!  It is a wonderful addition to your layout!

It didn't come with lights I went out and radio shack store was closing so I bought up all the leds they had about 7 packages mainly red and 2 red flashing total bill 2.35 everything was 70% off. so I sat here last night watching a movie soldering up 6 lights something that takes someone else 20 minutes took me over 2 hrs to solder I really dislike soldering then ran the wires inside of aluminum tubes to hide the wires and have them exit the bottom of the bridge and what the plan is to run another tube the length of the bridge to run the wires to the end where they can be hidden under the table first plan was to paint the bridge tehn do salt weathering on it but I kinda like the natural look of it


Last edited by Jhainer

Because of the storms this afternoon, I didn't want to take a chance running trains, and get my recently repaired TIU hit.  So I thought I would try my hand at putting together an AmeriTown general store kit I have had on hand.  The last I tried something like that was early fall, and it was too painful to use a hobby knife.  While I had my hand operations in January and March, it was still a bit painful putting enough pressure to sand the edges and trim flash on the windows.  Fortunately, there is almost no flash on these wonderful kits.  It was still a bit awkward glueing and holding the joints, but I got it done.  What I took for granted when I was younger and scratch building intricate models in N scale, was a major accomplishment for me Today!!  Yay!!

Mark it didn't happen if there's no pictures. I tinkered all day. I started off building my first tree. it's a little anemic but not bad for the first one. then I put a tunnel portal under one edge of the bridge. and painted the retaining wall a little. then cut a piece of mdf for foundations for the city buildings. then I built a sign for ReMax my mother worked for them so I wanted a ReMax real estate office on the layout. all the while I was running trains also wired up the lights on the Lionel wooden bridge.   

20150531_164131_Richtone[HDR)

20150531_164142_Richtone[HDR)

20150531_164154_Richtone[HDR)

20150531_210533

20150531_211129_LLS

Attachments

Images (5)
  • 20150531_164131_Richtone(HDR)
  • 20150531_164142_Richtone(HDR)
  • 20150531_164154_Richtone(HDR)
  • 20150531_210533
  • 20150531_211129_LLS
Originally Posted by Adriatic:

And I like the mood only a lighted bridge can set.


Are you going to bathe the new one in lights?

 yes sir it already has 2 flashing red led's at the top keeping the piper cub's from hitting it LOL using Marks words. I was just thinking either 4 led's shining down on the track or spot lights shining up at the bridge not sure which


Originally Posted by Jhainer:

looks good Mark yea I do work on it quite a bit but my kids are off doing there thing most of the time and so I get some good free time to work on it.

That is good!  Only our 24-year old daughter is home now, so she does her own thing.  However, we have several elderly relatives we have to help out, and my wife's health isn't the best.  That's what's important now.

Today I went through a book on gas electrics, etc.,trying to decide what my next project should be, and I dug out a number of old O scale kits for passenger combines,

that might be kitbashed, such as two Walthers, a 56' platformed one, and a shorty Sierra kit,  an old Rail Chief platformed one by that woman who ran the shop in NYC,

and another.  Then I found one of those Lionel 0-6-0T's, and while checking it, discovered that neither coupler would work, and on one the plastic knuckle cracked and came  off.  This was in the box and I think unrun.  These are different, one having a

longer shank than the other and they have that flat plate for the magnet.  Wonder where I can get these replacements?


Originally Posted by Adriatic:

Mark,

It is developing its own personality, as I new it would.

I don't see that stopping


No J video  

Adriatic,

Thank you!  The J video is on another topic.  PS3 N&J Jerky Movement. It has bee a disappointment since I got it a week ago.  I am calling MTH to send it in for warranty repair.

Last edited by Mark Boyce

I started the morning with running all four mainlines as I started to clean up my mess from the work being done. Looking at the third corner where I added three sections of cliffs to make the old saying of it ain't over till the fat lady sings dome to mind. With pink board left over I decided to make up one more cliff to come down the side. Sort of tapering it going from high to low. From that section I'll run my backs of buildings down the rest of the mainline. So with a bag full of garbage from the work in progress it is break time. And with having to do no outside work today I think this afternoon will be a good day to stay in the attic run trains and work on the layout...............Paul

Hi all.

This week I tried to build another display shelf for some steam engines. This one is 30" X 70" with sliding plexiglass doors.


First one I ever tried with sliding doors. It's ok , BUT needs some improvement on the sliding part.


I should have used the 3/8 plexiglass and not the thinner.


The difference is 54 dollars versus 98 dollars. I should have went 98 dollars.

REASON...to much flexibility in the doors.


Even old , still learning. And , sorry for the sorry picture. I could not get a decent finished one with the plexiglass reflection.


Larry


Still having fun.


DSCN4017

DSCN4041

DSCN4014

Attachments

Images (3)
  • DSCN4017
  • DSCN4041
  • DSCN4014

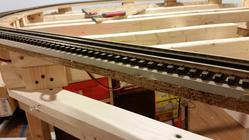
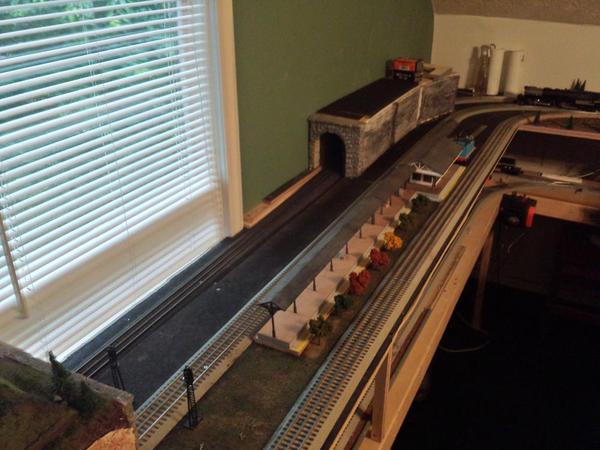
Nothing compared to many layouts here but I built an elevated track around the top of my (small, 11' x 11') train room. I wanted it to look good, so of course it took 10x more time and effort than I had intended. I used tube track thinking I'd need to bend and contort to get things to work (plus, most all my locos have magnetraction).


Tonight I loaded it up with ~20 postwar cars and the 'big' dual motor magnetraction locos (GG1, Train Master, F3) pulled 'em just fine. Pictured is a 1950 issue 773 and despite a single motor it pulled 'em fine too (albeit it's geared very very low) though current draw is fairly high (~4+ amps) so probably don't want to do it for too long.


IMG_2981[1]

Attachments

Images (1)
  • IMG_2981[1]

Add Reply

Post

OGR Publishing, Inc., 1310 Eastside Centre Ct, Suite 6, Mountain Home, AR 72653
800-980-OGRR (6477)
www.ogaugerr.com

×
×
×
×
Link copied to your clipboard.
×
×