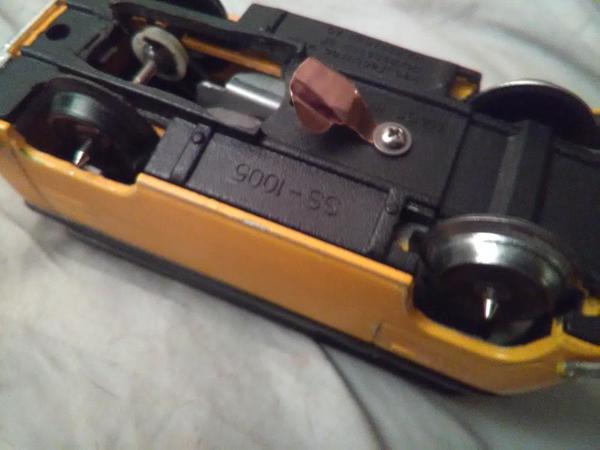
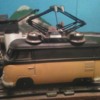
I finally electrified one of the MOW VW Buses.

IMG_20180225_002430

Not exactly like that......

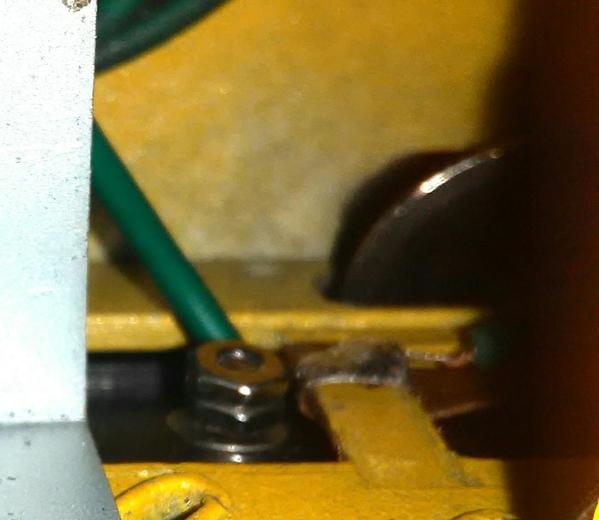
The shoe is curved and hugs the tube rail top. Inside there is a spring washer and 2 jam nuts on the screw so the copper shoe is sprung. Plastic drive whels might get swapped for metal to improve the connection. I needs two shoes or a big capacitor to stand a chance in turnouts.

IMG_20180306_042915

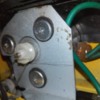
Front wheels use a flex strip on the axle to deliver power (1/16" gab there.)IMG_20180306_043454IMG_20180306_043022
Motor is from a cassette tape player, the drive belt is a clear Goody hair elastic.

IMG_20180306_043014

One down, three to go

Attachments

Images (5)
  • IMG_20180225_002430
  • IMG_20180306_042915
  • IMG_20180306_043454
  • IMG_20180306_043022
  • IMG_20180306_043014
Videos (1)
YouCut_20180306_150815065

The last of my building flats came today. Going to use them together as part of a brewery.Added the earth color to the plaster and painted the footprints for the buildings. Temporarily putting them in place. Added an over the door sign to Cooter's. Put masking tap on the track to the elevator and started lining it with Balsa wood. Making a discharge pit to empty the hoppers. Took out three buildings. Two could be for lower main street. The machine shop is going to have its own siding on another table. Started figuring the cuts on the sidewalks so I can finish them tomorrow, hopefully. That's it for tonight. Heading out for A Tuesday night train group. Pics................Paul

DSCN1601DSCN1602DSCN1603DSCN1604DSCN1605DSCN1606DSCN1607DSCN1608DSCN1609DSCN1610DSCN1611

Attachments

Images (11)
  • DSCN1601
  • DSCN1602
  • DSCN1603
  • DSCN1604
  • DSCN1605
  • DSCN1606
  • DSCN1607
  • DSCN1608
  • DSCN1609
  • DSCN1610
  • DSCN1611
paul 2 posted:

The last of my building flats came today. Going to use them together as part of a brewery.Added the earth color to the plaster and painted the footprints for the buildings. Temporarily putting them in place. Added an over the door sign to Cooter's. Put masking tap on the track to the elevator and started lining it with Balsa wood. Making a discharge pit to empty the hoppers. Took out three buildings. Two could be for lower main street. The machine shop is going to have its own siding on another table. Started figuring the cuts on the sidewalks so I can finish them tomorrow, hopefully. That's it for tonight. Heading out for A Tuesday night train group. Pics................Paul

DSCN1601DSCN1602DSCN1603DSCN1604DSCN1605DSCN1606DSCN1607DSCN1608DSCN1609DSCN1610DSCN1611

Look great Paul! Don't let Bryan near your arms!

DEUCE. I bought that kit many years ago when Walthers was making them. Now I believe Atlas makes them. I think it was called Phoenix Oil. The shed to the right is a fill station for trucks, I suppose the pipe stand that is  included could be either a fill or discharge unit. Mike, I hired a couple of body guards to stand by me tonight LOL. Tomorrow will be a full day devoted to the layout.................Paul

paul 2 posted:

DEUCE. I bought that kit many years ago when Walthers was making them. Now I believe Atlas makes them. I think it was called Phoenix Oil. The shed to the right is a fill station for trucks, I suppose the pipe stand that is  included could be either a fill or discharge unit. Mike, I hired a couple of body guards to stand by me tonight LOL. Tomorrow will be a full day devoted to the layout.................Paul

Smart man, Paul!! 

Glenn nice Sinclair station.  Is it a scratch build or a kit bash?  And Dino is as smooth and shiny as I remember.

Adriatic that seems like a lot of work but the result is fantastic.  All you need is some MOW lettering on the sides.

Jackson, I like he way you shortened and modified that diner.

coach joe posted:

Glenn nice Sinclair station.  Is it a scratch build or a kit bash?  And Dino is as smooth and shiny as I remember.

Adriatic that seems like a lot of work but the result is fantastic.  All you need is some MOW lettering on the sides.

Jackson, I like he way you shortened and modified that diner.

Thanks Joe. It is a kit bash from Walthers I think Atlas has the kit now. Dino came from the Sinclair web store.

Coach Joe, et.al., Here's a couple more of the diner, named after my friend and avid modeler, the late Andy Fusco. Also a pic on the other side of the parking area of a Pentecostal Church that was scratch built by myself and another fellow modeler. It was inspired by a similar buildingP1000363P1000346P1010385 that was near the Susquehanna RR yard in Binghamton, NY. (a former welding shop that had been converted into a church). Other inspiration came from the flashing lighted crosses i had seen on many of the churches when i lived in the south, as well as information from my daughter who earned her MTS at Harvard Divinity School.

Attachments

Images (3)
  • P1000363
  • P1000346
  • P1010385
paul 2 posted:

DEUCE. I bought that kit many years ago when Walthers was making them. Now I believe Atlas makes them. I think it was called Phoenix Oil. The shed to the right is a fill station for trucks, I suppose the pipe stand that is  included could be either a fill or discharge unit. Mike, I hired a couple of body guards to stand by me tonight LOL. Tomorrow will be a full day devoted to the layout.................Paul

Paul's security was asleep on the job.

12998582_10209696780562177_8640804925301509922_n

The end result

Untitled-2

Attachments

Images (2)
  • 12998582_10209696780562177_8640804925301509922_n
  • Untitled-2
carsntrains posted:

Oh you guys are killing me with all these great scenes and details!!!   I aint even got any grass yet lol    But here is a picture of the yard "ladder" that I will be adding one more siding to soon. Sorry for the crappy picture.  Took it with my tablet. Image may contain: outdoor

Jim

What are you talking about Jim! You have that scene of the pickup truck crashing threw the cow fence!

LOL Mike yeah that stuff I had to move to make the changes to the track.    I really like the "yard"!  Its worked out better than expected!  Will be even better with one more siding!  As I had said I went from nowhere to park the Wabash  to now having room to add 2 more cars to its consist!  YAY!!!!!!    Would like to find two or three boxcars painted in the Wabash passenger scheme.

Jim

Losing interest in the cliff for now, need to get some trees and decide on a building to place on top of it. So far I'm pretty happy with it, but its going to need some more paint.  I also started to paint the background blue.  This is going to be a serious pain in the butt.  Oh, well I'm learning to plan better for next time!  Some lights above the layout are in my near future.  

I also ran some trains for the first time in a while, and didn't check all the switches and had an accident.  I noticed a sound that did not seem right and found the coal train barreling towards the yard.  Hit the stop button just before the collision!  The passenger train is pretty long now that we added the RPO car and the box car.  I think the set is not complete.  Can't wait for get my Legacy 765 Berk to pull it (pre-ordered).  That would be a great birthday present (July 4th).


IMG_3559IMG_3564IMG_3568

Attachments

Images (3)
  • IMG_3559
  • IMG_3564
  • IMG_3568
Videos (1)
IMG_3571
modeltrainsparts posted:

Coach Joe, et.al., Here's a couple more of the diner, named after my friend and avid modeler, the late Andy Fusco. Also a pic on the other side of the parking area of a Pentecostal Church that was scratch built by myself and another fellow modeler. It was inspired by a similar buildingP1000363P1000346P1010385 that was near the Susquehanna RR yard in Binghamton, NY. (a former welding shop that had been converted into a church). Other inspiration came from the flashing lighted crosses i had seen on many of the churches when i lived in the south, as well as information from my daughter who earned her MTS at Harvard Divinity School.

Great detail work!


I spent all day yesterday just painting rail. The main part of the railroad is nearly done. Missing small spots at Red Wing, Chemolite, Pig's Eye and Dayton's Bluff on the lower deck, and Frogtown, Northtown, the Ford Plant, the Amtrak depot and the Minnesota Commercial yard on the upper deck. It sounds like a lot, but most of these spots just take extra effort to reach, which is why they are incomplete.

Welcome to my dark brown world. I got all of Western Ave done, even the Short Line Hill in the back.

IMG_8196

The yard was full of cars...

IMG_8197

so I moved them up to Midway, which I also finished.

IMG_8200

East Minneapolis is done.

IMG_8198IMG_8199

University Junction is done.

IMG_8201IMG_8202

Gotta go to Menards for another gallon of paint.

Attachments

Images (7)
  • IMG_8196
  • IMG_8197
  • IMG_8198
  • IMG_8199
  • IMG_8200
  • IMG_8201
  • IMG_8202

CARSNTRAINS, nice job so far. THADDEUS, looking good. Elliot, painting rail is like wiring, monotonous but pretty soon it will be done and behind. By the way when are the dates in September. Maybe I can make a trip but also have a train show in September.  Mark, don't worry I sent my Swat Team for refresher courses. They'll come back better then ever. Today was spent so far on the pit for the grain elevator and cutting the sidewalks to fit along the road. So right now paint is drying on the discharge pit and the sidewalks. In a little bit if they are dry I can keep going. Pics......Paul

DSCN1612DSCN1613DSCN1614DSCN1615DSCN1616DSCN1617DSCN1618

Attachments

Images (7)
  • DSCN1612
  • DSCN1613
  • DSCN1614
  • DSCN1615
  • DSCN1616
  • DSCN1617
  • DSCN1618

Thanks Paul. The convention dates are Sept 5-8. After that, My wife and I will be traveling to the east coast. Road trip, and a big one too.

BTW, now that all of this is painted, it needs ballast. I'm worried that I don't have enough of my good stuff, because I found two bags of the wrong color, and suspect there may be four more that I haven't opened yet, potentially leaving me short of my estimate of eighteen by a third. Not sure if I can go back to my source, so my plan is to supplement with some chicken grit from the local farm supply store. It's a different color, but I can use that to my advantage, since my layout features multiple railroads, which get their ballast from different sources.

Paul, how do you plan to get an engine past the pit, or is it just cars only? A piece of piano wire would do the job, holding the rollers up.

Elliot, that's a bummer on the ballast. I have tried to stay with the same. I was blending a light grey and a darker grey together but now my supplier says he won't be able to get the darker anymore. I am hoping I have bought enough to do the rest of the track down the road. You suggestion got me to thinking. I was going to use this siding only as pushing the cars over the dump. Where the opening is I am going to cover it with window screening to make it look like a grate. I do have wire that I used on building signs which would work if I decide to run an engine through the elevator. You gave me something to thinks about. Thanks...................Paul

Broken thumb, Mike?  I thought Bryan pointed out the green cast?  Paul, I am glad the SWAT team is getting more training!  

But on the other hand, Mike is right, Paul can keep pounding out the good work with one arm behind his back!!  :-)

All Kidding aside, Paul that is great work.  Bryan, I know you have been quite busy coaching that exceptional team!  SWAT team, you are all great having a good time getting together!!  Who is going to Kirtland on Saint Patrick’s Day?  I am hoping to make the trip up....as long as some extended family obligations don’t trip me up!

Elliot, It all looks great!  I think I recall you mentioning a good while ago you may not have enough ballast as we looked at many buckets of the stuff!  

Just a few minor things tonight. The track is screwed down in place. I think the discharge area came out better then I thought it would. Still have not decided to run a wire to power the back part of the track. Went and took the weights off the sidewalk. Glued down nice except where I had to cut a corner piece. It was a little lower then the sidewalks so I took some spackling and filled it in. Tomorrow morning I'll sand it down and touch everything up with concrete paint. Pics................Paul

DSCN1621DSCN1622DSCN1624DSCN1625DSCN1626

Attachments

Images (5)
  • DSCN1621
  • DSCN1622
  • DSCN1624
  • DSCN1625
  • DSCN1626

Paul, I have been told it is worth the trip.  I'm not in the market for anything in particular and earnings have been a bit slight this winter.  I missed the Worlds Greatest Hobby show at Monroeville Pennsylvania due to the weather, and they aren't having a Greenberg show there this winter, so I am ready for a show.  Actually it looks like Kirkland is just a smidgen more than twice as far for me than Monroeville.  That's not bad.

paul 2 posted:

Just a few minor things tonight. The track is screwed down in place. I think the discharge area came out better then I thought it would. Still have not decided to run a wire to power the back part of the track. Went and took the weights off the sidewalk. Glued down nice except where I had to cut a corner piece. It was a little lower then the sidewalks so I took some spackling and filled it in. Tomorrow morning I'll sand it down and touch everything up with concrete paint. Pics................Paul

DSCN1621DSCN1622DSCN1624DSCN1625DSCN1626

Looks good Paul! You sure have a great wife to let you get all this work done!

Keep up the great work! You never know when Bryan is going to strike again between now and next Tuesday! Lol


Thanks Mike, but one gallon will more than cover the rest. Remember, I'm still working on the first gallon, and I'm about 80% of the way done.

Thanks Mark, seems like just a couple weeks ago that I said that. In reality, it was 5 weeks ago. I believe I said that as part of a caption with this picture, and of course pictures have dates. This one is from January 31st.

IMG_8033

Attachments

Images (1)
  • IMG_8033

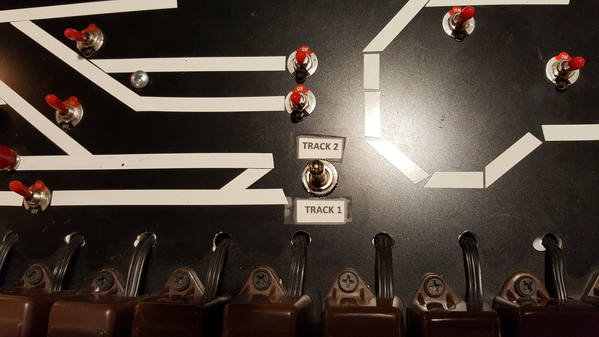
Didn't get as much done as I planned- snow day and all. Didn't have to shovel but the CEO had other plans for me yesterday. Did manage to get the high line painted and added more panels to another small section. Started a minor re-wiring project. The ground level section that I use as a passing line for my main loop is powered from the other side of my KW. I can usually make it work if I am running two trains but I decided to add a DPDT switch so that I can power the section from either side of the KW. When I'm done I will be able to run a train on the high line and use the lower section for switching and runarounds or run the train from the high line down the hill and back up the other side. 

2017-11-05 09.34.11

I ordered some dwarf signals that I am going to start adding where appropriate. They have to travel from a land far far away so I probably won't see them for a few weeks.

https://i.ebayimg.com/images/g/RXAAAOSwmUdUYNVx/s-l1600.jpg

Attachments

Images (1)
  • 2017-11-05 09.34.11
Last edited by RSJB18
RSJB18 posted:

Didn't get as much done as I planned- snow day and all. Didn't have to shovel but the CEO had other plans for me yesterday. Did manage to get the high line painted and added more panels to another small section. Started a minor re-wiring project. The ground level section that I use as a passing line for my main loop is powered from the other side of my KW. I can usually make it work if I am running two trains. I decided to add a DPDT switch so that I can power the section from either side of the KW. When I'm done I will be able to run a train on the high line and use the lower section for switching and runarounds or run the train from the high line down the hill and back up the other side. 

2017-11-05 09.34.11

I ordered some dwarf signals that I am going to start adding where appropriate. They have to travel from a land far far away so I probably won't see them for a few weeks.

https://i.ebayimg.com/images/g/RXAAAOSwmUdUYNVx/s-l1600.jpg

I need to wire my fiddle yard soon.   Looking forward to it.    Im not familiar with a KW.   Is it like a ZW?  

Jim

carsntrains posted:
RSJB18 posted:

Didn't get as much done as I planned- snow day and all. Didn't have to shovel but the CEO had other plans for me yesterday. Did manage to get the high line painted and added more panels to another small section. Started a minor re-wiring project. The ground level section that I use as a passing line for my main loop is powered from the other side of my KW. I can usually make it work if I am running two trains. I decided to add a DPDT switch so that I can power the section from either side of the KW. When I'm done I will be able to run a train on the high line and use the lower section for switching and runarounds or run the train from the high line down the hill and back up the other side. 

2017-11-05 09.34.11

I ordered some dwarf signals that I am going to start adding where appropriate. They have to travel from a land far far away so I probably won't see them for a few weeks.

https://i.ebayimg.com/images/g/RXAAAOSwmUdUYNVx/s-l1600.jpg

I need to wire my fiddle yard soon.   Looking forward to it.    Im not familiar with a KW.   Is it like a ZW?  

Jim

Yea- it's the ZW's little brother.

Image result for lionel KW

Attachments

Images (1)
  • blobid0
Big_Boy_4005 posted:

Thanks Mike, but one gallon will more than cover the rest. Remember, I'm still working on the first gallon, and I'm about 80% of the way done.

Thanks Mark, seems like just a couple weeks ago that I said that. In reality, it was 5 weeks ago. I believe I said that as part of a caption with this picture, and of course pictures have dates. This one is from January 31st.

IMG_8033

Ah ha, that's it!!  Thanks for looking that up!  I wasn't crazy then!  

This morning after I painted the sidewalk I plastered last night I decided to go back to a project I put on hold while building all the rest of tables. I had made a table for a large Scrap Iron Yard with the Lionel Gantry Crane, the latest version that moves up and down the track.  So I took all the stuff that was sitting on the table and stuffed it somewhere else. I'll be working on the fence to go around the yard. Decided on a Galvanized metal fence with a couple of swing gates. One for the track and a smaller one for truck traffic. Pics...................Paul

DSCN1627DSCN1628DSCN1629DSCN1630DSCN1632

Attachments

Images (5)
  • DSCN1627
  • DSCN1628
  • DSCN1629
  • DSCN1630
  • DSCN1632

Paul, the sidewalk is looking quite good!  The crane looks great there!!  That scene will look really good when done!!

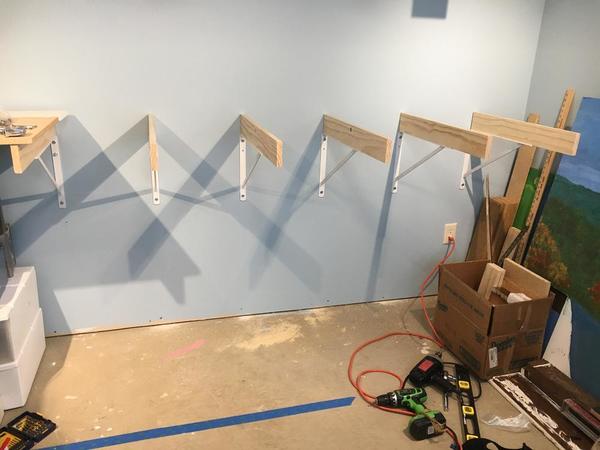
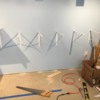
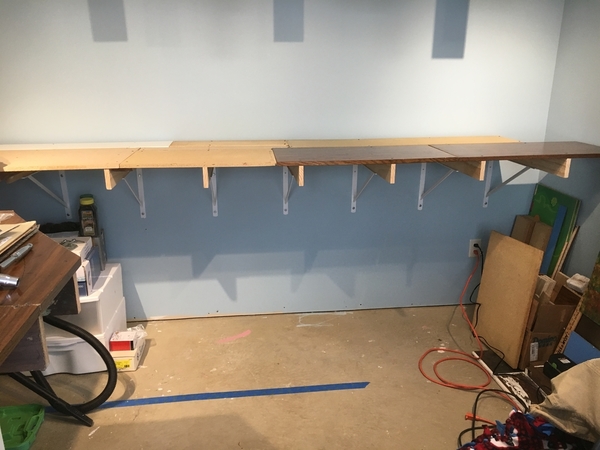
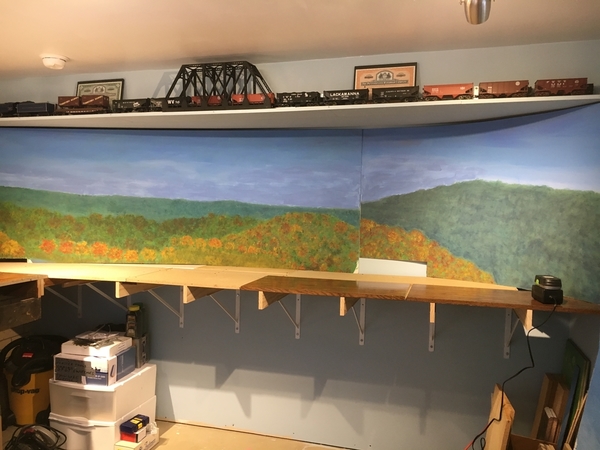
While you were working on that, I was putting in the 6 remaining brackets on the wall that will hold the stationary shelf part of my layout.

2018-03-08 11.15.51


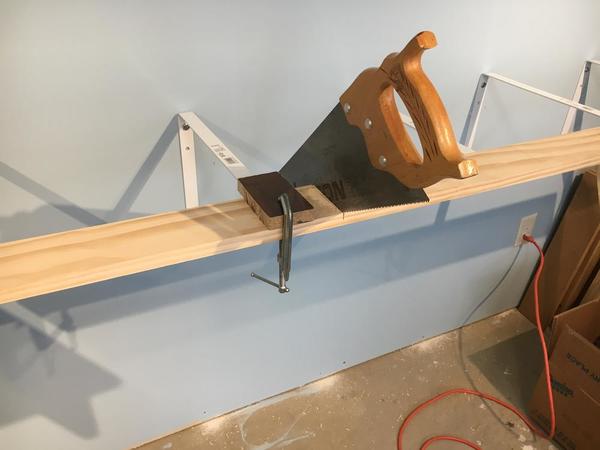
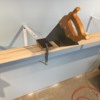
I decided to break down and buy two 1x4s to cut up for the stringers.  That is the first would I have purchased for this project.  It is cold outside, so I decided for these few small cuts to do them inside instead of putting the horses on the patio.  Here is my poor man's table saw.  Worked quite well.  

2018-03-08 11.25.54


Here they are attached and waiting for something to be mounted on top.  Lunch time.

2018-03-08 12.08.34

Attachments

Images (3)
  • 2018-03-08 11.15.51
  • 2018-03-08 11.25.54
  • 2018-03-08 12.08.34
coach joe posted:

Adriatic that seems like a lot of work but the result is fantastic.  All you need is some MOW lettering on the sides.

It was pretty easy; finding a pancake motor in the junk box was hard; it needed the shaft to sit centered over the gearbox well. So was finding an axle pulley that wasn't too big.  Waiting for the JBWeld to set took the most time outside of sanding  off the beach themed graphiçs as the motor frame was slice off the tapeplayer chassis with the motor on it.

Elliot, I am glad to hear one more gallon will do ya!

Bob, good luck on the wiring! Thing are looking really nice there and it will be an improvement to power everything they way you want!

Paul, I am with Mark! Sidewalks look wonderful! The Gantry Crane looks Fantastic! Bob is right, seams like your so close and up pops another table! How many more tables do you have left?

Mark the Brackets look great! Now for the top!

Mark Boyce posted:

While you were working on that, I was putting in the 6 remaining brackets on the wall that will hold the stationary shelf part of my layout

I decided to break down and buy two 1x4s to cut up for the stringers.  That is the first would I have purchased for this project.  It is cold outside, so I decided for these few small cuts to do them inside instead of putting the horses on the patio.  Here is my poor man's table saw.  Worked quite well.   

Here they are attached and waiting for something to be mounted on top.  Lunch time.

2018-03-08 12.08.34

Mark;

You bought wood??? Well, that explains the two feet of snow on my deck   

But seriously, looks like you are making some good progress - congrats. Are you planning on having some outbound support for the shelf or are the brackets strong enough to support the weight of the finished layout (not to suggest that ANY layout is ever finished)???

Mark Boyce posted:

Paul, the sidewalk is looking quite good!  The crane looks great there!!  That scene will look really good when done!!

While you were working on that, I was putting in the 6 remaining brackets on the wall that will hold the stationary shelf part of my layout.

2018-03-08 11.15.51


I decided to break down and buy two 1x4s to cut up for the stringers.  That is the first would I have purchased for this project.  It is cold outside, so I decided for these few small cuts to do them inside instead of putting the horses on the patio.  Here is my poor man's table saw.  Worked quite well.  

2018-03-08 11.25.54


Here they are attached and waiting for something to be mounted on top.  Lunch time.

2018-03-08 12.08.34

Image result for i hear that train a comin johnny cash

Thank you, Paul 2, Mike, Paul Techno-peasant and Bob!!!

I'm sorry buying wood lead to all that snow!!!  We only got an inch last night and an inch the night before.  The mountains keep the nor'easters away, and we are 80 to 90 miles from Lake Erie, so we don't get much from the Lake.     Yes, I was going to have too much waste ripping the remaining boards from the big workbench, and I haven't taken the time to go through my dad's stash to see what I can bring home.  So I bought two boards at Lowe's when I got the rest of the brackets.  

Apples55 posted:
Mark Boyce posted:

While you were working on that, I was putting in the 6 remaining brackets on the wall that will hold the stationary shelf part of my layout

I decided to break down and buy two 1x4s to cut up for the stringers.  That is the first would I have purchased for this project.  It is cold outside, so I decided for these few small cuts to do them inside instead of putting the horses on the patio.  Here is my poor man's table saw.  Worked quite well.   

Here they are attached and waiting for something to be mounted on top.  Lunch time.

2018-03-08 12.08.34

Mark;

You bought wood??? Well, that explains the two feet of snow on my deck   

But seriously, looks like you are making some good progress - congrats. Are you planning on having some outbound support for the shelf or are the brackets strong enough to support the weight of the finished layout (not to suggest that ANY layout is ever finished)???

Oh, sorry Paul, I forgot to answer your question.  The online write-up says these brackets will support up to 500 pounds.  In the reviews I see guys who have put them in their garages and loaded all kinds of stuff a lot heavier than I will have with the layout.  While my stringers are 28" long (10" longer than the brackets), I don't think there will be a problem as the front will have the lowest scenery elevations and least weight.  I will only have about 6 1/2 feet of shelf front exposed.  Since the wall is only 11 1/2 feet long, the freestanding portions of the layout on the adjacent walls should give ample support.  No, I'm not an architect or mechanical engineer; I'm a telecom engineer slowly going out to pasture, but I think it will work okay.    If not, I'll put a brace in the middle. 

Mark Boyce posted:

Paul, the sidewalk is looking quite good!  The crane looks great there!!  That scene will look really good when done!!

While you were working on that, I was putting in the 6 remaining brackets on the wall that will hold the stationary shelf part of my layout.

2018-03-08 11.15.51


I decided to break down and buy two 1x4s to cut up for the stringers.  That is the first would I have purchased for this project.  It is cold outside, so I decided for these few small cuts to do them inside instead of putting the horses on the patio.  Here is my poor man's table saw.  Worked quite well.  

2018-03-08 11.25.54


Here they are attached and waiting for something to be mounted on top.  Lunch time.

2018-03-08 12.08.34

is that a left handed saw or right handed saw ?

RSJB18 posted:

Those brackets should be fine Mark. The weight will be spread over all of them so you could probably put some 1:1 rail up there and it would hold.

darlander posted:
Mark Boyce posted:


Mark, nice to see progress.  Look forward to following your project!   

Cheers, Dave

cabinet Bob posted:
Mark Boyce posted:

Paul, the sidewalk is looking quite good!  The crane looks great there!!  That scene will look really good when done!!

While you were working on that, I was putting in the 6 remaining brackets on the wall that will hold the stationary shelf part of my layout.


I decided to break down and buy two 1x4s to cut up for the stringers.  That is the first would I have purchased for this project.  It is cold outside, so I decided for these few small cuts to do them inside instead of putting the horses on the patio.  Here is my poor man's table saw.  Worked quite well.  


Here they are attached and waiting for something to be mounted on top.  Lunch time.

is that a left handed saw or right handed saw ?

Bob, I think you are correct!!!

Dave, Thank you very much!!

Cabinet Bob, It doesn't matter if it is right handed or left handed. I am ambidextrous; I do carpentry equally poorly with either hand.    Actually, I used both hands, because the arthritis in my thumb was hurting, so I switched hands!!    For more cuts, I'll break out the circular saw, put on my coat, and go outside.  

Mike, ball park figure I still have 5 more tables to make up. After cleaning off the table I decided to vacuum the floor areas. I was feeling domesticated LOL. I got a coat of Aluminum on one side of the fence. Maybe after dinner I can get the other side painted. For now I think I'll head up to the attic to run some trains. Pic.............Paul

DSCN1633

Attachments

Images (1)
  • DSCN1633
paul 2 posted:

Mike, ball park figure I still have 5 more tables to make up. After cleaning off the table I decided to vacuum the floor areas. I was feeling domesticated LOL. I got a coat of Aluminum on one side of the fence. Maybe after dinner I can get the other side painted. For now I think I'll head up to the attic to run some trains. Pic.............Paul

DSCN1633

Looks nice Paul! You have the best of both worlds! A layout to build and a layout to run trains! Who knows if it was me I might forget about one or the other! LOL

Paul 2, The aluminum looks good!

Paul Apple, Jeff, I like the way you jentz think!!  

Well, I got to work a little longer, and did cut the table top boards outside with the circular saw.  It really wasn't cold at 30 degrees, but my comfort zone is defiantly shrinking with experience.

 2018-03-08 15.40.29

I also measured and trimmed two sections of backdrop I got from George (G3750) last spring, just about this time of year, now that I think of it.  The sections are just sort of propped up there to get an idea of how it will look.  Once I have them mounted on supports, I think they will look great!  Thanks again George!!

2018-03-08 17.22.55

Attachments

Images (2)
  • 2018-03-08 15.40.29
  • 2018-03-08 17.22.55
Apples55 posted:
cabinet Bob posted:
Mark Boyce posted:


2018-03-08 11.25.54


is that a left handed saw or right handed saw ?

That's a silly question, Bob... it all depends on which side you stand on!!!

Now, if you're talking a left-handed monkey wrench, that is a saw horse of a different color  

Sorry guys I think your all wrong! From the look of the saw you can still see the lettering on the blade! Which makes me think he barrowed it from the wife's do it yourself closet!

Mark Boyce posted:

Paul 2, The aluminum looks good!

Paul Apple, Jeff, I like the way you jentz think!!  

Well, I got to work a little longer, and did cut the table top boards outside with the circular saw.  It really wasn't cold at 30 degrees, but my comfort zone is defiantly shrinking with experience.

 2018-03-08 15.40.29

I also measured and trimmed two sections of backdrop I got from George (G3750) last spring, just about this time of year, now that I think of it.  The sections are just sort of propped up there to get an idea of how it will look.  Once I have them mounted on supports, I think they will look great!  Thanks again George!!

WOW that looks wonderful Mark! Nice work, sorry you had to get cold, but it sure looks nice! Love the back drops!

Adriatic posted:
coach joe posted:

Adriatic that seems like a lot of work but the result is fantastic.  All you need is some MOW lettering on the sides.

It was pretty easy; finding a pancake motor in the junk box was hard; it needed the shaft to sit centered over the gearbox well. So was finding an axle pulley that wasn't too big.  Waiting for the JBWeld to set took the most time outside of sanding  off the beach themed graphiçs as the motor frame was slice off the tapeplayer chassis with the motor on it.

Next time, try taking off the beach graphics with a cube of Magic Eraser soaked in generic Lectric Shave lotion.  Does a great job and doesn't craze the plastic! 

Mitch 

Hi Mark, I have to say I admire you for your recycling skills. I thought about it today

as I was packing up bags of useless bubble wrap to throw away. It amazes me how

many times I get an item that is nicely packed in new bubble wrap, but then is 

mummified in packing tape rendering the bubble wrap useless as you try to cut it away.

I rarely use any tape at all or at the most a piece of scotch tape and I have never had

a damage complaint. 


Thanks Mitch, but the scratches will vanish under clear coat and I have a whole lot of 480+ fine wet/dry to rid myself of too.  The scratches are needed for a non-flaking surface coat.    The yellow is also painted metal, only the top half is plastic. Even the bottom is just a plastic cover.

Sanding scratches ; they provide grip.  (composer fun again, editing to group subjects, near impossible)

M. Mitchell Marmel posted:
Adriatic posted:
coach joe posted:

Adriatic that seems like a lot of work but the result is fantastic.  All you need is some MOW lettering on the sides.

It was pretty easy; finding a pancake motor in the junk box was hard; it needed the shaft to sit centered over the gearbox well. So was finding an axle pulley that wasn't too big.  Waiting for the JBWeld to set took the most time outside of sanding  off the beach themed graphiçs as the motor frame was slice off the tapeplayer chassis with the motor on it.

Next time, try taking off the beach graphics with a cube of Magic Eraser soaked in generic Lectric Shave lotion.  Does a great job and doesn't craze the plastic! 

Mitch 

Oh shoot, missed the electric shave part, that's a no go for me, gasoline is easer on my allergies than scents.

Adriatic posted:

Oh shoot, missed the electric shave part, that's a no go for me, gasoline is easer on my allergies than scents.

Not surprising.  That stuff actually has MSDS warnings;  you're supposed to wear goggles and rubber gloves when using it.  

I've given paint removal demos in the past.  The reaction:  "You mean I've been putting THAT on my FACE?!"   

Mitch

M. Mitchell Marmel posted:
Adriatic posted:

Oh shoot, missed the electric shave part, that's a no go for me, gasoline is easer on my allergies than scents.

Not surprising.  That stuff actually has MSDS warnings;  you're supposed to wear goggles and rubber gloves when using it.  

I've given paint removal demos in the past.  The reaction:  "You mean I've been putting THAT on my FACE?!"   

Mitch

I always thought that stuff was not good for you. Sure did wake you up if you weren't already. Don't think paint remover would have ever crossed my mind though.

Bigger question Mitch- when (or how) did you figure out that Lectrik Shave removed paint???????

Added a little character to the layout with the Marx tin tunnel (upper left). Totally out of place, but I don't care. At this point I just need to complete the wiring. Dragging my feet.

My passenger station should come in soon. It'll go where the Lionel platform (lower left) currently resides. 

20180308_220713


Attachments

Images (1)
  • 20180308_220713
RSJB18 posted:

I always thought that stuff was not good for you. Sure did wake you up if you weren't already. Don't think paint remover would have ever crossed my mind though.

Bigger question Mitch- when (or how) did you figure out that Lectrik Shave removed paint???????

Used to use it to remove paint, Sharpie marks et cetera from barcode scanners once upon a time... and then I experimented with printing on pens and such.  Worked great on that!  So, going from that to removing paint from MPC era tender shells et cetera was a logical step. 

Mitch

M. Mitchell Marmel posted:
Mark Boyce posted:

Mitch, Lectrik Shave!  How about that!  Thanks for the tip!

Here's a couple examples of paint removed using Lectric Shave... 

GEDC0770GEDC3198

Mitch 

But does it make the hair on your face stand up?? LOL   

I took the day off from trains yesterday..    Hope to get some more stuff to work with soon.

Looks like everyone else was full steam ahead!!!!   Lots of good stuff happening here!   Soon yall will be running trains!!!

Jim

Had to run errands this morning so I got a late start. But my package arrived a day early. I got a Weaver TOFC that I had been looking for but they are sort of hard to find. I think it had just been posted on the Bay and I jumped on it right away. Learn that those that hesitate can lose out. After the excitement of opening it up I went back to working on the fence. Yesterday I got all the fronts painted. And today I started gluing fence post the the backsides. Once the glue dries I can paint them. I also painted the one side of the two gates. I am going to glue them to the posts so they can actually be opened or closed. So a little lunch then back to working on the fence this afternoon. Pics........Paul

DSCN1634DSCN1636DSCN1637DSCN1638

Attachments

Images (4)
  • DSCN1634
  • DSCN1636
  • DSCN1637
  • DSCN1638
paul 2 posted:

Had to run errands this morning so I got a late start. But my package arrived a day early. I got a Weaver TOFC that I had been looking for but they are sort of hard to find. I think it had just been posted on the Bay and I jumped on it right away. Learn that those that hesitate can lose out. After the excitement of opening it up I went back to working on the fence. Yesterday I got all the fronts painted. And today I started gluing fence post the the backsides. Once the glue dries I can paint them. I also painted the one side of the two gates. I am going to glue them to the posts so they can actually be opened or closed. So a little lunch then back to working on the fence this afternoon. Pics........Paul

DSCN1634DSCN1636DSCN1637DSCN1638

I'll have a tastykake and about 2000 miles of fencing please!!! LOL

Looks good! And that is a super cool flat car and trailer! 

Jim

Last edited by carsntrains

Added 2 older Atlas switchers to the roster and immediately tore into one in an attempt to improve it's looks.  The black NYC SW8 became an experiment to see if mounting the windows flush could be accomplished.  By separating the clear plastic into individual panes, they can be massaged with a file to tight fit back into their appropriate openings.  Once installed they also give the slight illusion that the plastic cab walls are thinner than they actually are.

Next on the agenda is to replace all the yellow colored plastic railings and grab irons that almost look translucent.   NYC practice never painted the coupler cut levers yellow anyway.  I hope to fill in some of the nothingness of the coupler opening in the pilot for more realism too.  Loads of fun in store while I wait on my ERR order that both these little jewels will receive.

Bruce

Last edited by brwebster

Add Reply

Post

OGR Publishing, Inc., 1310 Eastside Centre Ct, Suite 6, Mountain Home, AR 72653
800-980-OGRR (6477)
www.ogaugerr.com

×
×
×
×
Link copied to your clipboard.
×
×