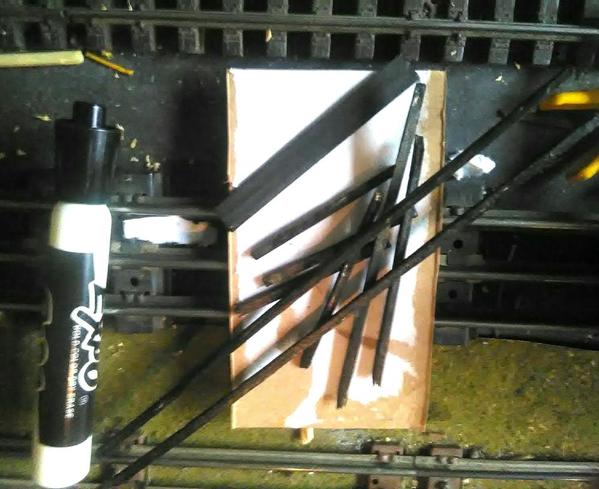
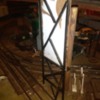
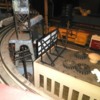
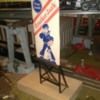
The basement is messy but I am close to completing the rough in for improvement of problem corner.

1. Increased height of water tower by lengthening support legs. But I may redo that. 2. Disassembled for painting some parts of a walthers golden valley built up depot that came today. 3. Looked over the Lionel Rico station kit that also came today. Looking forward to painting and assembling. 4. Installed last section of a retaining wall with tunnel.  5. Glued foam pieces to foam base for rock face foundation.

Someday I hope to run a train or two.20161230_15163520161230_22425120161230_22430320161230_224308


Attachments

Images (4)
  • 20161230_151635
  • 20161230_224251
  • 20161230_224303
  • 20161230_224308

What did I do on my layout today? Well I am pleased to say I finally started my layout! One module at a time. Started with a five foot module today. Got it all framed up and foam on. But still have to get the legs installed tomorrow and get the holes drilled in the bench work for wiring and such. Will post pics tomorrow to show the first bits of progress. The big thing will be scratch building the 15 foot long 32 inch high grain elivator on the 5 foot sections. This is gonna be fun! 
paul 2 posted:

Yesterday I got the stone down and glued in the scrap yard. Today I have to get a few more shelves in under the tables so I can get the boxes on the table under the table so I can start working on that section next. Pics. Now I am just waiting for my crane and sound building to come...................Paul

DSCN0086DSCN0090

Looking good Paul, cant wait to see the crane in place!

Mark Boyce posted:

I helped my daughter and son-in-law move almost everything left in her art studio on the rear of our house to their house last evening.  I decided to take some photos of the room after I placed some trains on some shelves she left behind.  Yes, the pink paint will be covered with blue.  I plan to start a topic soon for layout planning for this 11' 6" x 11' 4" room.  As the photos show, there is a door to the basement in one corner and a big sliding glass door on an adjacent wall.  The brick wall was the exterior of the house before my in-laws put on the addition, and the washer and dryer are on the other side of the brick wall.  The Ceiling Central RR is in the wood paneled room right outside the small door.


Mark- The day every father dreams of.

When the kids move out and we get the spare room for more trains ! Good luck with the project, can't wait to see progress photos.

Bob

RSJB18 posted:
Mark Boyce posted:

I helped my daughter and son-in-law move almost everything left in her art studio on the rear of our house to their house last evening.  I decided to take some photos of the room after I placed some trains on some shelves she left behind.  Yes, the pink paint will be covered with blue.  I plan to start a topic soon for layout planning for this 11' 6" x 11' 4" room.  As the photos show, there is a door to the basement in one corner and a big sliding glass door on an adjacent wall.  The brick wall was the exterior of the house before my in-laws put on the addition, and the washer and dryer are on the other side of the brick wall.  The Ceiling Central RR is in the wood paneled room right outside the small door.


Mark- The day every father dreams of.

When the kids move out and we get the spare room for more trains ! Good luck with the project, can't wait to see progress photos.

Bob

Bob,

Thank you!  I think progress will be slower than I had hoped due to obligations to elderly relatives, but I do see that the room will not be encroached on in the meantime.  For the last 25 years, every time I thought I had found some space for trains, a growing family (and their stuff) kind of took over my space.   I was glad to give up the space to help them and my wife with their interests and needs.

KRM posted:

Nothing on the layout but something on a layout project.

Got the last powered A-unit finished today from an idea of 8N's.

 Great idea and makes for a great set.

Works Great but sure lets the ZW know it is feeding something with it and six lit passenger cars behind it.. Laugh I had a 218 shell on a frame with a 2 position e-unit motor in it that I pulled the motor, pick up truck and e-unit out of and installed the new motor, A unit dummy front truck and wired pigtails to the motor so it all runs off the E-unit in the lead engine. So there is 8 axles with magnets pulling. So a post war 218 leads the way for the twin motor 8021 B unit and 8020 powered A unit. Works GREAT!!!


KRM- nice project. My 218 just died the other day. May be an idea for the repair project. My set is an A/ A dummy so we will see.

Bob

I saw the signs.

Well actually I used shears.

Pointy ones .

Im allowed now

White glue & Gel CA, it took 3 15 min. sessions. One more session for weathering after the thiings fully cure. Maybe a grain of wheat above the tall one, and  cat & sconces on the wide one.

IMG_20161231_064745IMG_20161231_065026IMG_20161231_070316IMG_20161231_070700IMG_20161231_065640


IMG_20161231_071608IMG_20161231_073752IMG_20161231_072725

Now I need delivery trucks. I'm thinking truck #101 of McAuliffe's "NUTS" Delivery, and the #82 of Carter Families Peanuts might be sparring for buisness ?  Any farmer figurers with a huge smile?

Attachments

Images (8)
  • IMG_20161231_064745
  • IMG_20161231_065026
  • IMG_20161231_070316
  • IMG_20161231_070700
  • IMG_20161231_065640
  • IMG_20161231_071608
  • IMG_20161231_073752
  • IMG_20161231_072725

Finally started placing buildings and accessories on the "Valley of Bridges" layout.  I will mark the table for each building footprint, then drill holes for powering lights. I need to trim the upper ridgeline plywood back some more to allow for the hillside slope down to the "Village of Deichman".  I also placed buildings in the industrial area, but this is subject to change as I build the elevated bridgework extension on the upper ridgeline reverse loop by the docks.  After placing buildings, I will run wire to the Atlas O Signals on the upper ridgeline before I do the rock quarry wall, sealing some of the access to the wiring. I made more progress in the last two days, then in the last three months.

Attachments

Images (8)
  • DSCN2142: C&O H7 #1578 steams into Village of Deichman.
  • DSCN2140: Village of Deichman nestled below the ridgeline upper track.
  • DSCN2139: Newly moved siding to accommodate Bethlehem Steel Culvert Unloader/Loader.
  • DSCN2133: Open area ready for Bethlehem Trackside Crane, either along river in foreground or open space in yard.
  • DSCN2131: Interlocking Tower a single Pratt Truss Swing Bridge across river.
  • DSCN2132: Swing Bridge at middle bridge Interlock.
  • DSCN2138: Upper ridgeline Country store and Logging Camp. Hillside not built yet.
  • DSCN2128: Dockside industrial area. T-square locates future elevated reverse loop off bridge in background.
RSJB18 posted:

Mark- I have one in College and one in Middle School. I've got a few years to go but I get it, family first.

Bob

Bob,

Yes, I wished our girls had been interested in trains, but my dad wished I had been interested in fishing, and I bought trains instead.  We helped them develop their own interests and talents.  Now I am a young 60, and you can call me Nester!  lol

Started mocking my module up. Pulled out the RS3 project to gain some motivation on it as well. Basically I am planning this to be the far end of a 15 foot industrial complex. There will be a drainage ditch between the tracks as is common in the northern Oregon area. It will come out of a culvert at the end of the module. Lots of overgrown grass and shrouds and debris to break the scene up. Anyways. Here is a few pics of everything just sitting in place to give a idea of what's coming next. IMAG0065

IMAG0061IMAG0053

Attachments

Images (3)
  • IMAG0065
  • IMAG0061
  • IMAG0053

Thank you Mark. 


What does the RS3 project entail? Well here is a run down lol. 

First it is a older weaver model so,cracked gears replaced was the first thing.

Now what's left to finish.

All brass grab irons. Door handles. Stanchions,handrails and lift rings 

Semi scratch built fuel tank.

P & D hobbies brass fan grill and fan. 

Brass breather.

PSC exhaust stack 

Brass sand fill hatches. 

Detailed cab interior.

Brass horn and bracket.

New pilot details. Coupler lift bars. Mu hoses. Overland models plows. 

Replace the brake cylinders on the trucks. Brake chain hanger and such for the trucks as well. 

TMCC conversion and sound coming later. 

P and D window kit. Wiper blades. 

New dual sealed beam headlight castings. 

Ditch lights. And of course paint and weathering. Still adding to the parts Pile so it may be a while longer till it's done. And who knows what else I will change.  


John Rowlen posted:

Finally started placing buildings and accessories on the "Valley of Bridges" layout.  I will mark the table for each building footprint, then drill holes for powering lights. I need to trim the upper ridgeline plywood back some more to allow for the hillside slope down to the "Village of Deichman".  I also placed buildings in the industrial area, but this is subject to change as I build the elevated bridgework extension on the upper ridgeline reverse loop by the docks.  After placing buildings, I will run wire to the Atlas O Signals on the upper ridgeline before I do the rock quarry wall, sealing some of the access to the wiring. I made more progress in the last two days, then in the last three months.

Attaboy! 

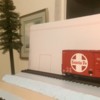
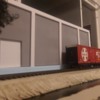
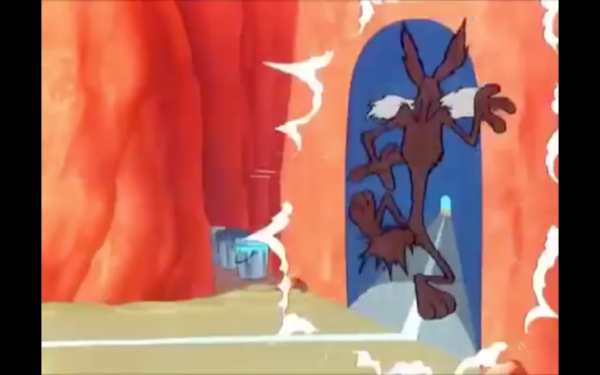
Got the perfect graphic for that spur going into the cinderblock wall:

Screen Shot 2017-01-01 at 6.51.50 AM

Mitch

Attachments

Images (1)
  • Screen Shot 2017-01-01 at 6.51.50 AM
theteejmiester posted:

Thank you Mark. 


What does the RS3 project entail? Well here is a run down lol. 

First it is a older weaver model so,cracked gears replaced was the first thing.

Now what's left to finish.

All brass grab irons. Door handles. Stanchions,handrails and lift rings 

Semi scratch built fuel tank.

P & D hobbies brass fan grill and fan. 

Brass breather.

PSC exhaust stack 

Brass sand fill hatches. 

Detailed cab interior.

Brass horn and bracket.

New pilot details. Coupler lift bars. Mu hoses. Overland models plows. 

Replace the brake cylinders on the trucks. Brake chain hanger and such for the trucks as well. 

TMCC conversion and sound coming later. 

P and D window kit. Wiper blades. 

New dual sealed beam headlight castings. 

Ditch lights. And of course paint and weathering. Still adding to the parts Pile so it may be a while longer till it's done. And who knows what else I will change.  


Thank you.  That is quite a project indeed!  It will look and run great when finished!

HAPPY NEW YEAR ALL. Last night while the wife was switching between the Cavs and Ohio State I was laying out switches I had to see what I could come up with for a industrial area. Not 100% with the area but at least a start. I placed a couple of the buildings around to get an idea. If I stay with the track plan I may end up with different industries in some of the spots. Today will be working on this and seeing what switches and crossover I have to order. Some pics.......Paul

DSCN0091DSCN0092DSCN0093

Attachments

Images (3)
  • DSCN0091
  • DSCN0092
  • DSCN0093
mike g. posted

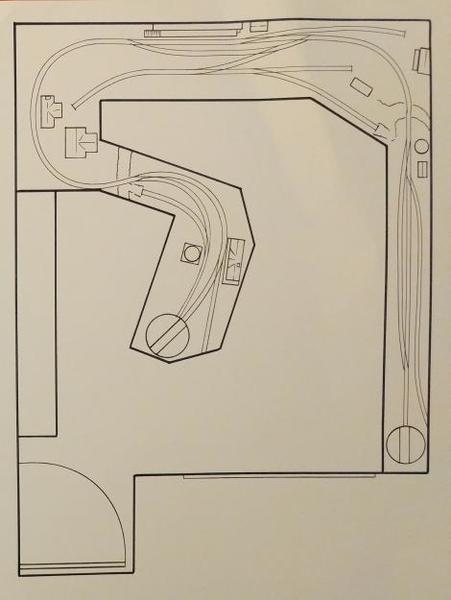
Your inking your track plan? I wouldn't think you are going to start over?

This is something I've been meaning to do for a long time.

I'm NOT starting over, this is the layout I have.

Eventually I'm going to scan it and play with it on Photoshop, adding colors and details.

p51 posted:
pennsynut posted:

I like the intriguing design with the switching challenges.

Sorry, I should have been more specific. This IS my layout, not a planned one. I edited my post to reflect that.

  Lee likes to put his carts before AND after his iron horses

Did you break out a "real" ink pen too?

No 3d SCARM version? 

Adriatic posted:
 

Sorry, I should have been more specific. This IS my layout, not a planned one. I edited my post to reflect that.


Did you break out a "real" ink pen too?

No 3d SCARM version? 

Yep, all in ink.

The only computer use will be when I do coloring and lettering to this.

Last changes to the track plan are done to include doors, which I'd previously forgot...0101171643a-1-1_resized

I also oriented it correctly.

Attachments

Images (1)
  • 0101171643a-1-1_resized
Last edited by p51

Not a lot,,,,

I did order up post war axles and wheels to fix the slop jobs Lionel put in those celebration series blue stripe passenger cars and I also bought a ALCO frame and front truck so I can re-build the one I cannibalized to make the powered A- unit for the four-motor set. So, I am tapped out but will be able to keep working the hobby. Yes

pennsynut posted:

Masked windows on a Walthers golden valley built up that I will paint. 88 pains, I mean panes. I also made walls for a 2.5 inch brick extension for a new Rico station to replace the freight part of the kit.  The Rico station is going to be a restaurant. Here is the golden valley station.

20170101_181709

Looks good, but wow I bet that took some time to mask all the small windows!

Started on the first building for my module. It's constructed out of foam core using my own grid style frame work to avoid any warping. All corners are finished using acrylic texture paste to avoid having any visible joints. Like I said I just started building it this afternoon so all the facade is just pinned in place for test fitting. But it's coming along well.IMAG0095

I forgot how fun it is to scratch build structures. Been over ten years since my last one! 

Attachments

Images (1)
  • IMAG0095

Add Reply

Post

OGR Publishing, Inc., 1310 Eastside Centre Ct, Suite 6, Mountain Home, AR 72653
800-980-OGRR (6477)
www.ogaugerr.com

×
×
×
×
Link copied to your clipboard.
×
×