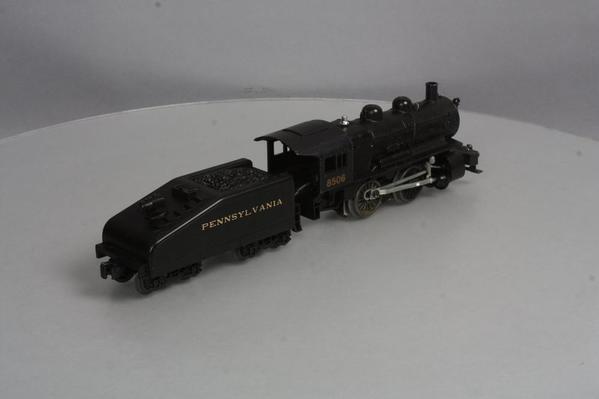
Today, I ordered coffee pods online from Walmart for my wife, along with a couple of knitting hoops, and, well, two Fold out table for Layout (garage sale) Cough Cough Layout! And masonite to secure the mini helix track and foam for limestone walls as backdrop first attempt. Oh, and a Helicopter H "With a circle Papa" for landing the mining company mans helicopter.... tis a great day..
Nice gi-raffe! ![]()
Speaking of which, Fortescue J. Gi-raffe is in trouble. Again.
https://ogrforum.ogaugerr.com/t...50#71678964410391850
Mitch
Attachments
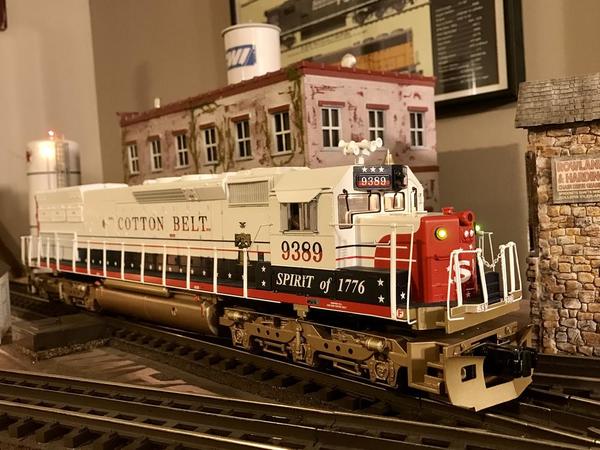
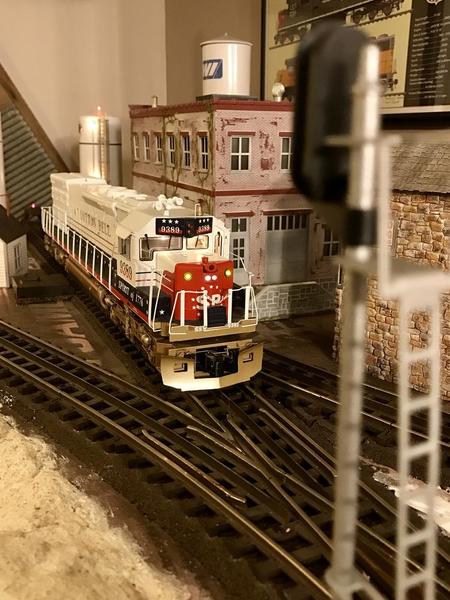
Unveiling a new addition to the fleet. A Bicentennial Cotton Belt Tunnel motor. Received new in box almost 9 years after initial release. Replaced the traction tires, which were dry rotted and applied grease to the gears. Started without issue. Prototypical lights. Sound is not too bad for a PS2 loco. Smokes like a chimney. Nice addition to the roster.
Attachments
Had fun last night by taking a Lionel #8 Standard gauge body and putting it on an O gauge running chassis from a Lionel 8111, DT&I switcher that I have. Fits right on. Will be the power for my Standard gauge n3 train set. Have two orphan passenger cars that will get a knuckle coupler to mate to the engine and O gauge trucks. Will post photos when it is finished.
Decided to take a swing at finishing the roundhouse, installing the between-rail flooring from Crescent Locomotive Works, etc. while waiting for a warm dry day to paint 200' of track outdoors. In Portland, Oregon. It might be a while. We're already way over for the year.
| Total Precipitation: | 8.34 inch (normal: 4.88 inch) |
With all the complaining about the lack of the premium MTH wifi ap, and since it's cold here in Chicago, I had a great time running my trains using my MTH wifi ap. This is very much the future of this hobby.
John
trumptrain posted:
The Western Maryland BL-2 #81! Looks great!
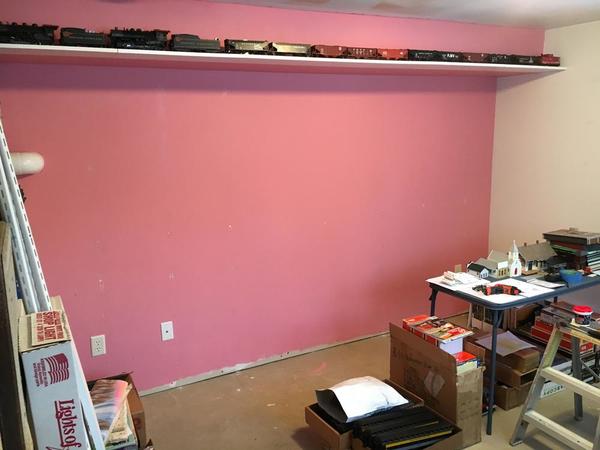
I worked this afternoon on taking down the shelves my daughter left, and spackling all the holes. Next will be to paint over that awful pink with a nice light blue! I am going to keep that one shelf on the bulkhead where the furnace vents go to exit the house.
Attachments
I wired up a switch on the side of the layout that turns on all the power to the layout plus the overhead lights.
I will wire up a 2nd one in the next day or two that will put power to the transformers and leave the original one for just the overhead lights.
I also realized I need to organize under the layout. As I was building I just been chucking stuff under there to get it out of the way. I will plan to condense and organize next before any more work on the layout gets done. I will be spending a lot of time under the layout soon to wire everything up and need room to work!
Took a break from lighting the buildings. Added a stone wall lining to the mountain tunnel. Used black construction paper to line the tunnel walls after the stone stacked wall at each end. The 2 pictures show that I will need to stain the inner wall/ceiling timbers.
Attachments
It has been a crazy week, starting last Saturday with the NMRA division modelers retreat. Saw some interesting clinics, more later on that. I had visitors on Monday, Thursday, Friday and today, so not much work got done until this afternoon. On top of that, Tuesday morning I woke up dizzy. As I stepped off the scale, I lost my balance, did a 180, and landed square on my butt, but not before hitting my ribs on the corner of the end table. Owww.
After that, Tuesday and Wednesday were a total loss. Let's get to the good stuff.
I did a bunch of things today. One of last weekend's clinics was on using LED's. Keep in mind I was one of only two O gaugers in the room. The main focus was on using the tiny 0306 rectangular LED's and the even smaller 0204's. Then the concept of battery power came up, and I got an idea!
These are number 10 hearing aid batteries. Smallest ones I could find.
This is a piece of Plastruct tube, note the thick wall. That is a 3mm flashing red LED, no circuitry required to make it flash. I took a drill and enlarged the inside diameter of the tube, most of the way up, but left a shoulder in the inside, to stop the batteries from going all the way through. I added the steel pin at the bottom, and stacked 3 of the batteries inside.
Have you figured out what it is yet? Answer here.
It still needs an easy on / off switch, and some cosmetic work to refine the package.
I made this box today. I still need to make the supports for it to stand on under the layout.
This computer will go in the box, and will eventually control the layout. The first connection will be to my command base. Once that connection is established, I'll be able to use JMRI's WiFi throttle app to run trains. This won't replace my Cab-1's, but rather supplement them and offer operators the option to use whichever device they feel most comfortable with. Also with the central dispatch board, if I want to run the layout solo, it can be done with an iPad and the premium version of the app for $10.
I preped for the new Midway yard track...
and the new engine pocket.
I'm also getting things gathered up for rail painting.
Going to be a busy week next week.
Attachments
Big_Boy_4005 posted:It has been a crazy week, starting last Saturday with the NMRA division modelers retreat. Saw some interesting clinics, more later on that. I had visitors on Monday, Thursday, Friday and today, so not much work got done until this afternoon. On top of that, Tuesday morning I woke up dizzy. As I stepped off the scale, I lost my balance, did a 180, and landed square on my butt, but not before hitting my ribs on the corner of the end table. Owww. Good to know your ribs prevented any serious damage when you landed on your butt
Glad your ok!!!!!!
After that, Tuesday and Wednesday were a total loss. Let's get to the good stuff.
I did a bunch of things today. One of last weekend's clinics was on using LED's. Keep in mind I was one of only two O gaugers in the room. The main focus was on using the tiny 0306 rectangular LED's and the even smaller 0204's. Then the concept of battery power came up, and I got an idea!
These are number 10 hearing aid batteries. Smallest ones I could find.
This is a piece of Plastruct tube, note the thick wall. That is a 3mm flashing red LED, no circuitry required to make it flash. I took a drill and enlarged the inside diameter of the tube, most of the way up, but left a shoulder in the inside, to stop the batteries from going all the way through. I added the steel pin at the bottom, and stacked 3 of the batteries inside.
Have you figured out what it is yet? Answer here.
It still needs an easy on / off switch, and some cosmetic work to refine the package. Great Idea and so simple.
I made this box today. I still need to make the supports for it to stand on under the layout.
This computer will go in the box, and will eventually control the layout. The first connection will be to my command base. Once that connection is established, I'll be able to use JMRI's WiFi throttle app to run trains. This won't replace my Cab-1's, but rather supplement them and offer operators the option to use whichever device they feel most comfortable with. Also with the central dispatch board, if I want to run the layout solo, it can be done with an iPad and the premium version of the app for $10.
I preped for the new Midway yard track...
and the new engine pocket.
I'm also getting things gathered up for rail painting.
Going to be a busy week next week.
Thanks for the update.
Doug, fortunately it no longer hurts when I laugh. ![]()
![]()
Should we assume what you saw on the scale caused the dizziness? Good or bad? or just plain disbelief. ![]()
Just concluded my op session. A good time was had by all.
Even my (15 year old dachshund) pup got into things!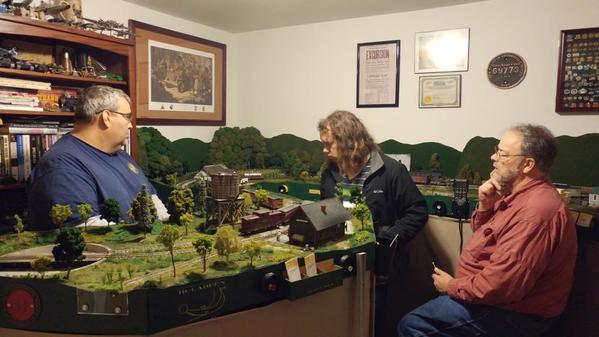
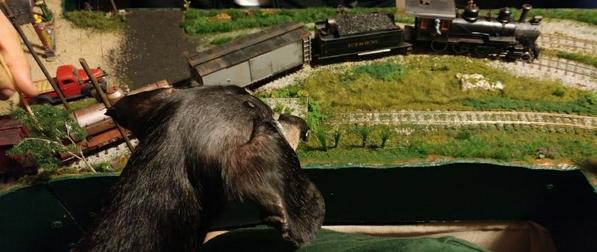
It started a little scary when I turned on the master power switch and nothing happened. We unplugged DCC throttles one at a time and the error got cleared. That'd never happened before and it appears a throttle wasn't completely plugged in. I sure sweated that for a few minutes!
Attachments
Nah, inner ear problem. Nothing that a good dose of Dramamine couldn't fix, but it was actually kind of scary.
Big_Boy_4005 posted:Nah, inner ear problem. Nothing that a good dose of Dramamine couldn't fix, but it was actually kind of scary.
Elliot, I have inner ear issues at times and have dealt with it for years.. No fun at all.. If want to discuss it with me my email is in my profile..
Neel
Nothing done on the layout yesterday but it was a train filled day. Saturday morning headed to Menards to pick up my wood load flat car. It is a really nice car and a bit of weight too. Mark, Menards and Cabinet Bob another home run. Saturday afternoon was spent at a friend's house running trains with a bunch of local guys. Once I got home I suggested to the CEO that I should balance out the day and take her out for a nice dinner. Pics...................Paul
Attachments
Jdevleerjr posted:I wired up a switch on the side of the layout that turns on all the power to the layout plus the overhead lights.
I will wire up a 2nd one in the next day or two that will put power to the transformers and leave the original one for just the overhead lights.
I also realized I need to organize under the layout. As I was building I just been chucking stuff under there to get it out of the way. I will plan to condense and organize next before any more work on the layout gets done. I will be spending a lot of time under the layout soon to wire everything up and need room to work!
Looks good Jim. I like the LC Berk. Very nice.
Looked at the local news coverage after your post about the car. Looks like it was a wild few days in your part of the world. We are expecting a blizzard here in the Northeast starting Monday night. Going to be indoors for a few days I guess.
Bob
paul 2 posted:Nothing done on the layout yesterday but it was a train filled day. Saturday morning headed to Menards to pick up my wood load flat car. It is a really nice car and a bit of weight too. Mark, Menards and Cabinet Bob another home run. Saturday afternoon was spent at a friend's house running trains with a bunch of local guys. Once I got home I suggested to the CEO that I should balance out the day and take her out for a nice dinner. Pics...................Paul
Smart man. Always keep the CEO happy!
Well it's been 8 months since we moved into an adult community and I'm finally making progress on the layout. I disassembled all my benchwork and carted it to our new house then reassembled it (easier than I thought it would be). This week I finished laying out the track and today started to wire the isolated blocks (only completed 3 and had to take a break). My only problem with soldering is the iron keeps getting blackened and I have to scrape it with light sandpaper to clean it - any idea what I'm doing wrong?? I'm using 14 gauge wire with 16 gauge drops - some of the longer runs will need the heavier wire.
Don't know if anyone else does this but if you look at the picture of the feeders coming off the track you'll see 3 black wires - I connect the 2 outside rails with a black (common) wire so that both rails are grounded - I never did this before but it was recommended by my LHS. Overkill??
The wires hanging from the steel beams are the wires from the "old layout" - I just cut them off when I moved and now reusing them on this layout - saves a lot of time and money.
OK my break is over - back to the basement!
Have a great Sunday -
Paul
Attachments
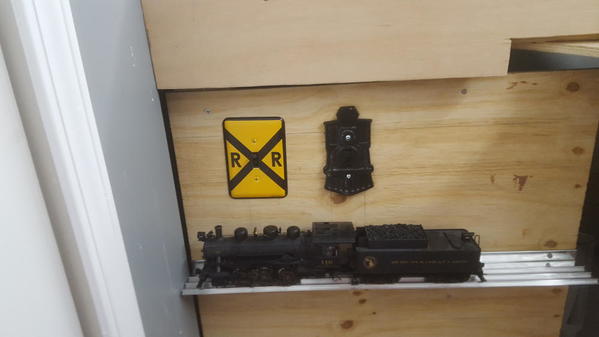
Not a lot done this weekend but I did manage to work on my facade. I wired up 2 switches for powering the layout. The switch with the RR crossing faceplate turns on the overhead lights and the one with the Locomotive faceplate turns on the layout itself. I also mounted 1 of the 2ft shelf to store locomotives on. I will have (3) 2ft shelves on this side and (4) 4ft shelves on the other.
I have a very busy week ahead at work but I hope to take it all apart this week and paint it. It should give the layout a more finished look, then back to plaster cloth and hope to get it all down on the left side of the layout by then end of next week.
Attachments
Jdevleerjr posted:
I found one of those RR crossing light switch plates at Hobby Lobby a few months ago. I was going to put it on the master light switch in the layout room. Frankly, I'd forgotten I ever had the thing until I saw this post. I need to find where I'd put it...
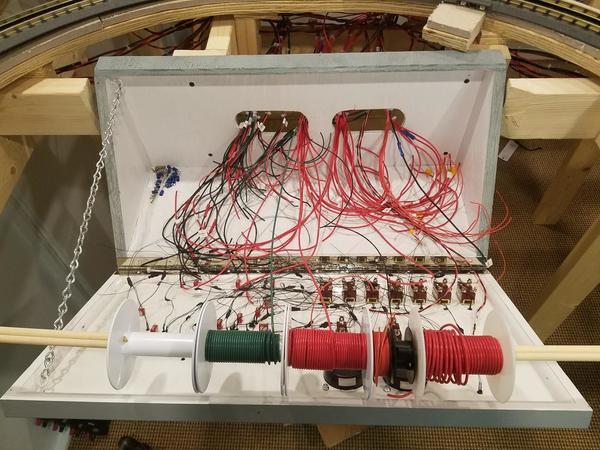
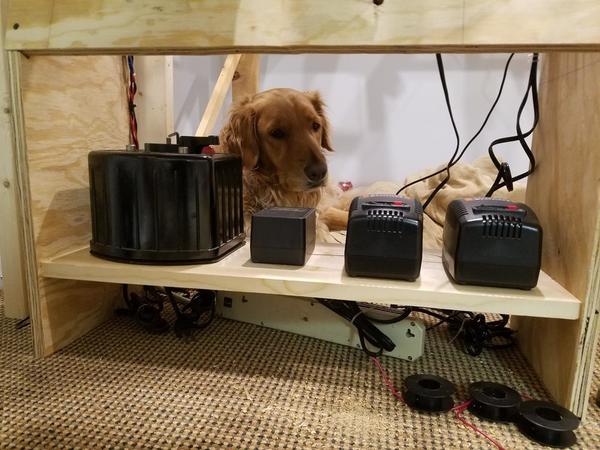
This weekend I added my power sources and did a lot more wiring. Wiring is almost done, well running it at least, then I have to make all of the control panel connections. Also, the old KW that a forum member gave me a few years back (thanks Thom) had some posts that needed fixed. I ended up drilling all of them out (one is completely missing and the connections of 4 of them were completely broken off inside), and then replaced with #8-32 x 3/4" screws.
My supervisor was also on-site most of the time.
Attachments
Another side project - actually a marketing survey. I made another track cleaning car yesterday using a PW caboose. I'll probably sell them for $30 +/- + shipping. Scale cars may actually double that price. If there is any interest, I'll look for other cabooses or transformer cars at upcoming shows next month. Right now I'm pulling this one. It needs more weight added over the wheels in order to be pushed. This is not patented, so anyone wishing to copy - the idea is free! LOL. This car needs a repaint and decals.
Attachments
mjrodg3n88 posted:This weekend I added my power sources and did a lot more wiring. Wiring is almost done, well running it at least, then I have to make all of the control panel connections. Also, the old KW that a forum member gave me a few years back (thanks Thom) had some posts that needed fixed. I ended up drilling all of them out (one is completely missing and the connections of 4 of them were completely broken off inside), and then replaced with #8-32 x 3/4" screws.
My supervisor was also on-site most of the time.
It looking good Mike! and how can you go wrong with such a great supervisor keeping an eye on you!![]()
Took a short break from taping and spackling the den. I took apart the tender from the 0-4-0 switcher I just bought. The light in the tender needs to be repaired so I am going to retrofit a LED instead. I want to play with making it operate off the E-unit so it only lights when the engine is in reverse. Lionel made a red lens for the lantern on the tender which I won't use.
Attachments
Thaddeus posted:
The cars look great! I have some Norfolk and Western cars that look similar. Mine are 15", are yours 18"?
fl9turbo2 posted:I decided not to build this weekend and just run some trains
Nice train!! I especially like the wagon tops!!
decoynh posted:Another side project - actually a marketing survey. I made another track cleaning car yesterday using a PW caboose. I'll probably sell them for $30 +/- + shipping. Scale cars may actually double that price. If there is any interest, I'll look for other cabooses or transformer cars at upcoming shows next month. Right now I'm pulling this one. It needs more weight added over the wheels in order to be pushed. This is not patented, so anyone wishing to copy - the idea is free! LOL. This car needs a repaint and decals.
The video is on the short line so it goes over both 031 + 072 tubular switches.
Matt,
I could send you a postwar caboose to make into a track cleaning car. Or maybe it is just as well if you picked up the car and I only paid shipping one way!
The Gi-Raffe Express was present at the World's Largest Baby Shower...
https://ogrforum.ogaugerr.com/t...-largest-baby-shower
Mitch
Attachments
Yesterday I trouble shot an electrical problem and got my outer loop main line fully operational again. I also did some scenery work, installed weights in some of my newly acquired Weaver boxcars, and fixed a wheel on one of my MTH Premier boxcars. I also pulled some excess stuff out from under the train table so I can sell it in a few weeks at a local show. I also ran trains! Had FUN!!
Today - I continued with pulling excess train stuff from under the table ( and finding stuff that I had forgotten about which I can use on the layout ![]() ) Re - created a Baltimore and Annapolis freight train ... using freight cars that would have brought loads into various industries along that line ( I'm familiar with the industries that that railroad once served ) did some scenery work and ran trains! Had more FUN!!!
) Re - created a Baltimore and Annapolis freight train ... using freight cars that would have brought loads into various industries along that line ( I'm familiar with the industries that that railroad once served ) did some scenery work and ran trains! Had more FUN!!!
Last week's start of the switching segment of my first operating session was interrupted to clean track and wheels and rollers on my Lionel H9. The ERR upgrade really allowed super slow switch manuvers. However, when activated, the rear coupler fails to deploy although it makes the telltale sound. That made for slow switching. Nonetheless, it made running trains more enjoyable and I can pause and resume the session at any point.
RSJB18 posted:cmscanuck posted:Finally finished putting up shelves and got the trains on them!!! Still some work to do in the basement but the major parts are done.
That's a lot of shelves. Enjoy filling them up
Thanks!!! the O&W side (The first picture) actually took up more space than I thought. Plenty of space to expand... I'm only 31 though, so unless I seriously restrict purchases, I doubt this will be enough space down the road. All said and done, it is 264' of shelving.


