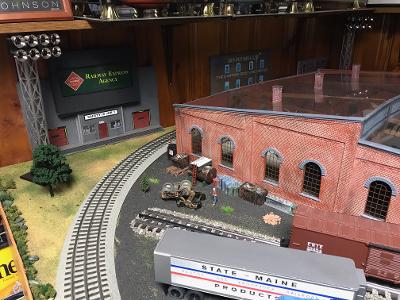
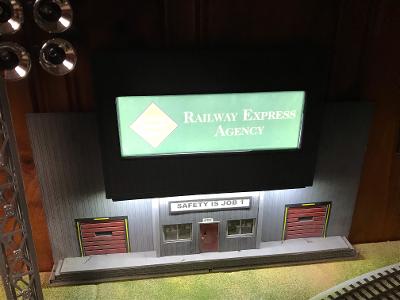
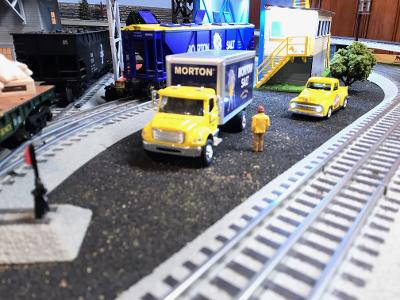
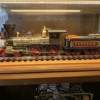
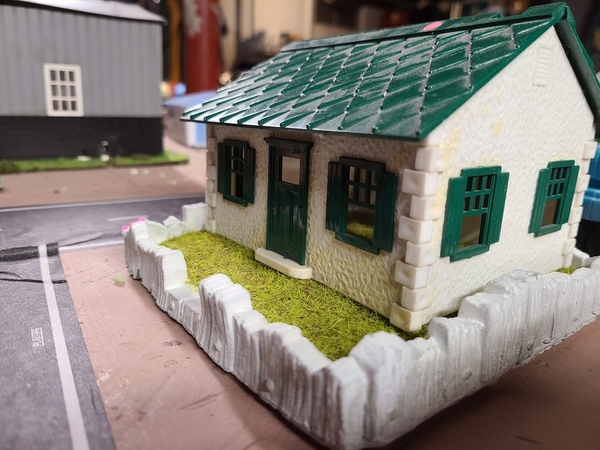
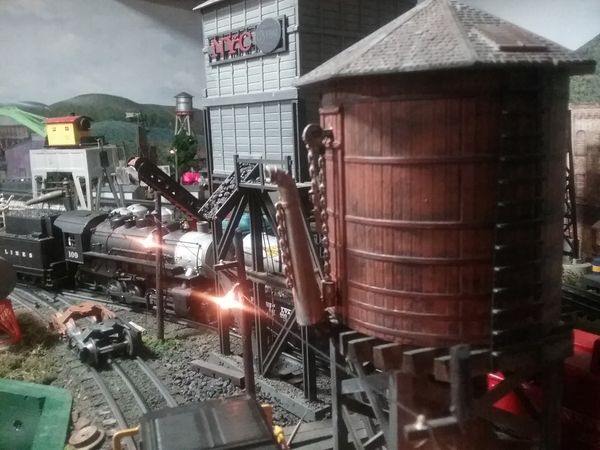
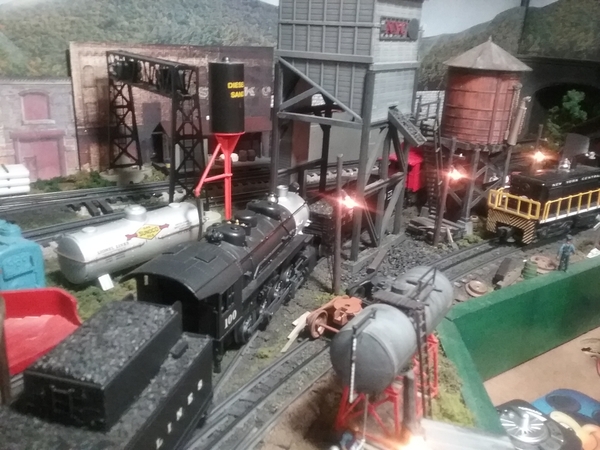
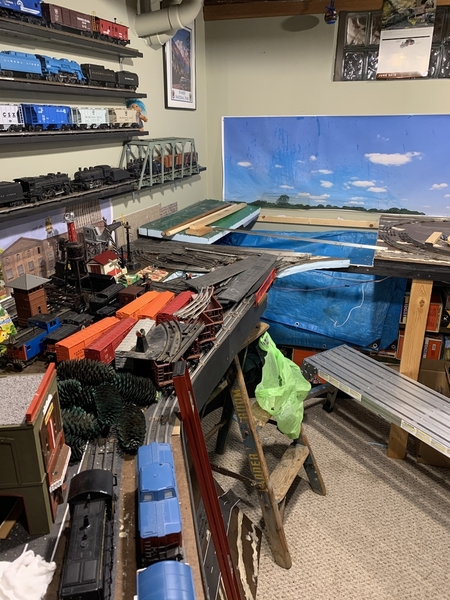
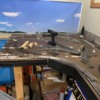
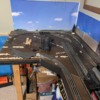
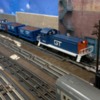
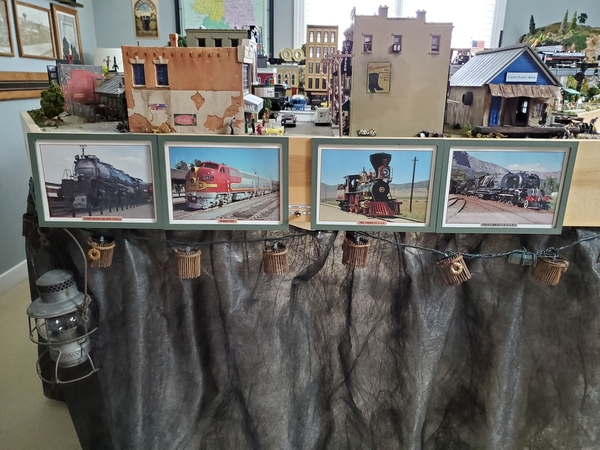
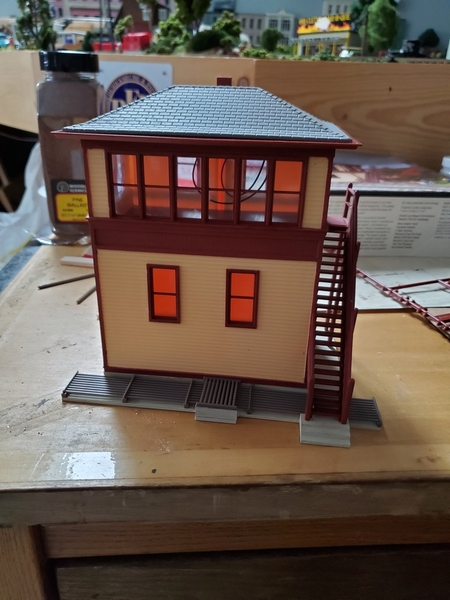
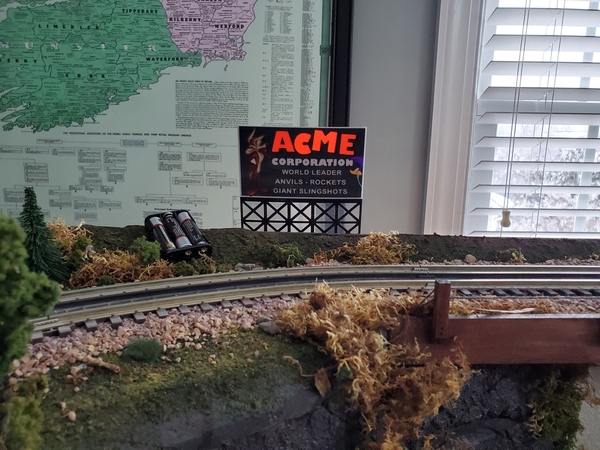
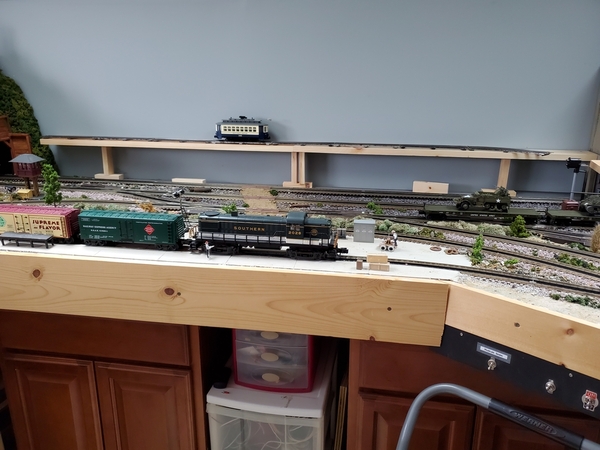
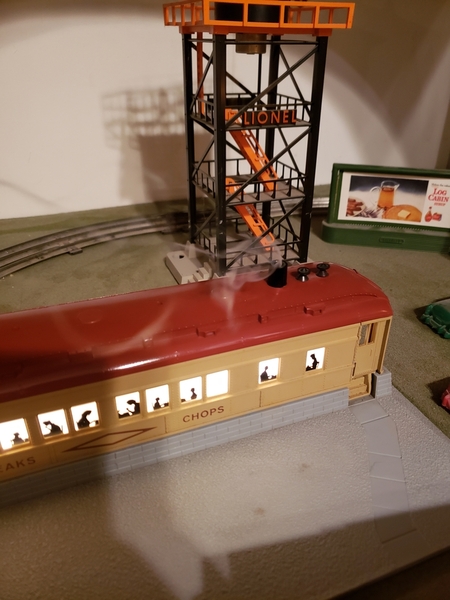
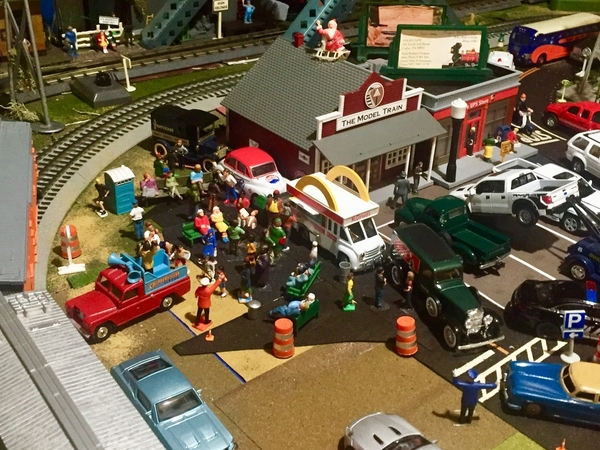
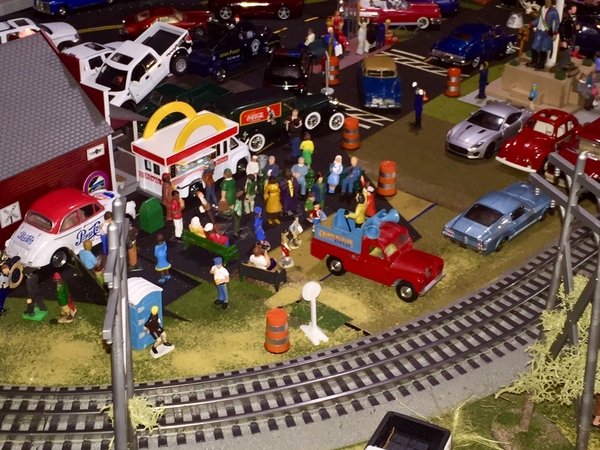
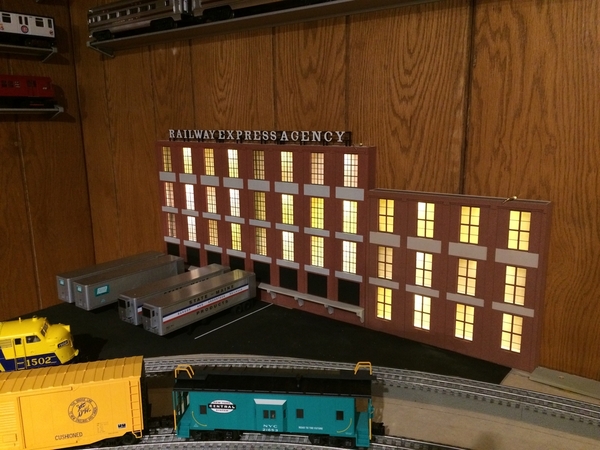
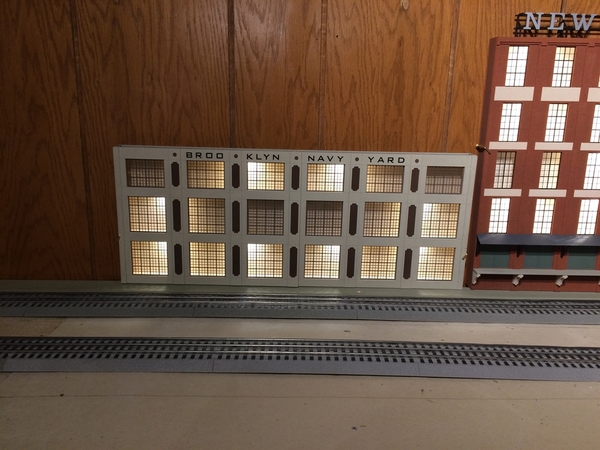
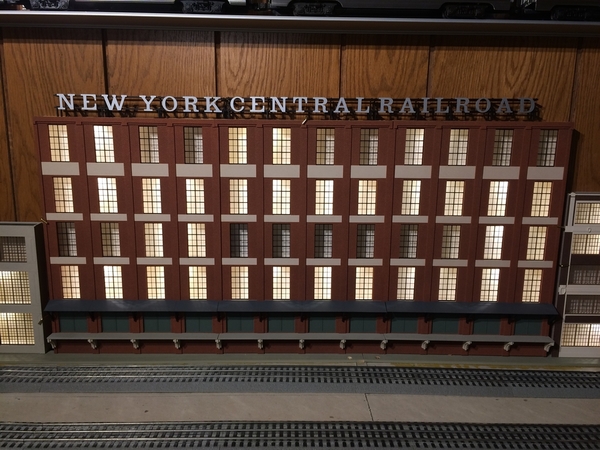
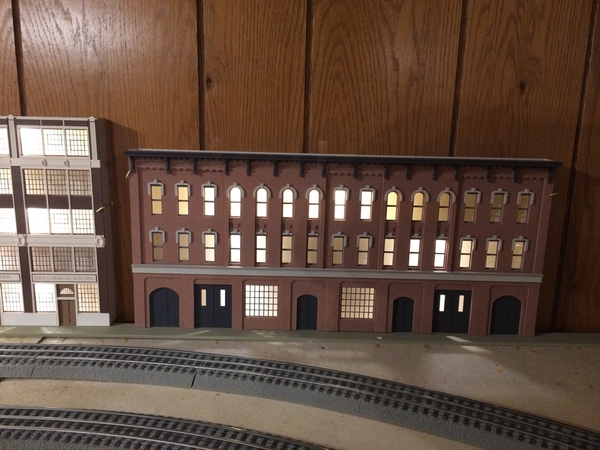
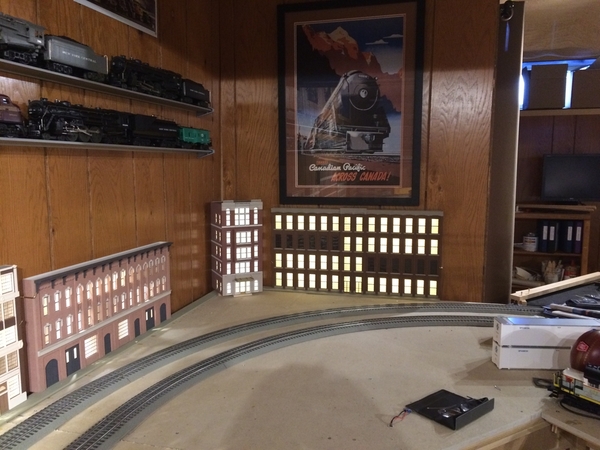
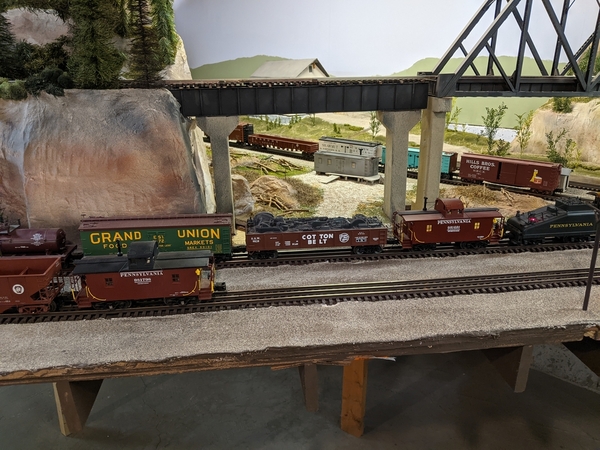
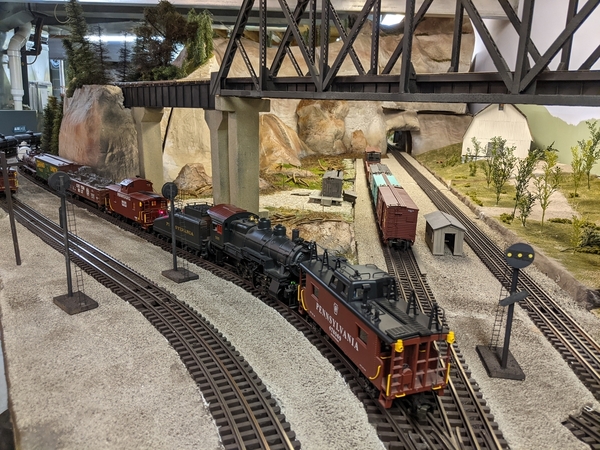
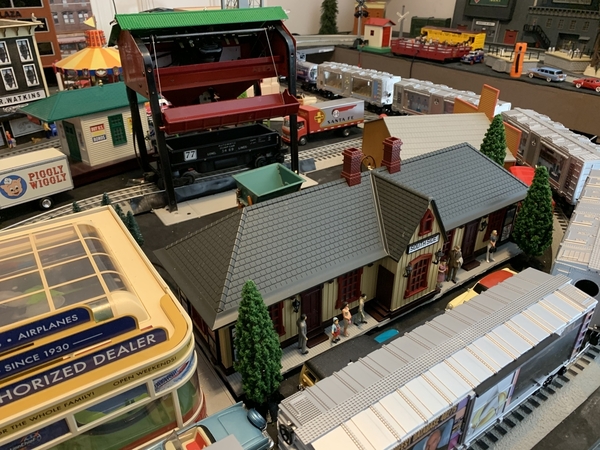
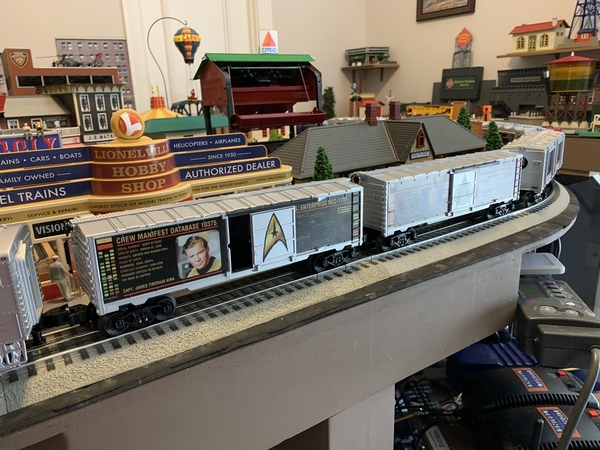
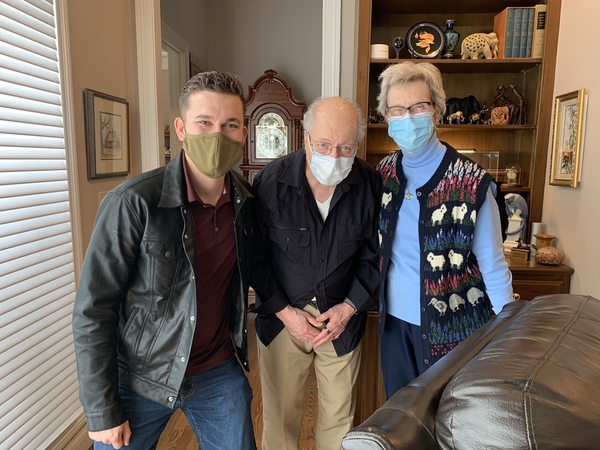
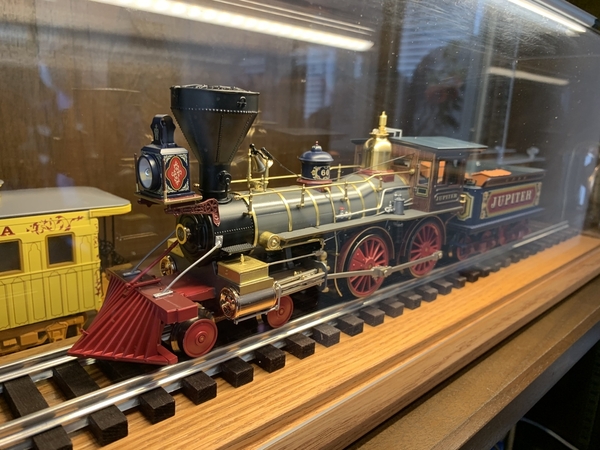
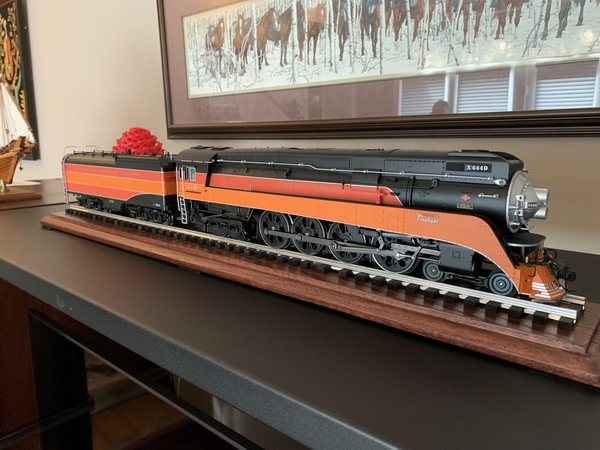
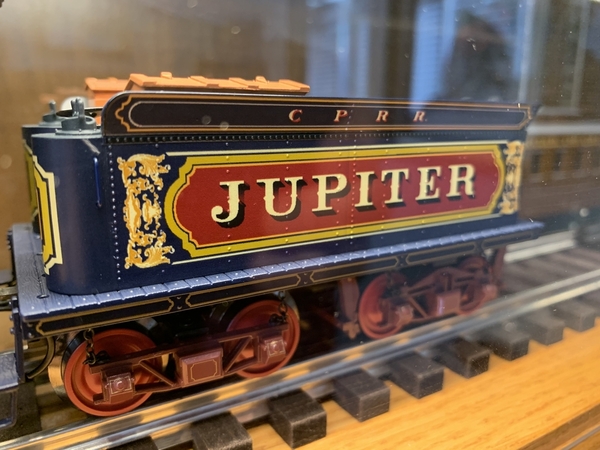
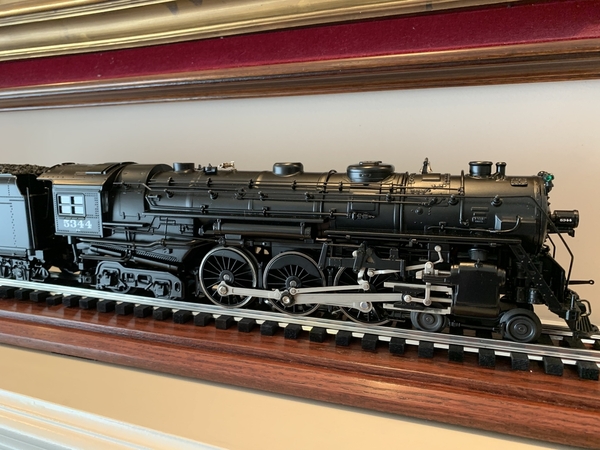
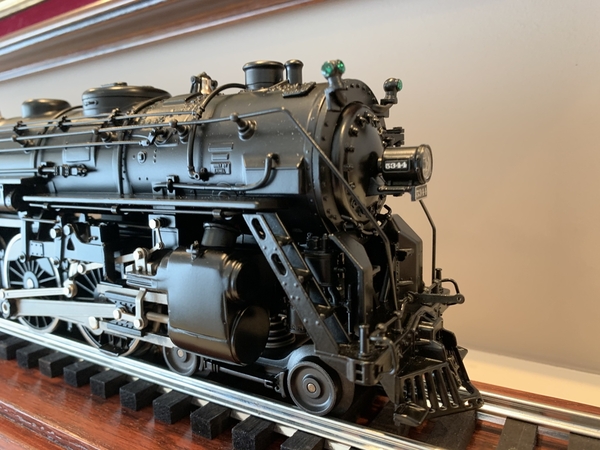
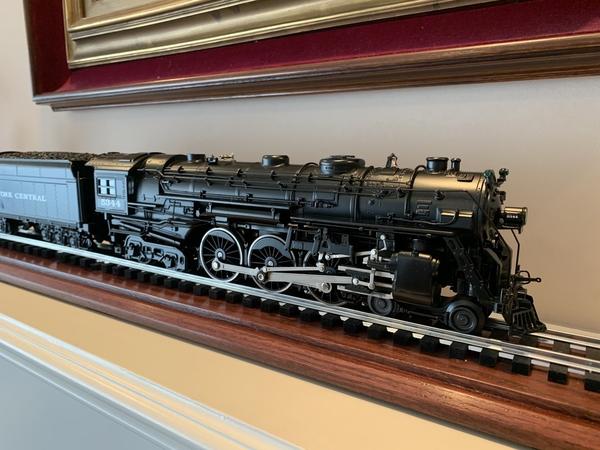
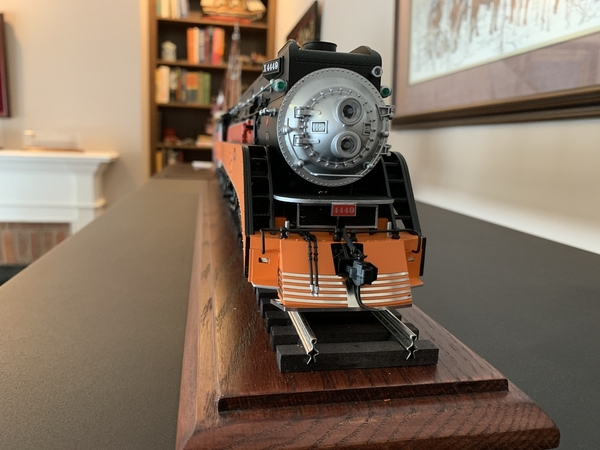
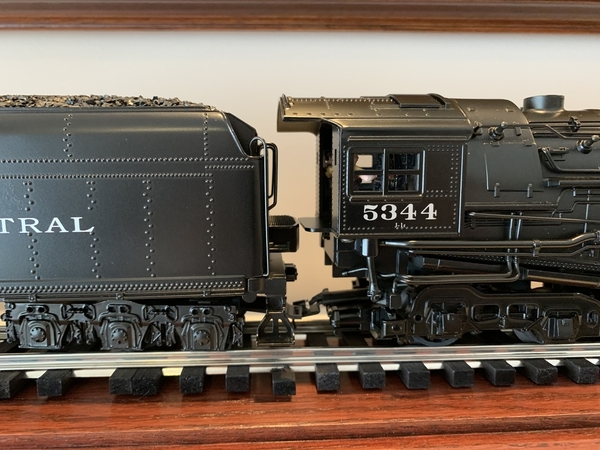
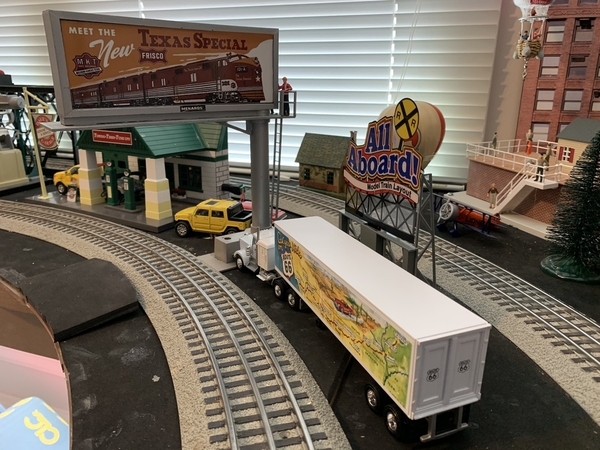
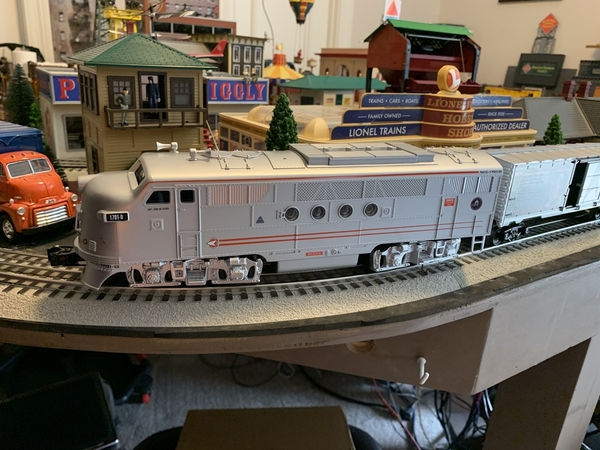
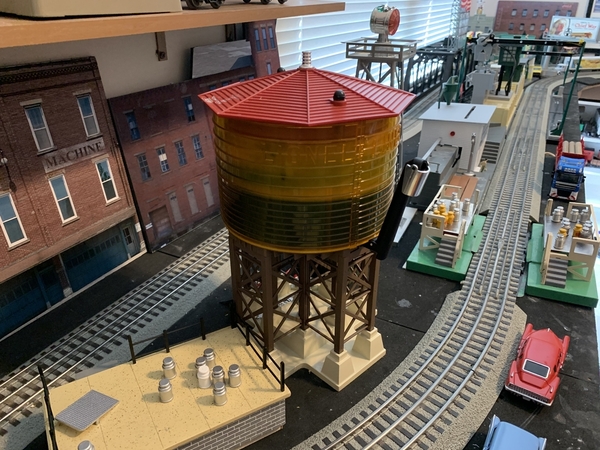
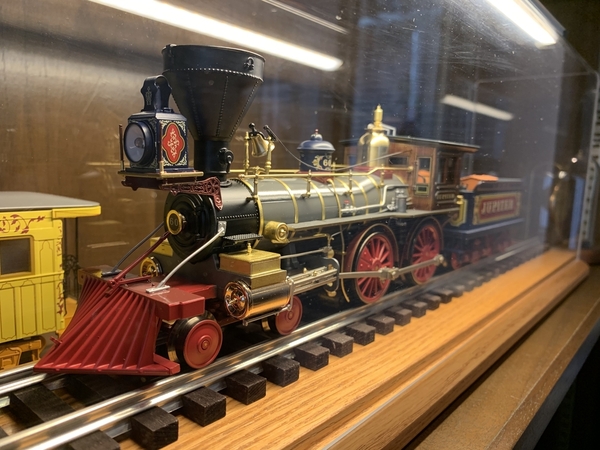
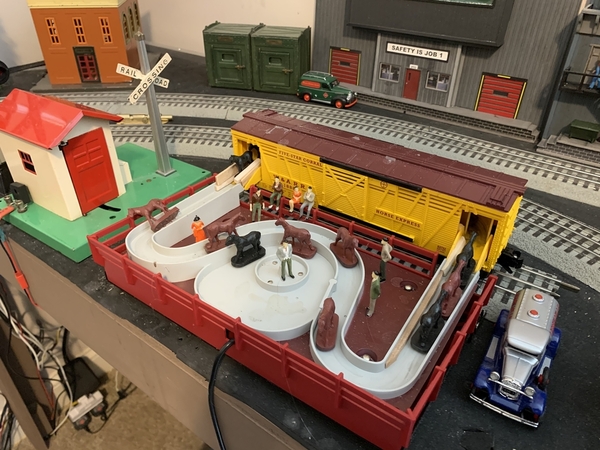
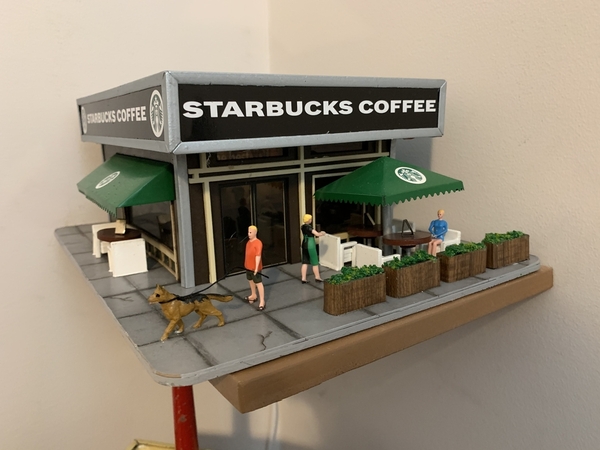
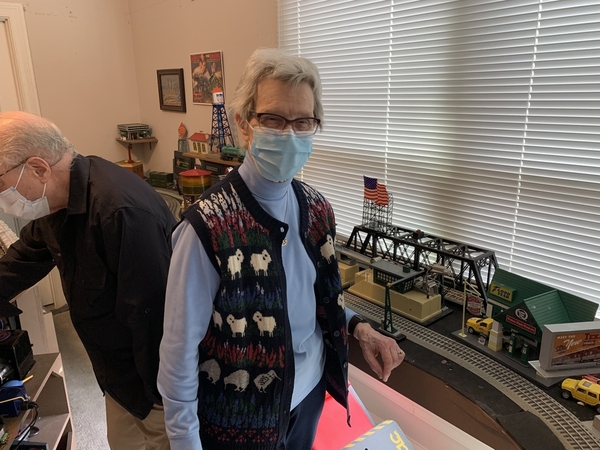
Wow, page 986, we are approaching 1000 pages, and this entire thread is an education in model railroading, it’s a really thick Book. Yesterday, while in Nashville, I visited a great friend, with some interesting trains, an upstairs Legacy command Entirely, layout and more. His name is Charles, a great friend. Enjoy the pictures, Happy Railroading Everyone.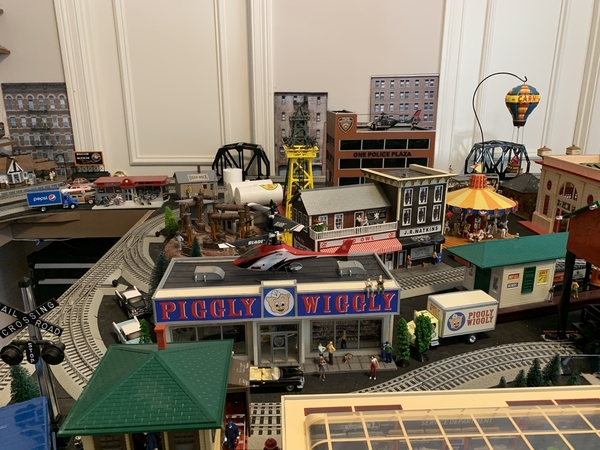
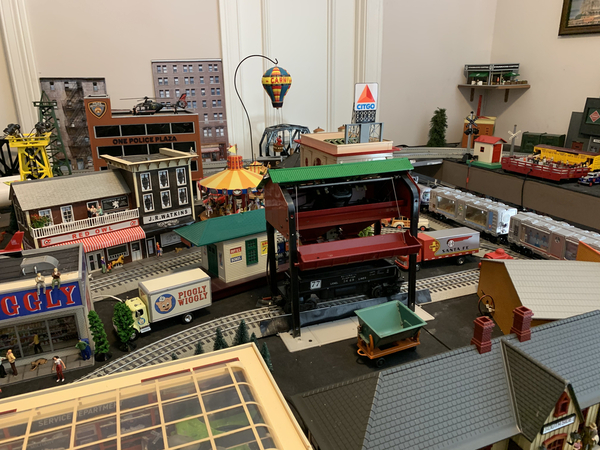



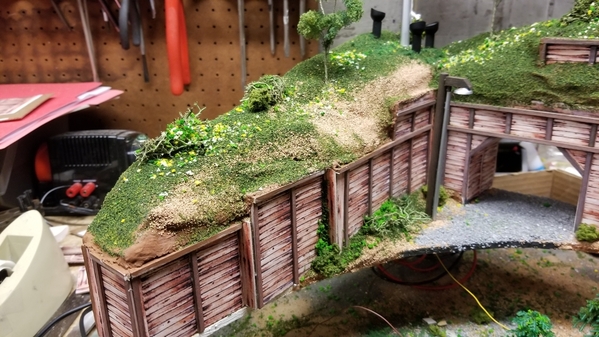
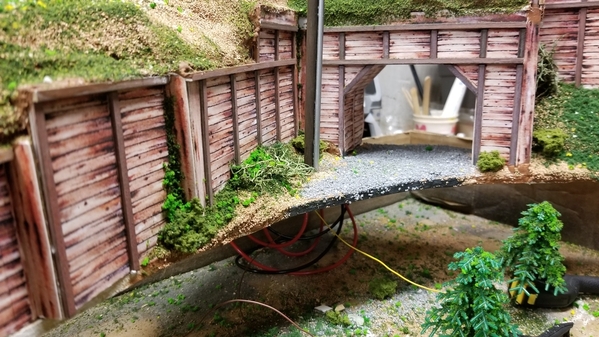
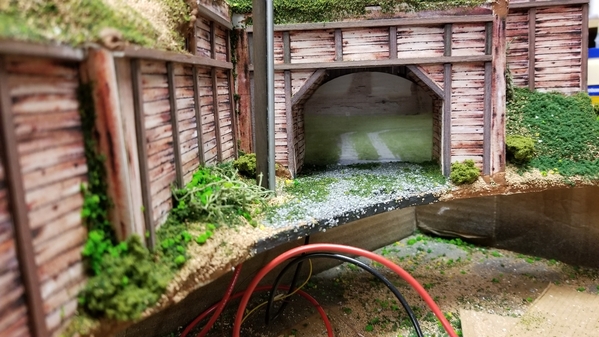
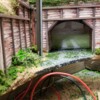
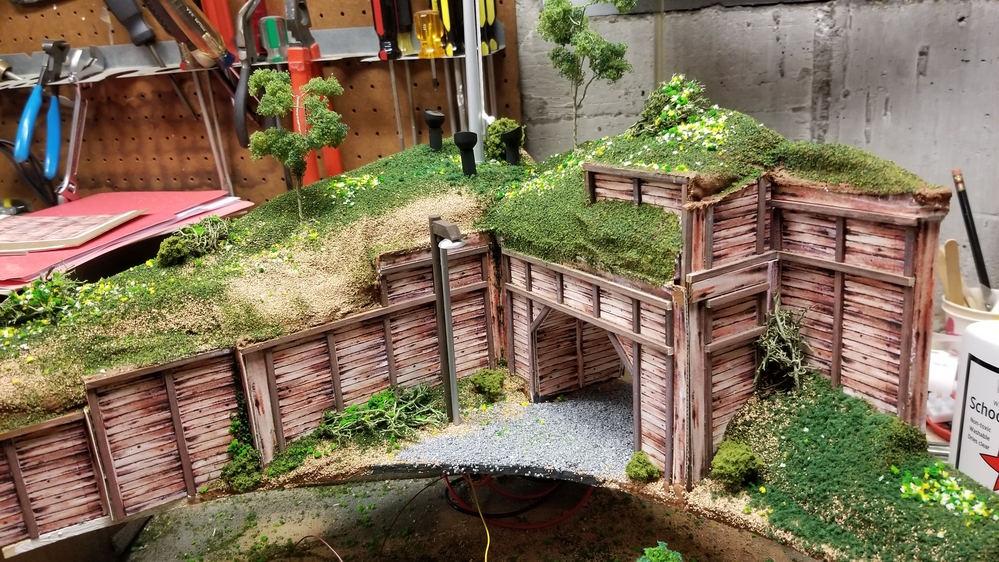
Did a bit of detailing on the tunnel, added bushes and weeds. I almost worked up the ambition to place it on the layout after dinner last night....
almost. ![]()
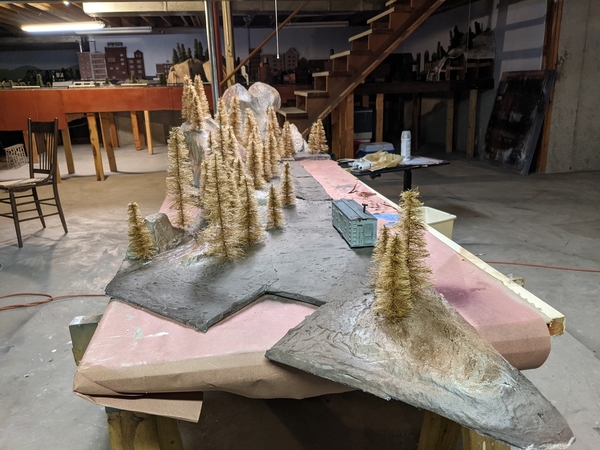
I have a bunch of these little plastic pine trees that I got at a friends party. They were cake toppers. I'm experimenting with spray adhesive and ground foam to cover the shiny plastic. Still a work in progress.
Bob
Attachments
Larry: Your friends layout is full of eye candy. Busy, tidy and colorful.
@RSJB18 posted:
Bob hope you have your access hole cut to feed your wires through as you put the great looking piece in place...LOL
@Rich Wiemann posted:Bob hope you have your access hole cut to feed your wires through as you put the great looking piece in place...LOL
That's exactly what I was trying to work up the ambition to do next. I have to drill two holes to drop the wires through.
Looking good Bob, Just wondering if you might be able to spray the trees with dull coat?
@mike g. posted:Looking good Bob, Just wondering if you might be able to spray the trees with dull coat?
Good idea Mike. I will have to wait for a decent day to get outside to do it. That stuff really stinks.
Thanks
@SuperChief posted:Some ballast getting put down:
That is a GREAT ballasting system. Who makes the ballast spreader car and where is it available?
Had been waiting to purchase a Menards flat and for them to come up with a free gift that I could use on my layout and they did, so I picked up the M&M's flat and got a mid-century lighted pick-up truck as a free gift.
The head and tail lights of the truck are illuminated and it is hooked up to a simple 4.5 dcv wall wart.
The flat is connected to an AC/DC buck converter running off 18 acv track power and set to 4.5 volts.
Attachments
@pennsynut posted:
Nice work! Looks GREAT!
Well, I have been busy, one of those projects that just kept mushrooming !! Installed Kadee 805 couplers on about 8 freight cars, then started playing with the 809 magnetic un-couplers, adding some neodymium magnets until I found the right combination... took much longer than I thought it would. Of course every project I start takes longer than I thought it would!
When I got 3 of the 6 yard track un-couplers done, I thought I'd try switching cars. Been waiting years to finally cut and switch cars in this yard.
Uh Oh.... found I had a dead section of track in the yard, and two stub end sidings that I had not connected the siding track drops to the power...... so under the table to add some drops and clean up the old wiring.
Figured I am good to go and can start practicing cutting some cars.... But no !, My Lionel 0-8-0 steam switcher started stalling on the Atlas 072 switches in a critical 1/2 inch section.
OK, so today, I took the tender and engine apart and installed a tether connecting the pick up rollers. Finally it all works. I shot a video just before dinner, but when I replayed it I didn't have the camera settings correct for video, way too dark. So I'll shoot a short video tomorrow and put it up.
Bob the timber retaining wall and tunnel entrance came out great !.
Today I finished my special cargo a huge gear loaded on a gon ready to be shipped to it's customer.
Attachments
@Randy Harrison posted:That is a GREAT ballasting system. Who makes the ballast spreader car and where is it available?
Hey Randy - It is called a Ballast King. We have been impressed with it. It looks like the original website we ordered off of is now down. I wonder if anyone might be willing to part with theirs in the wanted forum.
Thanks @chris a I hope to get it on the layout this weekend. The weather forecast here in NY looks very layout friendly. ![]()
Always something when working on our little projects. As the old saying goes if it were easy everyone would do it.
@pennsynut- the cabin car looks great.
@Jeff B. Haertlein- very nice custom load.
@Richie C.- the flat looks great. I don't have room for any on my current layout. Maybe on the next one.
Bob
I appreciate that Bob and all the "thanks" from fellow posters during the last crazy months. Covid and now the cold, snow and dangerous ice for some. Hoping for better times soon. Cheers.
JeffB, I used to sell large gears like that. I love those kind of carloads. Looks great.
@romiller49 posted:JeffB, I used to sell large gears like that. I love those kind of carloads. Looks great.
Who did you work for?? As for this gear in actuality; it came from a disassembled old hand cranked grinding stone. Thanks for all the compliments.
@leapinlarry posted:Wow, page 986, we are approaching 1000 pages, and this entire thread is an education in model railroading, it’s a really thick Book. Yesterday, while in Nashville, I visited a great friend, with some interesting trains, an upstairs Legacy command Entirely, layout and more. His name is Charles, a great friend. Enjoy the pictures, Happy Railroading Everyone.
Great layout and pictures of the locomotives in cases. What is the manufacturer of the Jupiter 4-4-0?? Is this a 2 rail or 3 rail model?? Thanks.
@Jeff B. Haertlein posted:Who did you work for?? As for this gear in actuality; it came from a disassembled old hand cranked grinding stone. Thanks for all the compliments.
Jeff, I retired from a large industrial distributor. My favorite customers were always cement plants, quarries and anything related to the aggregate industry. That’s where the big stuff like gears, gearboxes, conveyors, etc were used.
@romiller49 posted:Jeff, I retired from a large industrial distributor. My favorite customers were always cement plants, quarries and anything related to the aggregate industry. That’s where the big stuff like gears, gearboxes, conveyors, etc were used.
Sounds really neat. I know we had some pretty interesting machinery at our feed mill, but nothing as big as cement plants.
Here's a video of cutting and switching cars in the yard with the new Kadee 805 couplers and some Kadee 809 Uncouplers. Once I figure out how to operate the steam switcher more smoothly it will get better. 2 of the 3 magnet uncouplers are modified with one Kadee Magnet strip with neodymium magnets underneath on fine thread sheet rock screws. I needed to try and make the modified magent set up work as some sidings are already ballasted and I don't want to have to cut out ties and remove ballast if I don't have to.
I can accomplish "delayed uncoupling" pretty reliably, although now I see why that feature isn't really advantageous in a classification yard where you're not trying to spot a car in an exact location on a siding like a warehouse door or loading dock... Finally feel like I am getting somewhere !!!
@pennsynut posted:
Looks like you also have room to expand! Hope you can stake a claim to the space. Boy, do I envy you! PS: Love the trees!
Cheers, Dave
Thanks for the kind comments Dave. It just happens that the design of my home included a big basement. If I thought a long time ago how involved I would be in this hobby I would have considered a different design than what I have. But I have grown to accept what I built and expanded over the last 25 years. It is still a train layout in a basement as opposed to a train layout room. I have too many hobby interests to tackle an extensive redo and my grandkids are my priority now even though visiting is interrupted because of covid. However, when I read posts of the modelers starting new layouts or rebuilding I get to thinking what I would do differently. For sure 096 and larger for starters. Be well.
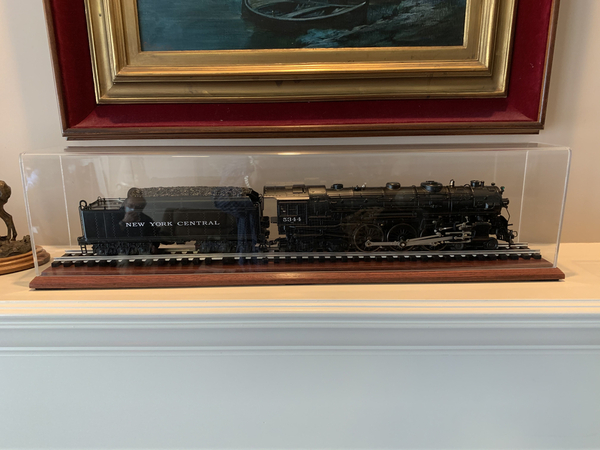
In my pictures above of the Jupiter Steam Locomotive, it’s the latest from Lionel, a brass Hybrid and it’s a beautiful model. Possibly the 2019 vol 2 Lionel catalog. The hudson is the VisionLine Hudson by Lionel. Charles is a fine model railroader and his wife loves the hobby to. I’m blessed to know them and be their friends. Happy Railroading Everyone 
Attachments
Attachments
@leapinlarry posted:In my pictures above of the Jupiter Steam Locomotive, it’s the latest from Lionel, a brass Hybrid and it’s a beautiful model. Possibly the 2019 vol 2 Lionel catalog. The hudson is the VisionLine Hudson by Lionel. Charles is a fine model railroader and his wife loves the hobby to. I’m blessed to know them and be their friends. Happy Railroading Everyone
Thanks for that information!!
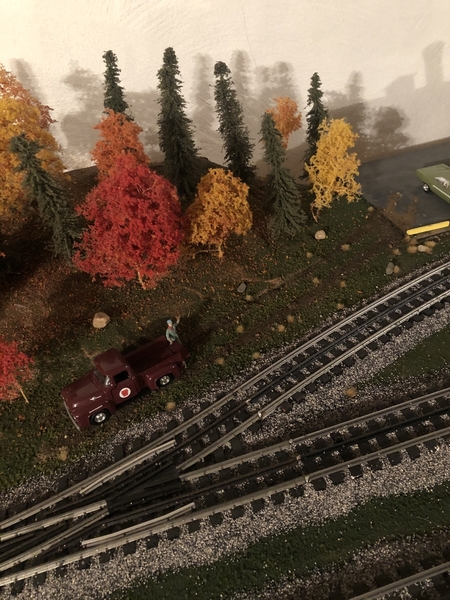
When the track department figures out you have been welding for 18 years, you become a track guy for a day. Switch point broke/cracked after one of the other track guys welded it. He “welded” it when it was about 12 degrees out not counting wind chill. No pre heat or anything. So after working for the track department figured I’d add some track department stuff to the the section I’m working on at the moment. Still need to fine some brighter sand/dirt for the road. 
Attachments
Nice train in convincing scene. Thanks for the video.
@Jeff B. Haertlein posted:Today I finished my special cargo a huge gear loaded on a gon ready to be shipped to it's customer.
As you may recall from my earlier post I set up a large gear for transportation; well I got out one of my 4-truck machinery depressed center flat cars and mounted my gear on it. It looks so much better and will be kept on one of these flats instead.
Attachments
My twin grandsons know Papa plays with trains. They gave me this train set for Christmas. I ran it for the first time today.
In case it was going too fast for you, the engine is a 0-6-0. I will find a couple more batteries and enjoy my new layout today.
Bill
Attachments
Bill : Train set looks great and I am sure given that it was a gift from your grandkids it comes with wonderful memories. I noticed a furry "friend" walk by in the background, I'll bet if he is like mine they are curious anytime anything is moving!!
Best wishes
Don
Today, i am looking for a Switcher No. 622 Lionel to add to my layout. Are there any affordable units from your "not run anymore" box? Its for the (cough cough) "Grandson"..... I can oil and clean and hug it and tuck it in at night and run it and name it Fred,
Then I will post: Added a fine little engine that could to my Layout today.
email please
Attachments
You are right Don. My grandsons were very proud of their gift. Heidi did not like having her nap interrupted. When the train stopped, she returned to her favorite pillow and resumed her nap. My wife likes it too.
Bill
Attachments
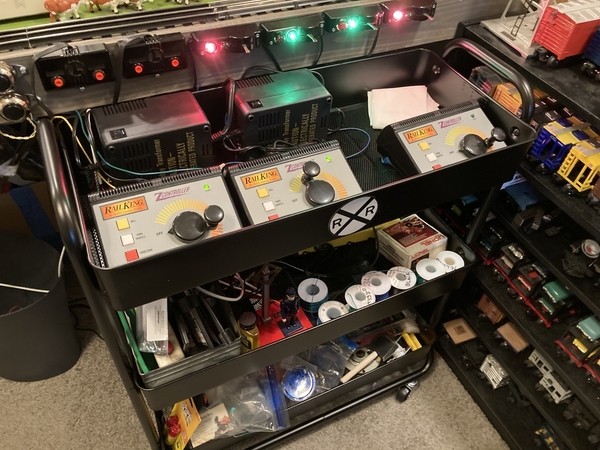
Time to get organized a bit... I went to Michaels craft store and bought this wheeled cart for my transformer controllers and such. It wound up being the perfect height and the shelves are handy. I might drill some holes in the back and put in some rubber grommets so I can run wires through it.
Attachments
Today added two inner loop crossover sections (Ross O64 turnouts) that will enable the future outer loop of Ross/Atlas (want to finish the inner completely first.) Used regular 5" Fastrack transition pieces on the departure side, but because of spacing had to make my own 1-3/4" transition pieces for the approach side. The Rossbed looks pretty good after some rattle can texture grey, and nice how the Ross ties sit about 1/3 into the Rossbed.
Attachments
@tnkMarx posted:
What happened? Frozen pipe? Looks like it was a substantial leak.
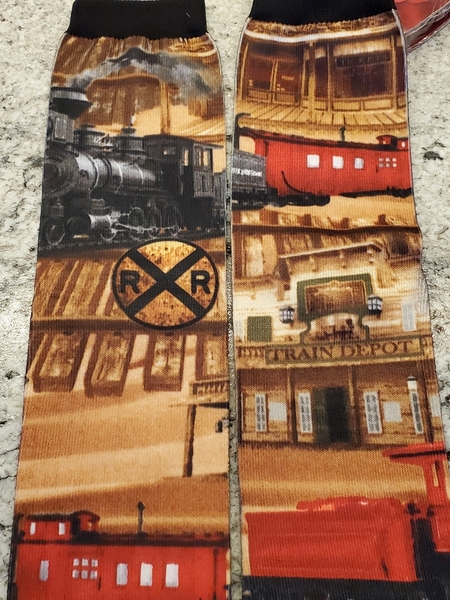
This is more of a "what did you do on your layout during a central Virginia ice and snow storm weekend". Regardless, I did get to spend some quality time with the trains: framed some photos one of my brother-in-laws gave me, worked on a Walther's Cornerstone kit I picked up at my LHS, temp placed a new Miller sign, and started prelim plans for an elevated trolley line. Later today, I'll wear some new Valentine's Day socks my bride of 40+ years gave me.
Attachments
@RSJB18 posted:What happened? Frozen pipe? Looks like it was a substantial leak.
3 years ago the plumber fixed a leaky pipe from the sink above my layout and said vent pipe would not be a problem. Less than a month later the vent pipe was dripping, so he put a rubber boot and clamp on the end and said it would not be a problem. It was dripping on the layout last week, and I noticed it 2 hours or so later I am guessing. Right before I could get a bucket under it, the rubber boot popped off and 8-10 gallons of water gushed out/down on the layout. I had moved a bunch of cars/engines/buildings right before, but did not think it would cover 6' of the layout. I guess the 3rd time was it!
The plumber was wrong about the vent pipe being a problem!
Time to find a new plumber! ![]()
@modeltrainsparts posted:Time to find a new plumber!
Agreed. 😂😂
ran new cars from Menards. PRR covered hopper NS heritage series paint scheme, looked too good to pass up. flat car with school bus, chinatown school district, kids speaking chinese? BNSF gondola. all of these look and run good.
Stayed up late switching my BNSF ES44AC #6425 onto a new BNSF #5815 sound chassis with the five horns and five bells. I had previously put the BNSF #6425 sound chassis into my BNSF ES44AC #6438 Dummy engine for another powered unit. I had planned to buy a second #6425, but they were sold out. I am glad I could not find the second because the new #5815 sound system in the BNSF #6425 is fantastic.
I have a second BNSF #5815 that arrived needing a front truck side frame. The screws were stripped out at the factory. It will remain as a BNSF ES44AC #5815 with the new sound system.
Joining the 6425, 6438, 5815 is the original 6411 produced when the 6425 was made. They will join the BNSF ES44AC "Golden Swoosh" #7695 to pull 16 BNSF Trinity Hoppers plus 8 BNSF Heritage Trinity Hoppers.
Here is a video of the BNSF ES44AC #6425 pulling my BN Rotary Bathtub Gondolas.
Happy Valentine's Day, John Rowlen
Attachments
@tnkMarx posted:3 years ago the plumber fixed a leaky pipe from the sink above my layout and said vent pipe would not be a problem. Less than a month later the vent pipe was dripping, so he put a rubber boot and clamp on the end and said it would not be a problem. It was dripping on the layout last week, and I noticed it 2 hours or so later I am guessing. Right before I could get a bucket under it, the rubber boot popped off and 8-10 gallons of water gushed out/down on the layout. I had moved a bunch of cars/engines/buildings right before, but did not think it would cover 6' of the layout. I guess the 3rd time was it!
The plumber was wrong about the vent pipe being a problem!
Time to get a new plumber for sure. As a plumber I can say there should be nothing but air in a vent. DUH can we say NO WATER! Hoping the layout did not sustain major damage but any damage is heart breaking to me and it isn't even my layout.
tnkMarx, simply put, that stinks, sorry to read about it.
CurtisH is right, there should be nothing but air in the vent pipes
Perhaps you should ask John Rowland about his bathtub gondolas?
Still working on building up my inclines from scrap wood. Also ordered the rest of the track needed for my proposed layout plan.
Finally had time to run the Alaska F units with the replacement Super Bass. It is not my best photography, but I am trying to finish things on my "to do" list.
The cars have been detailed with Preiser 65602 Unpainted Seated People that I painted. I still have three Lionel 21" passenger cars to finish if my eyesight improves a little more..
John Rowlen
Attachments
Too Cool
@John Rowlen posted:Finally had time to run the Alaska F units with the replacement Super Bass. It is not my best photography, but I am trying to finish things on my "to do" list.
The cars have been detailed with Preiser 65602 Unpainted Seated People that I painted. I still have three Lionel 21" passenger cars to finish if my eyesight improves a little more..
John Rowlen
Looks like you've been busy John. Very nice!
Bob
@chris a posted:Here's a video of cutting and switching cars in the yard with the new Kadee 805 couplers and some Kadee 809 Uncouplers. Once I figure out how to operate the steam switcher more smoothly it will get better. 2 of the 3 magnet uncouplers are modified with one Kadee Magnet strip with neodymium magnets underneath on fine thread sheet rock screws. I needed to try and make the modified magent set up work as some sidings are already ballasted and I don't want to have to cut out ties and remove ballast if I don't have to.
I can accomplish "delayed uncoupling" pretty reliably, although now I see why that feature isn't really advantageous in a classification yard where you're not trying to spot a car in an exact location on a siding like a warehouse door or loading dock... Finally feel like I am getting somewhere !!!
Chris,
Really like the video. Will you "kadee" all of your rolling stock? Also, tell me more about the building in the back left. Where did you get the brick paneling? Really like your ductwork.
Dave
Attachments
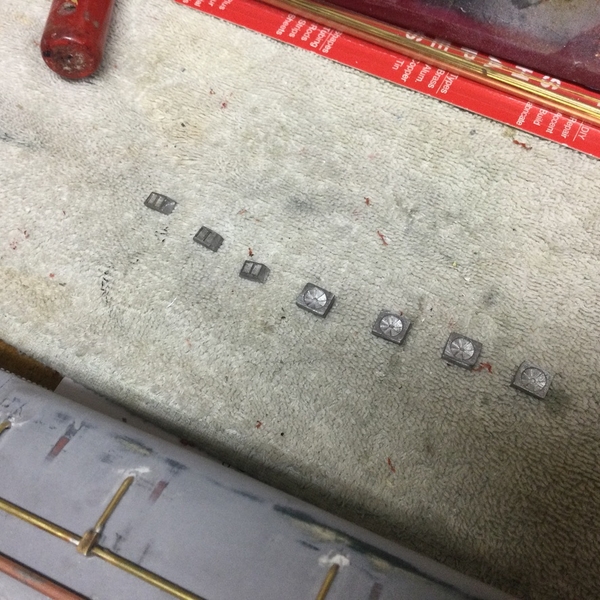
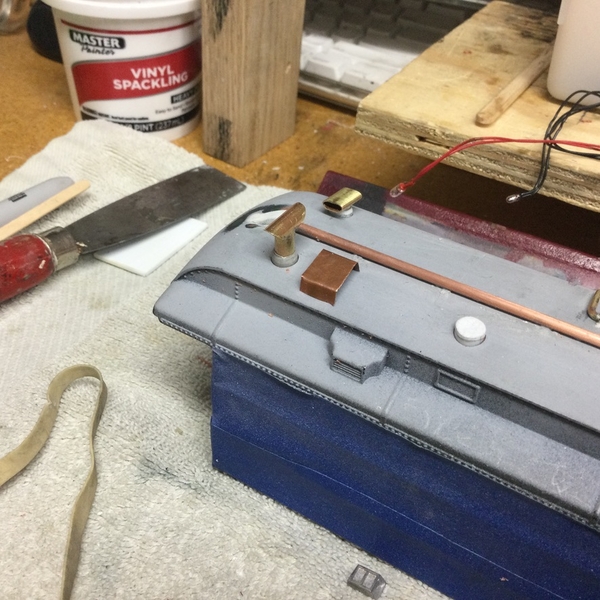
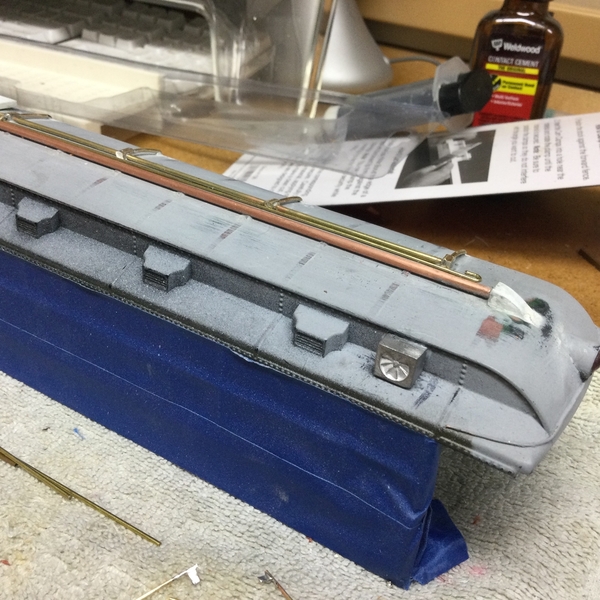
Still chipping away on the "Northland" roof detail. This past week I received some detail parts that needed to be placed. I spent a lot of time on the interior but I think the roof detail will give me the most satisfaction since it will be more visible. It is still a work in progress. I am currently working on the antenna and some additional piping detail. Hope to get the roof detail completed, primed and final coated this coming week. We are in an Arctic freeze, so I have plenty of indoor time thanks to the weather.
Cheers to all the posts! Dave
PS: Happy to get my first shot of the covid Vaccine! Nice BD gift. So far so good!
Attachments
Attachments
Broke out my Woodland Scenics fence to add some security to my military base:
Also, my food and beverage community festival has now turned into a “hype-fest” to announce that the Chipperfield circus is coming to town!
Attachments
@chris a posted:Here's a video of cutting and switching cars in the yard with the new Kadee 805 couplers and some Kadee 809 Uncouplers. Once I figure out how to operate the steam switcher more smoothly it will get better. 2 of the 3 magnet uncouplers are modified with one Kadee Magnet strip with neodymium magnets underneath on fine thread sheet rock screws. I needed to try and make the modified magent set up work as some sidings are already ballasted and I don't want to have to cut out ties and remove ballast if I don't have to.
I can accomplish "delayed uncoupling" pretty reliably, although now I see why that feature isn't really advantageous in a classification yard where you're not trying to spot a car in an exact location on a siding like a warehouse door or loading dock... Finally feel like I am getting somewhere !!!
Chris,
Really like the video. Will you "kadee" all of your rolling stock? Also, tell me more about the building in the back left. Where did you get the brick paneling? Really like your ductwork.
Dave
Thanks Dave,
The building on the left is Korber Joe's Pickel Factory built as a Flat.... The Duct Work is scratchbuilt poplar (cut on a table saw) seams are Plastruct stock, primed, painted with Testors Silver and weathered primarily with India Ink/Alcohol washes. I made the 2 inch deep end caps and printed some brick sheet off the internet that was really close to the Korber size bricks used that brick paper for the large chimney/smoke stack on the left end as well. The Concrete Loading dock is made out of rigid pink styrene insulation, carved, and weathered.
Yes I am thinking about going all in on the Kadee 805's. Started doing some of the GGD Heavyweight Pullmans to get them closer together, then migrated to about 8 freight cars. They look a lot better, and close up the gaps between freight cars as well. The other benefit, all Weaver cars get lowered when I take out the 3 rail claw, and I have been filing grinding down Atlas O couplers to lower some of the 40 foot boxcars that really sit too high. Definitely a noticable difference. Now that I am getting more comfortable with the magnetic uncoupler set up for the Kadee's I am encouraged to keep going. The 805's are nice because they mate with the 3 rail claw so I don't have to do every freight car immediately.... I have plenty more scenery that needs my attention
Attachments
@darlander, very interested in your roof detailing. How do you secure the various items in place?
@Pingman posted:@darlander, very interested in your roof detailing. How do you secure the various items in place?
I used a two part marine epoxy (mainly because I had it) when bonding dissimilar materials. The brass and copper parts are soldered together and then epoxied to the roof. I also used a liquid "Extreme Power" adhesive (Hobby Lobby) for bonding plastic to plastic. Note that some of the piping goes into a hole in the roof; I added a drop or two of the Extreme Power from the backside. The white material around the piping hole, is sparkling compound which fills in voids for a neat fit. I find it easier to make a nice fit if you slightly over size the hole.
Cheers, Dave
Attachments
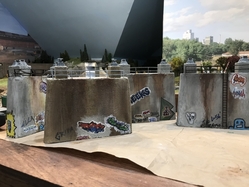
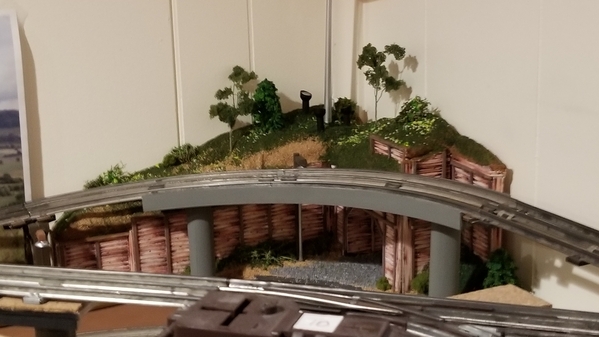
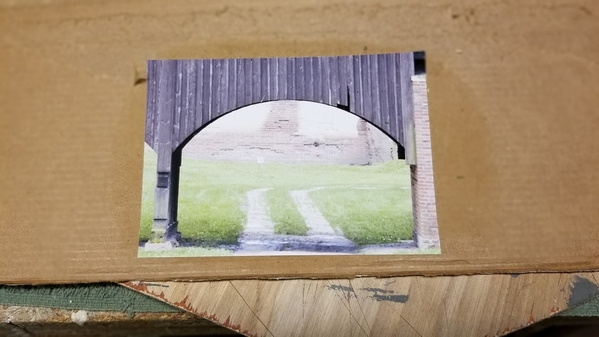
I got the tunnel diorama on the layout over the weekend and did one final test fit before making it permanent. Didn't make much more progress than that since the CEO had other things in mind. I also found a good image to place at the back of the tunnel portal.
Bob
Bob
Attachments
"Thanks Dave,
The building on the left is Korber Joe's Pickel Factory built as a Flat.... The Duct Work is scratchbuilt poplar (cut on a table saw) seams are Plastruct stock, primed, painted with Testors Silver and weathered primarily with India Ink/Alcohol washes. I made the 2 inch deep end caps and printed some brick sheet off the internet that was really close to the Korber size bricks used that brick paper for the large chimney/smoke stack on the left end as well. The Concrete Loading dock is made out of rigid pink styrene insulation, carved, and weathered.
Yes I am thinking about going all in on the Kadee 805's. Started doing some of the GGD Heavyweight Pullmans to get them closer together, then migrated to about 8 freight cars. They look a lot better, and close up the gaps between freight cars as well. The other benefit, all Weaver cars get lowered when I take out the 3 rail claw, and I have been filing grinding down Atlas O couplers to lower some of the 40 foot boxcars that really sit too high. Definitely a noticable difference. Now that I am getting more comfortable with the magnetic uncoupler set up for the Kadee's I am encouraged to keep going. The 805's are nice because they mate with the 3 rail claw so I don't have to do every freight car immediately.... I have plenty more scenery that needs my attention."
Chris,
Thanks for taking the time to explain everything. The close ups really show how realistic your cement panels look. I need something like this on the shelf part of my layout which in some places is only 17" wide. I don't really have a lot of room for full size buildings in this area.
I am kinda where you are with the kadees. I have several projects to start or complete on the layout itself but I have already started collecting kadees for the transformation. I feel like when I start that I want to just concentrate on the modifications to the rolling stock and engines. I guess you could call it the "icing on the cake". Great start!
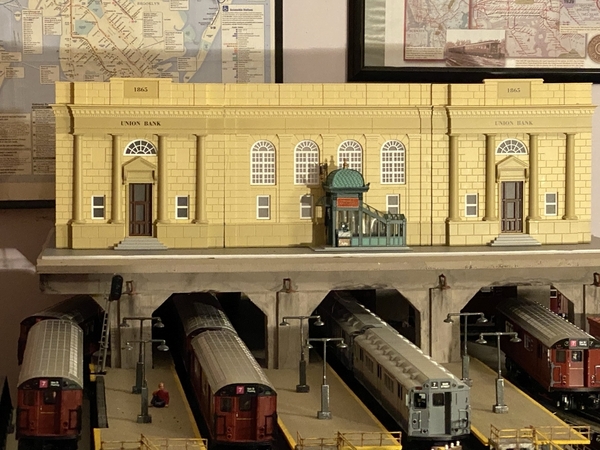
I spent the day cutting up MTH banks for my station project. I broke a few dremel cutting wheels along the way and the zona saw slipped a few times, sending my heart into my throat. In fact, about halfway through, I thought for sure I would be in the market for more mth banks, but with lots of sanding, it all worked out. Everything appears flush and ready for gluing, interior light placement, and roof signage.
If anyone else is going to attempt this project, I highly recommend this link - http://www.jcstudiosinc.com/MTHBankUnionStation
Attachments
@Strap Hanger posted:I spent the day cutting up MTH banks for my station project. I broke a few dremel cutting wheels along the way and the zona saw slipped a few times, sending my heart into my throat. In fact, about halfway through, I thought for sure I would be in the market for more mth banks, but with lots of sanding, it all worked out. Everything appears flush and ready for gluing, interior light placement, and roof signage.
If anyone else is going to attempt this project, I highly recommend this link - http://www.jcstudiosinc.com/MTHBankUnionStation
Looks great! I hope your heart has returned to its rightful place ![]()
Afternoon all! ..day off so I had to install a ground plane under my top loop..My new VL GS-4 didnt like the signal it was getting at 2 points on the layout .. a little research here on ogrforum and figured it out ..pretty easy and sigh of relief as it wasnt the new zillion$$$ Locomotive..I have 5 other Legacy units that worked fine before this one came along
@Snkbittin posted:Afternoon all! ..day off so I had to install a ground plane under my top loop..My new VL GS-4 didnt like the signal it was getting at 2 points on the layout .. a little research here on ogrforum and figured it out ..pretty easy and sigh of relief as it wasnt the new zillion$$$ Locomotive..I have 5 other Legacy units that worked fine before this one came along
What was the solution?
@Windy City posted:What was the solution?
I plugged my Base unit direct to wall outlet as I found out I shouldnt have had it plugged into a power strip..I ran telephone wire up under the upper loop in a Y that goes to a plug with only the ground wire connected into the same outlet..runs perfect now ..the telephone wire is black so it blends ..all i know from reading is basically the LEGACY system uses your whole house ground as part of its signal and when you have upper level with parallel runs it causes interference ...got all that from searches on here
tnkMarx, Sorry about the busted boot on your vent pipe. I am glad you were able to get things moved before the break!
JohnR, 2 wonderful videos! I really like the impressive BNSF collection!
Chris a. I really like the whole backstory on the Korber Joe's Pickle Factory! I am like Dave and will need something to put up on the upper section behind my tank farm! I have about 3/8's of my rolling stock switched over to Kadee 705's and 4 engines out of 8. I figure I will gety back to it down the road.
Bob, That looks great! I like the tunnel backing will look wonderful with a nice Auto in there!
Strap Hanger, Outstanding work! Things really look great and its is a wonderful focal point for your layout!
Windy City, I am glad you had an easy fix! Would hate to see it was one of those zillion$$$ Locomotive's!
Well guys as for me nothing new due to weather and CEO requirements. It looks like I might be able to get back out to the train room Wednesday to try and get back to my signal bridge project. I sure would like to get it done so I can move on! LOL
I hope you all are staying safe and sane! But most of all I hope your all finding time for your layouts and having fun!
Thanks Mike G and Bob. I’m very pleased with how this is coming out and am looking forward to all of the detailing that needs to follow, like concrete border walls, street lights, auto ramps up to the structure, etc. This thing is going to keep me busy for at least a few months. What a great hobby. Hey Bob, I think you have me confused with another poster. My name is not Ray - not that it matters, LOL!
@Strap Hanger posted:Thanks Mike G and Bob. I’m very pleased with how this is coming out and am looking forward to all of the detailing that needs to follow, like concrete border walls, street lights, auto ramps up to the structure, etc. This thing is going to keep me busy for at least a few months. What a great hobby. Hey Bob, I think you have me confused with another poster. My name is not Ray - not that it matters, LOL!
It matters George! 😂😂 I'm horrible with names. My bad.
O'le whatshisname 🤪
Finished the Northland roof detail today, added some more electrical conduit and antenna. It is all wash and ready for primer coat tomorrow. Looking forward to the finish coat, decals and final assembly. Too cold today to do much else!
Next project, The combined #W-24. It is the car behind the Northland.
Here is the future W-24:
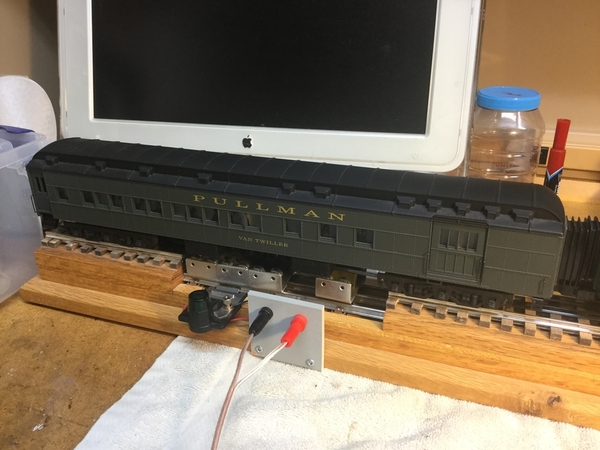
Stay Warm and Cheers!
Dave
Attachments
I wanted to get a picture of the four BNSF ES44AC engines I worked on two days ago. I still need to get a truck side frame from Lionel for the #5815. The lead #6425 has the new sound system from another 5815. The #6411 is as originally manufactured. The #6438 was a dummy that I put on my 6425 sound chassis. And the final 5815 is waiting for a side frame as the video shows.
I need to do revisions on my layout so I am clearing the layout and boxing all the trains after testing them. The double main line was built with minimum O-72 curves to accommodate a Vision Line Big Boy.
I was happy to see that the four BNSF engines with smoke did not trip a transformer breaker.
Here is a video of their first trip on my "Valley of Bridges" layout.
Sincerely, John Rowlen
Attachments
Here is a video of the Alaska GP35 engines #2501 and #2502 pulling freight to the Alaska pipe line.
The #2502 was a dummy that I put on a sound GP35 chassis. I converted eight dummy GP35 to sound engines when Gryzboski Trains had the GN #2519 on sale several years ago.
I am making custom packaging for the bulkhead cars with pipes so I do not have to remove straps and pipes to store the cars.
The Alaska flat cars have hitch stands that I purchased from Atlas O and then painted orange. They are permanently fastened to the flat cars.
I hope you enjoy the brief video.
Sincerely, John Rowlen
Attachments
Dave, Really fine job on the Northland. Love the photo of the interior and your job matching the seat colors. That's going to be a great Heavyweight Pullman to pull around your layout.
John - thanks for the 2 videos. I hope Brian gets to see the Alaska drag. That was impressive. I’m an Alaska RR fan, even though I sold all my Alaska equipment. BNSF WAS also impressive.
Dave - I could use that Pullman Van Twiller as is to add to my Pullman inventory, if you decide not to transform it.
@John Rowlen posted:Sincerely, John Rowlen
Both videos look great John. That's a lot of smoke ! I did notice that the lead engine has a bit of a wobble. Does it have a warped truck?
Bob
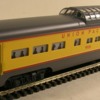
One of the benefits of a train club is my fellow members have skills and resources I don't have. I purchased two LIONEL UP 15" aluminum offset dome cars on eBay for $50 and a modest shipping charge--a heckuva deal. But they came with channels in the extrusion for the red stripes you see in the photo which made them problematic for my GN Empire Builder with its stripes.
A club member has a machine shop and he generously offered to mill the shells. He returned them to me Saturday and, after a primer coat, they look great!
Also, I completed my touch-up work on the 4 NP North Coast Limited 15" LIONEL offset dome shells and will begin decaling them.
Attachments
Carl. I enjoy seeing your passenger car projects. I wish I had your painting skills. I am just a rattle can painter and on wood side projects that get weathered to hide whatever happens.
@decoynh posted:Dave - I could use that Pullman Van Twiller as is to add to my Pullman inventory, if you decide not to transform it.
Thanks Matt for the offer but, no thanks! I have been watching eBay for several months for both items. The combined came new in the box at a great price. Everybody needs a canvas and this one will stay with me. PS: currently there are some available on the Bay!
Cheers, Dave
@chris a posted:Dave, Really fine job on the Northland. Love the photo of the interior and your job matching the seat colors. That's going to be a great Heavyweight Pullman to pull around your layout.
Thanks Chris, coming from you, I take that as a supreme complement as you are one of my roll models!
Cheers, Dave
I installed Kadee 805's on another 4 cars last night, worked on the uncouplers in the yard. Managed to remove some of the neodymium magnets under the Kadee magnet so I only get Un-Couple, no delayed coupling as I don't want delayed coupling in the classification yard tracks. I am pretty close to having a repeatable system for installing the magnets so I can get them to work, either with or without "delayed uncoupling" and do it without having to cut out existing ties and ballast where the trackwork is done and weathered.
It was so warm here this afternoon, I took out some 12 to 14 inch tall pine trees that I had made months ago, and dusted them with Hunter Green spray paint to knock down the yellowish green color of the fine grass fibers that I applied to the branches... see photos below.
Then I took out the K Line Scale Hudson and shot some video of it pulling the Heavyweight Pullmans.... I am going to be shipping it to Harmonyards next week for a complete rebuild.... Figured I'd run it some with the original drive and TMCC Railsounds so I have something to compare it to when it comes back from the over-haul.
Just some random layout shots included, while I had the camera out and all the lights turned on figured I'd shoot some photos.
I'll upload the video later once YouTube is done processing.
Attachments
Not exactly “today”, but rather a major project over the last few weeks... I FINALLY came up with a methodology for installing all of the shadow boxes I’ve purchased from @Todds Architectural Models over the last couple of years. In addition, I added LED’s to all but one of the boxes (it came pre-lit), and did the dreaded wiring - there are so many LED’s, I even broke out my backup PW ZW for dedicated power. Doug has these interesting magnetic strips to secure the boxes to the layout, but unfortunately, they are no match for the crappy un-plumb walls in my basement ![]()
![]() so I had to use a bunch of brass L hooks which I will eventually paint so they blend in better.
so I had to use a bunch of brass L hooks which I will eventually paint so they blend in better.
I’m not happy with the apartment in the corner and will most likely be replacing it with a taller shadow box.
To celebrate finally finishing the back wall, I had to buy some new trains... but that’s a matter for another post. I will probably just run some trains for a day or two since all the work on the back wall has limited what I could run for a while. Then I have to move to the right side of the layout and wire up the wonderful freight station @MELGAR was kind enough to build for me and a couple of additional pieces of my passenger station... I hate wiring!!! While the stations will be easier to wire, they are in an area which is not as accessible as the back wall, so maybe I’ll run trains for a few more days!!!
Attachments
@pennsynut posted:Carl. I enjoy seeing your passenger car projects. I wish I had your painting skills. I am just a rattle can painter and on wood side projects that get weathered to hide whatever happens.
My skills are meager, but I have perseverance in abundance. Plus plenty of paint and masking tape to redo the failures/not quite right situations.
When I finish these four domes, and they're "good enough" for me, I'll start a thread inviting folks to post their "mistakes and mishaps" along the way to a successful outcome. I have a bunch of photos and tasks that didn't pan out to get to this stage. Can't wait to see what decaling, final finishing, lighting, and final assembly have in store for me.
Here's the video of the K Line Hudson
@RSJB18 posted:
Bob;
In some respects, the back of my layout was better planned - there is an aisle running almost the entire length of the back wall and the back of the layout is only 30” wide, so access was relatively easy. The right side is somewhat more problematic. After the original design, I added a 30” wide yard to the side of the layout (which was already 30” wide), so access to the middle of that area is a little tricky. I did employ a version of your poor man’s creeper for the early work on that area and it was not comfortable!!! In some ways, I am not looking forward to finishing up the right side hookups. The problems we have!!!
Bob, I will take a closer look at the lead BNSF #6425 for the wobble. It could be the traction tires, or maybe the engines behind it were pushing a little faster as it passed over the switch.
Thanks, John Rowlen
Posted an update to Twin Pines Rail Road.
Funny I thought I had bought my last "new" MTH engine a month or so ago. Still have an Illinois Central GP40 on back order, could not help myself and ordered the new premier Big Boy 20-3807-1 and decided at some point for the next layout I could use a switcher and ordered a Chicago South Shore SW1. Maybe this time will be the last MTH engines unless of course they manage to be acquired and continue to make engines. I have all MTH power and am solid DCS operations. Cannot imagine making the switch to DCC.
Morning guys, to start off I would like to say what wonderful layouts and amazing work! I look at everything you all do and am just put at a loss for words! I see what folks are doing and sometimes it makes me want to tare mine down and start over and then I think to myself, self are you crazy! You would have to do all that wiring all over again and I dont think that is going to happen!
To a couple folks, Dave that heavy weight car is going to look amazing when your done! Carl, your cars are also looking great! Just wondering if you bake your paint after spraying?
Chris you have one of the most amazing layouts and thank you for the wonderful video! But one has to ask what are you hiding? When you pan to the right you only go so far and here I am sitting watching the video thinking to myself this time he is going to do a 360 so we all get to see the rest of this amazing layout! Please for god sake show the rest of your layout in your next video! LOL
I hope your all having a great week and are having fun with your trains and layouts!
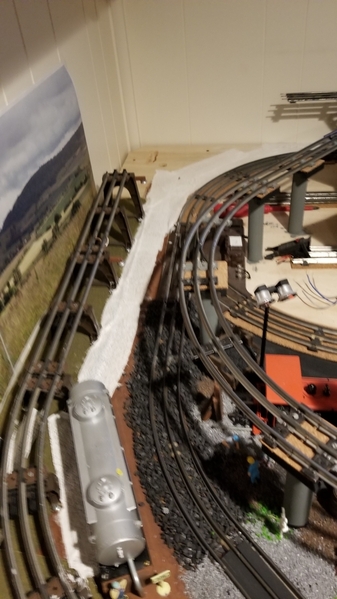
I pulled the tunnel off the layout (hopefully for the last time), to add the background in the tunnel. Looks pretty good IMHO. Since it's a gravel road with grass surrounding, I added some ground foam to the gravel on either side of the tunnel. I will continue this for part of the road and transition to just gravel since it runs parallel to my main line. I put some plaster cloth down on the board too.
I saved this piece of ground cover when I pulled up the grade on the other side of the layout. Looked like a perfect spot to use it.
Attachments
@RSJB18 posted:I pulled the tunnel off the layout (hopefully for the last time), to add the background in the tunnel. Looks pretty good IMHO. Since it's a gravel road with grass surrounding, I added some ground foam to the gravel on either side of the tunnel. I will continue this for part of the road and transition to just gravel since it runs parallel to my main line. I put some plaster cloth down on the board too.
I saved this piece of ground cover when I pulled up the grade on the other side of the layout. Looked like a perfect spot to use it.
Nice work Bob, your extra detail really makes it look like it goes somewhere! I need to do that to some of my tunnels down the road!
Bob, Tunnel looks great, I have 2 tunnels to "nowhere"... Don't know why it took me over 40 years to realize that was a great modelling idea !
Mike G: Thanks as always for the kind words ! That's hilarious about "hiding something" I wish I the layout went 360 degrees around the room, but "not yet". To the far right is the unfinished long 1.5% grade that I need to get down there and start planning and building the scenery for. That last section, module(s) of the layout is about 9 feet wide x 15 feet long.
Plans are for a kitbashed Union Station out of 4 MTH banks, a small engine service area for passenger train steamers, a decent sized city scene, and an industrial district with the last few sidings for switching destinations for cars. I am really thinking about a "small waterfront" industrial district, just haven't got the "vision" for it quite yet. I need to quit messing with the Kadee coupler project, and start working down on the far right.
Here's 2 (not so great) photos of my road tunnels to no where ! The one to the right of the gas station is somewhat hidden by trees and vegetation on purpose as the layout extends beyond that point, and it "doesn't make" any sense based on the scenery that will be added beyond the road tunnel entrance... ie. There's no room for the road to continue!!!
Attachments
Chris a - you do really nice modeling and I have enjoyed your posts. Bunch of questions.
In your video there is a 2 story building (hotel or station) with 2nd story arched windows and the 1st floor awning - scratch built or a kit and if a kit who's?
What are you using to weather your rails? I am playing with painting acrylics on the rails but haven't found a color I like yet. But I am also seeing shine coming through my coating - yours don't - multiple coats?
There is a round black oil storage tank in the background - is it a Plastruct model or scratch built?
Last - your trees look great, for the deciduous trees, I assume you found a real branch you liked and added leaf material ?
Thanks ... Jeff
Thanks Chris- I can't take credit for the idea. I saw another guy do it on a youtube video. Just glad I found an appropriate image to use.
Bob
Jeff Thanks for the compliments:
I think you are referring to the station on the lower level, It's an MTH , read many posts on this forum about taking them apart painting the window and door frames, weathering the brick then putting it back together. Keystone Ed did a great write up some years ago, which is who I copied in terms of removing the plastic base and making my own platform out of MDF, medium density fiberboard. There is also a great video segment on doing this on the Black Diamond Railway videos available through TOYTRAINSONTRACKS.COM
I spray paint all my track with Rustoleum Camou Brown. There may be some sections that were done year's earlier with a red oxide primer, but I much prefer the Camouflage Brown. It's dead flat. I really try to shoot it all outside or in my garage before installing it. I always use the blue shop towels wrapped around a small block of wood to wipe the tops of the rails, dry first pass, then a second pass with Acetone or Lacquer thinner.. I usually cut the towels up before I start and have small sized wipes ready to wrap around the block of wood. Purpose of the wood block is so I only wipe the wet paint off the top of the rail surface. As I finish ballasting sections, I have started to go back with my airbrush and blend everything together with light overspray of acrylics... It blends the harsh blue gray granite ballast with the dark ties and rails. I do add india ink to my diluted white glue when I finally set the ballast to darken it some.
Water tank in the Engine Service Yard is made my Walther's CornerStone 833-3311 I think is the part #... You have to keep an eye out on eBay and on the forum as they don't come up for sale that often. I assume you're asking about the tank in the next photo ? There's a smaller cylindrical tank up by the Coal Mine, but I picked it up from a forum member assembled and have no idea who made it.
Trees: I purchased the Scenic Express Super Trees large bulk pack kit plus numerous bags of their Leaf materials. They do look good, problem for me, is or should I say was, that I watched more than a few videos and thought I would be getting super trees branches that were over 7 inches tall, with decent sized trunks... That turned out NOT TO BE THE CASE..... I complained, they sent me a few more armatures. I also ordered one of their "Sage" Branch tree kits. and followed the directions to glue the super tree branches onto the woody Sage Trunks. I like the product, it's tedious gluing the branches and then the leaves but the results are hard to argue with. My other opinion is that they charge way too much for these branches, but I haven't found any good substitute.


