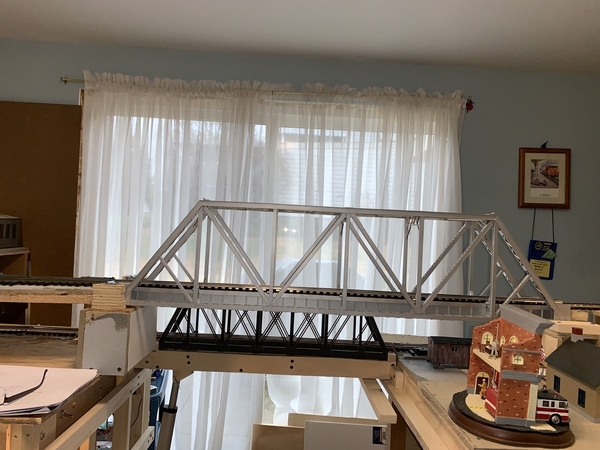
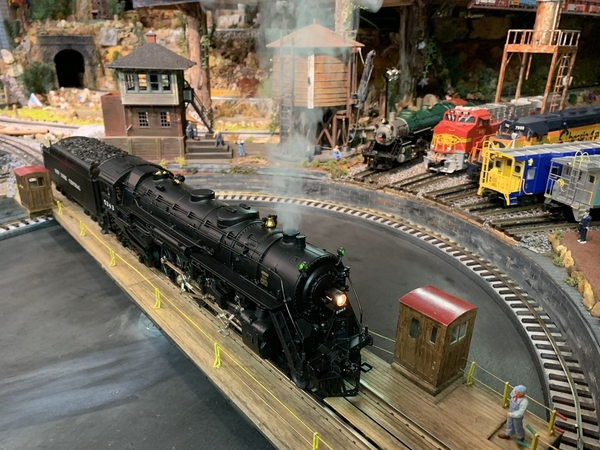
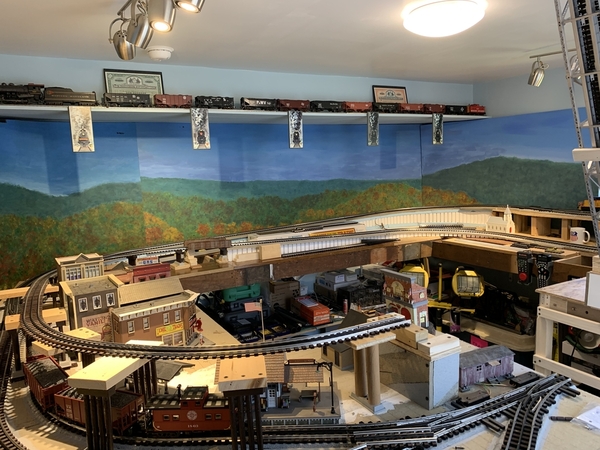
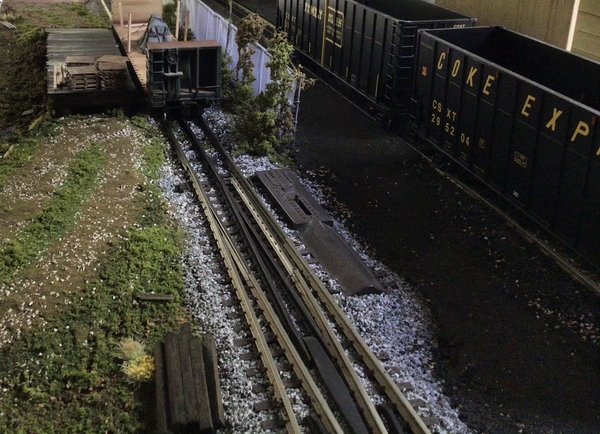
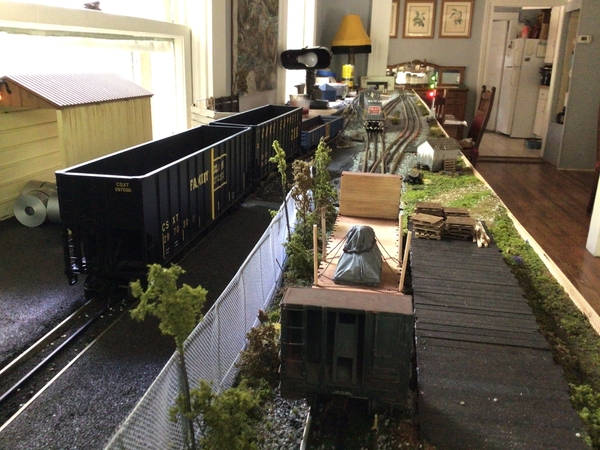
@ScoutingDad posted:

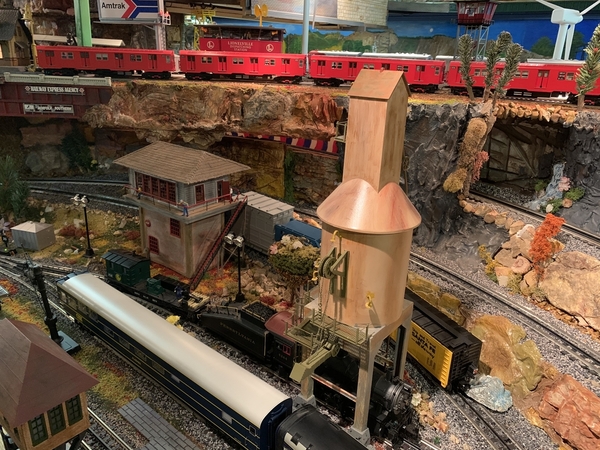
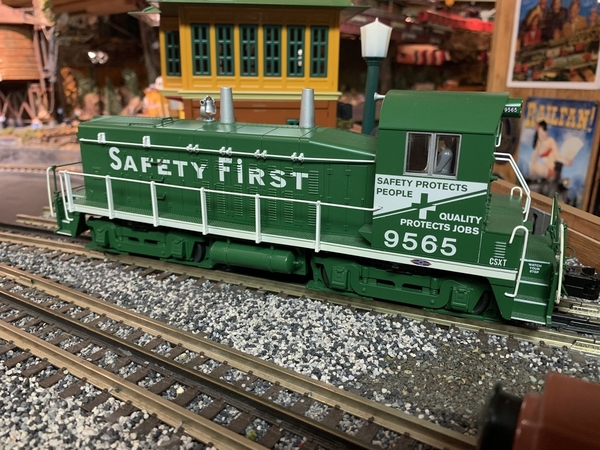
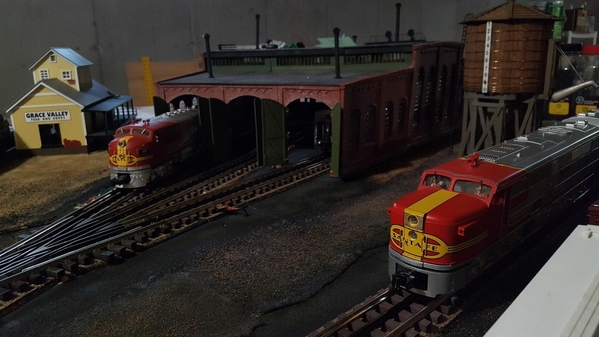
Spent some time trying to figure out why my GP38 would not power up. MTH tech suggested I make sure the DCS/DCC switch was in DCS. It was and I got a return authorization for repair as it was likely a blown board. Well after flipping the switch a couple of times to no avail, saw the 3rail/2rail switch was in the 2rail position. A quick flip and whaddayaknow? engine started up just fine. I must had switched it when putting it back or taking it out of the box.

Anyway the lead GP40 and following GP38 have gotten move orders - they are on their way. Pretty cool how DCS allows lashing the engines together.

IMG_2704

Jeff, I am glad it was an easy fix!

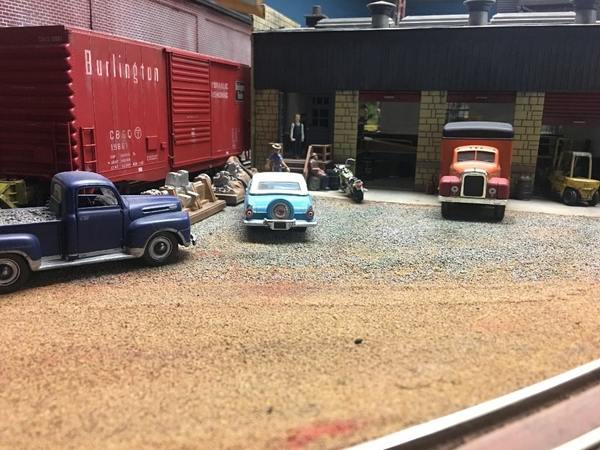
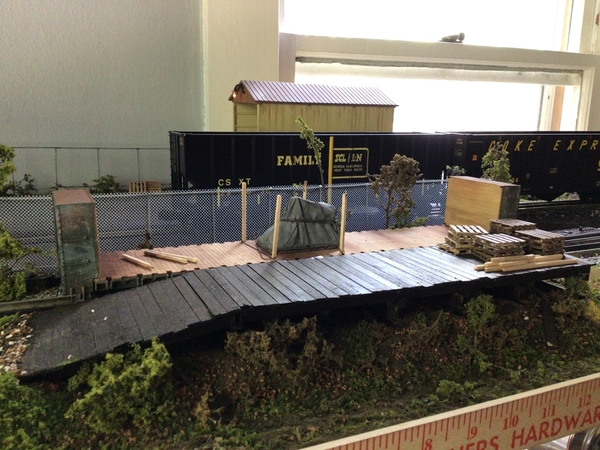
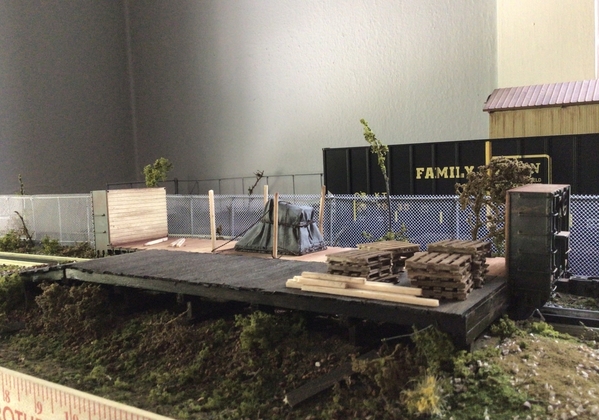
Mike -- For background i'm attaching pics of some of the background i did behind some factory buildings. Some of them were just painted on, others done either on Strathmore board, some on 1/8" or 1/4" foam core. I used brick paper glued (3M Spray 77) to the backing in most instances. It all gives the illusion of depth. Don't restrict yourself to one material or style; mix it up.

Another place you might want to look for materials (brick paper, etc.) and ideas is Clever Models.

Attachments

Images (3)
  • P1010389
  • P1010418
  • P1010419
Last edited by modeltrainsparts

We had the layout engineer and Inspector working on the layout today. Going with outside mainline, inside loop and planning a spur for an engine to park with two cars. And someone is requesting an incline to upper level... Hmmmmm, and me, well, this is pretty high elevation for a carpet layout guy. Excuse me for a minute, I think I am getting a nosebleed from this high altitude.

DO I need a railing to keep engine from falling? EEEEKS! hope to test the main line for shorts with TIMEX. Video at eleven (Timex, a Mark Army400, "Takes a licking, keeps on ticking"

Builder-help-onTask

Attachments

Images (1)
  • Builder-help-onTask

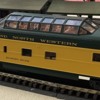
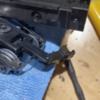
Posting this as more of a lesson learned.   Was opening the new CNW passenger cars and taking them out of the box to inspect and run on the track.   Well one of the cars coupler was not right.

So I took the car apart to see how to fix the coupler then noted I was missing a screw.   As per the picture (at joint at 90 degrees) you will possibly see where a missing screw is.  So looked in the packaging and no screw.  Between taking the car apart which was the least amount of time I spent over an hour finding the missing screw including looking for replacement as I keep all kinds of parts/screws.   This is one tiny screw.  

So between where I opened the passenger car to the layout I finally found the screw.    

My tip is open stuff and inspect in the same location and perhaps with some level of method to ensure any small parts that may fall out you might locate sooner.   I am sure there are many on this forum who have a method but I know I will be more methodical.  Now back to running trains.

Attachments

Images (2)
  • 6EBEC9C9-D49B-4F5A-92AA-93BAFBEE6533
  • 64C77DE0-14DB-40F8-B837-093ECE04762A
@Miggy posted:

We had the layout engineer and Inspector working on the layout today. Going with outside mainline, inside loop and planning a spur for an engine to park with two cars. And someone is requesting an incline to upper level... Hmmmmm, and me, well, this is pretty high elevation for a carpet layout guy. Excuse me for a minute, I think I am getting a nosebleed from this high altitude.

DO I need a railing to keep engine from falling? EEEEKS! hope to test the main line for shorts with TIMEX. Video at eleven (Timex, a Mark Army400, "Takes a licking, keeps on ticking"

Builder-help-onTask

Chopper 5 Update on layout construction. Tethered Steam Engines, complete with Bell option, stand at the ready.

Attachments

Videos (1)
Layout-today

Jeff, I too like the lashup feature.  I have lashed similar diesels and double headed H9 consolidations.  Really cool.

Mike, The lights and stairs are a great enhancement on that building.

Jackson, Those are really nice backgrounds making for a nice railroady feel to your industrial area.

Scott, Nosebleed section reminds me of the top of the upper deck at Pittsburgh's Three Rivers Stadium.  IT was all the rage when opened, than fans quickly realized it seemed like you were watching the game from a helicopter.  So after only 31 years they imploded it.  The layout looks good.  I had track that close to the edges on my original O gauge 4x8 and never lost an engine, but I don't run trains very fast and don't have any kids around.  The copter tour is great.  Is the boy in the first photograph your grandson.  He looks like he would be responsible.  He reminds me of me when I built my first train layout.  Congratulations on the planned expansion.

JJWyatt, Excellent advice on making sure you have everything intact right where you unbox trains.  I don't have room for a workbench, so I use the edge of the layout or the fold down table of an old sewing machine our older daughter has never picked up since she married and moved out.  She buys junkers and repairs them, but this machine has a fatal flaw that is beyond help, so it is my work area and place I do paperwork too.

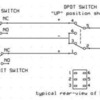
Back to Mike.  After cleaning up a lot of leaves, (still more to do, but it is raining and snow is predicted later this afternoon) I fiddled and fiddled trying to get the wiring to work on my limit switches.  I finally did a search for your original build in the Forum search function.  I got Stan's drawing quickly by entering the phrase "linear actuator" and mike g.  It pulled up links that took me to your topic back in the fall of 2016!  I was surprised it was over 4 years ago.  So here is Stan's drawing.
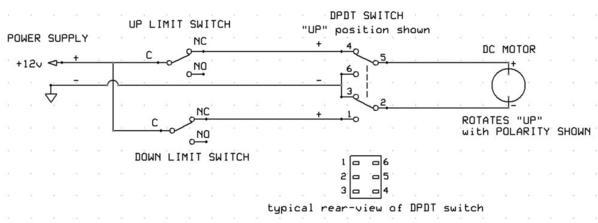
dpdt%2520bridge%2520drive%2520with%2520limit%2520switches

I really feel like a fool, but I can't seem to think outside the box.  And I was passing myself off as an electronics technician and engineer for 43 years!!!   (I guess that was me big accomplishment in life!)    I couldn't figure out how to tie the power and the normally closed contacts together.  Since it is raining I hope to knock this out today.  I'll get the soldering iron out as soon as I leave the computer.

Attachments

Images (1)
  • dpdt%2520bridge%2520drive%2520with%2520limit%2520switches

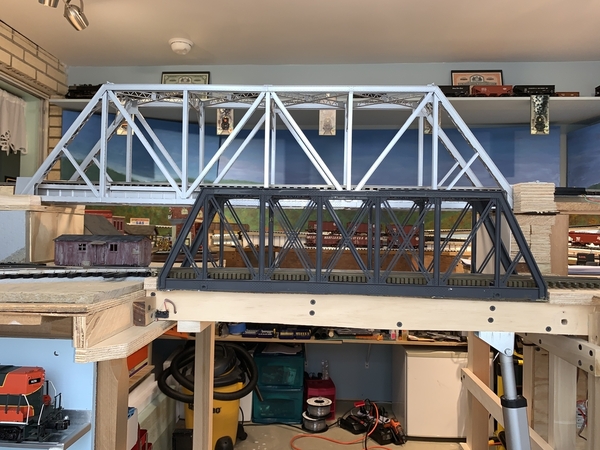
Success!!  I finished wiring my limit switches for the bridges.  I have to thank Mike again for sharing the ideas and helping me so much along the way.  Also many thanks to Stan2004 for the wiring diagram.

Here they are from the aisle.

2021-03-31 13.17.17

Here they are from the center of the layout.

2021-03-31 13.17.30

Here is a video of the complete action.  Please pardon the movement of the camera.  There really isn't room here to set up the phone for a complete view.

Attachments

Images (2)
  • 2021-03-31 13.17.17
  • 2021-03-31 13.17.30
@Mark Boyce posted:

Success!!  I finished wiring my limit switches for the bridges.  I have to thank Mike again for sharing the ideas and helping me so much along the way.  Also many thanks to Stan2004 for the wiring diagram

Here is a video of the complete action.  Please pardon the movement of the camera.  There really isn't room here to set up the phone for a complete view.

Beautiful Mark!! Is the crossbar teflon coated for less drag? Yes, Two Grandsons, Birthdays next month, 9 and 6 at that time. Seems like just yesterday. Yes, they are both adept with all the basics. They  make it fun! Nice work on the Bridges Mark! Exceptional! (Gomez CrAsH soon to follow, haha)

Thank you Lee, Seth, Scott, Redball!!

Scott, right now it is a poplar 1x2.  From the beginning I thought about needing something different that provides less drag and won't rub off some details from the underside of the bridge.  Teflon coated would certainly provide less drag.  I guess any smaller project on a layout is just like a layout as a whole; they both are never really finished.  There is always room for improvement.  Congratulations on bringing the grandsons up right!!  I'm sure it does seem like yesterday.  I was 35 when our first daughter was born, and she will be 30 soon.

Mark B, Wow, thats a great video, great Bridge lifting idea, you have good voice for narration, and it’s simply very impressive. Mike G., Stan, and I’m sure others chimed in giving you creative ideas. Farmerjohn has a great helper, Steve Kimble, who really shares in his success, Farmerjohn is creative with lots of unique ways to run trains, they appear, disappear, and re-appear, so neatly. There are so many folks having modeling fun on this forum. RSJB18, Bob is creating a super switch yard and is also very creative. Happy Railroading Everyone E549EB8F-C9F2-4258-873D-66A5E0A9ABA5889A5787-D5BB-4FD6-914C-96B9D64028FF7D72F3A5-8EC4-46E5-AECC-A35FEB0F59D640B20A3A-0843-49A2-895B-5F065AFF2F0F1DB4C628-6C88-47EE-8B50-BA815709A2D8

Attachments

Images (5)
  • E549EB8F-C9F2-4258-873D-66A5E0A9ABA5
  • 889A5787-D5BB-4FD6-914C-96B9D64028FF
  • 7D72F3A5-8EC4-46E5-AECC-A35FEB0F59D6
  • 40B20A3A-0843-49A2-895B-5F065AFF2F0F
  • 1DB4C628-6C88-47EE-8B50-BA815709A2D8
Videos (1)
5F65D4C8-C5AC-4EF8-8AC2-1B4B46983322

Farmerjohn,

Great work and I like most, am anticipating the progress on this area of your layout. Every time you post it makes me want to do work on my layout. I guess that makes you a motivator.

Mike,

The kit-bash is really well done. This will look great lit up. Will you add any interior...people, machinery, etc? Keep the progress coming.

Dave

Last edited by luvindemtrains

Mikeg: Like your building very much.

Larry: Always enjoy your videos and new locos.

Mark: Enjoyed the explanantion about the electrical details for bridge lift operation. Quite a project and the video is proof a job well done.

Getting busy with so many other things in the works so my posts will taper off but I will catch up with the gang later.  Cheers.
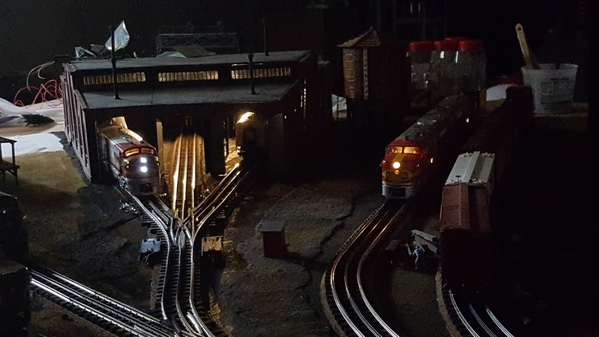
Hi everyone looks like alot of great work!

Mark, congrats on everything working well for your bridge's! They look great and nice and smooth!

Larry, what a great looking layout! I just sit and drool looking at your photos! LOL

Clifford, wonderful scenes! Cant get much better then that!

Paul, your Charles Street yard is looking outstanding!

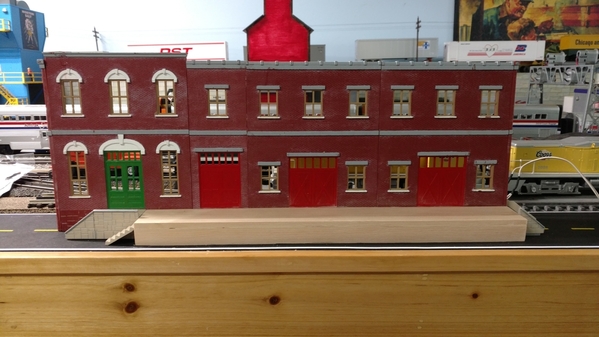
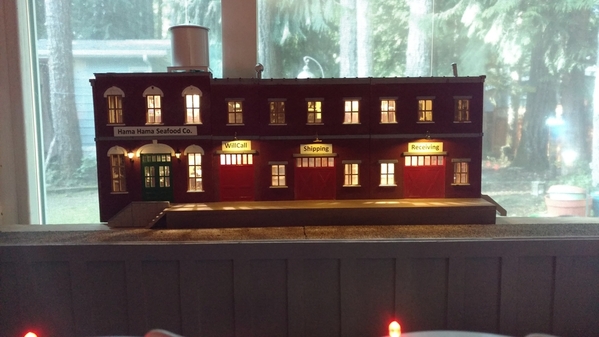
Farmer John and Dave, I plan on putting a back on it with print outs of people and cargo inside, the back will be 1 1/2" deep. Yesterday I added some outside lights and signage and still have to put the company name on. Today I hope to get all the lighting wired in, if not there is always tomorrow! LOL Here is a photo for your pleasure! IMG_20210331_152456027

I hope everyone has a great day!

Attachments

Images (1)
  • IMG_20210331_152456027

After a relocation and a hiatus from the hobby, I am back to working on a railroad.  The Ozark Midland & Southern Railway is under development.  Yesterday I roughed-in where there will be a river and a girder bridge and later painted the top of the new table with a base coat of light brown acrylic paint.  Tomorrow I am expecting a delivery of 1/8" hardboard to be used for the backdrop.

Attachments

Images (2)
  • OM&S 4-1-21 thumbnail_IMG_0560: River roughed into the benchwork and girder bridge set in place.
  • OM&S 4-1-21 thumbnail_IMG_0564: The new railroad table.
Last edited by OGR CEO-PUBLISHER

Railhead53, sure looks like you have a good start!

Modeltrainparts, most of the wearhouse's near me are about an hour drive! LOL So I will take your wordfor it. Right now I am debating weather to install the glass in the windows or not as the building will be about 3 feet from the edge of the layout. I want people to see the inside and the people working there!

Well guys today I got all the outside lighting hooked up and then one has a bad connection so I tomorrow I will have to figure that out. I also got the inside back drop done with cargo on the lower level and a main lobby, the second floor is office space. Here are a couple photos for you all to enjoy!

IMG_20210401_135821628IMG_20210401_135826689IMG_20210401_135850763IMG_20210401_135922448

Tomorrow is Friday and the start of the weekend, I hope everyone has a great Friday and a wonderful weekend! Remember to love the ones you have and thank them for allowing you your time for fun with your layout and trains!

Attachments

Images (4)
  • IMG_20210401_135821628
  • IMG_20210401_135826689
  • IMG_20210401_135850763
  • IMG_20210401_135922448

Thanks Mike for the comment about the progress.  It has been a while since I've worked on a railroad layout.  Feels good to be back at it.

Your project is really looking good.  My initial thinking about the glass in the windows would be to install it.  I always think adding the glass improves the overall appearance.  Perhaps the best thing to do would be to temporarily install some of it and then put your in place on the layout and then see what you think.  I'll be interested in what you decide.  Have a nice weekend.  Bill B.

Last edited by OGR CEO-PUBLISHER
@mike g. posted:

Railhead53, sure looks like you have a good start!

Modeltrainparts, most of the wearhouse's near me are about an hour drive! LOL So I will take your wordfor it. Right now I am debating weather to install the glass in the windows or not as the building will be about 3 feet from the edge of the layout. I want people to see the inside and the people working there!

Well guys today I got all the outside lighting hooked up and then one has a bad connection so I tomorrow I will have to figure that out. I also got the inside back drop done with cargo on the lower level and a main lobby, the second floor is office space. Here are a couple photos for you all to enjoy!

IMG_20210401_135821628IMG_20210401_135826689IMG_20210401_135850763IMG_20210401_135922448

Tomorrow is Friday and the start of the weekend, I hope everyone has a great Friday and a wonderful weekend! Remember to love the ones you have and thank them for allowing you your time for fun with your layout and trains!

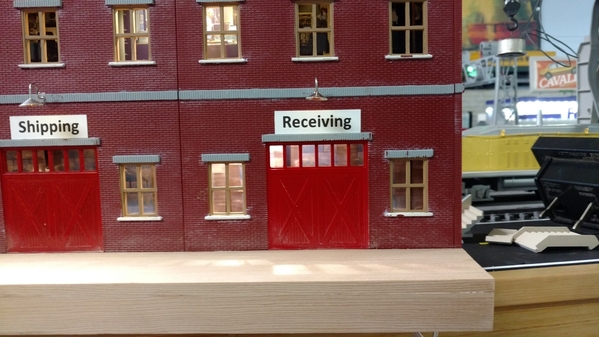
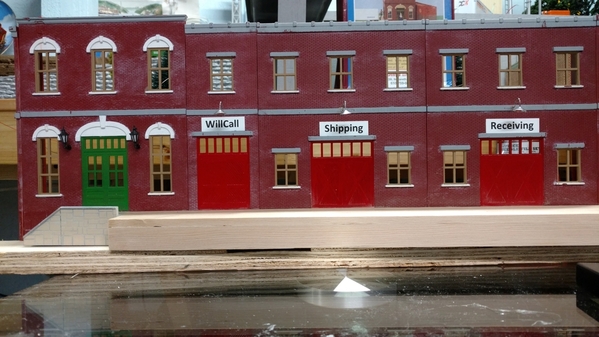
Mike, great progress on the building!  I like the loading dock you made and the figures in the building interior...looks very realistic.  It's good you created a separate door for "Shipping" and "Receiving"...much more efficient that way! 

Last edited by Capetrainman

Thanks guys for the nice words!

Jay, the beaches are worked all hours of the day and night, depending on the tied's.

Bill, I will put some glass in and see how I like it, who knows you might be right.

Paul, thank you I added the will call door cause it was smaller door and right next to the office, then that left me with what to do with the other 2 guess I could have always left them blank. But like you, I like the look.

Thanks Mike. Inch and half sounds really good for lighting.  On my layout that is about all the room ill have to spare. By design I messed up and put my rails to close to wall. My problem though.  But with your dezine I think it will work . Will let you know in the future. Thanks for the info. By the way. Love you're layout.

@farmerjohn posted:

Thanks Mike. Inch and half sounds really good for lighting.  On my layout that is about all the room ill have to spare. By design I messed up and put my rails to close to wall. My problem though.  But with your dezine I think it will work . Will let you know in the future. Thanks for the info. By the way. Love you're layout.

Thanks John, I have a few places that need flats or something so I thought I would give it a shot. My layout is nothing like your, but I don't think it's to bad for a guy that really just got into it. I got my first train 6 years ago and that was ho. Then my grandson found an old Lionel steam engine in the trash and gave it to me and that's all it took! LOL

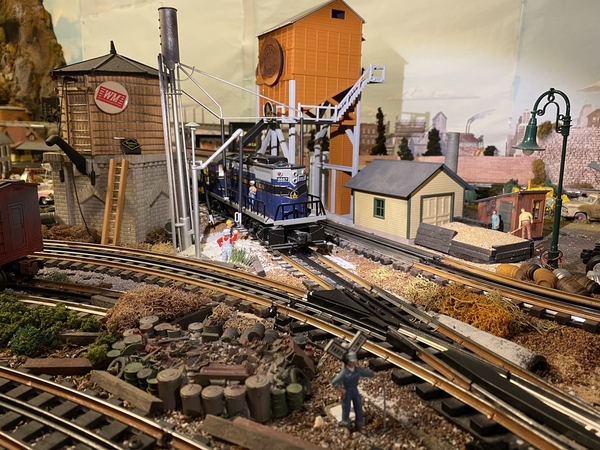
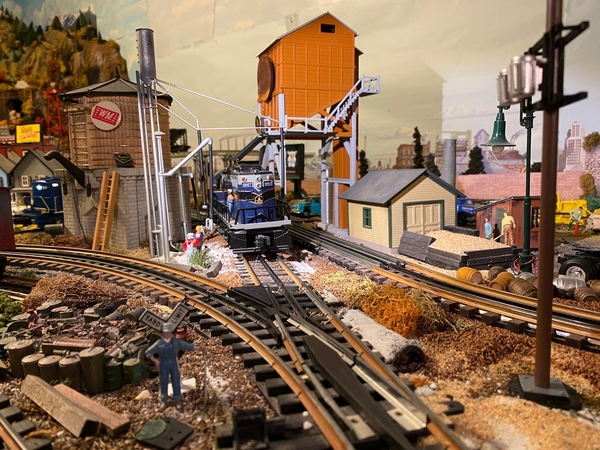
A few nights ago I performed some urban renewal.  I created this engine terminal facility for steam and diesel locomotives.  Doing this involved removal of a brewery, which may be re-located.  The top two photos shows the new engine terminal.  The bottom photo shows the brewery as it was before removal to make way for the new facility.

The sand house is a Model Power section shed for hand or motor car storage.  I used the shed's flat extension to create a raw sand storage area and wooden cross ties as containment walls.  Behind the sand house you will see a HO gauge industrial smoke stack.... to allude to a baking oven inside the shed for baking the raw sand.  The raw sand itself is from the beaches of Ocean City, Md.  Directly across from the sand house is the sand tower ( by MTH ).   Sand turns white as it is dried from the baking process, so I have applied the spillage of white sand around the track on which the GP9 is sitting.  IMG_5729IMG_5737IMG_1026

Attachments

Images (3)
  • IMG_5729
  • IMG_5737
  • IMG_1026
Last edited by trumpettrain

A few nights ago I performed some urban renewal.  I created this engine terminal facility for steam and diesel locomotives.  Doing this involved removal of a brewery, which may be re-located.  The top two photos shows the new engine terminal.  The bottom photo shows the brewery as it was before removal to make way for the new facility.

The sand house is a Model Power section shed for hand or motor car storage.  I used the shed's flat extension to create a raw sand storage area and wooden cross ties as containment walls.  Behind the sand house you will see a HO gauge industrial smoke stack.... to allude to a baking oven inside the shed for baking the raw sand.  The raw sand itself is from the beaches of Ocean City, Md.  Directly across from the sand house is the sand tower ( by MTH ).   Sand turns white as it is dried from the baking process, so I have applied the spillage of white sand around the track on which the GP9 is sitting.  IMG_5729IMG_5737IMG_1026

Looks great! I'm always a fan of engine facilities.

I didn't take any pictures but my dad and I are slowly building his new layout (old layout had been up for 20 years, it was time for a change) and we use gargraves track. So for the Lionel dump cars we use the technique Jim Barrett showed of cutting the ties out so you can install a piece of rail to activate the car. We needed two for in front of the 97 coal loaders. I'd never installed any of the activation rails on our old layout so it was nice to see how it is actually done. I'll keep posting pictures of the layout as we move along. Have a great Friday!

@mike g. posted:
Well guys today I got all the outside lighting hooked up and then one has a bad connection so I tomorrow I will have to figure that out. I also got the inside back drop done with cargo on the lower level and a main lobby, the second floor is office space. Here are a couple photos for you all to enjoy!

IMG_20210401_135922448

Tomorrow is Friday and the start of the weekend, I hope everyone has a great Friday and a wonderful weekend! Remember to love the ones you have and thank them for allowing you your time for fun with your layout and trains!

Looks great Mike. Since it's Good Friday today I'm sure that Will Call door is going to be busy!

A few nights ago I performed some urban renewal.  I created this engine terminal facility for steam and diesel locomotives.  Doing this involved removal of a brewery, which may be re-located.  The top two photos shows the new engine terminal.  The bottom photo shows the brewery as it was before removal to make way for the new facility.

IMG_5737

Very Nice Patrick. It's good to change up the scenes occasionally.

Berklover- Looking forward to pix next time.

@railhead53- welcome back to the greatest hobby in the world. Keep us posted on the build.

Bob

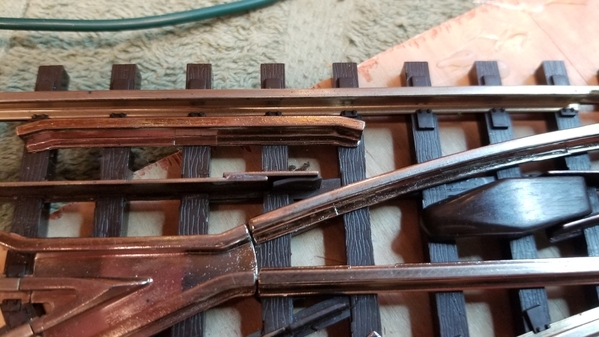
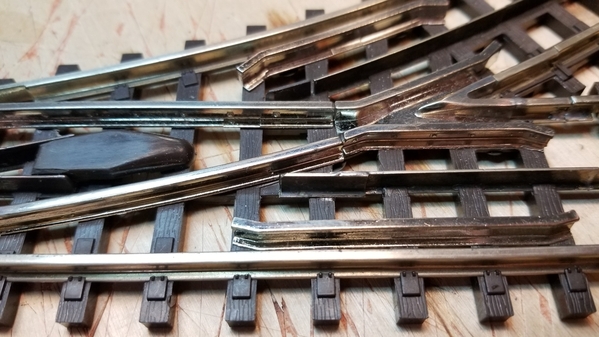
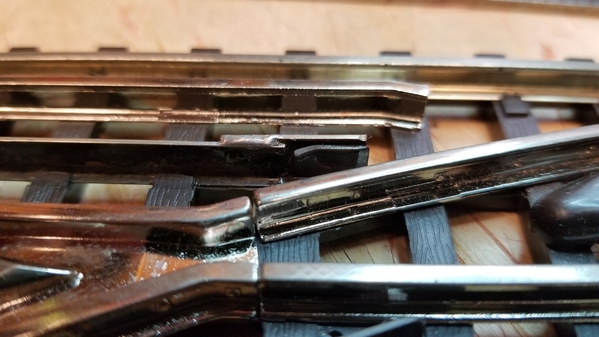
Yesterday I took another look at the switches I've been working on. I think I solved my problem for the most part. I won't know if the fix is 100% effective until I get everything assembled on the layout but it looks good in the tests. My fix was to add a short piece of center rail just past the outer turn-out rail. It only added about a 1/2" to the rail but it seems to have made a big difference. I tried several different locos and most ran through without stalling. If more center rail is needed I can add some copper sheet to the top of the plastic piece inside the turnout rails. I just have to watch that the roller isn't on both the center and outer rail at the same time.

2021-04-01 16.12.482021-04-01 16.13.302021-04-01 16.13.51

Attachments

Images (3)
  • 2021-04-01 16.12.48
  • 2021-04-01 16.13.30
  • 2021-04-01 16.13.51
Videos (4)
2021-04-01 15.43.37
2021-04-01 15.47.52
2021-04-01 15.55.06
2021-04-01 16.04.10

Nice work everyone and happy Good Friday!

Mike G, excellent lighting and interior scenes.  I've come to appreciate how difficult it is to get that right shade of light on a building interior from working on my current project.

Bob, way to go on that fix. As you pointed out, proceed with caution on extending that any further as you risk an electronics fatal short if the pickup roller touches both tracks.  Keep in mind that different speeds may slightly alter roller alignment as well as the unique characteristics of different engines.  Everything may seem fine when pushed by hand but it may be another ballgame at 15 SMPH.

Bob I would feel confident and say SUCCESS for your proof test. Your fix looks very neat and looks to have solved your issue. Good luck with the install and final test.

Thanks gents.

Agreed on both points. I will probably install as-is and adjust from there. The spurs will be powered by separate feeds which should help with power losses in and out of the sidings. Also not being able to run all the way through the last switch caused some short stops.
There is quite a bit of wiggle room as the engines roll through the points and frogs, so what works one way may not in the other.


Bob

Last edited by RSJB18
@RSJB18 posted:

Yesterday I took another look at the switches I've been working on. I think I solved my problem for the most part. I won't know if the fix is 100% effective until I get everything assembled on the layout but it looks good in the tests. My fix was to add a short piece of center rail just past the outer turn-out rail. It only added about a 1/2" to the rail but it seems to have made a big difference. I tried several different locos and most ran through without stalling. If more center rail is needed I can add some copper sheet to the top of the plastic piece inside the turnout rails. I just have to watch that the roller isn't on both the center and outer rail at the same time.

2021-04-01 16.13.51

Well Done!! Mighty good idea. Nicely detailed sir. Poifect!
A few nights ago I performed some urban renewal.  I created this engine terminal facility for steam and diesel locomotives.  Doing this involved removal of a brewery, which may be re-located.  The top two photos shows the new engine terminal.  The bottom photo shows the brewery as it was before removal to make way for the new facility.
IMG_1026

@trumpettrain

Pat:

Please find a new home for the brewery. It was a great scene in your layout. One of my favorites.

A few nights ago I performed some urban renewal.  I created this engine terminal facility for steam and diesel locomotives.  Doing this involved removal of a brewery, which may be re-located.  The top two photos shows the new engine terminal.  The bottom photo shows the brewery as it was before removal to make way for the new facility.

The sand house is a Model Power section shed for hand or motor car storage.  I used the shed's flat extension to create a raw sand storage area and wooden cross ties as containment walls.  Behind the sand house you will see a HO gauge industrial smoke stack.... to allude to a baking oven inside the shed for baking the raw sand.  The raw sand itself is from the beaches of Ocean City, Md.  Directly across from the sand house is the sand tower ( by MTH ).   Sand turns white as it is dried from the baking process, so I have applied the spillage of white sand around the track on which the GP9 is sitting.  IMG_5729IMG_5737IMG_1026

Patrick,,,great detail and color in your scene. I just noticed the "Bada Bing"...most likely some of the brewery crew stops by there at end of shift

@Dillonm posted:

Scoutingdad no the overhead is not live. But could be.  I would need a different pantograph.  But wire and hangars are marklin and do have continuity.

Matt, I noticed the Marklin HO catenary wires and thought they could be powered from the far end. I now have about 40 feet of the wire and am trying to decide whether to tinker with a short powered section. Nice job on the posts and wire supports. I'll have to checkout the Marklin hangars.

Mike -- For background i'm attaching pics of some of the background i did behind some factory buildings. Some of them were just painted on, others done either on Strathmore board, some on 1/8" or 1/4" foam core. I used brick paper glued (3M Spray 77) to the backing in most instances. It all gives the illusion of depth. Don't restrict yourself to one material or style; mix it up.

Another place you might want to look for materials (brick paper, etc.) and ideas is Clever Models.

Now that is an excellent background'.  Great depth of field'.. Very realistic'... and very nice weathering as well'...!!☑⭐👍

Mike, your building looks terrific'.  Nice lighting job'... I love 💚 the prople upstairs working'.. From the distance of the shots you took, I don't think you need the glass'.. You will get dust and baby spiders inside though.  As long as the cobwebs don't block the windows', it'll be fie..  Nice work Mike'...]..😍

Afternoon guys, sure is some nice work going on!

Patrick, WOW what a huge change! Looks great!

Bob, great idea! I sure hope it works well when you get it back on the layout!

Kwisor, great looking scene! Going to look even better when your done with the river!

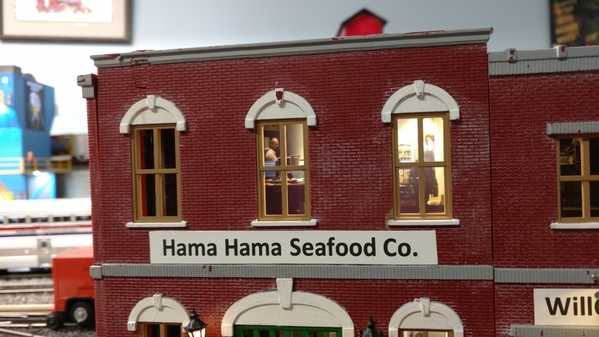
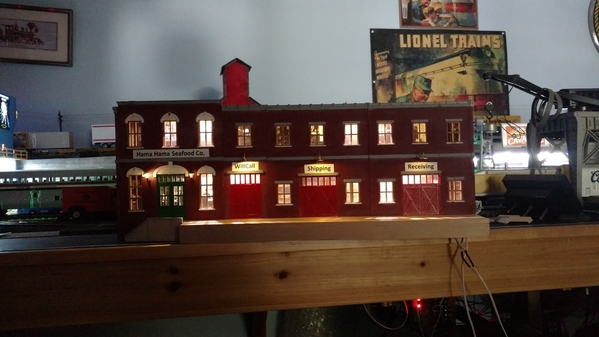
Well guys, I got out to the train room this morning at 3:30am fixed the short in the one light, it was a broken wire. I was able to get the back on, the loading dock weathered, and all wired up and in place.

Here is what it was meant to be.

IMG_20210402_074106129_TOP

Here is what it turned out to be in it's place in the window.

IMG_20210402_093857528IMG_20210402_093902598

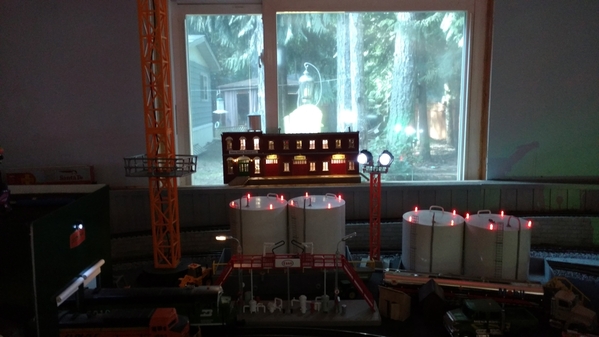
I did end up adding the windows and once I got them in I wasn't about to take them back out. I think it  looks fine to me!

I hope everyone has a great weekend and finds time to have fun with there trains!

Attachments

Images (3)
  • IMG_20210402_074106129_TOP
  • IMG_20210402_093857528
  • IMG_20210402_093902598

Wow, that's a lot of posts in one day!!

Bill, I'm glad to see you back.  IT looks like the new layout is off to a great start.

Mike, The Hamma Hamma Seafood Company looks great!  The interior detail is just right.  When are we going to see the Mike and Mrs Mike Store model?

Bob, It looks like you are doing great on the switch rebuild.  Maybe when you are finished you could sell Steve the plans for the short switches.

Dillonm, the scene with the trolley really captures the feel of a bygone day that all of us long for!

Pat, It is allways good to change up a good scene with another good scene.

Kwisor, that is a wonderful scene!

Yesterday evening I found and removed the short circuit that was causing my two TIU channels to be tied together.  I had a gap between the mainline and a siding that had closed up for some reason.  I never put any insulation in to fill the gaps before, but maybe I should.  I decided to run trains.  I promptly threw traction tires on one of the H9 consolidations and replaced them.

@mike g. posted:

Afternoon guys, sure is some nice work going on!

Patrick, WOW what a huge change! Looks great!

Bob, great idea! I sure hope it works well when you get it back on the layout!

Kwisor, great looking scene! Going to look even better when your done with the river!

Well guys, I got out to the train room this morning at 3:30am fixed the short in the one light, it was a broken wire. I was able to get the back on, the loading dock weathered, and all wired up and in place.

Here is what it was meant to be.

IMG_20210402_074106129_TOP

Here is what it turned out to be in it's place in the window.

IMG_20210402_093857528IMG_20210402_093902598

I did end up adding the windows and once I got them in I wasn't about to take them back out. I think it  looks fine to me!

I hope everyone has a great weekend and finds time to have fun with there trains!

Wow, Mike, those oil tanks look great.  The lights add that realistic look'....Nice'..addition to the layout'...

Hello Capetrainman!

I've purchased a supply of foamie but I must order a thicker supply for I am not satisfied with the two mm thickness to pair up with my 1 mm thick styrene sheets. 

I have this question for you experienced gentlemen. Regarding the width of the streets and roads, what is your normal width in inches.  And when you order car striping tape do you use the 1/8th width tape?

Thanks so much guys for your interest in helping.  I've begun to layout my streets and my foamie pads with the Woodlands scenic buildings placed on top as a dry run.  I'm doing this on a 4x8 plywood sheet in my shop and not on the layout as yet. The design,  Its coming together quick this way.  I have planned for this day to come for a long time.  Sometime this month the design I wish and the downtown streets will look like Olive Hill.

@Seth Thomas posted:

Hello Capetrainman!

I've purchased a supply of foamie but I must order a thicker supply for I am not satisfied with the two mm thickness to pair up with my 1 mm thick styrene sheets.

I have this question for you experienced gentlemen. Regarding the width of the streets and roads, what is your normal width in inches.  And when you order car striping tape do you use the 1/8th width tape?

Thanks so much guys for your interest in helping.  I've begun to layout my streets and my foamie pads with the Woodlands scenic buildings placed on top as a dry run.  I'm doing this on a 4x8 plywood sheet in my shop and not on the layout as yet. The design,  Its coming together quick this way.  I have planned for this day to come for a long time.  Sometime this month the design I wish and the downtown streets will look like Olive Hill.

Hi Seth...glad to hear your project is on the way!  My South Main Street is 9  1/2" wide...the width will accommodate 2 travel lanes and 2 lanes for parallel parking.  As a test for width, I put 4, 1/43 autos on the road appropriately spaced to come up with a width that was functional. For lane striping, I purchased 1/8" auto pin-striping tape in white and yellow from one of the auto supply stores.  1/8" is not exactly in scale, but I found it easier to work with and the appearance to me was adequate for the job...and the price was inexpensive.

I'm not able to post a picture of the road right now, but many of my pictures posted already show the roads with striping applied...good luck!  You'll hear many other options for sure...

@Seth Thomas posted:

Hello Capetrainman!

Thanks so much guys for your interest in helping.  I've begun to layout my streets and my foamie pads with the Woodlands scenic buildings placed on top as a dry run.  I'm doing this on a 4x8 plywood sheet in my shop and not on the layout as yet. The design,  Its coming together quick this way.  I have planned for this day to come for a long time.  Sometime this month the design I wish and the downtown streets will look like Olive Hill.

Seth- Assuming a typical lane width of 10', this would scale to 2.5" at 1:48 scale.

A lane marking of 6" = .125" (1/8").

Bob

@ScoutingDad posted:

Matt, I noticed the Marklin HO catenary wires and thought they could be powered from the far end. I now have about 40 feet of the wire and am trying to decide whether to tinker with a short powered section. Nice job on the posts and wire supports. I'll have to checkout the Marklin hangars.

My personal thought on working catenary is that it is overkill. Catenary is a great idea, but, just to allow your electric locomotives to run with their pantographs up for visual effect. Visitors to your layout will have no idea as to whether the power to the locomotive is coming from above or below. You will be the only one who knows that.

@railhead53 posted:

Mark, thanks.  It has been a while and it is good to be back and working on another railroad.  This one will be much smaller than the last, but I am having fun with it.  Bill B.

Bill,

While I really liked your last layout, I think smaller can be better.  While I would like to have a longer run, a twice around roughly the perimeter of my 11x11 room will keep me busy for many years.  Some modelers who are around our age perhaps bite off more than they can chew.  IF someone has help from other modelers, then a larger layout can work, but if a person is doing it by himself like I am, smaller works nicely.
Last edited by OGR CEO-PUBLISHER

Randy - I may end up just having a non-working catenary, but I am an engineer at heart and I enjoy dabbling in something like this and enjoy the challenge of getting it to work. Heck I might even try two rail if I don't have to mess with polarity issues. Lighting passenger cars would be a challenge however, a battery or supercapacitor with LED lighting would probably work fine - another engineering challenge.

Mark B - I tend to agree with the smaller layout to a point. I would love not to have to do any type of lift ups, outs, aways to access my layout. But with the desire to have at least some track with 072 curves, geometry otherwise requires arguably 15 feet for a dog bone type pattern. That tends to push a layout to 10x15 minimum.  Next layout I am thinking roughly 15x20 max - of course that kind of space is hard to find in homes today - living rooms, kitchens and main bedrooms are off limits - zoning permits would be denied. Still thinking about the Black Diamond layout as a basis but that is 14x36.     

Good Saturday morning guys.  Just before Easter I’m the chief bottle washer, the one making trips down stairs to the garage frig, and the best potato peeler in town.  Carol is the greatest cook in town even though she suffers from MS.  

So with the kids coming from Charleston Easter the layout downtown design is on hold. We have the grandson some next week and we cannot wait!  He an I have catchup to do in the train room running HO and operating the Gantry Crane.  He has not seen the tunnel covered nor listened to the whistle as the engines enter an exit the portals.

I have  enjoyed your bridge lift video Mark and watched the progress of the brick building Mike.  I think the beginnings of the 48 club members is a great way to learn of all the neat designs guys!

So sometime after Easter the downtown Olive Hill may come alive and thanks to Bob and Capetown the streets will be striped and scaled properly via the 1:48.  


@Mark Boyce posted:

Bill,

While I really liked your last layout, I think smaller can be better.  While I would like to have a longer run, a twice around roughly the perimeter of my 11x11 room will keep me busy for many years.  Some modelers who are around our age perhaps bite off more than they can chew.  IF someone has help from other modelers, then a larger layout can work, but if a person is doing it by himself like I am, smaller works nicely.
Hi Mark, Well stated.

"What did you do on your layout today." Me, nothing. Stuck. More fun to take photos of a wreck than to work on the layout. I am struggling with Layout design. What, makes an Oval Loop track interesting? Two loops takes 4 switches!! Taking inventory of track, switches and X crossing. Carpet was easy, no planning needed. I put out a layout and let the kids show what was fun. (Miglet, he said, sometimes kids are tired of trains.) "What sorry **** is This?" lol

What makes a 4x8 OVAL interesting? THAT'S, what I did on my layout... nothing... yesterday... nothing.

Last edited by Miggy

Nice to see all the great projects going on. Been busy outside but made a little progress this past week.

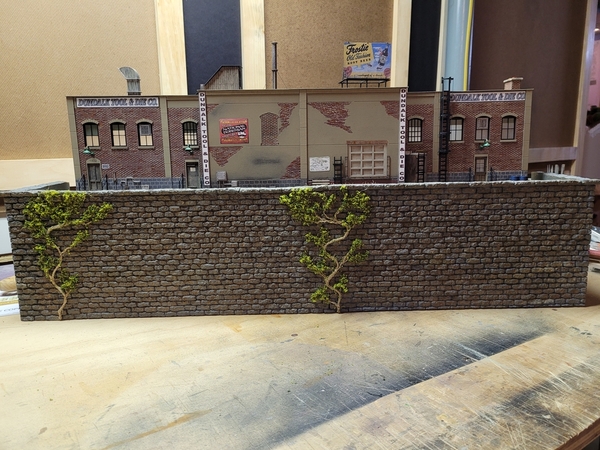
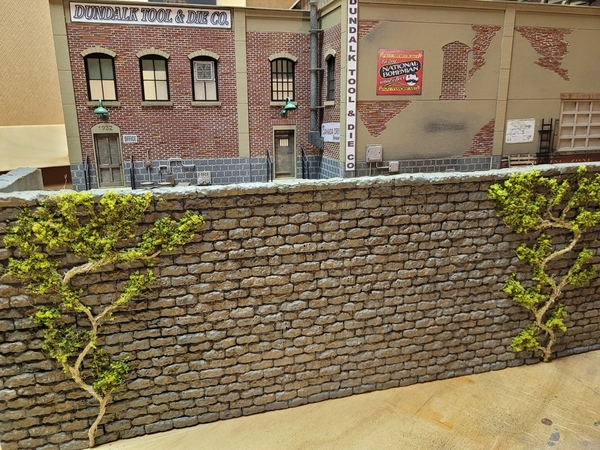
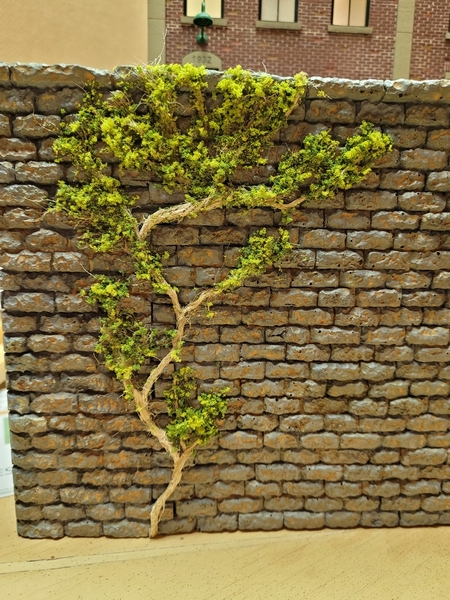
Built the raised platform for the background building I recently completed. Got the retaing walls weathered and installed. Tried Chris A's weathering mix, like it, 👍Thanks Chris!

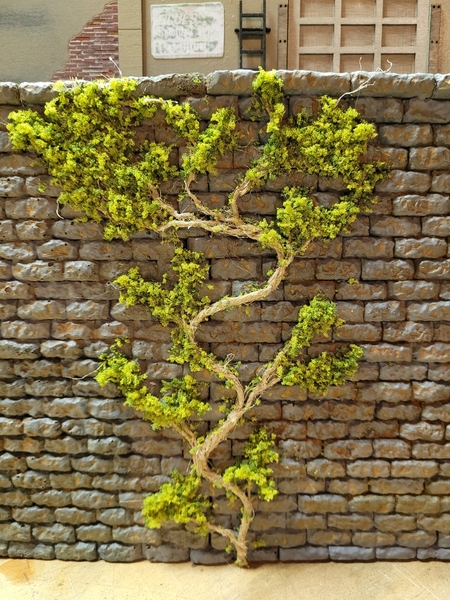
Tried a new method of making vines on the walls using Jute twine as my base. Pretty pleased with it and will experiment some more. Still waiting on LEDs to complete the lighting and then a little more details and plant it on the layout.

Have a Good Easter,

Scott20210403_15433720210403_15435920210403_15442820210403_154441

Attachments

Images (4)
  • 20210403_154337
  • 20210403_154359
  • 20210403_154428
  • 20210403_154441

Scott, the raised platform looks great! Your right about Chris A. and his methods, He is a great teacher and is willing to share!

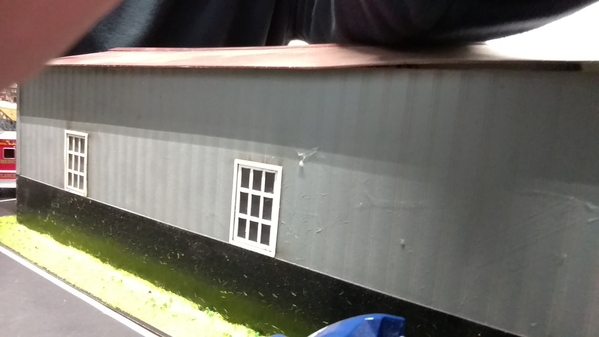
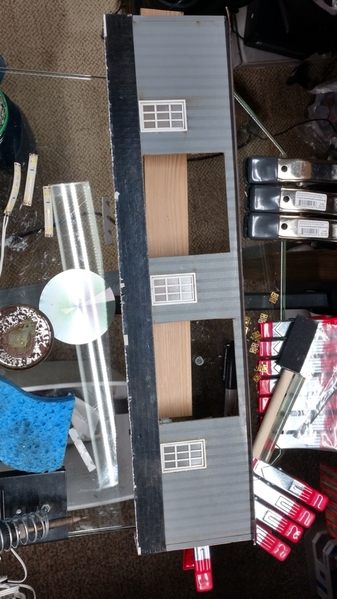
Well today I started a new building bash! LOL I have a Menards service building that I got 2 of and I had already used the door opening for my BNSF Engine shop! So the rest is free game. I am making another flat for along the window on the track that will be going outside one day! Here are a couple photos for your enjoyment! LOL

IMG_20210403_150230704

IMG_20210403_150155101_HDR

I am working on the doors and lighting. But tomorrow I am going to go to work with the wife for Easter so her employees can have the day off!

I hope you all have a great Easter and find time for your layout and trains! Remember Grandkids love trains! LOL

Attachments

Images (2)
  • IMG_20210403_150230704
  • IMG_20210403_150155101_HDR

Scott, the raised platform really looks great!  I like the jute creeping vines!

Mike, Good start on another kitbash!  What will it look like when done!  We are all in suspense.   

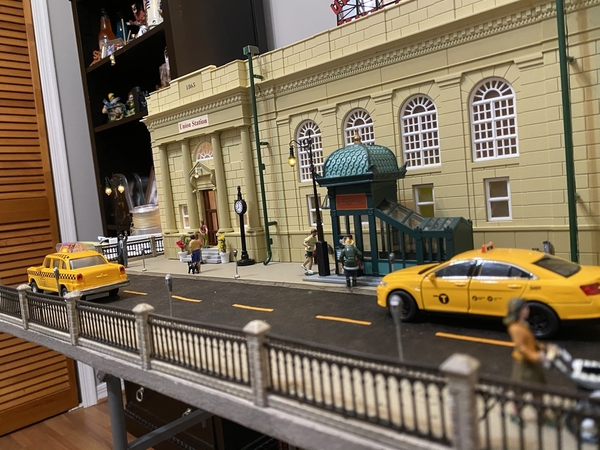
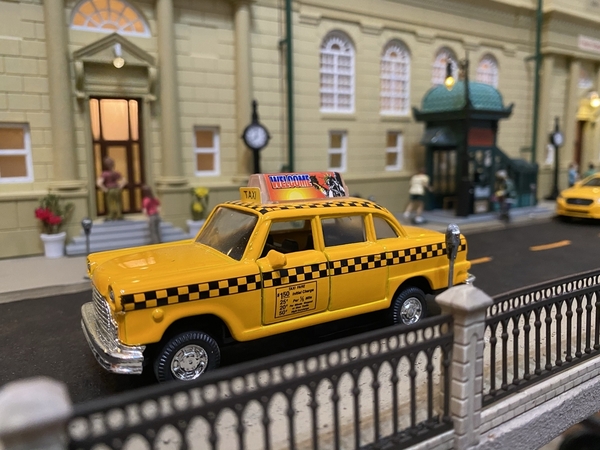
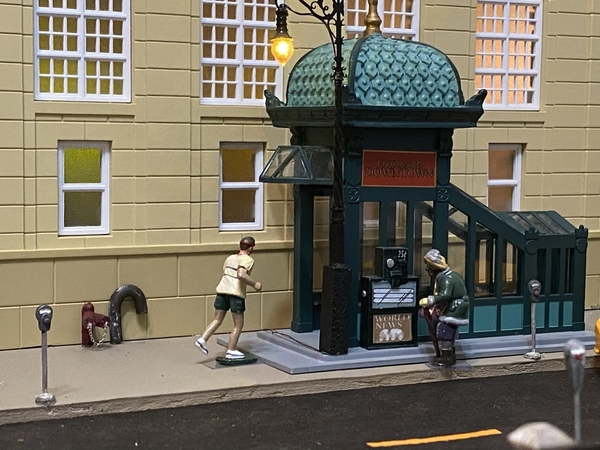
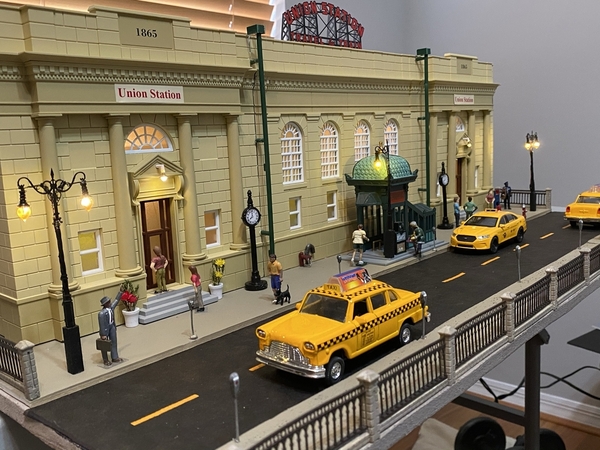
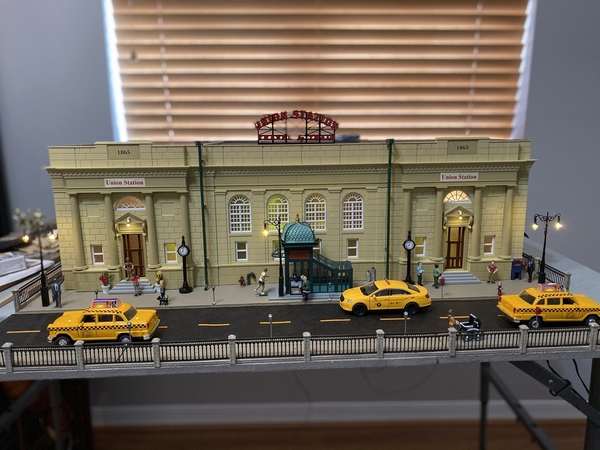
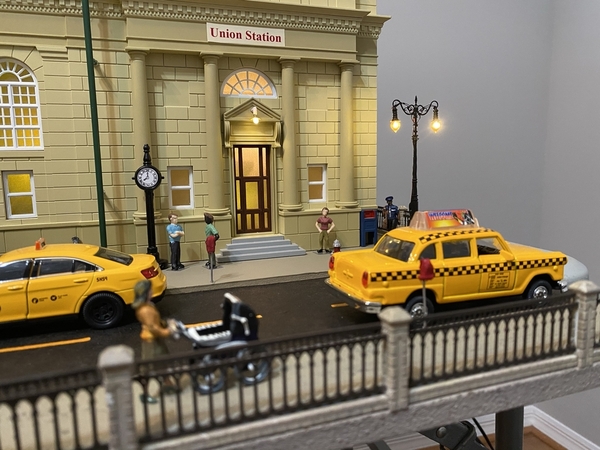
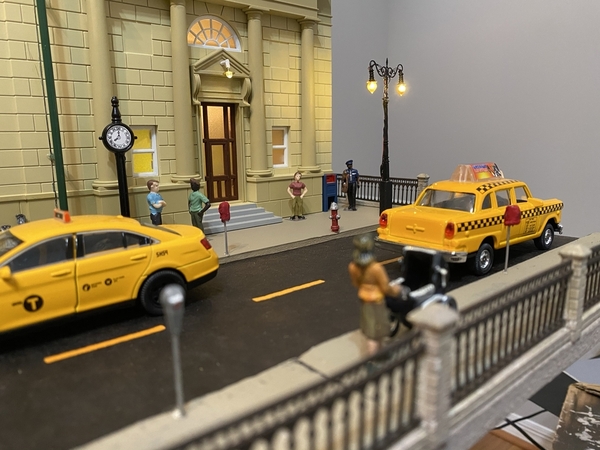
Ray, that Union Station scene really looks great!  The entrance to the underground really looks great!  I love those, though I have never seen one in person.  Yes, I stay away from big cities.  Did you #D print the great looking railing?  I loved those.  Now everything is solid concrete in the form of Jersey Barriers.

While thinking of starting some scenery on the long grade on my layout, I decided I had better level and mount the backdrop to the wall first.  It looks just the same as it did before, so I didn't take a photograph.

B&O Fan, I really like how you incorporated that stunning flat atop the retaining wall diorama, gives me some ideas. The vine idea is very creative and well executed. Please let us see when you place it on your layout.

Mike G- I have been really enjoying your kit-bashed flats. I'm getting ideas for an area of the layout where I only have about 5" between the wall and the track. Obviously I can't use full size buildings. Though I plan to try my hand at some scratch building, I'm sure your ideas will create some variety.

Strap Hanger-The station and scene looks great!

Dave

Morning guys I hope you all have a great Easter Sunday with the family! My wife and I will be spending the day at the store so our employees can have the day off with there family's .

Ray the station looks Amazing and I love all the taxi's waiting to get some fares!

Mark the scratch building will just be a small loading dock for some mom and pop company! LOL Not sure yet!

Have fun today guys!

I had placed my backdrops on the layout, but hadn't fastened them to the wall so I could adjust the height once the track was in. Yesterday, I screwed most of the the backdrop into the studs. This covers the 'big' wall (11 feet) and the coved corners to the windows on the two adjacent walls.  I only have some smaller sections to do.  Now I don't have to worry about it shifting anymore.  Once, we heard a boom, and I found the large section had tipped over partially knocking down some tools.  Nothing was damaged fortunately.

2021-04-04 11.44.54

Attachments

Images (1)
  • 2021-04-04 11.44.54

Add Reply

Post

OGR Publishing, Inc., 1310 Eastside Centre Ct, Suite 6, Mountain Home, AR 72653
800-980-OGRR (6477)
www.ogaugerr.com

×
×
×
×
Link copied to your clipboard.
×
×