paul 2 posted:So with with the possibility of rain and the wife having a game tonight I should be able to get some train work done................Paul
Paul, What are you going to do when the season is over? ![]()


|
|
paul 2 posted:So with with the possibility of rain and the wife having a game tonight I should be able to get some train work done................Paul
Paul, What are you going to do when the season is over? ![]()
LaramieJoe posted:Finished my control panel and began laying down some ballast!
Like the "Schitz plumbing service" building! Hahaha!
I think Mitch started something with his Patina comment. Suddenly it is a buzz word on
the Bay. I even saw one yesterday where the guy was bragging that he had clearcoated
the rust, oops, patina, to "preserve" it.
I love Spring/ Summer but I'm growing to hate yard work ![]() . Been catching up on a bunch of stuff that I put off for far too long. Trying to work between the rain drops has been a PITA too!
. Been catching up on a bunch of stuff that I put off for far too long. Trying to work between the rain drops has been a PITA too!
Everyone has been doing great work. One day I may get to do more than look at my layout.
This is for Paul.

Looking good Dr. Joe! Lets see a top side view of your layout!![]()
RSJB18 posted:I love Spring/ Summer but I'm growing to hate yard work
. Been catching up on a bunch of stuff that I put off for far too long. Trying to work between the rain drops has been a PITA too!
Everyone has been doing great work. One day I may get to do more than look at my layout.This is for Paul.
Love it Bob! ![]()
mike g. posted:Looking good Dr. Joe! Lets see a top side view of your layout!
Will do so today, Mike!
Pat and Bob, thanks for those observations and moral boosters LOL. Yes panic set in knowing I could be losing some good layout time but a while back I negotiated a binding contract with the CEO by putting in bold print that any days of drizzle or rain and flurries or snow will constitute a work day on the layouts. Now for this week between the Cavs and mother nature it does not look promising for me. LOL Starting off the day I glued the wood together for the frame of the pull out work shelf. When the glue has dried I'll add screws. The pic doesn't show it but I set the wood 3/4 of an inch from the ends. So while that is happening out to the garage to cut the rest of the wood on the band saw. I finally got some basswood, popular in this case, as suggested by BEARDOG to make the retaining walls for the scrap yard 1/4 inch. And then back to drilling out all the flashing from the windows on the building flat. Pics...........Paul


Looks good, Paul!!
Started construction of the bench work Sunday making a little progress. 
The plans:

The beginning!


Rit, can I make a small suggestion? Think about moving the front legs inward 8-12".
It may save a lot of tripping later on as you are working or doing other things on
the layout.
oops, meant RJT
Beardog:
Thank you for the suggestion all legs for now are temp as I had to get the framing off the floor to continue. My plan is the decking will overhang several inches so hopefully the legs will not be an issue.
What are you using for legs? I have found that 2x4's are overkill and 2x2's are questionable if you're going to have to get up on the table. 2x3's seem perfect (over 25 years of supporting my 200+ lbs when needed). My lumber yard splits 2x6's which makes them very cost effective. Just a thought.
paul 2 posted:Pat and Bob, thanks for those observations and moral boosters LOL. Yes panic set in knowing I could be losing some good layout time but a while back I negotiated a binding contract with the CEO by putting in bold print that any days of drizzle or rain and flurries or snow will constitute a work day on the layouts. Now for this week between the Cavs and mother nature it does not look promising for me. LOL Starting off the day I glued the wood together for the frame of the pull out work shelf. When the glue has dried I'll add screws. The pic doesn't show it but I set the wood 3/4 of an inch from the ends. So while that is happening out to the garage to cut the rest of the wood on the band saw. I finally got some basswood, popular in this case, as suggested by BEARDOG to make the retaining walls for the scrap yard 1/4 inch. And then back to drilling out all the flashing from the windows on the building flat. Pics...........Paul
Paul- I hope that contract is iron clad.......![]()
you may want to invest in a Dremel to clean out the windows on the flats. It's probably a tool I use most often when working on the trains.
Bob
Modeltrainparts:
2x3's for the legs and some of the cross braces 2x4's for the main framing. My last layout was all 2x3's and it held my 300 ads easy.
Rick, congratulations on getting started with your bench work!!! I’ll look forward to seeing what you do!
Bob, if I used a Dremel on the flashing, I think I would have a big mess. LOL. I’m sure you have a steadier hand, and Paul may also!
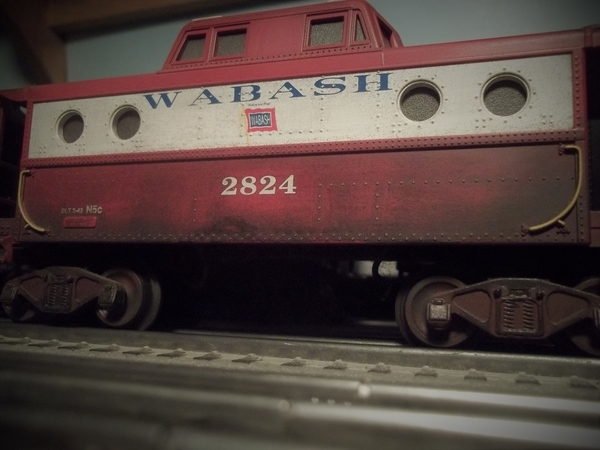
Brian, nice Wabash!!
Speaking of train table legs, I have been using a 1 X 6, ripped at an angle for the length of the leg, forming two triangular (actually trapezoidal) pieces, 1" at one end and 4 1/2" at the other. These two pieces are then joined, with wood screws and a strip of glue, at a right angle to each other with the wide ends at the top and the narrow end at the bottom and these form a nice looking, yet very sturdy table leg that when bolted to a corner of the layout with two stove bolts on each side are very solid, won't rock and give a nice, finished appearance.
Would like to send photos of how mine look but my computer took a dislike to my camera and I can't publish any photos.
Paul Fischer
Interesting, and probably attractive, but way too over-engineered for me and violates the KISS principal.
I like the idea Paul, if he has the right saw and skill. As for me, I’ll stick with Modeltrainparts. I use KISS too, and the second S stands for my middle name. LOL

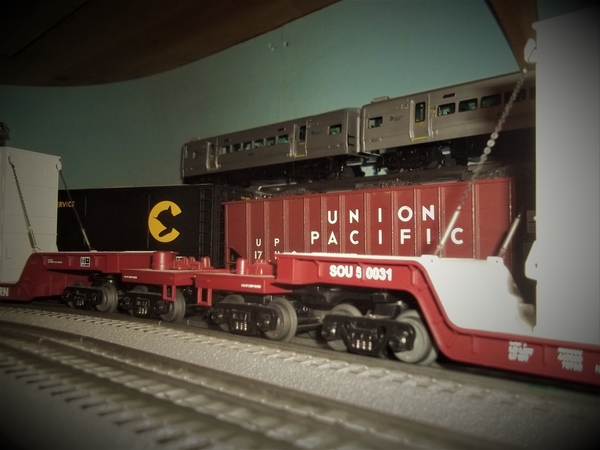
an empty hopper train heading back to the coal mine...

I am very big believer in the KISS Principle I used 2x4's this time because I could not get 2x3's in 10 and 12 ft lengths. The 2x3's I have i brought from the old layout. The old layout was 6 sheets of 4x8 OSB and this one is 17 Sheets of OSB with homesite on top for noise. Still trying to decide on a track plan and if there will be 1 level or 2. Have to fit a 30 Bowser TT and a scratch built transfer table and dreams of a second Millhouse 32 inch TT.
Bob, thanks, I never thought of using my Dremel. I had just been using it to cut my track. I'll have to look for the case which has a bunch of different bits to use. So today so far I got the last of the wood cut for my pull out work shelf. Have the sides all glued. Just have to get screws in the sides that will hold the plywood. And while I was doing that I cut up the wood to redo the timbers that will separate the different kinds of scrap in the yard. BEARDOG, good suggestion. 1/4 inch looks more realistic. I'll do 4 high and make up some short timbers for posts. Pics....Paul


So today I placed some trackage for my PW Lionel type semi hollow door layout. This is table number three. I decided not to use the additional foot width table (going to use it for something else as an extender piece to perhaps another door.
next week I will add the left handed 022 to complete the figure eight within the oval. Btw: while not wired in with feeders and blocks, the three tables are live and happily ran my FA and a F3. Wow, this is exciting.

Paul that sure is looking good! Make sure you put a little wax rubbed into the grove for your pull out shelf! Beardog was right on there, I think that will look much better and you will be happier in the long run! Keep up the great work!![]()
Leroof, its your layout so use the area as you with! From what you have down sofar I can tell you will probably put something special in that place!![]()
I have been noticing some chatter on bench work so I thought I would jump in on the subject and give my two cents worth. I have a tendency to over build, but in retrospect, I think it's a prudent behavior. Before I started my layout, I sourced the internet for inspiration. My goal was to minimize floor contact while preserving strength and stability. Therefore, 2x4 leg and framing construction topped with 1x4 and some 2x4 cross members made the most sense for the flexibility and strength it affords. I topped the cross members with 3/4” OSB for the sub roadbed. I was able to included needed storage shelving and large overhang to provide ample foot clearance from support posts. My entire layout has only 6 support posts mid-room which all have a rubber gasket interface between floor and leg. I am sure it was not necessary for noise abatement but I am known to overthink any project I am involved with. I also wanted off the floor storage shelving which was a logical inclusion in the dead space below the layout. I have Included some early pictures which should help to illustrate my objective. In my HOP, a strong foundation is the major key to any building project, especially a train layout. Cheers, Dave

Wall mounted supports minimize floor obstruction.


Topped the 2x4 frame with a 1x3 forming a L-girder which allowed anchorage of the cross members to the frame.


3/4" OSB sub roadbed:

OSB was topped with 1/2" Homasote and cork roadbed.

My rubber gasket attempt to reduce vibration/noise amplification from the floor.

All important suspended storage shelves.

My internet inspiration for the leg construction:

My version for the leg construction.

Dave your work looks great! You would mind if I ask what angles you used for your legs along the wall would you? Almost all of my layout could be built that way with the exception for the oil field! It will need some legs as it will be about 5-6 feet away from the wall!![]()
Barring a couple more vehicles here and there (in the last 2 weeks I've bought 20 vehicles to fill out the scene) and figures I'm pretty much done with the downtown area. I've added some details in addition to the vehicles I've purchased. I don't plan on weathering buildings/tunnels/retaining walls. For me it doesn't have to look like a finely detailed scale layout, as my trains aren't finely detailed scale models, just scale sized. So "Hi-Rail" is good enough for me.


Paul, The wood working all looks good so far!
Dave, The construction is certainly solid. And I don't just mean because it used 2x4s. I mean the construction method is good. I like your variation of the leg construction. I saw the same thing you did online, but forgot where.
Lou, the town is certainly starting to come to life! I like your choice of vehicles!
mike g. posted:Dave your work looks great! You would mind if I ask what angles you used for your legs along the wall would you? Almost all of my layout could be built that way with the exception for the oil field! It will need some legs as it will be about 5-6 feet away from the wall!
Mike, it is about 30-35 degrees. Note the OSB gusset plates at the bottom along with the shelf supports you should be able to strengthen the bracing for a wider span of 3 ft or more using a larger gusset plate. I use a gusset on both sides of the vertical wall support glued and screwed. My shelf is only 18" for a 4 track yard. Shortening the spacing between the vertical wall brackets would also give additional support for a wider shelf. Also, if the shelf is anchored to both side walls, this would add stability. You can add a post midway for added support if the span is too large. The 2x2 vertical supports should be bolted into the wall studs with a 3" lag bolt. Using 2x4 cross members well anchored to the back board would also give added support. Using a good grade of glue plus many screws will anchor the gussets and strengthen the whole system. Good luck with your new layout bench work. Anxious to see your progress posts. Dave
Mark Boyce posted:
Lou, the town is certainly starting to come to life! I like your choice of vehicles!
It's supposed to be set in the 1948-1958 time period, so I have to use old cars ![]() .
.
Lou1985 posted:Barring a couple more vehicles here and there (in the last 2 weeks I've bought 20 vehicles to fill out the scene) and figures I'm pretty much done with the downtown area. I've added some details in addition to the vehicles I've purchased. I don't plan on weathering buildings/tunnels/retaining walls. For me it doesn't have to look like a finely detailed scale layout, as my trains aren't finely detailed scale models, just scale sized. So "Hi-Rail" is good enough for me.
Wow, really nice work! You must have a small fortune in vehicles. Do you get your vehicles from one place or just buy them when you find them?
Mike ![]()
Lou1985 posted:Mark Boyce posted:
Lou, the town is certainly starting to come to life! I like your choice of vehicles!
It's supposed to be set in the 1948-1958 time period, so I have to use old cars
.
That’s my era too!!
LoadMaster posted:Lou1985 posted:Barring a couple more vehicles here and there (in the last 2 weeks I've bought 20 vehicles to fill out the scene) and figures I'm pretty much done with the downtown area. I've added some details in addition to the vehicles I've purchased. I don't plan on weathering buildings/tunnels/retaining walls. For me it doesn't have to look like a finely detailed scale layout, as my trains aren't finely detailed scale models, just scale sized. So "Hi-Rail" is good enough for me.
Wow, really nice work! You must have a small fortune in vehicles. Do you get your vehicles from one place or just buy them when you find them?
Mike
Hobby shops/ebay/craigslist. Where ever I can find multi car deals for cheap. I rarely spend more than $5-7 for a car.


End of day 2.

Lou, the city looks great! Nice choice of cars and amount! Looks just like a normal day in a small town! Nice work!![]()
Dave, thanks for the additional information! From what you show and stated I might be able to get by with only 2 legs and that would be where the oil field is going!![]()
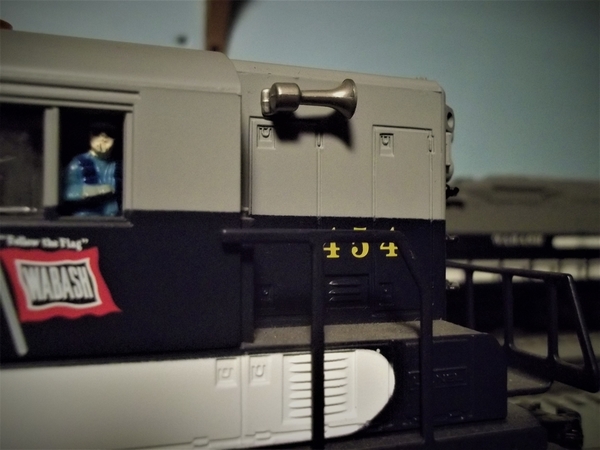
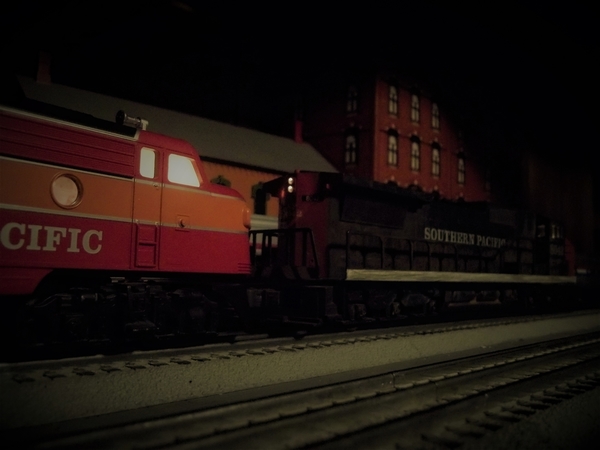
Brian, nice engines! You should shoot a short video!![]()
RJT, Bench work is looking great! Looks like its going to be one large layout! Just wondering if you access hatches going in to reach the back areas?![]()
mike g. posted:Brian, nice engines! You should shoot a short video!


Paul, I would suggest you try a decent file to do final removal of the window flashing... I prefer using files 1/2" to 1" wide as they have a perfectly straight edge. I also have one that is square, starts about 3/8" square at the far end and enlarges to 1/2 inch square with same teeth on all 4 sides, it's great for cleaning out 90 degree inside corners. For plastic parts I end up using files with fairly aggressive teeth, and keep a wire brush nearby to clean the files as the plastic fills the cutting grooves pretty quickly and seems to cling and clog up more quickly than wood or metal shavings. Chris
Access to this requires an OGR Forum Supporting Membership

