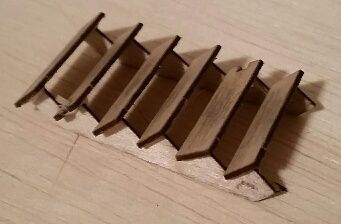
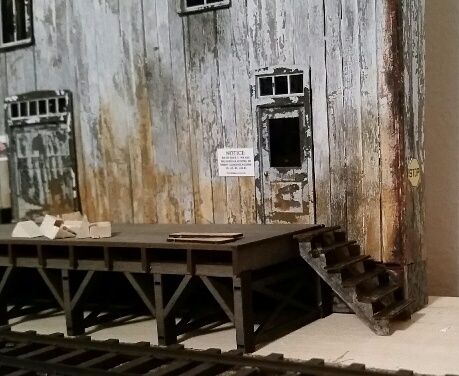
paul 2 posted:

This evening after dinner it was back to work on the layout. Wife was happy to let me go  because I cooked her a nice steak outside. Of course I made one for myself too. I spent the evening adding foliage along the track. I found some wood I had cut into strips and decided to glue them to the back of the upper level in front of the window. I had an open space there and now I can add a bit of plaster and put down foliage in that area. A couple of pics of the work tonight. Won't be working on the layout till the afternoon tomorrow. TCA show in Parma Saturday. Maybe I will luck out and find something to bring home ( DSCN2177DSCN2178DSCN2179DSCN2180without the wife seeing it LOL )............Paul

Hey Paul,

Looks good. My wife likes it when I go to run trains on the club layout or on my own layout down in the basement.  She says it keeps me out of her hair.

paul 2 posted:

This evening after dinner it was back to work on the layout. Wife was happy to let me go  because I cooked her a nice steak outside. Of course I made one for myself too. I spent the evening adding foliage along the track. I found some wood I had cut into strips and decided to glue them to the back of the upper level in front of the window. I had an open space there and now I can add a bit of plaster and put down foliage in that area. A couple of pics of the work tonight. Won't be working on the layout till the afternoon tomorrow. TCA show in Parma Saturday. Maybe I will luck out and find something to bring home ( DSCN2177DSCN2178DSCN2179DSCN2180without the wife seeing it LOL )............Paul

Paul:

I really like your scenery. You blend the foliage colors well. Your ballasting is second to none. Your use of trees and backdrops complements the scene well. Bravo!

DennyM posted:
Randy Harrison posted:

Chris and I finalized, this morning, the connection of all three levels of our layout. Here is a link to the Youtube video of the first train leaving the lower level and watching it travel all of the way to the top level. https://www.youtube.com/watch?v=ouL8BqJ7FbM

Hi Randy,

I just looked at your website. The pictures are fantastic. I bookmarked the link.

Thank you for the kind words. Our layout is undergoing a major redesign right now. There will be more photos as finishing touches are made. Here is another video we made several years ago that is a ride around the layout as viewed from a passenger car window. Here is the Youtube link. https://www.youtube.com/watch?v=RXWcvnSzFec Be aware that there is a long tunnel toward the end of the video.

Once again Randy thanks for the compliment. I just about got the corner done. I added some more trees and ground foliage among the trees and along the inner mainline track. I think I have just one more little spot to fill in. A couple of pics of todays work. I apologize for the slightly blurry pics. It was hard to hold the camera at those angles and the only tripod I have is my two hands..........PaulDSCN2182DSCN2183DSCN2184DSCN2185DSCN2186DSCN2188

Attachments

Images (6)
  • DSCN2182
  • DSCN2183
  • DSCN2184
  • DSCN2185
  • DSCN2186
  • DSCN2188

Dave, which trees were you talking about. Everything I have used is from Scenic Express. The evergreens I redid were specials with plastic trunks which I took off leaving the wire. I sprayed them with a mix of 50% glue and 50% water with some dawn thrown in and then sprinkled them with a combination of super leaf dark green and a small amount of super leaf medium green mixed in. The trees are Super trees and I used the same mix for them. All the other evergreens are as them came from the box. Hope this helps. Any more questions contact me. I did a step by step in this topic a few pages back I think.................Paul

I am working, slowly, it seems, on two cars:  a kitbashed Lionel pickle tub car, and a dual wooden tank vinegar car built on a Menard's flatcar platform.  I am wrapping "cable" (thread) around tubs for pickle car, and am building supports for the finished tanks on the flatcar.  The tubs are tedious, so I am sure I will have the vinegar car done first, although creating decals for lettering either one will be a challenge.


Got a bunch of old Testors or Floquil paints that need to be shaken!  Never fear! I found a great solution on YouTube: 

And here's my version, undergoing field tests at the Razorback Traction Co. shops:

GEDC2109

Works like a charm!  I did have to grind the end of the clamp a bit so it fit into the saw, but other than that, not a problem! 

Mitch

Attachments

Images (1)
  • GEDC2109
Last edited by M. Mitchell Marmel

Cool idea!  Unfortunately, like all of my ideas, it's not original. *sigh*  There is a guy who manufactures a little terrific paint shaker that will definitely not send your little jar into orbit - I found it quite by accident and bought two.  There was a snafu with USPS, they lost the shipment, and the guy cheerfully sent a duplicate shipment with the proviso that if the first package ever showed up I should simply keep both shipments.  They work perfectly and I'm completely satisfied with both product and manufacturer:

http://www.ebay.com/itm/Hobby-...e=ADME:X:AAQ:US:1123

Here's his video:

https://www.youtube.com/watch?...ture=player_embedded

I have kept busy with a new (downsizing) layout. It is only 5x10' . Yesterday I finished putting the Woodland Scenics Ready Grass down and put trim on to finish it off. I have two interconnected loops one 54r the other 42r. I used my Gargraves track from old layout.Right now I only have one industrial spur off the inner loop. 


Last edited by radar493

Hadn't run my Lionel ALCO 218 diesel with the War Bonnet paint so put it on track#2, dug out my 2400 series cars put  4  on the track and have been running them last night and this AM. Like getting a new train !!  The  218 was my first diesel, wouldn't run so I got it cheap, messed with it and it runs like a champ. I have one pass. car, two domes and an observation car running with 2 extras and 3 that  need some bits and pieces.  Next will be my F units and Madison cars. The beat goes on !!

there is a spot on my lower level that al the wiring went thru kind of a jumbled mess well it messed with the viewing alittle so I decided to move them and run the wires thru pvc to hide them I also at the same time decided to add a scrap piece of wood that fit the area so I can build in a hill. on the lower side of the layout it should look better.

20160116_164148
Transfer
table  addition with a concrete painted transfer table. I primed it first then painted it with concrete color maybe some ground cover and such will make it look more realistic. note a block of wood in front of the table it's a positive stop for the table to align the track in the first position and the wall is a possitve stop for the last position I will loose 2 positions on the right side because of a wall but nothing I can do about it  because of space I wanted a yard lead heading past the transfer table to a small 3 track yard but about 12 ft long. right now it is wired up and works fine with the controller that came with it and tmcc works as long as I push the buttons to pull the train off the plan is to have it work with the buttons and not have to push the button to pull the engine off the power stays to the center rail all the time .


20160116_164153
Lead in to the Transfer Table will be adding a switch on the second piece when they show up from Mario's  

20160116_164157
added boards to the edge here to finish off the look better.

20160116_164207

lower level hill not the way it is going to stay but something like it well be here when finished

20160116_164214

Spare piece of wood added seems to fit perfect for a little scene and hill. this was the spot for all the wires now moved some still not hooked up.

20160116_164220

white pvc pipe hiding all the wires between levels and you can see the block where the wires go to.  just this little bit cleaned the area up a lot. 

Attachments

Images (6)
  • 20160116_164148
  • 20160116_164153
  • 20160116_164157
  • 20160116_164207
  • 20160116_164214
  • 20160116_164220
Jhainer posted:

there is a spot on my lower level that al the wiring went thru kind of a jumbled mess well it messed with the viewing alittle so I decided to move them and run the wires thru pvc to hide them I also at the same time decided to add a scrap piece of wood that fit the area so I can build in a hill. on the lower side of the layout it should look better.

20160116_164148
Transfer
table  addition with a concrete painted transfer table. I primed it first then painted it with concrete color maybe some ground cover and such will make it look more realistic. note a block of wood in front of the table it's a positive stop for the table to align the track in the first position and the wall is a possitve stop for the last position I will loose 2 positions on the right side because of a wall but nothing I can do about it  because of space I wanted a yard lead heading past the transfer table to a small 3 track yard but about 12 ft long. right now it is wired up and works fine with the controller that came with it and tmcc works as long as I push the buttons to pull the train off the plan is to have it work with the buttons and not have to push the button to pull the engine off the power stays to the center rail all the time .


20160116_164153
Lead in to the Transfer Table will be adding a switch on the second piece when they show up from Mario's  

20160116_164157
added boards to the edge here to finish off the look better.

20160116_164207

lower level hill not the way it is going to stay but something like it well be here when finished

20160116_164214

Spare piece of wood added seems to fit perfect for a little scene and hill. this was the spot for all the wires now moved some still not hooked up.

20160116_164220

white pvc pipe hiding all the wires between levels and you can see the block where the wires go to.  just this little bit cleaned the area up a lot. 

You want to see a jumbled mess of wires, look under my table. I'm organizing all the wires little by little.

jim pastorius posted:

Last night before I went to bed I cranked up my layout and had 4 trains running at once. Something I usually don't do but everything went OK. I must say that the sound level was very tolerable, you could have had a normal conversation which is pretty good considering my rather basic soundproofing attempts.

did the same thing at about 10:30 last night not 4 trains but 3 all union pacific 2 sd90's and one sd40t-2. the whole time my son and I were having a conversation about school as one of his teachers ( computer science) doesn't like him. I had to tell him to sometimes act stupid because he has been messing with computers since he was 4 years old and now can write programs and makes his own video games in java and html. last week he came to me and he wrote a program for a new browser. I doubt his teacher can do that she still calls the tower a base unit. if you go in his bedroom it looks like mission control. 3 flat screen TV's for monitors each to it's own computer. now he wants my extra server rack and to move one of my servers to his room the kid has been running his own minecraft server for 3 years now. I guess that's the bonuses of having a dad that's an IT guy and owns his own business. he's been around it for ever. but on a train note in that conversation we designed in our heads a new way to wire up signals and to make it easier for me to wire since I am visually challenged when it comes to small wires . (using Ethernet wire). I might try to make a prototype sometime in the near future.


Ah..this is my first post, and I did something pretty big this weekend on the railroad...got it running.
So here is a short video of the first train.   


I have to admit that I got the music from a YouTube video  of a layout that is great,  it was posted on the Brian Palm Channel. Hope someone on the Forum knows more about this layout.

Attachments

Videos (1)
Hi-Rail NYC
Last edited by Mark Trains
Jhainer posted:
jim pastorius posted:

Last night before I went to bed I cranked up my layout and had 4 trains running at once. Something I usually don't do but everything went OK. I must say that the sound level was very tolerable, you could have had a normal conversation which is pretty good considering my rather basic soundproofing attempts.

did the same thing at about 10:30 last night not 4 trains but 3 all union pacific 2 sd90's and one sd40t-2. the whole time my son and I were having a conversation about school as one of his teachers ( computer science) doesn't like him. I had to tell him to sometimes act stupid because he has been messing with computers since he was 4 years old and now can write programs and makes his own video games in java and html. last week he came to me and he wrote a program for a new browser. I doubt his teacher can do that she still calls the tower a base unit. if you go in his bedroom it looks like mission control. 3 flat screen TV's for monitors each to it's own computer. now he wants my extra server rack and to move one of my servers to his room the kid has been running his own minecraft server for 3 years now. I guess that's the bonuses of having a dad that's an IT guy and owns his own business. he's been around it for ever. but on a train note in that conversation we designed in our heads a new way to wire up signals and to make it easier for me to wire since I am visually challenged when it comes to small wires . (using Ethernet wire). I might try to make a prototype sometime in the near future.

Jim and Jhainer,

Glad to see I'm not the only one that runs trains before going to bed. Sometimes I run trains before I leave the house so I don't think about running trains while I'm gone. Doesn't always work, when the bug bites, it bites hard. Jhainer, I think it's cool your son can do the computer stuff. Maybe he could design a program to run the Leagcy, TMCC, LionChief and DCC trains and accessories.

paul 2 posted:

Evening after dinner started out pretty good till I ran out of white glue. I thought I had some more tucked away somewhere but no. So tomorrow morning after breakfast it is a trip to the Depot to get more glue but I managed to have enough glue to do foliage between the next tracks. A couple of pics................PaulDSCN2193DSCN2194DSCN2195

This really looks good Paul.

DennyM posted:
Jhainer posted:
jim pastorius posted:

Last night before I went to bed I cranked up my layout and had 4 trains running at once. Something I usually don't do but everything went OK. I must say that the sound level was very tolerable, you could have had a normal conversation which is pretty good considering my rather basic soundproofing attempts.

did the same thing at about 10:30 last night not 4 trains but 3 all union pacific 2 sd90's and one sd40t-2. the whole time my son and I were having a conversation about school as one of his teachers ( computer science) doesn't like him. I had to tell him to sometimes act stupid because he has been messing with computers since he was 4 years old and now can write programs and makes his own video games in java and html. last week he came to me and he wrote a program for a new browser. I doubt his teacher can do that she still calls the tower a base unit. if you go in his bedroom it looks like mission control. 3 flat screen TV's for monitors each to it's own computer. now he wants my extra server rack and to move one of my servers to his room the kid has been running his own minecraft server for 3 years now. I guess that's the bonuses of having a dad that's an IT guy and owns his own business. he's been around it for ever. but on a train note in that conversation we designed in our heads a new way to wire up signals and to make it easier for me to wire since I am visually challenged when it comes to small wires . (using Ethernet wire). I might try to make a prototype sometime in the near future.

Jim and Jhainer,

Glad to see I'm not the only one that runs trains before going to bed. Sometimes I run trains before I leave the house so I don't think about running trains while I'm gone. Doesn't always work, when the bug bites, it bites hard. Jhainer, I think it's cool your son can do the computer stuff. Maybe he could design a program to run the Leagcy, TMCC, LionChief and DCC trains and accessories.

I don't think the software would be an issue but the hardware would be. some how have a program interface with legacy I think the code is out there for that already, same with tmcc, and dcs. now lion chief is different as I am not sure but it is controlled like an R/c car is with 2.4 ghrz spelled that wrong so the software would have to interface with hardware to control that wirelessly and all the hardware would have to communicate with each other too so it would be a jumbled mess and you would be creating something that each system already does and the price would be up there so I don't think anyone would buy it . now I did see where someone used r/c car/plane servos to switch switches now if you could come up with a way to interface the r/c receiver at 2.4 ghrz why couldn't you do the same with lion chief + but I'm not an electronics guru. by any means heck I had to send stuff out to have it soldered LOL.  but yea I'm biased cause he's my son but that kid does stuff that amazes me. like he came  in a few days ago dad he says type in an address on his laptop so I did and opened ogr forums in his new browser. now mind you it wasn't complete it was very basic just a address bar across the top but it worked and that was his point at 14 tho he needs to come up with better names for his software sexy browser just doesn't fit it LOL that's him on the right he fits the computer geek profile to a tee.

from left to right in front Annabelle my little helper her job on the layout is to dust buildings with a paint brush and move things at random usually on the track. she also is the inspiration to the Annabelle Falls station on the layout she fell off the stool while dusting and broke the railings then my daughter Khameron she is my painter anything I need painted that takes a few minutes she will do. it has to be a few minutes as she is always on the go. then there's  Zhoie she doesn't do to much on my layout as she has one in her bedroom/apt of her own to work on her's is Hogwartz and is conventional it also runs Annabelle's Thomas I gave her a new Lionel F3 the other day it made her all excited  She has CP and is slightly autistic so she loves the trains this photo is the day she graduated from High school last summer. funny the dr's said she would never walk and would never be able to go to school mor or less graduate they wanted us to put her in a home as a baby.  Then my other daughter LOL no that's my son Khamdon the geek LOL by the way Khamdon and Khameron are twins . Khameron has a PRR j.c. Penny starter set too so they all have trains except Khamdon. I had guardian ship over Annabelle until a few months ago so she has grown up around trains her whole life


11108185_10152906248561444_2639459414681096618_n

1460044_10151741423986444_213476135_n

1499438_10151791949326444_304493164_n

10958210_10203488153076106_5270947630742914989_n


Attachments

Images (4)
  • 11108185_10152906248561444_2639459414681096618_n
  • 1460044_10151741423986444_213476135_n
  • 1499438_10151791949326444_304493164_n
  • 10958210_10203488153076106_5270947630742914989_n
Last edited by Jhainer

With more white glue I got back to adding foliage between the last track and the grade finishing up at the control tower for the freight yard which I may change out for a smaller one I have and I have to make up some more regular trees to go in before the control tower, too much low foliageDSCN2197DSCN2198DSCN2199DSCN2200. Coffee break then I start tackling the grade and that area around the control panel will be done. Couple of pics..................Paul

Attachments

Images (4)
  • DSCN2197
  • DSCN2198
  • DSCN2199
  • DSCN2200

Got most of my "new bridge" put in place. I did just have the girder bridges straight across, but looking at it, thought it needed some "zazzing up". I thought that an arch would really add that flare that I was looking for, so I got some PVC and some dowels, a little paint and a new board, and got to work!

I just need to work out the wiring for the flashing becon on the top. I don't want to cut the original or get too carried away, I did however remove the circuit board from the pillar since I'm not using them. If I mounted it on the bottom, it would hang out from under the arch on the bottom and look horrible. 

image

Attachments

Images (1)
  • image

Tonight I completed one of the two cars I was working on for the Menards pickle works, the Von Allmen pickle tub car, bashed from a Lionel tub car.  Tubs were covered with wooden strips and then, tediously!, wound with thread for cable.  Lettering was a pain, as much of it was with press-on letters, strongly disliked here, but the alternative was to buy one of the HO kits and sent the decals off to be redone in O.  An inexpensive kit got away from me on the Bay and others were three times that price.  With a blow-up of a photo from one of those Bay auctions, I was able to press letter and to piece together decal sets with the statistical info.  I am also well along on a Standard Brands vinegar double tank car, that has 15 cables per tank, so tedious winding of thread has just begun.  That is being built on a Menards platform.  Luckily, that winding of cable is the last task.


my parts came in from lionel today. so I started off with replacing a fatboy speaker in a lionel sd90 #8048 that was quick and simple. Then I decided to do a smoke unit swap on another sd90 #8049 both union pacific. got it apart funny how different they were build screws in different places weird. but got it apart swapped out the smoke unit it powers up but didnt' turn on no smoke turns out the regulator was fried too. but it also has one ditch light out and the windshield was falling in so wile I had it apart I swapped out both ditch lights to Led lights and popped the windshield back in tightly left the new smoke unit in and put it back together until I get a regulator. another funny thing about it was the 8049 had 2 speakers in the fuel tank both were 16 ohms and not fatboys. the 8048 had a single fatboy. 8048 has better sound wonder if I could remove both and add a single fatboy . then I started working on sd40t-2 #4004 putting the snow plow back on. that was simple took my exacto twisted it in the broken off piece in the hole where the old plow was and out came the old piece and push new piece on and a drop of glue it was finished.

then decided to look at putting the smoke unit in the pa-1 and removed the shell couldn't see a plug to plug it in put shell back on and went to research it . thought about the f3 smoke unit need to figure out how to hook up a smoke unit to a cruise commander do both red wires get tied together to power the smoke unit ?


I've been slowly adding ground cover and ballast to the lower level of the layout. Little by little, I'm filling. Soon, I'll start putting the trees and structures in their more permanent locations. My son was home for a week at Xmas, and we worked together a little during that time. Fun, just like when he was little.imageimageimage

A little progress every day!

Having fun!

John


Attachments

Images (3)
  • image: Me and some ballast work.
  • image: my son doing some ballast work.
  • image: SW-1 and some log cars at Soap Creek.
WP posted:

I've been slowly adding ground cover and ballast to the lower level of the layout. Little by little, I'm filling. Soon, I'll start putting the trees and structures in their more permanent locations. My son was home for a week at Xmas, and we worked together a little during that time. Fun, just like when he was little.imageimageimage

A little progress every day!

Having fun!

John


that looks really cool .


Jhainer posted:
WP posted:

I've been slowly adding ground cover and ballast to the lower level of the layout. Little by little, I'm filling. Soon, I'll start putting the trees and structures in their more permanent locations. My son was home for a week at Xmas, and we worked together a little during that time. Fun, just like when he was little.imageimageimage

A little progress every day!

Having fun!

John


that looks really cool .


Thank you!

Chris D posted:

that bridge is cool!  PVC? I never would have thought to use that.  1/2"?  did you put them in a jig and gradually put tension to pre-bend them to keep the shape?  supports the middle good?  I love this idea! 

Chris

Yes, 1/2" PVC. I didn't pre shape it or anything, I just happened to have a piece in the garage when I had the board running across, and put it up against one side, to see if it would flex enough. It did, and I needed a bit longer to get from one side to the other, so I got more pipe. 

I was really leary when drilling the holes in the pipe for the dowel. I used 1/4" so I oversized the hole a 1/16" so the dowel would fit in, but kept thinking the PVC was going to bend or kink at one of the holes. 

I had watered a few videos on forming the PVC to the shape, but don't have a heat gun, so I figured that being under pressure, would help support the weight.

I had plans to paint the shelf brackets grey as well, but thought they looked kind of bulky and definitely out of place. Then I was going o swap them out with 4" angle brackets, but once I have everything in place, found that it had no flex at all so I left them off.

At the base, there is a lag screw angled at a 45 that the PVC fits over to hold the bottoms in place. The only other mounting hardware, was a screw in each piece of track on the table ends, that stopped a little bit of side-to-side sway.

I didn't start out with it in mind, it just came to me.


Moving along at a slow pace. I got another little section done. I am working on the sides of the grade now which is the last section in this area to doDSCN2202DSCN2203. Once I get this done it is done. I had to stop to make up some regular trees so now I have to wait for the glue to dry and after supper I hope to plant them. Pics. And Bryan thank God I am retire or I would only have time to do one tree a day LOL. Good catching up with you last night and hearing about your progress so far.........................Paul

Attachments

Images (2)
  • DSCN2202
  • DSCN2203
WP posted:

I've been slowly adding ground cover and ballast to the lower level of the layout. Little by little, I'm filling. Soon, I'll start putting the trees and structures in their more permanent locations. My son was home for a week at Xmas, and we worked together a little during that time. Fun, just like when he was little.

A little progress every day!

Having fun!

John


It looks great!  Good to have your son home helping you!

paul 2 posted:

Moving along at a slow pace. I got another little section done. I am working on the sides of the grade now which is the last section in this area to do. Once I get this done it is done. I had to stop to make up some regular trees so now I have to wait for the glue to dry and after supper I hope to plant them. Pics. And Bryan thank God I am retire or I would only have time to do one tree a day LOL. Good catching up with you last night and hearing about your progress so far.........................Paul

Paul,

Once again, it is really looking great!

Because I was up on the layout for the afternoon I felt bad for making the wife a widow for the afternoon. So when I came down from my man cave I asked her if she would like to go to Steak and Shake for dinner. Her eyes lit up. After we got home I headed back to the layout to finish up the last area behind the control panel. I have to go back and glue down the loose foliage but wanted to post pics before I did that. The area in the front is where I put in the regular trees I made this afternoon. On the back side I was able to place all the woodland scenic trees I had and was never sure where I could use or put them.  I made a stand of all of them in that area Here are pics of the work today...............PaulDSCN2204DSCN2205DSCN2206

Attachments

Images (3)
  • DSCN2204
  • DSCN2205
  • DSCN2206

I have been busy. smoke units and parts came in. so I fixed a bunch of engines replaced a few lights with leds. got to the smoke unit in the f3 and farted around with it for about a day and moved on to something else I'll go back to it I see what needs to be done just need to think of how to get it there. smoke unit is real close to the motor and the funnel is about 1/8 inch off so might have to find a different smoke unit . 2 switches came in yesterday so I installed them and ran the remote wires , then decided to upgrade my UP sd40t-2 well it was already upgraded so I added the railsounds to it . so I moved on to a brekshire jr upgrading it instead and that went real good to it took about 10 minutes to install the cruise commander lite in the engine. put it all back together and it worked but not great the antenna needs to be redone everything worked as log as my hand was over the shell metal shell and only about an inch of the antenna hanging out in the cab area doesn't work. also have to run a tether out to the tender for the rail sounds. so all in all busy days on the layout. so finally my Union pacific fleet is getting built up 2 sd90's 2 sd40t-2's and a Berkshire jr all command control now I wonder would my rio grande challenger be considered union pacific since rio grande bought southern pacific then union pacific bought them .   

paul 2 posted:

Thought I was through with the scenery on the grade but thinking about it I thought I had a bit too much open space under the trees. So I went back up and filled in with foliage under them. Pics of that and a pic of the last upper section to add scenery to...........PaulDSCN2207DSCN2208DSCN2209DSCN2211DSCN2212

Paul: The extra foliage is a great finishing touch. Your attention to detail is superb.

This afternoon I got the last section of the upper mainlines done. I would of have this area done this morning but I had to go out and buy a new hot melt gun. So after dinner all I have left is to glue down the loose foliage and then on to the lower level to finish off a few areas there. Pics of the section.......................PaulDSCN2213DSCN2214

Attachments

Images (2)
  • DSCN2213
  • DSCN2214

I finished up the upgrade to the berkshire jr minus coal load to hide antenna, then I ran some new rope lights on the lower level, then shot a few videos and ran some trains here is the videos I don't talk in them I let the engine talk for me . in the sd40t-2 I  put in the cruise commander and railsounds the sd diesel in the Berkshire Jr I put a cruise commander lite with the large steam rail sounds. on the SD90 8048 I replaced a bad fat boy speaker then on the 8049 I replaced the smoke unit and put in LED ditch lights since one light was bad. I'm happy with both installs need to do some touch ups per say the antenna needs a coal load over it and the sd40t-2 needs new lights wired up as none seem to work it's smoke unit doesn't seem to work either. not sure why yet. I bought the rope lights to light up the lower level and now I can start to work on it with light instead of in the dark . I also picked up some Ethernet plugs for another project I have in mind. more on that later once I figure out it works or not . hope you enjoy the videos. maybe one day I will talk on them and explain some of the aspects of the layout. a lot of the layout has a reason for being on the layout like the station being Annabelle Falls . the street lights are from my Mothers old Christmas village she setup every year before she passed . in one corner in the back there is some ceramic buildings that are what is left of her village. the steel bridge is for my daughter when we moved from Michigan she crossed the ohio river big steel bridge on I-75 and said what state are we in I told her Kentucky she repeated it conducky she was 4 same age as Annabelle is now. the coppertone sign well as a kid the family traveled back and forth from Michigan and Illinois and how I pasted the time was looking for that sign. the Ameritowne Buildings are for the town I grew up in same style buildings. and of course the Remax building My Mother worked for Remax Advisors Before she passed so I had to put a building on for her. Then Last but not least My wife likes her wine so I had to have a wine distribution building and the barrels are from a collection of corks from her wine   One day I might created a video showing all of it and telling the stories behind it . what made me think of it My daughter tonight asked me about all of them so I had to explain it to her.


Last edited by Jhainer

Today I put the last coat of Dullcote on my dual tank Standard Brands vinegar car kitbashed onto a Menards flatcar platform.  That would complete, with the two kitbashed Lionel tub cars, one for Peiffer's Perfect Pickles (fictional) and another for Von Allmen Pickles, my pickle train, except for a posting on here that showed a large pickle on a car.  That looksl like something that will go on another Menards flatcar, if I can find a table centerpiece decorative artificial cucumber or pickle.  I will add a small dome and manhole, and letter it for Peiffer's vinegar.  After I get that done, what can I use for an appropriate caboose of related theme?  A large sectioned cucumber with side doors and a cupola?  A cab forward 0-4-0 with a cucumber Vanderbilt tender as power, to switch the pickle plant?

Did not do much scenery today so far. I was getting the final two back areas on the lower mainlines cleared so I can start to work. I had a Rail King Alleghany sitting on the track near there so I decided to run it. So after dinner I'll drill all the holes for trees and evergreens. Pics of both cornersDSCN2217DSCN2218DSCN2219 where I will be working.......................Paul

Attachments

Images (3)
  • DSCN2217
  • DSCN2218
  • DSCN2219

I cleaned up some more wiring this time I took the power supplies, the tiu, the aiu, and tmcc. and mounted them to a board and organized the wiring for it. it all sat on the floor minus the tiu it was mounted to a board. now this is what it looks like. I was limited because of tonight we have both granddaughters the 4 month old I had to be quiet or I would wake her she was in a swing in the living room right below me so no over head lights either. last one is my wife sleeping beside her in the chair.

20160123_003930

20160123_00401720160123_023232

20160123_003823

Attachments

Images (4)
  • 20160123_003930
  • 20160123_004017
  • 20160123_023232
  • 20160123_003823

I've been adding ground cover and track ballast and trying out trees. On the stub siding of the switchback up to the timber cutting area, I put in the old, primitive sanding facility I built years ago for our old layout. Trying trees out. Put some willows at the end of the switchback  to see how they might work. If I decide it works, I'll remove the bases and install them. A Shay and a Climax will run here. 

Having fun!!!imageimage


Attachments

Images (2)
  • image: Sanding Shed
  • image: Tool Shed

This morning I started working on the corners. Above the one corner I decided while I was there I opted to take out the lichen in the upper corner and replace it with the foliage I have been working with. I finished that corner and the one below it but while I was doing that I plugged in my hot melt gun and wham...blew the fuse. Thank God I have the trains on a separate line otherwise they would of come to a abrupt halt. Lucky it was just the circuit breaker. But I managed to get most of the holes drilled for the trees and evergreen in the last lower corner before lunch. Couple of pics.....................PaulDSCN2220DSCN2221DSCN2222DSCN2223DSCN2224

Attachments

Images (5)
  • DSCN2220
  • DSCN2221
  • DSCN2222
  • DSCN2223
  • DSCN2224

Hey!  All of you Eastern guys:  Yeah, the ones of you that are sitting around under a foot and a half of snow that's still coming down.  You know who you are! 

Now that you're stuck at home (hopefully with enough food and with electric power) you guys ought to be able to be concentrating on your layouts and getting something done.  So, tell us about your weekend's accomplishments.  Photos are nice, too.

Paul Fischer


I am watching news and shaking my head about how much snow so far in Bayside Queens, 15 inches.    I do not think I will make out to club layout in East farmingdale  Long Island before Wednesday.   All roads shut down except for emergency vechicles.   It is going to take me and our sons all day Sunday to dig the two cars out and then wait for city to plow my area.    Glad I am retired.   VBG

To show my solidarity with my snow-bound fellow modelers, the Razorback Traction Company today commenced work on its trolley snow sweeper!

The components are a Pittman work car body, Lionel Vulcan diesel chassis and die-cast sweeper castings:

GEDC2114

Here's the carbody being fitted to the chassis.

GEDC2115

I'm laminating stripwood together to make brackets to hold the brooms.

GEDC2116

More to follow!

Mitch

Attachments

Images (3)
  • GEDC2114
  • GEDC2115
  • GEDC2116
fisch330 posted:

Hey!  All of you Eastern guys:  Yeah, the ones of you that are sitting around under a foot and a half of snow that's still coming down.  You know who you are! 

Now that you're stuck at home (hopefully with enough food and with electric power) you guys ought to be able to be concentrating on your layouts and getting something done.  So, tell us about your weekend's accomplishments.  Photos are nice, too.

Paul Fischer

I stood looking out my west-facing bay-window getting more and more alarmed as the snow continued to pile-up to the lower rung on our new fence, unabated. Playing with my trains is very, very far from my thoughts, though I did pass by the layout once  and gave it a smile of satisfactionphoto 1JAN23photo 2JAN23.

FrankM., getting more alarmed.

Attachments

Images (2)
  • photo 1JAN23
  • photo 2JAN23
dobermann posted:
Randy T posted:

Nice paint job on bridge.   

Thanks..I took it back out to put on a wash and finish the sidewalks but now I have a jumper

Stink bug looks like an alien craft on the bridge.  The past couple of years they were all over our office, and would hang dead from the drop ceiling tiles for months.  One was right over my desk many months.  They are all gone now I think.

Started to build a panel to support my TIU, WIU, TMCC base, and terminal blocks.  I had to stop and pick up medicine for my mother-in-law's 4-pound Yorkie, then travel to visit and get some mail from my aunt in her assisted living facility, before and after helping my wife who is recovering from knee replacement.  Oh yes, shoveled snow. 

So, the panel is sitting in a mess in the garage right now.  Maybe another day.


Bench construction and track laying was diverted to the other end of the layout at this point.  Here the upper level continues tight to the wall for about 20 ft.  The right switch at far left will serve some future industry.  Further along, the left switch past the crossover will feed engine fascilities yet unimagined....loads of time for details later.  If that switch appears different than the other GarGraves 100's, that's because it is a Ross equivalent with a DZ1000.   I utilized it in a relatively inaccessible area because it's automatic.  I'm still not assured of it's design but the price was irresistible.

On the other side of the chimney the 3 tracks cross over the stairwell.  Even thought this area won't have any landscaping, along with some refined carpentry work I plan on featuring 2 bridges of my own construction here.

A shot from the opposite end of that 20 foot run.   You won't be seeing this view from in behind my workbench ever again.  Now it's time to connect layout ends together.  More tomorrow.

Bruce


Thanks to the more than two feet of snow, I got a chance to work on the layout yesterday. I've been playing around with a few layout ideas in scarm. So, I decided to change up the track a bit. Wanted one of my two main lines to have no less than 072 curves and my second main line no less than O60.  It has gone well, much progress made until I ran out of track!  Off to the train store on Monday.

Funny, I posted this last night and it never got into the thread for some reason. So, here's take two!

I decided my loading dock needed to have stairs at the end because in real life, people would just jump out the door that's at the end. I also decided that in a rural pre-war setting, they probably wouldn't have built a railing.

I think I did well with just some scale lumber, a straight edge, knife and a cutting grid.

The stairs in place after I gave them some weathering color:

Didn't get into much today. Had a bunch of errands to run. I added two more trees on the end where I left off and ran foliage down between the tracks a bit but had to stop because I ran out of certain colors. So I placed an order with Scenic Express for more. I have to make up a couple of pieces of wood to anchor to the back of the table so I can add a piece of Masonite for a backdrop to go on. After taking the pics I realized it is too open there. So all and all it was a short work day..............PaulDSCN2233DSCN2234DSCN2235

Attachments

Images (3)
  • DSCN2233
  • DSCN2234
  • DSCN2235

Work on two projects today. Paint finally dried on cucumber car (artificial veggie mounted on a repainted Menard flatcar), so I lettered the cucumber for "Peiffer", which the Menard's pickle (sauerkraut) plant has been renamed, and added a dome, as it will be  the Peiffer vinegar car in this pickle train.  Ladders and other details to follow, but it is almost done.  Made rapid progress on the octagonal water tower, and after some thought, decided to make it the tower for the Peiffer siding.  This meant buying another artificial veggie, a red pepper, to serve as the water tank atop the tower, with ladder added, etc.  I am deciding whether to add a small station and call it "Peiffer", or "Pickleville"?  (I was going to put the red pepper on another Menard's flatcar, and cut out windows and doors in it, add a cupola, etc.,  to make it the Peiffer caboose, with a cut down Walther's Sierra combine on the flatcar, too, but I really wanted a sectioned cucumber for that car, and none is available)  I studied other artificial veggies available to see if any could be hollowed out and made into a station.  Still trying to come up wth ideas.

I did alot of clean up on the layout and layout room redoing wiring and in the process of that i wanted to try to rework the track plan in one area so i did and while doing that it looked like a good place to add a few bridges and add a scenery scene. but it did require the use of a saw. I am happy to say all fingers are in tact here is some dark photos after the room and layout cleanup and then some of the new track plan then tonight after the saw did some work. 20160126_00191720160126_001910

Attachments

Images (15)
  • 20160125_010056
  • 20160125_010101
  • 20160125_010109
  • 20160125_010118
  • 20160125_010124
  • 20160125_010129
  • 20160125_010140
  • 20160125_010146
  • 20160125_010204
  • 20160125_010213
  • 20160125_010219
  • 20160125_010227
  • 20160125_010602
  • 20160126_001910
  • 20160126_001917

Another slow day but working on scenery because it is slow going I had time to think about what I should of done years ago. Wire switches and uncoupling tracks. The problem was I could not figure where I could put the control panel because space is limited in the aisle ways. I decided to revamp the control panel I built. Transformers are on top right now. I am going to build a shelf below the top for them then build a control panel on the top. This appears to be my best option. But that is another project. I have Plexiglas across the two mainlines because they go over the stairs and didn't want the train to possibly fall off in that area. I took them off and added low foliage between the edges and the track. Once the glue dries I'll put the Plexiglas back up. A pic..........PaulDSCN2242

Attachments

Images (1)
  • DSCN2242
p51 posted:

Funny, I posted this last night and it never got into the thread for some reason. So, here's take two!

I decided my loading dock needed to have stairs at the end because in real life, people would just jump out the door that's at the end. I also decided that in a rural pre-war setting, they probably wouldn't have built a railing.

I think I did well with just some scale lumber, a straight edge, knife and a cutting grid.

The stairs in place after I gave them some weathering color:

Bravo!!! Superb modeling!

Randy Harrison posted:
p51 posted:

I decided my loading dock needed to have stairs at the end because in real life, people would just jump out the door that's at the end. I also decided that in a rural pre-war setting, they probably wouldn't have built a railing.

I think I did well with just some scale lumber, a straight edge, knife and a cutting grid

Bravo!!! Superb modeling!

Thanks. I almost didn't post it because it's just a set of stairs. But I started looking online and found it doesn't look like people make their own stairs very often. I was surprised to see how much a set of laser-cut stairs costs!

Mark Boyce posted:

Stink bug looks like an alien craft on the bridge.  The past couple of years they were all over our office, and would hang dead from the drop ceiling tiles for months.  One was right over my desk many months.  They are all gone now I think.

don't you believe it Mark......they are still there...lurking for a warm day to appear........

mk posted:

Bruce,  Is that a Zenith Transoceanic radio in your first picture.  A lot of modelers may have one,  I have mine.

Yes it's a Royal 3000, Marty.   When I took up playing with old radios there came a strong gravitation towards TransOceanics.  I have examples of every TO variation except for the Royal 7000.  I often fire up the 3000 for shortwave DXing, my only access to Alex Jones by radio.  Here's the first and last ...40 years of high quality Zenith shortwave portables.

Bruce

p51 posted:
Randy Harrison posted:
p51 posted:

I decided my loading dock needed to have stairs at the end because in real life, people would just jump out the door that's at the end. I also decided that in a rural pre-war setting, they probably wouldn't have built a railing.

I think I did well with just some scale lumber, a straight edge, knife and a cutting grid

Bravo!!! Superb modeling!

Thanks. I almost didn't post it because it's just a set of stairs. But I started looking online and found it doesn't look like people make their own stairs very often. I was surprised to see how much a set of laser-cut stairs costs!

Randy is right - your modeling is excellent!  And regarding crafting stairs, you certainly did do a good job! I find tstairs esp. tedious and irritating, seemingly extra eager to disassemble in your hands, on matter what glue is used. Yours look neat and strong. Cool.

FrankM.

jim pastorius posted:

Those radios are pretty !! I remember my uncle had one and I thought it was so neat to listen to the far off radio stations.

It's still a kick to pull in far off stations, although shortwave is rather empty these days.  Back when introduced ( roughly Oct 1941), the TransOceanic was an immediate hit, and would have been a big seller but for that little skirmish called WWII.  A number of the first ones went overseas and helped keep the troops connected to current events back home.  The owner of the Zenith company had a particular interest in the development of the Transoceanic, being an avid yachtsman who desired the latest in news and weather reports.  Sadly, the last ones had to be blown out at reduced prices, victims of the lighter digital offerings being produced in Japan.

Bruce

Steamer posted:
Mark Boyce posted:

Stink bug looks like an alien craft on the bridge.  The past couple of years they were all over our office, and would hang dead from the drop ceiling tiles for months.  One was right over my desk many months.  They are all gone now I think.

don't you believe it Mark......they are still there...lurking for a warm day to appear........

Good Dave.  I miss my assistant.  Maybe a new one will stick around.  ;-)

worked some more on the bridges. ordered a lion chief today my first one. not for me but my granddaughter she already has Thomas transformer controlled  but isn't able to run it on my layout so bought he lion chief one. also bought a full circle of 072 fastrack maybe I can figure out where to put it and be able to run bigger stuff. maybe hang it from the ceiling.


Attachments

Images (6)
  • 20160126_215142
  • 20160126_215149
  • 20160126_215154
  • 20160126_215203
  • 20160126_215208
  • 20160126_215228

Add Reply

Post

OGR Publishing, Inc., 1310 Eastside Centre Ct, Suite 6, Mountain Home, AR 72653
800-980-OGRR (6477)
www.ogaugerr.com

×
×
×
×
Link copied to your clipboard.
×
×