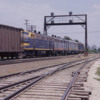
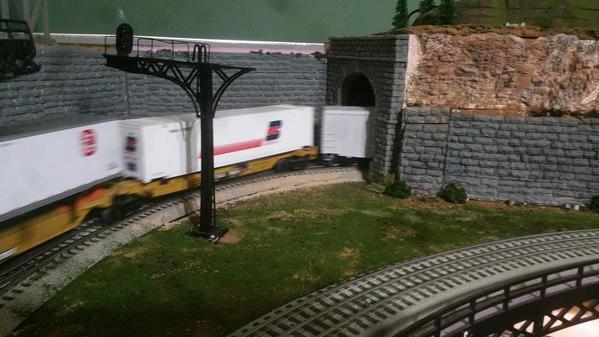
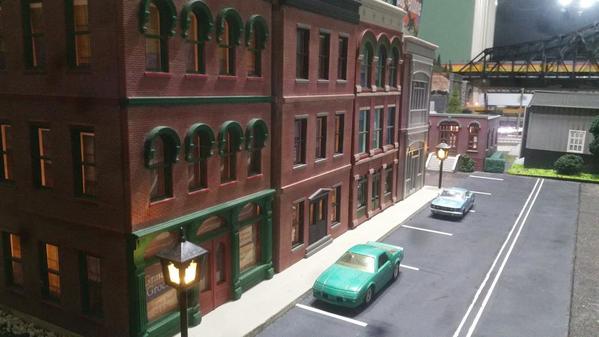
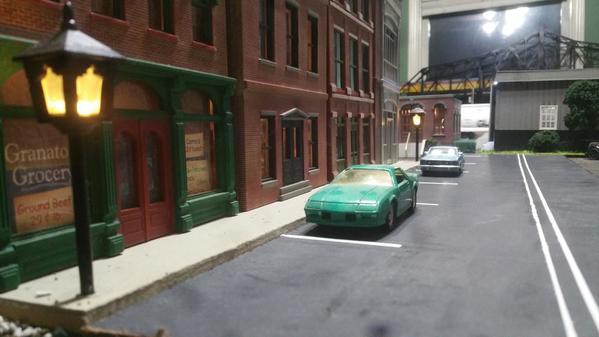
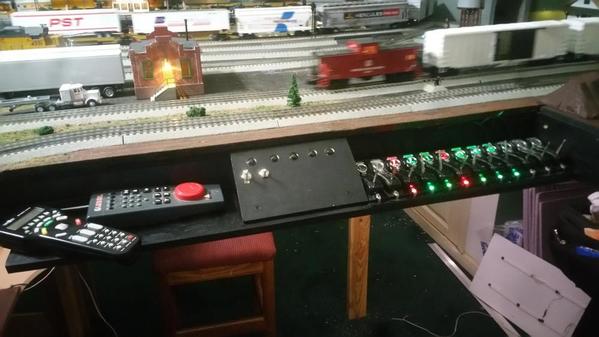
Bruce, I have the R-7000 on the right, like in your picture. The ultimate in portable radios.
No pics tonight. Mr. Brown dropped off my order from Scenic Express. Pays to lives close to them. I got the order in two days. So this evening I ran trains and made up more trees. Tomorrow I run to the Depot and get wood to make my control panel and a shelve underneath for my transformers..............Paul
Had purchased a nice baggage car on the forum but the paint scheme was wrong so bought some Pollyscale acrylic Tuscan red at my LHS today. Brush painted it, two coats, and it really did I nice job. Also bought a "book" today put out by the US Army in 1944 with plans and specs for the standard army buildings. This includes just about everything including a bamboo hut. I was a little disappointed in the few RR buildings and info in it. There was more on horses !! Did get official plans for a water tank, ash pit trestles, loading wharfs and two yards layouts Of course, a bunch of the work shop and living quarters would have been used for the railroads.
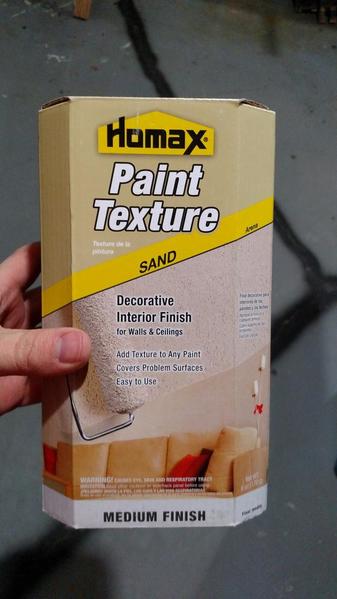
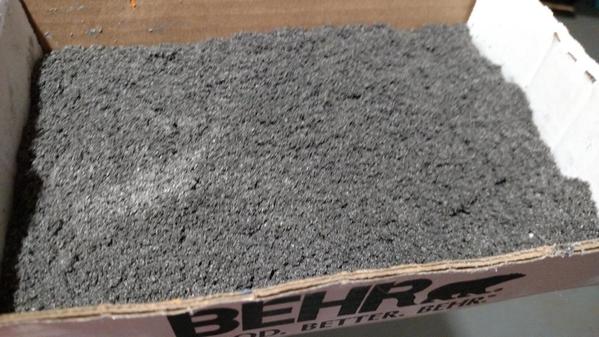
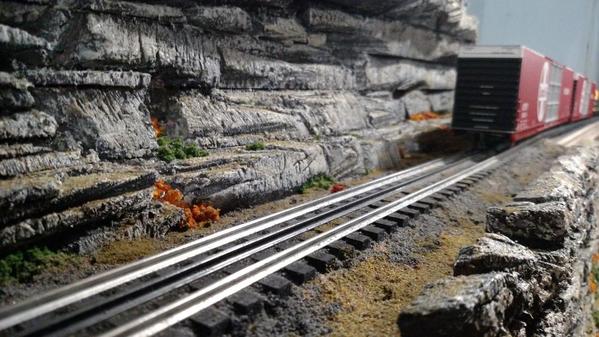
Made my first attempt at ballasting track. Used Homax wall texture sand dyed black for cinders, play sand for filler and color. Did about 12 feet. Thoughts?
Attachments
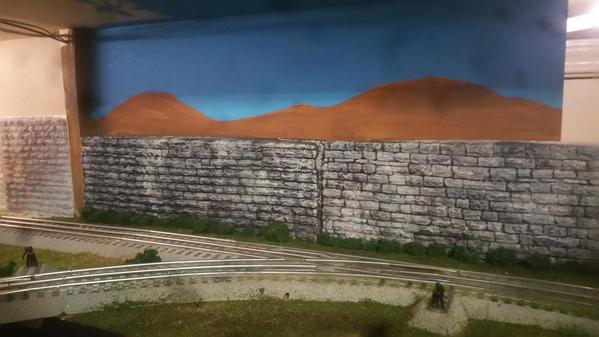
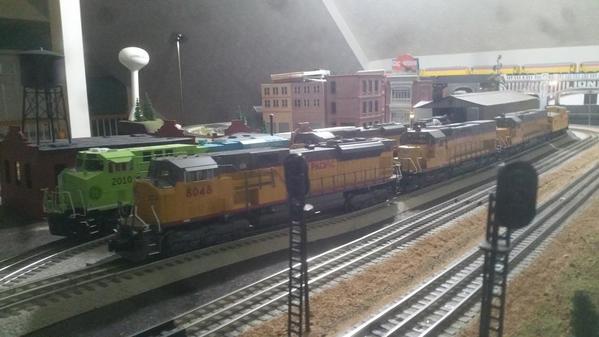
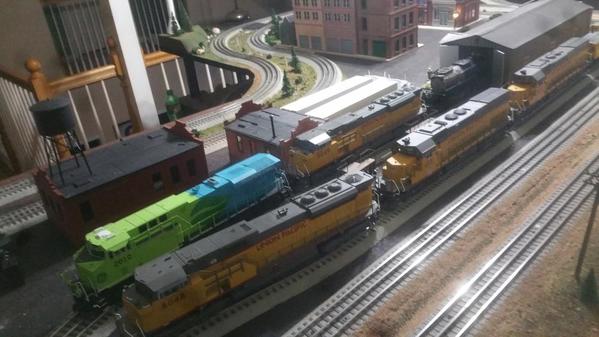
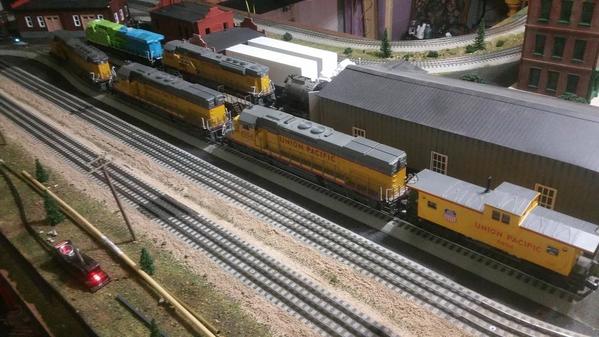
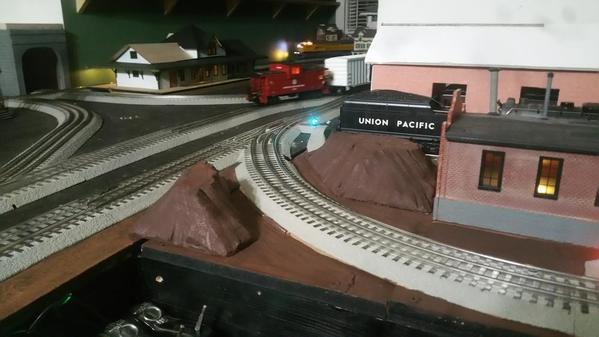
I ran trains for alittle while. moving all the UP engines to one spot. then did a little scenery I'm awaiting some fusion fiber to show up so i can work on the bridge area some more. Never used fusion fiber so this should be a new experiance. painted my first mural ![]() kind of different .
kind of different .
Attachments
J, I like what you did as ballast. Your scenery is coming together. Can't wait for the next pics and the area under the bridge...............Paul
paul 2 posted:J, I like what you did as ballast. Your scenery is coming together. Can't wait for the next pics and the area under the bridge...............Paul
Thanks Paul. I appreciate it. I feel like most ballast looks out-of-scale - at least for Kansas - Missouri which is what I'm modeling. I have seen larger chunky stuff showing up in areas along the tracks in Missouri where wash-out might occur - however most mainlines in Kansas - Missouri are crunchy and not pleasant to walk on, but not made of the big-honking stuff I see on most O scale layouts. The stuff I've seen in my years living along the tracks is mostly a 1/2 inch to 2 inches in size - scales out to somewhere around .01 to .04 inches. That's pretty fine. Examples from ATSF Mainline:
Melvern, KS
Lebo, KS
I'm going to try coloring some of the play sand, but I feel like I'm on the right track.
Attachments
Jacobpaul81 posted:paul 2 posted:J, I like what you did as ballast. Your scenery is coming together. Can't wait for the next pics and the area under the bridge...............Paul
Thanks Paul. I appreciate it. I feel like most ballast looks out-of-scale - at least for Kansas - Missouri which is what I'm modeling. I have seen larger chunky stuff showing up in areas along the tracks in Missouri where wash-out might occur - however most mainlines in Kansas - Missouri are crunchy and not pleasant to walk on, but not made of the big-honking stuff I see on most O scale layouts. The stuff I've seen in my years living along the tracks is mostly a 1/2 inch to 2 inches in size - scales out to somewhere around .01 to .04 inches. That's pretty fine. Examples from ATSF Mainline:
Melvern, KS
I'm going to try coloring some of the play sand, but I feel like I'm on the right track.
Jacobpaul81, I think you are on the right track (pun intended) and feel your real-ilfe examples support your point perfectly for a finer ballast.
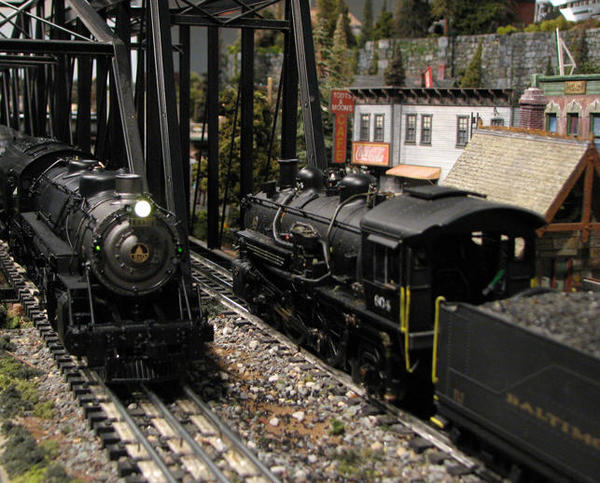
Unfortunately for me, I installed my ballast very early in the game - back in 1995 when I first built my layout - and have only since learned better. It always seemed to me that I should have used HO ballast but bowed to the pressure of what was marketed as "O-gauge" ballast. I am sorry I did that. I'd change it all, now, if I could, but there is no practical way I could ever attempt such a task nowadays, given all the scenery that is in-place, etc. These photos are examples of my disappointment in the ballast I have on the layout, since 1995. Much of it is glued into place, and thus, is permanent.
So, I make my "confession" here as a word-to-the-wise, so none of my fellow hobbyists do what I did. Also, I want to be supportive of your careful, exacting efforts.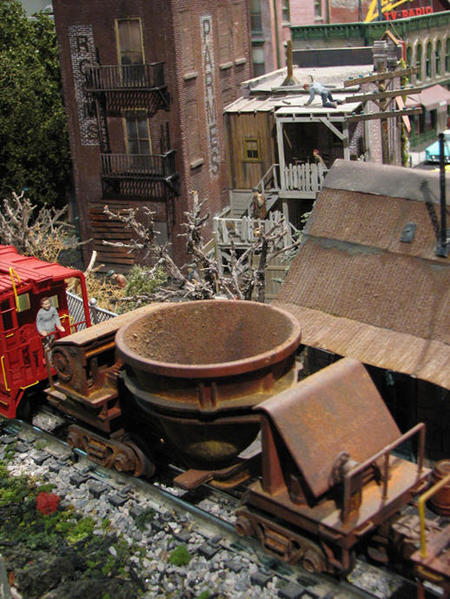


FrankM. ![]()
Attachments
Frank: Ya know, I actually think that your ballast looks pretty good. On my layout I have been using the crushed rubber ballast, which doesn't look bad to me, either, and at one point when I was making some changes and adding a bit of track, I did use some finer ground stuff. That part doesn't look as correct to me, anymore. The major problem for me is that the rubber is all pretty much the same color, I think that most real ballast has varying colors of stone used. In one place, I added some dark gray to the light gray that I had been using and I think that looks good, too.
And, I remember seeing a stretch of brand new railroad, back in Wisc, that had what I thought was "huge" pieces of rock for ballast. Wish I would have photographed it, because the ballast just barely fit in between the ties. I would have sworn that the rock size was between 3" and 4" for each piece.
Guess there's a prototype for anything.
Paul Fischer
I walked over to my train layout building with my 4 new cars that I got for Christmas and unboxed them and set them on the track. This was the first time that I have been in the train building in about 2 months, last time I was in the train building was Thanksgiving weekend. Spend 20 days in December in the Hospital. It takes longer to recover from Heart bypass at 65 years old than at 42 years old. BUT should be good for another 10 years of running trains,![]() God willing.
God willing.
fisch330 posted:Frank: Ya know, I actually think that your ballast looks pretty good. On my layout I have been using the crushed rubber ballast, which doesn't look bad to me, either, and at one point when I was making some changes and adding a bit of track, I did use some finer ground stuff. That part doesn't look as correct to me, anymore. The major problem for me is that the rubber is all pretty much the same color, I think that most real ballast has varying colors of stone used. In one place, I added some dark gray to the light gray that I had been using and I think that looks good, too.
And, I remember seeing a stretch of brand new railroad, back in Wisc, that had what I thought was "huge" pieces of rock for ballast. Wish I would have photographed it, because the ballast just barely fit in between the ties. I would have sworn that the rock size was between 3" and 4" for each piece.
Guess there's a prototype for anything.
Paul Fischer
Thank you, I appreciate the encouragement, Paul Fischer. I believe most of my ballast is that rubber stuff, too, and some of it so-called, or actual, "real granite." However, on a couple visits/drives to Upstate New York, I have actually counted the average number of ballast stones between ties and came up with 5 - 6, straight across, for whatever good that does me.
The ballast thing is only a question that nettles me; none of our visitors to the layout ever mention or give a rat'spatootie about that detail. I trust they have enough to see otherwise, including the trains themselves, of course. It's all relative, huh.
Attachments
Painted my 15" baggage car PRR Tuscan and looks good. The only problem is that it has a black plastic shiny roof and trying to decide to paint it flat black or Tuscan ?? The coaches have Tuscan roofs. Which is best ??
CBS072 posted:I walked over to my train layout building with my 4 new cars that I got for Christmas and unboxed them and set them on the track. This was the first time that I have been in the train building in about 2 months, last time I was in the train building was Thanksgiving weekend. Spend 20 days in December in the Hospital. It takes longer to recover from Heart bypass at 65 years old than at 42 years old. BUT should be good for another 10 years of running trains,
God willing.
Keith,
I am glad you are recovering and got to finally go to the train building. May you recover fully and have many more years to run trains.
Progress was made today. Chris and I are about 1/2 finished constructing the Great Northeastern Railway's corporate headquarters building to sit at the east end of the yard on the uppermost level of our layout. Another 2 days work is necessary before it can be installed in its final resting place on the layout.
Completed and tested the PS2 upgrade to my K-Line Trainmaster. Tests went well.
Need to dress up the wiring, load the software and install the shell.
Attachments
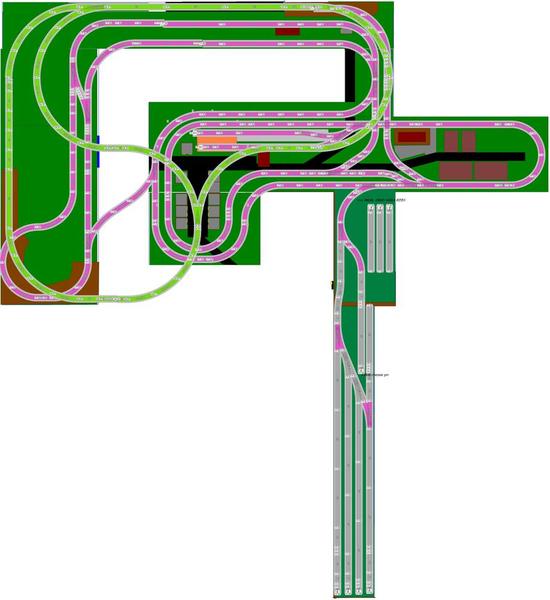
well since i awaiting more scenery products i decided it's time to make a control panel of sorts. a place for the remote switches and power for the sidings. figured since the transfer table area seems to be where i spend most of my time standing its a nice place to put it now the task of running all the wires for the switches to that one spot. Found the snow plow for the Evolution Hybrid. and i think i finished up my upper level track plan it's all 072. uploaded the scarm file if anyone wants to see it the photo of the switch remotes i know of 4 more that are needed for whats on the layout now and 1 more for the 3rd level then any manual switch i replace will add to the list of switch remotes ![]() I added up if replacing the manual switches it's 13 more switches
I added up if replacing the manual switches it's 13 more switches ![]() lionel bring the price down please
lionel bring the price down please
7X 036 LH
3X 036 RH
2X 072 RH
1X 072 Y
Ouch
Attachments
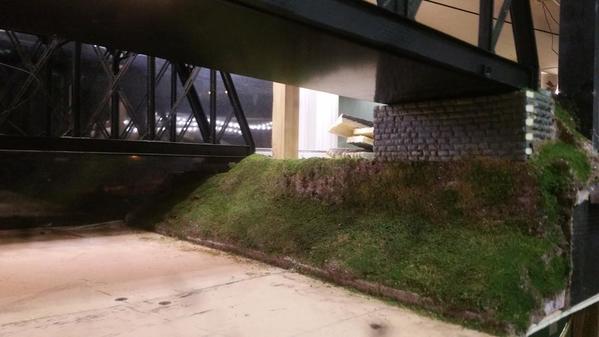
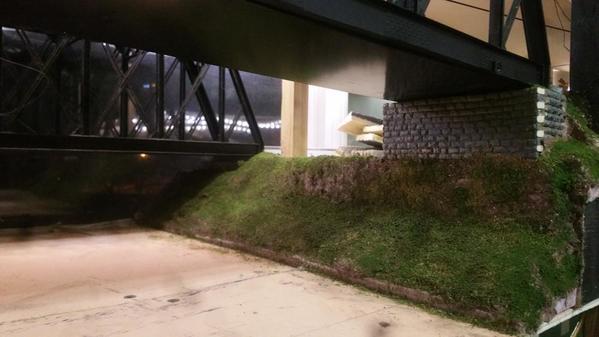
Today was spent replacing two wheels out for three rail wheels in a few two rail trucks on a couple of cars I bought. And I cut the base around a Korber switch tower so it would fit in the area better. I started cleaning up another area to put in scenery under the bridge and around and down to the station. I also got my measurements for making my control panel and now I can get the wood. I did run trains today............Paul
I thought I would have both projects I have been working on simultaneously done last night, and photoed, but I still have lettering and detail glitches to correct. The cucumber vinegar tank car for the Menards pickle plant needs numbers, and the pepper loco water tank, for use near the pickle packing plant, needs signboards. (can't decide to call this area "Pickleville, Peiffer after the plant, or Pepper Station", if I decide to build an odd-ball station for the area...mulling over station designs) Since this water tank was scratchbuilt out of an old model magazine article, with some bashing, it is "unusual", and unlikely to be found on other layouts. (and here I am on record as not liking fantasy cars, and these are both fantasies; a car and water tank)
Jhainer posted:
You will LOVE Fusion Fiber! It has been my flagship product for the last 5 years. It is a one sitting scenery application, it is light and it is reusable if you color it with acrylic paint. You have made a good choice.
jim pastorius posted:Painted my 15" baggage car PRR Tuscan and looks good. The only problem is that it has a black plastic shiny roof and trying to decide to paint it flat black or Tuscan ?? The coaches have Tuscan roofs. Which is best ??
The Pennsylvania Railroad's box cars had Tuscan red roofs.
Today was a Hodge Podge of little things. Ran trains for the afternoon but I got one weaver trailer flat changed over from two rail to three rail and added it to the one train. The other car I converted over I have to hunt down some couplers for it then that one is done. I made up another batch of trees and cleaned off the next area for scenery work. Pics of the area. I finally figured which switch tower to use. I have to take out the plaster in that area so it will sit flat. Then I can do shrubs around it................Paul
Attachments
Finally made the decision and painted the roof of my Madison baggage car Turscan. After thoroughly dry I will hit it with some clear lacquer. Also whipped up another batch of smoke fluid.
I finally finished both the Pickleville enclosed water tank, and the cucumber vinegar car. I would like to build a vegetable themed caboose and railroad station for Pickleville, but haven't come up with any ideas. I looked at artificial decorative red peppers for the caboose, but didn't think there was enough room in them to hollow out with windows, doors, etc., and that would have just looked right as a bobber caboose.
jim pastorius posted:Finally made the decision and painted the roof of my Madison baggage car Turscan. After thoroughly dry I will hit it with some clear lacquer. Also whipped up another batch of smoke fluid.
batch of smoke fluid ??? How
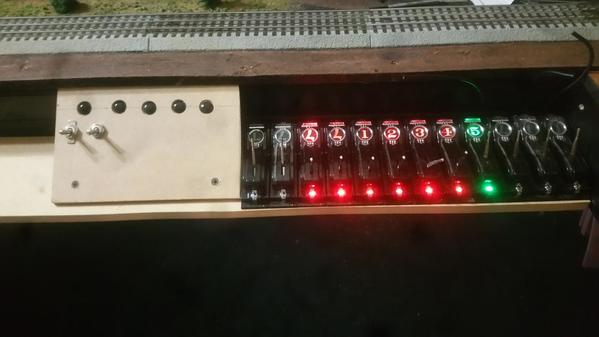
Today was a different kind of day. got a few packages in full loop of 072, roofs for Thomas passenger cars, and a Lion Chief Thomas set new in Box. all for the granddaughter minus the 072 even tho Thomas will look good on the layout on the 072 loop. so I setup her Thomas lion chief. and then setup a loop of mth tracks for her transformer Thomas. She got to run both Thomas's at the same time. then I started wiring up Switches. 
Attachments
I turned on the layout for the first time in a while (maybe 4 months) ran some trains and upgraded Legacy to V1.60.
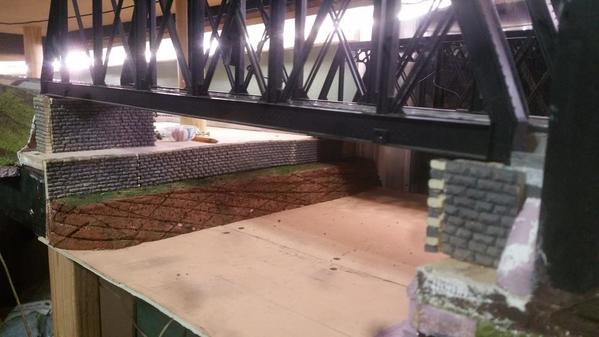
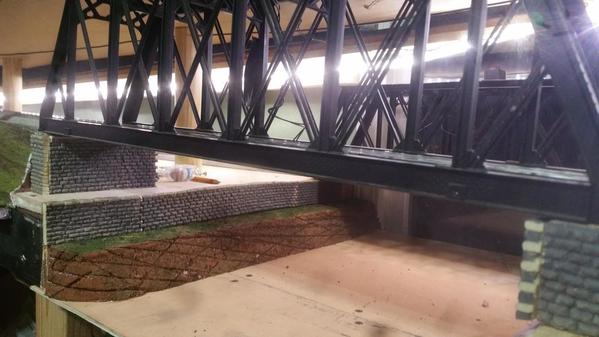
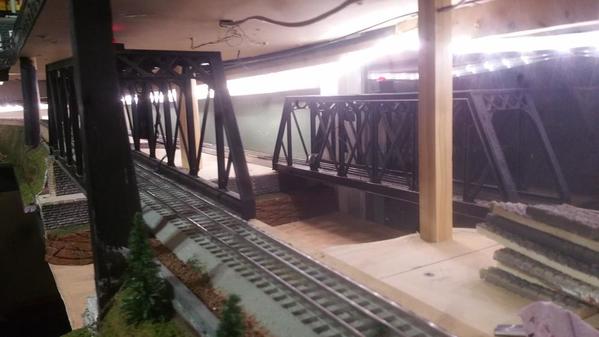
Today I glued down what I did last night. Then I started a couple of areas toward the station. That is a wrap for today I have promised to take the CEO of the railroad out for dinner tonight. Pic of yesterdays work from the back side of the bridge and the two areas I put foliage down. Have to make up some plaster to fill in where I moved the station back. On the backside of the station I still have to mount the mural before I can add more scenery.....Paul
Attachments
Completed the PS2 upgrade on my K-Line Virginian Trainmaster. Dressed the wires, checked lights, sounds, direction control, etc. prior to placing the shell on the chassis. Uploaded the software, tested great.
Jhainer,
I like the panel with the switches.
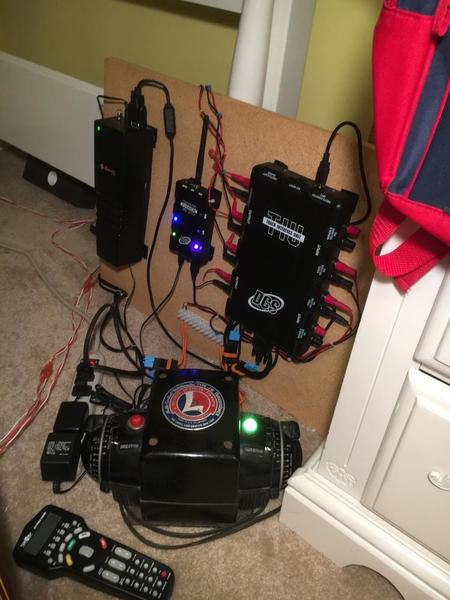
I finished up my panel today for my temporary layout. Prior to Christmas everything was laying on the carpet for a jumble of wires. At Christmas, since I was going to run conventional trains, I removed the DCS and some of the wire. Today, I got the panel in, ran a DCS engine both with the remote and my iPhone. The next thing to do will be to figure out how to run my new TMCC engine via the TMCC base connected to the DCS.
Attachments
Looks like you are ready to launch a moon rocket !! If I have 2 wires I have a jumble.
"Main street" is beginning to take shape. 600 grit sandpaper with woodland scenics asphalt brushed over the seams to look like crack filler.
"Pole butts" were added to help prevent careless drivers from ending up on the tracks.
A gravel road will eventually go around the back of the hardware store
I also dry bushed in some" traffic wear".
The spot on the right will eventually be a SMALL parallel parking area for the station out of view.
Attachments
I got in a book, on canning and pickle packing all over eastern Colorado, off Amazon. When I have done a couple of drives through SE Colorado and across the southern portion from the Rockies to Kansas, it has seemed very arid and unlikely to be growing and packing fruit and vegetables. Not true. Into the 1990's they were growing and packing all kinds of stuff...gooseberries, no less, and tomatoes, and tons of pickles. I wondered if I was stretching things a bit with a pickle salting station there. Nope, there were a lot of them, and canning companies, so my packing plant and train cars are legit. They shipped a lot of railcars of pickles east. Amazing that there are books on veggie and fruit packing in Colorado. But today, I passed up, because of price, a number of booklets I had not seen before, on logging railroads in central Pa., so I guess there is a book on everything, if you can find it.
RickO posted:"Main street" is beginning to take shape. 600 grit sandpaper with woodland scenics asphalt brushed over the seams to look like crack filler.
"Pole butts" were added to help prevent careless drivers from ending up on the tracks.
A gravel road will eventually go around the back of the hardware store
I also dry bushed in some" traffic wear".
The spot on the right will eventually be a SMALL parallel parking area for the station out of view.
Excellent work. That's a good looking scene.
got my creeper out and am trying to figure out way some acc don't work ,geeepers creepers
Mark Boyce posted:Jhainer,
I like the panel with the switches.
I finished up my panel today for my temporary layout. Prior to Christmas everything was laying on the carpet for a jumble of wires. At Christmas, since I was going to run conventional trains, I removed the DCS and some of the wire. Today, I got the panel in, ran a DCS engine both with the remote and my iPhone. The next thing to do will be to figure out how to run my new TMCC engine via the TMCC base connected to the DCS.
I did the same thing about a week ago. this is mounted under the layout. today I didn't do much train stuff as the temps were nice outside. I don't know if anyone remembers but my step brother wrecked one of my cars a 2001 Mustang Roush. well at the time it was only going to be used in the off chance I needed it while my 2013 was in the shop for warranty work. well he borrowed it and wrecked it. so today I went and bought a parts car to replace what he broke still gonna be a lot of work for a car that won't be worth it but it was promised to my daughter 9 years ago and she wants it fixed ![]() . I did manage a little project today before going and getting the parts car. made a batch of fluid for the first time. worked real good
. I did manage a little project today before going and getting the parts car. made a batch of fluid for the first time. worked real good ![]()
Attachments
Finally got around to running accessory wiring bus today.
Wired in log loader, coal loader, 213 lift bridge and railroad control tower.
Great to see the youngest playing with the two loaders. Ah that pesky escaped Lionel coal!
Have a great Sunday.
Nick
Attachments
Installed a hotter resistor into a Williams Turbine's Fan driven smoke unit (Lionel smoke unit). It now smokes great.
Replaced the resistor in my Dad's Lionel 2055 steamer and added some batting. Also smokes much better now.
Re-soldered the pick-up wires on our reissue of the Merchandise car.
Nick12DMC posted:
Good looking layout. Do you have any videos?
Not much, just tightened some track connections in my train yard and added more screws to secure the track down. Added a couple of figures that I had put on the side until I could decide where to put them.
There was plenty to do today, what with a swap meet this morning and then cleaning and repairing some of the what I bought. Then it was time to play. After some general maintenance this Premier set of PS1 F3's work like a dream. I recently hooked up a TPC to the layout and am learning to access all the PS1 features using my Legacy remote. Some previously purchased Daylight cars look far better behind something scale rather than the traditional sized GS4 in my roster. Time was also spent positioning a few structures I have on hand, getting an idea on where they might look best. As the layout progresses I find my head flooded with new ideas on just how to scenic certain sections, whereas other areas are still blank canvases. It's so easy jumping ahead when I really need to stay focused on benchwork construction. But then, the main game is to have fun, right?
Bruce
Overhauled the serial communication system: installed some Lionel SER2 modules, connected them to the TIU, ASC, DZ-2001 data driver, TPC-300, and Arduino automated layout control. Made up some new modular / DB9 connectors to link them all together. Surprisingly, everything worked perfectly the first time.
Then played around a little sending new Legacy commands instead of TMCC from the Arduino system.
Sorry gang, but I have all but stopped doing daily updates on this topic. But that doesn't mean I haven't been working on the layout though. Actually, I've been putting in a lot more time.
You can see the monthly update HERE.
Enjoy
I ran trains today for about 10 minutes. Ran trains yesterday for about 45 minutes. Always fun to watch them run!
Fixed a broken trolley pole tiedown hook. Every little bit helps... ![]()
This morning I was just going to take the morning and enjoy running all four mainlines. I did just that but when the one train went past I noticed the brake stand with brake wheel was missing from a Bobber caboose. So now I looking for it with no idea where it may have fallen off. But I do like a challenge. Almost as much as when I lost one of the springs from a truck and spent the better part of a half an hour looking for it but I finally found it.........Paul
Yesterday I added the second locomotive to the WiFi DCS and ran two trains for a while. The WiFi addition has worked well. Probably because I followed the written instructions. ![]()
Attachments
midnightwrecking posted:I finished my tank engine build and put her to work hauling commuters in the suburbs.
That's a good-looking unit.
Is it Tier 4 compliant ??
jim pastorius posted:Is it Tier 4 compliant ??
Wouldn't that be some U.S. reg., for diesels? It pukes out tons of smoke!![]()
I actually ran trains. First time since Christmas eve. LOL! They still work!
Ran some trains with homemade smoke.
Jhainer posted:
Pretty sharp!
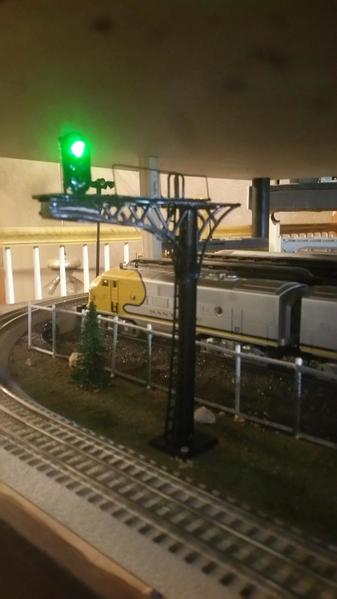
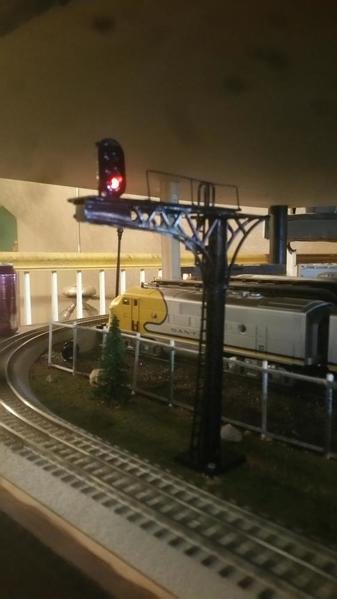
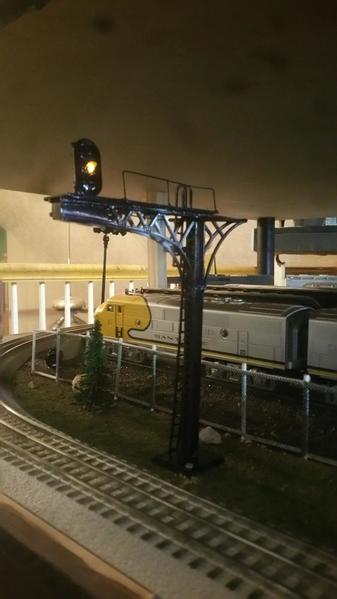
They look familiar. Are those from We Honest on the bay? I bought a bunch of blank searchlight targets from them a while back, but I'm going to have to make my own masts and assemble multiple heads. I was also looking at buying some of their dwarf signals.
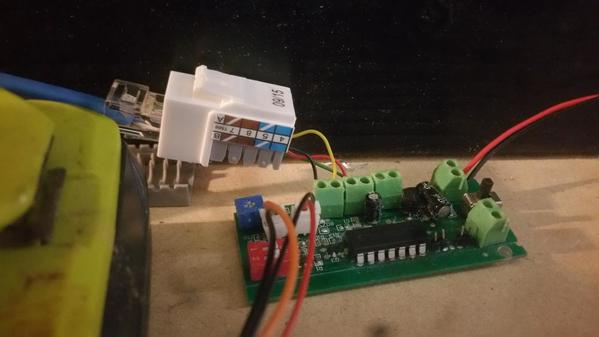
yep we honest I buy there signals and figured I would check out there cantilever ones and was surprised when they were metal. I wired up the controller to an rj45 connector then same with the light to a rj45 connector and make a cable the right length this way all the controllers can be in one spot and only have to run one cable to each signal.
JHainer-was your smoke scented ?? They look like ALCOs !! Do you run steam ??


 When you have idle time you think of stuff you can change that's why even Roger Farkash told me I would never be satisfied with anything so now I took a nice scene and make it better but I have to stop and just enjoy the trains it's almost done and I just want to run the first pictures are of what I had I took a old non working Lionel swing bridge so I wondered what to do with it so this is what I came up with with some left over track and some scrap wood I made it work now I have to finish and sure up the wood around the loop and get back to running
Attachments
jim pastorius posted:JHainer-was your smoke scented ?? They look like ALCOs !! Do you run steam ??
not scented yet ![]() but yes I do run steam just had them on the layout so I ram them
but yes I do run steam just had them on the layout so I ram them ![]()
After finishing benchwork I just finished laying my four mainlines; two on the base and two elevated. Nothing is modeled yet so it looks rough.
was back under the board with the creeper,,,,of course the cats milo/jake as helpers,,,,,well sorta ,trying to figure out why some acc don't work off the tiu,,,,only have 2 more to track down,got two more working ,,,
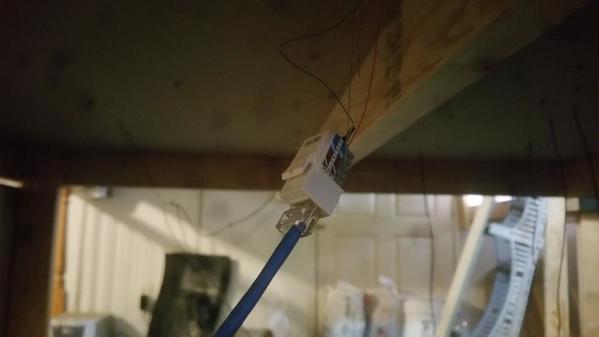
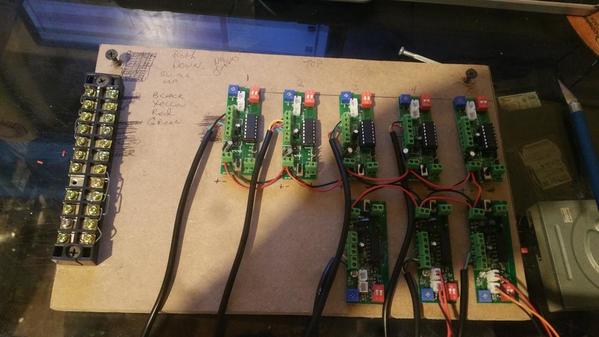
Here is what I have been up to tonight . controllers for the signals. all wired to power Wired to RJ45 Plugs for running Ethernet cable to the signal where another rj45 will be attached to the signalthe signals are 4 wires Black red yellow and green they use up one side of the rj45 the other side will be for the IR sensors. So I only need to run one cat 5 wire to each signal.
Attachments
Yesterday I just ran trains for a bit being it was Tuesday and the Tuesday night crew meets. But today I let the scenery go and decided to finish some un-plastered areas that needed to be done. The first was the last section coming around the wall. Where the wood is I will be putting up some flex wall. The second area was where I had two sections of rock that didn't butt together. First I was just going to add some dense foliage in the opening, changed my mind and filled it in with plaster. The third area was behind the station. Wasn't much of an area but I had to plaster it so I could get the backdrop up and foliage in front of it. That's probably the work day today. Tonight I'll just run some trains and tomorrow color all the plaster. Some pics....................Paul
Attachments
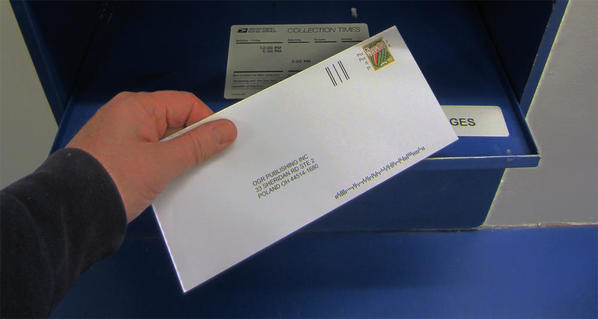
Used shims to level a switch, still have chaos. Went to the U.S. 24 Hour Post Office.
To renew my subscription to O Gauge Railroading magazine.
Attachments
With plaster dry I got busy adding the colors to the plaster and then washed it with a diluted black. Also got the earth tone on which I hope will be dark enough. I don't have any more color but this weekend is the Medina show here in Ohio and I hope to find some there. Two more areas to do after dinner and then I can add the foliage. Couple of pics.........Paul
Attachments
Cool, Paul2. Approaching total coolness.
Paul 2,
I really like what you have been doing! Have a good day in Medina!!
well yesterday I didn't do to much didn't even go to the train room ordered stuff for it but didn't go up there. today was a different story I went up there and stood there looking around for what am I going to do today. so decided to mix up the fusion fiber and try it out. then did some painting on the layout and finished off with a little scenery all the while I had 3 trains running in the background. a few days ago someone asked it I run steam engines because of the smoke fluid I made. so took a video of that too.
Attachments
Thanks, looks pretty good.
Jhainer posted:well yesterday I didn't do to much didn't even go to the train room ordered stuff for it but didn't go up there. today was a different story I went up there and stood there looking around for what am I going to do today. so decided to mix up the fusion fiber and try it out. then did some painting on the layout and finished off with a little scenery all the while I had 3 trains running in the background. a few days ago someone asked it I run steam engines because of the smoke fluid I made. so took a video of that too.
Your scenery work using Fusion Fiber is spectacular! Fusion Fiber is my flagship scenery product. It is easy to use and, unlike plaster, is a one-sitting process. You mix it with water, color it with acrylic paint, apply it with a putty knife and sprinkle on your ground cover. All of my customers that have tried it love it. Again, GREAT work!
I didn't use a putty Knife ![]() I'm not afraid to get my hands dirty
I'm not afraid to get my hands dirty ![]()
A little bit more done today. I colored the plaster and I applied plaster to three areas around the station I forgot to do yesterday. Where I filled in the two section of rock after taking the pic of that I did another wash of black to blend it in better. I need input on the two back drops I have. It will go behind the station on the back side. Which one, industry or city scape. here are the pics.................Paul
Attachments
Looks great Paul! As for the backdrop, I like the city scene for that location.
Mike
Paul2, thanks for your nearly daily updates on your layout progress.
City scene !!
I finally got around to hanging the Miller Electric 1900 Lighted Lionel Ornament, a way cool addition to to the Christmas layout.
Attachments
I ran trains, took photos and videos to post on forum. Will post on Switcher Saturday and already posted on Weekend Photo Fun.
Earlier this week I visited Engine House Hobbies in Gaithersburg Md and bought a couple freight cars. Also won a very nice Kline 18 inch B&O passenger coach on the Bay. It looks great as the rider coach on my B&O Mail train!
Began today by routing Romex under sections of track not yet wired in. I also ran some to the staging yard, finally tying it into the main bank of transformers. Then added a few jumper bars on the Xformer shelf and desk side to facilitate flexible 12 gauge wiring so that the main bank can be deployed or slid back inside. This was the perfect time to install circuit breakers at each Xformer power tap. During a short trial run I blew the breaker handling track power....maybe 6 amps is too small a breaker for my needs? After removing a bunch of lighted passenger cars from the circuit the breaker stopped tripping. I continued on by dropping about 6 feeders, bringing power to former dead sections of track. Test runs over the newly powered sections proved successful. It's on to finalizing the main bench work and connecting all the track ends.
Bruce
We had a operating session at the NJ HiRailers today with a few special guests from other local clubs.
This is an MTH Premier (20-3412-1E) Pennsylvania 4-4-6-4 Q2 Duplex pulling K-Line die cast hoppers and the MTH Pennsylvania N8 Caboose (20-3412). The engine and caboose I bought as part of a breakup set from a person in Rhode Island who only wanted the cars. I have had this for at least two years and quite frankly forgot I had them. Amazing what you find when you organize your self.
Attachments
We tore out a wall in the basement to open up a 12 x 11 space to expand the layout!
Returned to the slide out bank of transformers and replaced 6 amp breakers with 10 amp. I finalized their installation by mounting them conveniently above the tranny posts. Each power source received a number, with a breaker for each of the 12 binding posts. I designated the 6, #1 and 4 handles as track power, tying them into 10 amp breakers. The other #2 and 3 posts will supply accessory power through 6 amp breakers. Wrapped things up by temporarily labeling each breaker designation.
The addition of TVS diodes will come as soon as I get them. I did manage to replenish my lumber supply but didn't get around to using it today.
Bruce
I put in the rest of the hangers for my ceiling level layout. While not much, it is a momentous occasion. The ceiling level layout has been sitting for 2 years as a 3/4 completed loop since I gave up on it early 2012 because of my carpal tunnel. It took a year to get to the point where they decided to do surgery, then recovery time made it so I got no winter work done last year. While it is not easy working in that cramped quarters with arthritic hands, the worst of it is done. In that two years, I have had time to reevaluate how to complete the project.
Mark,
I'm so glad to hear your recovery has progress enough that you can return to working on the ceiling layout. Looking forward to seeing some pics when you get a chance.
Bruce
Mark, can only imagine what it was like before the surgery. But at least you were able to complete most of the ceiling layout before hand leaving only a small portion to do now. Rome was never built in one day. So in a very short amount of time you will be able to stand back and admire what was accomplished. Recovery takes time but you will get there. The light at the end of the tunnel is much brighter now.............Paul
Cleaned layout track, and then MORE track. Once all that was done, I looked at the four (4) locos that operate ON the "now clean" track, and all the rolling stock wheels that make up the varying consist for them. And (you've been there, too) was compelled to clean all the wheel rolling surfaces before putting it back on my fresh clean track. Then threw out an armload of nasty rag pieces. By inspection, it appears I've transferred a significant amount of black crud form the layout to my hands and fingers, also.....
*Note: Will not discuss what was used for cleaning purposes, 'cause I don't want to open that door, again !!!! (LOL)
Bruce and Paul,
Thank you very much for the encouragement! I will post some photos in the future.
I decided to put down the wire strippers and the staple gun and decided to just have some fun today and I just ran some trains!
Attachments
Been crawling under it wireing for two weeks. This is the worse part of a layout build., I Hope it is worth it. ![]()
![]()
![]()
![]()
God blessed us with the joy of running O gauge trains, then for some odd reason or past offence, he made us wire them.
In my ongoing efforts to corner the world gi-raffe car market one giraffe at a time, I just took delivery of yet another 3386 in good nick from eBay. After cleaning and oiling the wheels (and installing a new spring from the Train Tender), the new addition is seen trundling about in a 'shorty' train...
Also did a couple improvements on the basswood telltale mount, seen in action here!
Mitch
Attachments
After getting back from the Medina show where I got a Marx light tower in like new condition I glued the backdrop to the foam board. I took it up to the layout and glued it into place. Filled in the void and now I can add some foliage in front of it. After looking at it in the pic I think I'll take a piece of blue sky I cut off and go to the Depot to see if they can match it. It needs blue sky around it. Stands out too much. Pic................Paul
Attachments
paul 2 posted:With plaster dry I got busy adding the colors to the plaster and then washed it with a diluted black. Also got the earth tone on which I hope will be dark enough. I don't have any more color but this weekend is the Medina show here in Ohio and I hope to find some there. Two more areas to do after dinner and then I can add the foliage. Couple of pics.........Paul
Looking real nice Paul!
Attachments
Today, FINALLY, I took some photos of my pickle train projects.... the double tank vinegar car, etc., and began on a passenger car for it, kit bashing a junk box Lionel Civil War car shell, and an Industrial Rail trolley shell. I still am trying to think of an unusual caboose for the pickle train, as well, as maybe, a locomotive. Defintely the place for a scale-sized Porter.
M. Mitchell Marmel posted:In my ongoing efforts to corner the world gi-raffe car market one giraffe at a time, I just took delivery of yet another 3386
Mitch
I have employed a security system and guard dog in an effort to keep my gi-raffe from trying to escape and migrate to Mitch's Gi-raffe Shangri-La!! ![]()
Looking good, Mitch!!
I finally started work on adding a tunnel and mountain to my postwar style display layout.


