


Lew, Just shy of 63 years I am doing quite well! How many are far worse off or aren’t here on earth with us anymore.
I've always wanted a turntable. I needed at least a 30" turntable to turn my largest locomotive, a MTH Premier Santa Fe 2-10-4. I can't afford a Ross or Millhouse turntable. They are both waaaaay out of my budget. The Atlas unit is too small. So I decided to build one. Got started tonight. Still a long way to go but the bridge base spins in the pit. That's half the battle.

Attachments
Images (1)
Mark Boyce posted:Lew, Just shy of 63 years I am doing quite well! How many are far worse off or aren’t here on earth with us anymore.
Mark, I couldn't agree more. And I miss them all! I survived an MI a month after my 38th Bday and another last Summer so it's all good. Sometimes on our morning dog-walk we we walk with a person who has lived her whole life with arms truncated short of her elbows....remember "thalidomide babies". A few aches&pains are nothing.
Received the lighthouse tower from ebay. Got it for a great price.
I fit it to the area it will reside when the layout is finally set up. I just need paint it, and build the top and light.

Later today me and my son plan to do a test run of the track. If all goes well we will start painting the track.
Attachments
Images (1)
Lew, its enough space for me to get threw! LOL If it gets to small then its time to redo the layout! LOL Great photos and story about your granddad! very interesting!![]()
Chris, great to see you back at it the work is looking great and wonderful job on the trees! Thanks for sharing again on how you did the trees. I too also forgot you had posted awhile back on how to! I am glad your doing ok and hope the shoulder hold up! Take care of yourself!![]()
Brian, Birthday engines! Are you sure Marci didn't go find those out in the train room and clean them up to look new! LOL Really great haul and they should be a great addition to your collection! I hope you and Marci had fun running them last night!![]()
Lou, looks like you have a great start! Please keep us posted as you go!![]()
Jim, Nice looking lighthouse tower! What wonderful progress you have going and I bet it must be a blast to build with your son! I didn't have that chance as mine was into video games and girls when I got started! LOL![]()
I didn't get anything done in the train room yesterday as I had to work, same with today and then a meeting on Thursday so maybe Friday I will get back out there! I love all the work everyone is doing and still think this is a great place to learn and get wonderful ideas! Thank you all!![]()
Well its Wednesday, Humpday! I hope everyone has a great day and please have some fun!![]()
Mike g, wow, your layout is coming alive, nice track work, your lift section is a cool idea, and you’ve given yourself plenty of room to work. You’ve given me some ideas that I need to change on my layout. I look forward to seeing more of your ideas in the future. Briansilvermustang, I love The Chicago & Northwestern paint scheme, beautiful Diesels....Darlander, Keep the good comments coming....Have a great rest of the week fellows....


Attachments
Images (3)
Mike g, great idea for the center of the layout. Beats crawling on the floor.
LOU1985, keep posting pics of your tuntable project.
Jim, good find on the lighthouse. Going to look good once it is done.
Leapinlarry, very nice pics of your layout.
Chris a, good to see you posting again after the long hiatus. Good to hear the surgery turned out well. Very good looking trees. Bending Gar Graves is like riding a bike. You never quite forget how to do it...............Paul 2
Started to wire up the layout today for power. Unfortunately I ran out of wire and need to make a Home Depot run.

Attachments
Images (1)
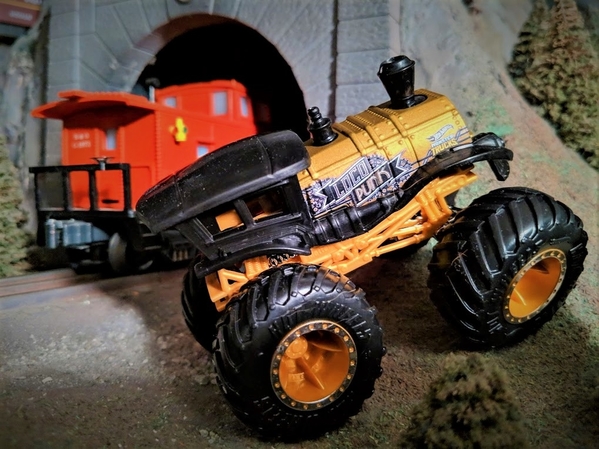
we had a little fun with some b-day toys last night... ![]()


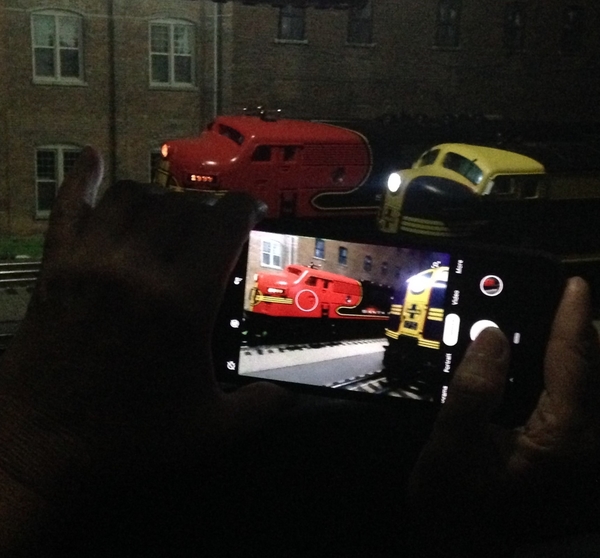
hopefully we will get to have some more fun tonight... ![]()
Attachments
Images (10)


The layout now has POWER!
Finished wiring up the 2 switches and plugs.
The top switch controls the overhead light.
The bottom switch turns on the power to the transformers that power the actual layout.
I did buy the wrong faceplates so I will have to get the correct ones tonight.


I can place the layout back in the room any-day now. I am just waiting on the backdrop to arrive. I would like to install it while the layout is removed and I have the room.
Attachments
Images (2)
A little work on the North Carolina Division. Added a branch line on the upper level loop. Original plan called for more trackage but I decided to simplify with a single tarck branck picking up a mill, a furnityre factory, and a feed supply . There is a second track that serves the town depot . Its located near the main line so it will be a mainline sto[ as well. There are some residences planed into the corner.
A problem you experience as you might know is the size of O gauge buildings and structures put a constraint on real estate for an around the wall shelf layout .
The track is in place and I think I am finished fiddling with the building placemnts. So here are some photos of what it looks like.
we are at the end of the branch

The furniture factory and the feed supply

down by the depot. The Cal Zephyr has made a stop

some commercial stores and residences on a hill

looking back down the branch

an aerial view for the full overview

looking up from the end of the branch

I think the buildings can come out of their packaging now
Attachments
Images (7)
Nice, LIRR Steamer! That area is going to provide very interesting switching operation. I would extend the end by a car length to provide either another car-spot or off-spot storage of a waiting car.
I see everyone has been keeping busy! I just got around to doing a first pour of WS Realistic Water. Had just enough to do the whole river, need to find more for subsequent layers. The clamps towards the back of the river are holding down a temporary dam. I have an access panel that I'm working on that goes back there.
I'm checking for leaks (fingers crossed) and need to put some cover over it to keep the dust bunnies off. Got the track all connected for first time in weeks, just in time for a bunch of folks coming over this weekend for a picnic.


Attachments
Images (4)
Jdevleerjr posted:
Congrats! I bought one of these light switch plates at Hobby Lobby over a year ago and the master light switch in my layout room has it in place next to the door.
Brain. Is that a Tonka 0-4-0 steamer???
Mike. I am having fun to day watching you guys do your Magic
Steve. I love that ravine bridge and your scenery looks awesome
p51 posted:
Jdevleerjr posted:
Congrats! I bought one of these light switch plates at Hobby Lobby over a year ago and the master light switch in my layout room has it in place next to the door.

Lee
found this on the Berkshire Valley Model’s site thought you might like it. He has added a lot of New stuff
Attachments
Images (2)

lee drennen posted:Jdevleerjr posted:
Congrats! I bought one of these light switch plates at Hobby Lobby over a year ago and the master light switch in my layout room has it in place next to the door.
Lee
found this on the Berkshire Valley Model’s site thought you might like it. He has added a lot of New stuff
That is awesome. I will be getting one for my layout!
geysergazer posted:Nice, LIRR Steamer! That area is going to provide very interesting switching operation. I would extend the end by a car length to provide either another car-spot or off-spot storage of a waiting car.
thank you for the suggestion. I will look at that end to do thatm maybe shifting a buildinga bit to squeeze it in.
Finally! I got the Coca-Cola Bottlecap Manufacturing and Repair Facility set up. The pictures aren't too good, but I'll have better ones tomorrow when there's more light.


Attachments
Images (6)
Larry, Thank you ! I sure love that Santa Fe engine! It even looks better on your wonderful layout!![]()
Paul, thanks! Your right it sure beats crawling under the table! LOL![]()
Brian, great photo's! Looks like you guys had a blast!![]()
Jim, Great news! You sure are moving right along!![]()
LIRR, Looks like you have a good plan! It sure is going to be fun to watch your build!![]()
Steve, the river is looks good, I bet it will be great after a couple more pours!![]()
Lee D. That always fun to see whats going on here!![]()
Did nothing today but work, maybe tomorrow!![]()
I've got better light, and I made a few minor improvements on the Coca-Cola Bottle Cap Manufacturing and Repair Facility.


Attachments
Images (4)
I see that you like the lighter side of having fun with toy trains too, Vincent.
As soon as I saw this I thought back to 60 years ago when I decorated my soapbox scooter with bottle caps.
Thanks for sharing
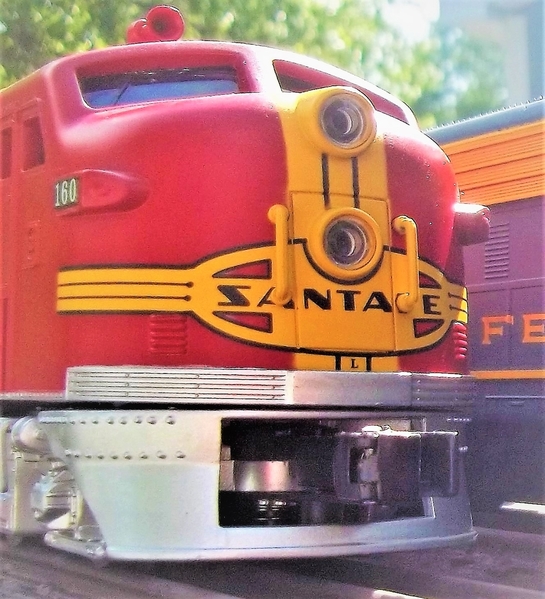
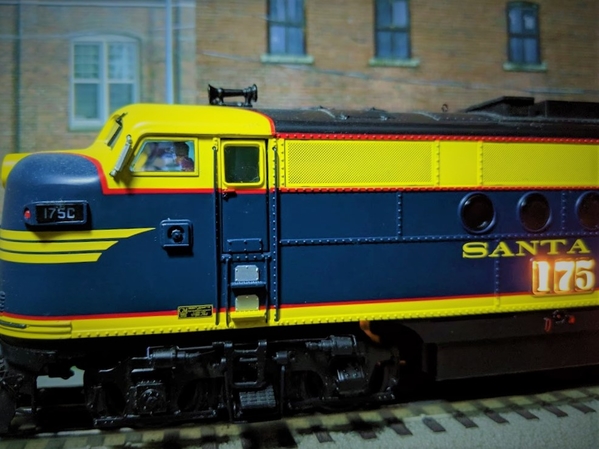
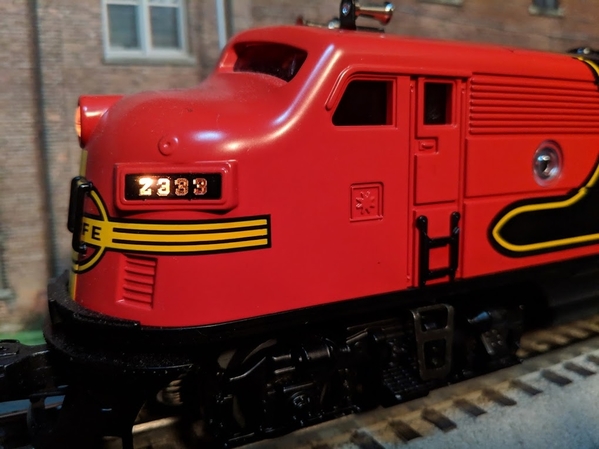
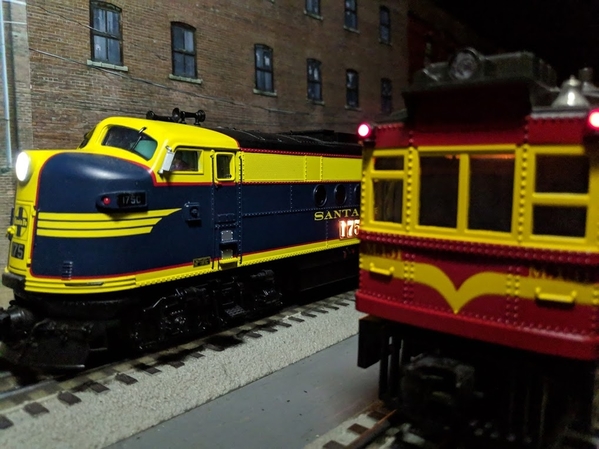
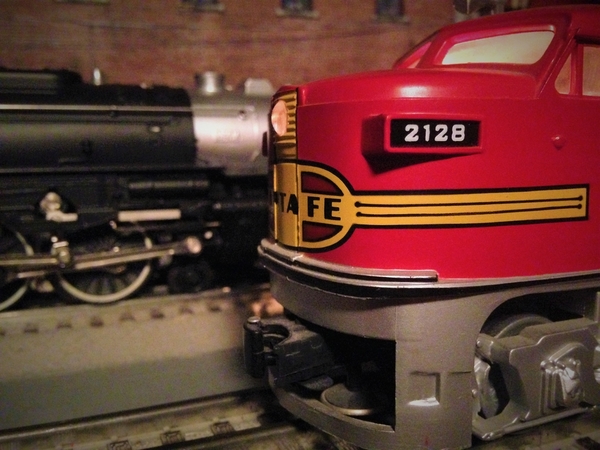
nice day out, so had to tinker around outside last night...

really like these black & red Santa Fe's...
can't wait to dig out my chrome SF passenger cars to pull behind them !!
Attachments
Images (2)


Spent a couple of hours helping to dismantle a donated HO scale layout at the JRM Museum. The layout itself was too large and bulky to be used, but sale of the track and equipment will help fund Museum operations, and a goodly supply of Homasote (scarce in this area) will help in the renovation of the Museum's Lionel layout.
Mitch


M. Mitchell Marmel posted:Spent a couple of hours helping to dismantle a donated HO scale layout at the JRM Museum. The layout itself was too large and bulky to be used, but sale of the track and equipment will help fund Museum operations, and a goodly supply of Homasote (scarce in this area) will help in the renovation of the Museum's Lionel layout.
Mitch
Mitch, that sounds like a fun job to take on.
I spent four hours today on my trains. I went through every storage box I have, putting things in the right box. I did some more work on my bottle cap plant and "Circuit City." And I spent about an hour-and-a half dismantling an old Motorola walkie-talkie so that I could use the parts for my lay-out. (Buddy, that thing did NOT want to opened by an unauthorized technician).
Vincent. those bottle caps remind me when I was a kid there was a candy called bottle caps. Care on with the fun you always have something interesting
lew. I always like to look at your layout
Brain. Never seen a war bonnet in that color
Ed. Love that TBF Adventure did you build it?
Likewise, Lee. Also too, I can't wait to see what you do with your upcoming new space.
My efforts were again limited to what I could do in the big house. Early today I removed my control panel from the setup for improvements. I connected an E-stop switch. I drilled holes for LEDs to indicate spur power (5) and #1122 switch power. I need to buy metric drill bits or SAE LEDs. There will be some gluing and soldering next. I will take my time with the control panel as the weather and outpatient surgery will keep me indoors. Further plans include labeling terminal strips to speed reassembly and troubleshooting. I started drawing system schematics. I am also considering the addition of another transformer. Please see "Seperate transformers for everything". Wow, I spelled that wrong twice! I will continue to follow everyone's posts carefully. Y'all are inspirational.
Bill
Sounds like a plan, Bill!!

Attachments
Images (1)

Brian, that is a great picture! You have several effects at play there that really make that 'ol PA pop.
Finished the cables on the suspension bridge and test fit it on the table.
Attachments
Images (1)
Bruce Jacobsen posted:Finished the cables on the suspension bridge and test fit it on the table.
That is an incredible structure, Bruce, and it will be a wonderful addition to your layout. Great job!!!
I put the first coat of paint on the turntable pit and installed the pit rail. I also roughed in the turntable bridge shape (I'm basing the turntable bridge on the Santa Fe girder type). Still a long way to go. As of today I'm $60 in materials into this turntable project. I think when it's all said and done I won't top $100. As of now it will be a manual turntable, unless I get the gumption to power it with one of the spare car window lift or antenna motors I have in the garage.

Attachments
Images (1)
Lou1985 posted:I put the first coat of paint on the turntable pit and installed the pit rail. I also roughed in the turntable bridge shape (I'm basing the turntable bridge on the Santa Fe girder type). Still a long way to go. As of today I'm $60 in materials into this turntable project. I think when it's all said and done I won't top $100. As of now it will be a manual turntable, unless I get the gumption to power it with one of the spare car window lift or antenna motors I have in the garage.
Looks great! Would love to hear more details on the materials used and how you did it. How long is the bridge?
JD2035RR posted:Lou1985 posted:I put the first coat of paint on the turntable pit and installed the pit rail. I also roughed in the turntable bridge shape (I'm basing the turntable bridge on the Santa Fe girder type). Still a long way to go. As of today I'm $60 in materials into this turntable project. I think when it's all said and done I won't top $100. As of now it will be a manual turntable, unless I get the gumption to power it with one of the spare car window lift or antenna motors I have in the garage.
Looks great! Would love to hear more details on the materials used and how you did it. How long is the bridge?
The turntable has a 30" bridge to fit my largest locomotive, a MTH Premier Santa Fe 2-10-4. I didn't go any bigger as the only scale articulateds I'd buy would be either a SP cab forward or AC-9, neither of which would fit on my layout (I only buy Santa Fe or Southern Pacific locomotives).
So far materials used are 1X4 pine, 1/2" plywood, 1/4" plywood, some 027 curved rail, and a lazy susan bearing. The pit is almost done. The bridge is going to take much longer, as I've got a bunch of details to add to it.
I put in a 12 hour day and have little to show for it. I finished drilling the new holes in my control panel. It took a long time and a rat tail file to make nine SAE holes into metric holes. Next up was a good coat of primer, front and back. I sprayed a light coat of "BRM" green followed by a way-to-heavy top coat. I'll have to sand and try again tomorrow. I decided my next adventure should be simple. I intended to mark the power cords on my two transformers for proper phasing. But... when I fired up my "Type S", I had no voltage on A or B to common. I read my "Greenberg's Manual" before taking the cover off the transformer. I found the wiper badly bent and making no contact. A small pair of needle nose pliers made that all better. I failed to take a before photo. I cleaned everything and put it back together. Once again, the dinosaur lives. Now I have a second supply to power my switches. Finally, I marked the plugs for correct phasing. I will be on my ham radio tomorrow until noon. Join me on 7.251 MHz if you can. Sanding and painting the control panel will follow.
73 and good night,
Bill
Attachments
Images (2)


Bruce, The bridge looks great! What did you use for the cables, and how did you attach them on either end?
Lew, That's a good idea to try out different track configurations to see what you like best!
Lou, The turntable is looking great! I'm with you, the well done commercial ones are way over my budget.
Bill, Looks like you will be in good shape now.

Attachments
Images (4)


Add Reply
Sign In To Reply
