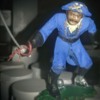
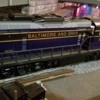
I had an old plastic Pirate figure made in Germany who had a broken sword, chipped red coat, yellow pantaloons, and heeled dress clogs. I picked him up and the sword arm snapped at the shoulder for no good reason. After using the Super-glue to put the arm on, I heated the needle I used to apply the glue and gave him a new sword. He still needs lots of touch up, this is the rough draft stage too.

  The new paint choice began randomly with a blue/grey, and the next thing I knew, "Larry Storch" was looking like an officer... I'm only gonna give him Quartermaster stripes though. Saber tied to his hand with his sash for a reason... He seems to have found a tomb while looking to do his duties of recovering the dead, and/or securing any useful supplies... like gold.IMG_20200415_151820~6

My "storyboard" so far...
Attachments

Images (1)
  • IMG_20200415_151820~6
Videos (1)
CuriousQmaster
John Rowlen posted:

Turning 70 tomorrow and starting to detail the Lionel Northern Pacific Vista Dome #550 that is one of the private cars in the N&W #611 Steam Excursion Train.  The interior is a cream color so I will add a little more Testors Flat Red Earth to the seat color.  The Dome seats will also need to be lowered to accommodate the Preiser 65602 Seated People I painted.

I will start later tonight after taking Mom for a car ride down the Cleveland Metro Parks Big Creek Parkway on the way to the grocery store.  I am trying to keep both of our minds alert after days of mind-numbing television.

Update:  I removed the Dome Floor and started painting the seats.  I will remove the seats and grind the post out of the way, then glue the lowered seat to the Dome Floor.  I had to do this with my Canadian Pacific Vista Dome in order to get the seated people under the shallow dome roof.

Have fun "working on your railroad", all the live-long day.

Sincerely, John Rowlen

Happy Birthday John!

Bob

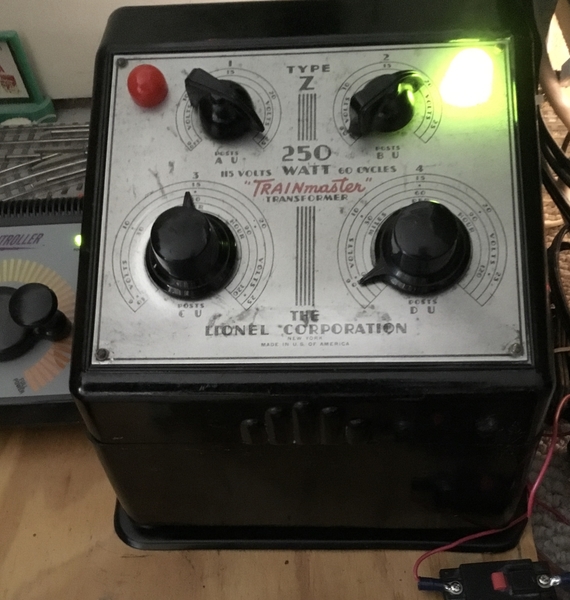
I received my Lionel Z transformer and I am very pleased with it. So far I have switched all the accessories that were on the 1033 transformer to the Z which required lengthening all the wires and placing new terminal connectors on the ends. Next I have to remount a few accessory switches and make some Wiring  look neater. What a difference the Z transformer makes in accessory operation. Now all the accessories operate smoothly and with power to spare! The next job will be reducing the accessory load from my Lionel ZW and move them to the Z.  Doing this will give me more reserve on the ZW to just run power hungry postwar engines.

I also wish John a Happy Birthday!

6391A106-B9E4-4973-995B-0881CCF209B3

Attachments

Images (1)
  • 6391A106-B9E4-4973-995B-0881CCF209B3
Last edited by N5CJonny

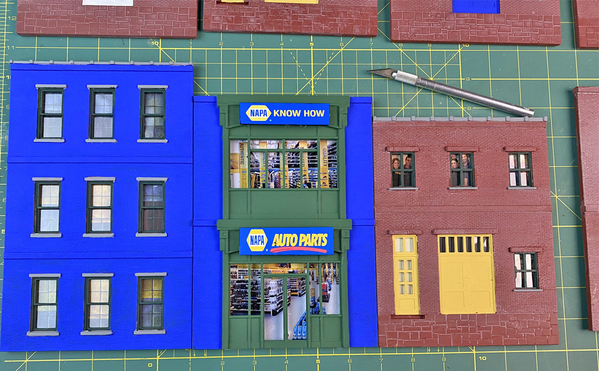
Working on the NAPA Auto Parts Store - Part 2

This morning I am working on the signs & interior for this flat structure.  This flat structure will be one small part of a large 3 dimensional backdrop.

Printing signs v2

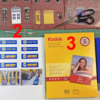
(1)  NAPA office & storage area.  (2)  Signs for the first floor and second floor. Along with the interior of the store.  (3). I use an Epson ET - 2720 - All in one, tankless printer. To print on Kodak Gloss Premium Photo Paper.  (4). The front of the NAPA Store.

Gary 🚂

Attachments

Images (1)
  • Printing signs v2

Don, very nice job on the scenery and backdrop.

Happy belated birthday John.

Christmas in April. UPS dropped these on my doorstep this morning. New additions to my auto racks. My buddy Bryan should be impressed I at least took them out of the shipping cartons. They will eventually make it up to the attic layout. Now that my excitement has worn off of opening presents LOL after lunch I am going to tackle putting down some ground foam around where I just did the track work. Pics...................Paul 2

DSCN0279DSCN0280

Attachments

Images (2)
  • DSCN0279
  • DSCN0280
Derailed10o posted:

Well, I tried with NO success to install Tortoise switch machines to my 2rail Old Pullman #6 switches. Cant get the switch points to stay tight against the rail on one side or the other. Any ideas would be greatly appreciated. Maybe heavier wire? I dont know. Seems like where the rail is cut almost all the way through where it swings is just to rigid.

John

The tortoise was originally designed for HO.  Hence the light spdt toggle amp rating and small throw wire.  I find a much larger wire necessary.  Flex only 0 scale points are hard to throw with a HO wire.  Even the real RR uses a fish plates alot of the time.  I float all points with a fish plate.  Brad Strong will provide floating points upon request on his Signature Switches.

The main problem with OP switches is the gauge and frequently misaligned frog point,  Sight down the diverging rails to eyeball the frog point location. 

The gauge of some OP turnouts seems to be  a combination of Ow5 and Proto 48.

Replacement is best if uninstalled.  Once installed it can be saved if you use a small flangeway file and spend some time.  Some points are so bad the need to be replaced.  I recently had to service an OP double cross over and spent all afternoon filing 7 of the frogs.   Time is money and at most of our ages we have more money than time left.

Last edited by Tom Tee

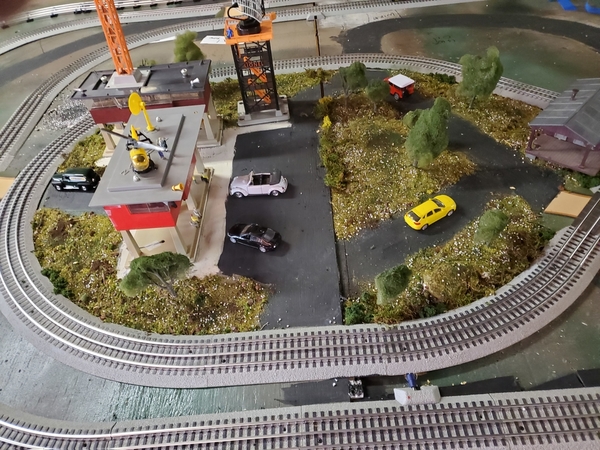
This week so far, Monday finished painting streets, marked accessories locations, 

20200413_181822

Tuesday did landscaping added trees

20200414_143057

Wednesday,  today, wired a few accessories and installed them, decided to add a few vehicles 

20200416_112731

Tomorrow  I'll  add telephone poles and a few more little effects and people.    This section is right in the middle of the layout, so I'm starting here, crawling on top of the tables, which I built in 1996 and have seen numerous layouts.

Then all I have to do is get underneath  and run a bus line to power up accessories.   Gotta love it, I do, lol.

Attachments

Images (4)
  • 20200413_181807
  • 20200414_143057
  • 20200416_112731
  • 20200413_181822

Lots of great projects everyone!  "Gotta love it!" Jushavinfun says.  So right!!

I have been working on my benchwork.  I kind of got ahead of myself, and had to rip some out.  No big deal.  I did take down a section of the family room layout to use the Mianne benchwork for the freestanding part of the layout in the middle of the room.  I set it up, but have to make a few adjustments.  I got stopped short and got no photographs.  Lew, you can wait with bated breath!  

leapinlarry posted:

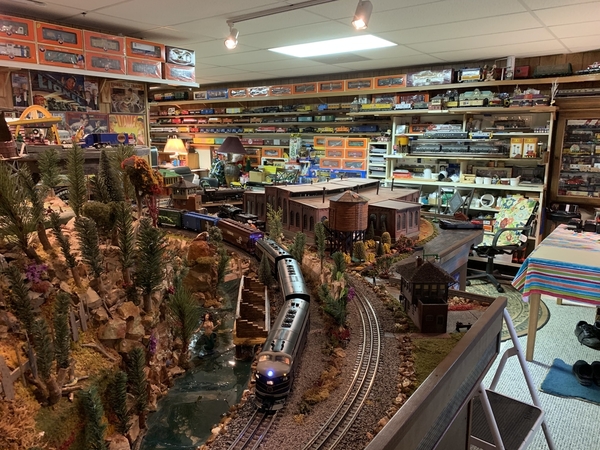
Farmerjohn, fantastic detailing of your transfer table area, looks so good. SIDEHACK, Wow, really nice Cab 2 cradle, awesome idea, John Rowlen, Happy Birthday a day or so ago, Everyone have a great weekend, your train work is looking good.  All I can say, yard work is time consuming.... Happy Railroading 8835EA9F-EED2-44AF-9756-134AC0E7D872

Great view of your train room Larry. Do any of those boxed up cars on the top shelves see run time or are they just for display?

Bob

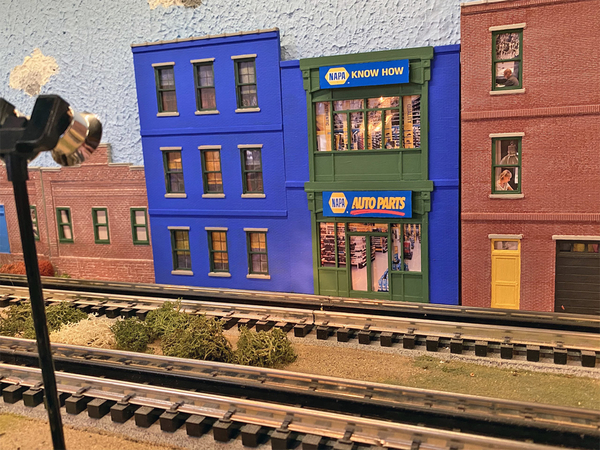
Working on the NAPA Auto Parts Store - Part 3 of 3

This morning I am finishing up the signs & interior for this flat structure.  This flat structure will be one small part of a large 3 dimensional backdrop.

1 Jig Saw

Using a scroll saw and some scrap wood to make the exterior signs.

2 Hanging Sign

Using a glue stick to adhere the sign to wood to give it a 3D look. Along with the interior of the store being tape to the inside with 3M Magic Tape.

3 On bench

On the workbench, glued on the two exterior signs & checked out the fit. 

4 Final setup

This photo is a test shot to see how it will look. This is not the final location.  When the lock down is over, I have to get to MENARDS to get a sheet of 3/16 plywood to build a 3D backdrop. Which will be painted a sky blue with clouds. (Ten feet long)

Thanks for taking a look at this 3 part, NAPA Auto Parts Store: Gary 🚂

Attachments

Images (4)
  • 1 Jig Saw
  • 2 Hanging Sign
  • 3 On bench
  • 4 Final setup

OK Larry, you keep posting photos of the B&O F units running....   It keeps reminding me that I need to unpack my set and put them on the track !!!!  It's like a not so subtle reminder.

I decided to take a break from wiring signals (yes I did get all 22 signal heads working, no gremlins today!)...  Decided to lightly fade and weather my other 2 State of Maine boxcars, as well as a Maine Central Pine Tree Route boxcar....  Things were going great till late last night I decided to shoot the Maine Central with clearcoat after I had dull coated it and applied Pan Pastel powders....

Boy was I shocked when the small testors can I grabbed turned out to be Silver, not Dullcoat....  Needless to say, I was up late removing silver spray paint from a dark green nicely weathered boxcar... Bummer !!!!!   Anyway,  got 99% of the silver off, went over it with a light acrylic wash of MEC Dark Green Polyscale acrylic that I luckily had on hand and just finished weathering it all over again...  Yes it doesn't take a rocket scientist to tell which side I had to do touch up on..... Came out better than I thought after I saw the silver damage !!!!

Hope everyone is healthy, safe and still sane.  
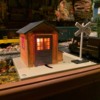
Before Weathering /  After Dullcoat sealer:  Weaver 40' PS-1....

DSC06978 [2)

After Pan Pastels and sealed with Krylon Flat 

DSC06979 [2)


DSC06980 [2)DSC06980 [3)

DSC06977 [2)

Attachments

Images (5)
  • DSC06978 (2)
  • DSC06979 (2)
  • DSC06980 (2)
  • DSC06980 (3)
  • DSC06977 (2)

RSJB18 Bob, thanks for the compliment, and yes, those are new in the box Cabooses, rolling stock, one day they’ll be on sale, I’m reducing inventory to what is actually needed. Trainroomgary, I like your new addition, NAPA, store front, the colors are really neat, a store that I’m familiar with. Mitch, you are so Creative, that’s going to be very interesting when it’s finished. There’s so many creative folks on this forum, so many cool fun to run layouts. I’ve just been thinking about what’s next to do on the layout, much more lights to connect up. Happy Railroading. B3720540-CA0D-4176-819B-1D2206B3A05ECD4E933B-24B8-412D-9C67-93CD84BD5A25B66FE73F-D6BF-4959-82E2-01C9E51DF1F5

Attachments

Images (3)
  • B3720540-CA0D-4176-819B-1D2206B3A05E
  • CD4E933B-24B8-412D-9C67-93CD84BD5A25
  • B66FE73F-D6BF-4959-82E2-01C9E51DF1F5

Chris nice save on the car.

I have started to add ground foam and a few trees between all the tracks. But while I was doing that I found out that before I put in the two sidings I should of have some cars so I could gauge the center to center track distance. Now I have to see if i can shift the one track over toward the silos or possibly just go with one siding. Time will tell. Pics......Paul 2

DSCN0281DSCN0282DSCN0283DSCN0284DSCN0285

Attachments

Images (5)
  • DSCN0281
  • DSCN0282
  • DSCN0283
  • DSCN0284
  • DSCN0285

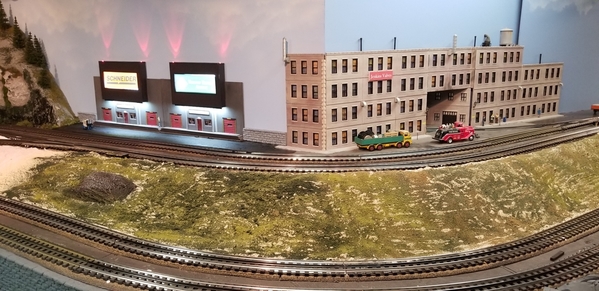
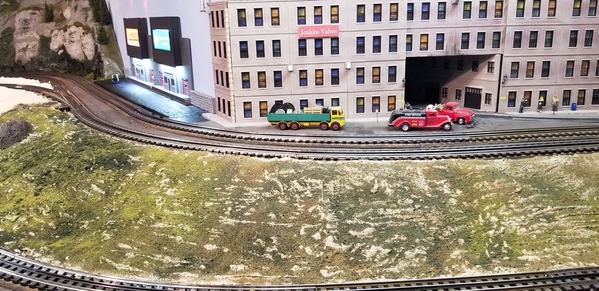
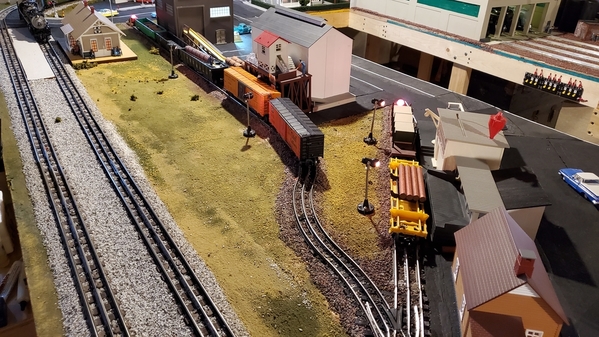
Well since I've been stuck at home I've been doing some layout work. There is a bare area between a siding and the mains on my layout. 

20200417_14174420200417_141757

I added a station platform and and warehouse. Kinda fills in the area and makes it look a bit more complete. I need to pick up some trucks, forklifts, and workers to complete the scene. 

20200417_20414820200417_204201

Attachments

Images (4)
  • 20200417_141744
  • 20200417_141757
  • 20200417_204148
  • 20200417_204201
Lou1985 posted:

Well since I've been stuck at home I've been doing some layout work. There is a bare area between a siding and the mains on my layout. 

20200417_14174420200417_141757

I added a station platform and and warehouse. Kinda fills in the area and makes it look a bit more complete. I need to pick up some trucks, forklifts, and workers to complete the scene. 

20200417_20414820200417_204201

Lou1985,

Nice way to fill in the area. What did you use for the road work?

Dave

Was blessed with having my little man with me the last 2 weeks...we finally got some things done on our layout:

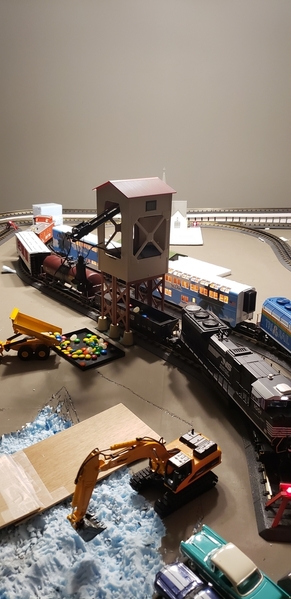
The pvc base we bought from freckleface.com worked great for one of our bridges...we cut into the foam so the top of the bridge base is flush with the foam base.1404189656_20200416_175956_9651142_resized20200416_19471820200416_20401420200416_202302

Also got the MTH operating coaling tower installed for our quarry...ended up mining m&m's and jelly beans the other night.  Anytime Christian got bored he went to digging out more of the quarry...the little guy is really making some progress!

Attachments

Images (4)
  • 1404189656_20200416_175956_9651142_resized
  • 20200416_194718
  • 20200416_204014
  • 20200416_202302
luvindemtrains posted:
Lou1985 posted:

Well since I've been stuck at home I've been doing some layout work. There is a bare area between a siding and the mains on my layout. 

20200417_14174420200417_141757

I added a station platform and and warehouse. Kinda fills in the area and makes it look a bit more complete. I need to pick up some trucks, forklifts, and workers to complete the scene. 

20200417_20414820200417_204201

Lou1985,

Nice way to fill in the area. What did you use for the road work?

Dave

The road and crossing are some scrap balsa I had that I painted black. 

Lee, congrats on the article. Also nice find on the boxcars. They will look good with the hoppers after you work on them.

I got some more done today. Started with the sidings at the silo. I moved the switch back to the other switch then took the two different size hoppers and ran them by each other. Move the back siding toward the silos. It seems like it will work. Might have to restrict the size of the hoppers on each track but now it is doable. After I did that I went back to putting down more ground turf and trees. I also place a couple of Marx light towers to see how they would look. Tomorrow I have to run to Menards. Now I have a list of stuff I don't know what I did with it. I only found one drill bit and it was a bit larger then the tree trucks so that is why the glue container is behind the tree. To hold it upright till the glue dries. Pics................Paul 2

DSCN0286DSCN0287DSCN0288DSCN0289DSCN0290DSCN0291

Attachments

Images (6)
  • DSCN0286
  • DSCN0287
  • DSCN0288
  • DSCN0289
  • DSCN0290
  • DSCN0291

Maintenance Day:
Car maintenance

Step 1- Lube couplers
Step 1A- break one...... I had to trim the pin for the coupler release on a K-line hopper and I went a little to far. I built the release pin back up with some Gorilla Glue and all is good now.
Step 1B-clean and lube wheels
Step 1C- order springs and rivets to repair a few broken ones.

Engine Maintenance
Cleaned and lubed the engines I'm running right now

ROW Maintenance
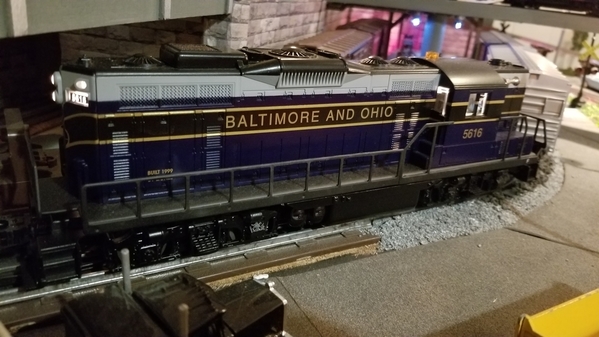
Had to cut the corners off of my switch machine covers. When you run 031 Geeps with fat fuel tanks on 027 curves you do what you have to do to get adequate clearance.


2020-04-18 17.31.492020-04-18 17.31.54

This Lionel B&O GP-9 was the worst offender

2019-08-31 07.36.56

Ran trains for a while too. Had a blast!

Hope everyone had a good Saturday.

Bob

Attachments

Images (3)
  • 2020-04-18 17.31.49
  • 2020-04-18 17.31.54
  • 2019-08-31 07.36.56

Add Reply

Post

OGR Publishing, Inc., 1310 Eastside Centre Ct, Suite 6, Mountain Home, AR 72653
800-980-OGRR (6477)
www.ogaugerr.com

×
×
×
×
Link copied to your clipboard.
×
×