Gentleman:
Happy holidays. It's only taken me 2 1/2 years to get to this point with my layout, but sometimes life gets in the way of even the best-laid plans.
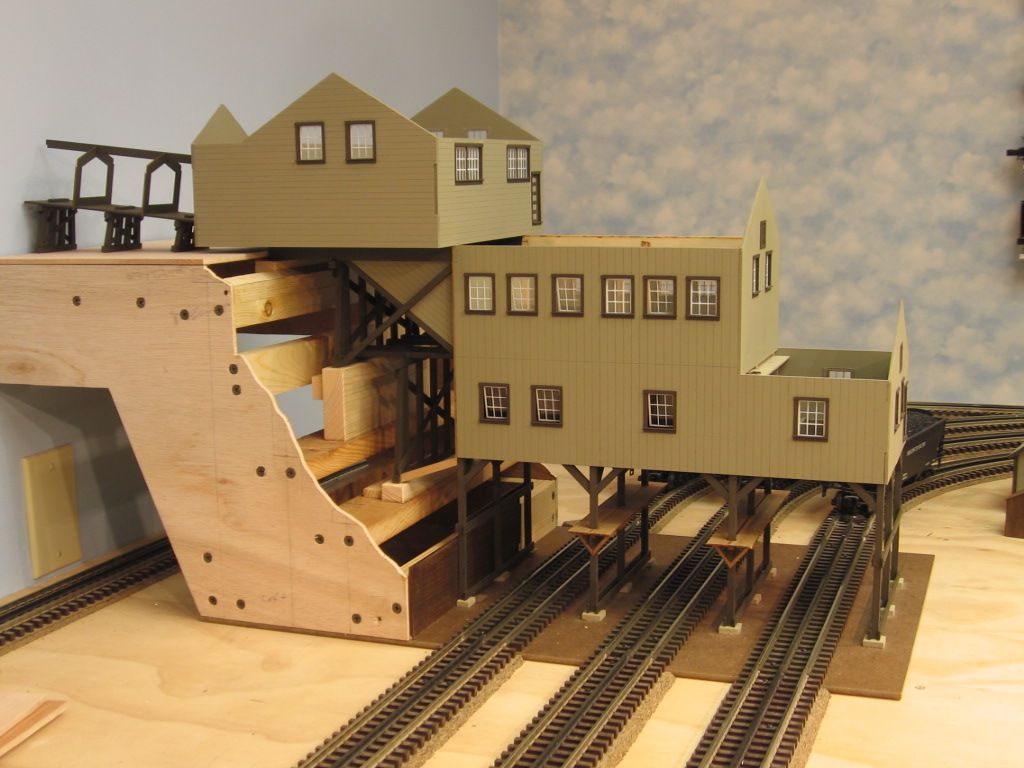
I present to you the progress on my childhood dream of building a large winter layout with tunnels and mountains. An HO scale would have been better for my limited 4' x 8' space, but these are the same trains I played with as a kid in the 1970s that belonged to previous generations.
As I squeezed just about as much Super-O track as possible into the space, it took quite a bit of engineering to make all the grades and clearances work. As it is, the train can only travel in one direction and only with the ZW transformer set at 13 volts--any higher voltage and the train derails on the downhill curves; much lower, and the train can't climb the grades.
I encourage all advice and opinions from anyone who cares to generously share his expertise. I do have a few specific questions as to the next step(s) from here:
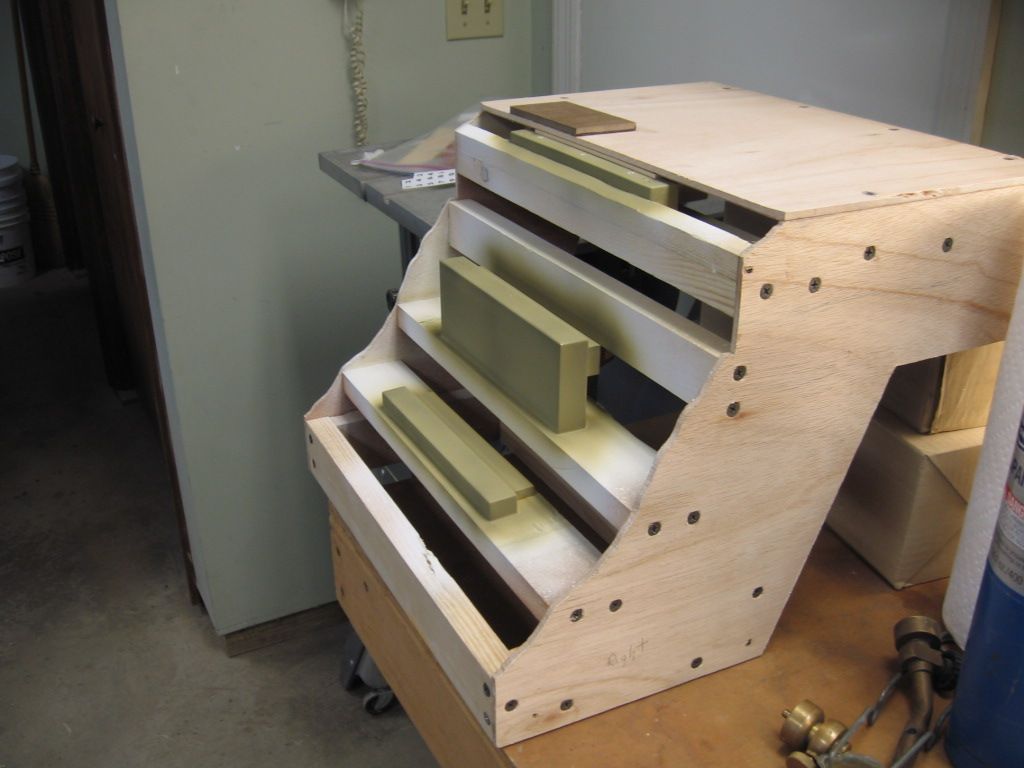
1) Now that I have the cross-hatch pieces of cardboard hot glued in to form the basic framework of the mountains, is it best to take plastic supermarket bags/crumpled-up pieces of newspaper to beef up the cardboard frame, and then overlay wet sections from the large roll of model railroad gauze?
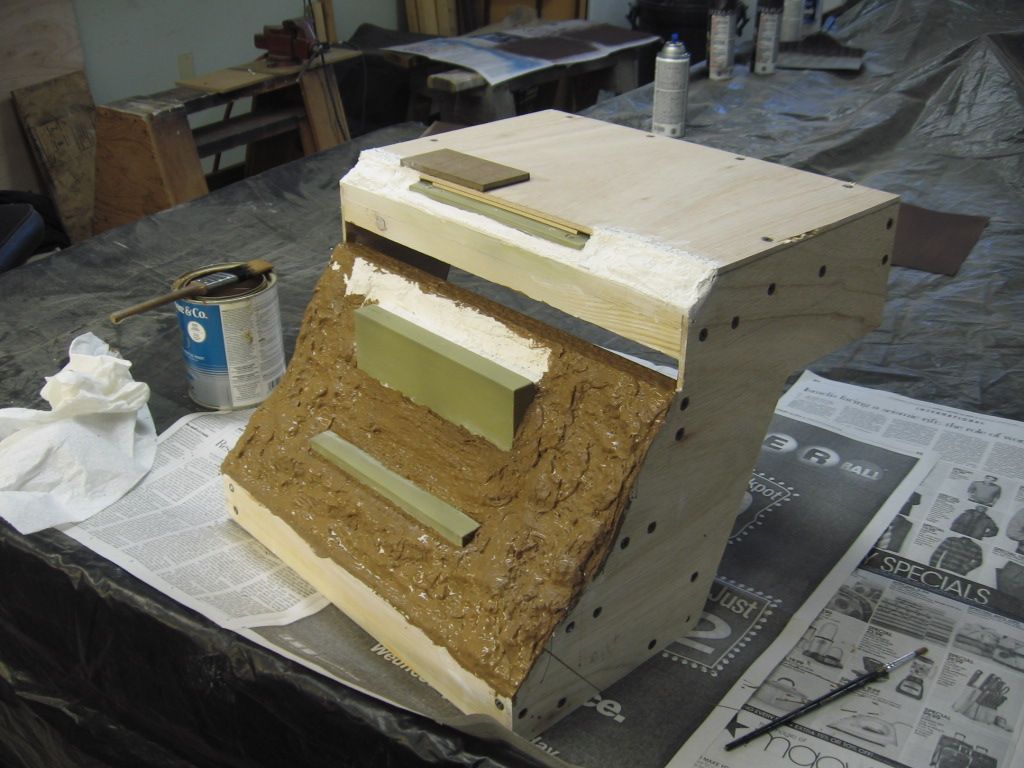
2) After that, am I then to trowel and/or glop on DAP plaster of paris over the gauze? I do have some yellow/gray/brown earth tone colors from the model shop, but I'm not going to go overboard coloring rock sections: I'm willing to forego reality and create more of a "whiteout" than may be realistic. I have 2 large bottles of the fake snow powder that I will coat the tracks with and cover any imperfections. I also have @50 O-scale pine trees waiting.
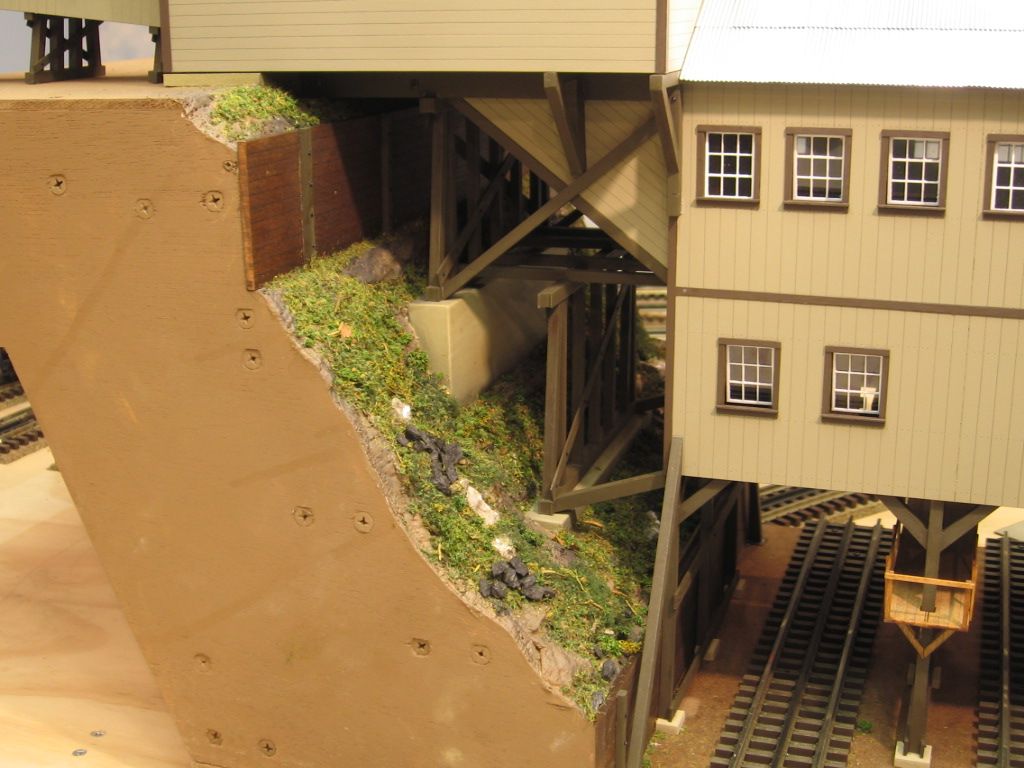
3) The long side where the track runs straight along the edge will be pushed against a wall; this is the back edge. Considering this, the front left edge has a 3-4' section underneath the mountain that I will be unable to access from the door hole cut beneath the mountain. (All tunnel entries have been constructed with wooden "retaining walls" from visible angles.) I am considering cutting about a 6" x 10" rectangle into this side of the 1/4" plywood and covering it with a bolted-on piece of plexiglas to serve as both an inner-mountain viewpoint as well as an emergency access, should there be a train derailing in this never-neverland section or if I need to clean the track (I should mention that while I am in the process of partitioning off and air-conditioning this room within the garage, I do live about 150 yards from the ocean). Naturally this will create more work in terms of landscaping this subterranean area. Opinions/advice?
Those are my main points of concern and unsure-how-to-proceedness; I've never done a layout before. There are a few areas where I will create iced-over waterfalls with some special fake ice material, and I will be challenged with making a frozen lake that's not well-photographed in the center of the layout (for this lake, I cut a section of the 4' x 8' sheet to add depth to the layout).
Thanks again for taking the time to consider my progress at this stage. I know of no other woodworkers/train enthusiasts, and this is site is the only way for me to learn construction tips.