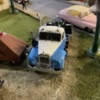
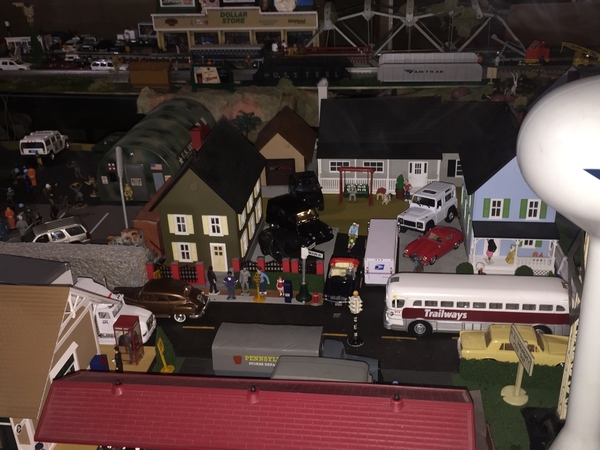
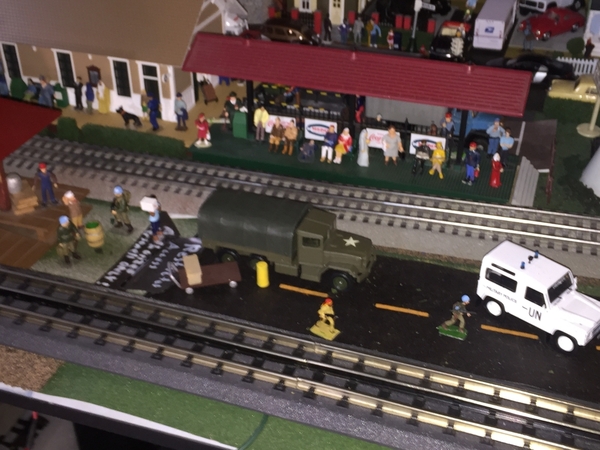
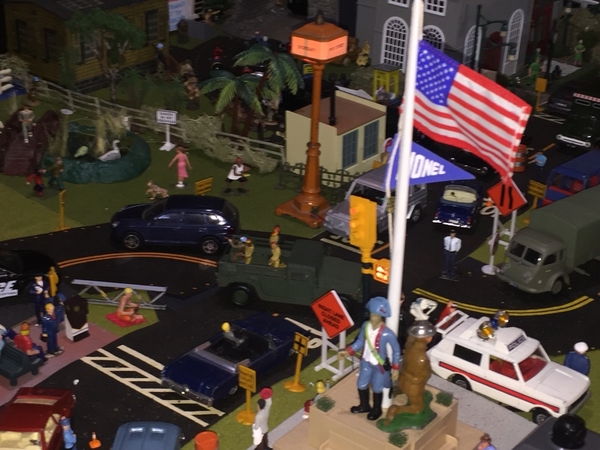
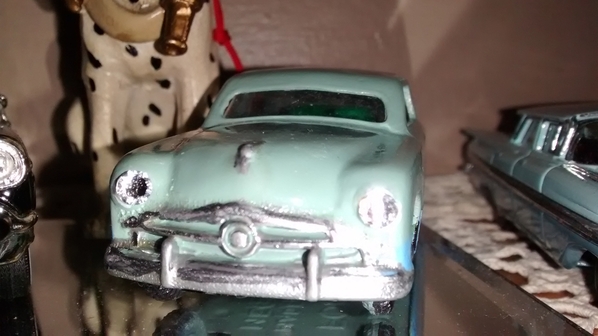
The entire family go with Dad to look a used station wagon for sale. It will be a new car for them if they can get the seller to drop the price.  However, it is pristine condition and is a gorgeous car'.  Grandma & Papa consider helping out with a contribution.  Lets see how Loyd makes out...😲 Connie, Loyd's wife has her doubts and doesn't think they can afford such a nice car, as they arestill waiting for their stimulus check'...💲💰😢

P1020486 [2)


P1020479


P1020491


P1020493 [2)P1020478 [2)

Well,  unfortunately, Loyd, couldn't together with the seller on the price he was asking.  Connie, tells him, now worries, we'll find something else.  We'll just have to wait a little longer to take our family trip....

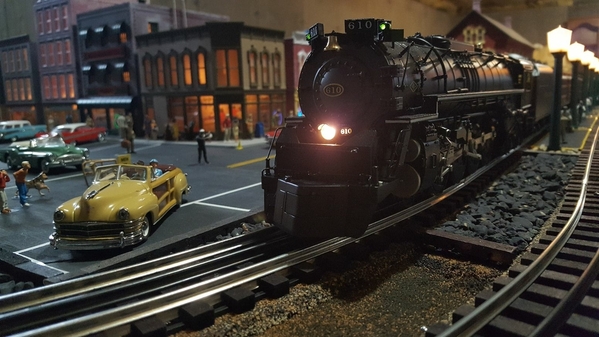
It took me ten minutes to realize this was a model.

Darn good photo, people and placement. Just WOW!

Ron H

The entire family go with Dad to look a used station wagon for sale. It will be a new car for them if they can get the seller to drop the price.  However, it is pristine condition and is a gorgeous car'.  Grandma & Papa consider helping out with a contribution.  Lets see how Loyd makes out...😲 Connie, Loyd's wife has her doubts and doesn't think they can afford such a nice car, as they arestill waiting for their stimulus check'...💲💰😢

P1020486 [2)


P1020479


P1020491


P1020493 [2)P1020478 [2)

Well,  unfortunately, Loyd, couldn't together with the seller on the price he was asking.  Connie, tells him, now worries, we'll find something else.  We'll just have to wait a little longer to take our family trip....

You know Ted when I was looking at it on my phone lastnight, I thought it was real as could be! Couldnt tell it was a model! Great work!

@Forty Rod posted:

South of the Border is still there?  I recall it from 1972-1973.


Somebody needs to make an O scale representation of that place

Yup,  bigger and kitschier than ever. About 6 - 7 buildings total on both sides of the road.

Yes, a cool representation on a layout would really be neat. The miles and miles of dozens of billboards are still on Rt 95 cannot be forgotten in that effort. They are sort of supersized Burma Shave signs

Mike, Lee, Joel and Ted, thank you for your kind words and encouragement.

Lee nice job on the Army tanker.

Ted great back story.  You've got the best figures on the forum.  The wagon looks great too.  Who's the mfr.?

Ulus, great looking military trains.  That's a lot of copies of lots of vehicles.

@JDFonz posted:

Yes, all hand painted. Been working to try and take my painting and weathering to the next level. You certainly nailed that family looking for their new classic car. Did you hand paint those people?

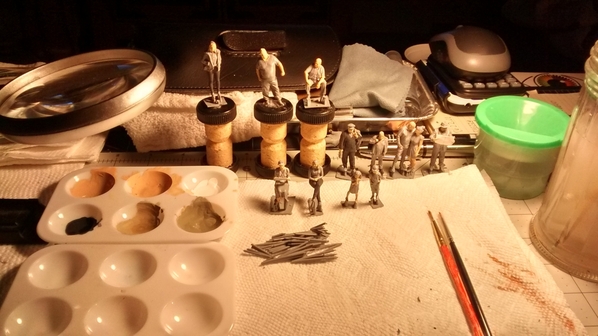
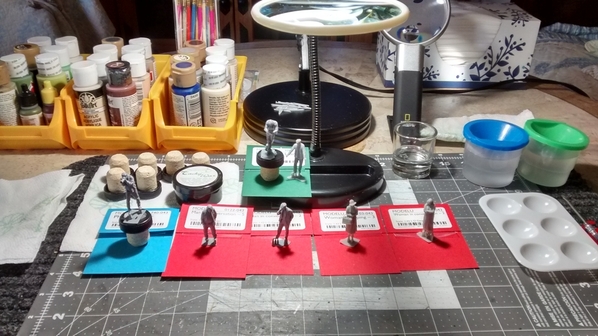
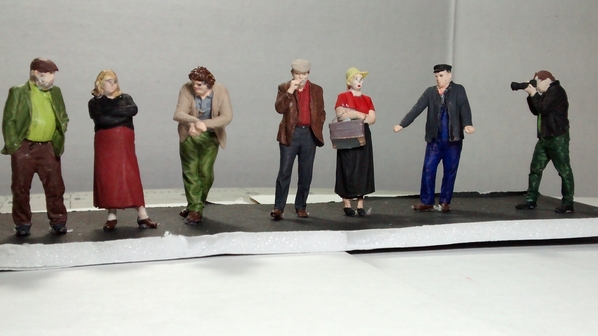
Yes Sir Joel', my figures are all hand painted by yours truly.  The three things I enjoy the most in the hobby, is scratch building structures;  Weathering/landscaping, and painting figures.  These particular figures are from "Model U", in England. They are actual scanned people, and  than transformed into scale figures.  Every scale.  It is a great site and outlet... They also have some great accessories for building structures.

Here they are as they are prepared to come to life'...😁

IMG_20210320_193412510_HDRMODELU before 2IMG_20191023_141017614

Attachments

Images (3)
  • IMG_20210320_193412510_HDR
  • MODELU before 2
  • IMG_20191023_141017614
@JDFonz posted:

Man, outstanding work Ted. Looks like you even have eyes and mouth painted. What do you use for those details?

Good question Joel. For eyes, I use a draftsman mechanical  lead pencil.  For lips and brows, I use the tiniest felt tip markers, and ever so gently just touch the areas you want.  I also use the very tiny 000 brushes for hair on the women.  I try to blend in blond if the air is brown, and vise a versa.   I studied all the figures on the market sold in the US.  98%, except Artista are made in China.  None are really detailed except Phiser from Germany, and Marklin.

So, I started to just touch them up.  As time moved forward, I found it easier to just buy the better figures and paint and detail them exactly to my liking.  I use Vallejo Acrylic air paint. and Michaels, Walmart , Acrylic craft paints.  ALso, the key item is taking ones time.  The process cant be rushed...

Take a look at the little kids in the post with the 57 Chevy.  They are the spittin image of two of my Grandkids.  Keep in mind, these figures are from Great Britain.  Actual scanned human beings. It is quite a coincidence the figures are almost identical to the two kids...

Well I’m going to have to try the sharpie trick on some people. You’d look excellent. I did look at the kids earlier and I liked the socks painted. Those details really bring out your great work. Now, one more question, do you put a wash over them to fill in the folds and creases in their clothes? You know like a real thin ink and alcohol wash.

@JDFonz posted:

Well I’m going to have to try the sharpie trick on some people. You’d look excellent. I did look at the kids earlier and I liked the socks painted. Those details really bring out your great work. Now, one more question, do you put a wash over them to fill in the folds and creases in their clothes? You know like a real thin ink and alcohol wash.

😀 Ha, socks'... THANKS.. I have done a wash on some.  BUT, sometimes the A&I will remove the paint.  I get better results with a very light wash of black or brown.  One drop of paint and 5 drops of water... Again though, it depends on the figure.   Many do use a wash.  And it depends on the paint used.  The Vallejo will not run off, the craft paints will...  Many use a primer of black or brown and the finial coat of colors.  Some use a white primer.  I found using Gesso watered down works very well on figures.  The paint will adhere to it very well.  ALso,  it all depends on the material the figure is made of.  These English figures do not require a primer. 

As far as markers go, Statler fine tip markers, from Dick Blick, are the best ones.  You don't want paint markers.... Prisma Color fine tip, and Sharpie extra fine tip are also very good'....

Tomlinson Run Railroad, Thanks very much'..  Your nice comments have made my night as well.   I found this car on the bay'. A Corgi Classic.  A guy in California was selling it for $6.99.  & 6 bucks shipping.  The figures I finished up painting today when the car arrived.  So I thought I'd take a few pics.. As I mentioned before, No rehearsal, or preparations.  Just a quick shoot on the deck with the wind blowing.  I never imagined they would come out as good as they did.... Thanks again'..😬

PS: Put your Bugatti on the thread.  We are not regulated by scale per say'.  I think everyone would like to see your car'...

Ted, great looking '57 BelAir!  The figures are incredibly realistic, and the paint job you did adds to the "real" appearance...the figures appear to be resin?  You must have a much steadier hand than I do to get the detailed results you did.  You have the "blonde" hair shade and color down perfectly

As some of the guys mentioned above, I thought the scene was actually real at first glance!  My favorite colors on the '57...black and white with silver cove!

Last edited by Capetrainman

Ted, great looking '57 BelAir!  The figures are incredibly realistic, and the paint job you did adds to the "real" appearance...the figures appear to be resin?  You must have a much steadier hand than I do to get the detailed results you did.  You have the "blonde" hair shade and color down perfectly

As some of the guys mentioned above, I thought the scene was actually real at first glance!  My favorite colors on the '57...black and white with silver cove!

Thanks Paul'. HA', some days the hand is shakey.. I was just lucky the past few days....😁

                         Latest acquisition:

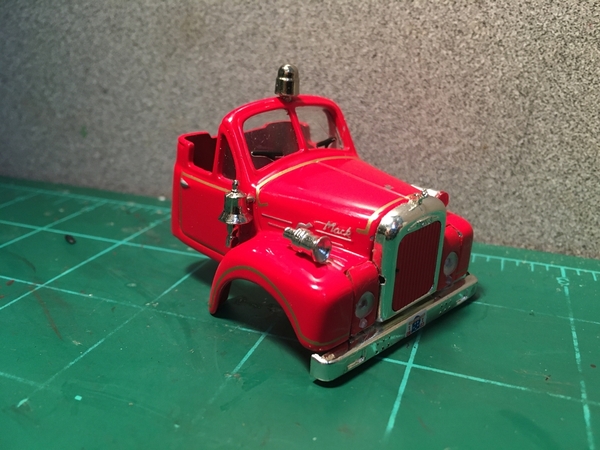
I only have one fire engine on they layout.  So when I saw this and only $25 bucks, free shipping, I had to get it. A Corgi special collectors, Mack Semi, American Lafrance, Hook and Ladder.  Actual Chicago Fire Dept replica.  1/43 scale 11 inches long.

P1020496P1020514P1020498P1020512P1020500P1020517P1020508P1020518P1020499

Nice fine and price Ted. These Corgi Mack’s are all 1/50 scale

Lee, the paper work and certificate of authenticity state this is a 1/43 scale model.  I compared  it to other 1/43 macks, I have and they are identical...  Perhaps because it a special  collectors model... it was manufactured in 1/43 instead of 1/50...?

Ted corgi never change the Mack molds  its 1/50 scale. Try measure the width of the front of  your truck.  B Model Mack’s are 94.5” wide. Here’s a the exact same corgi cab you have besides a New Ray B Mack. The New Ray is 1/43 the corgi is 1/50.

Attachments

Images (3)
  • EFFCF0D6-5BD0-4974-BF2F-226AB1689441
  • DBCD09B5-4605-4A4C-97D9-CE53D798629F
  • D72F34AF-C778-4EE0-B613-7A7D1E541092

WOW Ted, Now that is one sweet fire engine! I am going to have to try and keep my eyes open for one to put on my layout! Where did you score it from?

Lee, at the rate your going your going to have a truck fleet that surpasses your rail fleet! LOL Really things are looking great at the Lee truck manufacturing company!

Joel, I think I have figured out how to print the plates, I have one question for you. Do you want them printed out on Photo paper or decal paper?

@JDFonz posted:

Hi Mike, I think decal paper would do the trick.  Thanks again.

Joel

Mike, and Joel,  They recommend using photo paper'... It wil lstick better with a dab of white glue as it is thicker than the decal paper.

Mike, you can send me a set on photo paper.... I want to see how they come out.   I need a new printer. the two I have stopped working...🤬

I'll email you the address'...😁✉

Hello Cousins'...

The formula I have for measuring diecast cars/trucks, is as follows.

Length converted to Millimeters. Divide by 4828.54 for actual scale.

Length xxx MM = xxx  (÷) by 4828.54.

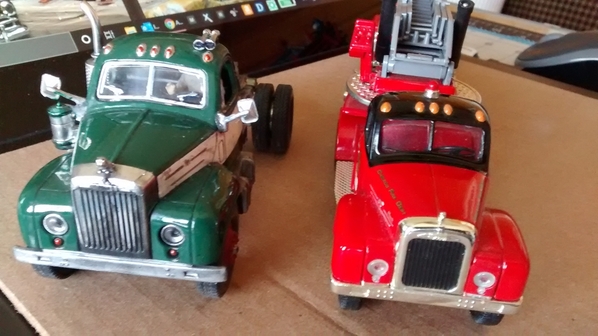
Results:  The Corgi Fire engine measures exactly, 48.045174 It is not 1/50.  It is a 1/48 scale model.  Not sure why the paper work and seller stated 1/43.

Measured against a 1/43 Mack. the results are.  43.305291. using the same formula.  See photo for both vehicles. 

So, Lee you are correct, as the fire engine is closer to 1/50 than 1/43. When I compared it to one of the Macks I have, it turned out is was a 1/50, and I thought is was/1/43... (LO))..

The Green Mack is 1/43.

IMG_20210326_162551682IMG_20210326_162440808

Attachments

Images (2)
  • IMG_20210326_162551682
  • IMG_20210326_162440808

Hello Cousins'...

The formula I have for measuring diecast cars/trucks, is as follows.

Length converted to Millimeters. Divide by 4828.54 for actual scale.

Length xxx MM = xxx (÷) by 4828.54.

Results:  The Corgi Fire engine measures exactly, 48.045174 It is not 1/50.  It is a 1/48 scale model.  Not sure why the paper work and seller stated 1/43.

Measured against a 1/43 Mack. the results are.  43.305291. using the same formula.  See photo for both vehicles.

So, Lee you are correct, as the fire engine is closer to 1/50 than 1/43. When I compared it to one of the Macks I have, it turned out is was a 1/50, and I thought is was/1/43... (LO))..

The Green Mack is 1/43.

IMG_20210326_162551682IMG_20210326_162440808

Ted, some impressive math skills on display here...still sharp at 1/48...in fact, there are so few accessories (cars, trucks, people, etc.) available is 1/48 to mirror the scale of the vast majority of our trains at 1/48, it 's good to see your fire engine is 1/48th.  There may be one just like yours showing up here before too long!

Let's just say I'll be looking for a O scale Dalmatian dog real soon...

Last edited by Capetrainman

The entire family go with Dad to look a used station wagon for sale. It will be a new car for them if they can get the seller to drop the price.  However, it is pristine condition and is a gorgeous car'.  Grandma & Papa consider helping out with a contribution.  Lets see how Loyd makes out...😲 Connie, Loyd's wife has her doubts and doesn't think they can afford such a nice car, as they arestill waiting for their stimulus check'...💲💰😢

P1020486 [2)


P1020479


P1020491


P1020493 [2)P1020478 [2)

Well,  unfortunately, Loyd, couldn't together with the seller on the price he was asking.  Connie, tells him, now worries, we'll find something else.  We'll just have to wait a little longer to take our family trip....

Fantastic scene! Where did you get those figures?

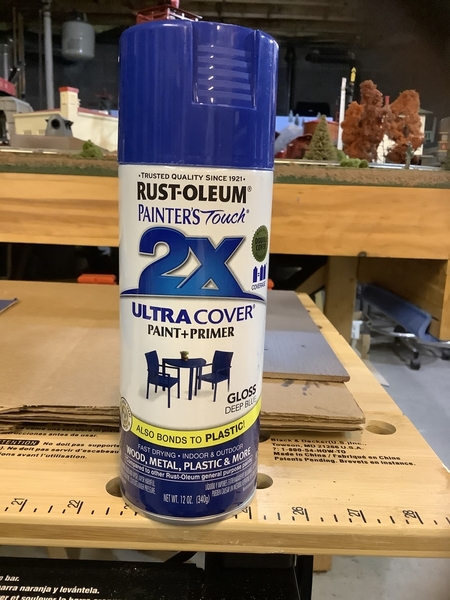
Hi, does anyone know why this crazing appears after painting? I’ve sanded them out and applied another coat in a few places, but I don’t want to put on too many coats. Could I be spraying too close or heavy? I’m using Rustoleum gray primer, and the blue final coat is also Rustoleum. Thanks, I want to finish this build.2B5EFCD2-2D5E-4736-9B77-8F91FDECF9D7

Attachments

Images (1)
  • 2B5EFCD2-2D5E-4736-9B77-8F91FDECF9D7

Hi Artie, I use Testers plastic cement on any windows, I don’t scrape paint off, but it certainly doesn’t hurt. I use the thin liquid that drips from needle tip. Use capillary action, it flows where it needs to.

As far as the paint issue, I have had that happen as well. I usually wait a good day or two before putting paint over primer, want to make sure it’s completely dry. And yes, like myself, I think I get carried away and get too close with too thick of coverage. Move back a bit and try more light coats instead of one or two heavy coats. That should help.

Joel

@Artie-DL&W posted:

Hi, does anyone know why this crazing appears after painting? I’ve sanded them out and applied another coat in a few places, but I don’t want to put on too many coats. Could I be spraying too close or heavy? I’m using Rustoleum gray primer, and the blue final coat is also Rustoleum. Thanks, I want to finish this build.2B5EFCD2-2D5E-4736-9B77-8F91FDECF9D7

Did you wash you model before primer? That’s called Crows Feet it’s caused when there’s a residue or your model and the paint is having a reaction to the primer like mixing lacquer acrylics and enamel paints. Although most primers are  resisted to this some are not also the oil from you fingers will do this if you handled it. After sanding did you wash it with a mild soap? If you did not wash it after sanding you probably brought out more mold release in the plastic I would soak this in Brake fluid for a couple days till the paint bubbles off of it then clean it off real good then wash it was soap and water I would use Dawn dishwashing liquid let it dry for at least several hours do not touch the model with your bare hands then paint it again with primer let the primer dry for at least a day and then paint it with very light coats building up to your main color

Last edited by lee drennen

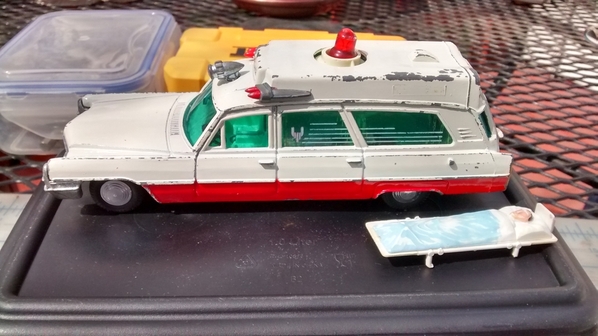
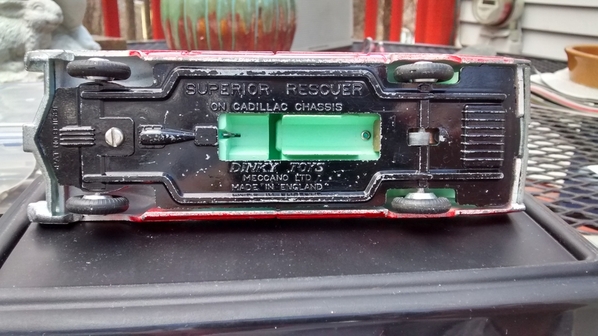
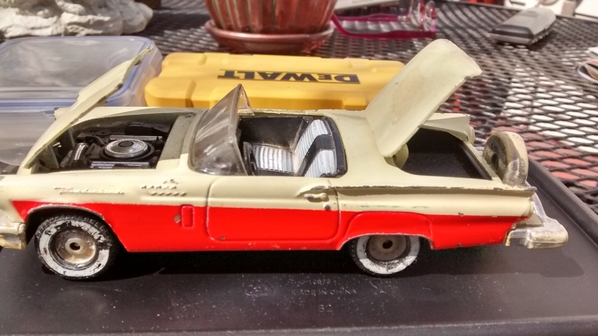
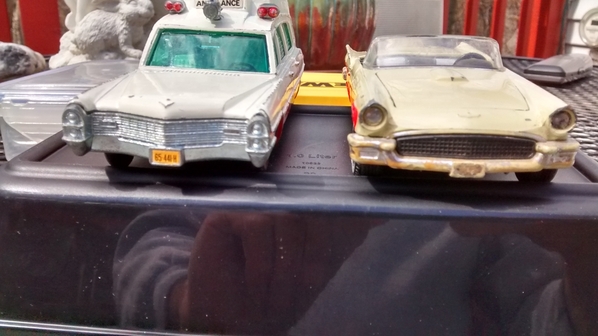
😁 Hello Agiain my Cousins'.. Latest restoraton projects in the que'.. Both of these items were listed as 1:43 scale vehicles.  Upon arrival they are not. Ebay Sellers are not on their game lately when it comes to scales'...👺

The Caddy ambulance,  is a 1:32 scale vehicle.  The T Bird is a 1:36 scale vehicle.  Here is their current appearance... The Ambulance has a triple A battery compartment. When the rear wheels turn it activates the red light. The bulb is shot, but the circuit component is intact.  I'll see if I bring it back to life....

The hood and trunk open on the Bird, and there's a motor in side, along with a carpeted trunk liner... Next photos posted will be finished restorations...😉


IMG_20210327_131822946_HDRIMG_20210327_132319103_HDRIMG_20210327_131902875_HDRIMG_20210327_132128764_HDR

Attachments

Images (4)
  • IMG_20210327_131822946_HDR
  • IMG_20210327_132319103_HDR
  • IMG_20210327_131902875_HDR
  • IMG_20210327_132128764_HDR
Last edited by Quarter Gauger 48

Thanks, Lee. Yes, I wash all the parts in Dawn to remove the mold release, and then let it dry for a couple of days. From then on I handle the model with surgical gloves. I use paints from the same brands also. The primer laid down nicely. I think I painted too soon after priming, and since we had warm weather I may have painted with too much humidity in the air. In addition, I think I moved in too close with the spray can to avoid breezes. I use a large cardboard box as a booth, and paint outside. I sanded down the crows feet, now, and wiped the area with a paper towel and distilled water. I’ll wait until the next warm spell. I think you can see it’s only a small area. It should only take a very light coat at this point.

Thanks for the advice, and I’ll let you all know how it comes out. Take care, Artie.

@Artie-DL&W posted:

Thanks, Lee. Yes, I wash all the parts in Dawn to remove the mold release, and then let it dry for a couple of days. From then on I handle the model with surgical gloves. I use paints from the same brands also. The primer laid down nicely. I think I painted too soon after priming, and since we had warm weather I may have painted with too much humidity in the air. In addition, I think I moved in too close with the spray can to avoid breezes. I use a large cardboard box as a booth, and paint outside. I sanded down the crows feet, now, and wiped the area with a paper towel and distilled water. I’ll wait until the next warm spell. I think you can see it’s only a small area. It should only take a very light coat at this point.

Thanks for the advice, and I’ll let you all know how it comes out. Take care, Artie.

Humidity does play a big factor but if it was me I would dig the box and paint in the open boxes sometimes can get paint dust while painting even though the box is clean. I’ve also painted outside in the warm weather then take it inside to soon and house will be cool and the paint has a reaction to it.  

😁 Hello Agiain my Cousins'.. Latest restoraton projects in the que'.. Both of these items were listed as 1:43 scale vehicles.  Upon arrival they are not. Ebay Sellers are not on their game lately when it comes to scales'...👺

The Caddy ambulance,  is a 1:32 scale vehicle.  The T Bird is a 1:36 scale vehicle.  Here is their current appearance... The Ambulance has a triple A battery compartment. When the rear wheels turn it activates the red light. The bulb is shot, but the circuit component is intact.  I'll see if I bring it back to life....

The hood and trunk open on the Bird, and there's a motor in side, along with a carpeted trunk liner... Next photos posted will be finished restorations...😉


IMG_20210327_131822946_HDRIMG_20210327_132319103_HDRIMG_20210327_131902875_HDRIMG_20210327_132128764_HDR

You got that right Ted those eBayer are horrible these days. Like you I’ve gotten stiffed on the scale size. These days if I see something I want and don’t recognize the scale I google it first then if it’s right I’ll bid on it. Good luck with it

Last edited by lee drennen

Lee, Looks like you have a great start on the fire engine! I see it has gold trim around the door. Did you free hand paint that?

Artie, Most likely there is something on the primer. Since you have re sanded it and washed it again, I would suggest to wipe it down with Wax & Tar remover and let it dry for a day or 2.

Ted, Good luck on your new project cars! I feel your pain I was told once everything was 1/48-1/50. So I bought the lot. When it got here the only thing right was one truck everything else would work perfect for HO Layout! I am looking forward to seeing the finished product!

@Artie-DL&W posted:

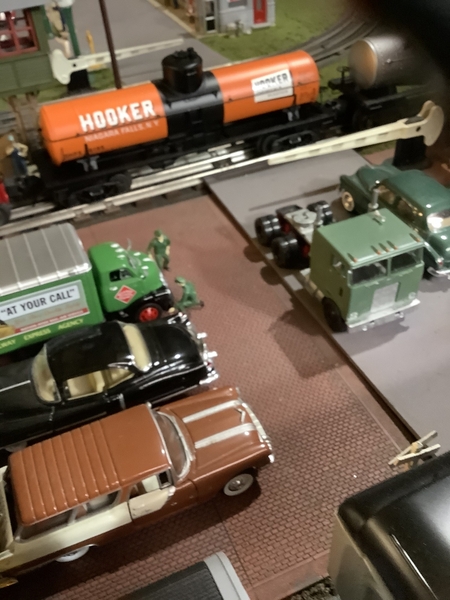
Thanks, Mike. I just realized I need to paint that stake trailer a more realistic color than that yellow!

Great thing about the hobby Artie, our work is never finished'.. Everytime we look at the layout we see yet another project that requires our attention...  Nice looking vehicles and layout'...

Last edited by Quarter Gauger 48
@lee drennen posted:

The Purple kinda of Nail Polish remover with a Q tip dip it and rub on the lettering gently and wipe with another Qtip

To remove paint I sometimes soak them in brake fluid in a tub with a lid on it for a week great when you have other projects going on or Air craft paint remover for metal models for faster results and never put resin models in brake fluid it turns them into a big wad of chewing gum

Ted, that's a big restoration job right there...nicely detailed vehicles.  Looking forward to seeing the finished products!

Lee, that "fire engine" red color is spot on...you've got the makings a sharp looking unit right there, especially with the accessories you've added!

Artie, you've got some nice rigs there...I'm in the process of building my fleet a little at a time...

All you guys have incredible skill and blessed with patience in bringing your restorations to life...I'm hoping to finish off the scenery today showing the diesel soaked ground surrounding the "Charles Street Yard".  From decades ago, I can still remember the smell of diesel and the appearance of the black ground from NH units running 24 hours a day.  I'll post a pic later on today...

Looks to me like the last coat of paint attacked the previous.

Using rattle cans, in some cases, actually requires more care than using an airbrush IMO.  First, the pigments in a spray can product are not as fine as in a model paint product.  Second the spray can is far less controllable- it is ON or OFF - no in between, which often leads to too much paint for a scale model or runs, or the crazing you got.

It looks like the solvent in the most recent coat is attacking the underlying coat.  It can be as a result of too heavy a coat on the last one- or of the underlying coat not being dry enough before overcoating. You should probably either remove the paint using a series of solvents- like Denatured alcohol, then (if that didn't work) mineral spirits, then finally lacquer thinner.

Good results are possible with rattle cans.  SO you don't have to have an airbrush.   To get better results-

1. I assume you did not use a primer??  (If so, it is possible that the primer (especially of a different brand of type than the top coat paint) is getting attacked by the color coat.  Use the same brand and type of primer as the color coat. BUT using a primer often covers fine details like rivets etc.

2.  If you use the center of the spray pattern and/or too close- that part will be too heavy, and above and below too light.   (You cannot spray it TOO light, assuming you are not 2 feet away. )  Apply just mist coats, using 3 or 4 coats for the job with drying time between.  I start off ahead of the object and pretty far away- maybe 12", actually painting BELOW it, and use the outer edges of the spray pattern to actually paint the train. Then move up a little when going the other direction.  Move the can rapidly to avoid runs.  Maybe make three passes to try and mist the whole thing. Practice on a piece of cardboard.

2. Start OFF the object to one side, with the nozzle 12-15" away, starting to paint with the center of the spray pattern below the object.

3.  Move the can in one direction from off of one end, until the nozzle is beyond the other end.  Repeat going the other direction, moving the spray pattern about halfway up, then a final pass in the original direction. Then let it dry 5 minutes or so. Wait for 5  minutes or so between coats but not over 24 hours.

2B5EFCD2-2D5E-4736-9B77-8F91FDECF9D7

Happy Sunday Folks, Thought I'd highlight motorcycles today. I learned how to ride a motorcycle at age 12, on a dirt track know back then as "Scramblers"  My Brother in Law, was a racer, and Harley shop owner.  I rode up until a few years ago, but stopped  due to the psychos on the road..  Any way, I've always loved the english bikes. Not too many in O scale. But here's a few from Germany, by "Schuco Piccolo".  Pricy, but worth it as you will see.
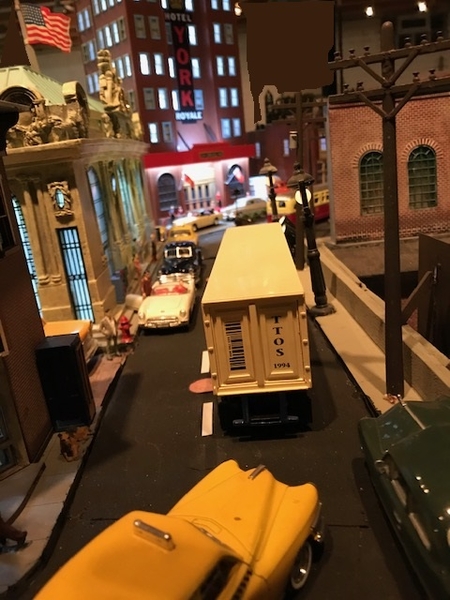
P1020459

BMW R-6

P1020468

Triumph 500 Tiger'

P1020458

Horex Regina - 250

P1020462P1020444

Action shot'..😃

Attachments

Images (5)
  • P1020459
  • P1020468
  • P1020458
  • P1020462
  • P1020444
Last edited by Quarter Gauger 48

Thanks for the input, Mike. I did use a compatible primer, but as you mentioned, I went in a little too close and wet on that area. I have used an airbrush, but you can get a good finish with a rattle can. I just finished a Plasticville coaling tower in another post, and it came out well. The next warm, un-windy day, I’ll try again. I just tried to rush it.

@Artie-DL&W posted:

No worries, Lee, I just used fine sandpaper, and leveled off the finish, cleaned it, and will wait for a nice day, and just lightly hit that area. I like that blue, which looks close to Sunoco blue.

Good sounds looks like you have this under control. Do you mind sharing what color Blue you are using? I never use a airbrush don’t even own one not worth the hassle been using a Rattle can for 40+ years and I’m happy with my results and if I don’t use a Rattle can I hand paint my models

WOW a lot of good advice being given here! I will try and soak everything in!

Ted, Great looking scenes and bikes, but I have to agree with Paul that gals that the bikers bring along don't leave much to the imagination! But hey I am ok with that! LOL

Artie, I also like the deep blue, I have the same can in my garage. Its the same color I used to paint my scratch built silo's for my Morton Salt building! Great rattle can Paint!

John, you sure have a vast verity of military folks on your base! I sure hope they are all on the same side! LOL Great looking new rigs!

Paul, the dealerships look great together! I know around here you can go down Auto Row and have every dealer of almost every car made right next to each other! Once again I love the night scene!

John, just checking, wanted to make sure there were no spy's that might have snuck there way on to base!

Great job everyone!

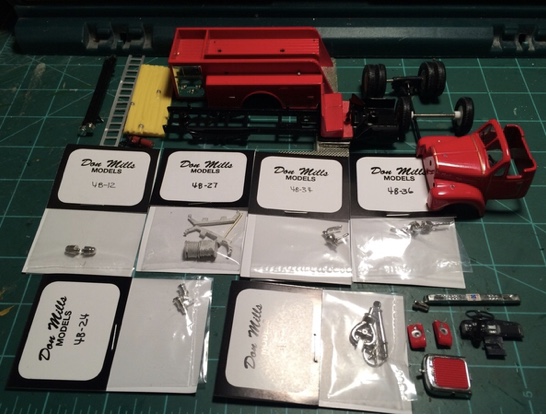
All the kits that everybody is posting is starting to pique my interest at trying my hand at one. There’s more to that which I’ll put in a follow-up post to provide some context.

Found some ice diecast this past weekend at the Renninger’s train meet!

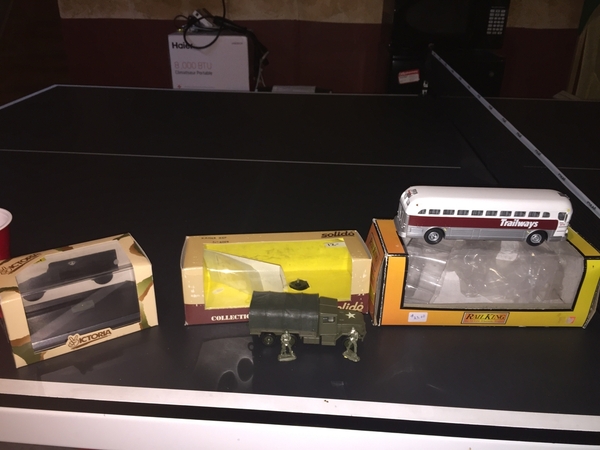
MTH Trailways bus! Might not seem too special but it’s a nice, realistic, non-geographically tied bus-as opposed to the Lionel by Corgi coach and the Eastern Michigan Yellow Coach( it replaced the later).

0DF5A921-A4CF-4AE0-8861-6B6DC5058D64

Was very excited to find these next two at $10 each!- Solido 1/50 Kaiser Jeep10A400EE-A9C2-419F-8387-CB3864857A87

Victoria(Vitesse) 1/43 United States Army Hummer45192B3B-4CCF-4688-95F0-B9EEA4CE28DD

all came boxed, which was nice. Especially for the Solido since it had the decals, instructions for placement, and the 2 soldiers30940E5D-E775-47F9-BA0F-1DB421EE155E

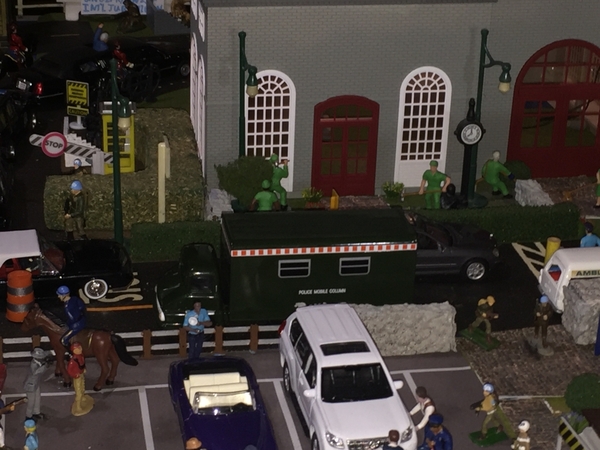
from eBay, arrived last week. Found this at a BIN much below what I normally see it at and had to bite. Corgi Classics Mobile Police Column:

58D31841-558C-4022-839D-48AD53678524

Last pic for now- shout out to @Quarter Gauger 48 , @mike g. And @JDFonz for helping with this! Got the tires for my 623 Dinky Army Wagon off eBay from the seller you recommended- love it more than I thought I would! The soldiers fit nicely and IMO looks right at home behind the 670 armoured car. Thanks a bunch, guys!

60AB6E78-332F-41D3-AE23-423A87409230

Thats all I was able to snap pics of this morning. Expect more to come!

Attachments

Images (6)
  • 0DF5A921-A4CF-4AE0-8861-6B6DC5058D64
  • 10A400EE-A9C2-419F-8387-CB3864857A87
  • 45192B3B-4CCF-4688-95F0-B9EEA4CE28DD
  • 58D31841-558C-4022-839D-48AD53678524
  • 30940E5D-E775-47F9-BA0F-1DB421EE155E
  • 60AB6E78-332F-41D3-AE23-423A87409230
Last edited by StevefromPA

Steve, great looking scene!

Paul, sure is a sharp looking Town & Country! I love how you do your night scenes!

David, Great fire engine display, looks like you have enough engines for a 2 alarm fire!

Nothing new from me but was wondering if Joel and got your plates yet and if so are they the right size?

@JDFonz posted:

Hi Mike, just got the plates today. They almost look a little big but I’m going to trim them down as much as possible and then look closer at them. Thanks Buddy!

im currently Peking on two items, a corgi Triumph Herald, and a dinky fire truck. I’ll keep you all posted.

Joel

Hi Joel, if there to big and you can't cut them down le me know, I will print a smaller set.

🐰 Happy Good Friday to all'.

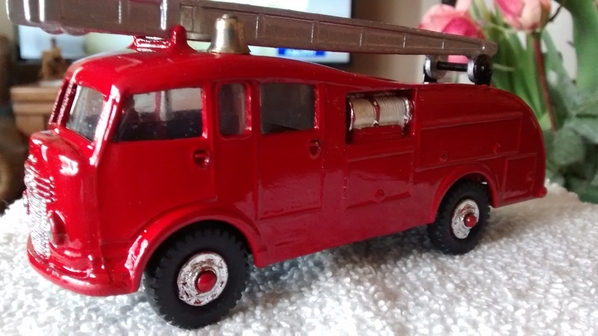
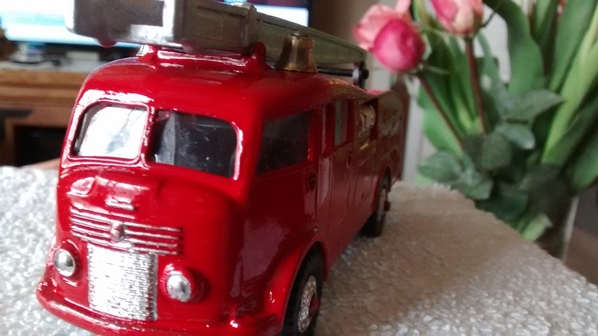
I'm sitting here looking at a  beautiful Dinky European style Fire Engine that was restored by Mike G, Forum member'.  This surprise came early this morning  in the mail .  What a nice surprise 😲 it was to receive an unexpected package containing this terrific little gem.

Mike did a great deal of work on this Dinky, and as his first restore performed a phenomenal job.  Thank you Mike for such a nice Easter present'...😀👍

IMG_20210402_125659071IMG_20210402_125815678

Attachments

Images (2)
  • IMG_20210402_125659071
  • IMG_20210402_125815678

Add Reply

Post

OGR Publishing, Inc., 1310 Eastside Centre Ct, Suite 6, Mountain Home, AR 72653
800-980-OGRR (6477)
www.ogaugerr.com

×
×
×
×
Link copied to your clipboard.
×
×