Myles, Welcome back!!

Thank you for sharing your visit to see the 2926 with us!!  The photographs do show the immensity of the locomotive!  It is great to learn that this one will be back riding the rails soon.  I have never been out that way, but I do get reports from my brother-in-law (another Butler Pennsylvania resident) who fishes in the Santa Fe National Forest annually that the scenery is great too!

Congratulations of your 50th anniversary with your lovely wife!  I'm glad she was interested in the 2926 as well!

I'm glad to be back and thanks for the nice comments. Here's the New Mexico Railroad Historical Society website that's doing the work. The project apparently started in 2000 when the engine was rescued from it's life as a park engine (and pigeon coop... most likely). Like they did with the UP Big Boy project, they had to move it from that place by laying temporary track in front and then moving that panel from the rear to the front so they could keep going.

http://www.nmslrhs.org

The site has tons of pictures and some videos that clearly show just what it takes in skill, persistence, and dedication to turn a hulk into a marvelous machine.

One last pic... he was my wife discussing locomotive reconstruction with Steve, the mechanical engineer. I'd really like to be on one of these projects. All of the skills were those I was teaching kids how to do in the early 1970s as a metal shop teacher including sand casting are being applied on this majestic job. They even set up a bronze foundry right at the loco work site to mold bearing wear plates for the radial buffer. Those Timken rods were in place on the original engine. As explained to us, it sounded like they were upgraded during the restoration. I think he was referring to this as a design upgrade in the 2900 series versus the earlier SF 4-8-4s (3700 series) that were running since the late 1920s (also Baldwin-built). The rods were removed and sent to Timken who rebuilt the bearings (still in business!!!). SF 3751 is the other SF 4-8-4 that is restored, running and doing fan trips (or at least it was). There's some great videos on YouTube about the 3751.

2926 Michele with Steve

Attachments

Images (1)
  • 2926 Michele with Steve
Last edited by Trainman2001

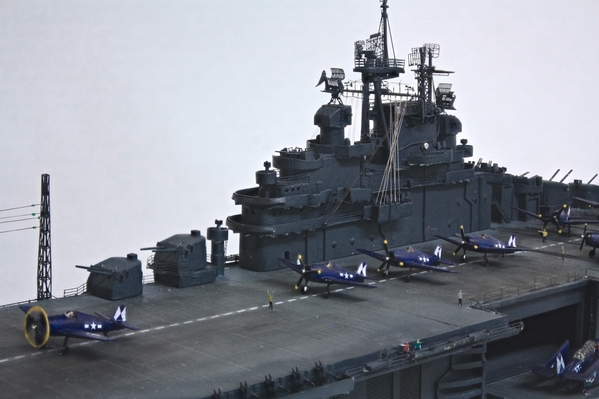
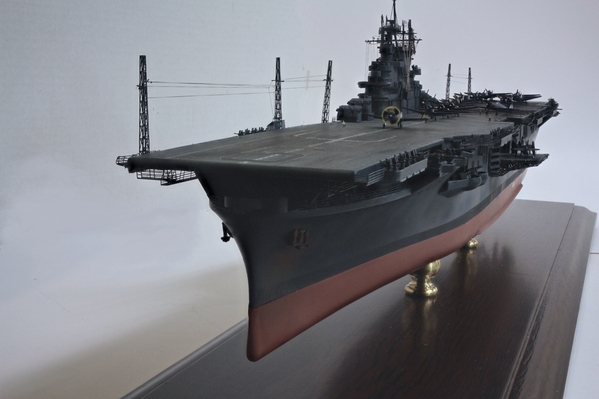
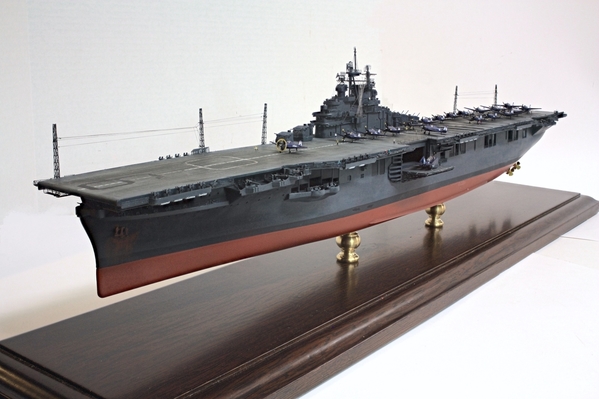
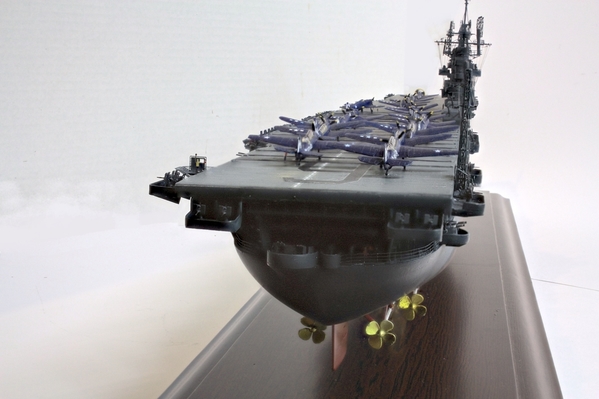
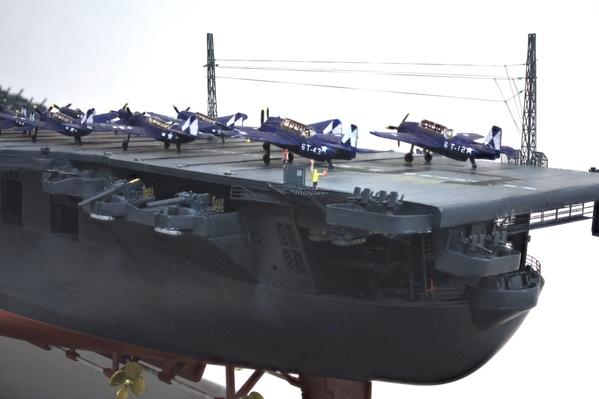
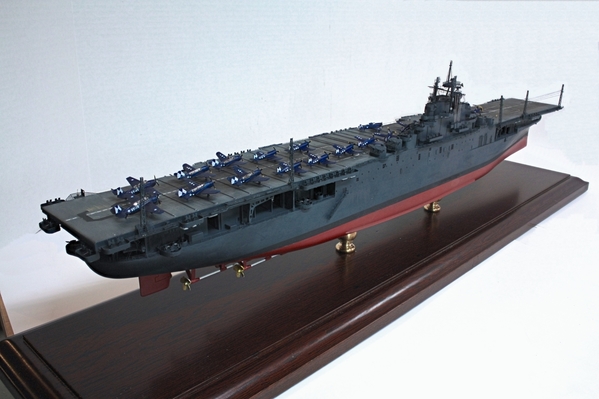
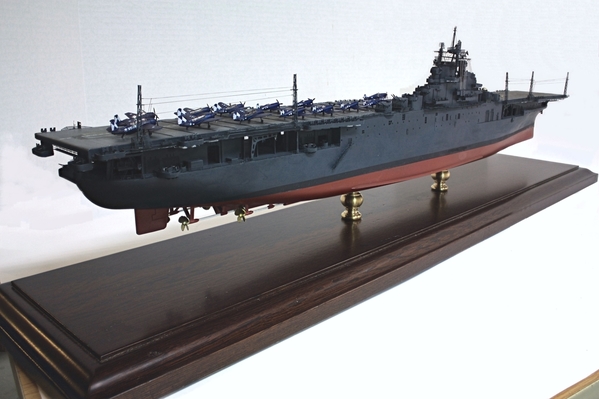
Hey there! Thought I'd check in an tell you what I've been up to. Nighthawks is patiently waiting for me to finish the model car. The Essex CV9 carrier was finished two days ago and I'm pleased with the results. It was a brutal build with lots and lots of custom work, tons of photo-etched parts to wrestle with, time spent getting additional parts to replace those that I screwed up, but it was very rewarding. I started using tiny surface mount LEDs on adhesive copper foil which I'm now going to use for building lighting. Takes some soldering skill due to their tiny size, but they're incredibly bright and take up zero room.

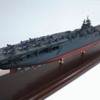
The ship sits on an oak plank made for me by my old friend in Albuquerque. I'm waiting for the plexiglass for the case to arrive. I found a Louisville plastics house that will cut the pieces on a router so the edges can be glued directly without further finishing. It's sitting with the Missouri which I built 6 years ago before starting the RR. The lights are on in the hangar.

Ships on Shelf

All the masts and yards are soldered brass. In fact, whenever I could, I soldered all the photo-etched parts. 

Essex Complete Cross-Deck

The ship is configured as it was late in the War where Corsairs and Helldivers were added to the air wing, planes were painted 100% dark sea blue, the ship was navy blue on all vertical surfaces, the flag bridge was moved forwards to coincide with the ends of the island and the 40mm gun mount that was in that location was removed. All the radar was repositioned or changed to meet it's late 1944 refit. Two additional 40mm mounts were installed in a port fore sponson that was supposed to be the location of a cross-hangar-deck catapult that was never installed in the Essex.

Essex Complete Port BowEssex Complete Port ViewEssex Complete Stern View

Again, I used E-Z Line to rig all the antennas. The tail designs are custom made decals which I drew on CorelDraw and matched the dark sea blue on the computer so the tail decals were bigger and easier to apply.

Essex Complete SternEssex Complete Strbrd Stern 2Essex Complete Strbrd Stern 3

Regarding the Ford, finally got the paint rubbed out, but wore through some paint on the high spots. I'm now adding adhesive foil to the window trim. 

GTA Chroming Rear Window

So that dear readers this brings you all up to date. I expect the Ford to be finished in about a week and then it's back to building things for the railroad. Meanwhile, one of my florescent lights was acting up and I had to go up in back to the open space. While standing there I realized that I had a unique view of the refinery and took some pics. Here's the one I like the best. Speaking of lights, one by one I'm replacing all my dual 40w florescent fixtures with LED. They go on sale at Costco for $20. They're easily twice as bright as the florescent, have better color and use 1/4 the power. Win/Win. So far, I've refitted all of them in the workshop. The railroad room will be next.

Refinery Reverse View 1

Attachments

Images (10)
  • Ships on Shelf
  • Essex Complete Cross-Deck
  • Essex Complete Port Bow
  • Essex Complete Port View
  • Essex Complete Stern View
  • Essex Complete Stern
  • Essex Complete Strbrd Stern 2
  • Essex Complete Strbrd Stern 3
  • GTA Chroming Rear Window
  • Refinery Reverse View 1
Last edited by Trainman2001

Myles, Glad to hear from you!!  I knew you were working on the carrier and the Ford and that the Nighthawks wasn't ready to go yet, so I wasn't concerned.

The carrier looks fantastic!!  Not being up on ships, I will only say that I like the plane ready for takeoff looks like it's propeller is going around!  Great!

That is a great view of the oil facility!  That was a good idea to take a photograph while up in the air changing the light!

Thanks Mark. You know I always like to show off what I'm doing to the vast audience that peers at my thread. My wife always asks me, "Are you doing the models for yourself or for what others think about them?" Can I do both? I do like the attention and it does encourage me to strive for better results. Being in the training/teaching profession my whole career and playing guitar professionally in college in front of big crowds are also forms of showing off. This is from a person who as a kid would have rather done anything instead of standing in front of a class making a presentation. I guess I'm still over-compensating.

I agree with your answer to your wife, You can do both!!  You are right, when you are doing it for someone else, it encourages you to do it a little better, and to think about it more to write it down!  I was horrified to get in front of the class, because my face would always turn red and kids would laugh at me.    It is far easier to type out replies and send photographs to show what I have done, and attempting to do, and asking for help when I know I don't know what I'm doing!  

Good news and bad news.

Good news: after a long wait just heard (yesterday) from editor of Railroad Model Craftsman mag that my article on the design and construction of the Bernheim Distillery is slated for publication as a three-part article. Don't have publication date yet, but soon. He requests that I take new pictures of the finished product on the layout using a sky blue background to block out any clutter. I bought two additional portable white boards at Michael's today, plus found 4' X 12' roll of sky blue "bulletin board" material that will make for a seamless background. I then went to Costco and picked up two more of their LED shop lights that are on sale for $20. They're about twice as bright as the florescent lights they replace and have better (less blue) color. Tomorrow I'll start changing out the lights and building the backdrop assembly and see what kind of pictures I can create.

Picked up the cut plexiglass for the showcase that's going to protect the Essex. 

Bad News: came down with shingles on Father's day. Awful! Started taking Valtrex as soon as I knew what it was and hopefully it will clear up faster rather than slower. We've been putting off getting the vaccine since we were waiting for the new advanced drug "Shingrix" that is significantly more effective then the current one. Unfortunately (for me) my luck ran out. When this bout is finished, I will still need it since it can come back again. My son had it two years ago at age 42 and is an ophthalmologist and warned me and my wife to get it since it can be brutal especially if it comes around the eyes. I had all intentions doing so. I'm in my 70s and it's the time to get it if you've ever had chicken pox. It's a nasty, mean, sneaky virus that lives in you all your life until it decides to activate. How the heck does that happen?

I'll take a half-like! The Shingles thing is my "community service" responsibility  We humans are funny… we're either convinced we're going to get something or we're convinced we're not. Neither is a rational point of view. But the randomness of illness is quite frustrating. It's one thing if you're a runner and wreck your knees… not random. Or if you've smoked for 30 years and get COPD… certainly not random. But a 65 year old virus living in you body and deciding to assert itself…Really! Give me a break. That really sucks! Shingles is not fatal, but can affect internal organs on the same nerve trail that activating. And it is especially brutal around the eyes and can lead to blindness.

Thanks guys! Shingles is annoying, but with the Valtrex and Tylenol, I managing okay and sleeping well. I do believe that it's giving me a lesser case of it.

Here's the Essex in the case I put together yesterday. I did not do the neatest job gluing it together, but it's fully functional and now that very delicate model is protected for the long haul.

Essex Encased

As things have it, I just met a very nice man my age here in Louisville who is as passionate about photography as I am about trains and model building in general. We had met earlier on a board we were on together, and he remembered that I am a proficient solderer. He had a hearing aid sterilizer that had a bad switch on a circuit board and asked if I could take a look at it. I replaced his switch and we found that we had much in common especially our professional career philosophies. Then along comes the note from RMC about needing a better finished model picture of Bernheim for the article and this gentlemen is going to help me photograph it.

Today I changed out the two fluorescents hanging near Bernheim with the Costco LED lights, and started experimenting putting the backdrop in place. Before I went to the trouble of attaching the sky blue bulletin board paper to the backdrop boards, I took an iPhone pic and sent it to the editor to see if what I had done was correct. I had two choices: put the backdrop at the rear edge of the layout, or put it directly behind the distillery. The picture I sent him was this.

Bernheim Far Backdrop 2

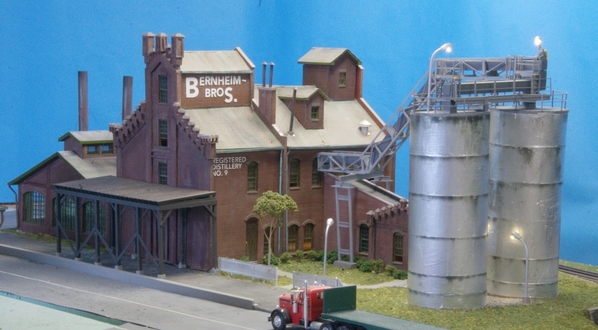
He said nearer would be better. So I moved the panels to immediately behind the model. I then took another shot just to see how it works. The photographer's bringing professional lights with umbrellas so the front of the building won't be suffering in shadow as it does. The LEDs do provide significantly more and warmer light than the florescents so every couple of months when Costco features them I'm going to pick a couple up and in a year or so all the layout lights will be converted over.

Bernheim Near Backdrop 1

Remember, all this backdrop will be blue and the lighting will be correct. It certainly isn't now. I am really excited about this article getting published…finally. I had really given up on it. Now I have to start thinking about the next ones. I should develop a more professional photo shooting area for the all the in-progress pictures. I'm noticing that folks that do construction articles regularly have their in-progress shots done with pretty good lighting and very plain backgrounds. You have to plan ahead for that.

Attachments

Images (3)
  • Essex Encased
  • Bernheim Far Backdrop 2
  • Bernheim Near Backdrop 1

I'm on the right track. Checked with RMC this morning with some test shots with the blue background. We're all set except for the studio lighting to get rid of the dark front face. Here's the set up. These are display boards available from Michael's for about $5 or so covered with blue bulletin board paper also around $5. I'm going to preserve this backdrop for use with other photographic challenges. These test shots were done with my iPhone.

Bernheim Photo SetupBernheim test

In a few minutes, my photographer friend will arrive with better cameras and lighting and we'll be in business.

Attachments

Images (2)
  • Bernheim Photo Setup
  • Bernheim test

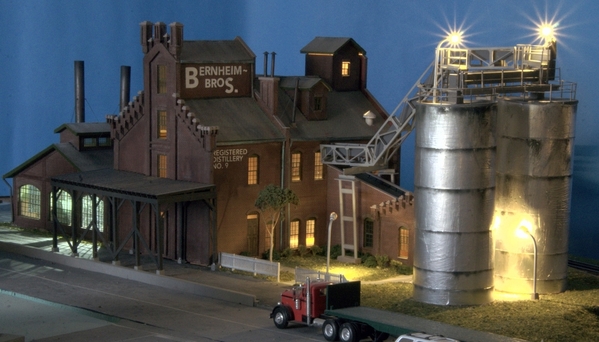
So… here's some of the pictures we took today. I have cropped/adjusted these. The editor is getting RAW, unmodified images which magazines prefer since they have the most adjustment latitude. I shot some pictures with my Canon EOS before he came and only used the LED overhead lighting, plus the LED spots that I have aimed at the town. He came equipped with remotely operated strobes and diffuser umbrellas.  I've sent the editor those that he took. If he wants to see mine, I would be happy to offer them.

This one was shot with no room lights on and is quite dramatic showing the lighting.

Bernheim All Flash 3

This had room lights on as well as the fill strobes.

Bernheim Final 3

Here's the setup: (Shot with iPhone)

Bernheim Photo Setup

Here's one from my Canon with just room lighting.

IMG_7498

I'll let you all know when the issue will come out. The Ford Fairlane is one day away from completion and I'll be back onto Nighthawks next week. My caricatures are about 10% oversize. I've reprocessed that so they'll be ready for the display I'm going to make. The model presented some real challenges including opening that door and having to mold a new windshield out of 0.010" sheet styrene in a Sculpey mold after the original cracked in half. I also had some paint problems doing it outdoors (pollen infestation). All that's missing is the tiny GTA badge that goes in that blank space in the racing stripe and a final polishing. The 66 Fairlane GTA was a nicely proportioned car. They got much bigger in later years.

GTA Almost Done 1

As I was crawling around the layout setting up the backdrop I came to the awful realization that my city streets need to be ripped up and redone. The Strathmore-on-green foam was a failure on many levels, but since the dishwasher leak, the moisture put the nail in the coffin and has the paper delaminating all over the place. It looks like crap and doesn't meet my standards. It's a miserable job to do now since all the structures and landscaping is all around. I may remove paper and use grout as a road surface. It looks very real and hopefully won't delaminate. I may just paint the foam directly, or use thin Masonite as a road surface. Anything but what I've got now.

Attachments

Images (5)
  • Bernheim All Flash 3
  • Bernheim Final 3
  • Bernheim Photo Setup
  • IMG_7498
  • GTA Almost Done 1
Last edited by Trainman2001

Thanks Mark! I added one more detail to the Ford before putting it on the shelf, a set of scratch-built semi-scale hood hinges. I found pictures of a set of 66 Fairlane hood hinges on eBay which I then used as a template to draw a detailed drawing on CorelDraw. I pasted multiple copies of the drawing onto some styrene and cut the parts out. I used some photo-etch brass free material for some of the smaller arms, and use 0.025" round styrene rod for pins. Because of all the plastic, the hinges are not robust enough to actually operate although they are mechanically correctly and do move properly, but they're flimsy, so I applied thin CA to the assembled hood to lock it into place.
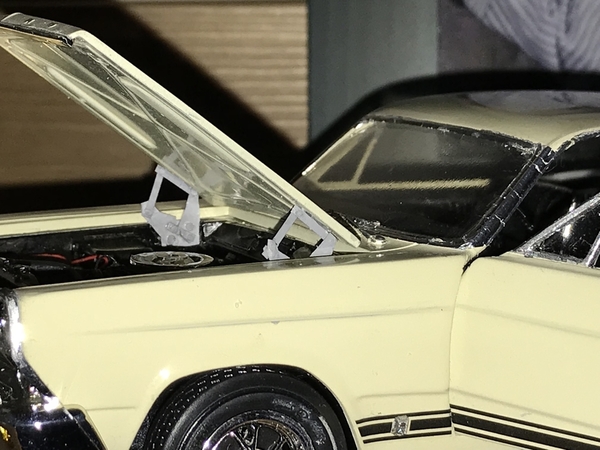
GTA Hinges Installed 1

All that's missing are the counter-balance springs. If I were to build another car model AND wanted to make these fancy hinges workable, I would make them entirely out of brass and add some springs (either real or simulated). There would be so much drag in the mechanism that it would hold up the hood regardless.

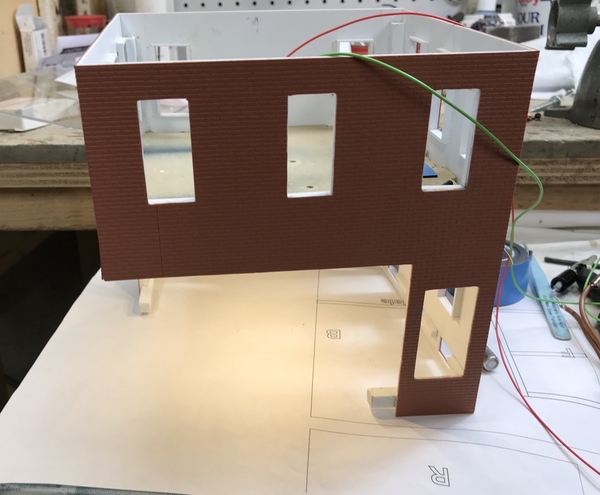
Now… onto Nighthawks. As promised I started back at work on it today. I got the second floor (first floor ceiling) fitted. I had to notch the heck out of it to clear the widen window boxes so it would settle down onto the floor supports. The second floor will not be decorated and will be blacked out, so the way the floor fits is immaterial. I did not attach the floor yet since there's a lot to do before that point.
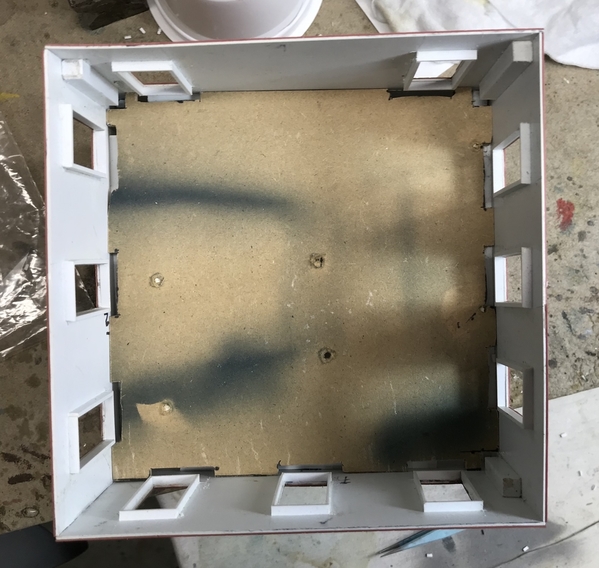
NH Ceiling Fit

But, what I did do was get the lighting installed. I used the very small surface mount LEDs soldered to adhesive copper foil laid out in a series pattern. I found that these small LEDs, while very bright, are also very delicate and heating too long while soldering does seem to kill them. I test them when isolated and then again when soldered into the foil and then again as a circuit. I'm now using CL2N LED driver chips. These little marvels eliminate all the guess work about what to do to limit the current in the circuit. You put the plus voltage on one of the three leads and the minus on the other end (the middle lead doesn't connect to anything) and regardless of whether you put 5 VDC or 90 VDC all you get out is 20 milliamps, which is just what the LEDs love. The limiting factor is the voltage drop across each LED. Each drops about 3 volts, so in a series circuit, with 4 LEDS, that's a 12 volt drop and I'm driving it with a 12VDC power source so all's well. If I was using a 6 volt source, I would use two drivers in a parallel circuit with 2 LEDs in each leg so each leg would drop the 6 volts. Again, I no longer have to worry about current. So with a 90 VDC power supply I could drive 30 LEDs in series with just one LED driver chip. This is so much easier than calculating the resistor values needed in conventional LED systems.

Here's the lighting under test.
NH Light Test

And here's the array. The positive and negative terminals are on the bottom of the LED. They're close together so you cut about a 1-2mm gap in the foil, tin the foil, hold the LED on the solder and then heat each side until the LED settles in, and then get off. Again… too much heat and you can kill the LED. They're only $0.29 each so losing one or two is not a big deal.
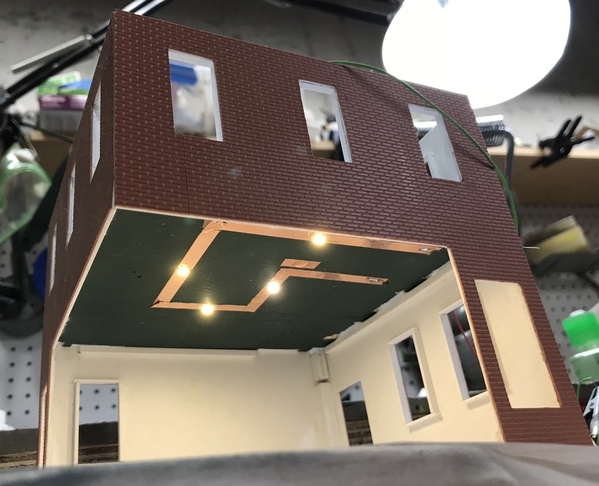
NH Light Test 2

I form the copper tape corners so I don't have to solder them. This is a trick I learned in the 70s when I was installing old school burglar alarms with the led foil tape on the window glass. The foil had to be continuous so you bend it back on itself, turn it 90 degrees and keep going. From this view you can see the widened window boxes. I will put on "sheet rock" to make regular looking walls.

I then masked each LED with a small piece of tape, premiered, and painted the ceiling flat white.
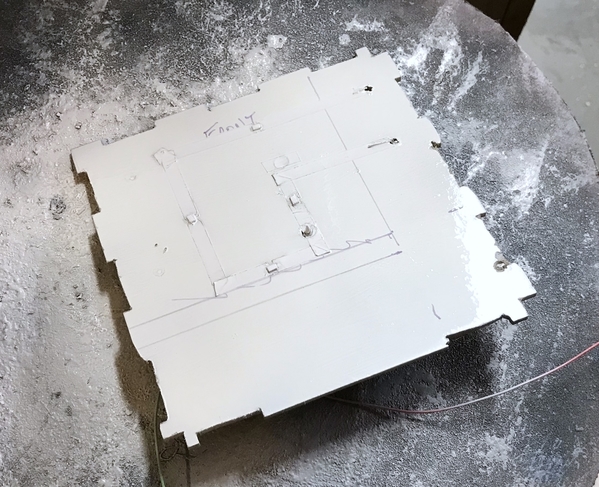
NH Ceiling Paint

The last thing I did today was add the Plastruct stone wall appliqué to the bottom scale 3 feet of the building. This will be painted to simulate stone. I'm letting it dry over night and work on it tomorrow.
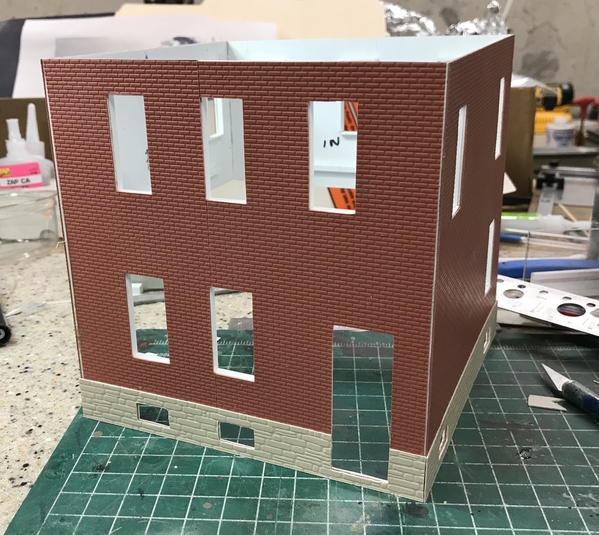
NH Stone Glued

The Plastruct stone worked well in this application since it had nice smooth courses  and makes a nice straight top edge which building foundations have. The windows mount from the inside to reveal some brick wall thickness. I'm using conventional Tichy windows turned upside down and mounted from the back which puts the upper sash on the outside and the lower on the inside as it should.

I realized today that the small, bottom, upside-down turret is nestled into the building so 3/4 of it is exposed. That means that the piece has to have a 90 degree notch cut into it, or I have to cope cut the buildings wall so the turret slips into it. I will probably be easier to cut the turret, but it has a ball bearing epoxied to the apex and an aluminum shaft that was used to hold it in the lathe chuck when I made it. I believe that an abrasive cutoff disk in the Dremel could handle the metal parts. We'll see.

I'm at a point where I have to pre-plan the assembly carefully. The interior probably has to be completely fit before the front window assembly goes in since it will hard to do it from the top down. It's also tricky just getting the floor plate into position without any walls or furnishing in place. I spend a lot of time just staring at what's built so far and building it in my mind to figure out the best approach. That's the one challenge with scratch-building that people don't speak about much…no instruction sheet. I also have to figure out the best time to paint the exterior since I can have the windows installed so painting should happen soon.

Attachments

Images (6)
  • GTA Hinges Installed 1
  • NH Ceiling Fit
  • NH Light Test
  • NH Light Test 2
  • NH Ceiling Paint
  • NH Stone Glued
Last edited by Trainman2001

I really appreciate the work you've put in on the LEDs.

By the way, a friend I road raced with 40 years ago restored a 66 vintage race car, the Fairlane, like your model and campaigned it in the SVRA. The chassis was set up basically like the racing Shelby GT 350s since they're so similar to the early mustangs.

Great work as always

Add Reply

Post

OGR Publishing, Inc., 1310 Eastside Centre Ct, Suite 6, Mountain Home, AR 72653
800-980-OGRR (6477)
www.ogaugerr.com

×
×
×
×
Link copied to your clipboard.
×
×