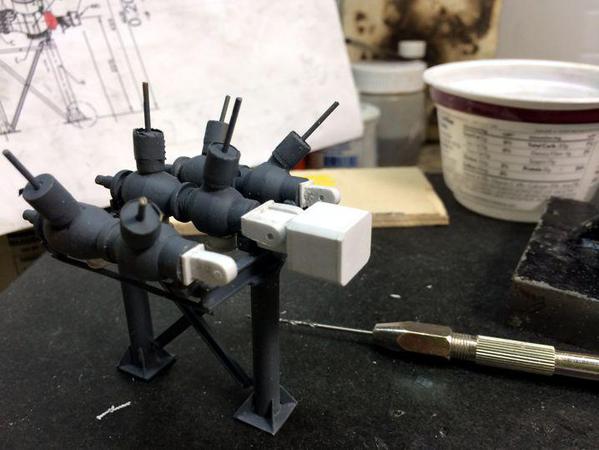
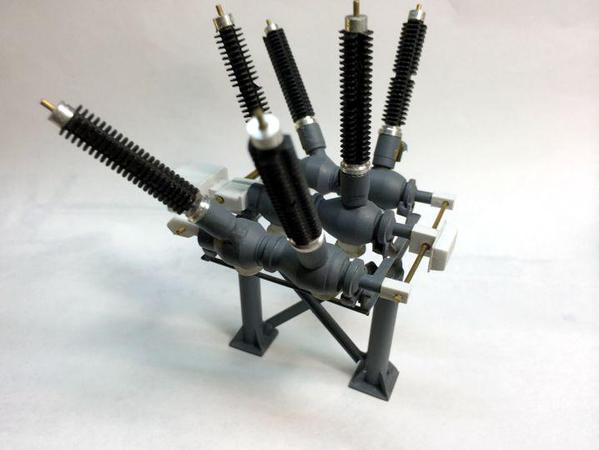
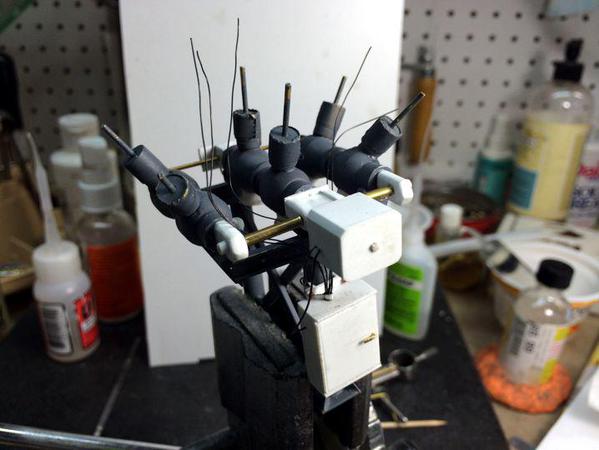
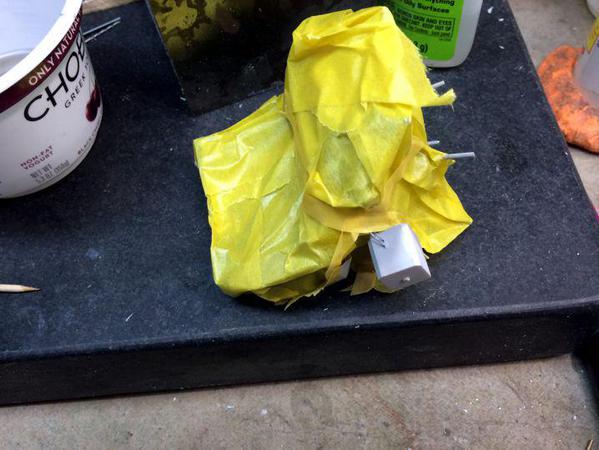
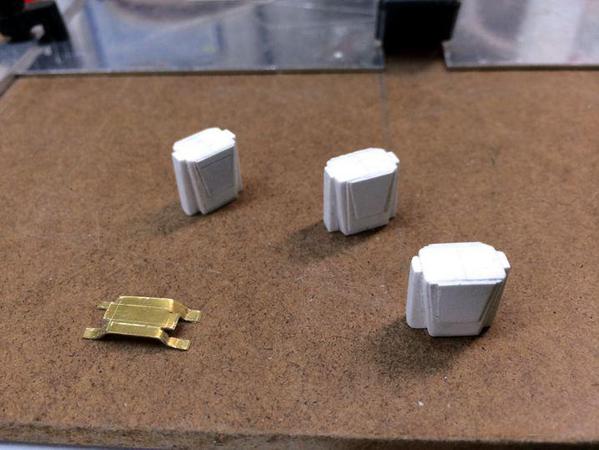
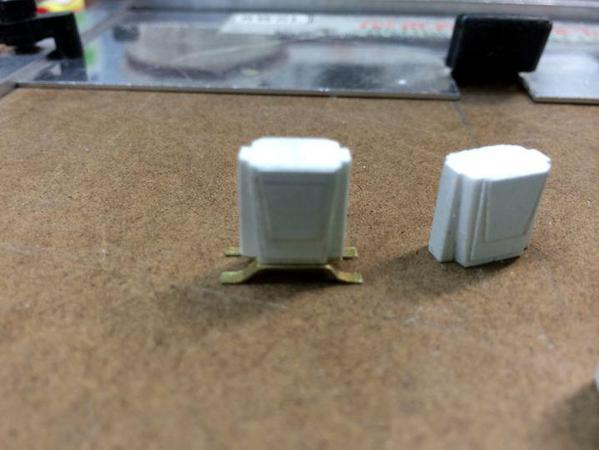
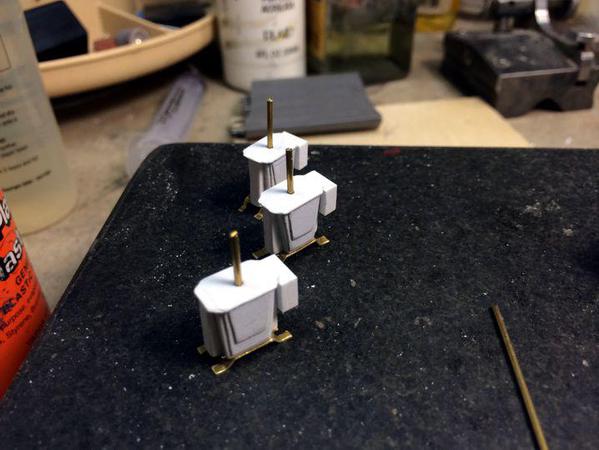
As I do each day... Thanks! It's a shame that I'm putting all this work in AND IT DOESN'T DO A SINGLE THING MAKING THE TRAINS RUN BETTER. It will make the trains LOOK better.


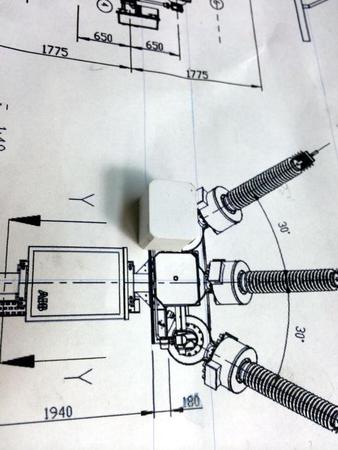
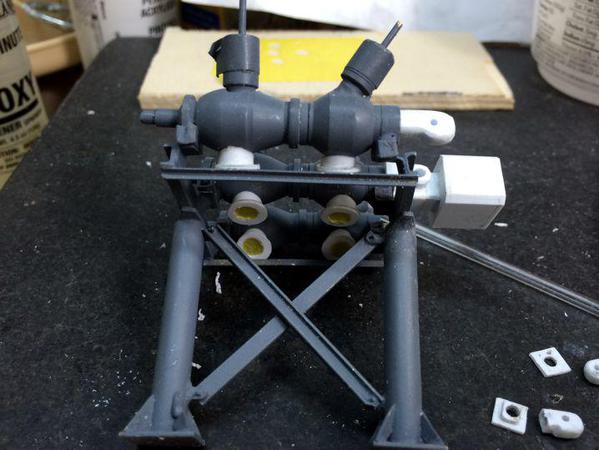
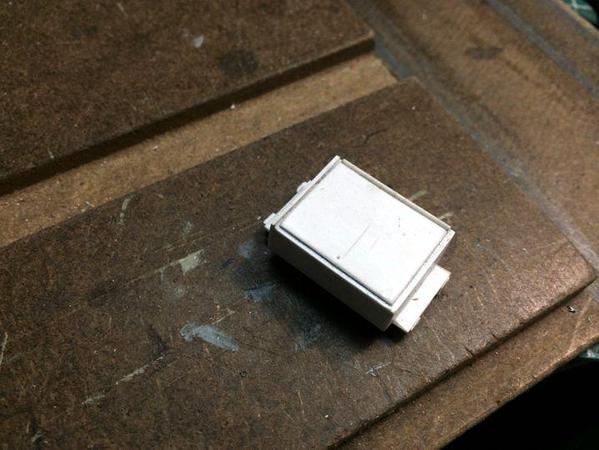
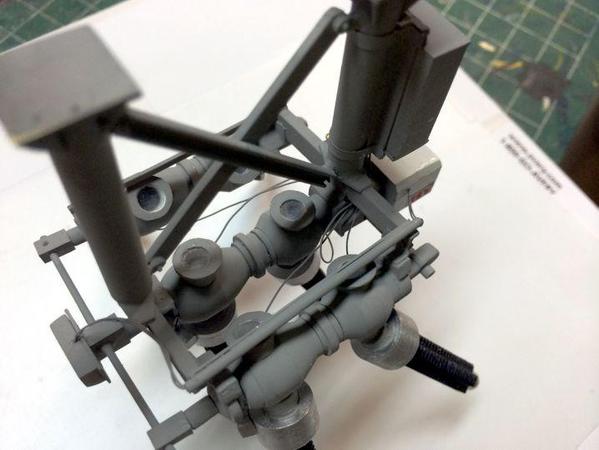
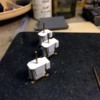
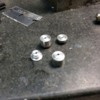
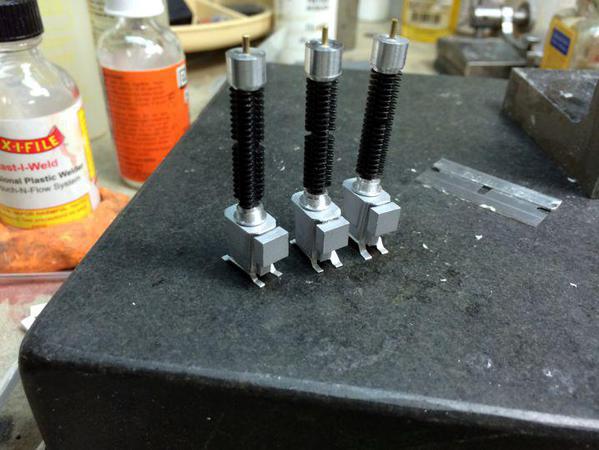
Worked on the breaker operating mechanism today. It's still not correct, but I may live with it. Let me explain. I first built the spring engine box. This went together sweetly. I used 1/8" corner reinforcements and .040" sheet styrene for the sides. I needed the heavier materials because the edges on this box are all chamfered 45º. 


After it dried I used a V-Block on the precision sander to cut the chamfers. Worked great!
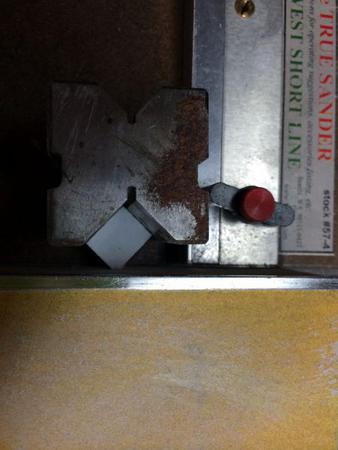
 

HBS 49


HBS 50


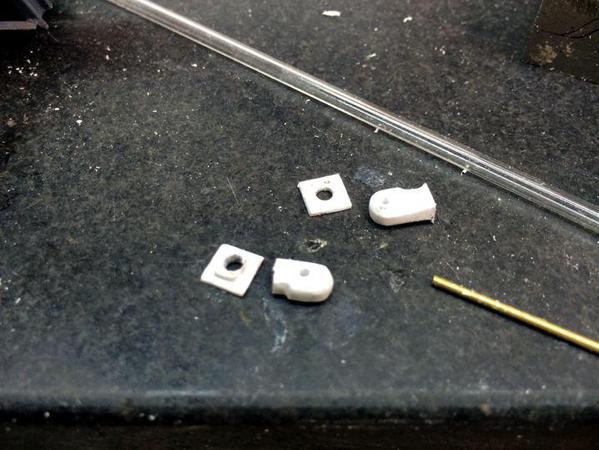
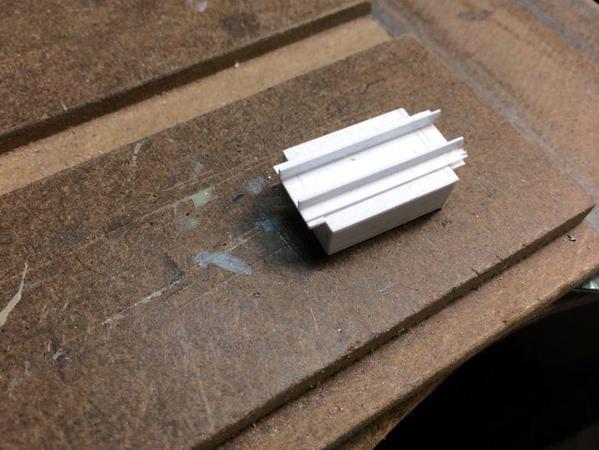
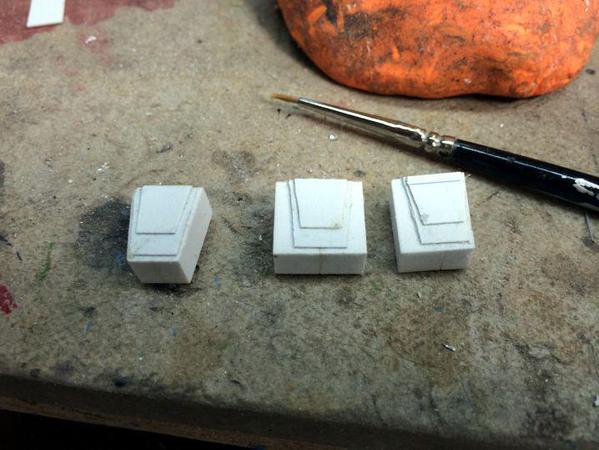
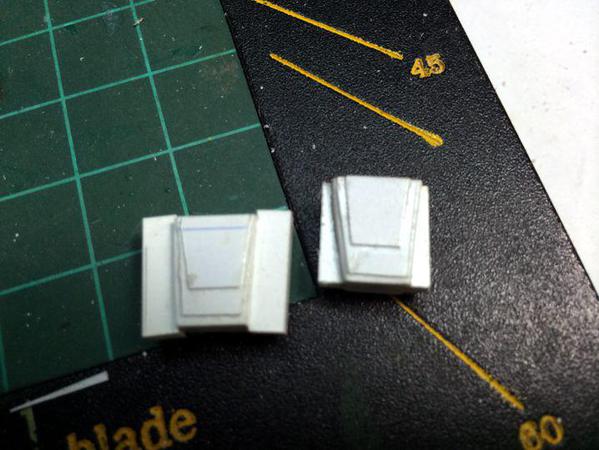
For the mechanism that attaches to the ends of the outboard breakers I needed to have a profiled part. The way I do this is shape a piece of stock and then slice off the pieces like salami. But I'm not completely happy with the shape, but it may be a AMS relapse showing its ugly head. 
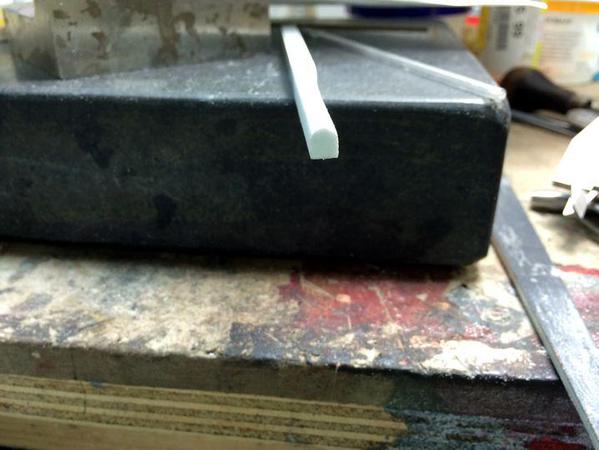
 HBS 48


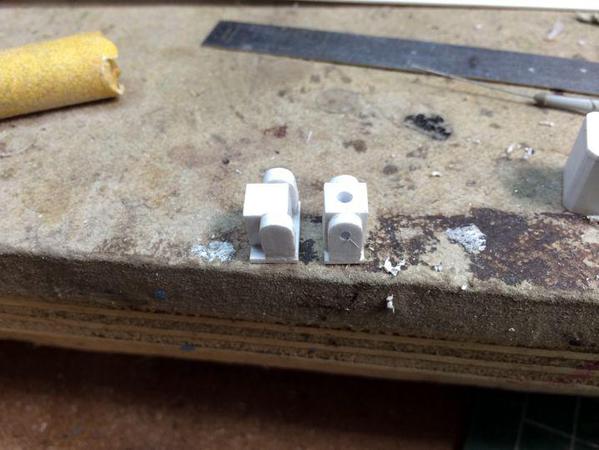
The 1/4" sq. stock that I used didn't have enough height so I laminated a couple pieces of .040" strip to it. When dry I sliced off the respective thickness with the razor saw in the miter box. The middle actuator unit is different than the ends. It has two lever boxes attached to a central piece which then has the spring energy box attached to it.


HBS 51


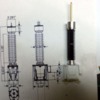
The assembly on the right was my first attempt with the drive shaft running down the center of the middle piece, but after re-checking the drawing I found that the mechanism is off-center lying below the breaker's center line. So I made another one, with the lever boxes offset from the middle piece.


I cross-drilled #55 drill for the cross shaft and tried it on for size.


HBS 52


I had to relieve the inner face on the middle piece to properly seat against the breaker body.


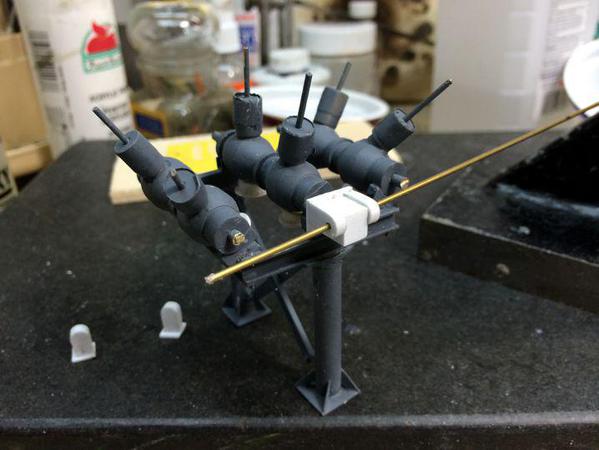
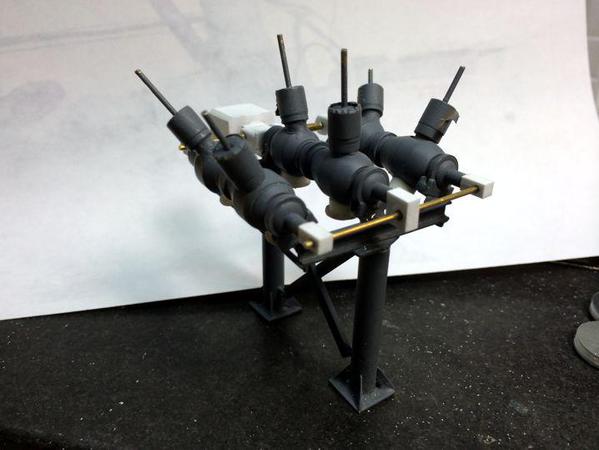
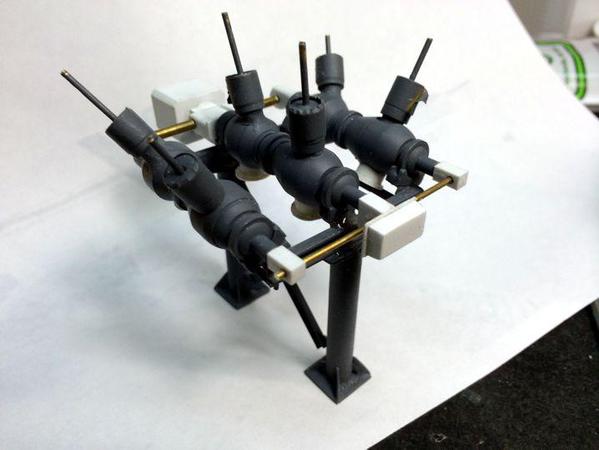
The end lever boxes are drilled to accept the shaft sticking out of the breaker and I then installed them on the breaker to get a location for the outboard ends of the cross shaft. While I mounted the breakers onto the base pretty well, there's still some non-alignment which meant I had to spot the shaft's location on each piece.


HBS 53


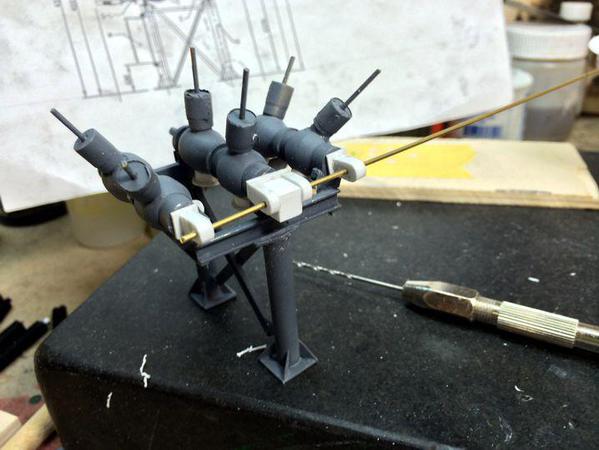
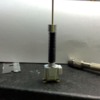
Between each of these components I'm installing a piece of telescoping brass tube to more closely resemble the enclosure on the real thing.


I then glued the spring engine box to the center piece and took this last picture.


HBS 54


There's a couple of minor surface details on the spring engine box which I'll also add next session. While it's hard to see in today's pictures, I also finished and installed observation windows underneath. I used the punch to make small masking tape circle to mask the windows. Incidentally, the real observation windows are actually off center. And they're smaller than I made them. So I could have just as well used the really off-center ones.


With all this done, I'm still not very happy with it. I found a nice close up of the out board lever boxes and they too are below center. This makes sense because there has to be a bell crank inside to transfer the rotary motion of the cross shaft to linear movement inside the breaker.  There's also one more lump on the top that is the pressure relief valve. It's in a tough location to shape so I'm thinking about leaving it off.


Actuator Details


As usual, the 1:1 details are always more complex than we'd like them to be in 1:48. You can see the offset, and you can see the subtle shaping of these parts. I have an eye doctor appointment tomorrow that will require dilation drops so there won't be any shop work, but I will be back on the "job" on Friday. Depending on my mood, I see if I can make a more precise rendition of this part of the project. It's also sitting on a round, not square, flange. That's something that I can change also.

Attachments

Images (8)
  • HBS 50
  • HBS 49
  • HBS 51
  • HBS 52
  • HBS 53
  • HBS 54
  • Actuator Details
  • HBS 48

The doctor's appointment was re-scheduled so I got a little "work" done, but not much... less than an hour. But in that time, I was able to start making the breaker mechanism a little better. I started by attempting to reshape the ones I made yesterday. But as I was working with them, the laminations...well...kind of...delaminated.


HBS 55


This forced me to do the right thing... remake them. In this instance, instead of building the end profile and slicing them off, I chose to use 1/4" X 1/8" styrene, shape the side profile and cutting them off the stick. This resulted in a much better performing part and I was able to get the drive shaft alignment. I finished one side, and ran out of usable stock. I'll get that tomorrow. 


HBS 56


I mentioned yesterday that I got the observation ports installed. Here's a shot showing them with their masking tape on the "window". When the whole shebang is air brushed they'll blend in nicely.

 HBS 57


Tomorrow will see the completion of the breaker-side mechanism and a good bit of work done on the disconnect side. The disconnect side is less complicated than this side, and shouldn't take too long.

Attachments

Images (3)
  • HBS 55
  • HBS 56
  • HBS 57

Thanks Mark!


The nice thing about scratch-building is you, the builder, have complete control of what's being done. So when I made the end pieces and didn't like them, I just made them again. If it was a kit, and you screwed something up, you'd have to get back to the manufacturer and beg for new parts. I know, I've done that too.
 

Went to the hobby shop and bought the additional stock to finish up the breaker. While there, opportunity knocked.


My LHS, traditionally only carried HO and N trains since there was a un-written agreement between them and one of the two train stores focused on O'gauge. When L & N Train Store closed this year, my LHS started carrying a limited offering of O. Today they were having a store-wide anniversary sale and I saw a very nice scale-length flatcar with laser-cut wood decking. I needed something like this since all the flatcars I have use dedicated loads and can't be used to carry "normal" stuff.


I'm going to the gigantic York train show in two weeks and didn't want to spend any money on an impulse buy. So as luck has it, a nice older women came into the shop when I was at the front counter asking if the hobby shop knew anyone who could repair an old trophy that was her late husband's. Her grandson just got admitted to UofK on one of their teams and she wanted him to have it. I suggested that I knew how to do it using pins and J-B Weld. The owner of the shop vouched for my skills explaining to her that was a "master modeler". Nice! She suggested she'd pay me to do it, and we agreed that she'd buy most of the flatcar. The deal was struck. It was a win-win. 


New Flatcar


As soon as I got home I did the trophy repair and it's setting up. Tomorrow I'll see if the fix is good. Trophies are cast pot metal and it's sometimes hard to glue that stuff, but with 1/16" brass pins in each ankle and the epoxy it should be good to go.


After that I got back to doing the important stuff... making a hybrid breaker.


With the new materials I was able to build the second breaker end mechanism, drill all the the holes and CA all this to the model.


HBS 58


The ends of the rods were trimmed and I've subsequently added a styrene tube on the outboard end to finish that up.


I also completed the disconnect end mechanism. As expected, this was much easier to fabricate than the other end. I used 1/8" sq. styrene for the outboard ends and a piece of the 1/8" X 1/4" stock for the center unit.


HBS 59


On the center section I added the operating box, which consisted of piece of 1/8 X 1/4 with slightly tapered sides completed with a sanding stick, and then joined to some thin stock to make a mounting flange. This was glued to the middle unit with solvent cement.


HBS 60


I stuck the insulators back on for another status shot.


HBS 61.


Next up: building the control cabinet. On the prototype the cabinet is held onto the upright post using straps. I think I'll epoxy the cabinet to the post and then fake the straps using the "wine-bottle lead foil" which conforms so nicely to round surfaces. Once that's one it will be ready for the paint shop. I'll spray the spring energy box white first, then mask it while I paint the rest sky gray to match the transformer.


With that, the entire assembly will be complete except for some cabling that will go from the various parts to other parts. I already cut the "concrete pads" for the mounting the posts. And then it will on to the next component. There's a lightening suppressor in front of this breaker, that's just a big insulator sitting on a metal pole. That should be easy too. I'm going to use some styrene tube instead of brass for this component since it's so simple. Then onto the girder work for the HV end.

Attachments

Images (5)
  • New Flatcar
  • HBS 58
  • HBS 59
  • HBS 60
  • HBS 61.

I went downstairs to finish working on the broken trophy and while down there I sneaked some work on the breaker.


The pins and J-B Weld worked perfectly on the broken trophy commission project. I cleaned up any excess epoxy and then did a little touch up with Tamiya gold leaf. It's as good as new and I'm sure the women who entrusted the job to me will be very happy.


I then built the control cabinet for the breaker. The cabinet was a straight forward rectangular box project with a top that over hangs the front a little bit as a drip molding and another piece of 0.010" styrene sheet laminated to the front as the door. I also put a piece of my thinnest styrene rod down the side as a piano hinge. It's a little oversized, but will show up as a hinge.


HBS 62


After reviewing the drawings I found out that the breaker has two pieces of angle behind it that flanks the post. It then had two bars across the angle that connects to the strap that wraps around the post's back which clamps the box to the post.


I took a piece of 1/4" tube (the post's size) and held it to the back as a spacer while I tack glued the angles. I then removed the tube and fully glued the angles in place. After which I added the cross bars. I'll trim them to exact length next work session. My older grandson's requested to sleep over so he can work on the trains tomorrow. So there will be another work session tomorrow most likely.


HBS 63


I'll CA the box to the post and then use the wine bottle "lead" to form straps around the back. I may add some Tichy NBW castings to this to simulate the clamping bolts.


I have to add some cabling and wire runs. I attached a small piece of aluminum tube to the base side into which I'll feed some simulated cabling from one side to the other. There's some heavier cables running from the cabinet to the spring engine box. I probably add all these before painting.

Attachments

Images (2)
  • HBS 62
  • HBS 63

Again, some surprise Sunday work time thanks to the grandkids being here and working in the basement and running some trains.


So I was able to mount the control cabinet and run some faux wiring.


The cabinet was CA'd directly to the post under the breaker end. It went on well, unfortunately, I put it on upside down. DOH! I know this because the cabinet top has extends out a little over the door to act as a drip ledge. Rather than try and pry it off (and breaking something) I simply made an applique for the the top and extended it out over the door. After sanding the edges, it looks okay.


Before mounting I did trim the top and bottom cross pieces so they were flush with the two pieces of angle. On them I drilled and then added four Tichy NBW castings to simulate the clamp bolts that clamp the straps to the post's back.


I added the wine-bottle-lead-foil strips to the back. I pre-formed them using a 1/4" rod sitting on the back of the cabinet again BEFORE mounting. I had formed them with the ink-side inwards. I find (now) that the CA reacts with the ink, removing it, and then doesn't stick well. After struggling with the first one, I soaked both of them in acetone to remove all ink traces and then re-installed them. This time they stuck well. 


With this done I started to add some cabling. I'm using different diameters of black iron wire for the wiring. I'm also using two drill sizes 0.021" and 0.016". Yesterday I glued the aluminum tube to serve as a cable guide. Tomorrow, I'll finish the cabling and get ready for the paint shop.


HBS 65

HBS 64


In the bottom pic you can see a little door handle I fabricated. The real one actually doesn't seem to have one, but I thought it needed it. A piece of 0.021" brass rod with a flattened end did the job.

Attachments

Images (2)
  • HBS 65
  • HBS 64

Today, did just a little bit. Made a few errands and didn't get down in the shop until 3:00. I added a couple more cables to and from the control cabinet and then added 6 more from the control cabinet up to where the current transformers are going to be installed (after painting). I also located and drilled holes in the current transformers' junction boxes to accept these leads. I then washed the whole deal with alcohol in preparation for paint. I wrapped a bit of foil around the bundle as it enters the control cabinet so it looks like a cable clamp.


HBS 66


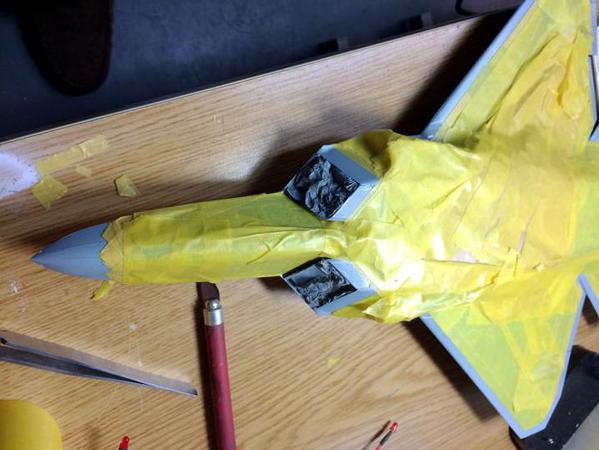
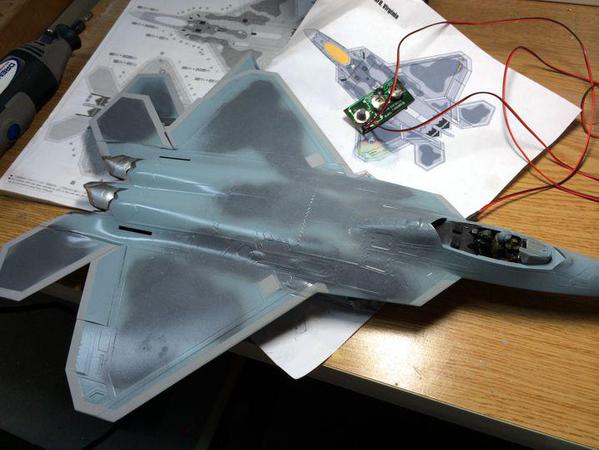
I didn't start painting yet because I was asked by #1 grandson to help him finish up the masking job on his 1:48 F-22 Raptor model that he's been building on and off for over 2 years. This plane has a complex, 3-color paint scheme which includes painting all the leading edges of wings, nose and engine intakes light gray, which is the same gray I'm using for the breaker. So it made sense to get his model ready for paint at the same time and not have to mix paint and clean the airbrush more than once.


Raptor Taping


You can get an idea of the complexity by looking at the irregular chevron pattern on the nose. You can see why maintaining the real Raptor with all of its stealth attributes is challenging, as it will be for the JSF F-35 Lightning II. It too has a very complex surface both in the prototype and any models available of it. There's a little more masking to do which will be done tomorrow, and then both it and the breaker get painted.

Attachments

Images (2)
  • HBS 66
  • Raptor Taping
Last edited by Trainman2001
Originally Posted by Mark Boyce:
Originally Posted by Trainman2001:

It's good, but it's not perfect. Are the ABB folks still checking in?

Who said the ABB breakers are perfect??  I never saw one. 

Every company has good and bad products.  ABB's are mostly good, and I'm not saying that 'cause I used to work there.  So too are all the other major suppliers: the industry demands pretty much perfection and they usually get somethjing close to it.  


Then and now, I'm always particularly leery of 63kA breakers (breakers rated to interrupt 63,000 amps as opposed to the standard models at, say only 50,000 or 55,000).  The 63kA stuff isn't necessarily bad, but among equipment I saw from several suppliers, particularly among GIS (gas insulated switchgear - breakers) stuff, 63 kVA equipment had less margin built into it than other equipment.  Most 63 kA units were upgraded versions of 55 kV designs, and in a few cases the way that extra capacity was engineered was to start out with a 55 kA unit that had been originally engineering with a lot of margin (say 15% so it was already really capable of nearly 63 kVA) , and add a bit of metal, etc, until you had it sufficiently over the 63kA threshold, to say to 66.   My concern then, and even more now, is that the utilities were used to the 55 kA equipment (15%) margin), yet the 63 kA equipment had only a 5% margin.  The higher rated equipment met the technical specifications but it wasn't quite apples to apples: operating and maintenance practices based on successful experience with 55 kV stuff might bump into problems with the 63 kA - you never quite know where and why that 'engineering margin" is needed or what it will get you.  


I knew of one supplier (not ABB and not usually bought in the US) who did nothing to their "higher capacity" breakers but de-rate the operate temperature (compared to the lower rated breakers) in order to push it up to 63 kA.  They cast an extra rib in the casing so the higher versus lower rated unit could be distinguished from one another in the field, and let it go at that: the 63 kV unit was really no different than the 55 kVA one except the paperwork called for operation at cooler temperatures.  We discovered this when a customer utility's workers in a utility in central America rebuild a "63 kA" breaker with parts  listed for the lower rated unit, and we noticed they all fit and looked identical.  If fact they were, just given different part numbers in their catalog.  Near as I can tell, this was not illegal, although it left a bad taste in my mouth.

Originally Posted by Lee Willis:
Originally Posted by Mark Boyce:
Originally Posted by Trainman2001:

It's good, but it's not perfect. Are the ABB folks still checking in?

Who said the ABB breakers are perfect??  I never saw one. 

Every company has good and bad products.  ABB's are mostly good, and I'm not saying that 'cause I used to work there.  So too are all the other major suppliers: the industry demands pretty much perfection and they usually get somethjing close to it.  


Then and now, I'm always particularly leery of 63kA breakers (breakers rated to interrupt 63,000 amps as opposed to the standard models at, say only 50,000 or 55,000).  The 63kA stuff isn't necessarily bad, but among equipment I saw from several suppliers, particularly among GIS (gas insulated switchgear - breakers) stuff, 63 kVA equipment had less margin built into it than other equipment.  Most 63 kA units were upgraded versions of 55 kV designs, and in a few cases the way that extra capacity was engineered was to start out with a 55 kA unit that had been originally engineering with a lot of margin (say 15% so it was already really capable of nearly 63 kVA) , and add a bit of metal, etc, until you had it sufficiently over the 63kA threshold, to say to 66.   My concern then, and even more now, is that the utilities were used to the 55 kA equipment (15%) margin), yet the 63 kA equipment had only a 5% margin.  The higher rated equipment met the technical specifications but it wasn't quite apples to apples: operating and maintenance practices based on successful experience with 55 kV stuff might bump into problems with the 63 kA - you never quite know where and why that 'engineering margin" is needed or what it will get you.  


I knew of one supplier (not ABB and not usually bought in the US) who did nothing to their "higher capacity" breakers but de-rate the operate temperature (compared to the lower rated breakers) in order to push it up to 63 kA.  They cast an extra rib in the casing so the higher versus lower rated unit could be distinguished from one another in the field, and let it go at that: the 63 kV unit was really no different than the 55 kVA one except the paperwork called for operation at cooler temperatures.  We discovered this when a customer utility's workers in a utility in central America rebuild a "63 kA" breaker with parts  listed for the lower rated unit, and we noticed they all fit and looked identical.  If fact they were, just given different part numbers in their catalog.  Near as I can tell, this was not illegal, although it left a bad taste in my mouth.

Lee,

I didn't mean to indicate I thought all breakers had problems.  My intent was to try to praise Myles' efforts on his model, so my comment was a poor choice.  The two problems I did recall had to do with the control relays showing up with 48V ratings when we needed 125V and vice versa.  That problem could have been on our end not ordering the right thing, so I should not blame ABB.  The other problem was probably due to shipping where we had to make sure all electrical connections were tight.  That can happen in shipping.  Therefore, it was my poor taste in trying to praise the model by criticizing the real product.  The overall engineering and production was very good.

I promise that I will not be putting 65,000 amps through my Hybrid Breaker. I'm not even going to put 1 amp through it. Today was a milestone day. I got the gray paint on it and also did the leading edges on my grandson's Raptor. I then masked the breaker so just the spring engine box was exposed so it can get a coat of flat white. I'll do that tomorrow afternoon. 


HBS 67


The Raptor's painting is ridiculous. Stealth design dictates that there are no front or side facing horizontal lines. Every surface is angular, and if it's not, they make is so by making a saw tooth pattern. It's even worse than that. The saw tooths themselves are irregular. This meant that masking the model for painting took hours.


Raptor Leading Edges


The gloss is due to a coat of Future floor wax as a prep for decals. Decals adhere best on gloss surfaces. I may shoot more gloss to cover the flat painted leading edges. These should have been masked and painted before the first clear coat went on, but grandson forgot about it so we masked and painted now. Once all the decals are in place—and there are hundreds—we'll spray it with flat clear to blend it all together. It's a **** of an airplane and a great model. This was a 1:48 Hasegawa kit and the always do a good job on fits and surface detail. I'm waiting for a good 1:48 F-35 comes out from them so he can have a set of America's 6th generation jets.

Attachments

Images (2)
  • HBS 67
  • Raptor Leading Edges
Last edited by Trainman2001
Originally Posted by Mark Boyce:
Lee,

I didn't mean to indicate I thought all breakers had problems.  My intent was to try to praise Myles' efforts on his model, so my comment was a poor choice.  The two problems I did recall had to do with the control relays showing up with 48V ratings when we needed 125V and vice versa.  That problem could have been on our end not ordering the right thing, so I should not blame ABB.  The other problem was probably due to shipping where we had to make sure all electrical connections were tight.  That can happen in shipping.  Therefore, it was my poor taste in trying to praise the model by criticizing the real product.  The overall engineering and production was very good.

Oh I knew that, Mark, and I appreciated your comments.  I was mostly talking about them just to emphasize that we're talking about complicated stuff and mentioning the one thing that used to, still does, concern me. 


Trainman2001, I sure hope you won't put 65 kVA through you breakers.  Hopefully the power system on your layout will behave itself and those breakers won't even have to operate!

Originally Posted by Lee Willis:
Originally Posted by Mark Boyce:
Lee,

I didn't mean to indicate I thought all breakers had problems.  My intent was to try to praise Myles' efforts on his model, so my comment was a poor choice.  The two problems I did recall had to do with the control relays showing up with 48V ratings when we needed 125V and vice versa.  That problem could have been on our end not ordering the right thing, so I should not blame ABB.  The other problem was probably due to shipping where we had to make sure all electrical connections were tight.  That can happen in shipping.  Therefore, it was my poor taste in trying to praise the model by criticizing the real product.  The overall engineering and production was very good.

Oh I knew that, Mark, and I appreciated your comments.  I was mostly talking about them just to emphasize that we're talking about complicated stuff and mentioning the one thing that used to, still does, concern me. 


Trainman2001, I sure hope you won't put 65 kVA through you breakers.  Hopefully the power system on your layout will behave itself and those breakers won't even have to operate!

Thank you, Lee!


Trainman was hoping to power his layout from this substation and the power station we are going to convince him to build next.    Then he can save on his electric bill.  I have always wondered how much juice my older daughter's hamsters could produce running all night on their wheels.  lol 

Perhaps us model railroaders should power our layouts from solar panels???


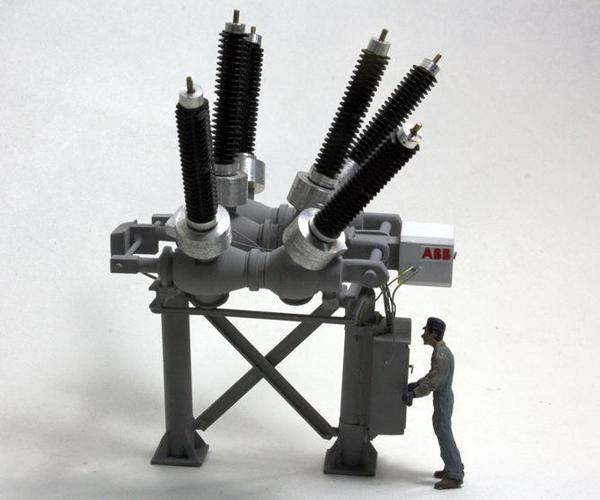
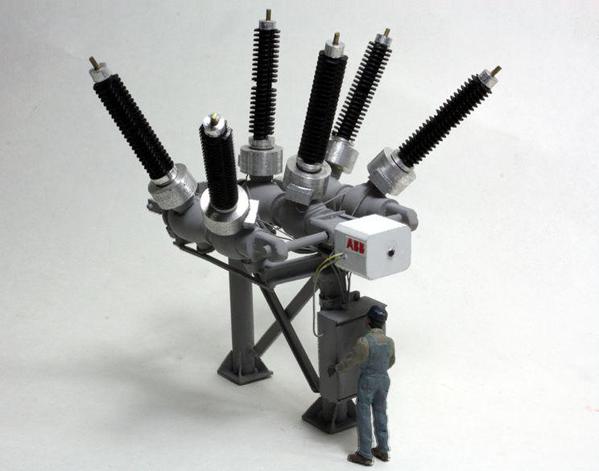
Anyway, today was a milestone day. The ABB Hybrid Breaker/Disconnect is finished! I took some display pics using both the iPhone and then with my Canon and depth of field software. Only after I finished did I realize that I put the "ABB" logo on the top corner of the spring energizer instead of the bottom corner. Oh well...


I pulled the tape off the observation windows. They came out well.


HBS 68


When installing the bushings I couldn't find one aluminum base piece. They were all sitting on the workbench nice as can be for weeks and then... it just ups and disappears. Quantum Rift... curses! So I quickly machined another one and finished the assembly.


So... (Drum roll please), after one month of intensive work, I present THE BREAKER!


Hybrid Breaker-Disconnect Final 2-sm

Hybrid Breaker-Disconnect Final 1-sm


After shooting the pics, I decided to epoxy the "concrete" foundation pads on now since it makes the unit much more stable when it's on the stand. I mixed some micro-balloons into the epoxy to fill the slight gap at the foot pads.


HBS 69


These pads will be painted concrete color after the epoxy cures. With this unit complete, there's one more HV-side device that I'll make. It's another lightning suppressor, although not as tall as the one attached to the transformer. It can also have corona rings which I'll add if I'm in the mood.


As I mentioned before, I'm going to use all styrene for the base on these suppressors. They're much simpler than the breaker. I'm currently doing research on these and will post more details when I figure them out.

Attachments

Images (4)
  • HBS 68
  • Hybrid Breaker-Disconnect Final 2-sm
  • Hybrid Breaker-Disconnect Final 1-sm
  • HBS 69

Andre, I am assuming that "abyssmal" and "didactic" are good things. Thanks to all!


Enough accolades, there's a substation to build. Today I started working on the next piece of HV apparatus, an oil-filled, Capacitive Coupled Voltage Transformer, this one is also based on an ABB prototype. I've chosen a model that's not too complicated and sized the same as the circuit breaker; 145 Kv. I decided on this rather than another lightning suppressor, since it was more interesting and is also prototypical.


Here's a picture of a slightly lower voltage unit.


CVT Pic


As the voltage increases, the insulator gets longer and fatter. Here's the print for the one on which I'm basing the model. The dimensions were in millimeters, but they're now scaled to 1:48 and in inches.


CVT Working Drawing


The post height (which I drew) is set to bring the top of the insulator on line with the tops of the breaker's insulators. As I noted before, I'm building this out of styrene instead of brass. I'm also toying with making a lattice stand out of styrene just for fun.


I'm going to use a different set of auto body screws for the insulators, which is the same one I used for the secondary outputs for the transformer. I'll use two in series. They're slightly short but it shouldn't make any difference to effect I'm trying to capture.


CVT 03


I started building the base using two pieces of 1/4' square styrene cemented together. I then started adding layers of thinner material to give it shape. After I did the wide faces, I started to add material to the narrow face and then realized that I was going about it all wrong. I popped off the narrow face appliques and added 1/8" square thick stuff which I then re-shaped on the belt sander and hand sanding. 


CVT 01


In reality, the box should be tapered in both directions, but I'm just tapering the sides. I chopped off the angle with the razor saw and sanded the surface flat. In this next pic you can see a before and after of shaping the side pieces. The prototype's case is obviously die-cast aluminum, and all the surfaces are irregularly shaped and rounded. I'm sort of faking this. 


CVT 02


I will finish up the rough shaping tomorrow and will work on the pieces on the top and bottom that will look like flanges. The bottom flange will get the feet. There's also a small junction box that goes on the side. I need to go to Lowe's tomorrow to get a couple more of the insulators. I only had enough to make two sets and I need three. This is a much, much less involved project that the last too. Whew!

Attachments

Images (5)
  • CVT Pic
  • CVT Working Drawing
  • CVT 03
  • CVT 02
  • CVT 01

Mark, here's the descriptive page for the CVT. There's probably different names depending on the manufacturer.


CVT Description


Only had about 45 minutes in the shop today, but did get some progress. I finished shaping the three housings and started making the base plate. I decided to make this part out of brass since I wanted to make the legs integral with the base for strength. 


I was using the belt sander to rough out the housing and knocked a couple of the glued pieces off, so I cut the excess off with the razor saw that was more gentle.


CVT 04


The housing sits on the base nicely. These will be CA'd together. The feet will be glued to stand with epoxy. 


CVT 05


I bought auto fasteners in both styles and will decide which I'm going to use as I go on. The long ones that I used for the transformer and breaker would work for this item also and I wouldn't have to piece two of them together.

Attachments

Images (3)
  • CVT Description
  • CVT 04
  • CVT 05

Practice makes perfect... I had another rare Saturday work session. The weather wasn't so nice and my wife was happy watching football. Go figure... I like to be in the basement and she watches sports.


It was a very productive day with the completion of the housings including the top plate and the junction box, the remaining base plates, shaping the insulators and drilling, and turning all the top and bottom fittings. 


CVT 07


The top plate overlaps the sides just a little bit. I located the center and drilled them with the 0.047" drill for the brass support rod. I then cut the junction boxes off a piece of 1/8" X 1/4" styrene stock. I sanded the ends true and glued them in place. I also CA'd the brass rod into the holes in anticipation of adding the insulators.


I then glued the bases to the housings using 45 minute epoxy. 


CVT 08


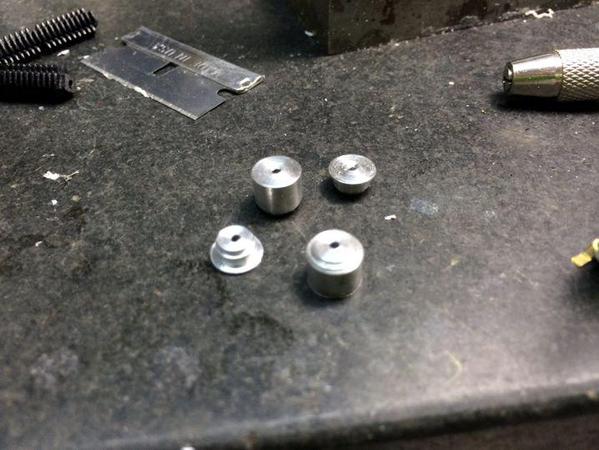
While this was curing I went back to the lathe and prepared the insulators by drilling the .041" hole from both ends. The insulators were just a tad loose in my collet chuck so I wrapped one layer of paper around them and it clamped nicely. The Taig's collets don't have much range. They're really only good for nominal-sized stock, but the paper worked well.


I then machined both the top and bottom insulator fittings. As I noted on my opening, practice does make perfect, and I was able to knock all six pieces out in about a 1/2 hour. Instead of changing tool bits between linear cutting and cutoff, I simply used the cutoff tool for the whole job. I also just dialed in the correct amount and cut the entire depth coming in from the side. The cutoff tool has some side relief so it will cut metal when moving sideways. It's not efficient, but with such tiny cuts it was the fastest way to do it. 


CVT 10


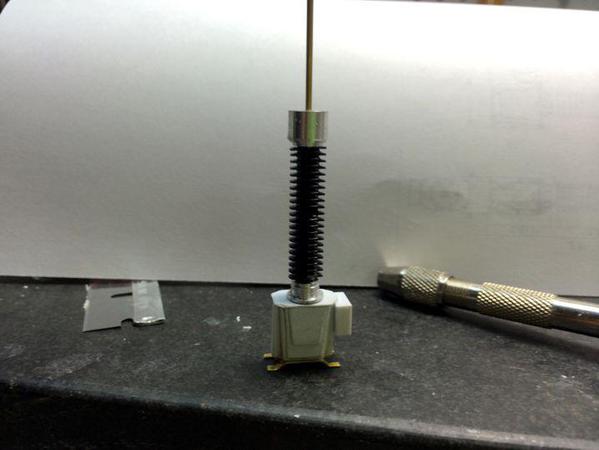
I couldn't resist trying all the parts together even though the epoxy wasn't really cured yet.


CVT 09


Looks like a CVT to me...


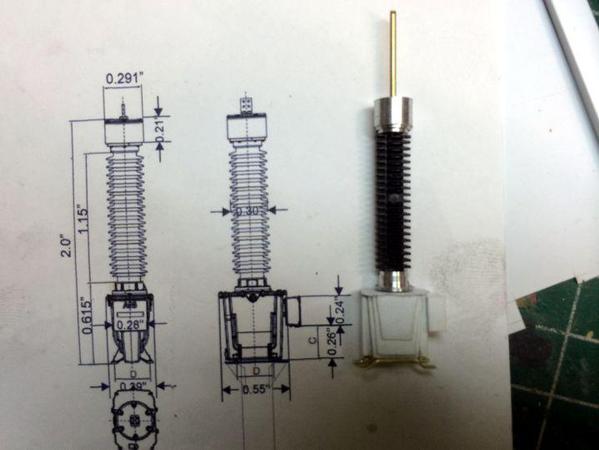
Here's the CVT laid on top of the prototype drawing.


CVT 11


Next session I'll paint the base and glue it all together, then start working on the stand. As I noted last post, I'm toying with the idea to build a lattice-type structure, just to add more interest. If it proves to difficult, plan B will be to use a cylindrical post.


Update: With the CVT pretty well under control, I'm working on the last component on the High Voltage side; the main front-end disconnect. I've selected the ABB 145 Kv Center-break Disconnect. It's reasonably complicated, but not ridiculous. It will require some more soldering, metal work, and lathe work, but nothing too challenging. This design will fit on the site plan that I have.


 Side View

ABB Center-Break Disconnect


 End View showing 3 phases

ABB Center-Break Disconnect end view


 Layout: It works this way: The two tower insulators rotate away from each other separating the conducting beam in the middle. There is a male and female switch contact in the middle that slide apart far enough to extinguish the arc. This drawing shows control cabinets for each phase so they can be disconnected separately.

ABB Center-Break Disconnect Illustration


I'll start building this when the CVT is done.

Attachments

Images (8)
  • CVT 07
  • CVT 08
  • CVT 10
  • CVT 09
  • CVT 11
  • ABB Center-Break Disconnect
  • ABB Center-Break Disconnect end view
  • ABB Center-Break Disconnect Illustration
Last edited by Trainman2001

Thanks Mark!


They're coming along so nicely that they're almost done. Went to the hobby shop and got .010" X 040" strip, .060" angle and a pack of .030" sheet stock. I then came home and got to work. I first rolled some tape to make it double-side and stuck the CVT bases to it so I could airbrush it flat aluminum. I then assembled the CVTs with CA. They're now complete.


CVT 12


With that out of the way I got to work making the lattice stands.


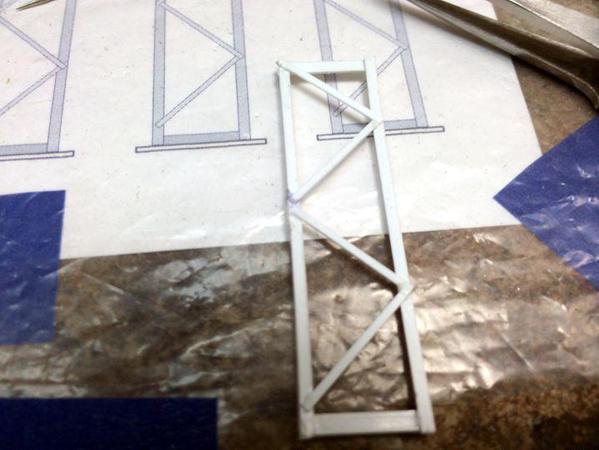
Before getting started I needed to make sure that the height would be correct. I wanted the CVTs to be the same height as the highest bushing on the Hybrid Breaker. My original drawing was based on the ABB Hybrid drawing, but my as-built was an unknown. I got my hyrbrid and set the surface gauge to this height. I then took my drawing, folded it into a square tower, set it on some 030 stock as a base plate and onto the plywood I'm using for the concrete foundation. It was too short by almost a 1/4". So it was back to CorelDraw to re-draw the lattice towers to conform to the new size.


I then taped the drawing to the Homasote work table surface (like I did when I built the bridges) and covered it with a sheet of polyethylene so nothing sticks.


CVT 13


At first I used pins to hold stuff in place, but quickly found that the .060" angle was to flexible and would bend and warp with very little pressure. I then added so angle blocks to form a square corner and only use on pin to keep on piece of angle tight into the corner. For the top and bottom angles, I used .080" since it offered a little more bulk. For the first pieces put in, I just used a square cut on the angle to nestle into the corner.


I then installed four diagonal members into the basic frame. At first I was using a small artist's brush to apply the solvent cement, but got my Touch-n-Flow working even though I broke off the back half of the glass tube. With these braces in place, the first frame had a little stability.


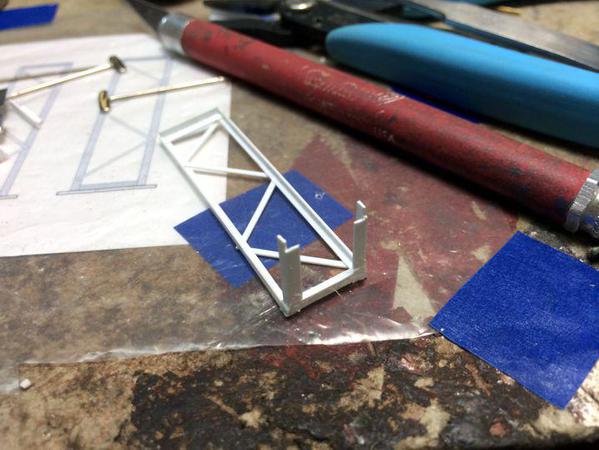
CVT Stand 01


I built two sides, representing the front and back. To connect them I again needed to add the .080" angle at four corners. But now I needed to do a little sculpting to get them to fit properly. 


CVT Stand 02


If I wanted to avoid making these coping cuts I could have mitered the corners of all the base angles, but I did it this way.


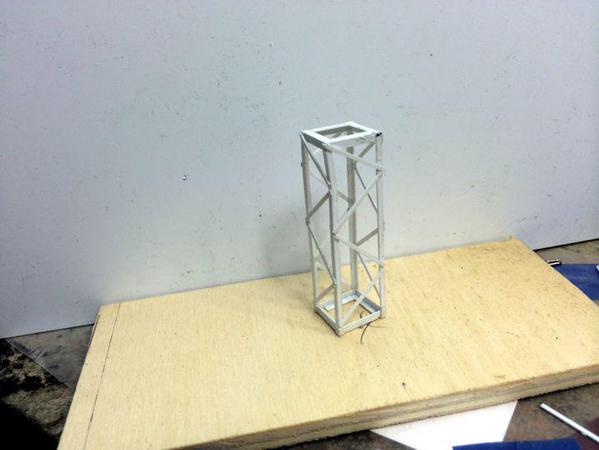
All four corners got angles and then I carefully glued the other frame on one corner at a time.


CVT Stand 03


With front and back in place, I was able to add the remaining diagonal braces to complete the frame.


CVT Stand 04


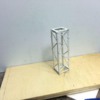
I checked this frame against the Hybrid Breaker before starting the other frames just to make sure that it was correct.


CVT Stand 05


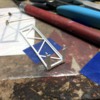
It was correct so I went into production and knocked out the other two. As usual, I developed easier techniques moving ahead, and the last two took less time than building the first one. I glued top and bottom plates on to ensure that these units would be strong. Before gluing on the plates I carefully touched up the two ends on the Precision sander to give them a true gluing surface.


CVT Stand 06


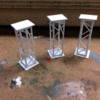
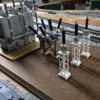
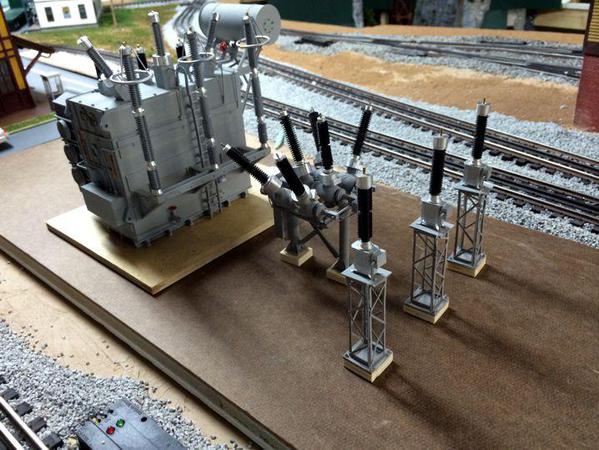
And just for fun—and just to remind everyone that this is ACTUALLY a model railroad project—I put all the finished parts onto the substation base on the layout. Tomorrow, I will airbrush the stands the sky gray I'm using for all the apparatus, epoxy the CVTs and the "concrete" bases to the stands. And then it's onto the center-disconnect switch.


CVT Stand 07

Attachments

Images (9)
  • CVT 12
  • CVT 13
  • CVT Stand 01
  • CVT Stand 02
  • CVT Stand 03
  • CVT Stand 04
  • CVT Stand 05
  • CVT Stand 06
  • CVT Stand 07

I know its have been more than hinted at, but I hope you continue this same level of detail and make the entire substation.  The good think about subs is that while the components - transformer, breakers, etc., were standard products, they could be arranged any way to fit the footprint of the site, within clearances that is.  This gives you flexibility to arrange it so it fits your layout.  

I agree. It's my substation, I'm the project manager, the general contractor, and the equipment builder so I can decide how it all goes together. O'gauge folks are pretty little and don't need too much room to get around. I'm heading to York tomorrow (get there on Friday) and am thinking about getting a crane of some kind that would be used to hoist equipment onto the site from outside of the fence line. Speaking of fence, I still haven't ordered the fencing from Brennan. We're going to continue the trip to visit family and friends back East so after this afternoon's session, there won't be any production from my shop until late in the month.


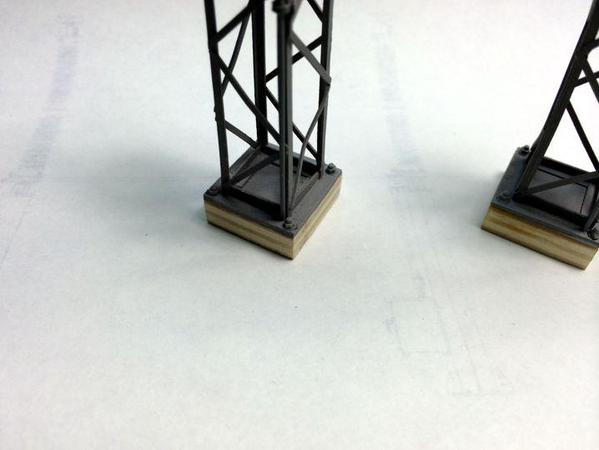
Since yesterday was a work-out day I only had a short session and got the gray paint onto the stands and epoxied everything together. By bedtime last night the epoxy was cured, so I'm ready to do some final detailing. I want to add some NBWs on the base plate, and a piece of faux conduit from the junction box down to the bottom. And then it's onto the HV disconnectors.


CVT Stand 08

Attachments

Images (1)
  • CVT Stand 08
Originally Posted by Trainman2001:

I agree. It's my substation, I'm the project manager, the general contractor, and the equipment builder so I can decide how it all goes together. O'gauge folks are pretty little and don't need too much room to get around.

You're not leaving a nice safety zone to protect them from the high voltage?


I think without a doubt, you'll have one of the most detailed power substations that's ever appeared on an O-scale layout!


Thanks Gunner! I'm not sure that was my goal at the outset, but it certainly has been evolving that way. I initially just wanted to make one that was reasonable. Now that I've gotten this far, there's no reason to slack off.


Today I put the finishing touches on the Capacitive Voltage Transformers. This included running the 'conduit', installing some faux foundation bolts, and doing touch up painting. With that, they're done and ready for concrete painting. I'm going to paint all the concrete at one go since I have to mix that color and don't want it varying all over the place.


CVT Stand 11

CVT Stand 10


CVT Stand 12

Now onto the Center-break Disconnects...


First up was building 6 leg sets. I decided to go with styrene here. It's just so much easier to join pieces than using brass. I measure the height of my CVTs against the disconnect drawing and found the ABB drawing was about a 1/4" shorter than the CVT. Again, I want these to be at the same height since I'm using rigid aluminum bus bars to connect the high voltage equipment. So I added this height to the legs.


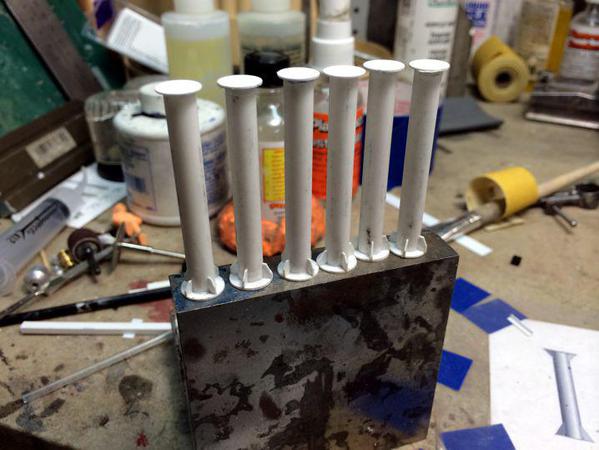
I measured and cut the lathes in the lathe using a razor saw to make the cut and then very lightly facing the end to ensure that it's perfectly square. I then made a bunch of disks using the hollow punches. I used 5/16" for the top plate and 3/8" for the bottom plate. The bottom plate receives the angle brackets so it needs more width.


I eyeballed the glue job, and then to make sure that the disks were concentric and also square I again chucked the legs up in the lathe and made very light cuts on both the edges and faces. A little clean-up with a sanding stick finished them off.


Disconnect 01


I cut a bunch of little rectangles and then clipped off the corner to make angle brackets that looked like what ABB was using. These were then all glued onto the legs. 


Disconnect 03


This is the last work you'll see until the 28 or 29th. The trickiest part of this job will be the various links that control the connecting arm's movement. I'm thinking of making the connecting beams out of brass, but that's not final.

Attachments

Images (5)
  • CVT Stand 12
  • CVT Stand 11
  • CVT Stand 10
  • Disconnect 01
  • Disconnect 03

I'm back! Trip back East was great, ending with seeing my granddaughter sing the National Anthem at a Penn State ice hockey game in their new 100 million dollar arena. It was the largest crowd so far that saw this amazing 9-yr old kid sing the heck out of the Star Spangled Banner. It made such an impression that the sports writer who was reporting on the game made special mention of the performance and suggested that the team should have her back since they won 7-1 over Holy Cross and she must have been a lucky charm.


The trip started with my wife and I going to the York Show. I didn't buy much, but got a nice Tomy 1:50 John Deere Excavator at the DHS booth as a load for my new flat car. I also got some Artista figures for the substation, some concrete colored paint and some Tichy NBW castings. I also spent some time with NJ International discussing getting operating crossing signals for the layout. I didn't buy then, but will get back to them to start the process.


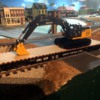
Here's the excavator sitting on the car. I'm going to add some chocks and chains. The car also needs some weathering. The excavator is new and will not be weathered. 

The New Excavator


Here's the substation crew.


Power Employees


And I finally got back to work on the disconnectors. 


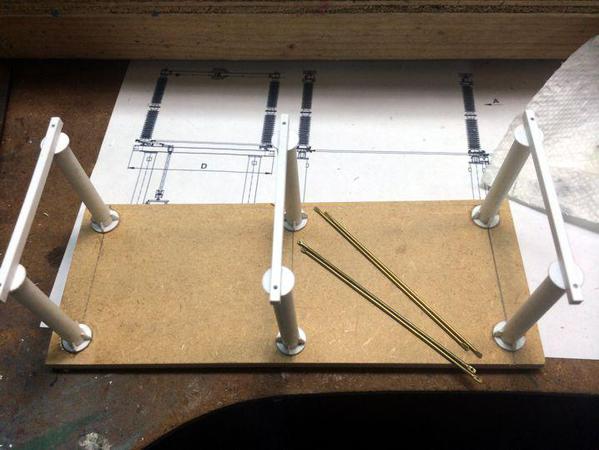
I cut and installed the cross-pieces out of .100 X .125" styrene using solvent cement, and then cut a piece of fine-grain Masonite for a "concrete" base. To this I CA'd the 6 stands after laying out their location on the pad. 


Disconnect 04


After putting them all on I realized that the pad needs to be twice as thick so I cut another piece and and laminated them together. When dry I sanded the edges so it looks like on thick piece. This matches the base heights of the rest of the equipment.


Disconnect 05


I plopped it on the substation base to see how it looked.


Disconnect 06


While it's a little tight, it fits. 


Lastly, I started making the moving parts for the disconnecter. There are 6 long rods and several short ones. The long ones take the rotational energy of the center phase and sends it to the end phases to rotate those insulators. The short ones send the rotational energy to the opposite pole of each phase. Under each insulator will be a movable plate that will be brass with a soldered pivot pin. I didn't have a #56 drill so I drilled the plastic cross-bars with a #57. The brass for the pins didn't fit, so I took a piece, ground a flat on it, chucked it in a pin vise and used it as a "D" bit to enlarge the holes. The local big box home stores don't carry individual number drills, nor does the ACE hardware nearby, so I may have to buy them on-line. For numbers 60 through 80 my local hobby shop carries them individually, but not the lower numbers.


To make the operating rods, I flatten and shaped the ends with the vise-grip technique and then drilled a .032" hole for the smaller pivot pins.


Disconnect 07

Attachments

Images (6)
  • Disconnect 07
  • Disconnect 06
  • Disconnect 05
  • Disconnect 04
  • Power Employees
  • The New Excavator
Last edited by Trainman2001

Perhaps we could formalize the TA support group and I could collect dues...It would help support the habit.


I've been perusing DHS Diecast's website and some of the construction models are so cool it almost makes me want to switch hobbies from trains to construction equipment. They had a beautiful Manitowoc high reach crane at the show that he'd sell me for $400. I was very tempted. I do want to buy some form of crane model to use as a prop either next to the substation or to move around to any in-progress construction project on the railroad.


Thanks for reading... I'll keep writing.

You're correct! It would be another hobby to get involved with and I can't handle that right now. (Although I'm lobbying my better half to get a 3D printer.) 


The boys had a day off today (Halloween?) so after peeling them off the little screens in which their heads were buried, I got them into the workshop. Grandson #1 was attaching details to his on-going F-22 Raptor project and #2 landscaped some more barren areas on the layout and filled in some ballast areas that were damaged during all the scenic building.


Kid's Work


While this was going on I did some more work on the disconnecters which included machining the rotating plates that sit below the insulators and finishing up making the control rods.


Disconnect 08


I made six of these (actually 7 after one got away into the quantum rift). I drilled a hole into this big wood block I found to hold the pieces while I prick punched and drilled the operating holes around the perimeter.


I then assembled some of the pieces for the trial fit. I quickly found a slight anomaly with the spacing between the three stacks is slightly off. The C-t-C distance from the left to the middle is about an 1/8th inch shorter than the C-t-C distance from the center to the right stack. I shortened two of the rods so they are all aligned and will have to keep them separate when I finally assemble them.


Disconnect 09


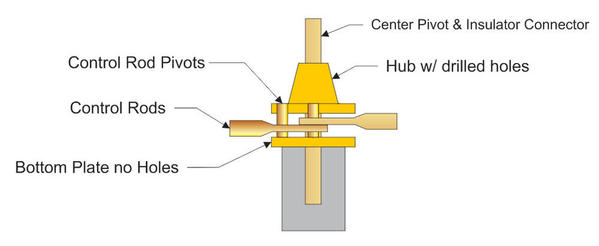
If I want to make this piece actually operational—other than my grandson thinking this would be cool, I actually have no valid reason why I should go to the trouble—I think that I will have to make an addition to the scheme. I noticed on the plans that the attachment point of the control rods is further out from the center of rotation than simply attaching it to the disk. I will have to make an extension arm that brings out the pivot further. This is necessary since the rod binds when it only rotates about 1/8th. To fully separate the contact arms they should rotate 90º, not 45º. With the pivot holes so close to the center of the hub, the rods impinge on it and can't rotate. If I'm not making it actually perform, I can leave the pivots where they are.


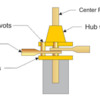
I will have to machine another brass disk to sit at the bottom of this assembly. Here's my design for this detail.


Disconnector Rotator Detail


I'll solder the control rod pivots to the hub and may add a spacer to the center pivot to keep the bottom plate at the right distance. This pivot assembly is the most complicated of the disconnector. Whether it's operable or not, it should still look good.

Attachments

Images (4)
  • Kid's Work
  • Disconnect 08
  • Disconnect 09
  • Disconnector Rotator Detail

Add Reply

Post

OGR Publishing, Inc., 1310 Eastside Centre Ct, Suite 6, Mountain Home, AR 72653
800-980-OGRR (6477)
www.ogaugerr.com

×
×
×
×
Link copied to your clipboard.
×
×