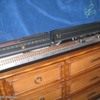
I bought my Micro Mark rollers off the forum. Looked around for what materials I had and here's what I came up with.

Roller Base

Base is poplar from another project, 1 x 4, actual size 3/4 x 3 1/2.

Overall length is 36". Front section is 6", rear section is 10".

Stained with three coats of poly. I used black #10 tack nails to mount the track, I didn't want to see screwheads.

My largest steam engine is a LionMaster Challenger so I made this to fit that. Once I start using it I'm sure there are things I'll want to change on the next one. Stained and polyed because it will be in my office with an engine on it when I'm not working on anything.

Quick question, cutting the track was the biggest PITA, suggestions for the future??

Attachments

Images (1)
  • Roller Base
Last edited by Jeff T
Original Post

Replies sorted oldest to newest

Looks good Jeff, my only comment is you'll probably regret making the upper level so small if you get a larger tender. Why the upper section on each end?  I settled for a 2-level design as well, but I didn't put an upper section on the front.

I also went "big", my upper track is 15" and the lower level is 30"  It's switchable between 2-rail and 3-rail and also has a detachable uncoupler/unloader control and embedded track.

Attachments

Images (1)
  • mceclip0

You guys are great!

I just plop three pieces of track on the bench and set the rollers on that. It takes a minute to get the rollers positioned properly, but the whole thing )minus the track) fits in a parts drawer when I am done.

Of course, my work bench accommodates trains of two different gauges, car radio rebuilding and real car repair, so I cannot specialize too much.

That plus the fact that I tend to be lazy are all factors.

Add Reply

Post

OGR Publishing, Inc., 1310 Eastside Centre Ct, Suite 6, Mountain Home, AR 72653
800-980-OGRR (6477)
www.ogaugerr.com

×
×
×
×
Link copied to your clipboard.
×
×