@Mark Boyce posted:

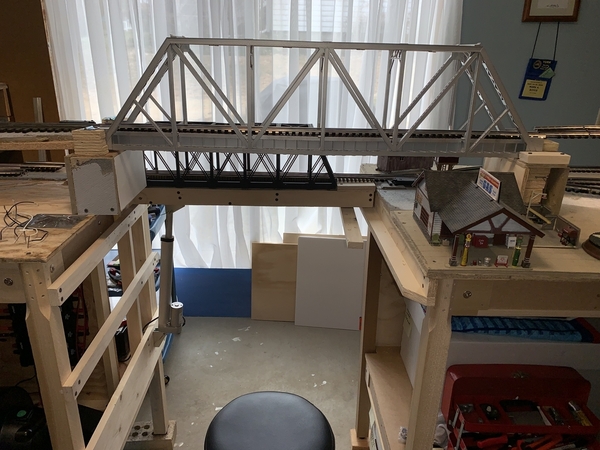
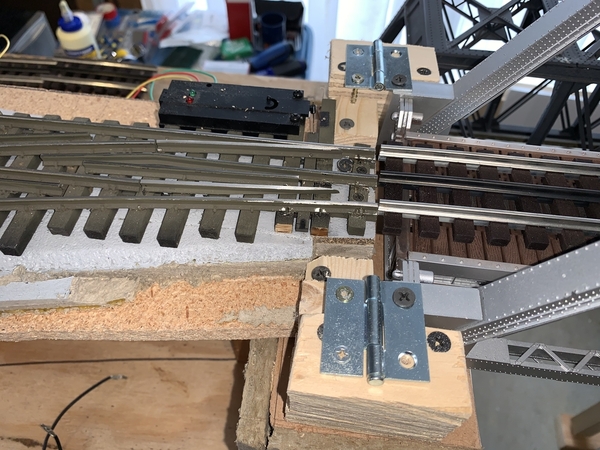
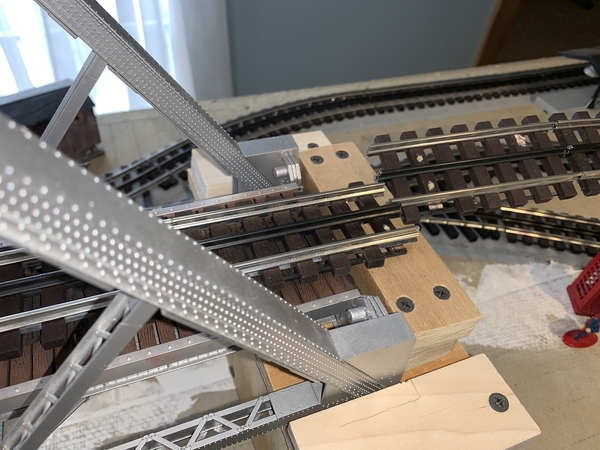
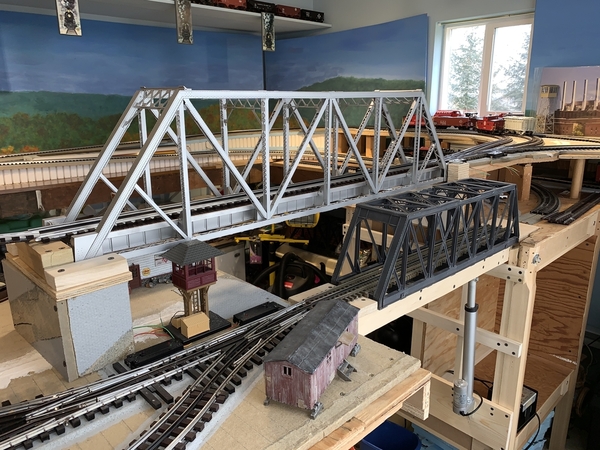
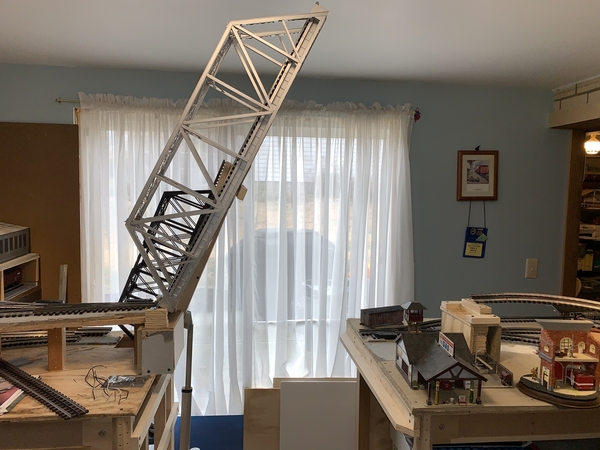
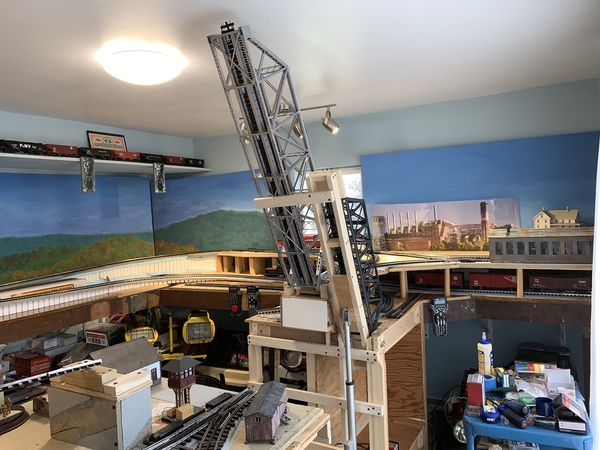
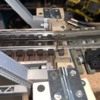
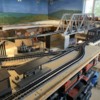
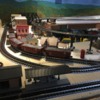
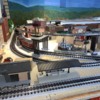
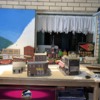
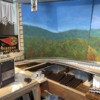
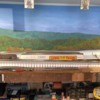
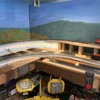
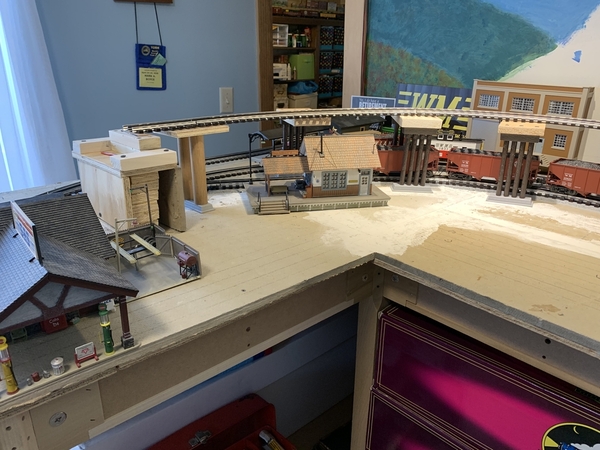
I finally got both my lift up bridges working.  I am following Mike g.'s design.  I'm very thankful he shared drawings and photographs with me.  I have not done any wiring yet.  The linear actuator is powered by my old Lionel DC Type 0100 variable DC power supply I bought to run my HO train back in the late '60s.  In the video I am holding the smart phone camera and controlling the supply so I don't crash into the ceiling.  I have not turned the track power on since I started this project, so don't worry about crashing trains into the gorge.

2021-03-05 10.32.27

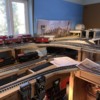
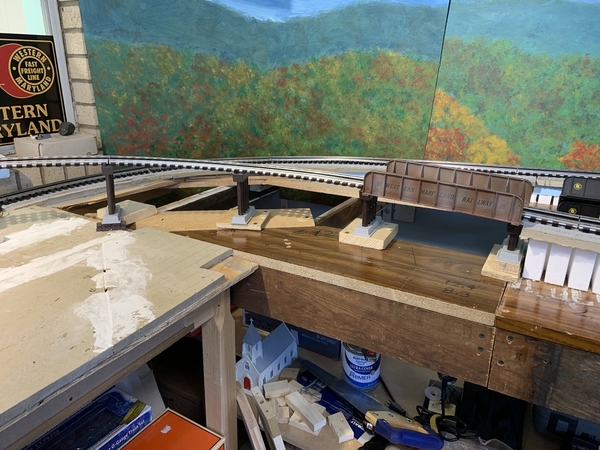
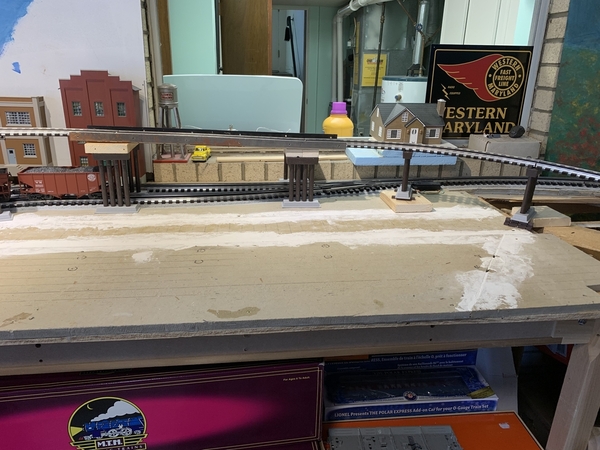
I mounted the Atlas Pratt Truss bridge following a video by Eric Siegel from 2008.  His was not motorized, but I used the same setup for the hinges and the alignment on the other end.    I would have liked the piers for the Atlas Pratt Truss bridge to be not so hefty, but thought I should make them that way to give good support and make a logical base for the hinge mounts.

2021-03-05 10.32.162021-03-05 10.32.082021-03-05 10.31.462021-03-05 10.29.572021-03-05 10.29.44

Next up will be wiring power, limit switches, and track power.

OMG Mark ! this is absolutely amazing !! Top notch excellent craftsmanship !!

Thanks, Alex

Mike G:   Eagle Eye !!! No I haven't cut through the rails yet,  so nothing is hiding.   Just didn't want to deal with the control and wiring issues as I had been waiting year's to finish the main line and connect the upper and lower levels.  Then before I got back to that "lift gate", project,  other projects moved ahead on the priority list,  Kadee coupler conversions, Union Station etc. etc.   Fortunately I can still do the crawl under so it's not super urgent and it's not somewhere I need to get to unless something derails for now.   

Thank you Lance, Alex, Kevin.

Thank you Mike for the question and Chris for the answer.  I had noticed the track also, but guessed it was to be cut later.  I wasn't expecting it to be cut so much later, Chris. 

Yesterday I worked some on the track approaching the bridges.  I thought I had better do that before I put in the final alignments and contacts for track power. I still have some fitting and leveling to do, then I'll post some photographs.

Last edited by Mark Boyce

Thank you very much, Mike!!

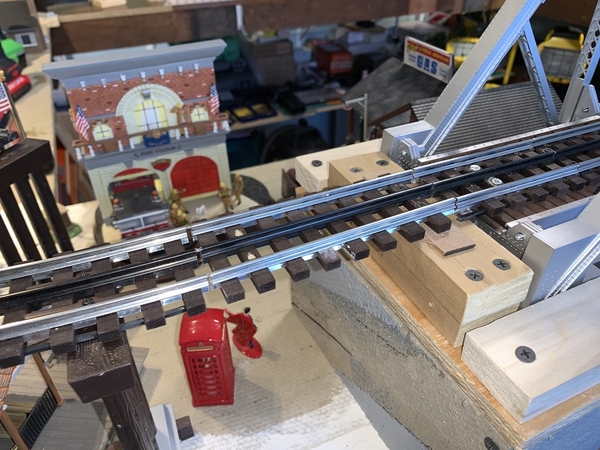
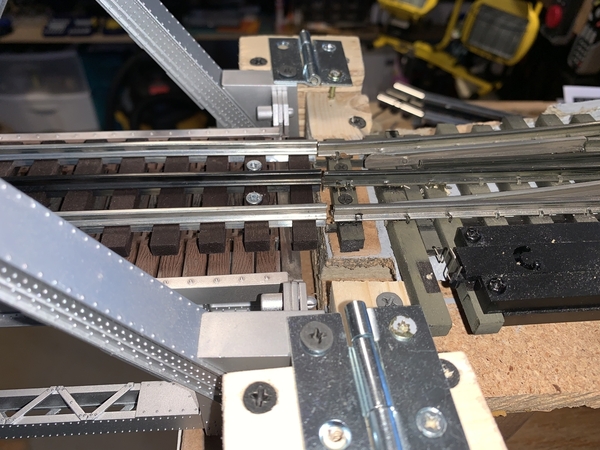
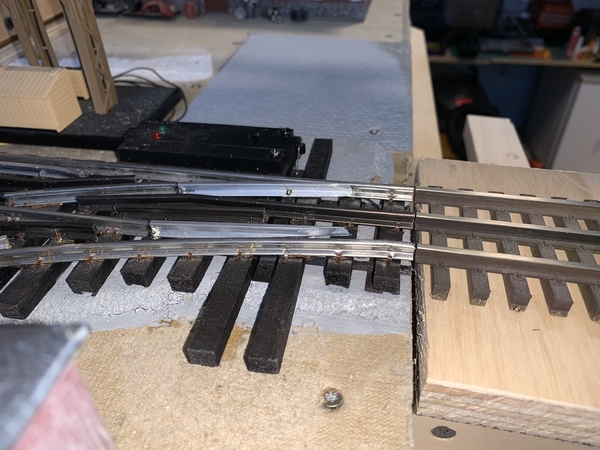
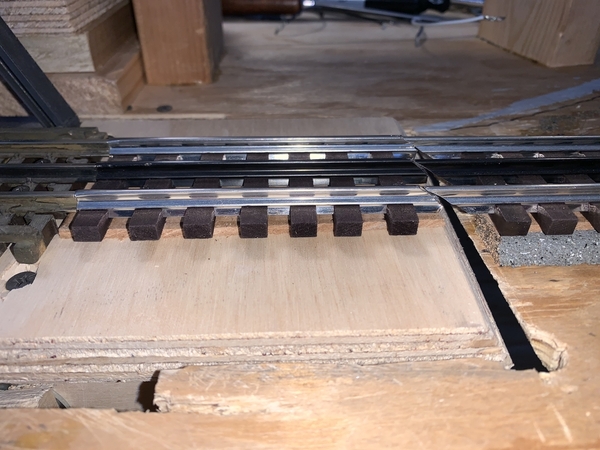
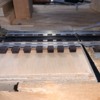
Here are some photographs of the track approaches to the two bridges.  I'll keep an eye on them to see if I need to tweak any of them further.  I wish I could get Superman to lend a hand with this construction, but all he does is stand in front of that British phone booth showing off!

2021-03-07 17.16.082021-03-07 17.12.172021-03-07 17.12.08

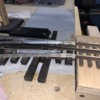
This is the lower bridge that has the end pivot down into the layout.  I think I did a halfway decent job getting the plywood and track cut at an angle.  If I had known how I was going to do the bridges when I laid the tabletop, I would have cut it out all at once instead of trying to fit it all together later.  This looks like a good place for some hefty bushes to hide the joint when the bridge is down.

2021-03-07 17.11.57

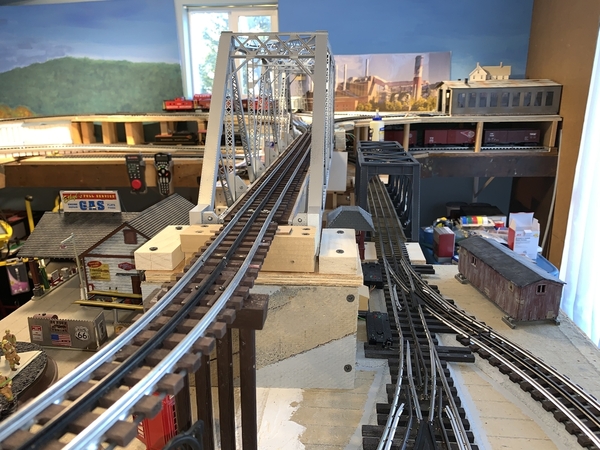
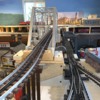
Here is an overall view through the bridges.  I am going to cover the two piers for the big Atlas bridge with a cut stone veneer of some sort.  I think they will turn out pretty good.

2021-03-07 17.17.02

Attachments

Images (5)
  • 2021-03-07 17.16.08
  • 2021-03-07 17.12.17
  • 2021-03-07 17.12.08
  • 2021-03-07 17.11.57
  • 2021-03-07 17.17.02
@Mark Boyce posted:

Thank you very much, Mike!!

Here are some photographs of the track approaches to the two bridges.  I'll keep an eye on them to see if I need to tweak any of them further.  I wish I could get Superman to lend a hand with this construction, but all he does is stand in front of that British phone booth showing off!

2021-03-07 17.16.082021-03-07 17.12.172021-03-07 17.12.08

This is the lower bridge that has the end pivot down into the layout.  I think I did a halfway decent job getting the plywood and track cut at an angle.  If I had known how I was going to do the bridges when I laid the tabletop, I would have cut it out all at once instead of trying to fit it all together later.  This looks like a good place for some hefty bushes to hide the joint when the bridge is down.

2021-03-07 17.11.57

Here is an overall view through the bridges.  I am going to cover the two piers for the big Atlas bridge with a cut stone veneer of some sort.  I think they will turn out pretty good.

2021-03-07 17.17.02

Well done, Mark!

Peter

Well done, Mark!

Peter

Thank you, Peter!  It is my variation of the Geezer Gorge!! 

@mike g. posted:

Hey Chris, I am just trying to help Mark keep you on your toes! You know he has been a little busy! LOL

Mark, I think things are going to be just wonderful! As long as your happy with your layout then everyone should be happy for you!

Thank you, Mike!

Chris, you aren't the only one!  Kevin had to whip me into shape today, and Bob had to yesterday!  I think I am losing it!!  All in friendly dialog!  Thank you.    

Mark, as long as the knives are out - kind if curious as to why you are not using black pan head track screws to secure your track. I was using the silver flat head wood screws until I decided track screws work way better and are really hard to see. Sometimes I can't find them when I am trying to move track.  Otherwise - nice work on the bridges.  Any plans for detail on the rest of the layout?  Jeff

Jeff, good question.   I take it you are referring to the four screws near the two ends of the Atlas bridge.  I had to drill down into the metal frame of the bridge, and the black screws didn't want to bite into the metal.  I used these silver screws because I had them on hand, and I was able to get them to bite into the metal and hold the track.  I'll paint them black when I go over and touch up some ties I nicked up.  All the other track screws are black. 

Thank you for asking.  I don't have time now, but this is a great time to go over the scenic details.  A lot of folks like you have joined in, and I have had some changes in my ideas since I last addressed that.  I'll leave this up on the computer and get back to that in a day or so.

Thank you, John!  You are invited down to see it whenever you feel comfortable.

In answer to Jeff's request for more detail on how I plan to detail the rest of the layout, I'll post some photographs and write a few plans for each area.

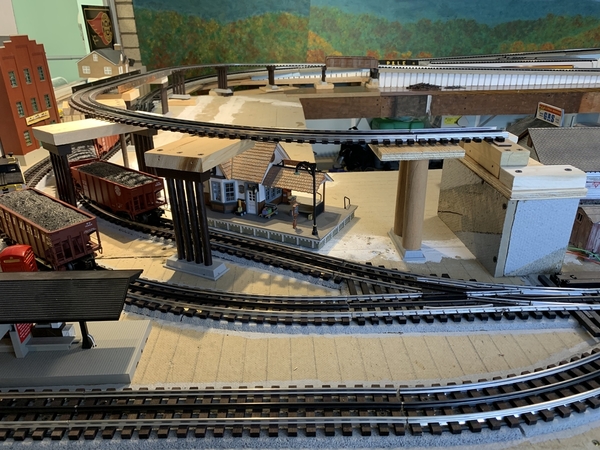
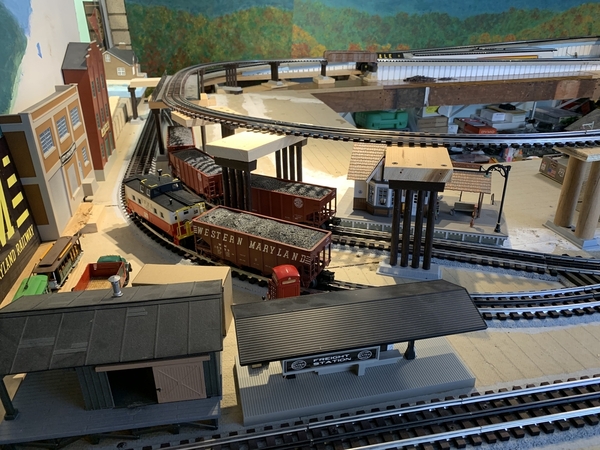
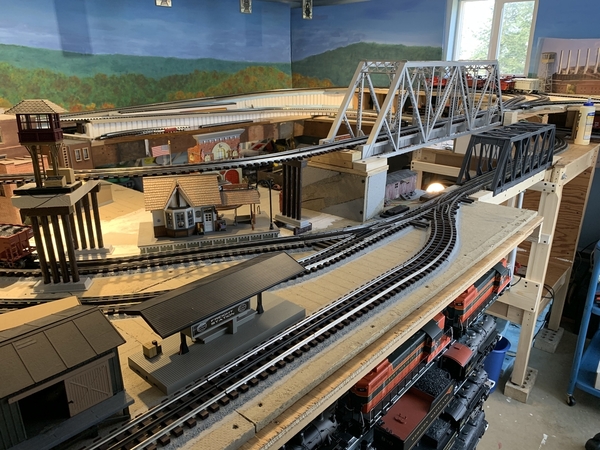
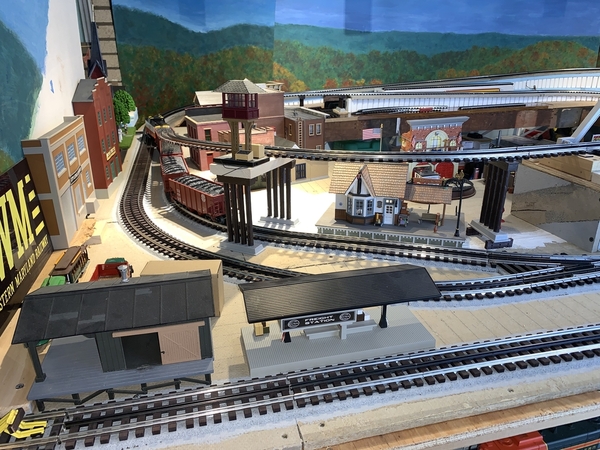
Here is where I left off.  The lower track has one siding off the bridge to the right and a passing siding to the left.  Right now I have a freight station on the right siding, but I would like to put in a business to drop off my lumber loads.  On the passing siding, I placed a station and originally had the switch tower by the switches where the Atlas bridge pier now is.  I just set it up on the rerouted upper level for now.  More on that for the next photograph.  I also have an Atlas switch tower kit like the HO version I built when in my early teens.  Time will tell where they will go.
2021-03-08 13.59.00

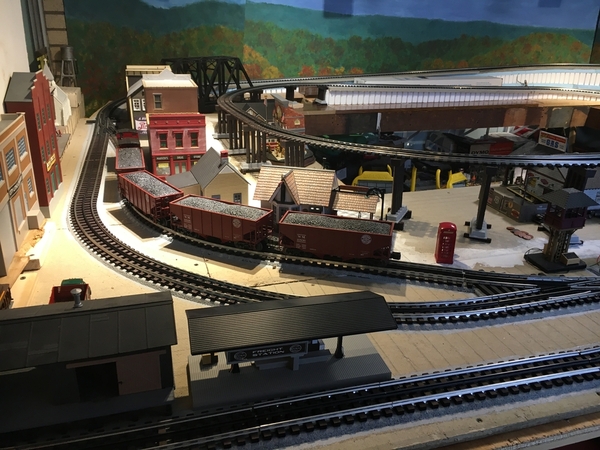
Turning to the left, here is a before photograph of the view of the high line over the town.  I never really liked this because the town was split, with some room for buildings between the trestle line and the asile and some between high line and low line.
2021-01-08 08.53.15

Here is what it looks like right now.  I would have to move the trestles back a little to accommodate the longer than planned Atlas bridge, and even though I proved to myself I could start my 054 curve right after the bridge like Palallin showed he did, the tracks would be right over the Woodland Scenics station with the lift off roof.  I decided to try moving the trestle line over top of the passing siding for a few feet.  I turned two trestles 90 degrees and made a platform between them to support the track.  I will have room between lower tracks to do that until I curve the track towards the upper track in the background.
2021-03-08 13.59.17

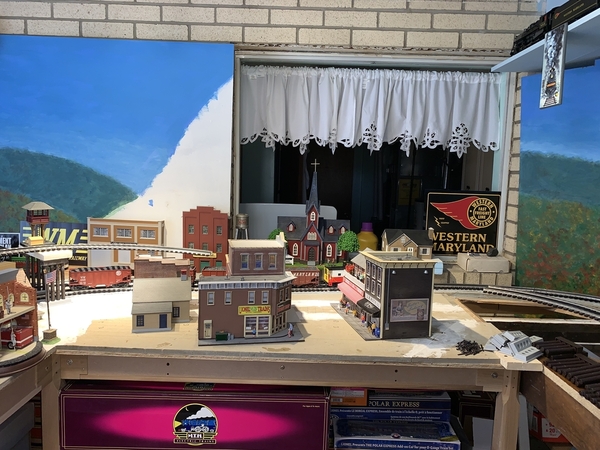
Placing the track over the passing siding allows for much more room for the town.  The buildings or the street alignment isn't set by any means.  I just moved them around this morning when I pulled out the trestles from their old positions.  You can see beyond the tracks I have room for narrow buildings on the windowsill beyond the tracks.  I like the placement of the new Menards church.  You can see on the right the track hanging in space which is the other side of the raised trestle track.  I thin the alignment will work out great, since I already have experience installing the piers  and matching up the two curves.
2021-03-08 13.59.35

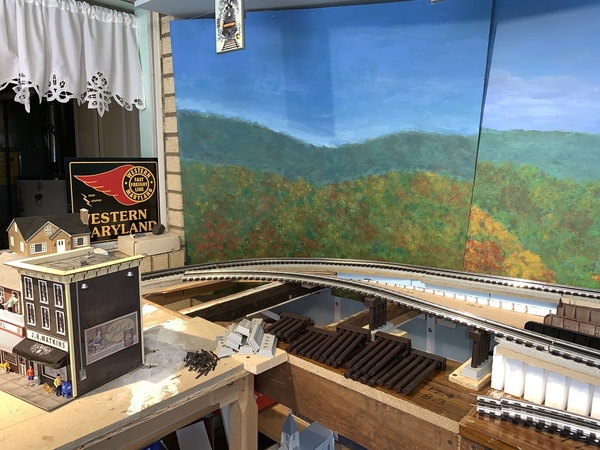
The track to the rear is the beginning of the grade up Blackwater Canyon.  I will be putting in a stream representing the Black Fork of the Cheat River.  I will need to put in a girder bridge like on the prototype for the stream to go under.  I may do it on both the high line in the foreground and the rear line.  I still have to fasten the backdrop sections to the supports.  I didn't do that earlier because I wanted to see how the scenery would match up.
2021-03-08 13.59.43

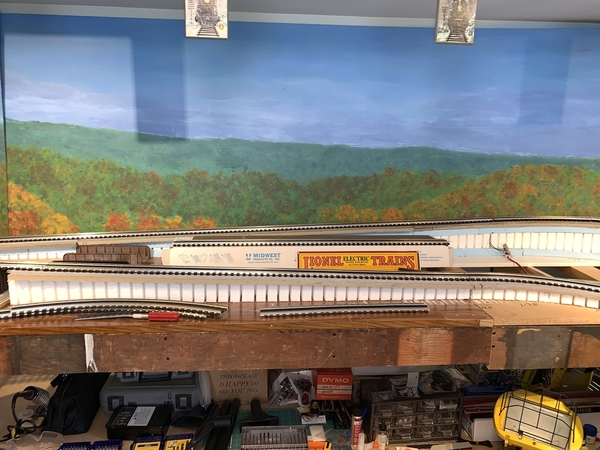
The high line in the foreground is descending fast.  The climb up the canyon is in the rear.  I will have no buildings here, just trees, stream, and rocks.
2021-03-08 13.59.54

Here is near the top of the canyon climb in the rear.  The other line is near table height.  The scenery treatment will be similar to the previous scene.  The stream will duck under the high line between two of the supports.  The passing siding starts on the higher line.  In the foreground is a passing siding that was going to be for coal loads.  I have to rework that, because the switch from the main line to it had to be removed fore placement of the lower bridge.
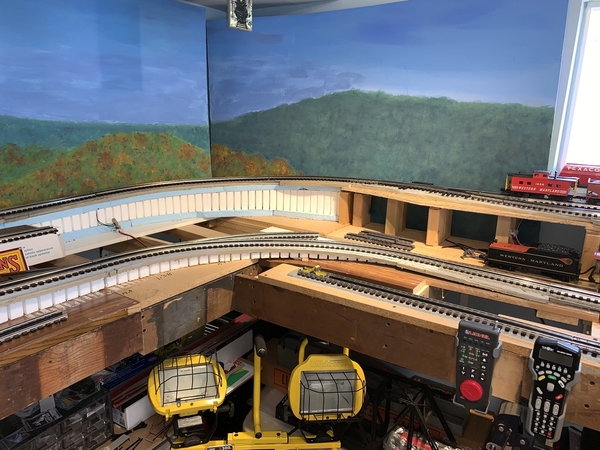
2021-03-08 14.00.00

On the upper line, there is the wye to the two stall engine house by Carolina Craftsman Kits.  I can store some engines there so I don't have to keep lifting them on and off the track.  On the lower line there is a switch that ducks under the upper level to the short yard under the engine house.  It is just for putting cars on and off the layout.  Some Forum members suggested it.  I had planned to have a town on the side of a hill like Thomas, West Virginia, but when I had the chance to get the Thomas engine house, that took some of the space.  The HO house represents some houses.  The power station backdrop needs positioned.  I wanted a power station since I worked at the Mount Storm Power Station that is a few miles from Thomas on the same mountain.  In the left foreground I will build up a place beside the upper tracks for the Carolina Craftsman Kits model of the Thomas West Virginia station that I bought and haven't started building.
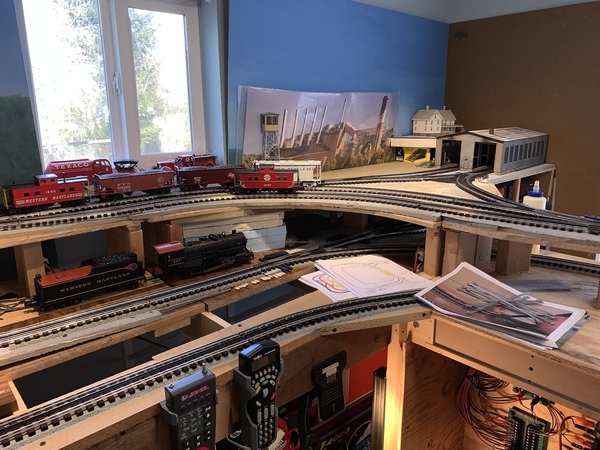
2021-03-08 14.00.10

Here we are outside the operating area for a better view of the engine house and yard.  Also, the approaches to the bridges are off to the left.  You can see on the lower level where I had to remove the switch to that siding to make room for the lower bridge.  It was an 042 switch.  I do not know if a sharper diverging curved switch would clear the supports for the upper level or not.  I haven't put much effort into that.  I just know there wasn't room to move the switch further along the track.
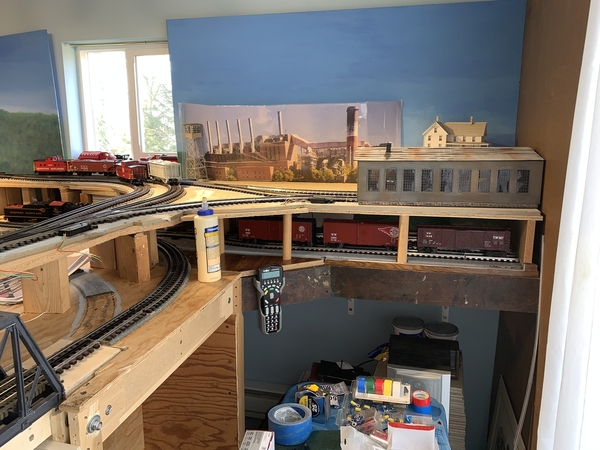
2021-03-08 14.00.39

Well, there you have it.  Any comments or questions are always welcome.  Thank you for looking at the photo tour.

Attachments

Images (9)
  • 2021-03-08 13.59.00
  • 2021-01-08 08.53.15
  • 2021-03-08 13.59.17
  • 2021-03-08 13.59.35
  • 2021-03-08 13.59.43
  • 2021-03-08 13.59.54
  • 2021-03-08 14.00.00
  • 2021-03-08 14.00.10
  • 2021-03-08 14.00.39

Mark, thanks for sharing the vision. Fun moving tracks after the fact, isn't it.  Just a thought, would it make any sense to raise your town to the level of the trestle track? or maybe part way?  Kind of hard to tell - with the piece of track ending where I think you had the Atlas bridge which you say will be connected to a rear track. (starting left of the window?) 

Chicago has a bunch of places where a raised rail runs through city neighborhoods. Solid wall of material until you get to a major street where there was a viaduct. Talk about living on the other side of the tracks. This design effectively sealed off neighborhoods.  To me trestles are for subways/ELs. In a couple of parts of the city, these former rights of way are now elevated strip parks. 

Attachments

Images (1)
  • mceclip0

Mark, I think the layout is coming right along! Remember awhile back I said Slow and Easy. Well it still stands just take your time and enjoy the ride! One day you might think your done and all you will have is just time to sit back and run trains. Now how boring could that get! LOL

Mark,

Really great job on the lift bridges.  Definately a lot of thought and craftsmanship went into that setup!  Very well executed!  It was nice to see your layout overview and scenery plans as well.  Everytime I see your layout it reminds me of driving on Interstate 68 through western Maryland from Cumberland to Morgantown, WV.  I spent a lot of time looking at that scenery as that was my route to and from college.  Keep up the great work!

Michael

Thank you Jay, Jeff, Mike, Pennsynut, Michael, Bill, Scott.

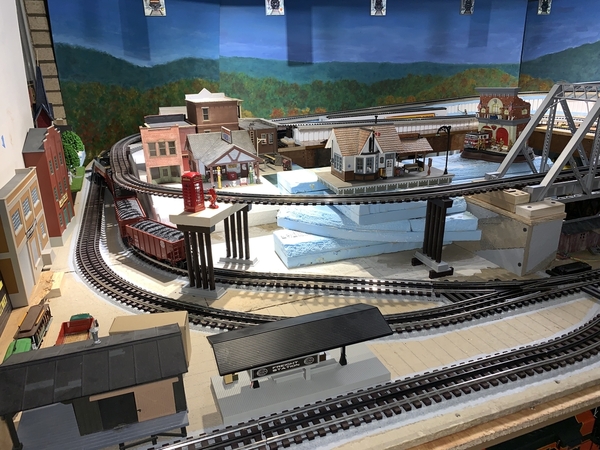
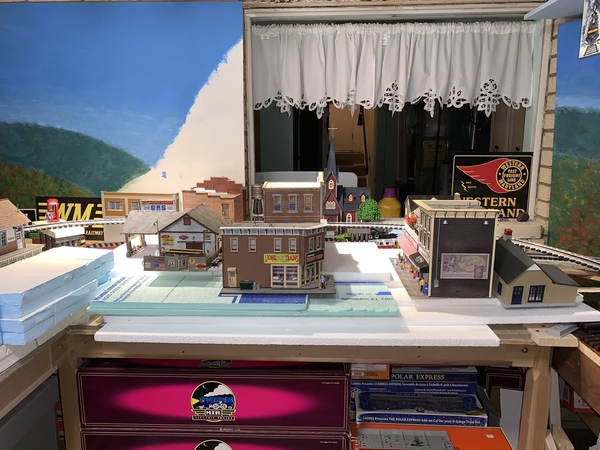
Jeff, The idea was to have the track open underneath to see the scenes behind including the tracks.  I did however mock up a raised foreground town to see how it might look.  I used a bunch of Styrofoam from a former Christmas layout to give a rough idea.  I also connected the last two pieces of track for the upper level balancing them on some temporary supports to show how that would look.

2021-03-08 20.53.162021-03-08 20.52.37

My personal opinion is that parts of the town could be raised a little, especially near the bridge pier, but I think it would make it harder to see the lower tracks in the background.  I agree with your comment that raised track in towns make it seem like Chicago. Though I have never been to Chicago or any other cities that have that arrangement, I have seen enough on television and movies.  I can think of one very small town near us that has a wooden trestle running right through the lower section of town.  The Buffalo and Pittsburgh has tracks through Chicora, Pennsylvania that are on a hefty wooden trestle.  Thank you for the ideas, they are always appreciated and worth further investigation.

Mike, thank you for the encouragement that there is no hurry on this.  Have fun.

Pennsynut, once I get the short section of raised track supported and some power to the bridges, I will take a video.

Michael, I am very familiar with I-68 from Cumberland to Morgantown.  We drove it a lot when we lived in Keyser, West Virginia, though we moved back to Pennsylvania in 1996.  It sure doesn't seem even close to 25 years!  Wow!

Bill, no victory lap yet, as I mentioned to Pennsynut.

Scott, Minimalist or Maximalist, either way your comments are always appreciated.   I agree, I like a layout that has nice rural scenes better than big city scenes.

Attachments

Images (2)
  • 2021-03-08 20.53.16
  • 2021-03-08 20.52.37
@Mark Boyce posted:

2021-03-08 20.53.162021-03-08 20.52.37

My personal opinion is that parts of the town could be raised a little, especially near the bridge pier, but I think it would make it harder to see the lower tracks in the background.  I agree with your comment that raised track in towns make it seem like Chicago. Though I have never been to Chicago or any other cities that have that arrangement, I have seen enough on television and movies.  I can think of one very small town near us that has a wooden trestle running right through the lower section of town.  The Buffalo and Pittsburgh has tracks through Chicora, Pennsylvania that are on a hefty wooden trestle.  Thank you for the ideas, they are always appreciated and worth further investigation.

Mike, thank you for the encouragement that there is no hurry on this.  Have fun.

Pennsynut, once I get the short section of raised track supported and some power to the bridges, I will take a video.

Michael, I am very familiar with I-68 from Cumberland to Morgantown.  We drove it a lot when we lived in Keyser, West Virginia, though we moved back to Pennsylvania in 1996.  It sure doesn't seem even close to 25 years!  Wow!

Bill, no victory lap yet, as I mentioned to Pennsynut.

Scott, Minimalist or Maximalist, either way your comments are always appreciated.   I agree, I like a layout that has nice rural scenes better than big city scenes.

@Mark Boyce

Mark:

Your layout is really progressing wonderfully! Bravo!

Thank you Randy, Neophyte, Leandro!!

Neophyte, Yes if you haven't been in the hobby long, I would expect your wife would shake her head.    I've been married for going on 37 years, and been in the hobby for over 50 years.  My wife knew what she was getting when she married me.  LOL  I can imagine your son would think it is cool.  I never tried making lift up bridges before.  In my mid 60's I don't want to be ducking under a layout much longer. 
Leandro, The two building flats came together in a package.  I couldn't remember who made them, but I found them on line.  They are Atlas O.  Here is a link from the Walthers website.  https://www.walthers.com/city-...-buildings-assembled  I purchased them about 5 years ago from a Western Pennsylvania hobby shop that closed at the end of last year.  There are a lot of more detailed building flats out there, but for background these are nice.

Thank you, Dennis, Chris!!

Dennis, I have noticed from following other modelers including you that we tend to see saw back and forth, like athletes or drivers in a long race one passing another as the marathon continues.

Chris, The question has not come up here before.  In fact, you are the first to comment on them, though I only got them in January.  The holsters are made by Forum member Ray (profile name sidehack).  He 3D prints them for DCS, Legacy, and TMCC remotes, I don't know if he has ones for LionChief yet or not.  His email address is in his profile.  They are really sturdy, about 1/4" thick with countersunk mounting holes.  I have one TMCC remote and two DCS remotes, so I got a holder for each remote from him.  Very handy!!!

Well, I am going to pull out the buildings and foam from my town area, so I can finish getting that elevated track back in its new position.  I'll post more photographs when I have something worth showing. 

Absolutely epic. Especially the lead up to the lift bridge that tucks down into the table. Brilliant. I’m getting better at the construction part but I hit a brick wall when it comes to scenery so I really appreciate all the photos and ideas. Gives me hope. Your layout looks easily twice the size of mine which proves how important good scenery and use of space is.

Mark, I’m proud of the progress you’ve made with the cool lift bridges, very interesting, also they make a great focal point as well as an entrance to get into your layout. The motor sounds are neat and when you do the scenery, it’s gonna be awesome. Your layout is an educational process giving us great ideas for our home layouts. You have come so far and it just gets more interesting. One thing I’ve noticed is you can reach almost every area easily. Your buildings, flats next to the wall, backdrop pictures, are all making a statement, it’s coming together in grand fashion. Great work. To me building the layout is the fun part, getting to run trains is our reward. Keep the pictures coming. Happy Railroading Everyone

Thank you David, Andy, Larry!!

David, I would not have thought of making the bridge pivoting so one end goes down below the table top until I saw Mike g.'s lift up bridge.  I do remember seeing others done that way in the past, but had forgotten until I saw Mike's video.  As far as scenery goes, I think a backdrop does wonders before other scenery is added and ever after.  Also placing some buildings on the layout works for scenic interest until more scenery is added.  I also recall just adding foam landforms really adds a lot even if they are still pink or blue.  All of that does make a layout look larger for sure.

Andy, you are so right, solutions for various issues are needed all through construction.

Larry, every part of the layout is within arm's reach except for about one square foot at the back leg of the wye where the peninsula leading to the bridges blocks access.  I have a folding 3-foot long metal platform that has two steps up on either end that I pulled out of my dad's shop when we were getting ready to sell the place that allows me enough height to bend a bit and access that area.  It is great for accessing my Ceiling Central Railroad as well.  I got so much out of other modeler's topics about layout building that I wanted to do the same.  Others learn from what I do, and I learn from others suggestions to what I post.  Everyone wins!!

I have built all the supports for the realigned overhead track that I moved back towards the wall to accommodate the length of the Atlas bridge.  It made the most sense to extend it overtop of the lower passing siding.  That made for some interesting supports.  I do not like the looks of a lot of these supports, but I have to keep in mind the who trestle system has only been intended to be temporary until I find something I really like.  The 5 supports at the lowest end of the grade are just like the trestles are intended to be used.  I did include the Western Maryland girder bridge on the extra straight section I was able to include.  I like that part.  The rest have the track just resting on top of the supports instead of being screwed down for now until I am satisfied with the alignment.  Notice some of the supports use two trestles straddling the track with boards supporting the track.  I tried cutting the 1/4" plywood like Bob did with his to support lengthwise, but it flexed too much for me.  It is not lauan like Bob used, but I don't know what it is.  It is really old stuff.  I don't like the 3/4" thick boards, but when I cut pieces of the 1/4" plywood I have on hand, it really flexed with a heavy engine on top.  I did cantilevered one board so I could put the station in place.  I also cantilevered one other place because I ran out of trestles that are tall enough.  I did push a passenger car through to check clearance, and we have plenty.

2021-03-12 15.52.172021-03-12 15.52.372021-03-12 15.52.022021-03-12 15.51.562021-03-12 15.51.49

Attachments

Images (5)
  • 2021-03-12 15.51.49
  • 2021-03-12 15.51.56
  • 2021-03-12 15.52.02
  • 2021-03-12 15.52.17
  • 2021-03-12 15.52.37

Mark,

Good work here! You have completed the first step in elevation. Sometimes the practical has to come before the creative. I can't remember how many times I used a piece of plywood or a 2X4 as a bridge until I could decide what I actually wanted. As you see your trains passing over the elevated section you will be able to envision the possibilities. It could be a different type of pier, embankment, or a combination of both. I'm sure whatever you decide it will be great.

Dave

Thank you Dave, Jeff!

Dave, you are so right.  I will be looking at wood instead of scenery for years, but what fun is it to build it in a hurry?

Jeff, You take the high road, and I’ll take the low road, and I’ll be in Scotland before you.  The black bridge ‘was’ a Menards.  I set it in the corner to keep it safe from being damaged until I used it.  I picked it up to move it and dropped it.  With the metal base, it probably wouldn’t have had much damage, but it hit my light stand on the way down and flipped like buttered bread.  The wood split into kindling.  😱

Add Reply

Post
The Track Planning and Layout Design Forum is sponsored by

AN OGR FORUM CHARTER SPONSOR

OGR Publishing, Inc., 1310 Eastside Centre Ct, Suite 6, Mountain Home, AR 72653
800-980-OGRR (6477)
www.ogaugerr.com

×
×
×
×
Link copied to your clipboard.
×
×