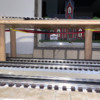
Mark - nice aerial view of the layout.  I've been trying to learn about switching yards, as up this this point I was really not interested in switching.  With your run around, you could lead a switcher into the double industry area at the "bottom",  back the freight cars into the runaround,  uncouple and run the switcher to the other side and then push the cars into the industry track. If you do not do that you would be forced to always having the switcher pushing into that area.

I take it you extended the upper section of track around the curve and under your station?  Of course then you could make another bridge to connect the lower track into a loop.  I've always considered my SCARM layouts a suggested plan, subject to change as I am laying in track.  I just did that with the TP build connecting the two tracks on the incline together and at the bottom to be able to lead in with an engine, run around and push into the yard. 

@Mark Boyce posted:

Does anyone see a reason why I should leave the 042 switches in place to provide some kind of run around?  I can't see any reason, but I am certainly not much higher than a novice at rail yard operations.  This is why I have reserved setting up a Golden Spike ceremony.

An extra run around is usually a good thing in my experience but that's all I can contribute haha

What are the dimensions for that industry area you have called out?

Thank you, Jeff, Bill!

Jeff, I think I will leave it as is for now and start wiring what is new.  Yes, I agree, when I previously built from a SCARM drawing, it didn’t work out exactly as planned.  Then I had ideas for changes as I went.  I eventually made an as-built drawing, but it didn’t have the exact alignment either.

Yes, I could do something like this and have a complete run-around track.

92F4AC86-76EB-45D9-9CBB-CA1ADD9EC016

Placing that track section there for the photograph reminded me that I used all the track Andy sent me except for a section of Ross straight about 18” in length.  Thank you, Andy!!

I did have to buy 1 section of 054 curve, so I bought 2 of those and 2 flex sections just in case.  I do have 18 sections of 042 curves I never used that I can pass on to someone else.

Bill, the industry is a figment of our imagination right now.  😄  The space is 18” long and the end of the ties are 5” from the edge of the layout.  Of course right now the 042 switch fouls the middle of that space.  There is a space under the station that could be used as a little vignette.  

EF6DBBB7-E52B-47A8-B52B-F2572AC583A4

I tested all 10 of my command control engines pulling the same train up the grade. I discovered the first engine I tried is the only one out of the 10 that draws excessive current of just over 3 amps.  The others all draw between 1 and 2 amps.  Maybe I need to look at the Consolidation that drew over 3 amps to see if something is wrong with it.  If I can fix the Consolidation that the mechanism locked up, I would have something to compare it to.  It’s always something!  🤪

Attachments

Images (2)
  • 92F4AC86-76EB-45D9-9CBB-CA1ADD9EC016
  • EF6DBBB7-E52B-47A8-B52B-F2572AC583A4
Last edited by Mark Boyce

Mark, a hearty congratulations to you for what you've accomplished so far! Due to a variety of "life adventures" I haven't been on the forum here for I think almost 5 years. Back then you were a kindred spirit that was an inspiration to me, and now after spending a week going through all 88 pages, you've inspired me all over again. THANK YOU!!

Thank you, Slowhands, Bob, Lance!

Slowhands, I'm glad you are back!!  88 pages read this week!!  I never dreamed we would get this much content!  As you so, so much information was contributed by a host of forum members.  I'm glad we were able to inspire you!!

Bob, Thank you for the comment to leave the switches in.  I would never know how they work out unless I leave them in.  The spike is in it's protective box awaiting the right time!  Good idea about the Harmon shops.  Pat already has one of my engines.  I will await the damages on what I owe!   

Lance, thank you!

Today, put in the missing power jumpers to two yard tracks.  I realized a long time ago I had forgotten them.  I started checking off track blocks that have power and those that don't using a couple of SCARM printed drawings.  I also put away some tools and got others out to start wiring the blocks that don't have power.  Nothing to show in a photograph!

Mark, congratulations! It looks like you’ve arrived at a great solution. Thank you for the explanations and aerial views. I’m still in awe of the track plan and how much interest you’ve incorporated into this space. It’s been a great journey, and I agree with Bob, don’t rush the golden spike. I’m glad I could help your cause in some small way.

Andy

Andy, thank you so much!  I am thankful for DAZ Dave’s and ScoutingDad Jeff’s ideas and input for the track planning.  It is true I came up with some of it myself, but it wouldn’t be what it is without the whole community on this great forum!

As for my next part, I plugged in the 4th AIU and linked it to the TIU to make sure that works before mounting to the wood and wiring.  I also put in jumpers and started to wire them to the power.  The space is tight, but there is room for the wiring.  It reminds me of working in a tight cabinet for the power or telephone company.  At least this work is in a climate controlled room, and I have a double padded stool to sit on.  I don’t even want to think about some of the lousy places I have had to work in over the years.  Also, there are no mouse or wasp nests in this space!  😄  I have seen some real unhealthy cabinets over the years!  🤕😜

Mark I am so happy for you and how far you have come with your layout! The good thing about your next project of wiring is that you have many years of experience doing it. For me that is the hardest part! Anything electrical related I need step by step instructions and photos and videos don't hurt either! LOL

I might be hitting you up on your electrical skills!

Thank you, Mike.  As far as wiring goes, I followed a plan Bill Webb shared with me.  I’m glad to pass that along.

Since last post, I wired 6 blocks and then ran out of wire again.  I certainly missed that estimate 🤔 but didn’t want to pay for way more wire than I needed.  I ordered another 100 feet of red and black #14 AWG, which should be here early next week.  Today I did install 3 manual throws on the three new yard tracks neat the edge of the layout.  There are 3 new switches that have DZ1000 switch controllers to wire also.

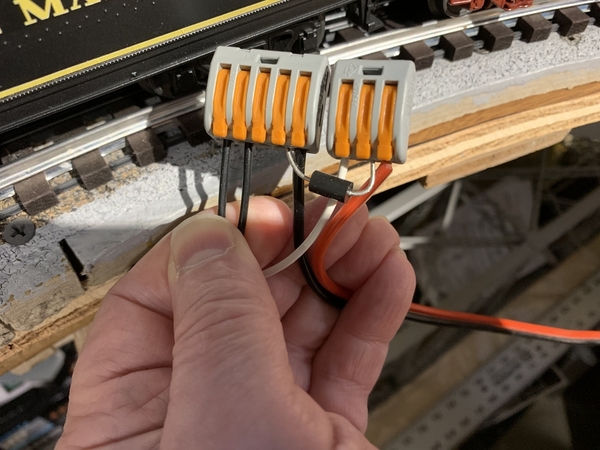
Here is a photograph of how I connected the #14 feeds to the #18 drops from the track.  The larger red and black wires go to the terminal blocks near the AIUs, and the smaller white and black go to the rails.  The diode looking device is a TVS that can protect engine electronics from short circuits. I am using up the gray WAGO connectors I bought a couple years ago.  They are almost gone.  I have 2 boxes of the clear style that have levers that are easier to operate. 😊

D7A6A5F3-57D0-4E13-9BEC-E4483CE21855

Attachments

Images (1)
  • D7A6A5F3-57D0-4E13-9BEC-E4483CE21855
Last edited by Mark Boyce
@Mark Boyce posted:

Thank you, Mike.  As far as wiring goes, I followed a plan Bill Webb shared with me.  I’m glad to pass that along.

Since last post, I wired 6 blocks and then ran out of wire again.  I certainly missed that estimate 🤔 but didn’t want to pay for way more wire than I needed.  I ordered another 100 feet of red and black #14 AWG, which should be here early next week.  Today I did install 3 manual throws on the three new yard tracks neat the edge of the layout.  There are 3 new switches that have DZ1000 switch controllers to wire also.

Here is a photograph of how I connected the #14 feeds to the #18 drops from the track.  The larger red and black wires go to the terminal blocks near the AIUs, and the smaller white and black go to the rails.  The diode looking device is a TVS that can protect engine electronics from short circuits. I am using up the gray WAGO connectors I bought a couple years ago.  They are almost gone.  I have 2 boxes of the clear style that have levers that are easier to operate. 😊

D7A6A5F3-57D0-4E13-9BEC-E4483CE21855

That's a good way to add the TVSS diodes Mark.

Bob

Mike, I’ll take some good photographs after I finish wiring in the last 4 blocks.  Hopefully the wire will arrive tomorrow as scheduled!

I programmed and tested all the new blocks I had wired after PT today.  I also have to wire in the contacts to power the double track bridge when it is lowered.  I can wire in the new DZ1000s after I have trains running.  I need to come up with a couple panels for the DZ1000s and rewire all the push buttons when I do the new ones.

@Mark Boyce posted:

I received the roll of wire yesterday.  The remaining 4 runs of wire have been terminated, the AIU has been setup, and all blocks tested.  Here is a photograph of the AIU panel.  Mike, I’ll take photographs of individual items and their wiring another day.

21259B3B-2B6C-499F-9531-10534BA9899C

@Mark Boyce

Mark:

That is a superb job of wiring. I have a question not directly related to your wiring. How do you attach the AIU's and TIU's to the walls of your connection enclosure? That is the one flaw in MTH design that I can find. The interface units have no screw holes for that purpose.

@Mark Boyce

Mark:

That is a superb job of wiring. I have a question not directly related to your wiring. How do you attach the AIU's and TIU's to the walls of your connection enclosure? That is the one flaw in MTH design that I can find. The interface units have no screw holes for that purpose.

Randy- I used 3M command velcro strips to mount my Cab-1L they work well.

2023-03-11 17.07.43

Mark- the panel looks great. Bet your glad to have that job is behind you. Hope the PT is going well.

Bob

Attachments

Images (1)
  • 2023-03-11 17.07.43

@Mark Boyce

Mark:

That is a superb job of wiring. I have a question not directly related to your wiring. How do you attach the AIU's and TIU's to the walls of your connection enclosure? That is the one flaw in MTH design that I can find. The interface units have no screw holes for that purpose.

I take the rubber feet off, and drill a hole trough the plastic.

TIU Screw Hole

Attachments

Images (1)
  • TIU Screw Hole

Thank you, Mike, Jay, Justin, Randy, Bob, Marty!!

First off, I will address Randy's question, which Bob and Marty replied to.  Thank you both for chiming in.  For quite a while, I was like you Randy wondering why there weren't any mounting holes, slots, whatever.  I made my first board with only a TIU and Base 1 with Velcro just like Bob showed.  One day I mentioned the issue on the Forum, and was given the answer Marty shared.  Here I thought the holes in the front only allowed you to get a screwdriver in to remove the front of the housing to replace a fuse or whatever.  Actually, if you peal off the rubber feet on the back of the TIU and AIU, the hole is already there except I had some flashing on one AIU I had to drill out as Marty showed.  Otherwise, you just need a standard Phillips head screwdriver and some self tapping screws, or in a pinch, just press hard on the screwdriver until a regular screw gets a bite into the plywood. 

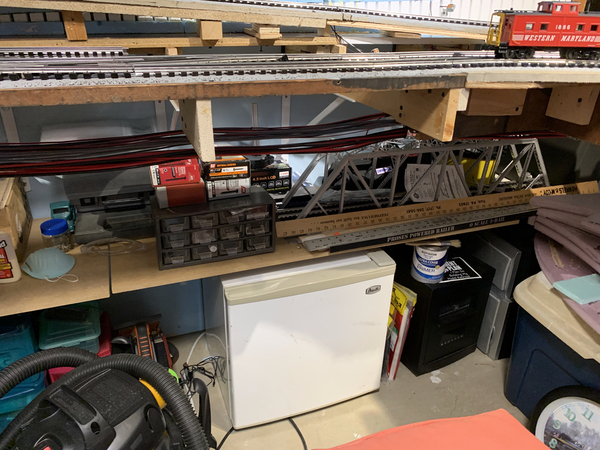
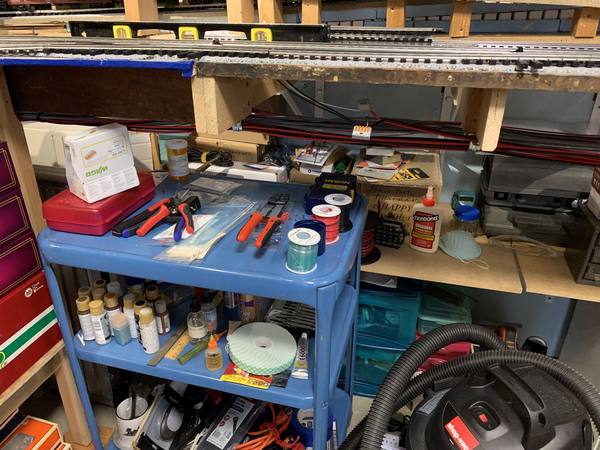
Mike, Thank you.  I'm not pulling out the boxes under the layout that are right behind the right side board so you can see all the wires coming in from all over the layout.  That was another problem besides running out of room adding to the scope of the layout.  They are crisscrossed in a rather haphazard fashion to enter the holes at the top of the panel.  Initially, I thought I would put the panel under the layout on the long wall underneath the two grades.  However the initial configuration had most of the switches on this one end of the layout, the little yard, engine service area, and one of two passing tracks.  I thought I would have less long wires, and this was the spot I could make the two sided board.  When I started the reconfiguration, I quickly realized, this wasn't the best spot, but I wasn't about to take everything apart and rerun all the wiring.  I have done that before at the power company when we moved 7-1/2 foot tall steel relay panels, and it is a mess to keep all the wiring documentation straight for the electricians.  Talk about using a lot of red and green pencils on the drawings!!  It can blow your mind!! 

Bob, yes I am glad this job is behind me.  I have the switch wiring to attack, but that is a project for next winter. 

Funny you mention PT.  I have completed 5 weeks, and the pain had really improved.  There are two issues.  I now have new pain in the thigh muscles mostly, but also in the hips when I first get up in the morning.  Yes, I have really put the muscles through the paces, so that makes sense.  However, I thought I lost strength in the legs.  Here the nerves to both legs have stopped responding to what the brain tells them.  It is worst going up stairs.  So now I am starting on new exercises to "retrain" the nerves as the therapist put it.  I am certainly glad I am retired now!!!!!!!    Time to go do my first of 2 daily exercise sessions. 

@Mark Boyce posted:

Thank you, Mike, Jay, Justin, Randy, Bob, Marty!!

First off, I will address Randy's question, which Bob and Marty replied to.  Thank you both for chiming in.  For quite a while, I was like you Randy wondering why there weren't any mounting holes, slots, whatever.  I made my first board with only a TIU and Base 1 with Velcro just like Bob showed.  One day I mentioned the issue on the Forum, and was given the answer Marty shared.  Here I thought the holes in the front only allowed you to get a screwdriver in to remove the front of the housing to replace a fuse or whatever.  Actually, if you peal off the rubber feet on the back of the TIU and AIU, the hole is already there except I had some flashing on one AIU I had to drill out as Marty showed.  Otherwise, you just need a standard Phillips head screwdriver and some self tapping screws, or in a pinch, just press hard on the screwdriver until a regular screw gets a bite into the plywood.

Mike, Thank you.  I'm not pulling out the boxes under the layout that are right behind the right side board so you can see all the wires coming in from all over the layout.  That was another problem besides running out of room adding to the scope of the layout.  They are crisscrossed in a rather haphazard fashion to enter the holes at the top of the panel.  Initially, I thought I would put the panel under the layout on the long wall underneath the two grades.  However the initial configuration had most of the switches on this one end of the layout, the little yard, engine service area, and one of two passing tracks.  I thought I would have less long wires, and this was the spot I could make the two sided board.  When I started the reconfiguration, I quickly realized, this wasn't the best spot, but I wasn't about to take everything apart and rerun all the wiring.  I have done that before at the power company when we moved 7-1/2 foot tall steel relay panels, and it is a mess to keep all the wiring documentation straight for the electricians.  Talk about using a lot of red and green pencils on the drawings!!  It can blow your mind!! 

Bob, yes I am glad this job is behind me.  I have the switch wiring to attack, but that is a project for next winter.

Funny you mention PT.  I have completed 5 weeks, and the pain had really improved.  There are two issues.  I now have new pain in the thigh muscles mostly, but also in the hips when I first get up in the morning.  Yes, I have really put the muscles through the paces, so that makes sense.  However, I thought I lost strength in the legs.  Here the nerves to both legs have stopped responding to what the brain tells them.  It is worst going up stairs.  So now I am starting on new exercises to "retrain" the nerves as the therapist put it.  I am certainly glad I am retired now!!!!!!!    Time to go do my first of 2 daily exercise sessions. 

Mark,

Your work is just impeccable! How do you label the wires so that you can identify them out under the layout?

As I continue planning my new layout, I am more and more focused on whether my 20 year old z4000, TMCC and DCS components will perform. Yours seem to be doing well, which is very encouraging, especially since nothing new is being manufactured at present and the new Base3 seems designed to give us to use our IPADS, etc for control.
Good luck with your latest bout of PT. I’m doing very well after two knee replacements but getting PT for my arthritic hips. I marvel at how you can get down and under your layout to get things running and wired, not to mention building that entry lift bridge. Very impressive! I hope I can do as well  

Thanks for sharing  We all benefit from your generosity and know- how.

Rubin

Thank you, Mike, Rubin!

Yes it is a mess!   I don't have anywhere to put all this stuff.

20230401_174243398_iOS20230401_174250143_iOS20230401_174254905_iOS20230401_174259923_iOS20230401_174304247_iOS

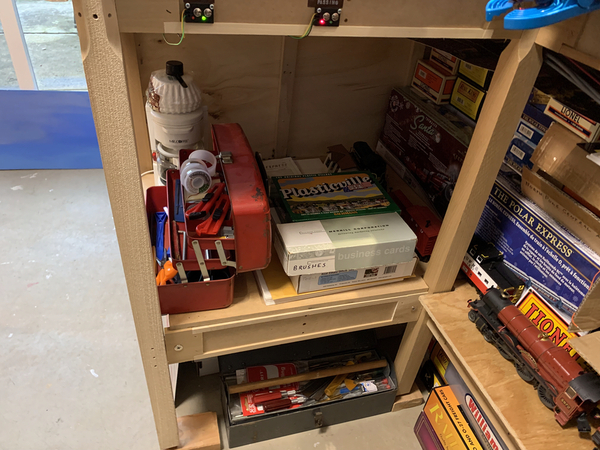
Rubin, as you can see, I would not get under the layout easily.  I run wires along the front edge of the layout where I can easily reach them.  In places where I can reach through the bench top, I stand and connect the main runs to the drops from the track.

20230325_204100665_iOS

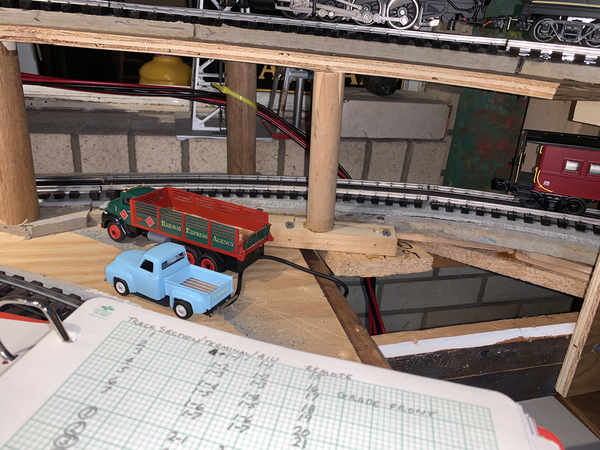
For this upper level that has a full tabletop underneath, I set the spool of wire on top of the layout and pulled the wire to the  the gap shown.  Then I pulled the wires through to the other end of the layout where they were terminated while standing in the middle open area.  There were only a couple of runs where I had to move something and reach in while sitting on the rolling stool to do wiring.

20230331_151309142_iOS20230331_151318925_iOS

As for labeling, I did not label any wires.  I didn't find it feasible to label the wires underneath if I can't reach them anyway.  I have printouts of the track plans that have number and letter designations beside each track section.  I listed all of them on a sheet of paper, and then listed the terminal block number, AIU, number, and relay number along side of that.  I can use the drawings and chart to located any wire.  If I have a time when I have an open or short circuit and need to get at a WAGO connector underneath the layout, I will get one of the daughters or sons-in-law to come over and do my crawling for me.  There is an advantage to having them all live within 2 miles from our house.    I don't like to wear out my welcome, though.  The layout has been built 100% by me.

Attachments

Images (8)
  • 20230401_174243398_iOS
  • 20230401_174250143_iOS
  • 20230401_174254905_iOS
  • 20230401_174259923_iOS
  • 20230401_174304247_iOS
  • 20230331_151309142_iOS
  • 20230331_151318925_iOS
  • 20230325_204100665_iOS
Last edited by Mark Boyce
@Mark Boyce posted:

I received the roll of wire yesterday.  The remaining 4 runs of wire have been terminated, the AIU has been setup, and all blocks tested.  Here is a photograph of the AIU panel.  Mike, I’ll take photographs of individual items and their wiring another day.


Mark, are you a retired phone tech? That's some outstanding work, it reminds me of the quality work the twisted pair techs used to do.

Dave, you guessed well.  Thank you!!  I am a retired power company controls technician, and retired telecom technician and engineer.  Yes, two pensions.    I moved into engineering when I was 51.  Wow, that was 15 years ago already!!

I learned being neat working at the power company in my earlier years.  Power company work was much neater than telecom, which says a lot.  The earlier power controls panels, when they still used waxed string to tie wires, were works of art.  Making changes on those panels, no matter how neat you were with plastic cable ties, were not as neat as the older panels from the 1960s and earlier.  As for the phone work, most twisted pair wiring was very neat as well.  As I mentioned to Rubin. none of those wires were tagged; good record keeping was a must.  When there are so many wires in a small space, tagging becomes a nightmare.
Thank you, Bill, Andy, Mike!

Bill, many thanks for the information on setting up the AIUs and relays last year!  You were right in saying I would use the spare AIU before long!  😄

Andy, yes the panel looks a lot better than the mess underneath the rest of the layout.  I admit I was really shortsighted on the amount of space I would need!  Some areas of it are hard to work in. 🤕

Mike, I do have a lot more boxes in a very large plastic bin that is behind the brick wall in the laundry.  It was hard to find a place for all of them!

I don’t know if you can use the DZ1000 control button units on MTH switches.  I don’t know what circuit is in those little push button units.  I have never seen the Scale Track switches.

Last edited by Mark Boyce

Thank you Rich!

It is only fair to Rich and everyone who has commented on the wiring for me to show the back side of the panels.

AEF2DEBE-ECE0-49BF-B3F5-E79125A0672A

I had to sit on the stool and stretch my hand as far back to the wall as I could to get the above photograph.  This is the problem with the location I selected for the panels.  It is at the Tee in the benchwork.  Nice for front access, but it wasn’t worth trying to get things neat back there.  😄

91403974-6622-49B3-960E-E3D8E1C6A515

44CF75F9-CFF8-49B0-A328-9B642EC16C4E

Attachments

Images (3)
  • AEF2DEBE-ECE0-49BF-B3F5-E79125A0672A
  • 91403974-6622-49B3-960E-E3D8E1C6A515
  • 44CF75F9-CFF8-49B0-A328-9B642EC16C4E

Thank you, Mike and Greg!

Mike, I thought I needed to give some moral support to everyone who may have been intimidated by my wiring.  I always feel sad that I have never been able to cut wood straight and square, though I don’t have access to any kind of table saw.

Greg, yes the pain has subsided a lot.  Now if I can get the nerves in my legs to wake up and move me around, I’ll be much happier!  😊  I did not understand what was going on with my legs after my lumbar fusion in May ‘21.  Same situation now.  🤷‍♂️

@Mark Boyce posted:

Thank you, Mike and Greg!

Mike, I thought I needed to give some moral support to everyone who may have been intimidated by my wiring.  I always feel sad that I have never been able to cut wood straight and square, though I don’t have access to any kind of table saw.

Greg, yes the pain has subsided a lot.  Now if I can get the nerves in my legs to wake up and move me around, I’ll be much happier!  😊  I did not understand what was going on with my legs after my lumbar fusion in May ‘21.  Same situation now.  🤷‍♂️

Don't worry Mark, it is getting harder and harder for me to cut straight or square stuff anymore also!

Add Reply

Post
The Track Planning and Layout Design Forum is sponsored by

AN OGR FORUM CHARTER SPONSOR

OGR Publishing, Inc., 1310 Eastside Centre Ct, Suite 6, Mountain Home, AR 72653
800-980-OGRR (6477)
www.ogaugerr.com

×
×
×
×
Link copied to your clipboard.
×
×