Mike, I'm sure Tank has gone ahead to inspect the next project and he'll be waiting for you.
Steve
|


|
Mike, I'm sure Tank has gone ahead to inspect the next project and he'll be waiting for you.
Steve
Very sorry for your loss.
Just ran some trains this rainy day.
I am very sorry to hear about your loss Mike. Animals like dogs are hard to let go when they are family.
On a lighter note, I was able to get a full product review done of the Valley Flyer version of the new 2-10-10-2. I wished to have had it done sooner, but due to back pain, computer problems, and just plain life it was pushed back. Hope you all enjoy it, and happy railroading!
Mike, So sorry to hear about Tank. They are part of the family for sure.
Andy
Sorry to hear the news Mike! Stay well.
@mike g. posted:Morning guys, first off Alex and Alan if you remove this I understand. I am just posting this as everyone here is like family!
This morning we had to let Tank the inspector go free of his duties as inspector and he is now riding the train over the Rainbow bridge! He was there from the start of the train room addition up until this morning for one last inspection! He loved the trains!
Bulldogs are sweet Mike & it looks like you gave him a great life.
I will check back in with all you great folks when I get my head on straight again! Please keep up the great work so I have new ideas to read about and maybe try!
Most of all I hope you all find time to have fun with your trains and layouts!
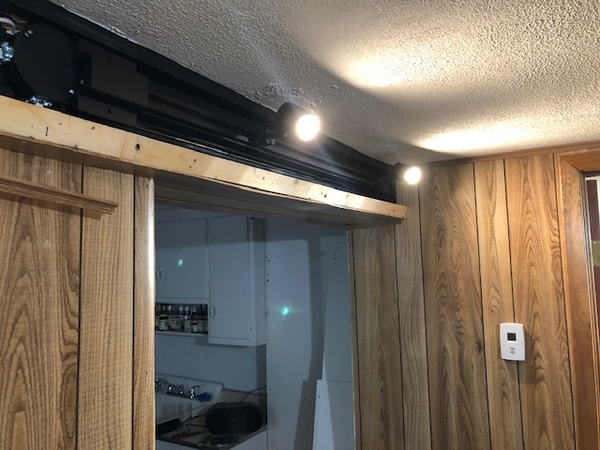
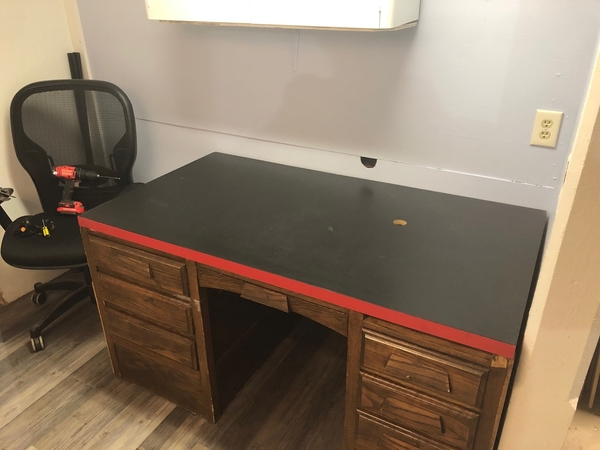
Continued with layout room prep, etc. Finished the "turn around loop" room that I'll be sharing with the CEO and her starter plants. The turn loops will be punched thru the wall. Also started on an upper shelf row of LED spots in the main train room, so far so good. Also snagged a free desk with a nice top for the former basement kitchen area- which will now be additional work space. Have to keep moving as I return to work March 1st.
Mike,
Sorry to hear of the loss of your train buddy. I'm sure he's keeping an eye on your progress from his new home.
John
My CEO has twisted my arm this passed week to remove 40 year old wallpaper and to primer and paint our half bath off from the library/den.
During this morning's improvement detail I was listening to Matt Jones KY Sports Radio. Of course a big topic is the rain, ice, snow forecast from Texas to the northeast. Matt informs the audience The Lexington weather person, Chris Bailey on WKYT Lexington has had several weather models KY this week.
So Matt informs his listeners that Chris has more models for this week than Lionel.
Mike G: Very sad news about Tank, That's a really difficult challenge to get through. I know from personal experience. Hang in there, stay busy. We'll all miss photos of Tank on "inspection runs".
Haven't been doing much on my home layout.
The Museum layout? That's another story...
I removed all the track so that another layer of Homasote could be added and painted (photos to follow).
The track was brought back to my workshop, cleaned and tightened.
The lighted lockons will no longer be used as a power feed. Instead, the wire has been soldered directly to the rails. Each oval (O27 and O42) will have feeds at each end of the 12 foot layout.
This VoltBolt will be used on the layout to turn off the power when I'm not there to supervise.
10a breakers being wired up.
A view of the wiring harness. The spade lugs will connect the ZW hot leads to the individual breakers; the black wires will go direct to rail ground. The red buttons will be mounted in the benchwork to operate various accessories such as the whistle and crossing gate.
Anybody wishing to make comments concerning air breakers is more than welcome to donate a set to the museum. My email address is in my profile. ![]()
Mitch
@M. Mitchell Marmel posted:Haven't been doing much on my home layout.
s. The spade lugs will connect the ZW hot leads to the individual breakers; the black wires will go direct to rail ground. The red buttons will be mounted in the benchwork to operate various accessories such as the whistle and crossing gate.Anybody wishing to make comments concerning air breakers is more than welcome to donate a set to the museum. My email address is in my profile.
Mitch
Greetings Sir Mitch, With the grandkids not around as much this year, not even a carpet home layout here. Even the Big Club layout was not well attended over the Holiday Running Night Lights this year....
I have a question, Do you favor any of the new era Transformers for small 4x8 layouts?
Cheers
@Miggy posted:I have a question, Do you favor any of the new era Transformers for small 4x8 layouts?
Well, you have to watch out for the Decepticons. They're not trustworthy... ![]()
Can you be more specific as to which models and manufacturers? I'm not thrilled with modern Lionel, but MPC makes a good product and I use an Atlas transformer on my test bench. The Z series from MTH are proven performers.
Mitch
@Apples55 posted:@RSJB18 the Rutland consist is very sharp, Bob... definitely needs a matching caboose
No caboose yet but I did pre-order the Two Cousins refer from Nassau Hobby yesterday ![]() . We used to go there when I was a wee lad.......
. We used to go there when I was a wee lad.......
Thanks Paul.
Bob
I re-wired my Menards F7 in series last night. Don't know why I hadn't thought of this sooner to slow it down but on another thread is was mentioned and done successfully. Makes a big difference.
Transformer is at 12v, and the remote at the lowest setting to get the engine moving.
First video is parallel wired, second is after series wiring. Note the time on the two videos too.
Bob
So sorry to hear about tank. I don’t know how I’ll take it when something happens to Chester. I joke around that it’s “his” trainroom.
I had the materials, so I started another shelf yesterday. The first one filled up fast. I also ordered 10 more GS display shelves. Hopefully that will allow me to get everything up off of the floor, and have room for swapping out rolling stock.
@mike g. - I'm terribly sorry about Tank. Seeing this news makes me hurt inside. Dogs are family and it is terrible when one crosses the rainbow bridge. I hope that you are able to remember all the great moments with you and Tank over the pain of the end sooner rather than later.
Matt
OMG Mike I'm so sorry about Tank ! Dogs to me are absolutely family. My heart goes out to you and your family. Anytime i hear about a dog passing it takes a toll on me. May Tank rest in peace.
Alex
@JDtrain posted:
Nicely done! Weathering is the next chapter in my train life. Would like to hear more about your method/steps for weathering.
Cheers, Dave
@RSJB18 posted:I re-wired my Menards F7 in series last night. Don't know why I hadn't thought of this sooner to slow it down but on another thread is was mentioned and done successfully. Makes a big difference.
Transformer is at 12v, and the remote at the lowest setting to get the engine moving.
First video is parallel wired, second is after series wiring. Note the time on the two videos too.
Bob
Really a nice improvement Bob. ![]()
I don't get the wiring but good results of your efforts .
@Dallas Joseph posted:Really a nice improvement Bob.
I don't get the wiring but good results of your efforts .
It's not as complicated as it appears Dallas. Think of it as one motor with a couple of extra connections in between.
power goes in one motor (blue) out on white- to the next motor (blue) and back to the board (white).
Today I finished fabricating my 'roll your own' ITADs. Going with the across the track version using the cheap obstacle avoidance boards, removed the emitters and receivers, mounted new ones on the stanchions using PCBs. Went with making them obvious as opposed to trying to camouflage them. Below the base flange are two other PCBs with male and female header mates so they can only be seated one way. The bottom PCB will get attached to the bottom of the mounting hole and the top section will simply unplug (if ever required). Went with a Searchlight style for the emitter and a two- aspect style for the receiver. They will be mounted on the layout at a height to match the bed of a flatcar. Only one of the two receivers needs to be blocked to detect a train. The logic portion will be provided by an Arduino.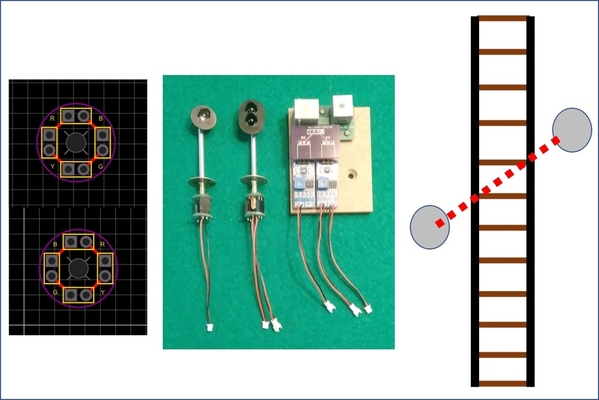
Mike, I'm very sorry to hear about Tank.. I know my dogs are family to me, as I'm sure Tank was to you.. Please accept my since condolences........
@RSJB18 posted:It's not as complicated as it appears Dallas. Think of it as one motor with a couple of extra connections in between.
power goes in one motor (blue) out on white- to the next motor (blue) and back to the board (white).
Maybe I'm too used to looking at MTH wiring Bob .🤔
I thought it might be something to look at for the MTH. I'll have to look at that " another thread " to see if anything SINKS IN .![]()
I recognize those green/yellow trucks. I've got a couple of those babies from some recent orders.
@Jack Texas Special posted:I recognize those green/yellow trucks. I've got a couple of those babies from some recent orders.
Yes…actually they came along with the Cripple Creek Lumber Building and look right at home parked next to it…🚂😉😺
Bob,
Wow, what a difference!
JD, great as always.
Barnun, nice work on the signals.
Paul, the Menards stuff looks very nice, well done.
Andy
Looked at the Locos and various other related items!
@Wooter1 posted:Looked at the Locos and various other related items!
Usually when I do this, I'll find a project (which I love) as a result. Track refinement or cleaning, dusting/cleaning, scene updates, train maintenance, custom train or building projects, etc.
Although there are times when I just like to sit on the couch, surrounded by what I've accomplished, and be happy. This is my view from said couch (shown bottom left):
@darlander posted:Nicely done! Weathering is the next chapter in my train life. Would like to hear more about your method/steps for weathering.
Cheers, Dave
Hi Dave, thank you. I usually just airbrush my locos. On a steamer I start down low with the wheels rods and chassis . I do my highlights first. I’ll start with rail tie brown and hit the front of the cylinders lightly and anywhere I want to look dusty and chassis. Then a spray a tiny bit of rust on the couplers and front of the cylinders . After that I blend it all in with grimy black. I spray the underside of the local first then I get it running on rollers and spray the wheels and rods and stop there. This is all done with acrylic paint so after it dries I clean the wheels and rollers with paint thinner. This is done in case of overspray I don’t want locos performance to suffer because of sloppiness. After that I get rid of the water base paint and switch to solvent base paints they look way better when airbrushed.With the boiler I do the highlights first. I’ll just dry brush water stains and deposits with some whites and grays blended. Then I spray the whole boiler with grimy black, then I use engine black around the smoke box and anywhere I want to look greasy. Go back and dry brush any features you want to pop in that’s all I do. It’s pretty easy you can do it.
Didsomething really different today!! "JUST RAN TRAINS"!!!
@decoynh posted:
Such a bummer for Mike, I felt so bad for him I didn't know what to say that would make him, or anyone that losses a pet, to make them feel better! And condolences for your loss decoynh. You probably did the best thing, got a new buddy.
Boston Terrier, the American Gentleman, what a great dog!
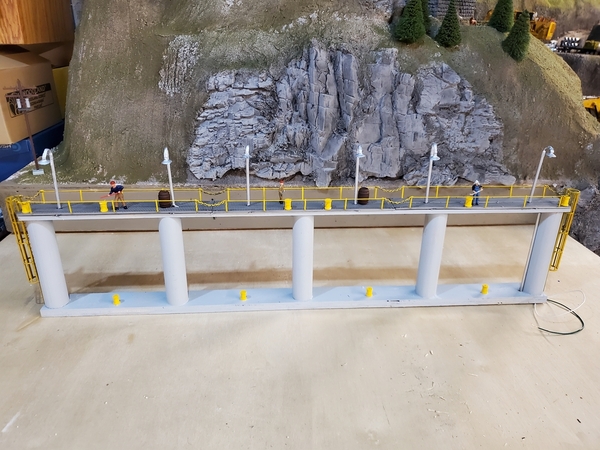
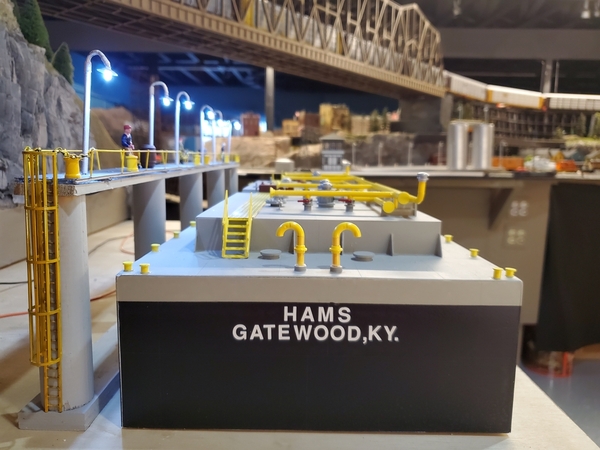
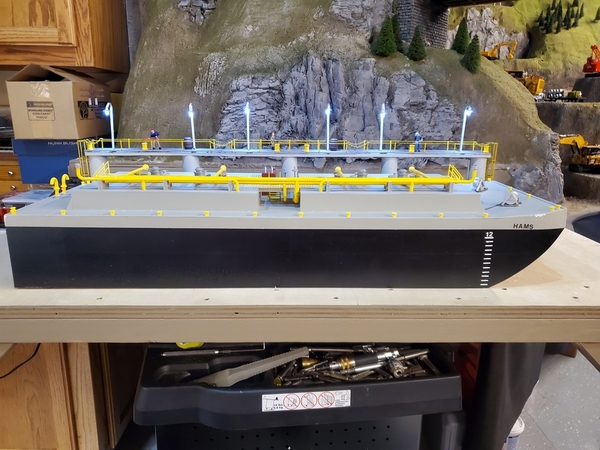
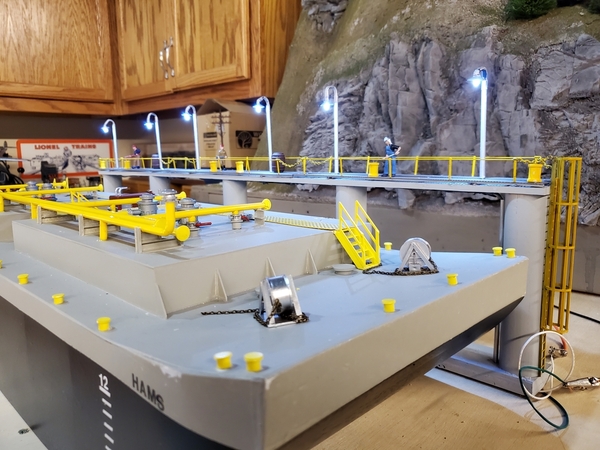
Finally got back to working on my oil refinery and the scenery around it. Put together the final module for it as well as the docking and unloading platform for the oil bardge. Need to find some heavy thread that looks like tow rope to anchor the bardge. Takes a lot of time but so much fun
Access to this requires an OGR Forum Supporting Membership
