


I agree with Chris. If it is too close to the edge, I'll knock something on the floor sometime. Also, I want some space between tracks so I can get my shaky hands in there to pickup cars etc.
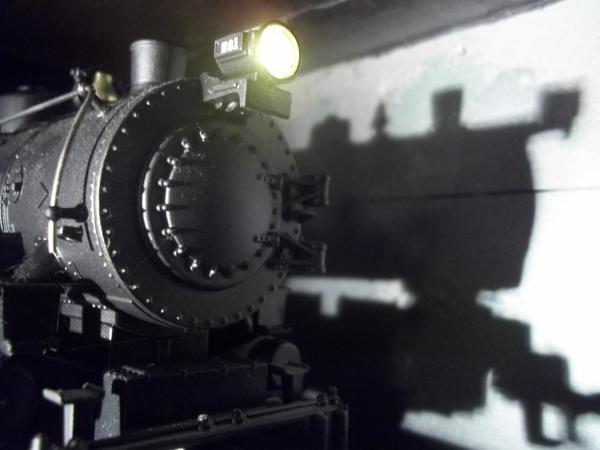
paul 2 posted:Okay guys, time for input from you. I posted pics of the service yard but today I took two tracks away. So which is the better of the two. There is going to be a Lionel coaling tower with coal shed in this yard too. I have to put it together and paint it yet. I may have too many irons in the fire but I like jumping around like a chicken with my head cut off sometimes LOL.........Pics..................Paul


More tracks = more room for trains. ![]()
I would put the tower on the table before you make your final decision.
Bob
Just to be different, I'll say neither, but inbetween ![]()
Go with one between the shed & tower and two to the edge.
I ended up AT a Menards yesterday and asked to be escorted to the leftover seaonals for a peek.
What was there was mostly obviously damaged, some missing parts, etc.. Exactly what you'd expect to find off season.
I quickly made 5 or six good flat cars by plucking wheel sets and brake wheels off the unsavables, and fixing another, grabbed two of them for $8+govt. penny's and took the two new Penny's home where they got some chopstick steaks.....and thanks spellcheck, now I'm hungry for stir-fry, lol. ...stakes.
I had to lightly file the inside edge of coupler's knuckles where it makes contact in pullling. And also took off a bit of a ridge along the outside, on the knuckles hinge, to stop MILD binding in turns and catching/hanging up or the next car when lifted off the track while coupled. Maybe 1/32 off each area and all was grand.
The wheel gauge was pretty narrow. Any smaller and it might have fallen in when natually tilting on the fast angle.
For $8 a flat and a 5 min. knuckle massage I could have skipped, I'm sold. I'd say MPC starter quality to compare.

Sat next to the train table while paying bills this morning. Did not run em ![]()
On the bright side the CEO's project is moving at a good clip. Finished painting the ceiling and got a first coat on the lower half of the walls. In the home stretch now.
Bob


Attachments
Images (4)
Looks good Bob! Soon you can run trains
When asking for input I may not of mentioned that this is not the area where this will be. It will be in a wider area so tracks will not be on the edge of the table. I just used an open area on a smaller table section to lay it out........ Thanks Paul


Very nice, Sam. ![]()
Mark Boyce posted:Looks good Bob! Soon you can run trains
Yes Mark- I hope to be soon. I guess we have all endured the pain of projects around the house that take us away from our hobbies.
Thanks.
MaxSouthOz posted:Very nice, Sam.
I agree with Max, Sam!!
Moonson posted:luvindemtrains posted:Moonson posted:What did I do - at, near, on, or by - my layout today? I walked past and along it, on my way out the door to the garage, and smiled, happy at knowing I had allowed myself such an indulgence and creative effort, through the years, since its 1995 inception with the first shipment of lumber.
FrankM.
Hey Frank,
You have created a masterpiece and I am sure some days you have to just stand back and say "look what I've done" and be proud. Kudos to you! I can't wait to get to that point on my layout. As you know the journey is very exciting. At this point when I just go in and look I feel sort of guilty and tell myself I should be doing something.
Dave
Good to hear from you, Dave. Thank you for the positive feedback!
As far as having any guilt is concerned, I never had the least bit of guilt or regret regarding the layout's investment of effort, funds, time , or commitment, though I might have lightened-up on the use of credit cards just a bit (!)
Yet, it all turned out for the best, especially due to my wife's indulging and applauding me, which included her pride in sharing the layout - our layout - with others. Having OGR come take a peek too was very nice.
FrankM.
Frank where can we see more of your layout?
paul 2 posted:Okay guys, time for input from you. I posted pics of the service yard but today I took two tracks away. So which is the better of the two. There is going to be a Lionel coaling tower with coal shed in this yard too. I have to put it together and paint it yet. I may have too many irons in the fire but I like jumping around like a chicken with my head cut off sometimes LOL.........Pics..................Paul
That is a very nice sanding tower! Who makes it?
Kerrigan, thanks. That was a Plastruct kit I bought back in the 80's or early 90's...............Paul
I broke out my Amtrak consist to demonstrate the concept of a "push-pull" train for some folks on another forum:

Afterwards, I put the whole consist on the track for some exercise.

I'd converted my second A unit to a dummy back in February, but the dummy floor was black. So, a a quick teardown later, the floor was in the paint booth being sprayed Rustoleum chrome, then being gently baked for an hour at 200°. Next up will be lighting it...

The rear of the observation car caught my eye as being deficient in the marker light department...

And so, a bit of drilling and a couple of GG-1 marker lights later...

Much improved!

Mitch
Attachments
Images (7)


luvindemtrains posted:Moonson posted:luvindemtrains posted:Moonson posted:What did I do - at, near, on, or by - my layout today? I walked past and along it, on my way out the door to the garage, and smiled, happy at knowing I had allowed myself such an indulgence and creative effort, through the years, since its 1995 inception with the first shipment of lumber.
FrankM.
Hey Frank,
You have created a masterpiece and I am sure some days you have to just stand back and say "look what I've done" and be proud. Kudos to you! I can't wait to get to that point on my layout. As you know the journey is very exciting. At this point when I just go in and look I feel sort of guilty and tell myself I should be doing something.
Dave
Good to hear from you, Dave. Thank you for the positive feedback!
As far as having any guilt is concerned, I never had the least bit of guilt or regret regarding the layout's investment of effort, funds, time , or commitment, though I might have lightened-up on the use of credit cards just a bit (!)
FrankM.
Frank where can we see more of your layout?
Thank you, again, Dave, for your interest in my layout. If you wished, you could go to these Runs of OGR, in which my layout has been featured through the years: Runs 163; 168; 221; 285. Being presented in OGR has been the thrill of a lifetime for me.
Also, I have a website: www.layoutrefinements.com
FrankM.
Moonson posted:luvindemtrains posted:Moonson posted:luvindemtrains posted:Moonson posted:What did I do - at, near, on, or by - my layout today? I walked past and along it, on my way out the door to the garage, and smiled, happy at knowing I had allowed myself such an indulgence and creative effort, through the years, since its 1995 inception with the first shipment of lumber.
FrankM.
Hey Frank,
You have created a masterpiece and I am sure some days you have to just stand back and say "look what I've done" and be proud. Kudos to you! I can't wait to get to that point on my layout. As you know the journey is very exciting. At this point when I just go in and look I feel sort of guilty and tell myself I should be doing something.
Dave
Good to hear from you, Dave. Thank you for the positive feedback!
As far as having any guilt is concerned, I never had the least bit of guilt or regret regarding the layout's investment of effort, funds, time , or commitment, though I might have lightened-up on the use of credit cards just a bit (!)
FrankM.
Frank where can we see more of your layout?
Thank you, again, Dave, for your interest in my layout. If you wished, you could go to these Runs of OGR, in which my layout has been featured through the years: Runs 163; 168; 221; 285. Being presented in OGR has been the thrill of a lifetime for me.
Also, I have a website: www.layoutrefinements.com
FrankM.
Zoom, I am on it!!!!!!
luvindemtrains posted:Moonson posted:luvindemtrains posted:Moonson posted:luvindemtrains posted:Moonson posted:What did I do - at, near, on, or by - my layout today? I walked past and along it, on my way out the door to the garage, and smiled, happy at knowing I had allowed myself such an indulgence and creative effort, through the years, since its 1995 inception with the first shipment of lumber.
FrankM.
Hey Frank,
You have created a masterpiece and I am sure some days you have to just stand back and say "look what I've done" and be proud. Kudos to you! I can't wait to get to that point on my layout. As you know the journey is very exciting. At this point when I just go in and look I feel sort of guilty and tell myself I should be doing something.
Dave
Good to hear from you, Dave. Thank you for the positive feedback!
As far as having any guilt is concerned, I never had the least bit of guilt or regret regarding the layout's investment of effort, funds, time , or commitment, though I might have lightened-up on the use of credit cards just a bit (!)
FrankM.
Frank where can we see more of your layout?
Thank you, again, Dave, for your interest in my layout. If you wished, you could go to these Runs of OGR, in which my layout has been featured through the years: Runs 163; 168; 221; 285. Being presented in OGR has been the thrill of a lifetime for me.
Also, I have a website: www.layoutrefinements.com
FrankM.
Zoom, I am on it!!!!!!
A very modest man you are Frank. Wow!
Still making progress on the coal mine scene..... got the remaining support structure timbers for the 2 tipples/loaders cut, glued and stained. Weathered the 2nd tipple, covered the roof with tar paper (220 grit wet/dry sandpaper). Also cut and mounted the 1/4 inch luan backdrop and support for the mine track. I am improvising on a new method of building really lightweight mountains as this is a large portable module 60 inches long, and so far it's working well and keeping the total weight under 35 pounds....
So the new method is 1/4 inch wire screen, spray foam covered with low loft batting. The foam has definitely adhered to both the metal screen and the batting material so I am ready to load it up with earth colored latex paint and start putting down all the different landscaping grasses, dirt, shrubs, trees, granite dust dirt etc.


Attachments
Images (6)


JUST FINISHED PUTTING ALL MY ENGINES INTO ALL THREE REMOTES IN ORDER.PENN TOGETHER B&O TOGETHER AND WESTERN MARYLAND TOGETHER. NOW I NEED TO MAKE UP CHEAT SHEETS SO PEOPLE CAN FIND THE ENGINE THEY ARE LOOKING FOR EASIER. I ALSO CLEANED AND LUB. ALL THE ENGINES I ADDED TODAY. I ONLY RAN TRAINS ON THE TEST TRACK AS I ADDED THEM. TO TIRED TO RUNS TONIGHT. SON IN LAW IS COMING OVER TOMORROW THEN THE TRAINS WILL GET THEIR SHARE RUN TIME. AFTER SAYING MY GOOD NIGHT TO THE TRAIN I CLOSED THE DOOR GENTLY AS NOT TO AWAKEN THEM.
NIGHT ALL
Carl Machen posted:JUST FINISHED PUTTING ALL MY ENGINES INTO ALL THREE REMOTES IN ORDER.PENN TOGETHER B&O TOGETHER AND WESTERN MARYLAND TOGETHER. NOW I NEED TO MAKE UP CHEAT SHEETS SO PEOPLE CAN FIND THE ENGINE THEY ARE LOOKING FOR EASIER. I ALSO CLEANED AND LUB. ALL THE ENGINES I ADDED TODAY. I ONLY RAN TRAINS ON THE TEST TRACK AS I ADDED THEM. TO TIRED TO RUNS TONIGHT. SON IN LAW IS COMING OVER TOMORROW THEN THE TRAINS WILL GET THEIR SHARE RUN TIME. AFTER SAYING MY GOOD NIGHT TO THE TRAIN I CLOSED THE DOOR GENTLY AS NOT TO AWAKEN THEM.
NIGHT ALL
Carl,
Looks like you are ready for a big day of train running tomorrow!!
I was nearing completion of two signal bridges for my layout, but I was needing help with how to make the walkways and railing, and painting them. Thanks to Dave Minarik who did an awesome job making the railings, and painting and weathering the bridges, I'm ready to install them at home. Here are a couple pictures of the bridges on Dave's layout after he finished painting them.
The first one is a kitbash of two plasticville signal bridges. Thanks to Neal Schorr's advice, I was able to make a decent model of a PRR bridge by removing the vertical braces, installing sway bracing in the main span, adding ladder rails and adding the curved braces between the main trusses and the side supports. I just had one signal head with me for test-fitting. When installed, I'll snake all the signal wires through the bridge and hide them as best as possible.


The second bridge is a scratch build of a more utilitarian, PC/CR-era bridge. The WB signal bridge at ALTO was my inspiration for this one.


I'll post more photos of them on my layout as I get the signals mounted.
Attachments
Images (4)
I'm often hesitant to post projects here, since it really isn't working on the layout proper. Maybe another separate topic like, "what's on your workbench?" is in order.
What began as PS1 Premier Berkshire finally gets it's orders from ERR. It was the simplest upgrade I have yet performed. There was no need to open up the loco, just tie into the original MTH, 4 wire tether. I let the lighting up front get handled by the original MTH circuit board, with tender markers connected to the ERR front headlight output, reverse light to it's respective output. AUX2 kills them both. 12 volt incandescents replaced the low voltage LED markers and incandescent reverse light.

Plenty of interior room made fitting the components, wiring and attaching a breeze. A magnetic reed switch for chuff is activated by 2 magnets on one of the tender wheels. Close enough to 4 chuffs per that it's almost perfect.

To provide an antenna, MTH did me a big favor by making the real coal load removable. The metal coal tray wasn't easy to isolate from the tender shell, so I fashion a new tray from styrene. The antenna was made of 1/4" screen to fit inside the tray and the antenna wire soldered to it. The wire runs through the tray and through one of the coal load attachment holes in the shell.

With its big can motor, long drags are effortless. Let's hope the traction tires hold up.

Last minute tweaking included dabbing a bit of candy apple red on the rear markers. This shot is before a second coat. Once I get a significant order ready, I'll add one of GRJ's Super Chuffer's to really take full advantage of the prodigious MTH smoke generator and loco lighting up front.
Bruce
Anthony,
The signal bridges look great, thanks for posting good quality photos, and adding the comments on the kitbash pair of Plasticville signal bridges.... I have two and am planning a similar project, your notes from Neal Schorr's recommendations were very helpful.
This morning headed to Menards to pick up my Pepsi plant. When I got home I couldn't leave it in the box. I placed it on the table to see how it is going to look. I got one tank car for it last week and I found a few more to order for it this past week. I also decided where I am putting the engine servicing facility and started laying out the yard for it. Going with the four tracks for the sand tower. I'll have to make up a small extension at the back for the tracks. Pics..................Paul


Attachments
Images (2)
paul 2 posted:This morning headed to Menards to pick up my Pepsi plant. When I got home I couldn't leave it in the box. I placed it on the table to see how it is going to look. I got one tank car for it last week and I found a few more to order for it this past week. I also decided where I am putting the engine servicing facility and started laying out the yard for it. Going with the four tracks for the sand tower. I'll have to make up a small extension at the back for the tracks. Pics..................Paul
looking good Paul! I see your Menardsville suberb is growing at a nice rate. Any new work under the stairs?
I replaced the traction tires, glued an air brake chamber back on one of the truck sides and soldered a broken wire so the ditch lights would work on an MTH BNSF SD70ACe. Took me a little while to figure out that wire was broken at the spring contact pad on the frame. It looked like it was soldered through a hole in the pad.
Larry
Made some good progress on the hillside behind the coal tipples/loaders.... I am definitely liking this method of using low loft fiber batting over foam, or foam board for scenery... It provides alot of texture under the grass/dirt/clump foliage clusters. I can't take credit for coming up with this idea.... I found it on YouTube and the gentleman who did it shot a really informative easy to watch video the link is: https://www.youtube.com/watch?v=9C6aHEoUWYg
Here are a couple of photos of todays progress after getting the initial layer of flat latex paint and a couple of different grass blends, plus screened dirt, and earth layers applied.
The last photo is a picture from the prior post showing what it looked like yesterday with just the fiber batting applied. 


Attachments
Images (4)
Superb results, Chris A. very natural looking.
FrankM
paul 2 posted:This morning headed to Menards to pick up my Pepsi plant. When I got home I couldn't leave it in the box. I placed it on the table to see how it is going to look. I got one tank car for it last week and I found a few more to order for it this past week. I also decided where I am putting the engine servicing facility and started laying out the yard for it. Going with the four tracks for the sand tower. I'll have to make up a small extension at the back for the tracks. Pics..................Paul
The Pepsi plant looks good Paul. I hate to rain on your sand tower yard but, be aware that the National Electrical Code requires 3'X3' of clear floor space in front of an electrical panel. No big deal unless you will have an inspector in the house for some reason. They could make you move the table away from the front of the panel. Looks like a relatively new panel so my guess is that you had the service done already.
Bob


Attachments
Images (3)


Attachments
Images (3)


Greetings Everyone,
So, I finally got a few hours to work on one of my favorite (not) aspects of layout building, which is Power Distribution and Train Control, (that's a $5.00 phrase referring to "Electrical Stuff").![]() I tried to make this as simple and uncomplicated as possible, which is why it took me so long.
I tried to make this as simple and uncomplicated as possible, which is why it took me so long. ![]() Basically, I have 3 work boxes connected together and controlled by one standard "on/off" wall switch. This switch will kill ALL power going through this distribution center. The three "wall sockets" will power a Z1000 for the MTH TIU, a 990 Legacy Command Control Set, a MTH Z4000 which will power both of the "Fixed" channels of the TIU and a 180W Power House for the upper level track which will be routed through the TIU as well. You could say that this is sort of a "Home Made" power strip without the built-it circuit protector that is found in the power strip sold at the Big Box stores.
Basically, I have 3 work boxes connected together and controlled by one standard "on/off" wall switch. This switch will kill ALL power going through this distribution center. The three "wall sockets" will power a Z1000 for the MTH TIU, a 990 Legacy Command Control Set, a MTH Z4000 which will power both of the "Fixed" channels of the TIU and a 180W Power House for the upper level track which will be routed through the TIU as well. You could say that this is sort of a "Home Made" power strip without the built-it circuit protector that is found in the power strip sold at the Big Box stores. ![]()
Since I am using the "Star Wiring Method" suggested in the extremely useful book, The DCS O Gauge Companion, by Barry Broskowitz, there are 3 MTH 50-1014 12 Port Terminal Blocks (one for each of the 3 mail lines) that will accomplish this task nicely. ![]() The TIU is mounted directly to the Ply-Wood with wood screws. All connections from Z4000 to the TIU and to the terminal blocks will be via banana plugs which will make removal for any up-dates relatively easy.
The TIU is mounted directly to the Ply-Wood with wood screws. All connections from Z4000 to the TIU and to the terminal blocks will be via banana plugs which will make removal for any up-dates relatively easy. ![]() There is room for the planned addition of a WIU to be able to operate via Wi-Fi if I choose to do so. Thank you all for taking the time to look!!
There is room for the planned addition of a WIU to be able to operate via Wi-Fi if I choose to do so. Thank you all for taking the time to look!! ![]()


Chief Bob (Retired) 
Attachments
Images (4)
AS planned, I added a Standard gauge loop on the inside of the O gauge loop of my carpet railroad. To accomplish this engineering miracle I laid down wider (12") strips of indoor/outdoor carpet. Using a KW for power. Runs well.
Chief Bob,
The Power Distribution and Train Control panel is looking good! After 41 years in electronics as a technician and engineer, I like neat, organized panels and wiring. Are you going to have surge protection on the front end protecting all the outlets and therefore all the electronics?
PUFFRBELLY posted:Greetings Everyone,
So, I finally got a few hours to work on one of my favorite (not) aspects of layout building, which is Power Distribution and Train Control, (that's a $5.00 phrase referring to "Electrical Stuff").
I tried to make this as simple and uncomplicated as possible, which is why it took me so long.
Basically, I have 3 work boxes connected together and controlled by one standard "on/off" wall switch. This switch will kill ALL power going through this distribution center. The three "wall sockets" will power a Z1000 for the MTH TIU, a 990 Legacy Command Control Set, a MTH Z4000 which will power both of the "Fixed" channels of the TIU and a 180W Power House for the upper level track which will be routed through the TIU as well. You could say that this is sort of a "Home Made" power strip without the built-it circuit protector that is found in the power strip sold at the Big Box stores.
Since I am using the "Star Wiring Method" suggested in the extremely useful book, The DCS O Gauge Companion, by Barry Broskowitz, there are 3 MTH 50-1014 12 Port Terminal Blocks (one for each of the 3 mail lines) that will accomplish this task nicely.
The TIU is mounted directly to the Ply-Wood with wood screws. All connections from Z4000 to the TIU and to the terminal blocks will be via banana plugs which will make removal for any up-dates relatively easy.
There is room for the planned addition of a WIU to be able to operate via Wi-Fi if I choose to do so. Thank you all for taking the time to look!!
Chief Bob (Retired)
For someone who doesn't like wiring, well done.
Bob
Mark Boyce posted:Chief Bob,
The Power Distribution and Train Control panel is looking good! After 41 years in electronics as a technician and engineer, I like neat, organized panels and wiring. Are you going to have surge protection on the front end protecting all the outlets and therefore all the electronics?
Hi Mark,
That's is something I didn't consider. ![]() But since you suggested it, I will add the surge protector.
But since you suggested it, I will add the surge protector. ![]() Good idea. Thanks!
Good idea. Thanks! ![]()
Chief Bob (Retired)
On recommendations on another thread, I checked the terminal connections inside my new TIU (REV. L) All had locktite type stuff on them, all were a bit loose.. I also added extra nuts and washers as suggested in the thread.. This seems a bit of overkill, but it was a "while I'm in there" thing and won't hurt anything...
Today I got this in the mail. Found it for sale in the forum ad section by a forum member. Another wood chip hopper. They are like needles in a haystack to find. Layout work has been on hold but this weekend an obstacle will be removed. I was able to get rid of a treadmill which was in the way in the basement. So with that happening on Saturday I can start building the tables under the stairs going to the back of the basement. Also with RSJB18 pointing out I may have a problem with the table under the electrical panel I think I have an option now which I have to work on. Cut out the area needed in front of the panel box putting the table side cut on hinges and on the table edge side put two latches to hold the piece in place. My thinking is if access is needed I just undo the two latches and with the hinges on the other end I can open up the area. At least that is my idea. Anyways pic of the car.............Paul

Attachments
Images (1)
Add Reply
Sign In To Reply
