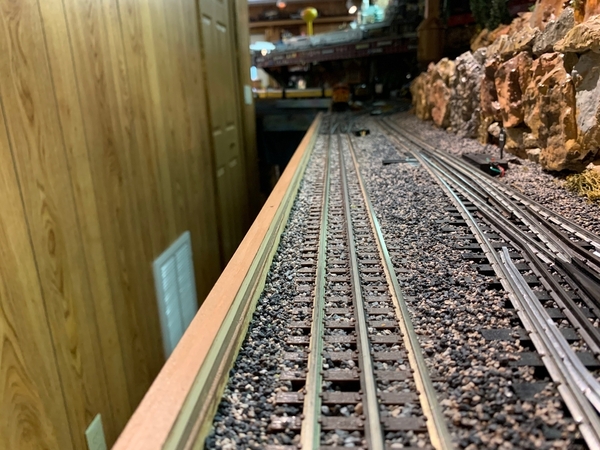
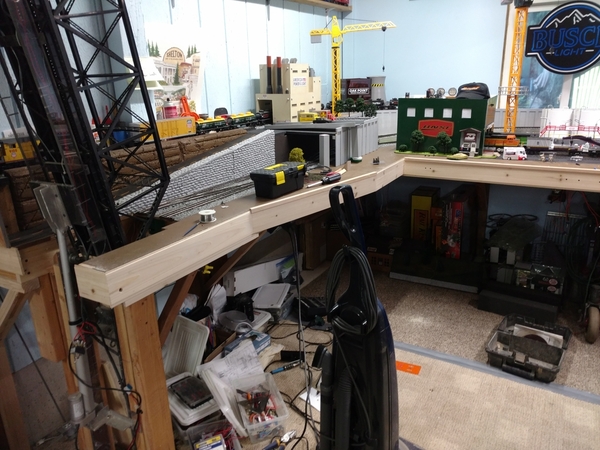
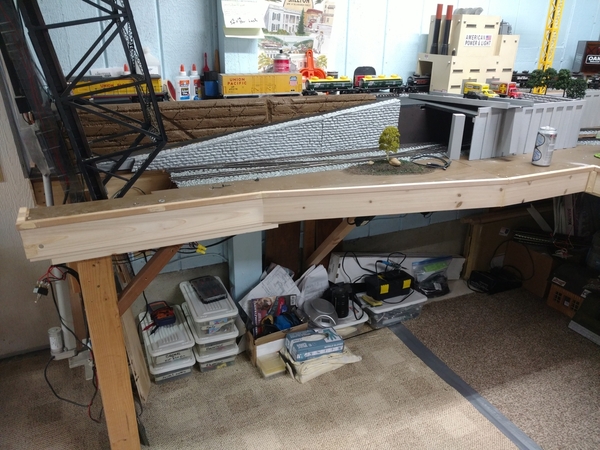
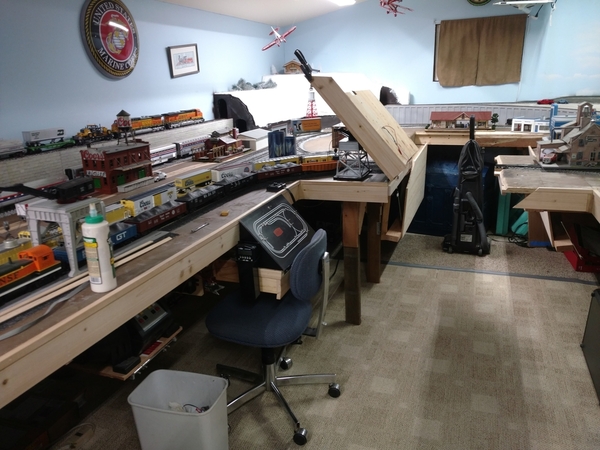
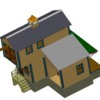
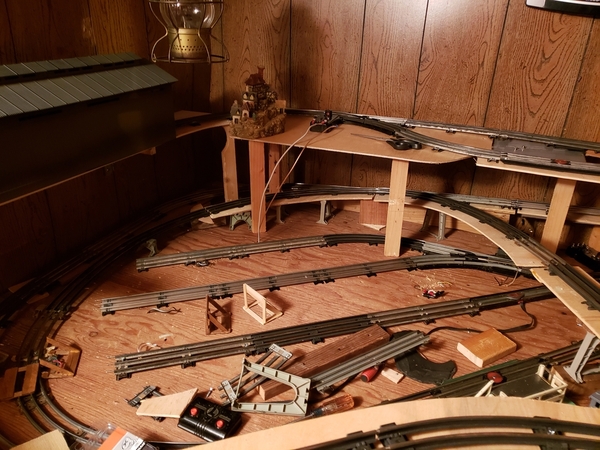
Good morning. Well I got just about everything, track, switches, transformers. Started testing switches, but with 14, I was running in to a spaghetti mess (tinman switches with controllers). I realized I need to build control panel, so rough drawing, thinking about connections, etc. Oh I bought more trains. Lol. 

I have been seeing some really great  work here I'd list you all but with 60 notices i would run out of space.

Have a great day


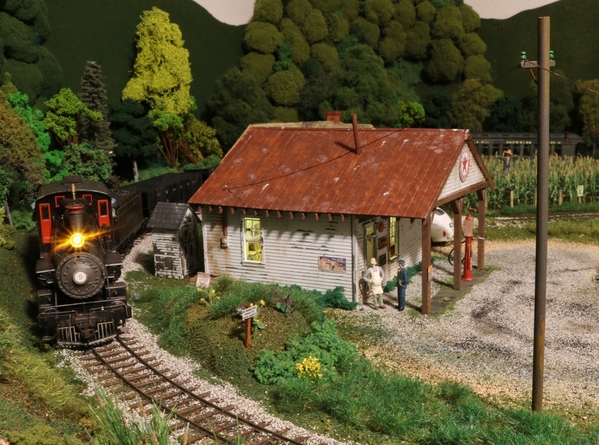
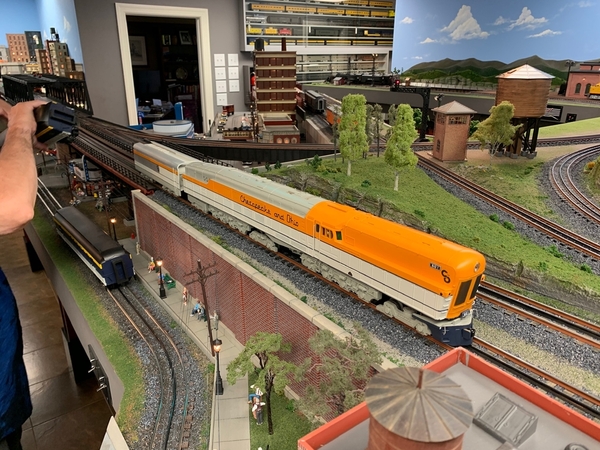
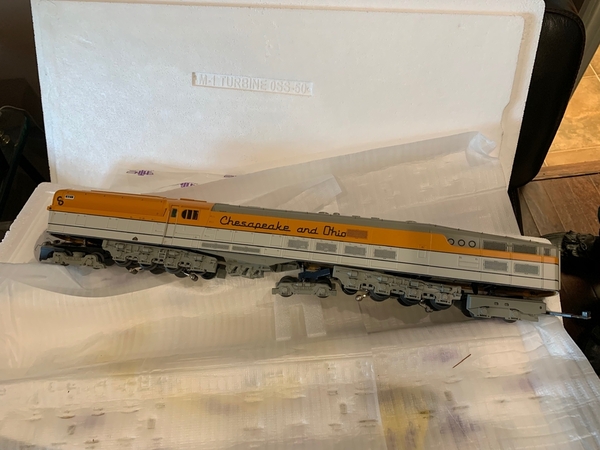
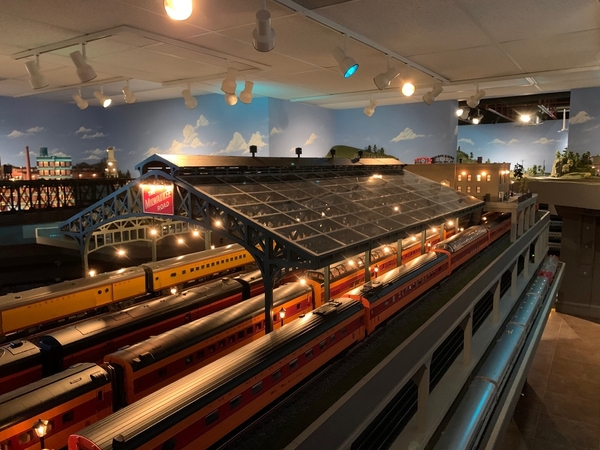
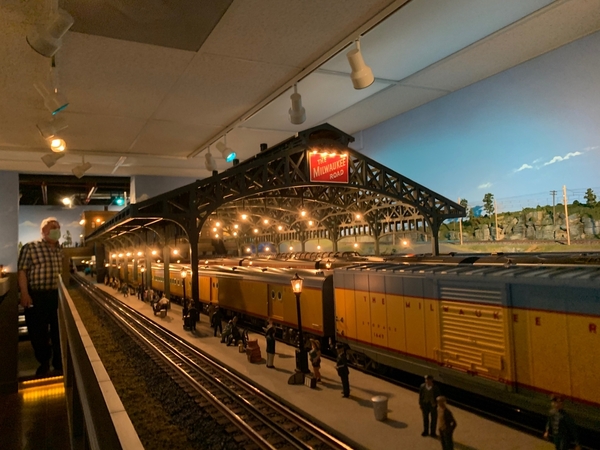
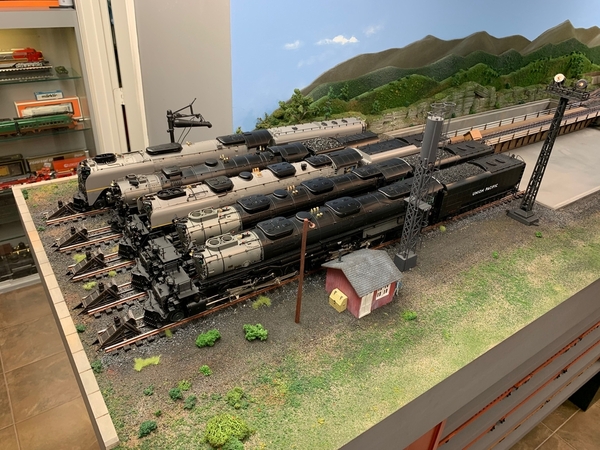
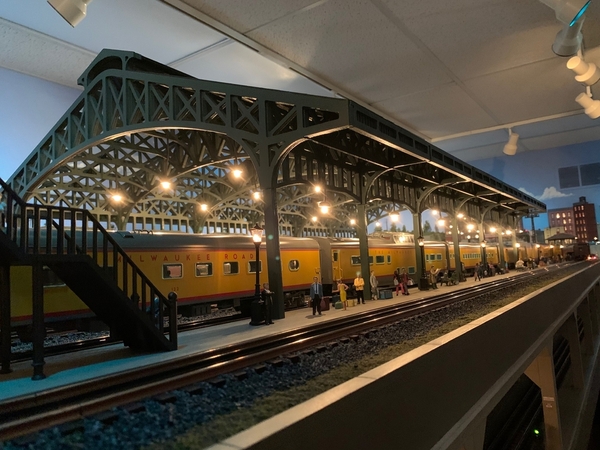
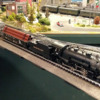
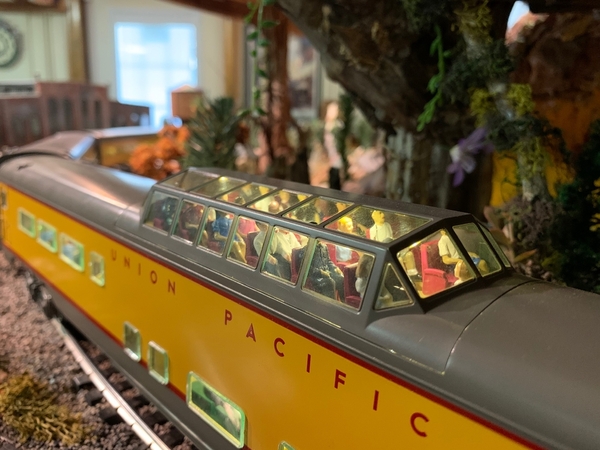
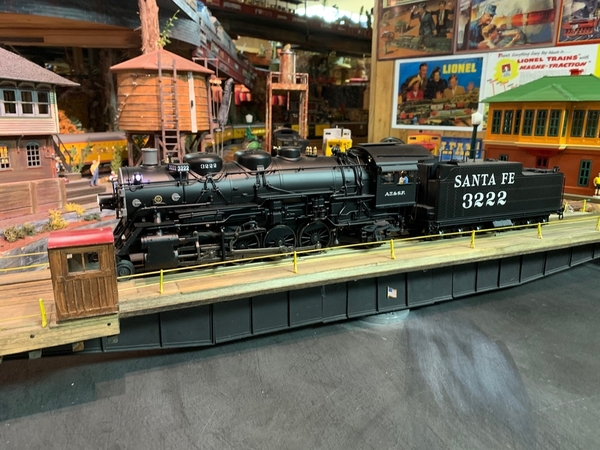
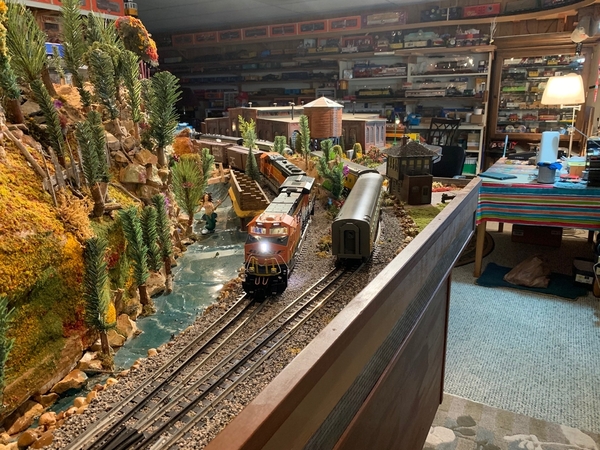
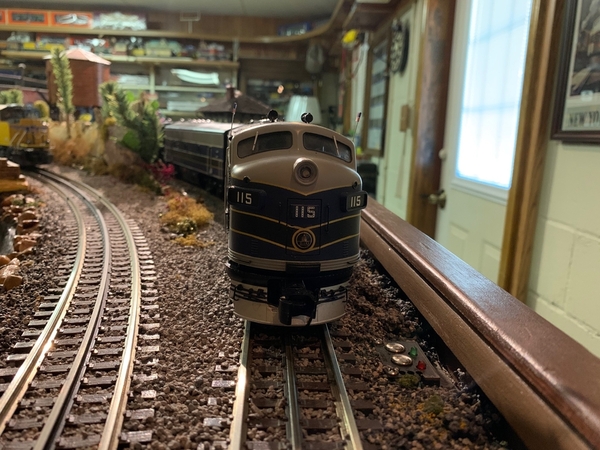
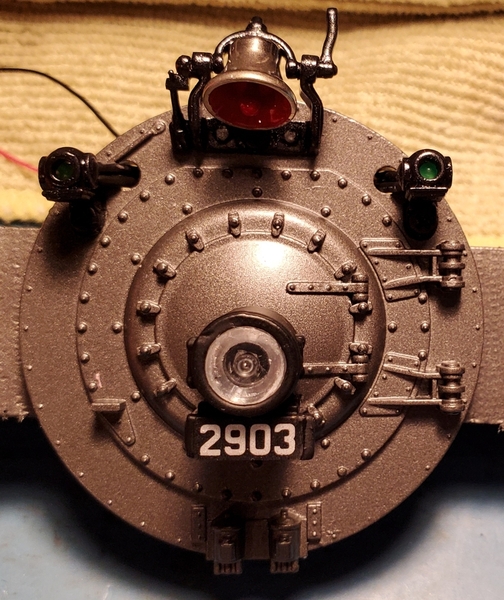
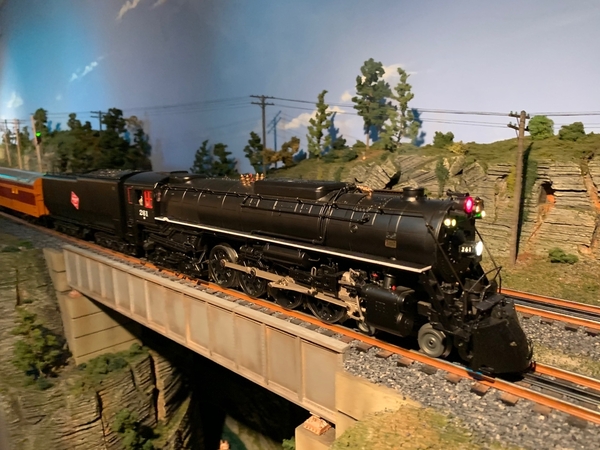
P51 Lee, your model rural gas station, convenient store, is simply amazing, weathered, placed properly, with that neat steamer rounding the curve it’s a nice scene. Your model work is fun to view as are your pictures of the real BNSF Diesels and other trains. Your contributions to our forum are so inspiring. Wow. Dave Ripp, now that’s some neat trackwork, very interesting. Everyone, I hope your having a great week, Wednesday being Hump day, and staying safe, staying healthy, and praying continually. The pictures I’m showing are of a good friends layout we visited June 1, Dr. Jacks. A real fun day, checking out a friends MTH M1, a huge Locomotive, it ran fine right out of the box. Enjoy. Happy Railroading 7BA8B728-A13C-47C7-A887-039EFB84E2EFAF73D39C-59C7-4EDB-839C-34F8BDA0DB2ADCE16201-7D56-4E93-A3D0-A5B1DB9C597B5BC559FB-31B3-41B6-A917-2FFFD8EAD1C761BEF261-B8F1-4BE7-8F51-A52699E8F915B7BE8C1D-A251-46CA-A6AD-7981FB09EF6F51B3F7DF-3755-4652-A5CD-D0976751EE167AE84C1E-B766-4E41-93C7-6FA589CB41D1

Attachments

Images (8)
  • 7BA8B728-A13C-47C7-A887-039EFB84E2EF
  • AF73D39C-59C7-4EDB-839C-34F8BDA0DB2A
  • DCE16201-7D56-4E93-A3D0-A5B1DB9C597B
  • 5BC559FB-31B3-41B6-A917-2FFFD8EAD1C7
  • 61BEF261-B8F1-4BE7-8F51-A52699E8F915
  • B7BE8C1D-A251-46CA-A6AD-7981FB09EF6F
  • 51B3F7DF-3755-4652-A5CD-D0976751EE16
  • 7AE84C1E-B766-4E41-93C7-6FA589CB41D1
@Allegheny posted:

Hello Dave, 

Maybe I missed it somewhere, but I'm not exactly sure what this layout represents or your goals for it?

I looked around and I didn't find anything that speaks to it.

Could you please post something on it (again)?

Thanks! 

I added the track plan which Dave Detert or DoubleDaz helped me with though he doesn't understand it either.  This design may look a little odd but I have a vision of where my scenery will fit and I am a looper at heart.

Larry, Thank you for posting the photographs of Dr. Jack's layout.  The overall detail, passenger shed, and the steam locomotives look great!  

Lee, that gas station is fantastic!  It reminds me of one outside of nearby Evans City, Pennsylvania that used to have a sign, 'Bill's Place'.  It was so derelict in the mid '60s that I said, "It looks like Bill hasn't been around".  I go by occasionally, and the basic structure still stands, though the awning over the long removed gas pump is laying on the ground in rubble and saplings

DaveRipp:  Just a little advice from a guy who did what it appears you are doing.  In my case, due to width limitations in my train room I was restricted to just 40" in width and in order to use an 0-31 outer loop and a 0-27 inner loop I also ran the straights from my outer loop down the edge of the table.  I can tell you that while this works and does take max advantage of the width you have, it makes scenic insertions a challenge.  You cannot put any backdrops or even tunnel portals on the straights as the "outer" end has nothing to rest on.  In addition, it makes the trains on the edge vulnerable to falling off the table (or being accidentally knocked off by either a) clumsy adults (me in my case) b) little curious hands.  I know that I currently wish for about 2" outside of the outer loop for safety and to add some details (like signals). Here you can see my dilemma, note the two outer straights run directly down the edge of the layout and that completely limits doing much in the way of scenery.  As you can see, in my case room dimensions set the width but you may have more room.


Sincerely Don


Layout Overview

Attachments

Images (1)
  • Layout Overview

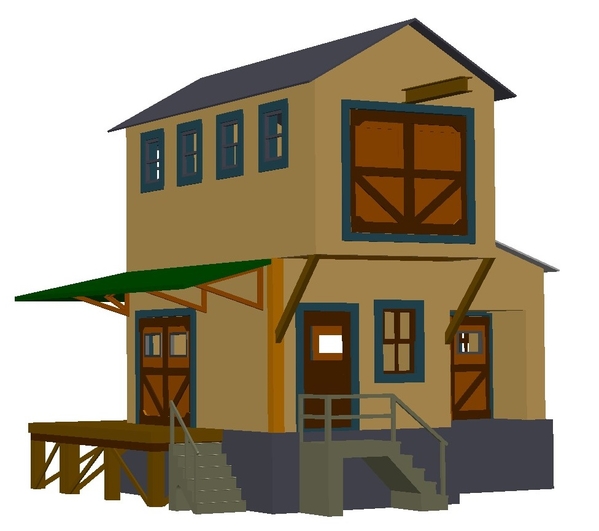
Just learned that you can remove the center rail on MTH Scale Trax by rocking the center rail back n forth to pop it out for the BTE Bulk Bldg. Added height spacers with black top and cement RR tie center coverings. I scrapped the 2r Atlas O track idea since it don't line up with any 3r tracks. Odd ball Atlas.

So all good now. Just don't understand why 3r modelers continue to use 3r track on sidings?

Other stuff...

layout stuff [1)

layout stuff [2)m boro billboard

New layout bulk [4)


Attachments

Images (4)
  • layout stuff (1)
  • layout stuff (2)
  • m boro billboard
  • New layout bulk  (4)

DaveRipp:  Just a little advice from a guy who did what it appears you are doing.  In my case, due to width limitations in my train room I was restricted to just 40" in width and in order to use an 0-31 outer loop and a 0-27 inner loop I also ran the straights from my outer loop down the edge of the table.  I can tell you that while this works and does take max advantage of the width you have, it makes scenic insertions a challenge.  You cannot put any backdrops or even tunnel portals on the straights as the "outer" end has nothing to rest on.  In addition, it makes the trains on the edge vulnerable to falling off the table (or being accidentally knocked off by either a) clumsy adults (me in my case) b) little curious hands.  I know that I currently wish for about 2" outside of the outer loop for safety and to add some details (like signals). Here you can see my dilemma, note the two outer straights run directly down the edge of the layout and that completely limits doing much in the way of scenery.  As you can see, in my case room dimensions set the width but you may have more room.

Sincerely Don

 Thanks Don, I always build a buffer on the curves and hope to never crash going straight. You really did a nice job for an odd space.

DAVE Ripp


@p51 posted:

Am I the only person who keeps staring at this photograph, and thinking that it looks like a menorah?

Like a lot of things, it can be hard to figure out what something is going to be at this stage. Dave did say he had a vision for it. I am interested in what he is going to do with it, especially if the u-shapes don't connect to anything.  Trolleys going back and forth? 

@ScoutingDad posted:

My 2019 Christmas present from my wife arrived this afternoon. MTH Rail King Cab Forward SP Steamer. Had just enough time to put it on the rails and power it up. I need an exhaust fan - it puts out a LOT of smoke! Photos or video later.  Christmas in June - who would da guessed?   

I  make sure the smoke works when I first get the engine, then turn it off For good.  It messes with my wife’s asthma.

This morning I worked on the switch order for session #1. The order involved first picking up 2 Box cars from a printing business, picking up 1 reefer from a wholesale grocery warehouse. I had to move the previously spotted gondola of wood at the Tool and Die Company to get to the pickups.  Second phase was spotting 2 full reefers at the warehouse, and a box car at a furniture factory next to the warehouse and returning the gondola to its previous spot. These are in the photo. There were several manuvers to get this accomplished.

 IMG_20200603_115732

Tomorrow I plan to continue working the switch order that involves a brewery, an ice house, a drygood warehouse,  a farm equipment transfer warehouse, a motorcycle machinery and parts warehouse, and a fresh produce transfer facility. I'll post photos of that later.

Attachments

Images (1)
  • IMG_20200603_115732
Last edited by pennsynut

IMG_2100

Still painting people for 21" passenger cars.  Union Pacific Excursion #4 and Challenger #3 two-packs arrived today from Charles Ro.  I need to order more Preiser 65602 unpainted people, but my suppliers in Germany cannot ship through German Post Office or DHL yet.  They can't ship to North or South America under German restrictions.

I did find four more packs here in the United States, but had to pay $37.95 per 24 pack, $10.00 more than my German suppliers.

Trump just announced no flights from China to the United States starting June 16, 2020, so my China supplier might not be available either.

How do we work when we cannot get supplies?

Sincerely, John Rowlen

Attachments

Images (1)
  • IMG_2100
Last edited by John Rowlen

F32291B6-3A20-465A-A3F1-FB9078EF9F18FD6A620F-895C-4093-BCC6-F34139898C6DThe last couple of days I was adding a couple of details to the logging section of the layout.

I repainted a logger figure, made a new tree for the logger to be cutting down, and started putting it together. It’s not all finished yet. 


Attachments

Images (2)
  • F32291B6-3A20-465A-A3F1-FB9078EF9F18
  • FD6A620F-895C-4093-BCC6-F34139898C6D
Last edited by WP

Logging scene looks great John.

I purchased some leds from Evan Designs a few weeks ago, just got around to adding them to various structures.  Still working on getting things finished, and sorry for shots in daylight if they are hard to see.

Don't know what I did with first pic rotation.

Next two pictures are add of flashing warning light on bridge with routing wires through painted straws.

Korber building with welding lights - this one looks much better at night.

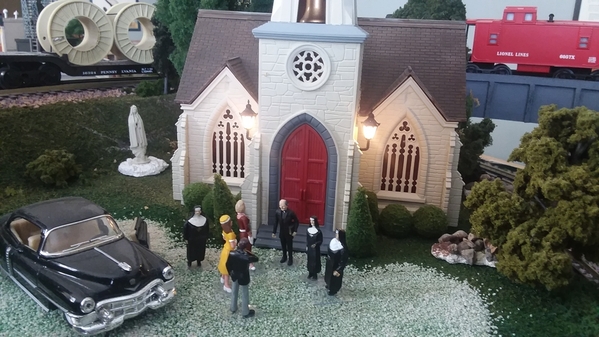
Last one is Plasticville church with wall lamps.  Those are the O gauge lamps, should have gone with the HO size.

20200604_14295520200604_14302620200604_14304420200604_14312320200604_143137

Attachments

Images (5)
  • 20200604_142955
  • 20200604_143026
  • 20200604_143044
  • 20200604_143123
  • 20200604_143137

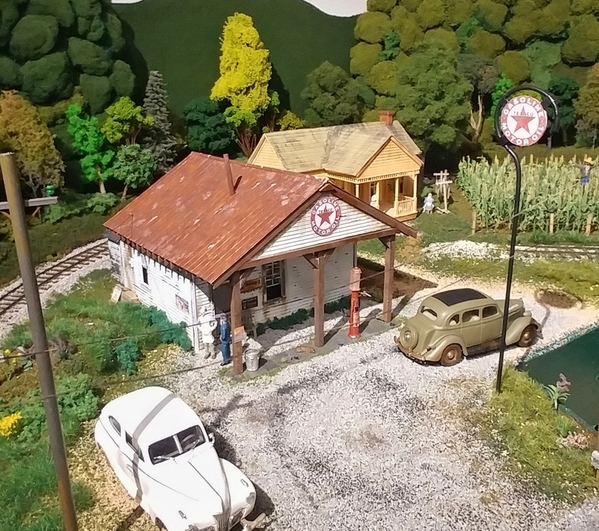
Last night, I painted this cash register casting, and put some plastic castings of bottles, scattered around the new country store, as well as randomly sitting all over the layout. The cash register itself represents the final of many details that went into the interior.

0604202041-01

Ironically, at the angle this thing is that, he won't be able to see it through any of the open windows on the layout. But it was important to me that it was there.

Attachments

Images (1)
  • 0604202041-01
@p51 posted:

Last night, I painted this cash register casting, and put some plastic castings of bottles, scattered around the new country store, as well as randomly sitting all over the layout. The cash register itself represents the final of many details that went into the interior.

0604202041-01

Ironically, at the angle this thing is that, he won't be able to see it through any of the open windows on the layout. But it was important to me that it was there.

The interior of your building is stellar and deserves to be seen. Is it too late to make your roof detachable to show layout visitors inside?


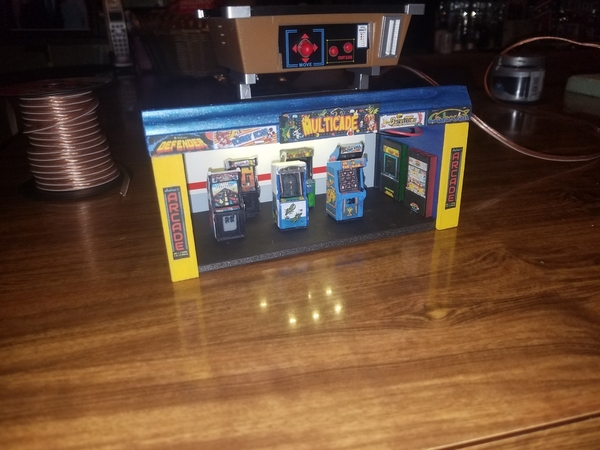
Had some fun with a vintage video game idea.  First suggested by Frizzinbee.  They are O scale.  The bottom photo shows the real miniature arcade games, that are certainly NOT scale.  As you can see, those games light up nicely, are completely licensed, and play much like the original games.  The lit marquees look great and the sound is exactly like the real thing. 

Oh, yeah.  That tabletop Pacman is just there to hold the roof on while I wired the LED's out the back.  I actually have a real one, with the original Pacman chip in it.  A prize possession, that holds your cocktail flat as you sit and play.

20200602_141357

20200602_142002[1]

20200602_133449[1]

20200602_141409[1]

20200519_074241[1]

I finally decided on two machines in front, four in the back.  It allows you to see the side cabinet art.   Of course, the camera skews the light but, it looks good to the eye.  This is placed in one of the very few locations on the 35 foot table layout that I can't reach, from either room.  Can't get a backdrop in there either.  I used a small pole to get it there.

20200605_152142[1]

20200605_152125[1]

Jerry

Attachments

Images (7)
  • 20200602_141357
  • 20200602_142002[1]
  • 20200602_133449[1]
  • 20200602_141409[1]
  • 20200519_074241[1]
  • 20200605_152142[1]
  • 20200605_152125[1]

Lot's of great work going on. Mini video games and cash registers WOW !

Lee and Jerry- very nice.

Ralph- not sure if I can accept defacing a NYC steamer, but since you converted it to one of my other favorites I'll let it slide. 

Mayor Magoo- I just used some of the same lights from ED. They make lot's of great stuff. I used the O scale coach lights on my Ameritowne building, I guess they are a little big on P'ville.

2020-04-11 17.25.28

Can't mention everyone but again, lot's of great work.

I've been away from the layout for a few weeks......overdue for some train time. Now that the spring/ early summer outdoor work is done I hope to get back soon.

Bob

Attachments

Images (1)
  • 2020-04-11 17.25.28
@p51 posted:

Last night, I painted this cash register casting, and put some plastic castings of bottles, scattered around the new country store, as well as randomly sitting all over the layout. The cash register itself represents the final of many details that went into the interior

Ironically, at the angle this thing is that, he won't be able to see it through any of the open windows on the layout. But it was important to me that it was there.

I totally understand!   Looks wonderful!

Cheers, Dave

Trying to get used to a dual action airbrush since my 20+ years old Badger single action developed an air leak about the same time I replaced its air compressor partner with a new model.  Results were so inconsistent that a replacement airbrush was ordered via Amazon only because a free return was offered.  The compressor and airbrush issues arose in the midst of painting 8 aluminum cars--just when I was getting into the swing of painting again.

Meanwhile, I spent time on the phone with a nice fellow at Badger to determine if my old faithful could be repaired, and discovered the defective body could be replaced for $8 plus shipping so it was ordered.

Also opened an eBay purchase:  two, new UP 15" aluminum offset dome cars for donor use for an as yet undetermined paint project.  Happily they arrived as advertised; very pleased with the purchase price--love the dome cars.  


The interior of your building is stellar and deserves to be seen. Is it too late to make your roof detachable to show layout visitors inside?


Nope, the roof is easily removable. The light is attached on the upper wall, just for that reason.

Doesn't help for short people, though. Some friends came over for dinner tonight, and they had problems seeing the full interior as neither is tall and the structure is well away from any layout edge...

@p51 posted:

Nope, the roof is easily removable. The light is attached on the upper wall, just for that reason.

Doesn't help for short people, though. Some friends came over for dinner tonight, and they had problems seeing the full interior as neither is tall and the structure is well away from any layout edge...

Well, I guess I am out to see the detail. Five-foot two life. Also, love your style and skill of detailing! I can understand what you mean about why you need to have detail in the building. Not a lot of people do put detail in their buildings, so it is nice to see someone doing it. Thanks!

Gang, I had to take down my "Battle of Atlantis" lay-out (Aquaman won) so I could remove the extension on my train table so we could fit a new washing machine through the door. Anyway, today we began construction of "To the Moon, Alice!" Since my wife had already assembled a 1,087 piece Lego Lunar Lander,SUNP0002SUNP0003SUNP0004SUNP0005 I let her start.

Trains and other accessories are on the way!

Attachments

Images (4)
  • SUNP0002
  • SUNP0003
  • SUNP0004
  • SUNP0005

Evening y'all, here is a two day update.

I figured out the design of the third level on the living room floor.  I then made several uprights 11 1/4 inches tall.  I took the track apart into sections.  Next I put each section on a 3/16 piece of plywood and cut bases to fit the track.  I was able to put over half of the new level in place.  Photos below.  I hope to finish the woodwork tomorrow.  Stay tuned.


Attachments

Images (3)
  • 20200606_195433: West wall
  • 20200606_195439
  • 20200606_195453

Morning guys, All I can say is WOW! Everyone is doing such great work. I had planned to get out to the train room early this morning, but it has taken me over an hour to get up to speed from all the different pages here on the forum. 336 emails later and I have finely reached this point.

Lee, Ray, Jerry your additions and projects are just outstanding! You all make your layouts look so real and fun to view. I hope to get to that point one day but its been really slow for me with all that's been going on here.

I have been getting a couple minutes here and there in the train room to work on facia and still have more to do. If anything it seams like I am just making a big mess, but I will get that cleaned up when I am finished with the facia.

I hope you all have had a great weekend sofar and fun with your layout and trains! I will check in later with some photos of my little project!

Everyone have a great day and be safe!

Update on 225 x 63 inch layout. I got the rest of my 2 x 4 ceiling tiles down for my sound deadening and some track laid. I cut a 45 crossover wrong so I need another and I'm also waiting on 4 - 30 inch straights from Legacy Station. Several cuts to make where the track exits on the 45 it's just slopped together right now. I deviated from my original plan that Dave Detert - DoubleDAZ helped me with I think I'll skip the double 90 exit.  With scenery,trim and plexiglass around the table I have no worries on being close to the edge though it did come closer than I planned.  The rooms a train wreck I guess since I'm in a holding pattern I can clean up some.

A1A3A4 

Attachments

Images (3)
  • A1
  • A3
  • A4

Michael Hasty, the cardstock buildings you make look so cool, great work on the colors and the styles your using, Mike G, your right everyone is making great progress and building neat structures, Sidehack, awesome building, really great engineering, also your layout is so cool the way the trains come between the buildings, RSJB18, Bob, Mark Boyce is right your BL2’s are cool, that particular body styles growing on me, it’s cool, as is your layout. Dave Ripp, now your trackwork makes sense, looking like it’s ready for a one day in the future expansion, or possibly an end look for depth, it’s so unique. Everyone has so many unique ideas, making this hobby so much more fun. I played with the trains for a few minutes today. Happy Railroading 3F66F8C5-C963-4F1D-A5D3-FE307715493B77B431D9-3178-4D1C-AB4E-D16F23A386A378EF228E-4BD7-439C-94C2-2C1D75B264F24C4BA8A1-C40F-49E3-AF89-C4343B2FA390

Attachments

Images (4)
  • 3F66F8C5-C963-4F1D-A5D3-FE307715493B
  • 77B431D9-3178-4D1C-AB4E-D16F23A386A3
  • 78EF228E-4BD7-439C-94C2-2C1D75B264F2
  • 4C4BA8A1-C40F-49E3-AF89-C4343B2FA390

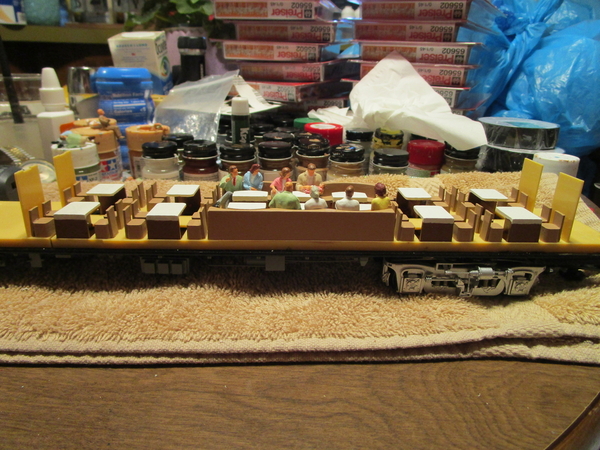
I have returned to the Lionel Alaska 21" Dining Car after painting more Preiser 65602 seated people.  140 of the 240 are perfect. The remaining 100 will be finished with hair color as I begin detailing passenger cars.

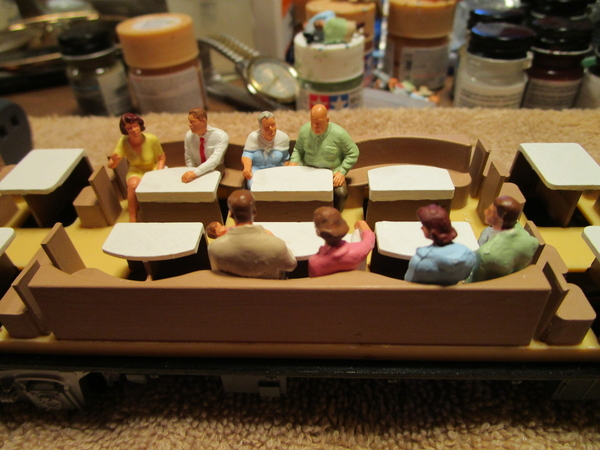
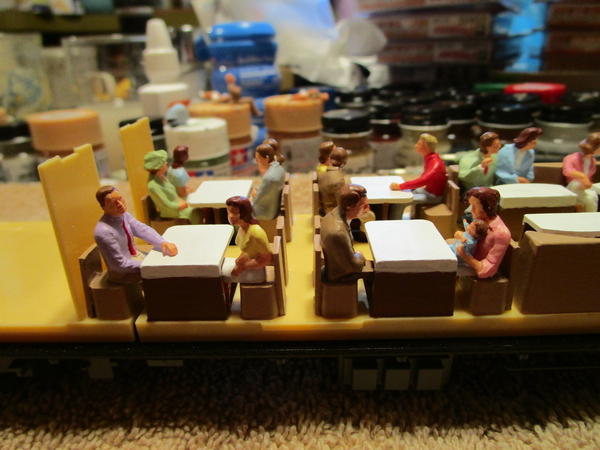
Finding time to work has been difficult. Here are some pictures of the finished interior before I add the seated people to the car.  I cut and added seat backs to the molded cubes that are the bases for the seats at the tables.

Update:  Eight figures have been added to the center dining area.  Most had a leg removed, butt ground down, an arm broken off and re-glued on top of a table, and paint touched-up.  It only took two hours for the eight people.  Now I need to add people to the eight remaining tables.

Update #2:  Four more tables have eleven more seated passengers.  It took three hours of careful grinding and paint touch-up.  I have four more tables to finish.

Update #3:  The car is competed, finished, done.  I am tired, exhausted, pooped. 

Wait a minute:  I put the body shell on the car and noticed two problems,

1.  There is a spot in a dining area window that I needed to move to the walkway by the kitchen.

2.  The vacant table needs to have people sitting at it.  The windows do not line up with the seats.  The end walls of the dining area show through windows on both ends of the dining area.  I am not going to change these now, or I will be slowed in detailing the other Alaska Cars.

NOTE:  The Alaska Dome Car has round tables on the lower level of the long end of the car.  This is the FIRST I have ever seen this interior pattern.

Was this fun or what?  The next car will be the Alaska Dome.  Why you may ask?  That's a very good question.

Have a good week.

Sincerely, John Rowlen
IMG_2091

 IMG_2089

IMG_2090

IMG_2093

IMG_2092

IMG_2102

IMG_2101


Attachments

Images (16)
  • IMG_2088
  • IMG_2087
  • IMG_2086
  • IMG_2085
  • IMG_2084
  • IMG_2083
  • IMG_2082
  • IMG_2080
  • IMG_2079
  • IMG_2091
  • IMG_2089
  • IMG_2090
  • IMG_2093
  • IMG_2092
  • IMG_2102
  • IMG_2101
Last edited by John Rowlen
@leapinlarry posted:

Michael Hasty, the cardstock buildings you make look so cool, great work on the colors and the styles your using, Mike G, your right everyone is making great progress and building neat structures, Sidehack, awesome building, really great engineering, also your layout is so cool the way the trains come between the buildings, RSJB18, Bob, Mark Boyce is right your BL2’s are cool, that particular body styles growing on me, it’s cool, as is your layout. Dave Ripp, now your trackwork makes sense, looking like it’s ready for a one day in the future expansion, or possibly an end look for depth, it’s so unique. Everyone has so many unique ideas, making this hobby so much more fun. I played with the trains for a few minutes today. Happy Railroading 4C4BA8A1-C40F-49E3-AF89-C4343B2FA390

Larry, Thanks. Question, I like the extended fascia how high is it above the layout? Also the water between the hill and the tracks looks prenominal. 

Thank you all for the likes as this has been a fun model railroad adventure for us. The curves are 096 to 0120 in the area of the B&O F units and the side facia board is only about 1-1/4 inch above the table work, and as it goes around is 1-1/2 above the table, and actually goes down to 3/4 above the table... We run trains slow and have few wrecks, however we do have derailments from time to time, but nothing goes off the table. Thanks for asking. F70ED631-FC7D-4A49-8A68-A030F1D19207DBF5A4EE-5644-495C-819F-B2517F6D93EC435431E2-A3C6-438B-A6CA-CD2433363C84281F5E8E-6A66-48BD-AEEA-355CBB16D59DBBCA9423-5546-4817-85E7-04352306D746

Attachments

Images (5)
  • F70ED631-FC7D-4A49-8A68-A030F1D19207
  • DBF5A4EE-5644-495C-819F-B2517F6D93EC
  • 435431E2-A3C6-438B-A6CA-CD2433363C84
  • 281F5E8E-6A66-48BD-AEEA-355CBB16D59D
  • BBCA9423-5546-4817-85E7-04352306D746
Last edited by leapinlarry

I printed some scale copies of 1943 magazines, and put some of them in the Country Store, on the counter and around the figures. I also took a plastic tube, split lengthwise, and painted it to hide the wires which run up one wall. Hey, a brown column along a wall looks kind of odd, but it's way better than lose wires just hanging there like that.0607201536a-010607201537c-01

Attachments

Images (2)
  • 0607201536a-01
  • 0607201537c-01

Evening guys, as before more wonderful work!

Vincent, sure sounds cool, but no photos.

Dave Ripp, Sorry for the wrong cut, but its always nice to have a day to clean!

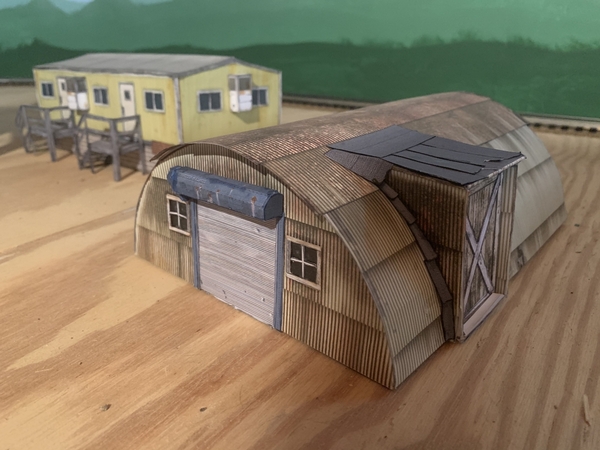
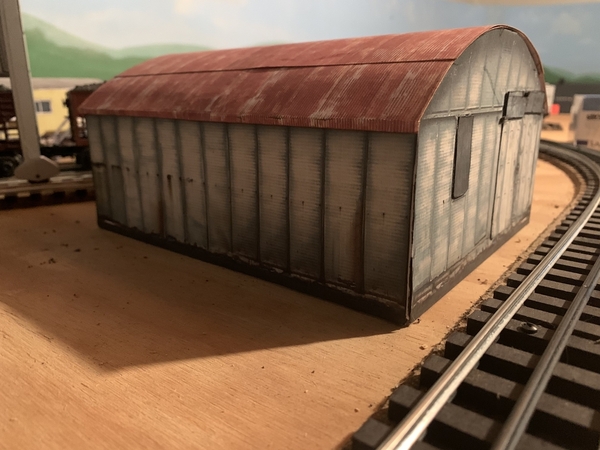
Michael, wonderful job on the Quonset Hut! Are those free downloads?

Larry, Your layout is so Amazing that I could spend all day looking at photos of it along with watching any videos of it! Thanks for sharing!

John R. The seat backs truly make a great improvement! Nice work!

Lee, Nice touch! I don't thing the brown tube is that big of a deal, If you ask me I thing it all looks great!

Well guys I did get out to the train room to work on the facia. I was able to get it all up and putty all the nail holes. Tomorrow I hope to get out and sand, clean, then put a clear coat of Polyurethane on it to protect it as time goes along. Here are a couple photos of during and after a little clean up! I hope you all had a great weekend!IMG_20200607_125303819IMG_20200607_125307451IMG_20200607_125314103IMG_20200607_150336542IMG_20200607_150343882IMG_20200607_150349949IMG_20200607_150357788

I hope everyone doesn't work to hard this coming week!

Attachments

Images (7)
  • IMG_20200607_125303819
  • IMG_20200607_125307451
  • IMG_20200607_125314103
  • IMG_20200607_150336542
  • IMG_20200607_150343882
  • IMG_20200607_150349949
  • IMG_20200607_150357788

Today I tackled the roof, wanting a corrugated type but a more upscale looking one. So made a model of the type I liked and then made some dies to produce them. I'm pretty happy with how it came out.

This is how I imagined the roof construct roof_27

and the dies with first run IMG_9525IMG_9524

I think painted gray or green would look good but the bare metal also would be nice, still haven't decided on the paint scheme for the walls and trim so that would make a difference.

Attachments

Images (3)
  • construct roof_27
  • IMG_9525
  • IMG_9524

I made laps on the new third level this evening!  I finished the woodwork and mounted the track.  Too tired to start the electrical, I put on two jumpers and grabbed a Geep.  I made note of some adjustments to be made.  For my next trick, I have an appointment with a hot shower and a waterbed.  Tomorrow I'll go another ten rounds.

Attachments

Videos (1)
20200607_202031

It just occurred to me that in East Tennessee during the war, you'd have pictures of FDR around. So, I put one up inside the Army Shack, and then this one in the store. It just looked correct, because so many people in the area felt like they owed their lives to the man.

0607202012-01

It's a very small detail, barely even worth mentioning, but this is the kind of stuff I am really loving to do. On the sheet of photo paper on which I printed this, I also printed several photographs of granite, and I'm going to be making a photo-realistic path of stepping stones from that. More to come on that project...

Attachments

Images (1)
  • 0607202012-01
@p51 posted:

It just occurred to me that in East Tennessee during the war, you'd have pictures of FDR around. So, I put one up inside the Army Shack, and then this one in the store. It just looked correct, because so many people in the area felt like they owed their lives to the man.

0607202012-01

It's a very small detail, barely even worth mentioning, but this is the kind of stuff I am really loving to do. On the sheet of photo paper on which I printed this, I also printed several photographs of granite, and I'm going to be making a photo-realistic path of stepping stones from that. More to come on that project...

Lee, love the job you are doing with all the details. The satisfaction of doing a project like that is knowing that you did it with the knowledge that you left nothing you deem important undone. Keep that desire and doing these projects will continue to be very satisfying.

Another fine day in the train room.  I ran a spare Type VW output to "level three."  I remembered the insulated track pins in the rise from the second level.  The new level needs a couple more power drops.  I fine tuned the height of two uprights.  I ran both LC+ and conventional with no problems.  Tomorrow I will wire the two new switches and connect Illumination voltage (10.5 vac) to the covered bridge.  Maybe I will run trains on both lines too.

Rain on a metal roof is making me sleepy.

Say goodnight Gracie.

Trainmaster04, thanks for the wonderful review!

Kwiser, Very cool and will look great on your layout, but I have to say its out of my price range for now!

Jushavnfun, Wonderful scene!

Lee, Looks like its going to b e a perfect match! Nice work as usual!

Well yesterday I got all the sanding done on my facia and went to polyurethane it but my stuff that had been around for a while had jelled up. So after some Auto repairs this morning I plan on buying some new Poly and get it on later today so I can install all my toggle switches. Then I am going to have to make some new labels.

I hope everyone has a great Tuesday and finds time for there layout and trains!

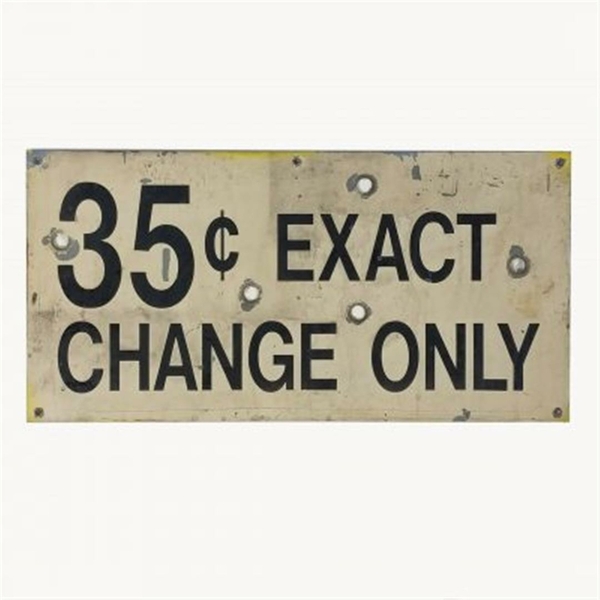
Looks great! Now you need to put some bullet holes in the sign.

Nah, through the 30s until WW2, some of the locals in the Blue Ridge were just barely existing above starving. People didn't waste bullets (usually fired from muzzle loaders) on something like a sign...

I wish I could put some holes into it, but I'm all about what it historically correct or plausible.

I started detailing the Alaska Dome Dining Car last night.

When I opened the car, I found several surprises.

1.  This Dome Car has a table arrangement for dining in the lower rear of the car.  Of all my 21" Lionel passenger cars, this is the first time I encountered this floor arrangement.

2,  The normal ramp down and up in the side passing aisle is not low enough by an eighth of an inch.  This depth difference means that their is a scale 30-inch drop into the recessed Lounge area and dish washing area.  There are NO STAIRS from the aisle ramp to the lower areas,  I will have to make stairs for these two rooms.

3.  The Lower lounge has two posts molded into the lounge floor that serve NO PURPOSE, other than obstructing where a person would sit.  I had to take needle nose pliers and break the posts from the Lounge floor.

4.  The kitchen area is two parts: An upper cooking area and the dishwashing and clean-up area on the lower recessed floor.

5.  The dome Seats are the traditional seats used in all Lionel 21-inch Dome Cars.  I will keep the seats at the manufactured height because the Alaska Dome is the high Dome similar to the Union Pacific Dome Cars.

6.  The round dining tables are molded into the table base with no space for diners legs and feet.  I will have to carefully grind the figures to flush-up to the round tabkes.  I did not paint the table bases because they are ugly and I want them to disappear into the floor plastic color.

I will now begin the grinding and placement of people in the lower levels.  This will be a challenge because the figures must butt-up to the tables with no gaps.  Wish me luck.

Note: I placed the pictures in reverse order of construction.

Have a good week.

Sincerely, John Rowlen

IMG_2104


 IMG_2128

IMG_2134

Attachments

Images (28)
  • IMG_2121
  • IMG_2120
  • IMG_2119
  • IMG_2118
  • IMG_2117
  • IMG_2116
  • IMG_2115
  • IMG_2114
  • IMG_2113
  • IMG_2109
  • IMG_2108
  • IMG_2107
  • IMG_2106
  • IMG_2105
  • IMG_2103
  • IMG_2104
  • IMG_2128
  • IMG_2129
  • IMG_2130
  • IMG_2131
  • IMG_2132
  • IMG_2133
  • IMG_2135
  • IMG_2137
  • IMG_2138
  • IMG_2139
  • IMG_2134
  • IMG_2134
Last edited by John Rowlen
@John Rowlen posted:

I started detailing the Alaska Dome Dining Car last night.

When I opened the car, I found several surprises.
1.  This Dome Car has a table arrangement for dining in the lower rear of the car.  Of all my 21" Lionel passenger cars, this is the first time I encountered this floor arrangement.

2,  The normal ramp down and up in the side passing aisle is not low enough by an eighth of an inch.  This depth difference means that their is a scale 30-inch drop into the recessed Lounge area and prep kitchen.  The are NO STAIRS from the aisle ramp to the lower areas,  I will have to make stairs for these two rooms.

3.  The Lower lounge has two posts molded into the lounge floor that serve NO PURPOSE, other than obstructing where a person would sit.  I had to take needle nose pliers and break the posts from the Lounge floor.

4.  The kitchen area is two parts: An upper cooking area and the serving prep area on the lower recessed floor.

5.  The dome Seats are the traditional seats used in all Lionel 21: Dome Cars.  I will keep the seats at the manufactured height because the Alaska Dome is the high Dome similar to the Union Pacific Dome Cars.

6.  The round dining tables are molded into the table base with no space for diners legs and feet.  I will have to carefully grind the figures to flush-up to the round tabkes.  I did not paint the table bases because they are ugly and I want them to disappear into the floor plastic color.

I will now begin the grinding and placement of people in the lower levels.  This will be a challenge because the figures must butt-up to the tables with no gaps.  Wish me luck.

John,

I have always found it interesting how things like this are designed, with little or no regard to how real little people would navigate them.

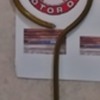
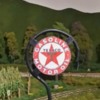
I was pondering how to frame the Texaco signs on to the pole, as the real one used turnbuckles or metal brackets.

Fm1m5GziWWDf6VUMYr99jA

I used a grinder bit  to cut off the ends  of a bent wire coat hanger , thinking how I was going to attach the sign into the center.  Then, as I was throwing away a soda can it just hit me has an epiphany.

0609201747-01

I cut the shape out the side of a Doctor Pepper can, glued it in place with ACC, and spray painted the whole thing black. 

I can't believe how fast the paint dried, and the dull coat. Just glued the signs into place, and test fit it onto the layout. I'm going to lower the pole quite a bit, but for now I'm just going to let it sit until it's good and dry.

0609201848a-010609201848-01

Then, I'll do some weathering on it, with dry brushing and maybe a very light wash on the tops of the signs.

Attachments

Images (4)
  • 0609201747-01
  • Fm1m5GziWWDf6VUMYr99jA
  • 0609201848a-01
  • 0609201848-01
Last edited by p51

It's hard work playing with trains.  I took a break every other hour.  I made several adjustments to level three.  I adjusted the incline as well.  I started thinking about wiring two more switches when my light bulb came on and told me to pull up the West yards.  It helped to have a place to sit on the layout.  The switches are working with temporary wiring.  I changed the steam yards from 4 spurs to three.  They are longer and straight.  I added a spur to the third level with the now spare switch.  I have a few days work ahead but I can see it will be a good change.

20200609_21104320200609_211033

Attachments

Images (2)
  • 20200609_211043
  • 20200609_211033

The imaginative work displayed here still manages to inspire us who are yet to begin scenic endeavors.  I had begun the process quite some time ago but realized major readjustment to the track plan was necessary before continuing.  Can't wait for the day when the layout becomes populated....with no socially distanced citizens.

Now that track construction is generally finalized and most all is supplied with power I spent the last few days taking care of operational issues.  A combination of Atlas and Gargraves switches can cause just a few electrical head scratchers.  Quite a bit of running is involved in the process and already the improvements over the old wiring is evident.  What used to cause Legacy engines to choke is no more.  Armed with confidence, tying in DCS brought more joy and I'm reading tens on almost the entire 300'+ system.

Bruce


Completed phase 1 of automating my AMC/ARC Gantry crane. I enjoy spinning the cab and lowering and raising the magnet, but I've been antsy to also have it move along the track.  I finally got all the pieces to work, and now I'm in the process of making it permanent and pretty. In one video you'll see a covering over the spindle that automates the crane. I intend to make that a bit more 'industrial'.  Steps up to it, a railing some scattered 'stuff' and a figure or two. I'm considering adding a lighted welder, but that's down the road. I'm also going to build a shack to cover the motor that runs the whole thing.  I'm using a 3000pm motor that's connected through a board that allows me to vary the voltage and provides a switch that changes polarity and stops voltage to the motor.  Enjoy. Oh, the spindle rod is 12".  I can move the Gantry though about 11"

2020-06-10 Gantry Crane

Attachments

Images (1)
  • 2020-06-10 Gantry Crane
Videos (2)
I2020-06-10 Gantry Crane spindle exposed
2020-06-10 Gantry Crane Spindle covered

Add Reply

Post

OGR Publishing, Inc., 1310 Eastside Centre Ct, Suite 6, Mountain Home, AR 72653
800-980-OGRR (6477)
www.ogaugerr.com

×
×
×
×
Link copied to your clipboard.
×
×