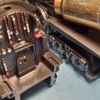
Evening guys, as before more wonderful work!

Vincent, sure sounds cool, but no photos.

Dave Ripp, Sorry for the wrong cut, but its always nice to have a day to clean!

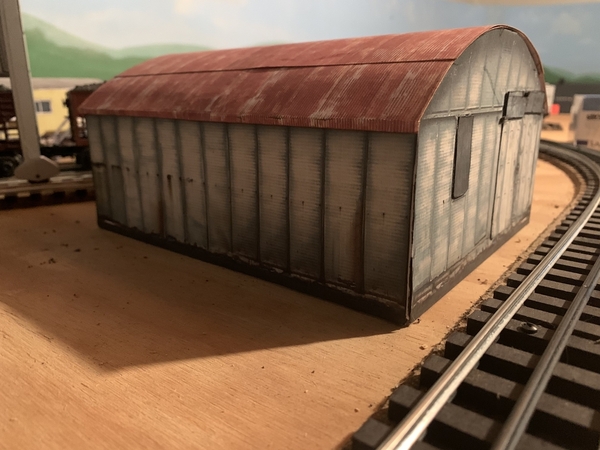
Michael, wonderful job on the Quonset Hut! Are those free downloads?

Larry, Your layout is so Amazing that I could spend all day looking at photos of it along with watching any videos of it! Thanks for sharing!

John R. The seat backs truly make a great improvement! Nice work!

Lee, Nice touch! I don't thing the brown tube is that big of a deal, If you ask me I thing it all looks great!

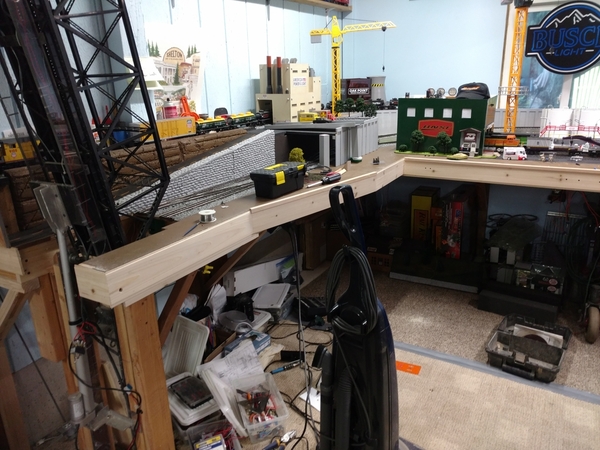
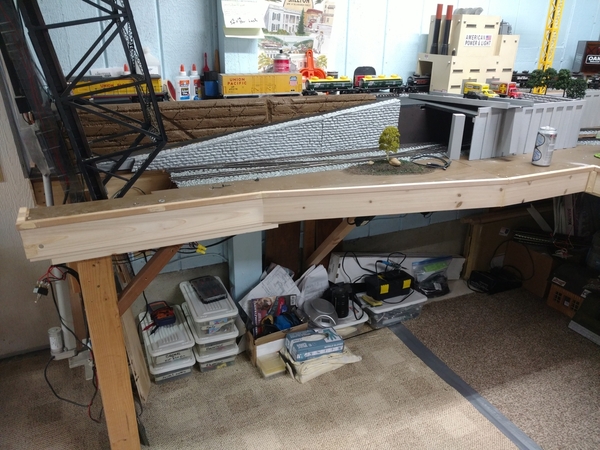
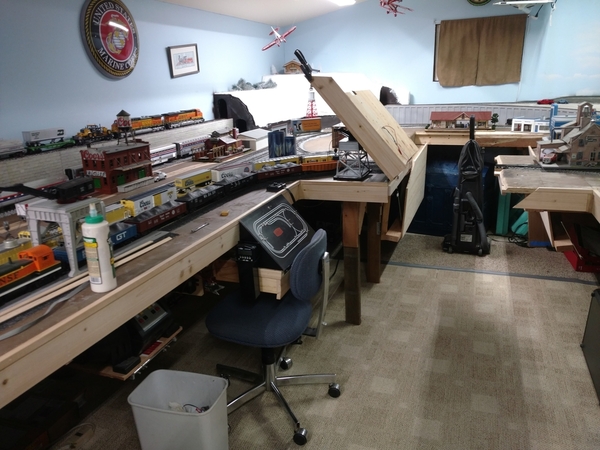
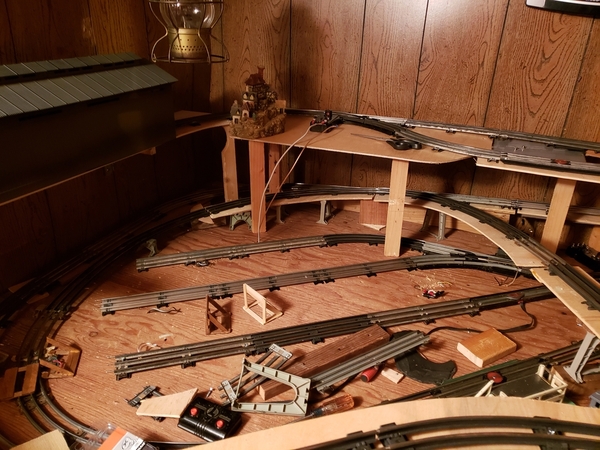
Well guys I did get out to the train room to work on the facia. I was able to get it all up and putty all the nail holes. Tomorrow I hope to get out and sand, clean, then put a clear coat of Polyurethane on it to protect it as time goes along. Here are a couple photos of during and after a little clean up! I hope you all had a great weekend!IMG_20200607_125303819IMG_20200607_125307451IMG_20200607_125314103IMG_20200607_150336542IMG_20200607_150343882IMG_20200607_150349949IMG_20200607_150357788

I hope everyone doesn't work to hard this coming week!

Attachments

Images (7)
  • IMG_20200607_125303819
  • IMG_20200607_125307451
  • IMG_20200607_125314103
  • IMG_20200607_150336542
  • IMG_20200607_150343882
  • IMG_20200607_150349949
  • IMG_20200607_150357788

Today I tackled the roof, wanting a corrugated type but a more upscale looking one. So made a model of the type I liked and then made some dies to produce them. I'm pretty happy with how it came out.

This is how I imagined the roof construct roof_27

and the dies with first run IMG_9525IMG_9524

I think painted gray or green would look good but the bare metal also would be nice, still haven't decided on the paint scheme for the walls and trim so that would make a difference.

Attachments

Images (3)
  • construct roof_27
  • IMG_9525
  • IMG_9524

I made laps on the new third level this evening!  I finished the woodwork and mounted the track.  Too tired to start the electrical, I put on two jumpers and grabbed a Geep.  I made note of some adjustments to be made.  For my next trick, I have an appointment with a hot shower and a waterbed.  Tomorrow I'll go another ten rounds.

Attachments

Videos (1)
20200607_202031

It just occurred to me that in East Tennessee during the war, you'd have pictures of FDR around. So, I put one up inside the Army Shack, and then this one in the store. It just looked correct, because so many people in the area felt like they owed their lives to the man.

0607202012-01

It's a very small detail, barely even worth mentioning, but this is the kind of stuff I am really loving to do. On the sheet of photo paper on which I printed this, I also printed several photographs of granite, and I'm going to be making a photo-realistic path of stepping stones from that. More to come on that project...

Attachments

Images (1)
  • 0607202012-01
@p51 posted:

It just occurred to me that in East Tennessee during the war, you'd have pictures of FDR around. So, I put one up inside the Army Shack, and then this one in the store. It just looked correct, because so many people in the area felt like they owed their lives to the man.

0607202012-01

It's a very small detail, barely even worth mentioning, but this is the kind of stuff I am really loving to do. On the sheet of photo paper on which I printed this, I also printed several photographs of granite, and I'm going to be making a photo-realistic path of stepping stones from that. More to come on that project...

Lee, love the job you are doing with all the details. The satisfaction of doing a project like that is knowing that you did it with the knowledge that you left nothing you deem important undone. Keep that desire and doing these projects will continue to be very satisfying.

Another fine day in the train room.  I ran a spare Type VW output to "level three."  I remembered the insulated track pins in the rise from the second level.  The new level needs a couple more power drops.  I fine tuned the height of two uprights.  I ran both LC+ and conventional with no problems.  Tomorrow I will wire the two new switches and connect Illumination voltage (10.5 vac) to the covered bridge.  Maybe I will run trains on both lines too.

Rain on a metal roof is making me sleepy.

Say goodnight Gracie.

Trainmaster04, thanks for the wonderful review!

Kwiser, Very cool and will look great on your layout, but I have to say its out of my price range for now!

Jushavnfun, Wonderful scene!

Lee, Looks like its going to b e a perfect match! Nice work as usual!

Well yesterday I got all the sanding done on my facia and went to polyurethane it but my stuff that had been around for a while had jelled up. So after some Auto repairs this morning I plan on buying some new Poly and get it on later today so I can install all my toggle switches. Then I am going to have to make some new labels.

I hope everyone has a great Tuesday and finds time for there layout and trains!

Looks great! Now you need to put some bullet holes in the sign.

Nah, through the 30s until WW2, some of the locals in the Blue Ridge were just barely existing above starving. People didn't waste bullets (usually fired from muzzle loaders) on something like a sign...

I wish I could put some holes into it, but I'm all about what it historically correct or plausible.

I started detailing the Alaska Dome Dining Car last night.

When I opened the car, I found several surprises.

1.  This Dome Car has a table arrangement for dining in the lower rear of the car.  Of all my 21" Lionel passenger cars, this is the first time I encountered this floor arrangement.

2,  The normal ramp down and up in the side passing aisle is not low enough by an eighth of an inch.  This depth difference means that their is a scale 30-inch drop into the recessed Lounge area and dish washing area.  There are NO STAIRS from the aisle ramp to the lower areas,  I will have to make stairs for these two rooms.

3.  The Lower lounge has two posts molded into the lounge floor that serve NO PURPOSE, other than obstructing where a person would sit.  I had to take needle nose pliers and break the posts from the Lounge floor.

4.  The kitchen area is two parts: An upper cooking area and the dishwashing and clean-up area on the lower recessed floor.

5.  The dome Seats are the traditional seats used in all Lionel 21-inch Dome Cars.  I will keep the seats at the manufactured height because the Alaska Dome is the high Dome similar to the Union Pacific Dome Cars.

6.  The round dining tables are molded into the table base with no space for diners legs and feet.  I will have to carefully grind the figures to flush-up to the round tabkes.  I did not paint the table bases because they are ugly and I want them to disappear into the floor plastic color.

I will now begin the grinding and placement of people in the lower levels.  This will be a challenge because the figures must butt-up to the tables with no gaps.  Wish me luck.

Note: I placed the pictures in reverse order of construction.

Have a good week.

Sincerely, John Rowlen

IMG_2104


 IMG_2128

IMG_2134

Attachments

Images (28)
  • IMG_2121
  • IMG_2120
  • IMG_2119
  • IMG_2118
  • IMG_2117
  • IMG_2116
  • IMG_2115
  • IMG_2114
  • IMG_2113
  • IMG_2109
  • IMG_2108
  • IMG_2107
  • IMG_2106
  • IMG_2105
  • IMG_2103
  • IMG_2104
  • IMG_2128
  • IMG_2129
  • IMG_2130
  • IMG_2131
  • IMG_2132
  • IMG_2133
  • IMG_2135
  • IMG_2137
  • IMG_2138
  • IMG_2139
  • IMG_2134
  • IMG_2134
Last edited by John Rowlen
@John Rowlen posted:

I started detailing the Alaska Dome Dining Car last night.

When I opened the car, I found several surprises.

1.  This Dome Car has a table arrangement for dining in the lower rear of the car.  Of all my 21" Lionel passenger cars, this is the first time I encountered this floor arrangement.

2,  The normal ramp down and up in the side passing aisle is not low enough by an eighth of an inch.  This depth difference means that their is a scale 30-inch drop into the recessed Lounge area and prep kitchen.  The are NO STAIRS from the aisle ramp to the lower areas,  I will have to make stairs for these two rooms.

3.  The Lower lounge has two posts molded into the lounge floor that serve NO PURPOSE, other than obstructing where a person would sit.  I had to take needle nose pliers and break the posts from the Lounge floor.

4.  The kitchen area is two parts: An upper cooking area and the serving prep area on the lower recessed floor.

5.  The dome Seats are the traditional seats used in all Lionel 21: Dome Cars.  I will keep the seats at the manufactured height because the Alaska Dome is the high Dome similar to the Union Pacific Dome Cars.

6.  The round dining tables are molded into the table base with no space for diners legs and feet.  I will have to carefully grind the figures to flush-up to the round tabkes.  I did not paint the table bases because they are ugly and I want them to disappear into the floor plastic color.

I will now begin the grinding and placement of people in the lower levels.  This will be a challenge because the figures must butt-up to the tables with no gaps.  Wish me luck.

John,

I have always found it interesting how things like this are designed, with little or no regard to how real little people would navigate them.

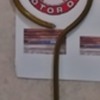
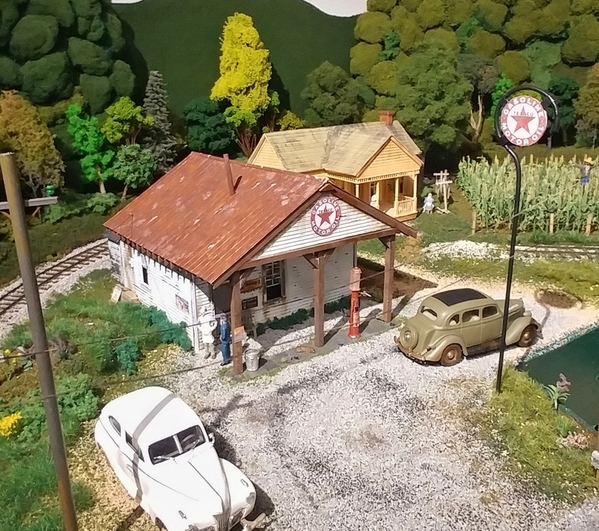
I was pondering how to frame the Texaco signs on to the pole, as the real one used turnbuckles or metal brackets.

Fm1m5GziWWDf6VUMYr99jA

I used a grinder bit  to cut off the ends  of a bent wire coat hanger , thinking how I was going to attach the sign into the center.  Then, as I was throwing away a soda can it just hit me has an epiphany.

0609201747-01

I cut the shape out the side of a Doctor Pepper can, glued it in place with ACC, and spray painted the whole thing black. 

I can't believe how fast the paint dried, and the dull coat. Just glued the signs into place, and test fit it onto the layout. I'm going to lower the pole quite a bit, but for now I'm just going to let it sit until it's good and dry.

0609201848a-010609201848-01

Then, I'll do some weathering on it, with dry brushing and maybe a very light wash on the tops of the signs.

Attachments

Images (4)
  • 0609201747-01
  • Fm1m5GziWWDf6VUMYr99jA
  • 0609201848a-01
  • 0609201848-01
Last edited by p51

It's hard work playing with trains.  I took a break every other hour.  I made several adjustments to level three.  I adjusted the incline as well.  I started thinking about wiring two more switches when my light bulb came on and told me to pull up the West yards.  It helped to have a place to sit on the layout.  The switches are working with temporary wiring.  I changed the steam yards from 4 spurs to three.  They are longer and straight.  I added a spur to the third level with the now spare switch.  I have a few days work ahead but I can see it will be a good change.

20200609_21104320200609_211033

Attachments

Images (2)
  • 20200609_211043
  • 20200609_211033

The imaginative work displayed here still manages to inspire us who are yet to begin scenic endeavors.  I had begun the process quite some time ago but realized major readjustment to the track plan was necessary before continuing.  Can't wait for the day when the layout becomes populated....with no socially distanced citizens.

Now that track construction is generally finalized and most all is supplied with power I spent the last few days taking care of operational issues.  A combination of Atlas and Gargraves switches can cause just a few electrical head scratchers.  Quite a bit of running is involved in the process and already the improvements over the old wiring is evident.  What used to cause Legacy engines to choke is no more.  Armed with confidence, tying in DCS brought more joy and I'm reading tens on almost the entire 300'+ system.

Bruce


Completed phase 1 of automating my AMC/ARC Gantry crane. I enjoy spinning the cab and lowering and raising the magnet, but I've been antsy to also have it move along the track.  I finally got all the pieces to work, and now I'm in the process of making it permanent and pretty. In one video you'll see a covering over the spindle that automates the crane. I intend to make that a bit more 'industrial'.  Steps up to it, a railing some scattered 'stuff' and a figure or two. I'm considering adding a lighted welder, but that's down the road. I'm also going to build a shack to cover the motor that runs the whole thing.  I'm using a 3000pm motor that's connected through a board that allows me to vary the voltage and provides a switch that changes polarity and stops voltage to the motor.  Enjoy. Oh, the spindle rod is 12".  I can move the Gantry though about 11"

2020-06-10 Gantry Crane

Attachments

Images (1)
  • 2020-06-10 Gantry Crane
Videos (2)
I2020-06-10 Gantry Crane spindle exposed
2020-06-10 Gantry Crane Spindle covered

Add Reply

Post

OGR Publishing, Inc., 1310 Eastside Centre Ct, Suite 6, Mountain Home, AR 72653
800-980-OGRR (6477)
www.ogaugerr.com

×
×
×
×
Link copied to your clipboard.
×
×