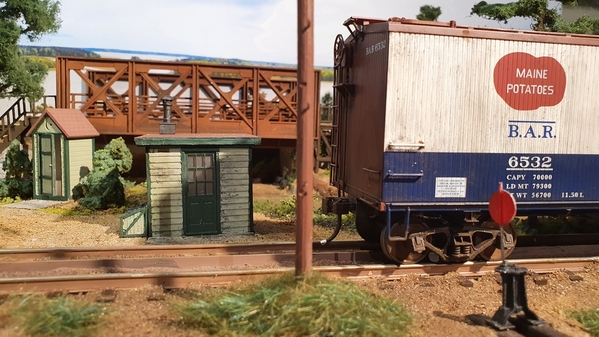
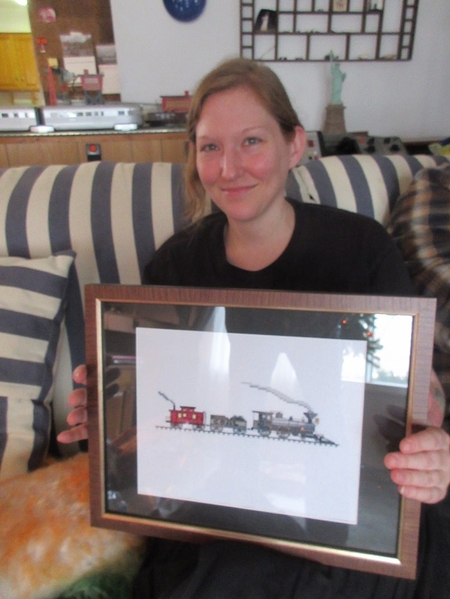
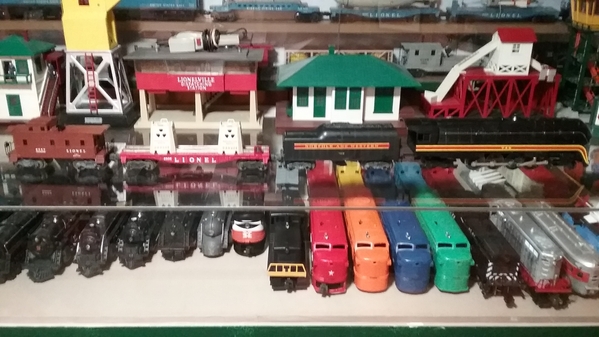
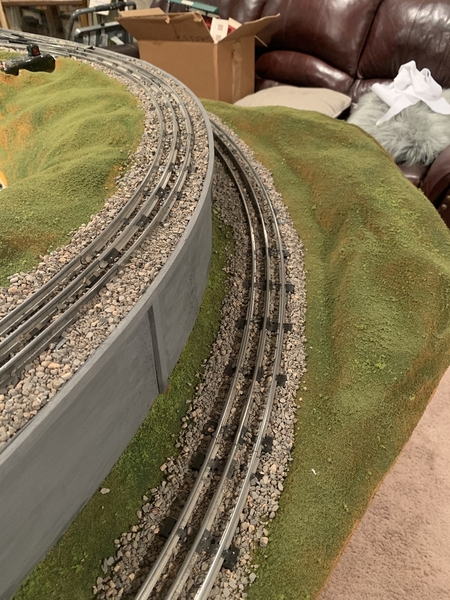
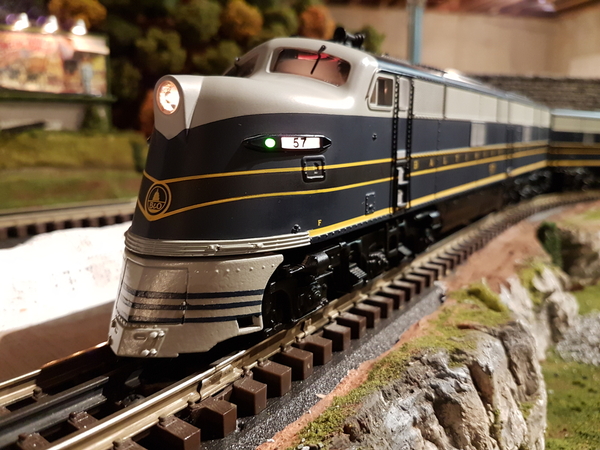
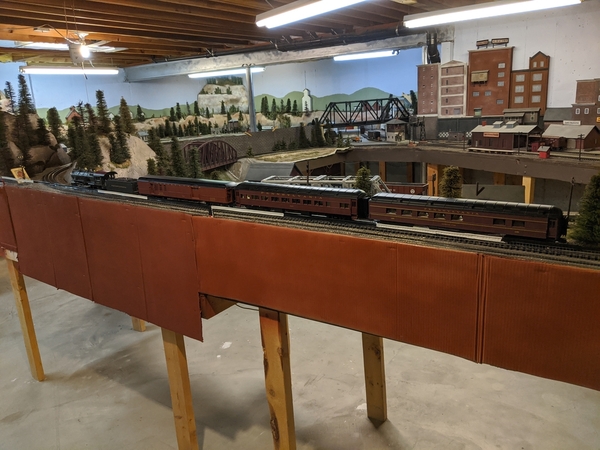
 Cleaned and lubed Lionel Atlantic and Consolidation engines. Ran each around the mainline with track cleaning car. Decided to retire and pack up some K-line PRR heavyweight cars except for the diner car that I ran with a Lionel coach and GGD RPO. Nice pics folks.
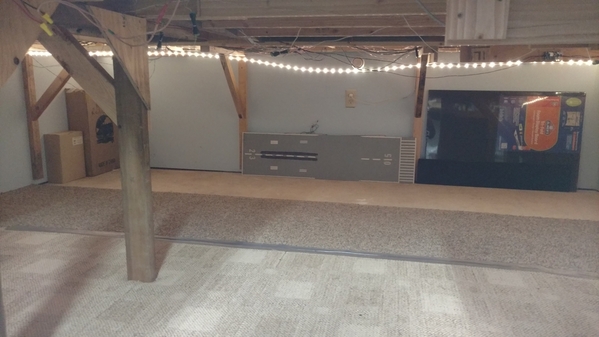
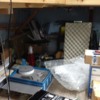
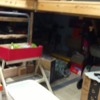
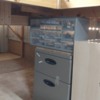
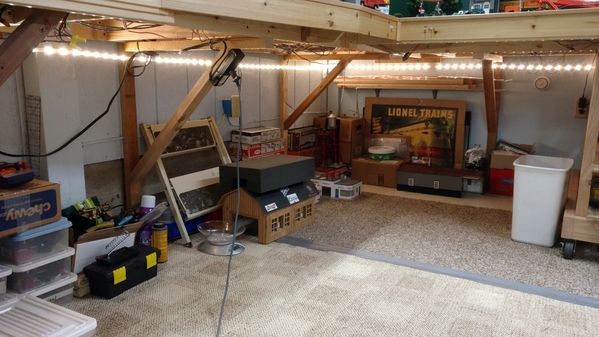
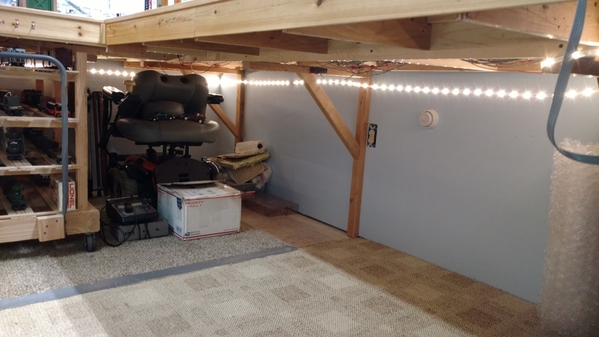
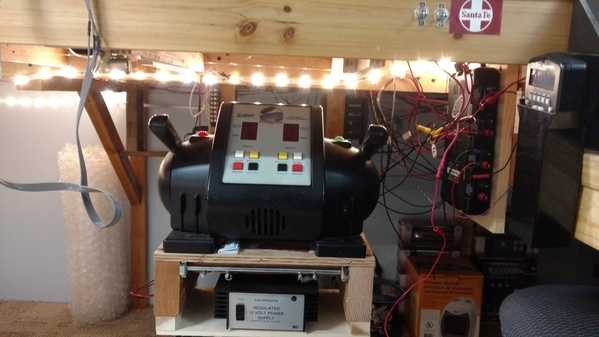
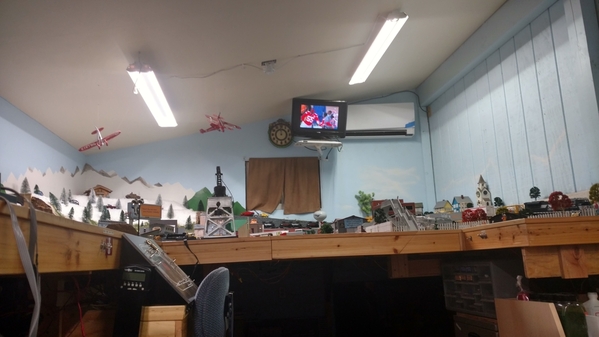
Morning guys, I am sure you all have heard I might have fried one of my engines. So everything is off the tracks till I get a chance to rework the wiring under the layout and add more protection. The only problem is its a total pig pen under the layout. so I spent part of yesterday and this morning cleaning things out that I don't need. Here is a couple photos. Enjoy! LOL
The first couple are the end of the layout I haven't gotten to yet.
The next 2 are of the end I have already cleaned. You will notice I also added light rope so I don't have to wear that darn miners lamp on my head.
I will do more later today when I get back from the doc. I hope you all have a great day and please be safe!
Oh and if you can please find time to have fun with your layout and trains!
Attachments
I made this typical urban Main Street type building (store below, apartments above) from my Plasticville junk box.
Bottom front is from the 5 & 10, Top front and sides from apartment house, part of top back from side of bungalow with peak cut off, top valance from post office as are the bottom back and sides, roof from supermarket, antenna from colonial house, top front door from motel, center sign from advertisement, front spotlights are pop rivets, "glass" is from packaging, balsa trim. Tan and primer spray paint, home printed "Warrenville Arms" signage.
Attachments
John, that's great looking! Very nice work!
LeapinLarry : Wow What a passenger train...a Big Boy + tender and over 19 FEET of passenger cars! That would go around my layout twice I would have to double it up for track space!! Great pictures.
John great work, your innovation in combining otherwise perhaps parts that would not be used is really great. Looks great as well.
Sincerely
Don
A quick happy snap of a WIP for the A&M museum layout:
The 2245 has been languishing in a display case at the museum since we got it. Recently, I acquired some K-line Texas Special cars, so I brought the F3 home to see what needed fixing. Got a replacement bike horn on order and replaced the broken front electromagnet coupler with a fixed coupler from the parts box.
Anybody got spare K-line Texas Special cars so I can finish the consist? I have an RPO, diner and Pullman and would like a dome car and observation so we can put this train back into service on the museum layout next year...
Plans are to commence the Razorback Traction rebuild after New Year's.
Merry Christmas, all!
Attachments
Guys,
Thanks for the kind comments about my fun little Plasticville bash project.
Mitch,
I frequently run this guy behind my 2245's. It was made by Lionel for one of TCA's divisions several years ago.
Attachments
Miggy
I have a question, how do you keep the train on the elevated track...??? Go Slow - apparently. My transformer has two speeds............. and will never make it around turn one without "CRASH"... roflmao
my thoughts
i generally elevate your outside rail in the curve.
I use pop sickle sticks in the centers of the curves on the outside rails.
Slight amount of height going into and leaving the curve and then the highest in the center.
I’m certain there are other ideas and suggestions but the sticks do not conduct rail current.
I too back off on the transformer volts on my z4000 while the engines are in the elevated tracks and curves...
Seth
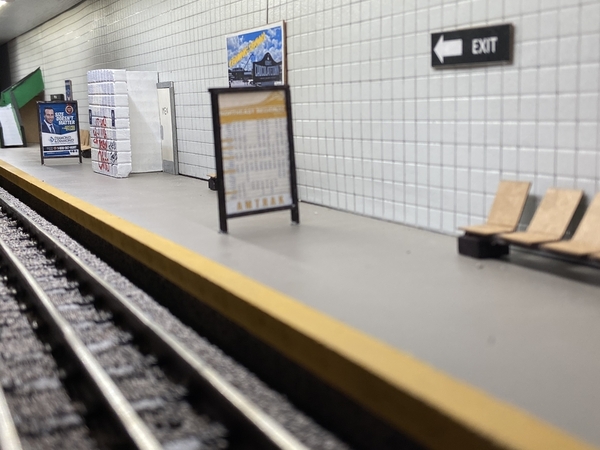
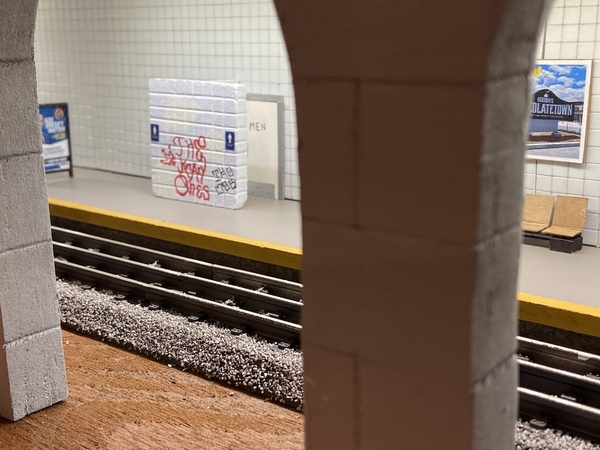
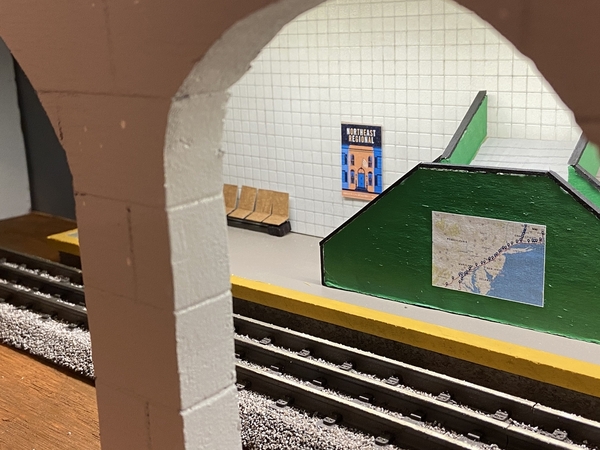
Finished the subway car repair facility on the first level of my station project. Now I need to paint the sidewalk in front of the facility and lay some mud down in front before working my way up to the second level and installing the fencing and stairs to each platform. Then, i’ll hit the third level and start cutting up my mth banks to make the station. b
b
Attachments
Strap Hanger - nice work on the subway. Platforms look to be 2 cars deep? One of these days when I have appropriate room, I'll do something similar. Merry Christmas. Jeff
This past week, I’ve been back on the layout. Even though I have heat in the woodshop, it’s cold enough outside that I don’t want to go out unless I have to ( I really dislike the cold!!)
Anyways, I got most all of my detailing done on my station platform. A couple small things left: the “continuation” of the stairs (my wife the artist is working on that for me), trash cans, and a vending machine or two.
I’ve realized I need to just focus on small areas at a time, instead of the whole thing, with one project here and another there. It gets easier to keep track of your ideas that way!
The next section is the town area above the platform. I searched for a Miller sign that I last saw about 18months ago, for almost an hour today. I guess Mike has the right idea, time for some under layout cleaning!!
Happy Holidays to everyone, hopefully I’ll be back next week with more progress pics!!
Attachments
Strap Hanger, amazing work !
Mo, You and your wife are doing outstanding work! I am like you and hate the cold but I have heat both in the garage and train room so I am all good there! LOL
Just do your best to have fun! ![]()
Annddd...... from under the treeeeeee, carpet layout, new headlight and marker lights and "A red bulb in the FireBox!" My problem is that this little guy, Lionel 8042... 242.. Prairie style has solid rollers for pickups and bangs pretty hard through the 022 switches.... and... AND, is there a trick to keeping the front trucks under the steamchest, On the Tracks ? I was going to try LEAD, but not much room. Perhaps glue a black nut for a little weight?
Shes a happy engine, pulls well, Smokes well and the kids love her.
I suppose I can leave the front trucks off...... (run the diesel, run the diesel) OR add a flat circle and extra transformer?
Attachments
@ScoutingDad posted:Strap Hanger - nice work on the subway. Platforms look to be 2 cars deep? One of these days when I have appropriate room, I'll do something similar. Merry Christmas. Jeff
Thanks Jeff. Yes, that was all the room I could spare. Unfortunately, we don’t have any basements down here in Florida. The third level is fully removeable and all lighting there will be connected to detatchable blocks. Eventually, I’m going to install a couple of switch tracks to the second level’s two middle platforms. However, since it’s only two cars deep, I figured it could wait. Merry Christmas to you and your family as well!
Mike G, Thanks! Hey, I’ll trade you my Florida heat for one of your cold basements or attic’s any day. My world is limited to a 14x9 spare bedroom.
Mo985, outstanding work!
@Miggy posted:is there a trick to keeping the fron trucks under the steamchest, On the Tracks ? I was going to try LEAD, but not much room. Perhaps glue a black nut for a little weight?
2-4-2, right? Make sure the front truck is bent down to the right angle. When dangled in the air, the front wheels should be about 1/4" or a bit more below the drivers on the bottom...
Mitch
Well Christmas Eve is a good time to clean track & run some trains 🚂. First I fired up my US Army 44 Tonner with 2 track cleaning cars to clean the short line and then the main line. When that was finished out came my MBTA Genset with MBTA double deck commuters & mail cars from siding #3. After that came the veteran’s SD-60 with the hospital train. Last I brought out my Pan Am F7 excursion with Amtrak & PanAm passenger cars from siding #7. Tomorrow I hope to celebrate with a couple long freights.
Merry Christmas to all, & to all a good night! 💤
Be safe & God bless!

Merry Christmas ! have a good night everyone !!
Attachments
@briansilvermustang posted:
Merry Christmas ! have a good night everyone !!
Hey Brian... Good to hear from you! Merry Christmas and Happy New Year!
Bob
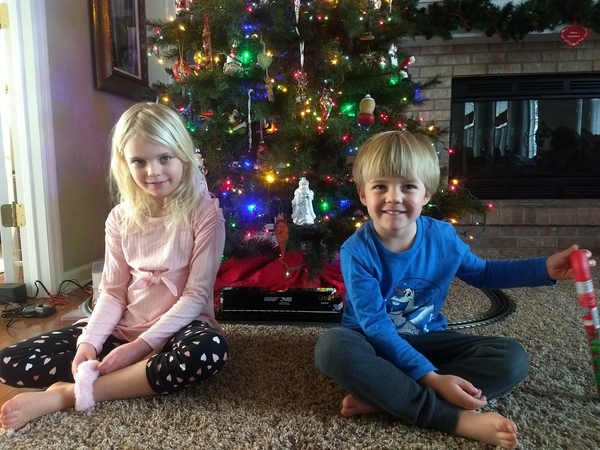
Well, today was clean up and tune up day so the trains will run perfectly for some young Christmas visitors.
My wife helped out with some touch-up painting while a set of post war F3's race past...
Attachments
Attachments
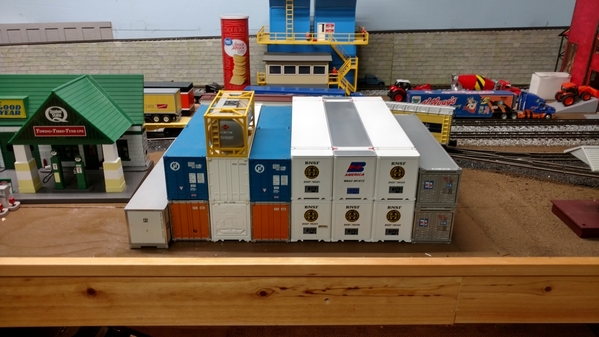
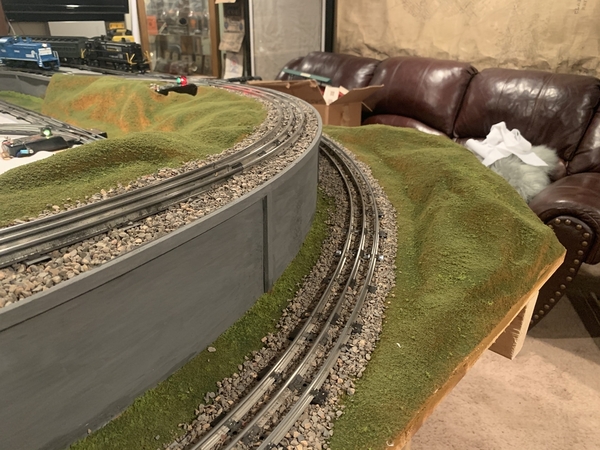
Merry Christmas everyone! Today I was able to get the other end of the layout below the bench work cleaned out and ready for my wire inspection and repairs where needed! I plan on going over every inch, making a list of what I need. I am in no hurry as I want to make darn sure I have it well protected this time! Here are a couple photos.
It's funny I found stuff I forgot I ever bought and I found more stuff to sell! I found these containers I forgot I ever bought from Andy!
Attachments
Attachments
@gandydancer1950 posted:
Very cool I hope you both have a wonderful and Merry Christmas!
Mike g., very nice cleanup under your cool layout. I remember what it’s like to re-do the necessary wiring as about 7 years ago I had to do the same. My next project is to adjust all of my turnouts to be sure the switch machines Snap open/closed so I can begin Routes. I’m happy you’ve found merchandise you had forgotten about... Gandydancer, that’s a fantastic project for your grandson, and he will always remember your time and generosity. Toy trains are fun, they provide a Lifetime of enjoyment. Great work. (A handsome lad) Happy Railroading Everyone and Merry Christmas...

Attachments
Mike, Very nice job!! I’m glad you had somewhere else to put all that stuff. Did you have to leave the car outside of the garage? When I make room under the layout, it is only a section at a time, and it all goes in my 6’ x 4’ operating area or the 8’ x 27” access aisle into the room. You will see when I add the TVS’s and lever terminals and post photographs. Fortunately I can still access a lot from the topside.
Gandydancer, I’m glad you have a good time with your grandson and trains!
Merry Christmas everyone!
MERRY CHRISTMAS:
http://webmail2.cincinnatibell...id=223806&part=2
========================
Best Christmas ever had or will ever have.
I was seven. Growing up in Cleveland, Ohio, we had Higbees, May co and Halley’s down town department stores. After Thanksgiving, each would have an entire floor full of toys. Of course the best was the train area where there were Lionel and American Flyer layouts set up. I’d stay there for hours watching them run and, of course, there were free catalogs.
Mom asked me what I wanted for Christmas. I pointed to the Lionel SF diesel A-A and 4 beautiful aluminum passenger cars and said ‘that’. At 90 bucks, mom said we can’t afford that. Dad worked at Midland Ross steel and, if he made that in a week, he was lucky!
$90 in 1953 is over $866 in 2020: imagine spending that much on a seven year old, today, for one present!
I remember getting up that Christmas morning and seeing the large rectangular box all wrapped and knew exactly what it was.
As in ‘Christmas story’, that was the best Christmas I ever had, or ever will.
And it still runs great!
Attachments
Making good progress on Altoona Model Works Nanton elevator. Pulled Nanton, Alberta up on Google and found it has two sets of paired elevators, in unusual colors....screaming bright orange, and light blue. I found an appropriate color..."summer wheat"..well, winter wheat would be better for a Canadian elevator.. l have the storage shed and truck dock done and am detailing the tower. These kits, with Masonite shells, are the kits to take a beating in moves on a portable layout. This and a water mill are the only structures l have ginned out during pandemic. Been goofing off..
Pulled out the Sawmill to cut some logs with the grandson, and we tried to get the E-Unit working in the Lionel 637... no luck, so running the Prairie 9042 and making SMOKE!
Ya'll use MegaSmoke? Whats favorite smell.. ( wife does not like the "Dirty Socks" smell....) Merry Christmas
Attachments
Everything evergreen
Wow, samparfitt, you even had a Hellgate bridge, too! ... My Dad has a ATSF set of A-B-A's, love those A~A's with the passenger cars. That looked like a fun layout! Thank you for posting your memories, and, Merry Christmas!
Rusty
@Diverging Clear posted:Wow, samparfitt, you even had a Hellgate bridge, too! ... My Dad has a ATSF set of A-B-A's, love those A~A's with the passenger cars. That looked like a fun layout! Thank you for posting your memories, and, Merry Christmas!
Rusty
Rusty,
All the 'stuff' on the present layout isn't what I had. I had the two black steam engine sets, the SF AA set and several accessories and switches. The two steam engine sets were used that my parents got from a friend for Christmas when I was 5 years old. Other Christmases, I would get an accessory and some other stuff, ie, cattle loader, vibrating freight station, freight cars, etc. All the other 'stuff' is what I wanted but couldn't afford until later in life (like most of us!).
Especially the culvert unloader. That was 18 bucks (today $175) which was a lot of money 'back then'.
Attachments
@samparfitt posted:MERRY CHRISTMAS:
http://webmail2.cincinnatibell...id=223806&part=2
========================
Best Christmas ever had or will ever have.
I was seven. Growing up in Cleveland, Ohio, we had Higbees, May co and Halley’s down town department stores. After Thanksgiving, each would have an entire floor full of toys. Of course the best was the train area where there were Lionel and American Flyer layouts set up. I’d stay there for hours watching them run and, of course, there were free catalogs.
Mom asked me what I wanted for Christmas. I pointed to the Lionel SF diesel A-A and 4 beautiful aluminum passenger cars and said ‘that’. At 90 bucks, mom said we can’t afford that. Dad worked at Midland Ross steel and, if he made that in a week, he was lucky!
$90 in 1953 is over $866 in 2020: imagine spending that much on a seven year old, today, for one present!
I remember getting up that Christmas morning and seeing the large rectangular box all wrapped and knew exactly what it was.
As in ‘Christmas story’, that was the best Christmas I ever had, or ever will.
And it still runs great!
Growing up in Cleveland myself I know those feelings quite well!
Wired my fastrack switches for auxiliary power and I have the bumps on my head to prove it
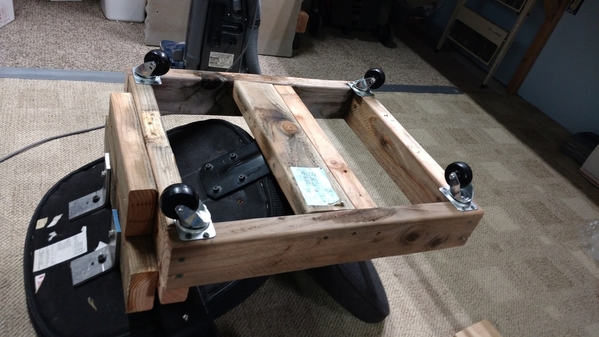
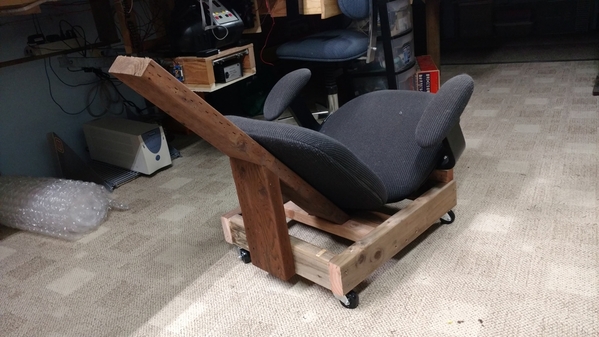
Worked on a scratch build under layout creeper. Still working on it.
Anyone know if they sell them on Amazon?
@mike g. posted:Worked on a scratch build under layout creeper. Still working on it.
Anyone know if they sell them on Amazon?
Mike,
I bought one similar to this last summer. IT has worked well for me under my layout and for doing other jobs. I needed one with a padded seat after deep bruising my soft kiester sitting on the sidewalk removing rust from the railing. It still hurts. ![]() One of those things where you hurt places you didn't even know you had.
One of those things where you hurt places you didn't even know you had. ![]()
Hi Mark, I checked prices and will just finish building the one I started. Thank you though.
@mike g. posted:Hi Mark, I checked prices and will just finish building the one I started. Thank you though.
Mike, I thought you would be able to build something dandy for a fraction of the cost of a commercial one. I paid $40 something for the one I got. It was worth it to me, but you have so many more resources and skills than I have.
My two creepers came from yard sales...one for each side of layout.
My swivel casters I buy at any hardware begins at the cost of $4-$6 each... at least four are necessary so in comparison my two purchases for my two creepers totaled $4.00. I see them estate sales as well.
Too cold today to start up the heat in the train room so I worked on updating my train listing and structures on my excel spreadsheet. Much warmer inside job.
I truly enjoyed our Christmas visit with our kids yesterday via Zoom.us. I’m certain others did as well.
Seth, yours sound great!! A creeper is worth buying or spending the effort building, especially once one is retired like me.
@Mark Boyce posted:Seth, yours sound great!! A creeper is worth buying or spending the effort building, especially once one is retired like me.
I question a creeper as you are laying flat on your back. But I guess it has a great deal to do with your visual concept of your layout. If your layout is low enough to only accommodate a creeper under it, when running your trains you have the Jolly Green Giant concept where you can overview your entire layout. When considering my layout, I put it at 42 inches above the floor. This way I can visualize myself in the action seeing a Locomotive coming right at me and the cars passing by. The added benefit is I can sit on a mechanic's stool under my layout to perform my wire connections. Just a different way to view our layouts. To each his/her own.
Jeepers Creepers! Can't wait to see what you come up with Mike. I recall a thread on here discussing the subject. Hunt around for inspiration.
Nice pick ups Howard. Especially the "J"
@samparfitt what a great addition to the train room.
Bob
I'm contemplating adding a third track to my small yard. I can only get two 5122 turnouts to fit inside my loop currently, but it looks like I can fit three with a different mfr's turnout. I tried different types in SCARM and it looks like MTH Scaletrax 031's will work. They will need to be heavily modified (OK butchered) ![]() !
!
I did a printout of one from SCARM in 1:1 size. Assuming the straights are 10" long I can cut approximately 3"-4" off of each to get them to fit. I have 27" overall to work with but need to keep the top one about 3" away from the mainline 027 turnout in the back. The supports for my upper level would need to be moved around too much. I'm going to mock up the whole thing on paper and check clearances, etc before pulling the trigger. If I'm going to spend $$$ on new switches I want to make sure it's going to work first.
I know it sounds like a lot of work just to fit two or three more cars on a siding but what the heck- it's winter in NY so there's not much else to do, especially with the lock down's and Covid stuff still raging.
I'd also have to account for space to adapt the rails to my 027 tubular. I did it before going from Fastrack to tubular so I should be able to make this work too. ![]()
If anyone has some old Scaletrax (edit) 031's collecting dust please shoot me an email.
I also stopped in Home Depot yesterday and picked up a couple of pieces of 1" rigid foam board for my tunnel project. They sell 2X2 pieces for $5 bucks each. I'm sure this will progress before the track work does.
Bob
Attachments
Bob, it’s always a good idea to come up with a project to keep the creativity flowing. Plus it keeps your track gang working.
I like your yard plan Bob. Keep us updated.
Another possible option would be using Lionel's O42 (O27 height) switches. Looking at your ladder track issue, I think if you cut 3 1/2 inches off of the straight section to move them closer together, and put 1/2 of an O27 curve on the curved end, you could wind up with 3 yard tracks about 3 1/2 inches apart in a small space like yours.
Lionel's non-derailing feature will be maintained, I don't know if the MTH switches have this function
Mike - regarding creepers. Harbor Freight has both the flat style (with a backrest) and the round stools usually around $20 each on their perpetual sales.
@RSJB18 posted:I'm contemplating adding a third track to my small yard. I can only get two 5122 turnouts to fit inside my loop currently, but it looks like I can fit three with a different mfr's turnout. I tried different types in SCARM and it looks like MTH Scaletrax 031's will work. They will need to be heavily modified (OK butchered)
!
I know it sounds like a lot of work just to fit two or three more cars on a siding but what the heck- it's winter in NY so there's not much else to do, especially with the lock down's and Covid stuff still raging.
I'd also have to account for space to adapt the rails to my 027 tubular. I did it before going from Fastrack to tubular so I should be able to make this work too.
Bob after reading your post I had remembered a previous thread, “Cutting down O22 switches” I saw that might help you.
https://ogrforum.ogaugerr.com/topic/15649413456028014
Extra yard tracks are always worth the effort.
Hi Bob, I would go for it! I think its a great idea!
Scott, the transformer setup looks great!
well guys here is what I came up with from a free chair I got from the local fire department to scrap wood laying around the place! I did have to buy new coasters as the ones that came with the chair didnt roll good enough when I was sitting it low to the ground trying to push it! The new ones work alot better! Here are a couple photos for you all to enjoy!
Attachments
Mike, That one looks great! I knew yours would be super!! I need to come up with one for scooting around my attic, and it has to be lower than the padded roll around stool I showed you or I'll hit my head on the rafters. I could just leave it up there. I used to crawl, but I can't crawl on the fake knee anymore. I told my wife I needed a padded creeper to sit on. I glanced at inexpensive refrigerator dollies at Walmart a couple weeks ago, and thought a chair with no legs would work, I just don't have a chair to donate. Maybe I should look for one at the thrift stores. I would like to have it before I have to put Christmas decorations away. My wife has 2 fake knees, so I won't let her go up there.
@Mark Boyce posted:Mike, That one looks great! I knew yours would be super!! I need to come up with one for scooting around my attic, and it has to be lower than the padded roll around stool I showed you or I'll hit my head on the rafters. I could just leave it up there. I used to crawl, but I can't crawl on the fake knee anymore. I told my wife I needed a padded creeper to sit on. I glanced at inexpensive refrigerator dollies at Walmart a couple weeks ago, and thought a chair with no legs would work, I just don't have a chair to donate. Maybe I should look for one at the thrift stores. I would like to have it before I have to put Christmas decorations away. My wife has 2 fake knees, so I won't let her go up there.
Thanks Mark, The wife asked me last night why I don't just buy one and when I told her how much they can be, she said have fun building one! LOL
RSJB18
I am somewhat confused. You started by saying Scaltrax was what you used in your layout program. At the en you requested Realtrax. They are both MTH but way different. Cabin fever auctions has scaletrax switches (O31) listed now. Auction is Dec 30th so keep an eye out on it.
Curtis
@CurtisH posted:RSJB18
I am somewhat confused. You started by saying Scaltrax was what you used in your layout program. At the en you requested Realtrax. They are both MTH but way different. Cabin fever auctions has scaletrax switches (O31) listed now. Auction is Dec 30th so keep an eye out on it.
Curtis
Oops- my bad- I went back and edited my original post. Yes Scaletrax is what I need. I will check out Cabin Fever. Thanks
@Rich Wiemann posted:Bob after reading your post I had remembered a previous thread, “Cutting down O22 switches” I saw that might help you.
https://ogrforum.ogaugerr.com/topic/15649413456028014
Extra yard tracks are always worth the effort.
Rich- I saw that thread a while back. The biggest problem is the size of the frames. On the referenced thread, 022's were modified. Less plastic and metal to remove. 5122's have the big rectangular bodies which would be a PITA to modify.
@Lionelski posted:I like your yard plan Bob. Keep us updated.
Another possible option would be using Lionel's O42 (O27 height) switches. Looking at your ladder track issue, I think if you cut 3 1/2 inches off of the straight section to move them closer together, and put 1/2 of an O27 curve on the curved end, you could wind up with 3 yard tracks about 3 1/2 inches apart in a small space like yours.
Lionel's non-derailing feature will be maintained, I don't know if the MTH switches have this function
John- I have a pair of 042's on my layout, same as above- too much modification to do. The Scaletrax machines allow the switch points to move freely so powered non-derail is not necessary.
Thanks for the tips and suggestions guy's. More to come.
Bob
Mike that is ingenious. Is it working for you and how high is your layout?
Jay
@Tranquil Hollow RR posted:Mike that is ingenious. Is it working for you and how high is your layout?
Jay
Hi Jay, all the test runs under the layout have been good I am trying to figure out a nice tool holder for it that is going to make things easy for me so I dont have to search for thngs!
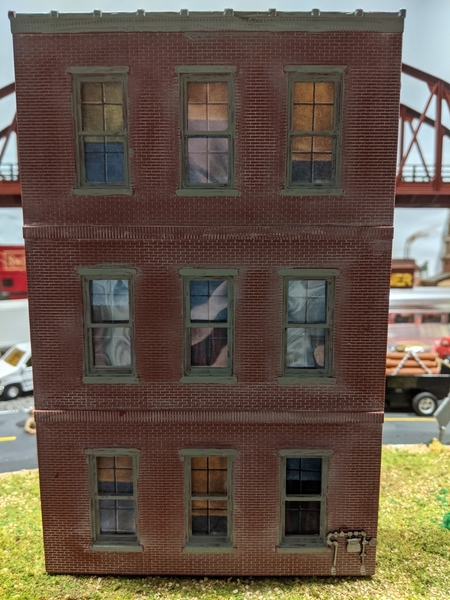
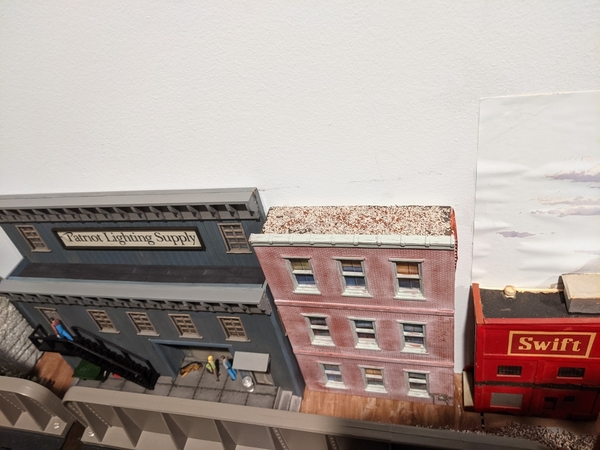
I started (and completed) my first ever attempt at making my own building façade, using an Ameritowne building front that my wife gave me for Christmas. Overall I am fairly pleased for a first attempt. I felt like I left a bit too much white paint on the bricks at certain spots (even after using Paint Thinner to get some off). That said, it certainly gives that weathered look.
I added a little gas meter from GC Laser that my wife also gave me for Christmas. This item is much nicer and easier to manage than I expected when I first saw the package -- I thought they were decals at first. But they are laser cut wood. Paint first, clip out, glue together then on. Slick!
And here it is in position, where you can see my stone roof that I added to it:
Attachments
@RSJB18 posted:Oops- my bad- I went back and edited my original post. Yes Scaletrax is what I need. I will check out Cabin Fever. Thanks
Rich- I saw that thread a while back. The biggest problem is the size of the frames. On the referenced thread, 022's were modified. Less plastic and metal to remove. 5122's have the big rectangular bodies which would be a PITA to modify.
John- I have a pair of 042's on my layout, same as above- too much modification to do. The Scaletrax machines allow the switch points to move freely so powered non-derail is not necessary.
Thanks for the tips and suggestions guy's. More to come.
Bob
Quoth the Ghost of Christmas Yet To Come, “Expand... expand... expand”…![]()

![]()
Layout expansion project underway.
Mocked up my track plan so I can start measuring for inclines. I will need to buy a few more pieces of track and some roadbed before I can start permanent mounting.
I completed the Altoona Model Works grain elevator, only the 2nd structure kit l've managed, with the pandemic. Really is a great kit...would be easy to build, except for instructions . I only mildly bashed this kit, need to photo it and the other "C-19" model done.
Mike: I am on board with modeltrainparts, my wife surprised me with the Harbor Freight flat creeper at $19 and I used it for all my construction so far. Great value and works great too
Don
Don, I've had one for many years now, propped the back up to a comfortable position, love it.
Hi guys, I just didn't think something like that would roll easy and be height enough.
Graham, that's quite the undertaking! Its looking really good. I can't wait to see the next step!
I promised it a LC 2.0 diesel on-the-way...Wife mad.....
@mike g. posted:
I love printer parts too Mike. Lot's of DC motors and gear drives ![]()
@RSJB18 posted:I love printer parts too Mike. Lot's of DC motors and gear drives
Bob, you are so right. The stuff you can get out of a broken printer you can automate almost anything you can think of. That's what I need the motors for, I have a few ideas brewing upstairs! LOL
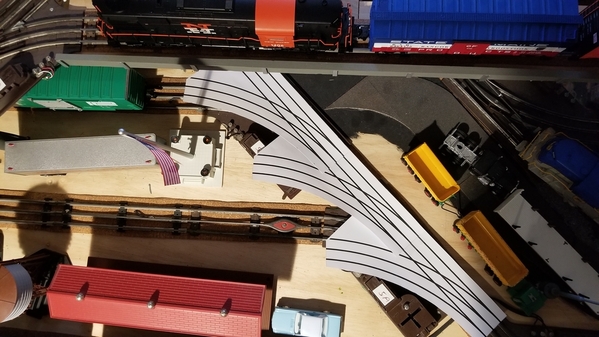
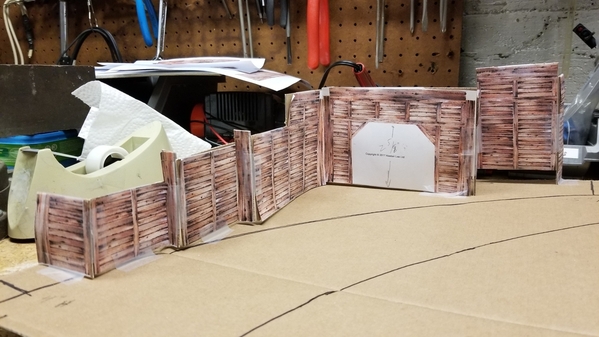
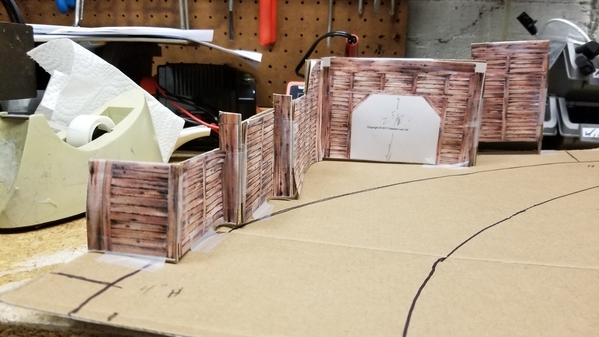
I finished a mock up of the retaining wall and tunnel project. The finished product will be printed images on card stock, with balsa added for dimension. The area behind the wall will be carved rigid foam. The two arcs on the template are my upper and lower rail lines. Time to break out the scissors and glue. ![]()
Bob
Attachments
Bob, now that is going to be interesting. I am guessing the line that goes under the wall is your upper line. I will be watching to see how it turns out.
Thanks for sharing, could be a future project! LOL
The wall is going to be great, Bob!
Jeff, two extra days with the grandchildren! Sounds like a win for you entertaining with trains, but a lose for Mum and Dad! $$
Mark, they arrived Wednesday night and began to leave Sunday afternoon, but realized the car they had borrowed did not sound right - ended up being bad tie rods - hence the repair and later than expected departure. Logan and Ryan are very active children and you do not realize the chaos they bring until they are gone. Regardless we totally relish every visit and are sad to see them go. For a variety of reasons my 3 sons were all home for the holidays and was quite a blessing to have everyone "home" for Christmas. Jeff
Wonderful, Jeff!!
After a very long hiatus I finally got down to the train room after Christmas !! Dusted, vacuumed and cleaned all the main line track, then got the layout running. (First time since Spring).
Anyway, it's good to be back. Parked the California Zephyr on it's siding, and took out my K Line Hudson and put some heavyweight passenger cars behind it. Decided to finally open up one of the Lionel 18 inch Heavyweights from the C & O George Washington set, and replace the windows that I purchased from Lionel. The original windows on my set, had the dreaded spots/blotches on them, plus the window tint was really dark green.... Not an easy car to disassemble but the Lionel replacement windows are much lighter green tint, they almost look clear once installed.
Here's some photos.... Now I need to go back and speed read about 400 pages of posts in this thread. Chris
Attachments
Chris, I'm glad to see you back in the train room again! Great photographs!
Mark, Thanks. Ironic that the first page in this thread that I went back to, had your description and reference plus live link to the PSX-1AC Solid State Circuit Breaker TVS unit. I ended up on your layout thread as well reading about the PSX and watching that great video. Your layout is looking great!
Mike G: Really nice job on that creeper. I need to upgrade the padding on my home made one. Great idea using that chair, looks very comfortable. Ditto on the need for a tool/tray !
Chris A - I too have been away from my layout for the last 9 months. On Christmas Eve, I went down to the layout and cleaned track and ran some trains. Christmas always seems to get the old train juices moving in my veins.
Heavyweights are some of my favorite passenger cars. I need to reorganize and sell off some little used or display only stock. I'm sure I missed picking up some nice buys here on the forum.
Thanks for the photos.
Thank you, Chris! I agree with Matt, the heavyweights are my favorites! Welcome back to the layout too Matt! I'm glad to see you back posting!
Hello Chris,
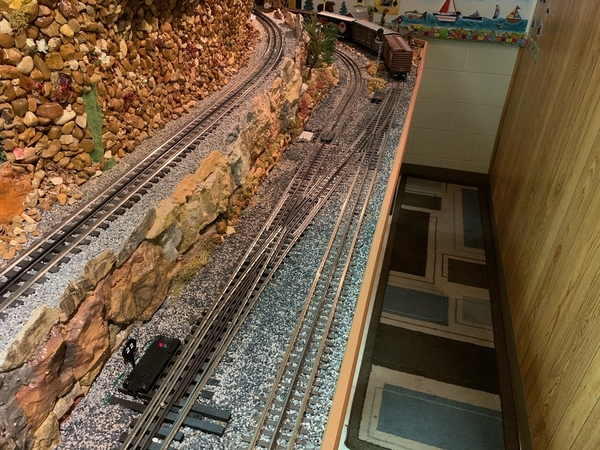
From viewing your layout shots this morning I do believe you have the walls lined with the Pennsy Rock Walls from Scenic Express. The walls look very nice! I have this morning and yesterday attempted several options on weathering the Pennsy Walls that I have from Scenic.
I find that they are molded from a foam and the exterior does not accept anything with moisture based.
In your shots your wall looks as if you have painted an weathered.
Please share with me your paint and weather technique today. I appreciate your assistance and thank you.
Seth
And Chris, I meant to add that I enjoy viewing the C&O passenger coaches with the green heavyweight paint. I do not see those very often in the forum or for sale.
Thanks,
Seth
Seth, Thanks for the positive feedback. The walls between the lower and upper track level were cast out of plaster. The walls below the MTH weathered brick station were purchased in the "Flexible Foam" material which is similar to but not exactly like the rigid foam wall sections. The middle section of the lower walls in front of the station is actually the face of a "Pullout Drawer" that has a control panel on it with the switch controls for that section of the layout upper and lower....
I made my own Latex mold of one if the flexible sections as I knew I would end making around 8 to 10 of the cast ones out of Hydrocal... Couldn't see spending what they charge per section for 8 of them...
Anyway, sorry for the digression .... I guess the main point is that I wanted to figure out how to make both the factory foam ones and the plaster ones look the same after weathering, and I wanted them in the dark brown family, not gray. My solution for that was to use the same Light Gray Auto Spray Can primer on both substrates, it's flat and has sufficient "tooth" to accept colors.
Fortunately, I figured out several years ago, that I'd better start writing down all my color and step by step procedures for concrete, Block, wood and road weathering or I'll never be able to remember what I did should I want to "duplicate" it... So
Formula for Pennsy Stone Block Walls: Used on 7 x 15 inch retaining wall 2018
Prime with Light Gray Auto Primer
Washes of the following colors mixed 50 % acylic paint/50 % water, a few drops of isopropyl alcohol IPA as wetting agent.
Squeeze out nickel to quarter size blobs of paint on a non-absorbent color working pallet... I use an old pane of glass
- NOTE Apply with Stamping Technique creating blotches of different colors & Shades
- Burnt Umber,
- Raw Sienna,
- Pewter Gray,
- Khaki and some White
After the 50/50 washes dry overnight,
Apply a Final Diluted wash with 1:3 or 1:4 Burnt Umber & Raw Sienna, these are much thinner washes
Attachments
Chris, that looks spectacular! There so much in the photos from top to bottom. You have such an artist touch.
More progress on the Razorback Traction teardown and rebuild!
Chris, it sure is nice to see you back! I always love seeing photos of your layout and projects you have going on! You do such a great job on everything you do! If you run short on things to do and want some extra cash, build me one of those portholes but just a single one! LOL
The new windows look great! Really brings the reality of the cars out!
Graham, the engine is really looking sweet! Very nice work!
As for me I did nothing, but my TVS's came today. I have been packing up Christmas decorations!
I hope everyone has a great day and finds time to have fun with there layouts and trains!
Mike: It's Great to be back. Hope you're felling better !!... The Pennsy block style tunnel portals are purchased, not made or cast by me... I bought mine used some time back from Eliot here on the forum. Here's a link to Scenic Express. It's best to find these slightly used at train shows for short $$, maybe sometime in 2021. Anyway, the link will at least show you what you're looking for.
Today, I have just completed pulling out the Legacy Base, the TMCC Base and GRJ's TMCC signal booster and I am moving all 3 close to the center of the layout. For whatever reason, I was losing the communication between the Legacy handheld and the base unit when I went to the far end (newest section) of the layout. Got it set up and will test run it shortly to see if it solves my blinking red light on the Legacy handheld. Tried upgrading the antennae, no help, and I am not dying to purchase and wire in a 2.4 Ghz booster... that's the last resort.
Yes Matt, you're right, I can't get through Christmas without thinking about, working on or running my trains ! Always brings back fond memories.
Chris - Good to see you posting again, great pictures as always. You have quite the touch for weathering and coming up with appropriate color mixes. Looks great, getting close to starting the bash of the 3 lionel kits you told me about.
Have a Great New Year,
Scott
Attachments
I started taking down the temporary Christmas Village so I can get working on a more permanent layout.
Today's epiphany: I will need more Fastrack switches!
Just got a back ordered MTH ICG engine. I thought the color was off, but looking at the prototype, it looks like MTH got this color correct. Now I can't wait to get the IC orange and white paint job. Most likely the last ever new MTH engines I will purchase. But who knows?
Attachments
@RSJB18 posted:I scored the three switches I need for this project on the Cabin Fever MTH auction today
. At about $10 each below retail, it won't hurt so much to cut them to pieces.
Bob
That’s great news for you Bob and what away to end the year on a high note.


