


Dave, That is an excellent way to put it about Al's sawmill!!
Al, Absolutely stunning work on the lumber saw mill. Thanks for sharing.
Mark, I haven't logged on in a few days, glad your back is improving. Good luck getting started with the Mianne benchwork.
Paul: Nice work finally swapping out all the screws, the warehouse district is looking great.
Mike G: Just went back and read about your challenges with the control panel, bummer. I prefer to use 1/8 inch pin striping tape, and although I had Plexiglas and lexan around the shop, I decided to use 5 to 6 MM plywood for my control panels. I paint them flat black first, then use a flat acrylic clear coat to seal them, then pin stripes and finally I drill for the switches, LED's etc. It's way more forgiving material than plastics, just a thought.
Yesterday, I finished cleaning up the not so well done wiring in the panel in the last 2 photos below. Ended up making some changes to the Power Districts which entailed going in there, and decided while I was there that it needed improvement. It was the first panel I completed for the current layout.
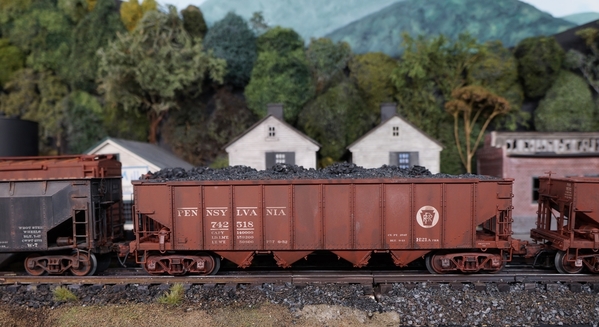
NSRailfan: I agree with Eliot, your weathering looks good, but could use some additional touches, which will make the weathering "less uniform". I also highly recommend that you try acrylic paint washes applied with brushes. It's sounds complicated, it's nothing more than acrylic craft paints diluted with water, and touch of alcohol to act as a wetting agent so the wash doesn't 'bead up". If you seal your base coat with flat clear coat, you can do the acrylic wash, and as Eliot noted, if you don't like the result, you can remove it with a damp cloth, or tooth brush with some water. I usually get to similar colors going at the same time, like a raw sienna wash, and a burnt umber wash. The burnt umber will make shadow areas on red oxide boxcars, and the raw sienna is more in the "rust" family. The PRR H21a hoppers below were done with washes only.


Attachments
Images (9)
")
")
")
Mike G, regarding your control panel: Since you are back to square one, you might want to reconsider locating your switch controllers to the fascia, close to the switches. You mentioned that you were waiting on the fascia until the scenery was started or done. Putting the fascia up early would help with the scenery design as it would provide a rolling contour to attach rolling terrain. Placing your switch controls adjacent to the switch would also ease the wiring. With all the hand held controls today, such as DCS and the Lionel system, most operators are free to move around the layout and follow train operations and thus are not confined to a large control panel. When little engineers visit, stationing them at the switch would provide them active participation. This would also apply to operating accessories - place their controls on the fascia close to the accessory. Just a thought! Cheers, Dave
PS: I avoided toggle switches as they have a tendency to get caught on clothing as one moves about the layout. I do not have that problem with the rocker switches.

The red rocker switch controls the turnout, the two rockers with white dots control power to the sidings. The lighted rocker switch on the far left activates the freight station and the one just to the left of the red switch, turns on yard lights.


Attachments
Images (3)
I put my switches on a panel in front of the area that they operate. Going to see if I can get the vinyl graphic folks to make me a diagram overlay. <----- off on-----> and line it out like yall folks have been doing.
Jim


carsntrains posted:I put my switches on a panel in front of the area that they operate. Going to see if I can get the vinyl graphic folks to make me a diagram overlay. <----- off on-----> and line it out like yall folks have been doing.
Jim
Depending on what kind of switches you used, you probably can find off the shelf "on/off" labels/covers for them.
For example:
https://www.grainger.com/produ...77!!!g!340352457831!
Bob and Jim, that photo with the Saurekraut factory at the bottom is looking toward the front of the basement. It is going to be a 95% switching layout but eventually I will have one mainline running around the whole layout.
Mike, I agree with Jim. Mount your controls for the switches where the switches are. If you are running remeotely you do not want to keep going back to the control panel to control the switches.
Mark, I got out to Menards and got what I needed. 1X4's and more Balsa wood for loading platforms. After lunch I will be working on taking out the wall on the other side of the doorway by the sanitary tub. So if the storm is going to be a big one I now have what I need to work on the layout. Once that is out I can make up my next table. It will contain two Menards double track bridges and underneath will be a lot of water falls over rocks coming from the back to the front. The one double track bridge will have two tracks going through it and the other double track bridge will have one track and the other side will be for coal trucks. ................Paul


Attachments
Images (2)
Last night the Bald Rock Mountain RR surrendered it's holdings in the living room for a better location in a bedroom. Trains are moving again this morning. Additional roadbed patterns will be made this afternoon. I have 73 pieces of o27 track, six switches, and three custom cut pieces. A large turn around and four spurs keeps me busy. I added a chair next to the operating position since there are fewer derailments. Here we are now.


Attachments
Images (3)


paul 2 posted:Bob and Jim, that photo with the Saurekraut factory at the bottom is looking toward the front of the basement. It is going to be a 95% switching layout but eventually I will have one mainline running around the whole layout.
Mike, I agree with Jim. Mount your controls for the switches where the switches are. If you are running remeotely you do not want to keep going back to the control panel to control the switches.
Mark, I got out to Menards and got what I needed. 1X4's and more Balsa wood for loading platforms. After lunch I will be working on taking out the wall on the other side of the doorway by the sanitary tub. So if the storm is going to be a big one I now have what I need to work on the layout. Once that is out I can make up my next table. It will contain two Menards double track bridges and underneath will be a lot of water falls over rocks coming from the back to the front. The one double track bridge will have two tracks going through it and the other double track bridge will have one track and the other side will be for coal trucks. ................Paul
MR. Paul! Tear Down That Wall!!! LOL YAY! Now I may take down that 4x4 area no matter what anybody else says! : )
Jim
great photos Chris !! looking GOOD ![]()
awesome scene here Chris, looks very real !!

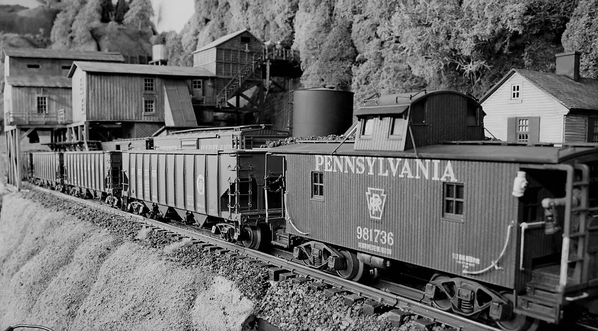
PS hope you don't mind the black & white photo Chris,
thought it went good with the real train photos...
your layout, scenery, and weathering are looking great, good job !!!
Attachments
Images (4)


carsntrains posted:paul 2 posted:Bob and Jim, that photo with the Saurekraut factory at the bottom is looking toward the front of the basement. It is going to be a 95% switching layout but eventually I will have one mainline running around the whole layout.
Mike, I agree with Jim. Mount your controls for the switches where the switches are. If you are running remeotely you do not want to keep going back to the control panel to control the switches.
Mark, I got out to Menards and got what I needed. 1X4's and more Balsa wood for loading platforms. After lunch I will be working on taking out the wall on the other side of the doorway by the sanitary tub. So if the storm is going to be a big one I now have what I need to work on the layout. Once that is out I can make up my next table. It will contain two Menards double track bridges and underneath will be a lot of water falls over rocks coming from the back to the front. The one double track bridge will have two tracks going through it and the other double track bridge will have one track and the other side will be for coal trucks. ................Paul
MR. Paul! Tear Down That Wall!!! LOL YAY! Now I may take down that 4x4 area no matter what anybody else says! : )
Jim
FUDGE STRIPE COOKIES! YUMMMMMM! ![]()
Elliot and Chris-I will try to do that with my future tries. I appreciate the input. There is nothing wrong with constructive criticism!
carsntrains posted:RSJB18 posted:paul 2 posted:I was going to say I got all the drywall screws out but when I was checking the pics I see I missed one. The only place I could not change out the screws is where the track goes under the stairs, So after dinner I'll head down to the basement, take care of that screw and then maybe add some more ground cover around the Saurekraut factory. Tomorow if the weather is good I get to Menards and buy some lumber for the next table. Pics........Paul
This is a great shot Paul. Shows the complexity of your track plan. Lot's of switching fun to be had.
Bob
Yes I agree. Awesome switching to be done there!! Now can we see the whole layout please?? LOL
CSX Al nice work. Id been considering doing a kit. BUT.. I broke the windshield frame on one of my little army jeeps. Cant even get it fixed. Guess I'll have to get my wife or son to do it lol Some of us just aint cut out for that stuff!! You have a gift!
Mike keep a diggin! LOL
Jim

2nd on seeing the whole layout! and a track plan if you have one?
also, it would be awesome if you started a thread with all the various sidings and switching areas on your layout. I've been seeing different parts of your layout for the past couple of weeks in this thread but its hard to find them all in the same place. I'm in the process of adding a few sidings for switching operations and could use some inspiration.
NSRailfan100 posted:Elliot and Chris-I will try to do that with my future tries. I appreciate the input. There is nothing wrong with constructive criticism!
Thanks and you're welcome. I do try to keep it constructive. We're to help each other get better at this hobby. You could try working with the ones you've "started" to improve them.![]()


Attachments
Images (5)


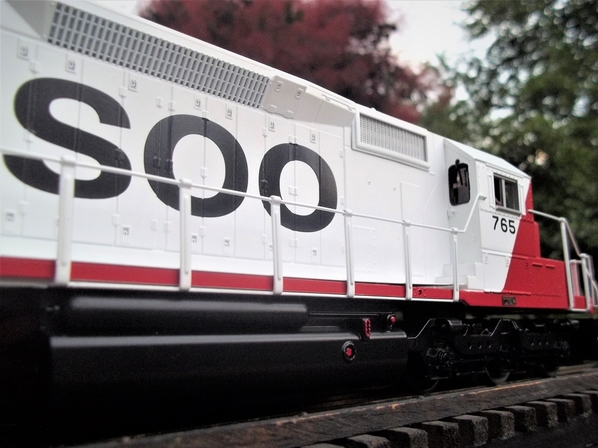
By coincidence, I have a couple of Soo F unit shells on order from eBay for future "Little Mitch" conversion into a double ended electric on an RMT GG-1 chassis...
(seller's photos)


In other news, I repaired a waif N scale gondola with a broken truck pin...

Fortescue rather likes it, as it's more his size... ![]()
Mitch
Attachments
Images (9)
Awww Mitch, those Soo shells are too nice to chop up. I wish I had something to swap you for them. I even love the way the lettering is scratched up. I might have a couple Williams shells I'd trade.
Let's make a deal! I once did a similar transaction at a TCA convention where I ran home to get get a piece to trade in a 3 way deal, so the guy wouldn't destroy a Milwaukee Road Roosevelt campaign car. He was going to buy it for repaint, and I had one without the bunting. Took me a half hour round trip, but I got it done.
I'll pay the shipping both ways. and throw in some extra goodies too.![]()
awesome scene here Chris, looks very real !!
PS hope you don't mind the black & white photo Chris,
thought it went good with the real train photos...
your layout, scenery, and weathering are looking great, good job !!!
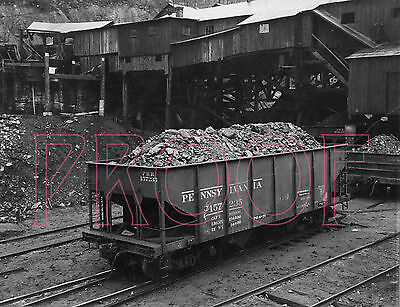
Brian: I love it, no I totally don't mind. Some your great photos of Coal Tipples and Hoppers filled with all different grades of coal were an unbelievable help when I was building that scene.... You do a great job mixing prototype and model RR train photos on this thread, it's always appreciated. Chris
NS Railfan - The weathering is an evolution process for me, the more I learn, and the more I do, the better the results get, and the more willing I am to try different techniques. I do think you'll like working with the acrylic washes, once you do one or two, you'll realize the difference between what it looks like "wet" versus dry after the water dries out and leaves the pigments behind. The other thing I think you'll find is that it's fun to go back and do different colors/shades in specific areas to make final adjustments. That's how I ended up getting the different shades on the roof, doors and sides of the boxcars below.
")
")
")
Attachments
Images (3)
")
")
")

Attachments
Images (1)
Big_Boy_4005 posted:Awww Mitch, those Soo shells are too nice to chop up. I wish I had something to swap you for them. I even love the way the lettering is scratched up. I might have a couple Williams shells I'd trade.
Let's make a deal! I once did a similar transaction at a TCA convention where I ran home to get get a piece to trade in a 3 way deal, so the guy wouldn't destroy a Milwaukee Road Roosevelt campaign car. He was going to buy it for repaint, and I had one without the bunting. Took me a half hour round trip, but I got it done.
I'll pay the shipping both ways. and throw in some extra goodies too.
Yer on! I agree, those shells are too nice to chop, but they were what I could find.
Drop me an email! ![]()
Mitch
Corner Field Model Railroad Museum posted:Another busy day at Corner Field Model Railroad Museum & Hobby Shop. Remember, kids are what it's all about and boy what a group. And they really enjoyed themselves.
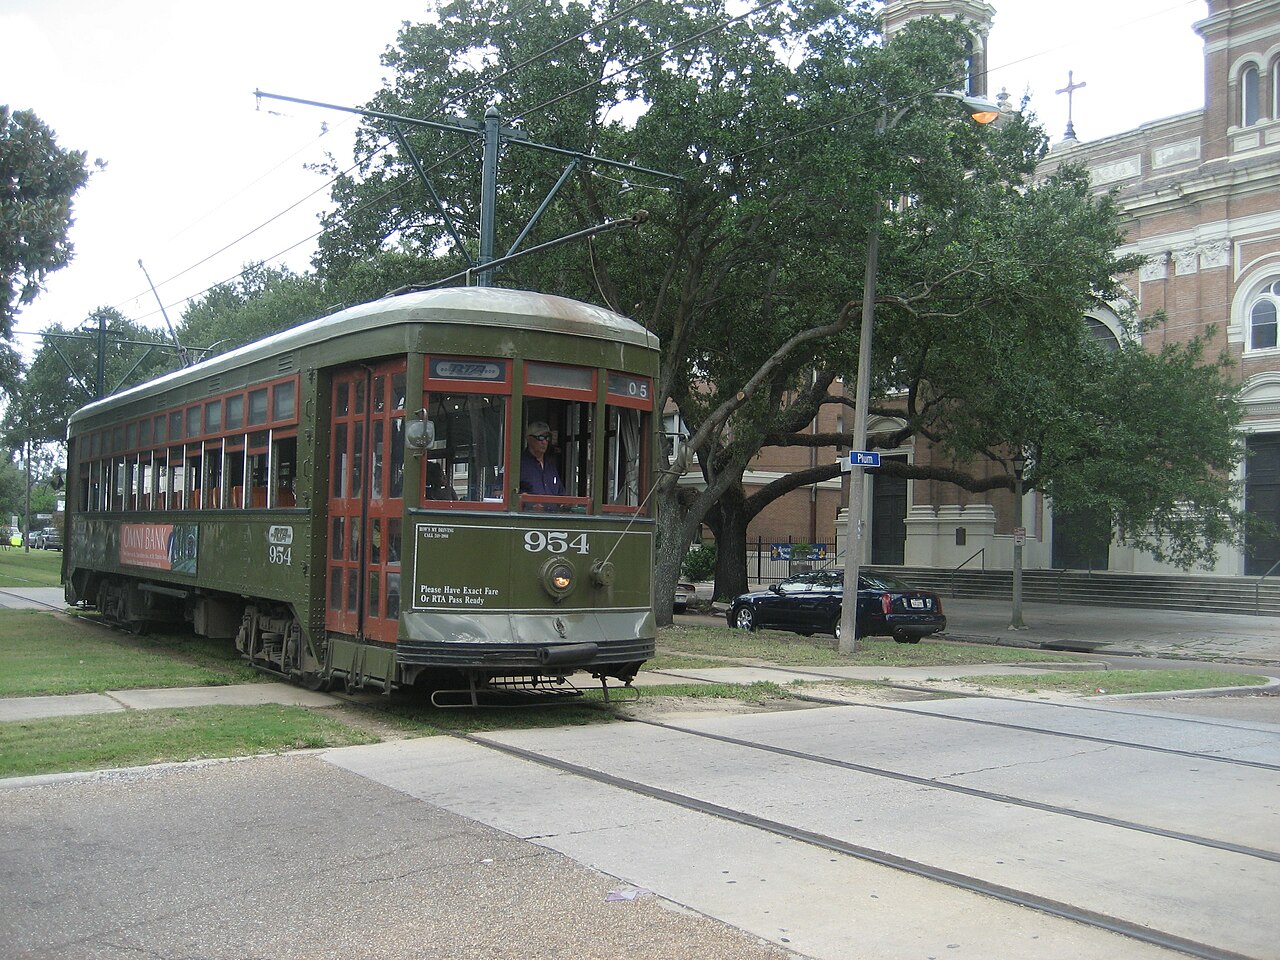
Interesting streetcar connexion, FYI: The Thomas schoolbus company used to be known as Perley Thomas, the folks who manufactured the iconic New Orleans streetcars...
https://en.wikipedia.org/wiki/..._A._Thomas_Car_Works
Mitch
M. Mitchell Marmel posted:Big_Boy_4005 posted:Awww Mitch, those Soo shells are too nice to chop up. I wish I had something to swap you for them. I even love the way the lettering is scratched up. I might have a couple Williams shells I'd trade.
Let's make a deal! I once did a similar transaction at a TCA convention where I ran home to get get a piece to trade in a 3 way deal, so the guy wouldn't destroy a Milwaukee Road Roosevelt campaign car. He was going to buy it for repaint, and I had one without the bunting. Took me a half hour round trip, but I got it done.
I'll pay the shipping both ways. and throw in some extra goodies too.
Yer on! I agree, those shells are too nice to chop, but they were what I could find.
Drop me an email!

Mitch
Hang on there, Mitch - F unit shells are too nice to adulterate, but GG1’s are fair game??? I think I need to get a lawyer and Soo you...
Sorry, but you tee’d that one up too well... just couldn’t resist.

Chris, Thank you on the back well wishes and on the Mianne purchase. It is scheduled for delivery on tomorrow, but we will see if that happens since they are predicting 8-12" of snow starting tomorrow morning.
Dave, The fascia switches look real smart as does the whole layout!
Tom, Wow they brought a bus!! I hope everyone had a great day at Corner Field!!
Paul, Yes, we only got a smidgen of snow last night and it has been sprinkling off and on just over freezing. You are all set for demolition and construction during tomorrow's snow!
Jim, Mr. Paul, Tear down that wall! I love it!
Bill, Yes moving the layout from the living room to the bedroom is a great idea!
Brian, The PRR Coal Country photographs are great, as arr the SOO engines!
Mitch, So do you have an engine to pull Fortesque around in that N scale gondola? It does fit him well!
Johan, That is a very dramatic photo angle of the Lehigh Valley engine!
I finalized the last roster sale this morning to raise funds for the Mianne and other layout building supplies. This one wasn't as hard to let go of as some others. I started cutting when I had to use the money I saved for the layout on car repair and dog repair. ![]() Then I saw the Shay, so by that time I had cut so much, I just kept going. I now have The Shay, a WM H9, and a PRR 0-4-0 switcher I want to re-letter for the WM. On the diesel side, I have a BL2 and an A-B-A F3 set that I want to repaint and upgrade from PS to PS3, I have the kits. I already upgraded the BL2. I do have a WM PS3 Hudson on preorder for the passenger train, so no order from the new Lionel catalog.
Then I saw the Shay, so by that time I had cut so much, I just kept going. I now have The Shay, a WM H9, and a PRR 0-4-0 switcher I want to re-letter for the WM. On the diesel side, I have a BL2 and an A-B-A F3 set that I want to repaint and upgrade from PS to PS3, I have the kits. I already upgraded the BL2. I do have a WM PS3 Hudson on preorder for the passenger train, so no order from the new Lionel catalog. ![]() That doesn't count the Christmas sets.
That doesn't count the Christmas sets.
It's been a long time coming. I purchased the Starlight Diner by Miller Engineering in 2013 without ever checking what was involved to build it. I opened the box and closed it in about 10 minutes, deciding that this was well beyond my scope. At the time Alex M was building my Penn Station using MTH banks. I asked Alex if he would take on this project. With some reluctance Alex took the kit and started researching the build. He came back to me and asked if he could get Alan Graziano involved. I agreed, and the diner got built; it was beautiful. However I was preparing to move so the diner never found a home on the layout in Brooklyn. I started the new layout in the fall of 2015. Eventually the diner building was unpacked an placed on the layout to claim its real estate; but I was reluctant to put the roof on during construction. This week I decided that it was time and I unpacked the roof and tested the lighting and sign. Today I wired it to the layout; landscaping and the whole road thing still has to be done. I wanted to post this today as a way to thank Alex and Alan for their collaborative effort in putting this fine structure together. They did a fantastic job! THANK YOU Alex and Alan!
Attachments
Images (1)

Apples55 posted:Hang on there, Mitch - F unit shells are too nice to adulterate, but GG1’s are fair game??? I think I need to get a lawyer and Soo you...
Sorry, but you tee’d that one up too well... just couldn’t resist.
Hee! ![]()
Mark Boyce posted:Mitch, So do you have an engine to pull Fortesque around in that N scale gondola? It does fit him well!
Oddly enough, yes.

(The N scale equipment will be going to the Sugar Creek MRR club, as I've got my hands full with three rail O...) ![]()
Mitch
Attachments
Images (1)
pennsyfan posted:It's been a long time coming. I purchased the Starlight Diner by Miller Engineering in 2013 without ever checking what was involved to build it. I opened the box and closed it in about 10 minutes, deciding that this was well beyond my scope. At the time Alex M was building my Penn Station using MTH banks. I asked Alex if he would take on this project. With some reluctance Alex took the kit and started researching the build. He came back to me and asked if he could get Alan Graziano involved. I agreed, and the diner got built; it was beautiful. However I was preparing to move so the diner never found a home on the layout in Brooklyn. I started the new layout in the fall of 2015. Eventually the diner building was unpacked an placed on the layout to claim its real estate; but I was reluctant to put the roof on during construction. This week I decided that it was time and I unpacked the roof and tested the lighting and sign. Today I wired it to the layout; landscaping and the whole road thing still has to be done. I wanted to post this today as a way to thank Alex and Alan for their collaborative effort in putting this fine structure together. They did a fantastic job! THANK YOU Alex and Alan!
Bob, Alex and Alan did a great job! Looks so good, but what would I expect from them!!! ![]()
Well just keep your eyes on Fortesque.![]()
Big_Boy_4005 posted:Well just keep your eyes on Fortesque.
Yes, we don't want him running off with the Sugar Creek Club!!!
I put my Vetter's building and trucks on the layout tonight in a temporary spot. Tested them all and they work great! Been checking out the new Lionel catalog and folks its groundbreaking! Just saw a few pages and I am in awe! Lots of new rolling stock in what little of the book Ive seen. Hope everyone has a great and productive weekend!
Jim

Haven't put interior in the logging bunkhouse, although rest is done. Kit only had four double bunks with eight lockers, but l can fit many

CSX Al posted:I got an early start this morning before heading out to the shop to build turntables. I got all of the equipment glued in and will tackle saw floor lights and saw filers floor lighting tonight.
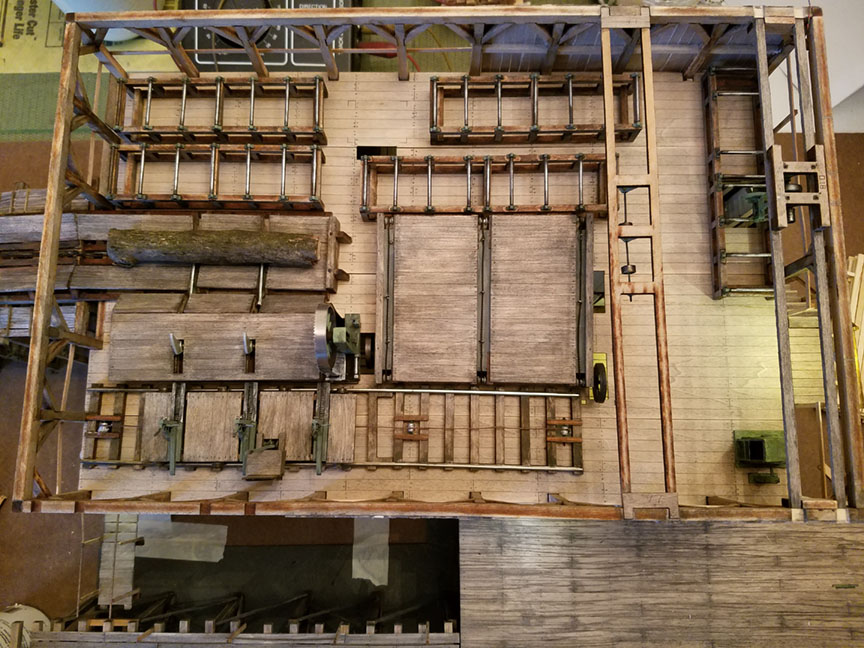
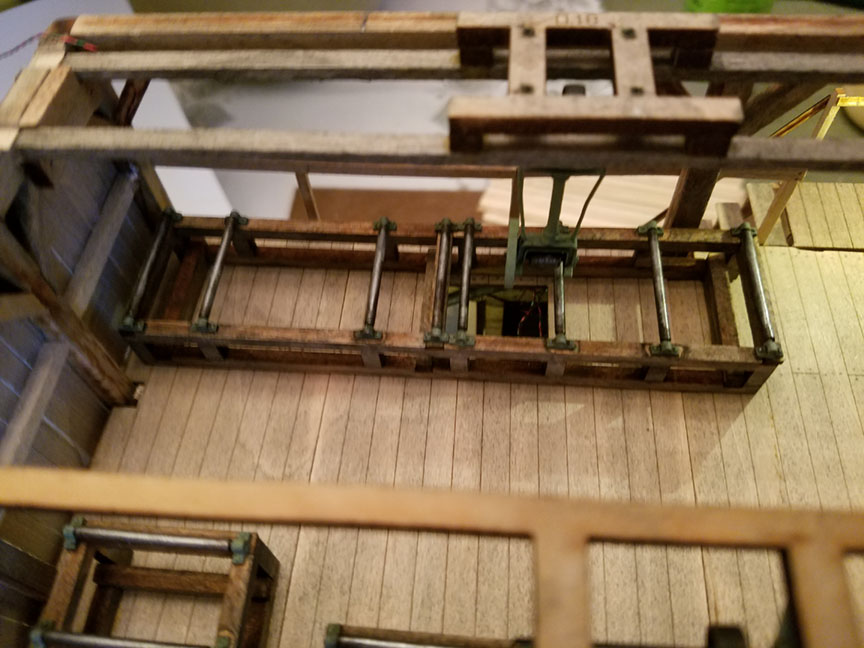

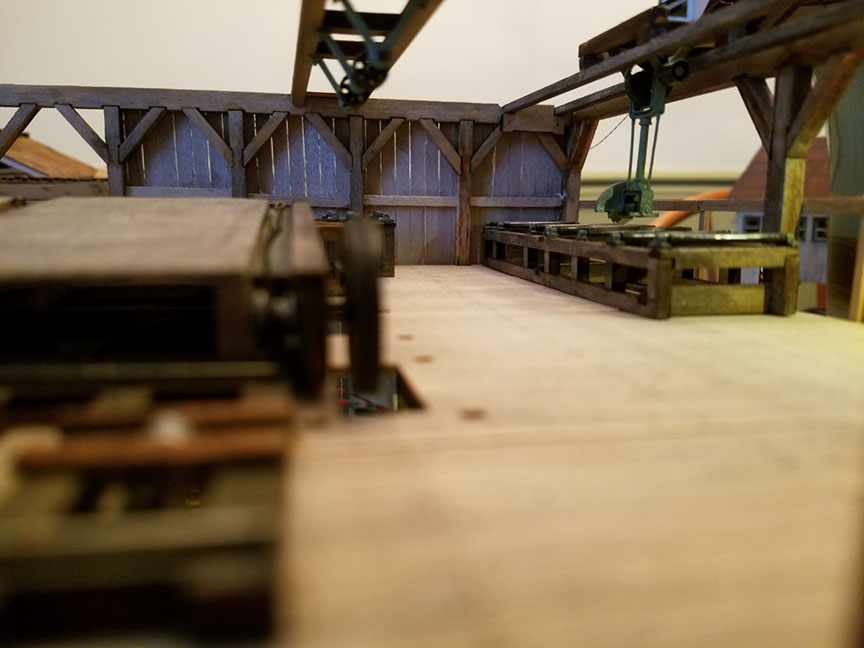
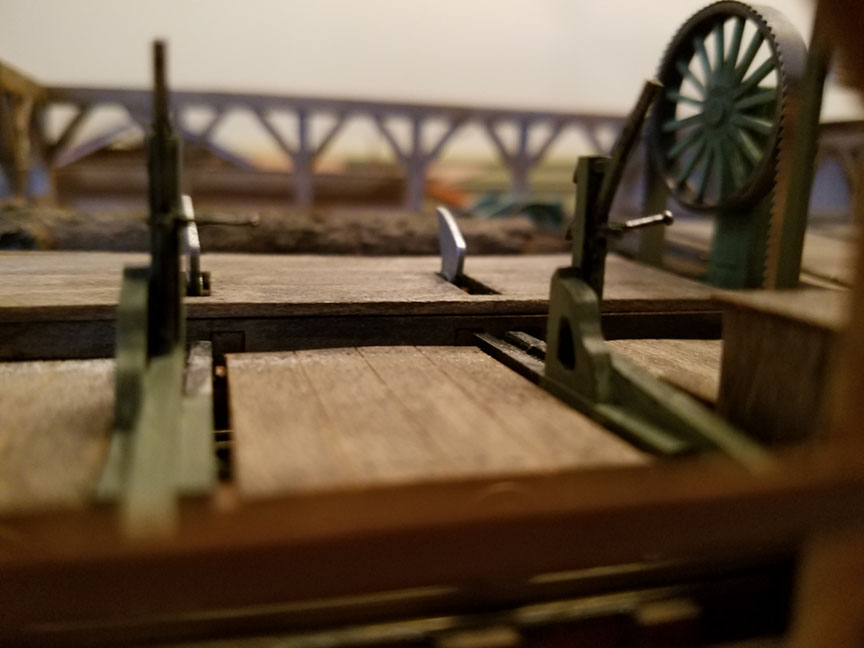
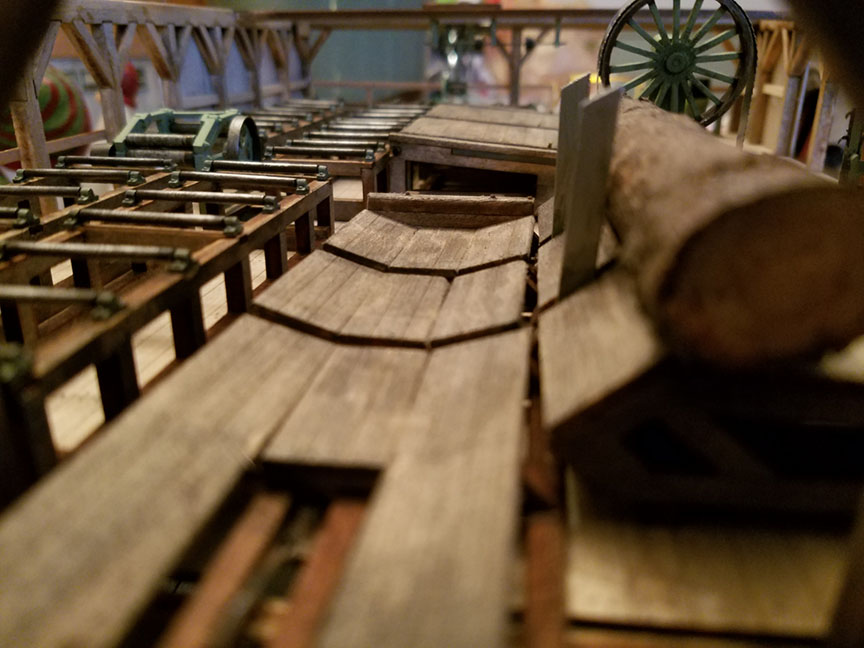
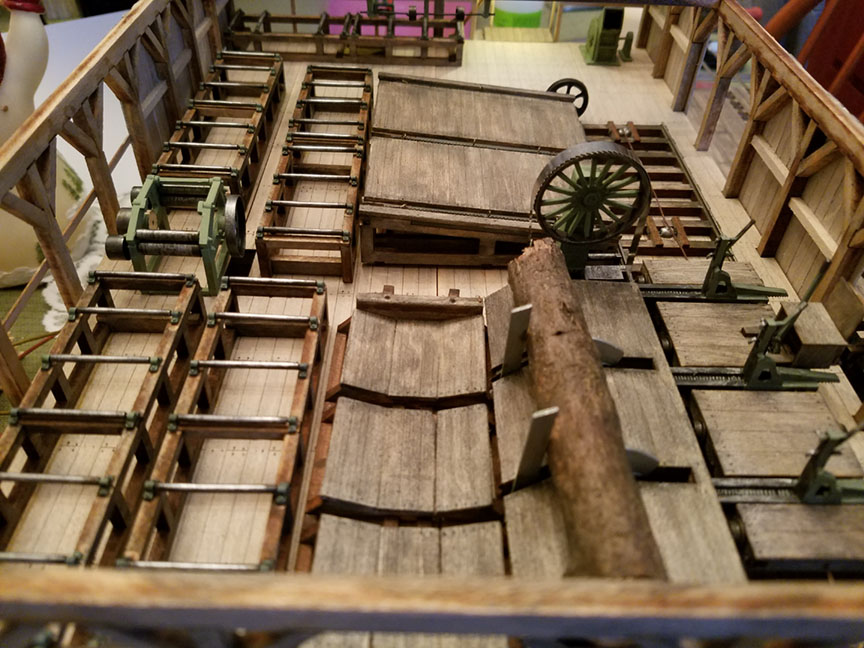
Wow!!Talk about going all out in detail.Just wow I am impressed by your skills.
Andy, The signs look great all done ready to go on the layout! You always have great action on your videos!
Colorado Highrailer, Sounds great you got the bunkhouse ready except some detail.


Attachments
Images (10)


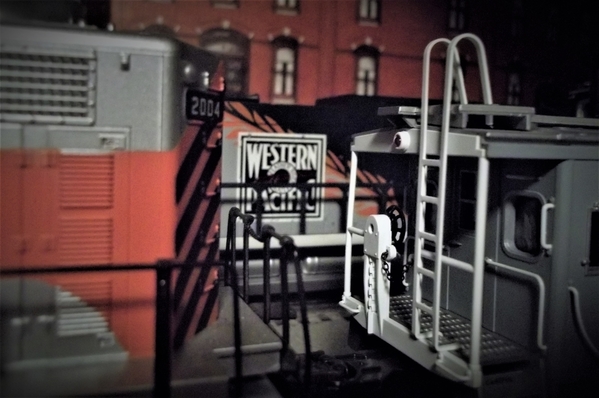
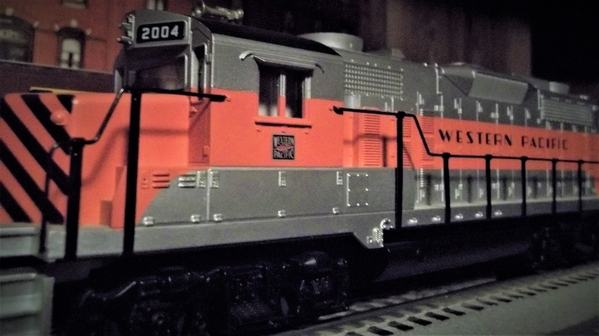
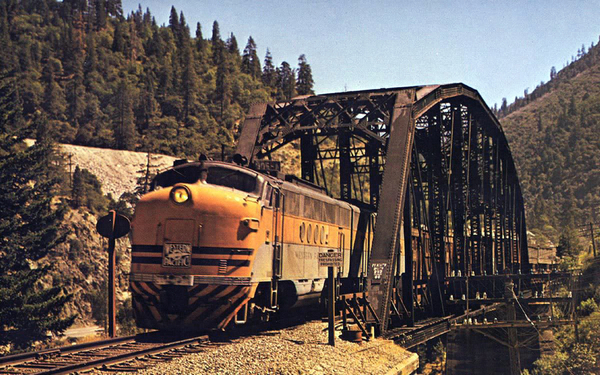
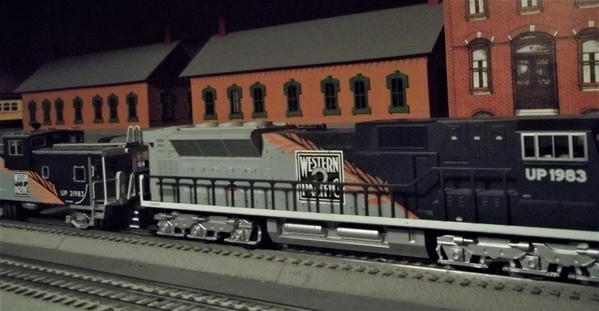
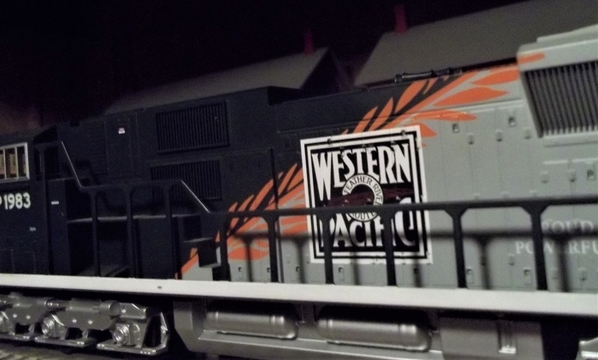
The railroad of the day is......Western Pacific!! Those are more great photographs, Brian!! ![]()


Very nice !! great looking scene and scenery !!!
Attachments
Images (1)

Yesterday and today, I put away all the Christmas trains and decorations, back in their boxes and back under the layout till Thanksgiving. Depressing on one hand, but on the other hand it’s great to get back to normal operations.
Add Reply
Sign In To Reply
