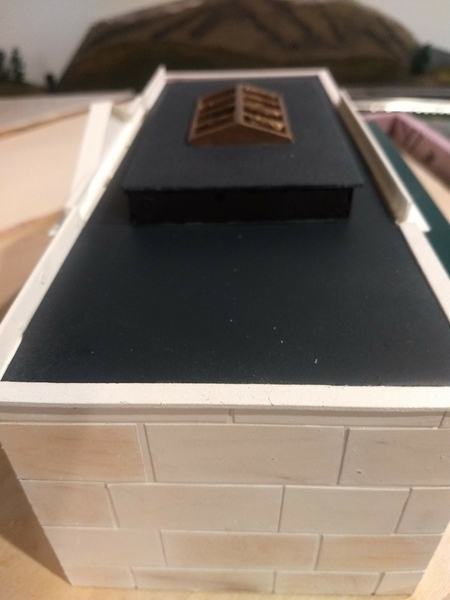
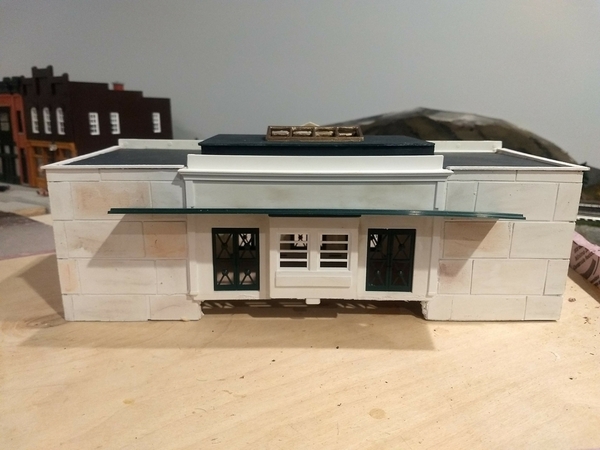
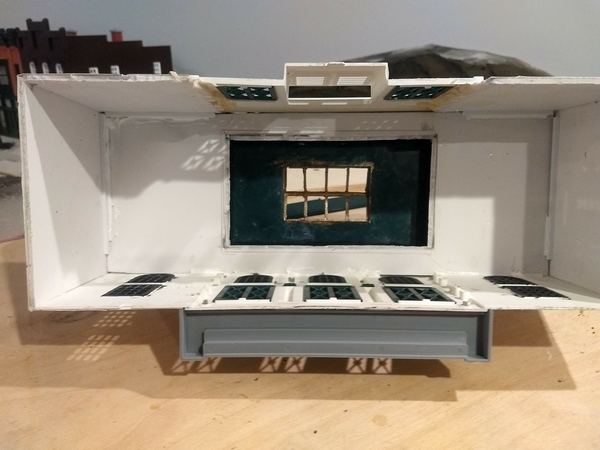
Strap Hanger - The total materials used for the kit-bash was the Bachmann Union Station - #45976, white foam core, thin balsa, square styrene stock and card stock. and of course paint, adhesives and pastel chalk.  The skylight comes with the building. It was meant to be the entire roof of the station.  I cut out its plastic windows, to allow light to get through. I made a 1/2 frame out of foam core to raise the skylight above the foam core roof (there is a hole in the roof the frame sets in). I used the balsa to trim out the top of the foam core and the styrene for a ledge to support the roof. The original sides of the building were glued to the front. Foam core makes up the sides and back wall where it meets the kit back wall.

I meant to leave the skylight green, but accidentally spray painted it white in a DOH  moment or "what was I thinking" moment - some call it a senior moment. Anyway I like the way it turned out.   I used silicone caulk adhesive to glue the roof to the building and the skylight to the foam core. I had a hard time having the more common adhesives bond plastic to foam core. I did use a gorilla urethane glue to mate the back wall together. Could have used the silicon there as well.   

This is a short building just a hair over 4 inches or 16 scale feet tall so at best a single story train station.

Long answer to a short question   Jeff

IMG_20201217_171701038IMG_20201217_171726130IMG_20201217_171752528

Attachments

Images (3)
  • IMG_20201217_171701038
  • IMG_20201217_171726130
  • IMG_20201217_171752528

Wishing everyone a Merry Christmas and the Happiest of Holidays.  Mom and I will have a simple day of eating and snoozing since all the family is in Florida.  Maybe Mom will climb down the stairs to see some of the work I have done on the layout.  She has seen individual passenger cars I have detailed at the kitchen table, but not a full train running on the layout.

Sincerely, John and Ruth Rowlen

This thread is turning into something similar to the "coffee cup" thread over on CTT!  That is not our intention.  Keep your posts to what the title says and don't make political comments, shipping and delivery problems, etc.  I deleted those posts on this page and those of you that know better and post these things anyway will find your membership deleted.  We have enough crap going on social media, TV, etc. so don't bring it here.  We don't want it and don't need it.  This place is our escape from comments like some of you made above (you know who you are) so if you can't enjoy this forum for what it has been intended to be, then go elsewhere.  Now, can I make it any more plain?

Last edited by OGR CEO-PUBLISHER

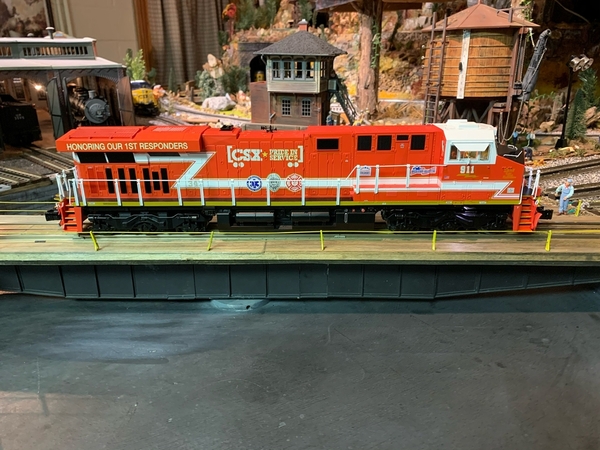
John Rowlen, the new CSX ES44 diesels with the new 5 horns 5 bells and the sirens are fantastic. I may have to secure one like yours as mine is CSX 1st Responders. The crew talk, tower com are new and realistic. The aux 3 sets off the siren, so cool.   Happy Railroading Everyone C6228925-2B27-40F4-AC37-762CB8AD27CF
Attachments

Images (1)
  • C6228925-2B27-40F4-AC37-762CB8AD27CF
Last edited by OGR CEO-PUBLISHER

I have been wanting to shoot some video of my Alaska passenger train and this GP35 freight for a month.  The replacement Alaska SuperBass B unit for the passenger train finally arrived, but finding time to clear the outside mainline of engines and box them has not been available with my caregiver tasks.  After Mom is settled for the night, I have dishes and laundry to finish.  I am too pooped to play.

Here is a quick pass of the Alaska GP35 freight.  I put the Alaska GP35 #2502 (non-powered) on one of eight Great Northern Legacy Powered GP35 I purchased from Gryzboski Trains several years ago.  I have done this with non-powered units in Pennsylvania, Rio Grande, Santa Fe, Union Pacific,  Western Pacific, Great Northern, Canadian Pacific, and Alaska GP35 engines.

Have a good evening.

Sincerely, John Rowlen

Attachments

Videos (1)
MVI_2794
Last edited by John Rowlen

Here are the three Canadian Pacific GP35 engines with one dummy that is now fully powered on a Great Northern GP35 chassis that I purchased from Gryzboski Trains several years ago.  I carefully transferred the Non-Powered shell onto the powered chassis, installing light boards and antennae to create a three powered engine consist.

Have a good evening.

Sincerely, John Rowlen

Attachments

Videos (1)
Canadian Pacific GP35-2
Last edited by John Rowlen

Great to see all work being done on layouts along with the videos of trains in action. Mike g, I am glad to see you are getting better and have had a chance to get to the train room. That is always great therapy. I haven't done much of anything on either layout since before Thanksgiving. I ended up with a health issue which put me in the hospital for 4 days before Thanksgiving. But since then I have been gradually getting back to a normal routine. So seeing what everyone has been accomplishing on here has been my therapy. I wish a Merry Christmas to all. And may Santa leave you some trains under the tree for Christmas.............Paul 2

@Miggy posted:

I have a question, how do you keep the train on the elevated track...??? Go Slow - apparently. My transformer has two speeds............. and will never make it around turn one without "CRASH"... roflmao

Salute to neat layout.....

Yes- slow and steady wins the race. When I re-do the track work for the tunnel I'm going to super elevate the curve to help the trains around the bend.

Well, finally finished the Mi-Jack 'yard'  That's one humongous accessory!  The concrete pad was made with Woodland Scenics Smooth-it.  I painted it originally with Woodland Scenics Concrete, but I thought it was too creamy.  Tried gray, didn't like that.  Tried a wash...well, that was a wash!  Then I hit on ModelMasters 'Old Concrete-Flat' and liked it.  At QUARTERGAUGER48's suggestion, I used a pencil to highlight the expansion cracks...worked great.   The red line you see was an idea I got from a picture of an actual yard. There were two yellow lines to guide the crane...I use the line to correctly position the crane so I can dump a container on either side of the track.  It's a fun, but challenging accessory to play with.

2020-12-21 Mi-Jack-12020-12-21 Mi-Jack-22020-12-21 Mi-Jack-3

Attachments

Images (3)
  • 2020-12-21 Mi-Jack-1
  • 2020-12-21 Mi-Jack-2
  • 2020-12-21 Mi-Jack-3
@ToledoEd posted:

Well, finally finished the Mi-Jack 'yard'  That's one humongous accessory!  The concrete pad was made with Woodland Scenics Smooth-it.  I painted it originally with Woodland Scenics Concrete, but I thought it was too creamy.  Tried gray, didn't like that.  Tried a wash...well, that was a wash!  Then I hit on ModelMasters 'Old Concrete-Flat' and liked it.  At QUARTERGAUGER48's suggestion, I used a pencil to highlight the expansion cracks...worked great.   The red line you see was an idea I got from a picture of an actual yard. There were two yellow lines to guide the crane...I use the line to correctly position the crane so I can dump a container on either side of the track.  It's a fun, but challenging accessory to play with.

2020-12-21 Mi-Jack-12020-12-21 Mi-Jack-22020-12-21 Mi-Jack-3

That is a very cool accessory.  Thank you for sharing.

It has been fun to see all of the great activity on this thread. COVID SCHMOVID.

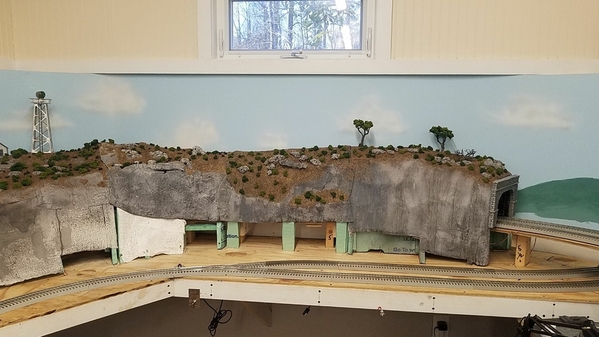
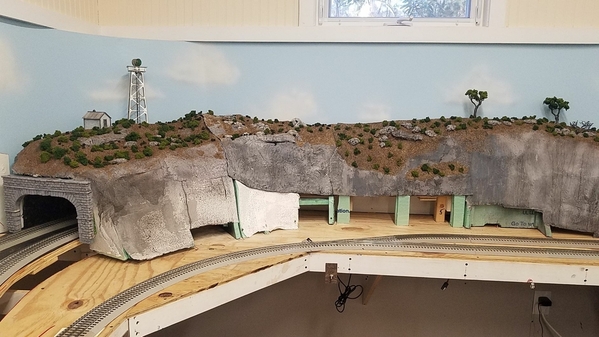
My grandsons are arriving for a visit soon, and I just completed a stage of the modular mountain on the Happy Valley RR.

Today I dry-fit the four sections, made from foam board ribs, plaster cloth, Shaper Sheet (in places) and a couple of  coats of Hydrostone plaster. Together they form a sturdy, lightweight shape with a hard shell that I can pick up one-handed from a wheelchair. The latest stage involved putting forest ground cover on the upper areas of the hard shell, which was already painted to look like rock. For a thick coating of “dead leaves” I gathered the real thing from my yard and ground them up in a cheap blender. I sifted the ground-up stuff and blended it with some sawdust, then liberally sprinkled the mix onto a wet slurry of adhesives and tinted dark brown.  It’s kind of my own soup, having read how-to articles for decades, but I won’t claim any originality. The cool thing about it is that it stays wet for plenty of time to cover surprisingly large areas quickly. After the layer of dead leaves dried, I used white glue to apply dozens of “shrubs” using Woodland Scenics clump foliage. I also made three trees from the same foliage, glued onto twisted strands of heavy-gauge wire with a plaster coating. They’re my first attempt and look a bit like acacia trees in Africa. I plan to make another half-dozen or so to represent hardwoods. They’ll be mostly hidden by nearly 30 of Bill’s Handmade Trees, which are ready to “plant” with some assistance in the coming weeks.

The overlapping joints fit pretty well, and as I continue working on different areas and adding details, they should blend together even better. The two outer sections will be attached semi-permanently, while the two inner sections are detachable. Some of the “stone outcroppings” are actually handles.

Dry fit 4Dry fit 5Dry fit 6

Attachments

Images (3)
  • Dry fit 4
  • Dry fit 5
  • Dry fit 6
@mike g. posted:

WOW Ed! That sure looks great! I almost bought  a used one at a train show but thought the guy wanted to much for a broken one that I would have had to fix. I kinda wish I did now! Once again outstanding work!

Mike, thanks. It’s not only big, but in my opinion the most complex and sophisticated accessory to operate Lionel has made. Great fun too!

@ScoutingDad posted:

Bruce - The mountains look good. They remind me of the modeling Luke Towan does on his Australian layout. Before adding any more trees this could be an Australian or South African diorama.

Thanks! It looks a little odd now, and somewhat too tubular toward the tunnel portal on the right, but once all of the scenery is in place I expect it to look a bit more like the Alleghenies. At least I hope so!

@BruceG posted:

Thanks! It looks a little odd now, and somewhat too tubular toward the tunnel portal on the right, but once all of the scenery is in place I expect it to look a bit more like the Alleghenies. At least I hope so!

Bruce, you are on the right track to look like the Alleghenies!  I hope to come up with something similar looking!!

@mike g. posted:

I'm sure not only me but the grandkids would love it also!

Mike, It sounds like you need one!  I don't even have room for my Erie one that you made the connector parts for.  It is safely away in its box along with some other accessories awaiting the day we have grandchildren.

Last edited by Mark Boyce
@carsntrains posted:

I went into the train room and looked around for the first time in many months.  All I do is work and...  work.     Things have been crazy busy here.    Glad to see Mark, Mike, and others still getting things done!     

Thank you!!  It has been good getting things done.  Being retired now sure does help. 

I've been doing a little more wiring on my layout, but mostly ordering materials for wiring and to construct my two lift up bridges.  Several folks have added ideas over on my Blackwater Canyon Line topic!

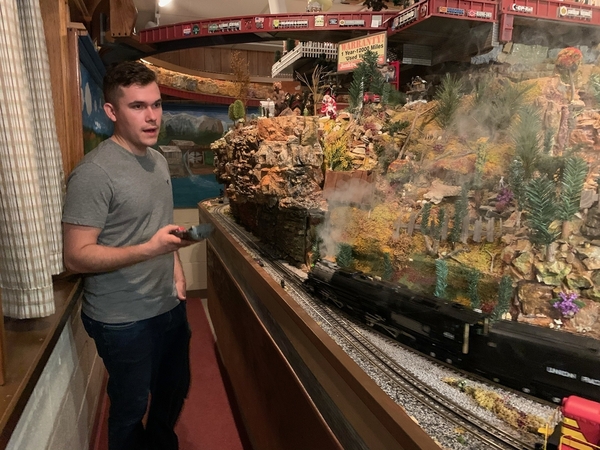
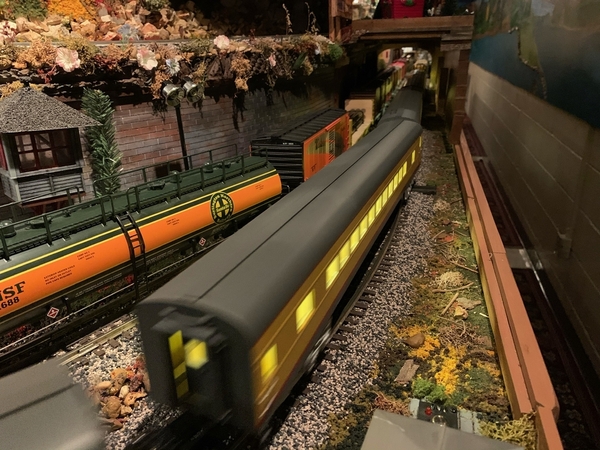
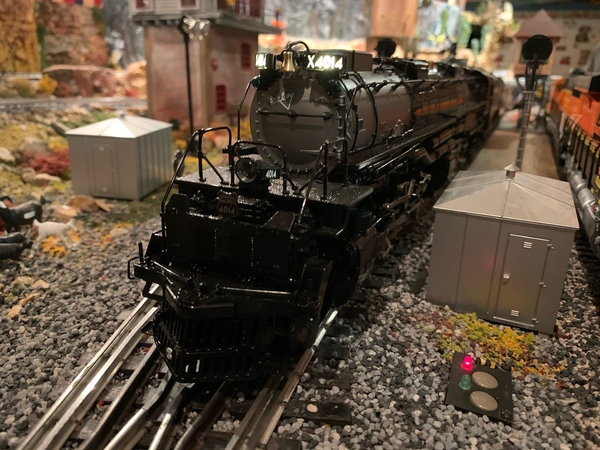
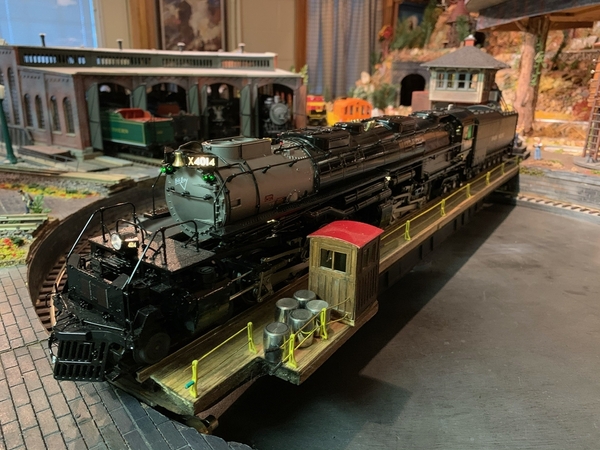
SuperChief, I agree with RSJB18 Bob and Mark Boyce, that’s a cool accessory, positioned really nicely on your interesting layout. When you have time, show us more pictures, Wow. Mark Boyce, I’m like Mike g., pictures of your wiring will be neat to see, I am still learning at age 76.... Yesterday, my friend Will brought over his new Legacy First Run Big Boy and 11, yes eleven new UP passenger cars. The new 21 inch ones with the new couplers. I love the sound cars. I’m not sure I like the couplers stretching and swiveling, but, in pulling mode, they worked just fine. Happy Railroading Everyone 1A7BA2FC-19A2-493B-953D-8D58199193C7B1BBFA72-2644-4538-9043-2D168F7F4506B7FB0E8E-EB94-458A-AEC3-447F538EDCC1E6E88AA1-4BD4-43CB-A316-2351C7AAF84A76B0FB07-2DA9-47BF-AAD4-9DAE5C95536ACDC26C3B-9273-4902-ADFA-A414F444BFE9B838A03D-CE83-4D67-8834-1193B12FEDC662FEE1AE-3EFB-4A9A-82E9-A4DB6043CAAFC9BF310D-E64B-40A5-839D-FB2E63435965303B90F7-5CE3-4717-BD20-B994806EF7F7

Attachments

Images (10)
  • 1A7BA2FC-19A2-493B-953D-8D58199193C7
  • B1BBFA72-2644-4538-9043-2D168F7F4506
  • B7FB0E8E-EB94-458A-AEC3-447F538EDCC1
  • E6E88AA1-4BD4-43CB-A316-2351C7AAF84A
  • 76B0FB07-2DA9-47BF-AAD4-9DAE5C95536A
  • CDC26C3B-9273-4902-ADFA-A414F444BFE9
  • B838A03D-CE83-4D67-8834-1193B12FEDC6
  • 62FEE1AE-3EFB-4A9A-82E9-A4DB6043CAAF
  • C9BF310D-E64B-40A5-839D-FB2E63435965
  • 303B90F7-5CE3-4717-BD20-B994806EF7F7

Add Reply

Post

OGR Publishing, Inc., 1310 Eastside Centre Ct, Suite 6, Mountain Home, AR 72653
800-980-OGRR (6477)
www.ogaugerr.com

×
×
×
×
Link copied to your clipboard.
×
×