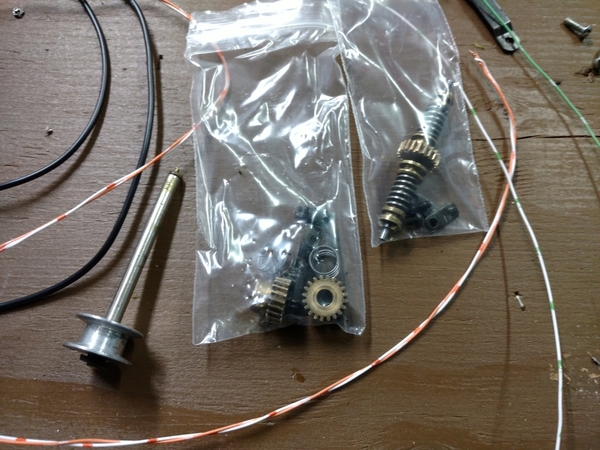
Lew, Yes on the 182, it only goes in one direction and the winch only works in one direction. My thought is to just rewire the whole thing with the wire diagram I got from Rob on the forum. Thanks for the video, it proves mine is a lot louder. I will have to check into it after I get done with the 182!

Johan, wonderful job on the Linde Natural Gas car!

Larry I really like your Crane  & Boom sound car sets! I have one from MTH Railking , but its not remote controllable. Your passenger stations look great! If you get a chance can you take a little video of them in action?

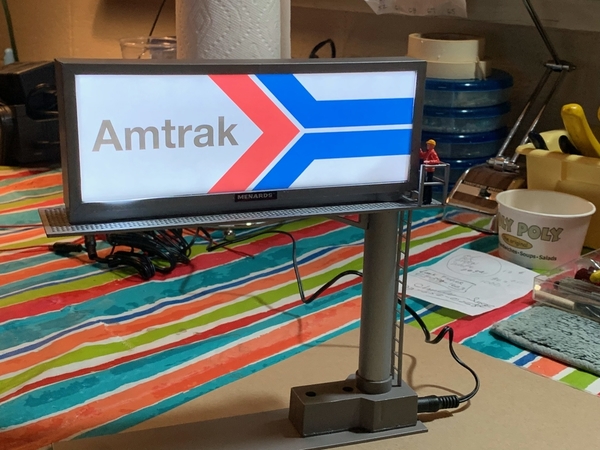
Bryan, Great job on your module! The crash scene with the cops on location, the lighted billboard for dummies, and of course the chain gain picking litter! Its a good lesson for the young kid playing basketball! LOL

Bill, your old caboose with the new LED's  look great! Nice job!

John, you do such wonderful work that you cant even tell that you grind your folks in half! 

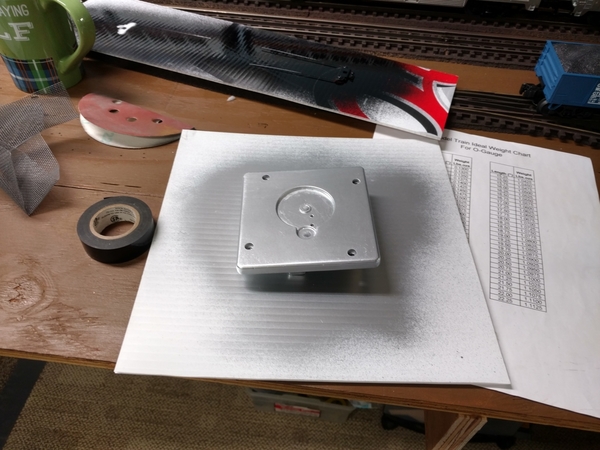
Well the CEO has given me the day off from working on the house. That means train room time today. I will spend my time working on my Lionel 182 crane. I plan to rewire it, clean it up and maybe even repaint some of it. Does anyone know it 24AWG is to small for wiring something like that?

Well I hope everyone is having a wonderful weekend! 

I hope you all find time for your trains and layouts!

Last edited by mike g.

Another busy Saturday. I've discovered that I don't have to watch the weather reports anymore.....just look at the volume of work going on here and I know it's raining or snowing......

Bryan- nice work on your module. I do my best work when I'm on a deadline too.

Mike- you can double up the 24 ga. wire if that's what you have. Should work just fine.

Bill- Very nice caboose. Not bad for a buck!

Mark- some cleaning up counts. One step closer to bench work. I'm afraid to google "Pittsburgh Toilet"

John- I don't know how you do it. I'd be blind by now working on those little folks.

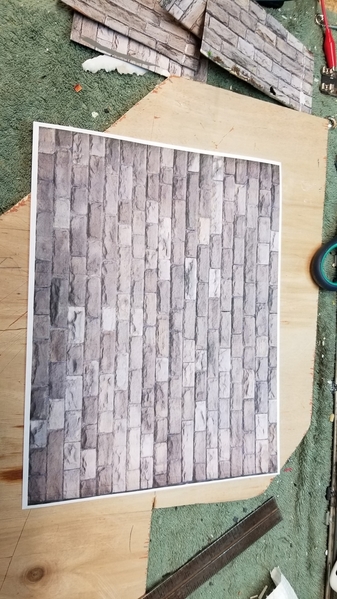
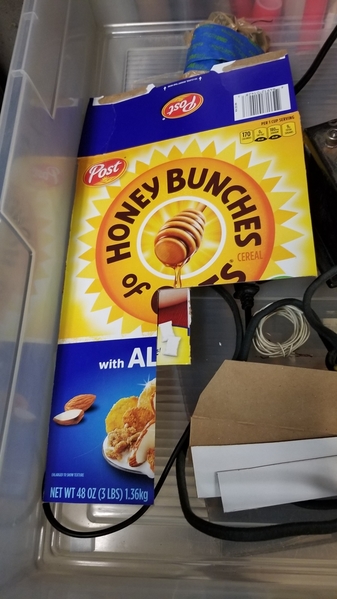
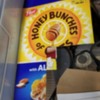
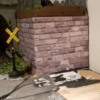
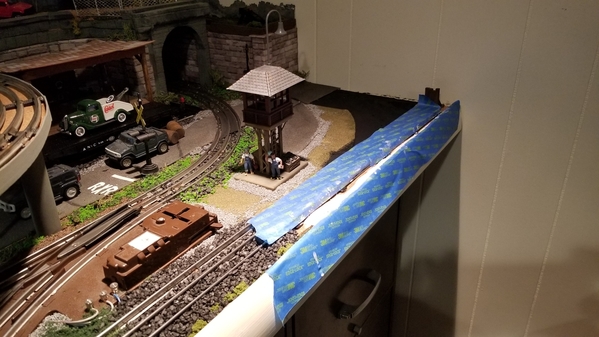
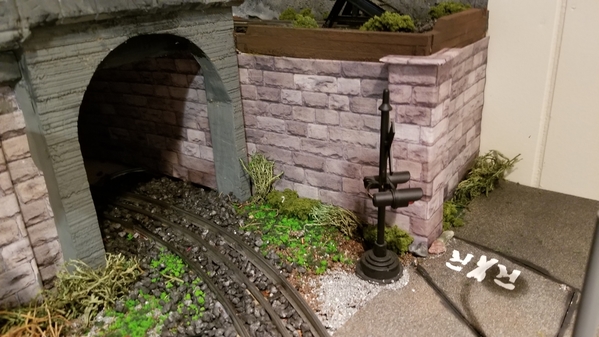
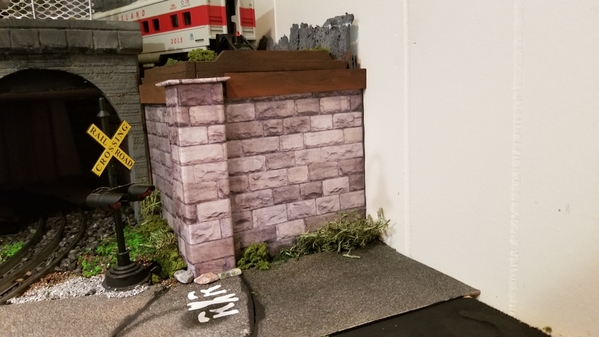
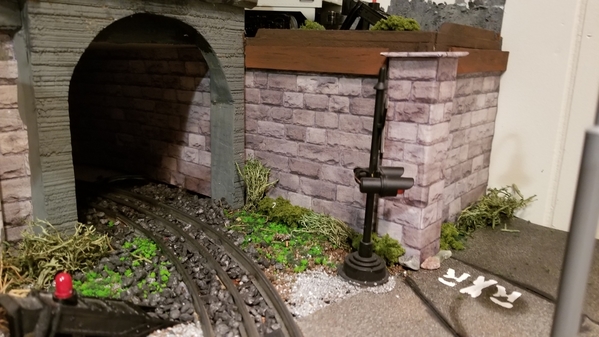
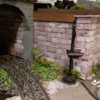
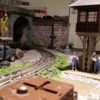
So I printed out more block wall images yesterday for the elevated siding. Cut-glue-repeat is the name of the game. One thing I forgot to do was spread the glue on the cardstock (BJ's cereal boxes), with a brush. I just laid it out in a S pattern which caused a little wrinkling. A couple of hours under some weight solved that issue.
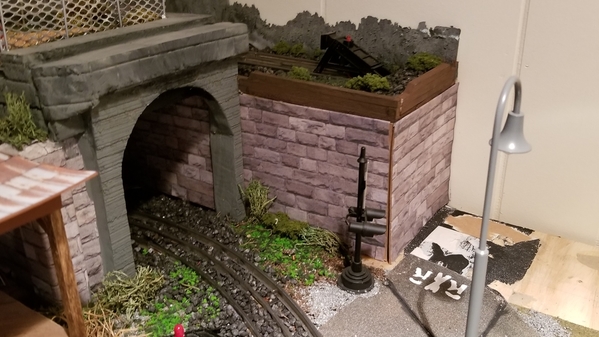
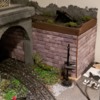
I mounted the three flat walls (one inside the tunnel) and put back some of the ground cover. Still more details to do.
Bob
2020-01-25 15.22.302020-01-25 15.23.162020-01-25 15.24.522020-01-26 08.35.592020-01-26 08.36.18

Attachments

Images (5)
  • 2020-01-25 15.22.30
  • 2020-01-25 15.23.16
  • 2020-01-25 15.24.52
  • 2020-01-26 08.35.59
  • 2020-01-26 08.36.18

It's not so much what I did for my layout today, but what I did for someone else's layout. Working on 3 locomotives for a client. The two A units were originally Lionel 2032 Erie Alco's, circa 1952-1954. The B unit is from Lionel's MPF days. The two A units were "artistly" repainted by someone using a brush trying to stay away from the decals. Same with the truck side rails. Guess they wanted to update the color scheme. 

I was able to strip away the brush applied paint job as well as Lionel's original decals, black paint & yellow side strips. These shells have now had time turned back about 67 years and all of lead based paint is gone! 

After stripping a number of older Lionel cars my stripping solutions has enough lead in suspension to probably offer some limited radiation protection. 

IMG_0413IMG_0419

Attachments

Images (2)
  • IMG_0413
  • IMG_0419
decoynh posted:

Sorry Brian, Izzy is the good looking one in that photo. 

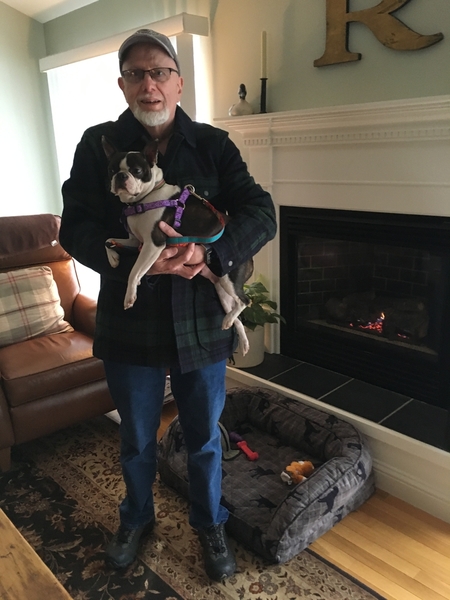
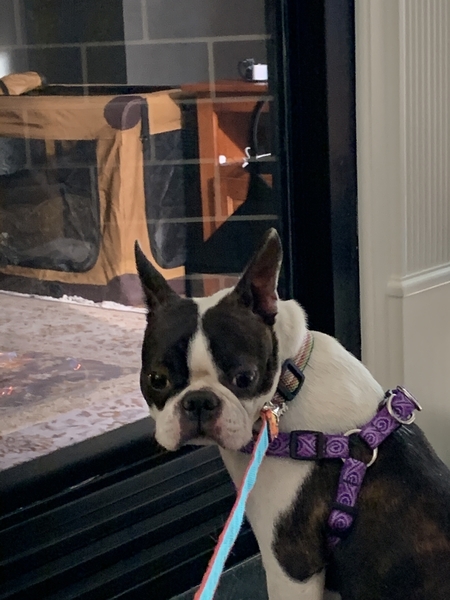
Meet Lucy, she's a 2 yo Boston Terrier, retired mom, who is being trained as a conductor on the SENHRR.  She just came on board on Thursday and learning the ropes quickly.

C4187CE6-1721-4477-831B-619AECE68E3A6675AF39-D78E-4184-BB75-A48C44FA03C7

I can tell from here Lucy is gonna' be an excellent conductor.

Buffy has similar duties on the PER:

                    IMG_2936

I gotta' hand it to you: I second that emotion, that Izzy wins the beauty-contest hands down:

        mceclip0

I "borrowed" this pic of Izzy from one of Brian's posts. 

Attachments

Images (2)
  • mceclip0
  • IMG_2936

So maybe today I can get back to my layout. Yesterday at the Parma TCA show the mod squad had set up their modules and as luck would have it I was again next to Bryan. I think everyone that stopped to look at our setup enjoyed it, especially Bryans. Even though I grit my teeth to say this LOL Bryan has done a great job on his module. A lot of thought went into and it is not even totally done yet. In the video he posted of it I was fortunate to have my tank train running through it at the time. Even though he charged me a fee to cross his module LOL All and all it was a great day of comradery and running trains. ............Paul 2

Bob, LOL on the Pittsburgh Toilet.  Yes it falls under the heading of, "Why would you do such a thing?"  Those printed walls look great!

Glad to see everyone's favorite train dogs!  What would we do without them?
Ericaann, Nice work on refurbishing the finish on those old engines!
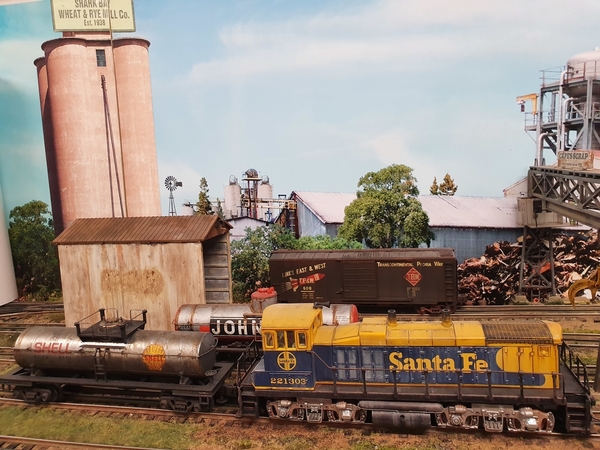
Johan, Great paint and decal work!!

Paul, Nice work with the Mod Squad!  The tank train was great!  I already complimented Bryan. 

Last edited by Mark Boyce

Here are some pictures of my second Broadway Limited 21" Dining Car with Preiser 65602 Seated People I painted.  The car was previously painted after modifying the original Lionel interior by cutting off an extra set of tables from one of the Floor molds that Lionel put in the car.

I have been running this car as an empty Dining Car when dinner was not being served.  As I prepare for the inevitable, I decided to add Preiser People so all my passenger cars would have passengers that match the other set cars,

While dinner was being served, seven more people joined the thirty-five already in the Dining Car. There are now forty-two (42) Seated People in the car.

I am checking my paint supplies to see if I work on the Santa Fe Baggage Car wood-grained Floor (a Yellow, Sand, Earth Red and Dark Earth wet blend),  or start fabrication of a scratch-built kitchen in the Santa Fe Dining Car.  I purchased the 1927050 Union Pacific "Excursion" 2nd Add-on 2-car pack to fill out my UP Excursion passenger set that should arrive this week. The two UP "Challenger" 2nd Add-on cars were finished this past week.

I need to re-group/organize my painted/finished Preiser 65602 Seated People, and I may need to start painting some more of the remaining 12 unopened packages of 36 people.  My selection has been depleted by the 9-car Santa Fe, two-pack Challenger and Pennsylvania Dining Car.

Have a very good week.

John Rowlen

Attachments

Images (17)
  • IMG_1360
  • IMG_1361
  • IMG_1362
  • IMG_1363
  • IMG_1364
  • IMG_1365
  • IMG_1366
  • IMG_1367
  • IMG_1368
  • IMG_1369
  • IMG_1370
  • IMG_1371
  • IMG_1372
  • DSCN4867: Factory interior with two tables against each other.
  • DSCN4868: Cut one duplicate table to move seats to table.
  • DSCN4871: Corrected interior that matches windows in body shell.
  • DSCN4874
Last edited by John Rowlen

John Rowlen, Fantastic work, Beautiful passengers riding a beautiful train, wow...Briansilvermustang, great pictures, it’s nice to see who is doing all the pictures and others should pls e recent pictures for us to see. It’s a great forum. I had friends over to simply run trains for a few minutes. Mike G., when I learn how to do a video, I’ll put some on the forum. My grandson will help me. Thanks for the compliments. DECOYNH, nice looking room and pet. RSJB18 Bob, great scenic effects, looking good, and the weather here in Middle Tennessee is just cold 47 degrees, but it feels cooler. I know that’s not cold compared to other areas of the country. Lew, great pictures, really neat way to do a layout.  Everyone have a fun Sunday. Happy Railroading 46B03236-8ADA-4779-88D8-7022E0989A8F5E0FBF00-D292-4EB2-B964-6A579F81E989545C3ADE-FC4A-4D6B-A8E2-52B5020A752154225BE1-4D9E-4957-AE76-61E08729738A7C688496-78AA-4845-89CF-73D81D0E75A232D867E0-BC74-4C03-95FE-E4BC31AEBBE7B4FBFC98-5245-4AB2-ACA5-8796A88C97D0

Attachments

Images (7)
  • 46B03236-8ADA-4779-88D8-7022E0989A8F
  • 5E0FBF00-D292-4EB2-B964-6A579F81E989
  • 545C3ADE-FC4A-4D6B-A8E2-52B5020A7521
  • 54225BE1-4D9E-4957-AE76-61E08729738A
  • 7C688496-78AA-4845-89CF-73D81D0E75A2
  • 32D867E0-BC74-4C03-95FE-E4BC31AEBBE7
  • B4FBFC98-5245-4AB2-ACA5-8796A88C97D0

Hi Guys and gals


During the week, I managed to get some Woodland Scenics plaster cloth put down on my Styrofoam structure work on the layout. The end result is a rigid ,lightweight base for scenic paint and details. 

To start off, I managed to find a pair of pplastic bowls with lids to hold the water used to wet the cloth. These were at the Harris Teeter market for about 7 bucks for the pair. Having the lid makes it easier to handle the ised water for dispoasal outdoors without spills on the floor. 

IMG_4964

The paper towels are handy for absorbing excess water which puddles on the table. Heres the cloth and a old pair of scissors used to cut the cloth. When cutting the cloth , choose sizes that you can handle and control easily when the cloth is wet. Too large and the pieces get unwieldy and become a mess.

IMG_4965IMG_4966

Here is some of the work to cover the tunnel portal and some vertical walls I have between levels. The Tunnel Portal

IMG_4960IMG_4961IMG_4974IMG_4976  And here is some work on the vertical walls.

IMG_4971IMG_4972IMG_4973


So that's it for now. Plan to get bck to it and do some more during the week. One last point, its always a good idea to clean up when you finish one of these sessions. It can get kind of messy . and don't forget to cover the tracks. 

Attachments

Images (9)
  • IMG_4964
  • IMG_4965
  • IMG_4966
  • IMG_4961
  • IMG_4974
  • IMG_4976
  • IMG_4971
  • IMG_4972
  • IMG_4973

Bob, looks really good! Thanks for sharing on how you do it. It will make my life a lot eaiser!

Ericaann, Great start on the engine rehab! If I may ask what is your stripping solution?

Brian, great photos of you and Izzy! Oh and your engines also! LOL

Johan, wonderful job on the new Refeer! Looks great!

Larry Thank you for sharing such wonderful photos of your amazing layout! I cant wait till your grandson comes over to show you how to do videos!

Sam, What a great story of the Hogger life!
Lirr, your plaster cloth work looks great! Messy is lightly putting it! LOL

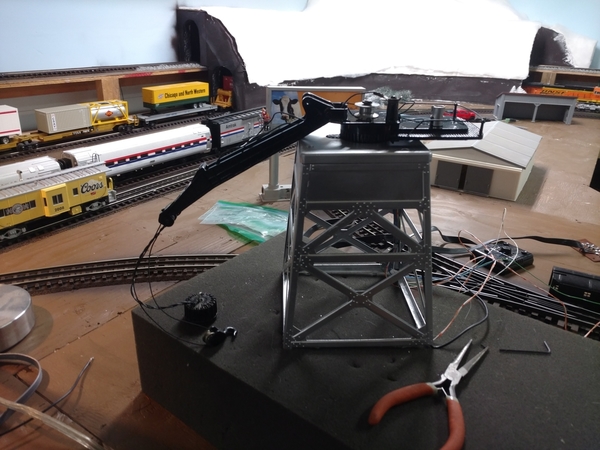
So yesterday I went out to work on my @#182 crane that just wasn't working right. So here is what I started with!

IMG_20200105_064541051

IMG_20200126_072919669_HDRIMG_20200126_073721956_HDR

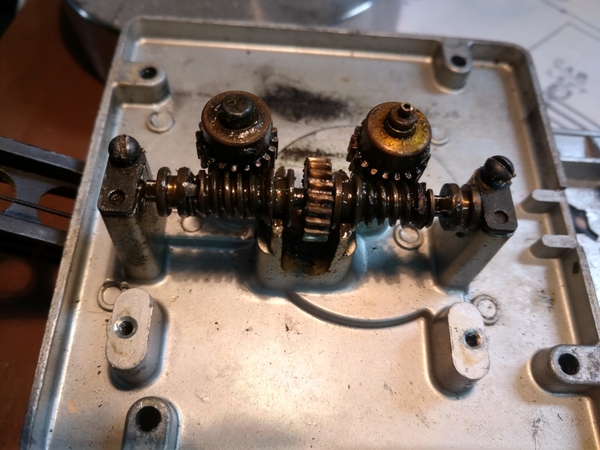
As you can tell everything is coated with years and years of grease from probably the day it was built! I soaked it in Dawn soap and with the help of a small cooper brush and some scrubbing I was able to get it all cleaned up.

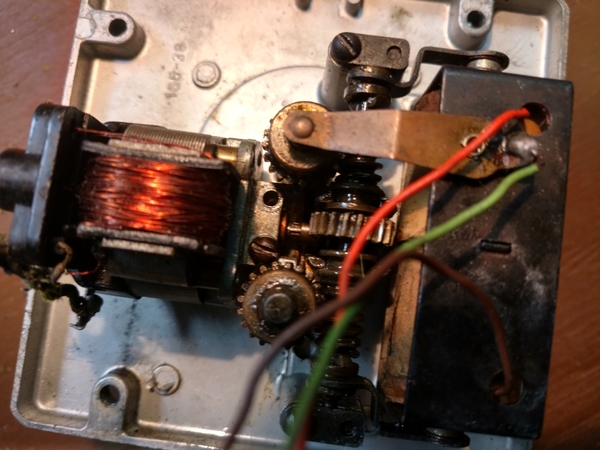
I then went on to the cleaning and painting the body parts of the crane, then electrical! I found why it was only going in on direction. The loose wire was broken off of the outter field connection. I was so far in where it broke off I couldn't see it till I got the motor out. I reconnected a new wire and tested and works great! This morning I am going to go out and put as much together before I can start construction noise! LOL

After several hours and many cups of coffee and a couple cold ones as the day went on here is what I have now.

IMG_20200126_121636022_HDRIMG_20200126_121640666_HDRIMG_20200126_121647891IMG_20200126_154120743

I hope everyone has a great Monday and finds time for there layout and trains!

Attachments

Images (7)
  • IMG_20200105_064541051
  • IMG_20200126_072919669_HDR
  • IMG_20200126_073721956_HDR
  • IMG_20200126_121636022_HDR
  • IMG_20200126_121640666_HDR
  • IMG_20200126_121647891
  • IMG_20200126_154120743
Mark Boyce posted:

Bob, LOL on the Pittsburgh Toilet.  Yes it falls under the heading of, "Why would you do such a thing?"  Those printed walls look great!

Glad to see everyone's favorite train dogs!  What would we do without them?

Ericaann, Nice work on refurbishing the finish on those old engines!

Johan, Great paint and decal work!!

Paul, Nice work with the Mod Squad!  The tank train was great!  I already complimented Bryan. 

Mark. Thank you. 🤝

Johan

mike g. posted:

Bob, looks really good! Thanks for sharing on how you do it. It will make my life a lot eaiser!

Ericaann, Great start on the engine rehab! If I may ask what is your stripping solution?

Brian, great photos of you and Izzy! Oh and your engines also! LOL

Johan, wonderful job on the new Refeer! Looks great!

Larry Thank you for sharing such wonderful photos of your amazing layout! I cant wait till your grandson comes over to show you how to do videos!

Sam, What a great story of the Hogger life!

Lirr, your plaster cloth work looks great! Messy is lightly putting it! LOL

So yesterday I went out to work on my @#182 crane that just wasn't working right. So here is what I started with!

IMG_20200105_064541051

IMG_20200126_072919669_HDRIMG_20200126_073721956_HDR

As you can tell everything is coated with years and years of grease from probably the day it was built! I soaked it in Dawn soap and with the help of a small cooper brush and some scrubbing I was able to get it all cleaned up.

I then went on to the cleaning and painting the body parts of the crane, then electrical! I found why it was only going in on direction. The loose wire was broken off of the outter field connection. I was so far in where it broke off I couldn't see it till I got the motor out. I reconnected a new wire and tested and works great! This morning I am going to go out and put as much together before I can start construction noise! LOL

After several hours and many cups of coffee and a couple cold ones as the day went on here is what I have now.

IMG_20200126_121636022_HDRIMG_20200126_121640666_HDRIMG_20200126_121647891IMG_20200126_154120743

I hope everyone has a great Monday and finds time for there layout and trains!

Mike. Thank you. Next coming weathering. 🤝

Johan

Last edited by BAR GP7 #63

Regarding Pittsburgh toilets (a toilet installed in a basement with no walls around it, just sitting proud) there are theories.  One is that in the original setup there was also a shower-head with the appropriate valve-set to supply it and a floor drain. The idea was the men coming home from the mills filthy from head-to-toe would walk into the basement, potty, strip, and shower without getting the house proper dirty. Another theory is that it was/is the very cheapest way to have a second potty in a house. Right there under the floor was/is the sewer line. BTW, the proximity to the sewer line explains the sometimes odd middle-of-the-floor locations of the comfort station. We owned a home in Meyersdale, Pa that illustrated another explanation. You could tell that until some relatively recent remodeling project the Pittsburgh Toilet was the ONLY facility in the house. The house was built around 1900 when the B&O RR was built so may have started with an outhouse. The Pittsburgh Toilet would have been the cheapest way to put in plumbing in an existing structure. For the [later] upstairs bathroom the sewer pipe was modern PVC pipe passing down through a corner of the living room, then covered with panelling angled across the corner.


Mike, as the saying goes: you done good! Very nice. Can't wait for a video.

        IMG_20200105_064541051


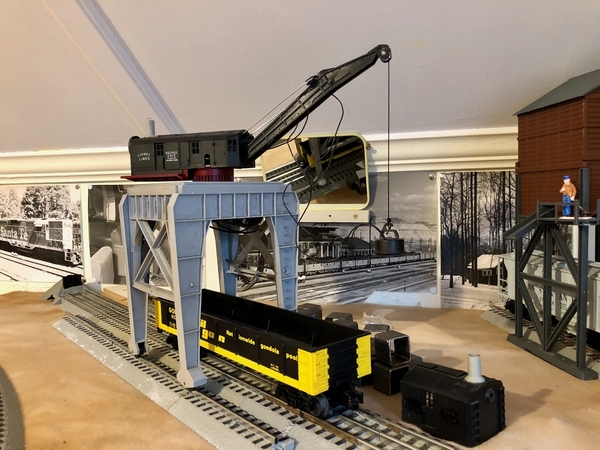
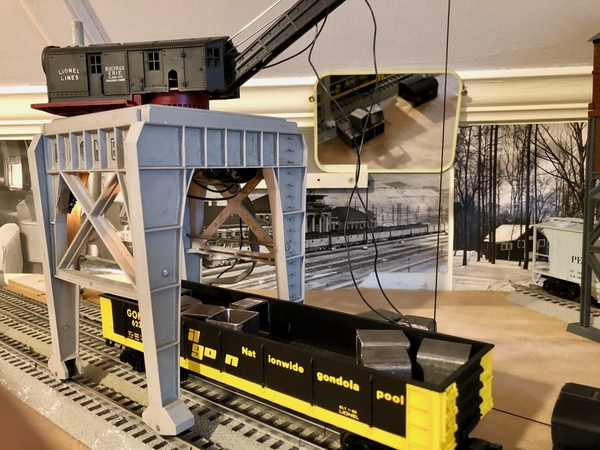
What'd I do today? A little thing but pesky and niggling. In order to add traverse-movement to the 282 Gantry Crane I had to fit the winch-guts in between some structural bits under the deck. This required moving the car-spot several inches ahead. This in turn caused the Crane to block my view of the scrap pile in the mirror placed for that purpose. So today I moved the mirror and all is good again.

Before:

       IMG_0242

After:

        IMG_0245

Attachments

Images (3)
  • IMG_20200105_064541051
  • IMG_0242
  • IMG_0245

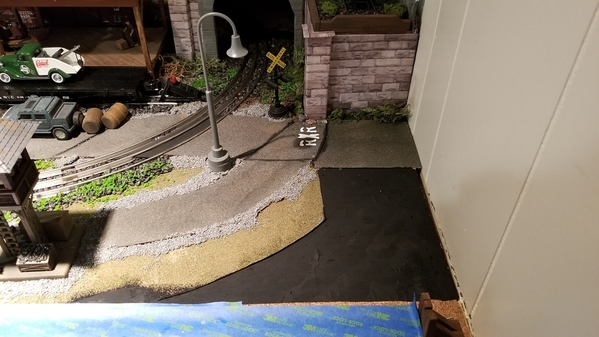
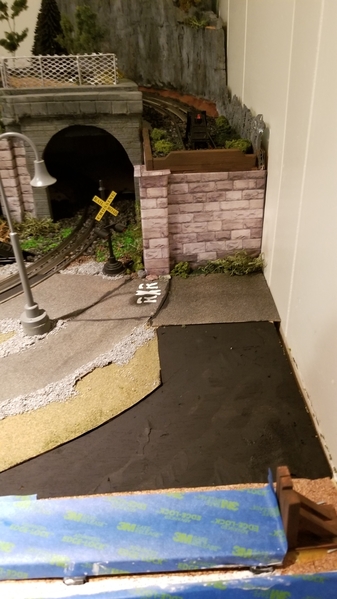
Finished up the details on the retaining wall today. Made the corner piece, top, and some wood boards (balsa), to cover the top of the cardstock print. Added some ground cover at the base of the walls. I might make a railing to go around the top at the end of the siding.
I "re-paved" the road that was torn up during construction.
I also painted the base board where the machine shop will go. Makes for a clean pallet to work on when building up new scenery.
I added some plaster cloth along the new siding too.

2020-01-27 13.15.522020-01-27 13.16.092020-01-27 13.16.172020-01-27 13.16.292020-01-27 16.37.172020-01-27 16.37.222020-01-27 16.37.37

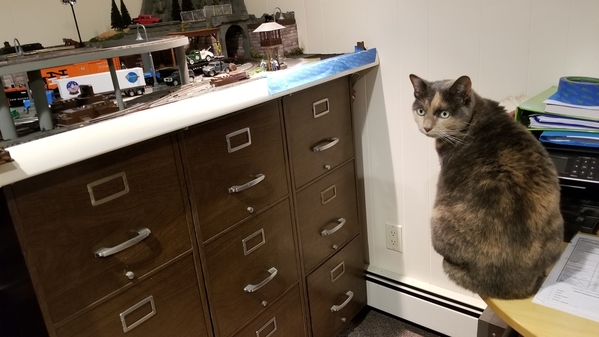
My helper pitched in with meows of support.

2020-01-27 13.15.43

Ran some trains for a while too

Bob

Attachments

Images (8)
  • 2020-01-27 13.15.52
  • 2020-01-27 13.16.09
  • 2020-01-27 13.16.17
  • 2020-01-27 13.16.29
  • 2020-01-27 16.37.17
  • 2020-01-27 16.37.22
  • 2020-01-27 16.37.37
  • 2020-01-27 13.15.43

Lew, The house we owned that had the Pittsburgh Toilet was built in 1952, if I remember correctly.  Anyway, we bought the house from the daughters of the couple who had built the house.  The father may have worked at Armco (American Rolling Mills) or Pullman Standard in Butler.  Regardless, that case would have fit the first scenario you mentioned.  Our daughter's home (the one that I previously mentioned had the moisture problem in the basement) was built sometime prior to 1920 and is directly across Connoquenessing Creek and Route 8 from both AK Steel formerly Armco and Pullman.  That house had a basement toilet and shower, that someone later built walls around.  You can tell, because it was a plasterboard and paneling job.  That could have been for  millworker or the first plumbing in the house.  We tore out most of that because it was part of the moisture/varmint access problem.

On to the crane.  Nice job with the mirror.  I didn't realize until now that the scrap pile was on the back side of the track.  

Ray, your skills at 3D printing and building are very impressive!

Mark, thank you sir!

Lew, thank you! I like the mirror's new placement!

Bob, wonderful job on the block wall and how you placed the boards along the top! Your ground cover is doing its job at hiding the bottom also! Nice.

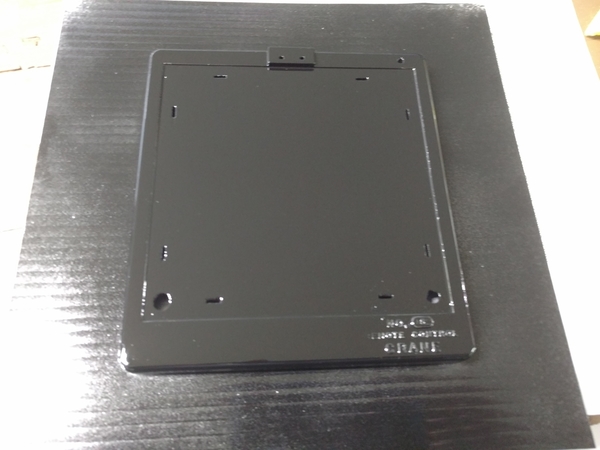
So at lunch time I was able to get the base painted. I spent part of the day yesterday filling the power post holes and mounting screw hole with fiberglass and spot putty. I didn't like the look of them on top and since the power is going to be coming from the bottom, I will mount all the power hook up's there! I hope everyone had a great day!IMG_20200127_152138929

Attachments

Images (1)
  • IMG_20200127_152138929

Got a small shipment of detail parts today from Wiseman, and decided to go ahead and use them now...
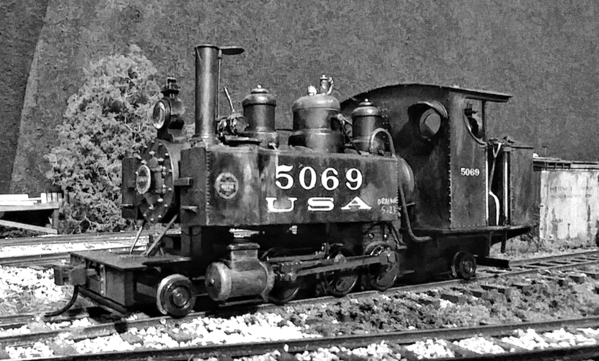
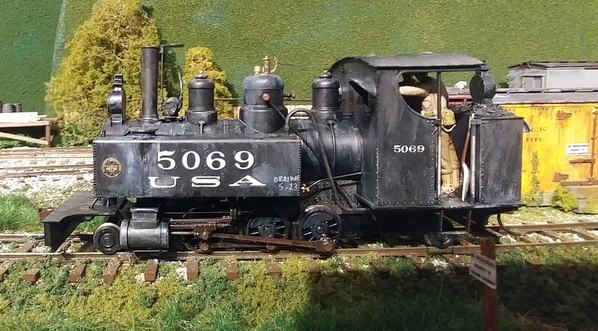
I added a Pyle generator to the trench engine, between the stack and the forward sand dome.

0127202245b-01

I also added a coal shovel on the fireman side and an oiling can on the engineer side.

0127201955a-01

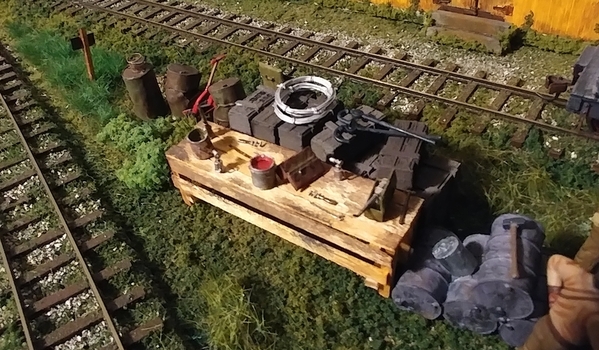
As an afterthought, I decided to build a shop table. Eventually, it will be inside and enclosure that will also include coal and ash bins.

0127202246-01

Attachments

Images (3)
  • 0127201955a-01
  • 0127202246-01
  • 0127202245b-01
Last edited by p51
RSJB18 posted:

Finished up the details on the retaining wall today. Made the corner piece, top, and some wood boards (balsa), to cover the top of the cardstock print. Added some ground cover at the base of the walls. I might make a railing to go around the top at the end of the siding.
I "re-paved" the road that was torn up during construction.
I also painted the base board where the machine shop will go. Makes for a clean pallet to work on when building up new scenery.
I added some plaster cloth along the new siding too.

2020-01-27 13.15.522020-01-27 13.16.092020-01-27 13.16.172020-01-27 13.16.292020-01-27 16.37.172020-01-27 16.37.222020-01-27 16.37.37

My helper pitched in with meows of support.

2020-01-27 13.15.43

Ran some trains for a while too

Bob

That corner has really come out well. Nice detail. Coloring on track really helps to minimize the visual impact of the size of the tubular track. I love the coloring on the stone work. Very realistic. 

Today I started painting the interior of the Santa Fe Baggage Car from the Lionel 1927010 21" 4-pack.  The floor is a wet blend of Yellow, Sand, Dark Tan and Earth Red.

I will be adding Woodland Scenics Baggage, Freight, Bicycle Buddies and Baggage Handlers, as well as Depot Personnel.  I may need to purchase some figures in order to complete this last Santa Fe Car.

Note: I used a flat 1/4" paint brush to blend the paint. 

John Rowlen

IMG_1378

Attachments

Images (9)
  • IMG_1374
  • IMG_1373
  • IMG_1375
  • IMG_1376
  • IMG_1377
  • IMG_1378
  • IMG_1379
  • IMG_1380
  • IMG_1378
Last edited by John Rowlen

Lee, wonderful detail your putting into your layout! I always look forward to see what you add next!

John, The floor looks great! I know its going to turn out perfect as do all your other cars!

Well I have time to get out to the train room this morning as its 3:30 AM and I am wide awake! Thanks to my buddy Tank who is now back to sleep, but that's ok it gives me time to work on my crane before I have to start working on the house!

Everyone have a great Tuesday and have fun with your layout and trains!

Mike, Annie got me up at 3:00 am EST to let her out, then was back at me at 7:00.  I'm sitting at the computer at the basement door while she is out surveying the perimeter.    I hope you make great progress on that crane.

John, the baggage car already looks great with the floor and furnishings!

Lee, You do outstanding detail work.

No PT for me today, just home exercises.  I'll try to get some time in the train room after some chores.

John Rowlen posted:

Today I started painting the interior of the Santa Fe Baggage Car from the Lionel 1927010 21" 4-pack.  The floor is a wet blend of Yellow, Sand, Dark Tan and Earth Red.

I will be adding Woodland Scenics Baggage, Freight, Bicycle Buddies and Baggage Handlers, as well as Depot Personnel.  I may need to purchase some figures in order to complete this last Santa Fe Car.

John Rowlen

What happened to "Sincerely, John Rowlen"?

Another wonderfully detailed passenger car; looking forward to you detailing it.

Last edited by Pingman

Lee- nice details on the new engine.
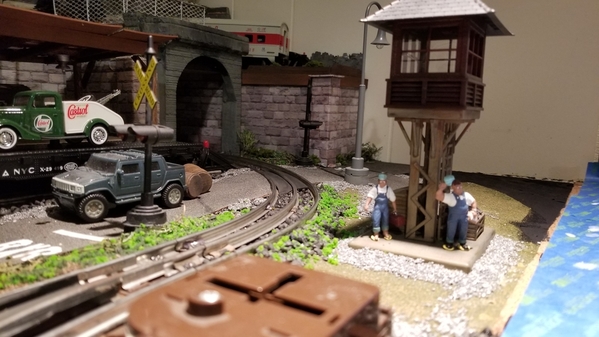
Vincent- the tow truck came with a flatbed car from Lionel. It's standard O scale. I like flatbed cars with different loads. Adds some variety to the layout.
LIRR Steamer- Thanks. I had considered adding extra ties to the tubular track but after adding the ballast I decided they weren't necessary. Nice work on your tunnel entrance area too!
Mike and Mark- thanks for the comments. Nice work on the crane Mike.
Ray- the building is coming together. Your making we want a 3D printer now.....
John R- another great car
Johan- beautiful scene

For all- the paper printout scenery is really easy to work with. You can make things as simple or complex as you like by adding 3D pieces like I did on the corner. The best part is that if you make a mistake just throw it out and print another sheet out. Just gotta eat more cereal.....

Bob

Last edited by RSJB18

Add Reply

Post

OGR Publishing, Inc., 1310 Eastside Centre Ct, Suite 6, Mountain Home, AR 72653
800-980-OGRR (6477)
www.ogaugerr.com

×
×
×
×
Link copied to your clipboard.
×
×