I'm guessing the answer is yes but I just want to be sure because what I'm looking to do is swap a Lionel Penn Central GP-7 shell from the 70s onto a modern Lionel GP-7 chassis with TMCC.
Replies sorted oldest to newest
Not without a little work, the TMCC GP-s have 4 screw holes on the underside of the frame.
It might not be as hard as it might sound. The PC shell (black, I presume) of MPC was still using the end-of-body mounting screw: so the hole is already in the body. You would only have to line up the body shell on the frame of the TMCC chassis, and mark-off the spot on the end tab of the frame, front and back, for the screw hole to be drilled. Drill the hole and either use a self-tapping screw or tap a thread into the drilled hole for the screw you are going to use. Do not over tighten the screw when mounting; plastic cracks! The lighting might be another issue, as MPC used a shell mounting bracket that also served to support a light socket with a wedge bulb slipped on it for support and ground to the chassis and track. The newer TMCC lightening was usually the push-in Italian type lites and were mounted at the roof top of the shell in plastic retainers. You could clear silicone the lamp assy. to the body and just wirenut them together so you can service the unit more easily. Hope that helped. Dennis M.
P.S. Don't forget about the antenna, a silver metal plate to receive the TMCC signal to control the loco.
Thank you for the great info gentlemen, but I was only going to commit to the project if it was a no modification swap. Didn't realize they changed the hole designs. I was just looking for a way to hang onto my TMCC GP-7 but will go ahead and sell it as I've moved on to full scale trains.
I swapped a 70's shell onto a TMCC RS Geep shell with no problems. I had to pack the end screw holes on the stamped metal frame to hold the screws. (The holes are oversize.) I used the strobe light bulb as a cab light. Metal foil tape works fine for holding things temporarily inside the shell. You might want to line the shell with the metal foil tape first to act as a heat shield and keep light from showing through.
I had to change the loco programming code to make the strobe light not flash. At the moment I can't remember the code I used.
Fred
I have mounted a Williams GP-9 shell with the front and rear screws to a TMCC Canadian Pacific GP-9. As Fred mentioned, you may have to do a little work but the holes are in the frame. You should check the GP-7's frame before you abandon the project. I purchased a "strobe light cover" and plan to drill a hole in the top of the shell so I do not have to de-activate the strobe light.
Regards,
Calvin
I've written numerous times about this before on the Forum. I've done the procedure quite a few times, and currently have 5 GPs on my roster that have swapped shells. I've bought newer Geeps from the late 90's on the Bay (that are equipped with command, railsounds, directional lighting, etc.), and put MPC-era or later shells on them (from engines that didn't have TMCC/RS etc.), to get the road names I wanted. It's really, really easy.
MPC-era Geeps had a single hole in the front and rear of the shell, with a screw going through the shell into a hole in a vertical metal piece that is part of the stamped metal chassis. The newer Geeps have four inserts molded into the shells, and use four screws going through the metal frame from the bottom and into the four molded inserts. Just forget about those - you won't need them in the swap.
The good news is that the newer Geeps still have the vertical metal pieces attached to the frame at the front and rear (which the shell slides over when placed on the frame), and these still even have the screw holes in them! So all you have to do is drill a hole through the plastic shell at the front and the rear (you can even see where the mold was changed and the holes were filled in, so it's a cinch to line up the holes) and then screw the shell to the vertical metal pieces attached to the frame. That's it!. You can do that part in 10 minutes or even less.
The only other thing to do is to switch over the lights and the TMCC antenna. It's easy to do this with a glue gun. Remove the antenna from the old shell, and glue it to the top of the replacement shell, and then move the lights over and glue those to the front and rear of the replacement shell as well.
The older Geeps had plastic molded holders for the light bulbs - usually molded into the top of the cab window insert, that were located quite a ways back from the front headlight lens. This made for a weak front light, much less bright than the rear light. So just glue the front bulb right behind the lens at the front (not touching the lens, because the bulb will get hot). I also put a piece of aluminum foil between the lightbulb and the top of the shell to prevent any melting of the plastic - most of the engines already have these, and I just move it.
That's all there is to it. Once you do one of these conversions, you can do the whole job in 15 minutes-20 minutes tops. The newer engines also have strobes - you can either snip the wires and not worry about it, or else get a yellow strobe lens from Lionel (they have the parts) or a parts place, drill a hole in the top of the cab, and glue the little light inside the lens. On one of my swap jobs, I drilled out two holes in the front under the headlight, glued in another headlight lens I had, and then glued the strobe light behind that new headlight lens. This gave me a simulated MARS light. Lots of variations are possible - really fun to tinker with these classic Geeps.
I have done it too... Without issues...
I will add one thing: Theres a little black plastic insert that fits in the hole of the shell that the mounting screw fits through... use this and it will prevent you from over tightening the screw and cracking the shell nose.
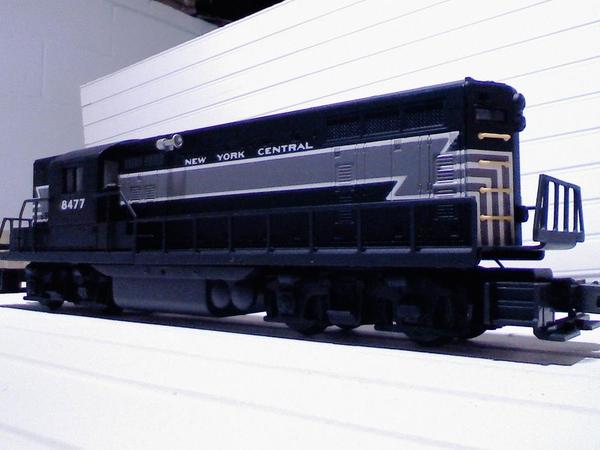
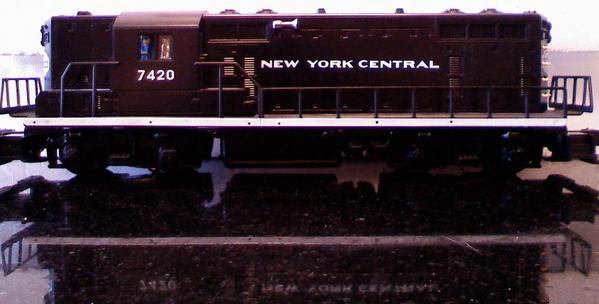
I've swapped a spare #8477 shell onto a TMCC-equipped frames, and swapped TMCC from another engine onto the #7420 frame because I wanted to keep the white sill. For the #8477, no frame modification was needed, and the screws from Lionel fit in the tabs on the frame.
I also swapped out the black grab irons for yellow grab irons to make them look more like prototype units, and sprayed them with flat clear coat.
I think it works, and will be great trailing units.
Thanks,
Mario


