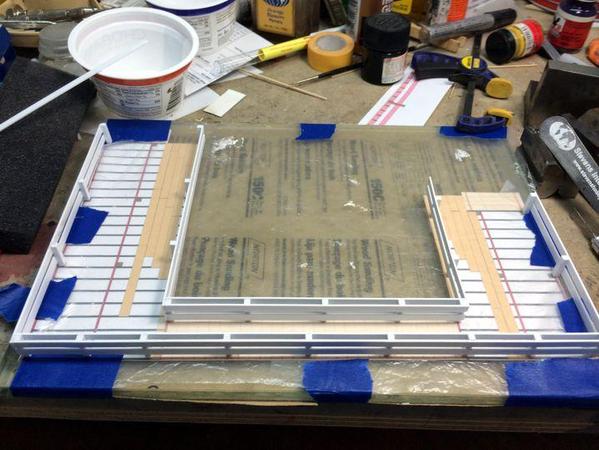
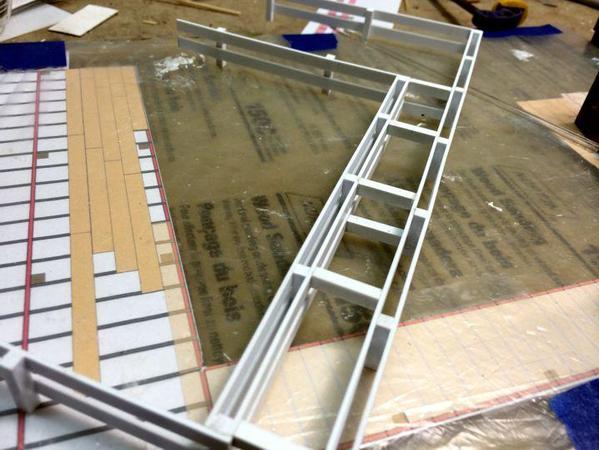
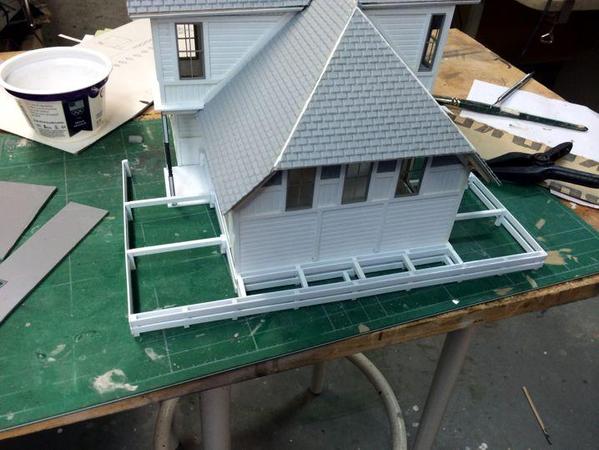
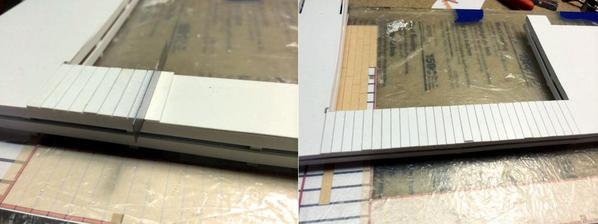
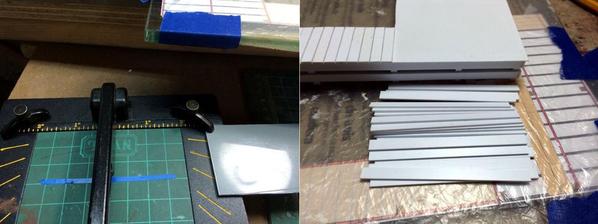
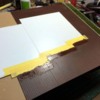
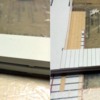
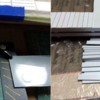
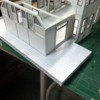
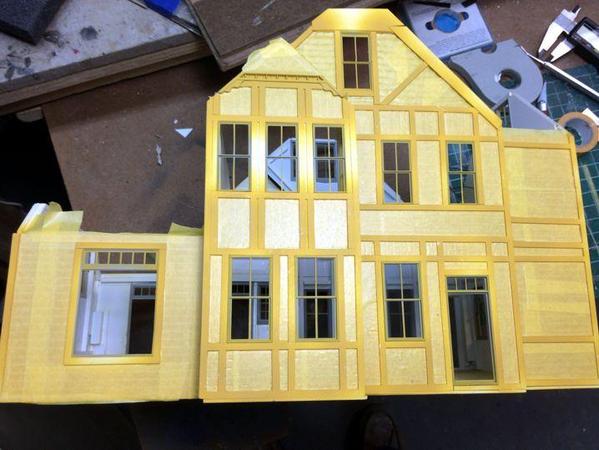
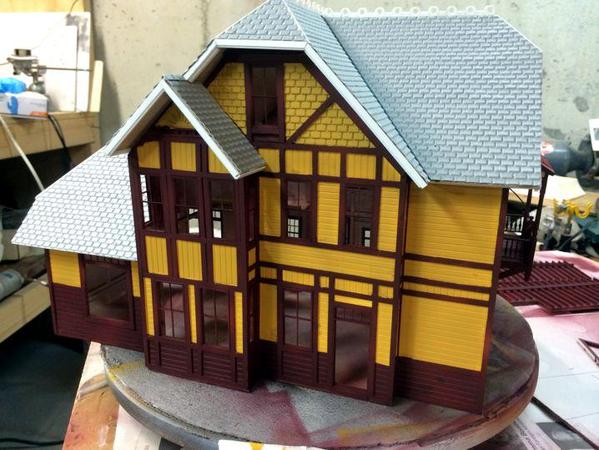
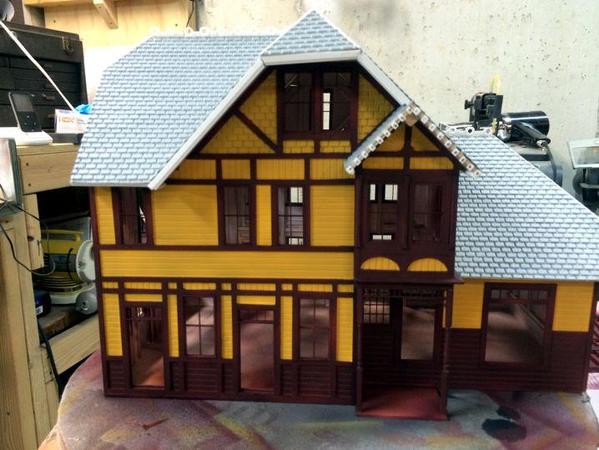
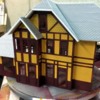
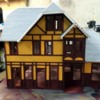
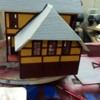
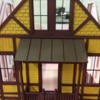
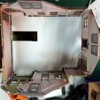
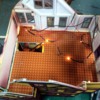
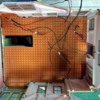
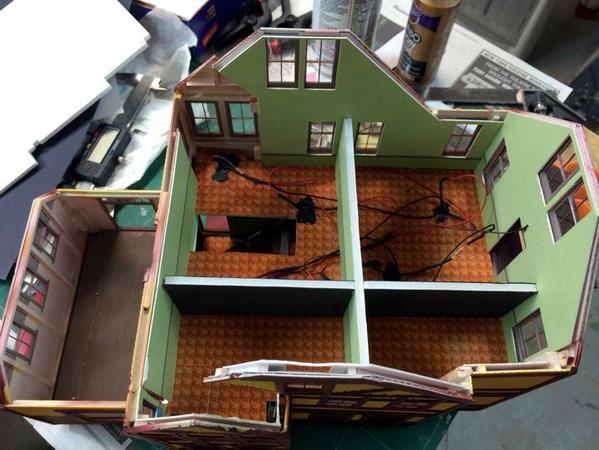
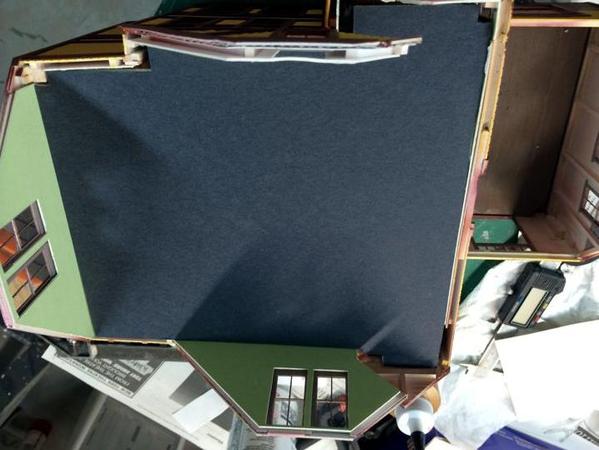
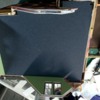
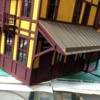
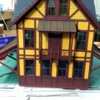
Continued work on the station's loading platform. The underframe is a little complex, but probably because I built it that way. There is an inner and outer frame. The inner frame will be glued to the station body. Both are sitting on scale 6" square timbers. I glued them together over the plans initially, but needed to be sure they fit the station as built.


Loading Dock 02


Pieces of .125 X .156" stock forms the connectors between inside and outside frames.


Loading dock 03


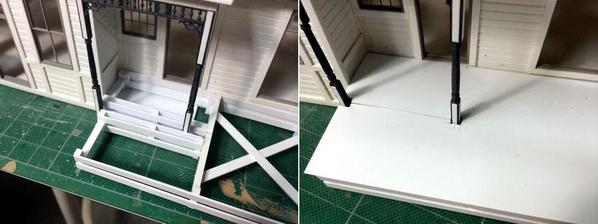
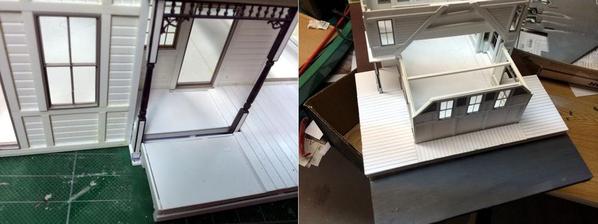
I tried it on the station and it fit fine.


Loading dock 04


Before going further, I decided I'd better try it out on the layout to ensure that the trains don't smack into it. It's a good thing I did. The track side was about an 1/8th inch too wide and did get clipped as a train went by. I cut the double rails on the right side flush with the inside of the corner post, cleaned off the remains of the .040 X .188" stock and then re-glued the end rails to the post in their new position. This should solve the clearance problem. Trains do come very close to loading platforms.


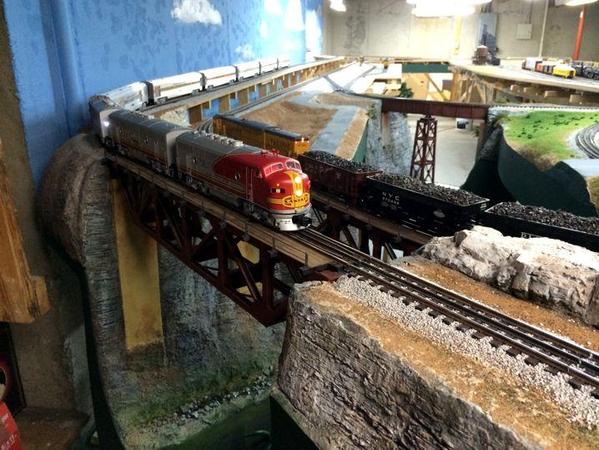
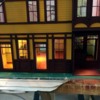
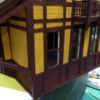
I couldn't help myself. When I had to move the trains out of the way so I could position the station, I ended up parking them on the bridges and took a picture, just for fun.


Bridge Shot 2


There's still soooo much to do. I simply don't know how Patrick completed his railroad so quickly. One of these days I'll do something with the open-framed high line... 

Attachments

Images (4)
  • Loading Dock 02
  • Loading dock 03
  • Loading dock 04
  • Bridge Shot 2
Originally Posted by Trainman2001:

Continued work on the station's loading platform.


I tried it on the station and it fit fine.


Before going further, I decided I'd better try it out on the layout to ensure that the trains don't smack into it. It's a good thing I did. The track side was about an 1/8th inch too wide and did get clipped as a train went by. I cut the double rails on the right side flush with the inside of the corner post, cleaned off the remains of the .040 X .188" stock and then re-glued the end rails to the post in their new position. This should solve the clearance problem. Trains do come very close to loading platforms.


I couldn't help myself. When I had to move the trains out of the way so I could position the station, I ended up parking them on the bridges and took a picture, just for fun.


Bridge Shot 2


There's still soooo much to do. I simply don't know how Patrick completed his railroad so quickly. One of these days I'll do something with the open-framed high line... 

Having seen Patrick's layout twice in person, it is amazing what he did in such a short time.  I went on back to the beginning months of his thread, and saw his layout had initially taken shape much faster than I had realized.


While not like his, yours is progressing pretty rapidly too.  The test run was a good idea for the station platform,and the photo of the train on the bridge is great.

More work on the station. Working around the porch posts created complexity. I want to paint the loading dock while still separate from the station to both save masking and to do a better job on the loading dock. 


I split the frame around the posts and then split the underlayment. At first (shown) I made a square hole for the posts and put a slit down the middle. I realized this would solve the problem when the flooring was glued to the framing so I opened the slit to the post width. The reason for the double-sided slats is that they were cutoffs from one of the other frames. I didn't waste anything.


Loading dock 05


With this fitted, I decided to put it back on the layout and run a train by it to check clearances. Again, I'm glad I did. The train smacked into it again. Instead of cutting more loading dock away, I simply moved the whole station away from the track. It exposed some new white plastic on the mounting plate which I re-scribed and painted.


Loading dock 07

Once that was solved on went the floor boards, starting with the narrow section.


Loading dock 08

I used a Gargraves connecting blade as a board spacer. I worked from end to the middle, but believe it or not it worked out perfectly. After this section I started on the track side. For this I had to cut more boards using the Chopper.


Loading dock 11


Here's the track side.


Loading dock 12


The boards are about 10 scale feet long so I don't know if I need to scribe joint lines in them. Right now I'm leaving them alone.


Here's the street side:


Loading dock 13


Now comes the tricky part. The dock needs to be glued in position before those last boards on the porch need to be installed. Since I want to have all the boards match, I airbrush the completed part of the dock and the loose boards at the same time. Then I install the final boards after the dock is glued in place. Getting closer and closer...

Attachments

Images (6)
  • Loading dock 05
  • Loading dock 07
  • Loading dock 08
  • Loading dock 11
  • Loading dock 12
  • Loading dock 13
Originally Posted by dpg on October 17, 2013:

What a spectacular layout and read! It took me well over an hour to read this thread from start to finish but well worth the time.


I congratulate you on your attention to detail. I will be following this thread to see how it all turns out.

Well over an hour!!  I must be a slow reader.  I have been working on Trainman's L-girder thread and this one a bit at a time for weeks.  I too am very impressed with what he is doing, but in how he is documenting it for all of us.  What's more impressive is in a lot of cases he is learning as he goes.  Thanks Trainman.  There is hope yet.  I am only 11 years younger than you by your statement about writing in '63.

As usual, thanks Mark and all others who read and comment. Mark's right! Many of things I'm writing about are firsts for me. All the other versions of this RR did not have scenery or scratch-built anything. All of this is new, and I'm experimenting and learning as I go... then sharing.


As I see it, there are two different kinds of folks: those who are unafraid to try new things and those that are reticent. I fall into the first type. it was why I wasn't too worried about taking a long-term assignment in Germany at age 53. I knew it would be an adventure and it was. Same goes for moving to Louisville.


I wasn't always this way. I didn't realize that I had any intellectual power until my late 20s. My school experience was average, average and more average. In my late 20s when I finally went from public school teaching to industry I found out what I had to offer. It was quite an awakening. It can happen to anyone.


I haven't stopped learning. Latest studies indicate that even in us older folks new synapses are being created and learning continues. Motor skills learning is not quite the same. In that case, most ability for new motor skills learning ends in the early 20s. That's why it's so freaking awful to take up golf in your forties. Just ask me...

Thanks Alan!


I have several hundred build pics on my iPhone. Now that I'm retired and don't talk about "work" any more, my new "work" is the trains. I'm getting some negative feedback from my chief counsel that I should stop whipping out the iPhone and boring the bejeezus out of people giving them all the gory details about building a railroad. Most people don't care as much as the people that read this great forum. Oh well...

Thanks guys!


I picked up the sick Santa Fe B unit today. And guess what? It came in under estimate! Reason: They were able to track down the specific chip on the R2L2 board and replace it. It was a tiny surface-mount think about an 1/8" sq. The motor's worm gear part that runs in the bushing appeared to be over-sized and was binding in the bushing enough to over heat and put drag on the whole system upping the current. So a new motor set, rectifier and that one chip fixed it for just a bit over $100. I tried it out and it did work well and is now in the lash up with it's siblings. But... tonight it started all over again... running nicely and then current draw goes up, speed goes down to eventually stalling. This time, though, it's the A Unit, not the B that's causing the problem. I'll take that into the shop and see what's what. I'm getting tired of this engine. It's a beauty, but much too temperamental. 


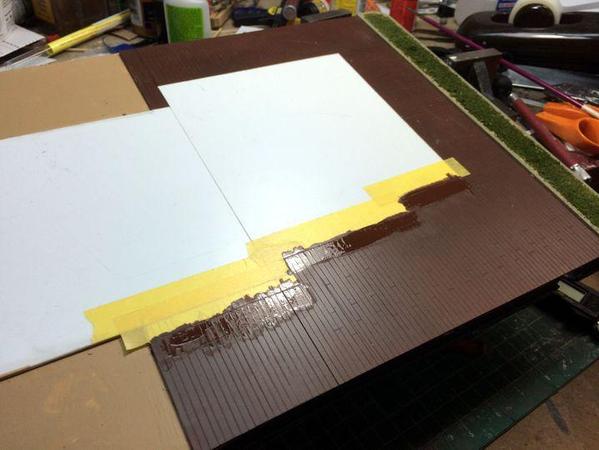
When I got back to the shop I put the last step on the loading dock steps and then painted it a weathered brown (a mixture of haze gray, Tamiya brown and black). It was a pain in the neck!. The paint kept clogging in the air brush. I had to completely clean it out at least four times to finish the job. I had mixed an alcohol-based acrylic (Tamiya) with a water-based one. It tends to clump and did multiple times.


Loading Dock painted


I chose not to scratch the surface. A deck like this would have many coats of paint on it and not shown wood grain. I will weather it a bit with the powdered chalks. You can see the remaining slats waiting until the deck is secured.


I started masking the station. It is a slow, finicky job—as expected—and I didn't get one side down in over an hour's work. 


Masking 02


I'm measuring the slot width with the digital calipers and then specifically trimming the tape before sticking it onto the model. It's time-consuming, but guarantees that the tape masks the intended space well.


Masking 01


I'm going to spray the entire model with Dulcoat before painting color to help seal any leaky areas. I'm sure I'll have to touch up some spots, but I want to minimize. In pictures I saw of the original station, they also had two-tone panels with the lower half panels the trim color on each floor. I'm not going to do that. I'll finish masking tomorrow, and hopefully be able to shoot that trim color. When that's done I do the window glazing with clear styrene, and start installing the first floor interior and then inter-floor lighting.

Spent another hour on masking and finished the track side and started on the balcony end. This one's a challenge since I have to mask areas under the balcony roof. I hadn't masked the light bulb sticking out of the balcony ceiling so I had to scrape off the first coat and use some liquid mask to keep the rest of the colors from coating it.

 Masking 03


Sadly, I have to sell my Santa Fe (For Sale Forum) due to its having Magna Traction and being incompatible with the roofing granule ballast I'm using. The engine is like new and the problems I've been having stem from stones being picked up and getting into the drive gears. There is no permanent damage due to this on the A unit. The B unit was rebuilt because it had an out of spec worm gear on one of the motors. It runs very nicely now. I'm sorry to have to sell it. It's beautiful!, but I can't afford to have any engines that can't run on my track. Lionel is the only manufacturer still using magna traction. This engine has that PLUS traction tires.


If you know of anyone who can make a home for this beauty, please let me know.


Santa Fe Sale 01

Attachments

Images (2)
  • Masking 03
  • Santa Fe Sale 01
Last edited by Trainman2001
Originally Posted by Trainman2001:
Sadly, I have to sell my Santa Fe (For Sale Forum) due to its having Magna Traction and being incompatible with the roofing granule ballast I'm using. The engine is like new and the problems I've been having stem from stones being picked up and getting into the drive gears. There is no permanent damage due to this on the A unit. The B unit was rebuilt because it had an out of spec worm gear on one of the motors. It runs very nicely now. I'm sorry to have to sell it. It's beautiful!, but I can't afford to have any engines that can't run on my track. Lionel is the only manufacturer still using magna traction. This engine has that PLUS traction tires.


If you know of anyone who can make a home for this beauty, please let me know.

Sorry the Santa Fe set is affected by the roofing ballast.  Who would have known about the ballast before you started.  The Santa Fe Fs make a nice set.  I can't say I know of anyone looking for one, but I'm sure you will find a good home for it.

Thanks Mark! Glad you're caught up.


Al, can that be done? I don't think Lionel wheels can be changed like MTH can. Perhaps others would like to respond.


It was a beautiful Spring day today so I WAS NOT IN THE BASEMENT. Instead we took a 3 mile walk in the beautiful Bernheim Forrest and Arboretum. When we got back I was playing on the computer and doing a color study for the station. I've decided to paint the lower third of the first floor exterior walls with the darker trim color. This appears to be normal and it keeps the grime caused by passing trains being less obvious.


Color test


Looks "railroady" enough, don't you think?


Attachments

Images (1)
  • Color test

Now that you've seen the CGI version, on Easter Sunday I was able to finish the masking, take it outside in perfect weather and shoot the whole thing with Dullcoat, and then shoot the Tuscan red for the trim.


Dullcoat

I use Polyscale water-based color so I could air brush it inside. I also fastened the doors, shed supports and shed roofs (underside) to masking tape and sprayed them too. Pre-spraying with Dullcoat really sealed the mask and I had very few leakers which is amazing considering the amount of separate pieces of masking tape this thing required.


Paint complete 07

Paint complete 06

Paint complete 02


In the next picture you also see the balcony roof painted an aged iron color that I concocted. This was shot today. The color is brown, black, yellow and red in some ratio which I could never duplicate.


Paint complete 01


Removing the tape was much less onerous than I anticipated. I used a #11 blade pointy end to just pick the tape up from the edge and then used a good pair of tweezers to grab and pull it off. In some cases it did pick some yellow, but some touching up fixed that. I also has some wear on the tuscan red when I was laying it on the workbench to pull the tape from the other side. Touch up fixed that too.


Here's the whole deal just stuck together to see how it looks.


Paint complete 04


I have to airbrush the roof edges with tuscan and then shoot the roof with a dark gray I bought today. I will do some light weathering on all the walkways and probably dust the lower tuscan panels to simulate the spray that would be thrown up by passing trains. Next comes glazing and the interior including the lighting scheme and this baby's done. As George Peppard used to say in the "A Team" "It's great to see a plan come together." It's one heck of a building. 

Attachments

Images (6)
  • Dullcoat
  • Paint complete 07
  • Paint complete 06
  • Paint complete 02
  • Paint complete 01
  • Paint complete 04

Thanks Mark!


Yes! That's a lazy susan with a circle of corrugated cardboard on top. I've been using it for a long time to spray anything from spray glue to paint. It's much easier to rotate the model than walk around it. It's also good when I'm shooting outside. I stand upwind of the breeze and just rotate the table.


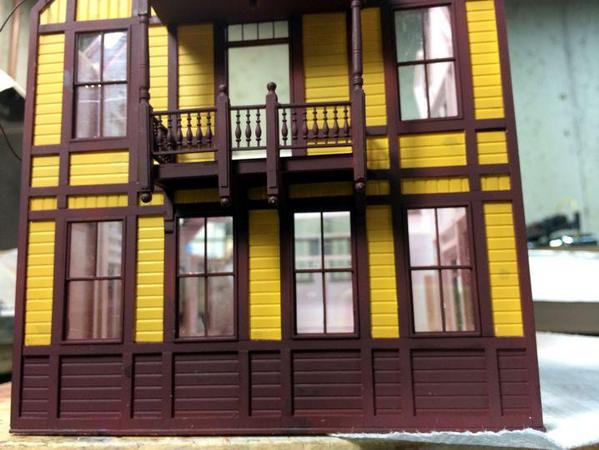
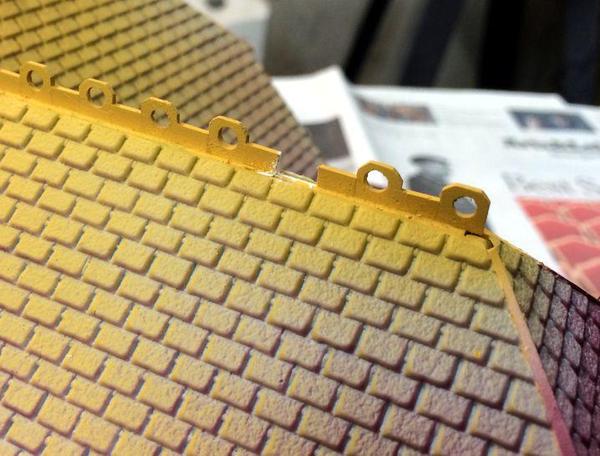
Today I had a short session, but made progress. Started painting the roofs with the edge trim and the top gingerbread. I've chosen to paint the eaves trim in Tuscan and the peak details in the yellow. I didn't think the Tuscan would stand out on the peak.


Roof Paing 1


While that was drying I started glazing windows. I'm using 0.010" Evergreen clear styrene instead of acetate. When glazing Grandt Line styrene parts it makes sense to use a material that reacts with plastic cement. I measure the inside frame dimension with a divider, cut one piece with a razor blade and straight edge to check it. If this fits correctly, I then set up the Duplicutter to cut the number of pieces at that size. If the frames were wood or card stock, it wouldn't matter whether you use styrene or acetate, since plastic cement doesn't work with those frame materials. You'd have to use a PVA cement such as RC aircraft canopy adhesive and in that case, I might go with acetate.


There's nothing worse than having glazing pop out and fall into the building. It's often impossible to get in there and re-install the glass. I know... it's already happened to my Idaho Hotel. Bar Mills models uses a pre-applied pressure-sensitive adhesive on it's window frames. This is supposed to hold permanently. It doesn't always work that way. It can dry out and lose its stickiness.


These are double hung windows so the top frame sticks out beyond the bottom so you need two pieces of glazing and they're not the same size. The top one is one frame thickness shorter than the bottom. Remember: we're looking at the back of the window. I install the recessed part first and then the piece that overlaps.


Glazing 01


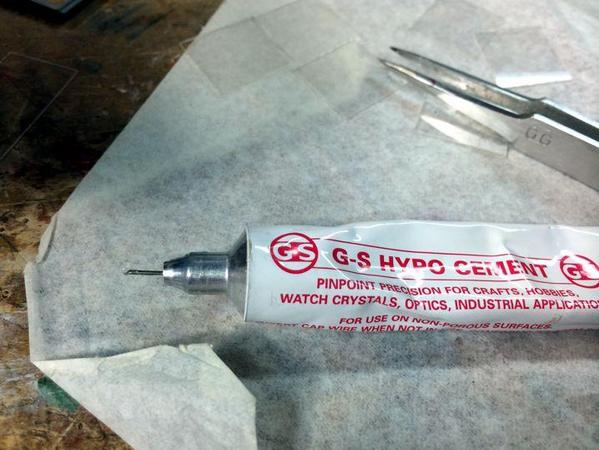
I attempted to glue in the first piece using the solvent cement with a small artist's brush. I promptly got glue on the glazing. I then switched to G-S Hypo-cement (available at MicroMark). It's a plastic glue that comes in a tube with a needle applicator. It works great! I didn't mess up a single pane and I'm done the big windows. 

 Glazing 02


Tomorrow I'll finish glazing, paint the roof and start laying in the interior and lighting.

Attachments

Images (3)
  • Roof Paing 1
  • Glazing 01
  • Glazing 02

Finished all the glazing. I found some extra medium-sized Grandt Line windows that didn't get used. It gave me an idea. I had to replace two mullions that were missing in the station's windows. One was in the same size frame, while the other was a bigger window. So I painted the mullions in the extra window and after putting in the "glass" carefully cut out and glued the mullion directly to the styrene window. It worked well and now all the mullions are in place. For the larger window, I had to piece two mullion pieces together. Gluing the windows also stabilized all the other window mullions, many of which were repaired as least once.


I returned to the roofs and started masking them for the major painting. One of the gingerbread peak details had broken. I had kept extra pieces just for this eventuality. I cut the broken one out, filed and sanded the opening so the new piece fit correctly, glued in the replacement. 


Roof Damage 1

 Roof Damage 2


Roof Damage 3


With that in place, I used 6mm Tamiya masking tape and masked all the roof trim. After I do the grey painting, I'll go back and paint the repaired peak detail.


Roof Painting 2


I didn't get a chance to mask the freight house roof yet. I do that first thing tomorrow, then paint. While the paint's drying I'll get back to installing the interior. Fun!

Attachments

Images (4)
  • Roof Damage 3
  • Roof Damage 2
  • Roof Damage 1
  • Roof Painting 2

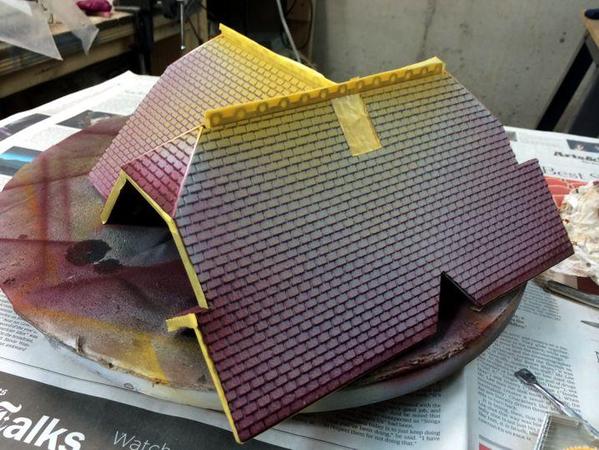
Sprayed the roof and started installing the interior.


Roof painting was nominal. 


Roof Painting 4


The decision to have the peak trim yellow was a good one. The contrast really makes it stand out. Again this is just a trial fit. I'm thinking to use rare earth magnets to hold it on when its time. The Vallejo black gray was a good color for the slate. I'm now going to randomly pick out shingles to lighten/darken/ with slight color variations. The chimney will then go on with some simulated counter-flashing on the lower edge.


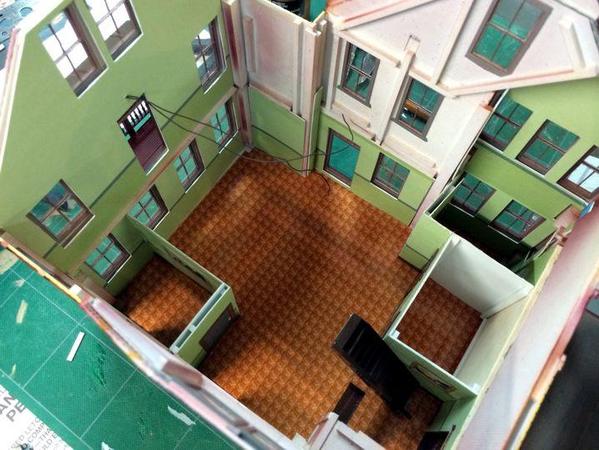
I made a template to cut out the flooring print. I started with tracing the exterior profile then kept subtracting material until it conformed to the inside. Once I had what I wanted, I traced it onto the flooring, cut the flooring, installed it and held it with Krylon spray adhesive.


Flooring Template


The fit was pretty good. I also cut and fit an elevated floor for the freight room, and painted it loading dock color. 


Floor Install 1


I immediately started installing the partitions and interior wall panels. It went together reasonably well, but I've learned a powerful lesson.


IF YOU WANT TO INSTALL INTERIOR WALLS, BUILD THE WALLS WITH THE INTERIOR PIECES AT THE TIME OF CONSTRUCTION. It's the only way you can guarantee that everything will line up and more importantly, the interior walls actually cover the entire interior. Mine actually doesn't.


Interior Install 2

Interior Install 1


The biggest trouble areas are the fat 1/4" corner braces that were holding the building together. If I was to double up the walls at construction, I would have not used such large material, and I could have nicely boxed in all the windows. No one is going to see this stuff, but I know it's there.


In one area, the window cut-outs were wrong with the top cut being about 1/8" too low and was showing in the window. I had already glued this wall in and already had the station master's office glued to it when I realized this problem. I chose to cut the extra material off using the Xacto with #11 blade. This workrd, but my hand jerked and I blew the stair banister right off. I attempted to re-glue it with CA, but it wasn't going so well so I'm leaving it until tomorrow. I'm using RC 560 canopy adhesive to glue the Bristol board to the styrene. It works.


I'm going to use the floor template to cut the 2nd story floor pieces. It will be two layers separated by spacers so I can run all the wiring through the flooring and down through the bathrooms through the base. There will be two LEDs for the main floor and one 1.6 MM in the hole over the back porch. Those puppies are bright and the interior will be quite visible.

Attachments

Images (5)
  • Roof Painting 4
  • Flooring Template
  • Floor Install 1
  • Interior Install 2
  • Interior Install 1

As usual, thanks Mark!


At the moment, I'm leaning in the direction of not making the second floor removable. That being said, I can imagine where it would be advantageous to be able to remove it to make repairs to the first floor. There will be wiring extending from the ceiling down through the bathrooms on the first floor and that would make removable more of an engineering project than I care about right now. So let's say that it will be able to be removed, but not for display purposes. Where the station is located makes taking it apart to show folks not so easy.

Trainman,

Good point, I hadn't thought about the wiring because I never lit any of my buildings.  Also, since the station looks to be good enough to take to shows, that is not your intent.  It is to be a completed and useful station on your layout.  I have never taken any of my models to shows, while I have posted a few pictures on Internet forums.  I think we have the same idea, our modeling is for our own enjoyment and that of our friends.  Our intent is not to show off or try to win awards, although I have no problem with those who like to do that.  I am always impressed and grateful to see fine modeling at a show or contest.

I have thought about showing this model. There's an IPMS contest here on May 17 where I'm going to display the Missouri. I've also thought about showing this since it will be modular and not permanently fastened to the layout. I don't think many folks enter structures so it may be an "easy win"... famous last words. I do like the adulation though which is one reason I'm so diligent about posting everything...at least that's how my wife sees it.

Originally Posted by Trainman2001:

Since I've been running through the Woodlands Scenics Scenery Cement like it was water — water that cost over 8 bucks a bottle that is — I decided to ask my local hobby shop owner if there was a better deal if I ordered in bulk. Too bad that Costco doesn't sell Woodland Scenics products. He came in in the mid 6s which worked for me and I bought 10 bottles. Even after the ballasting is done, I will still need lots of this stuff for general ground cover gluing, and there's a lot of ground to cover.


try buying untinted paint at HD. (get a few of the sample cans to see what works)my memory says it is a flat light tint base.

This is more or less a matt medium.

also the flat modpodge at michaels will do the trick.


as much as I am a fan of woodland Scenics everything but the ground foam and kits can be found elsewhere for less money.

Using untinted base for scenery cement sounds like a neat solution. It's not too late for me to try since I have almost a half of the layout to landscape and scenic. Most home paints are latex based and dry to a rubbery consistency. Scenic cement I believe is really a thinned white glue with is Polyvinyl Acetate and many "Latex" paint formulas have similar chemistry. BTW: there's no "latex rubber" in latex paint. They're often vinyl based like the glues. Therefore, the base should be an economical way to go.


Now onto today's work effort.


I finished up the interior walls by piecing in little strips of wall paper for the corners and around those oversized 1/4" corner braces. I then added baseboards and a piece in the back hallway.

 Interior Install 4.

 Interior Install 3


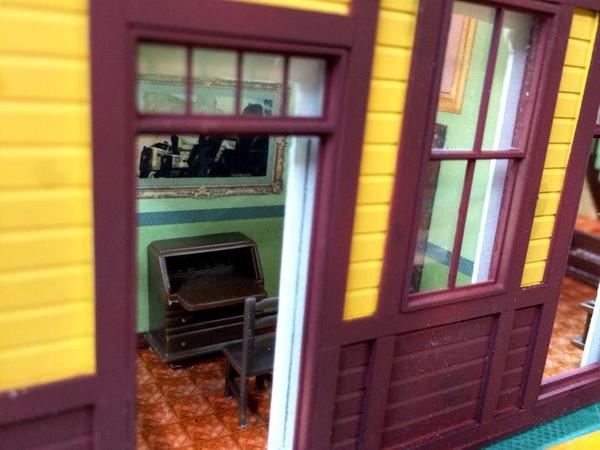
I was going to scratch-build a roll-top desk, but then found that I had some plastic furniture bought years ago at York which included a drop front secretary desk. That will work! I installed some of the furniture and am ready to paint some figures to take their places in the waiting room.

 Interior Install 5

I struggled mightily to re-install the banister on the stairs, but finally got it. The banister was originally butt-glued to the vertical supports, which were very small styrene strips. Once I had to re-glue it, it was almost impossible especially since the piece was now painted. It wasn't the first time it had broken off so there was some old CA on there also. It was also an awkward location in that hallway.


After trying about a half-dozen times I realized that I needed to do something different. I drilled holes large enough to contain the verticals. When the holes were filled with CA, I had a fighting chance to get the banister to align and then settle into the glue. It worked! Not right away. I wasn't very steady and it was very frustrating, but it's not patience that I have, it's raw determination. Once it set up, I went back and touched up the paint that got damaged from messing around so much. 


As I noted on yesterdays post, but it bears repeating, it would have been much easier and with better outcomes if I built the interior and exterior walls together while still in the flat. If I am to do any more buildings with detailed interiors, that's the approach I'm going to use.


"Good judgement is the result of experience, which is the result of bad judgement!"


Next work session: Folks, lighting and second floor. If I get a chance, do the roof shingle painting.

Attachments

Images (3)
  • Interior Install 4.
  • Interior Install 3
  • Interior Install 5
Originally Posted by Trainman2001:


As I noted on yesterdays post, but it bears repeating, it would have been much easier and with better outcomes if I built the interior and exterior walls together while still in the flat. If I am to do any more buildings with detailed interiors, that's the approach I'm going to use.


"Good judgement is the result of experience, which is the result of bad judgement!"


The fact that you did most of the interior after the building was put together is amazing! I guess doing it the way you did just improved your skills.


I am in awe of your work, and yes a lot of it is patience and mostly perseverance. I know.

Thanks for finding the silver lining.


Good judgement is the result of experience, which is the result of bad judgement. I live by that aphorism.


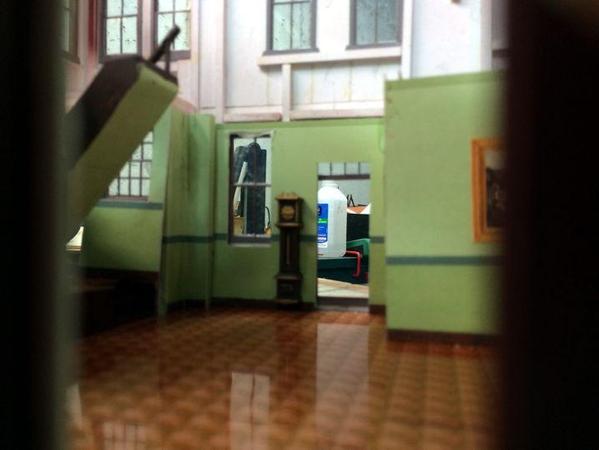
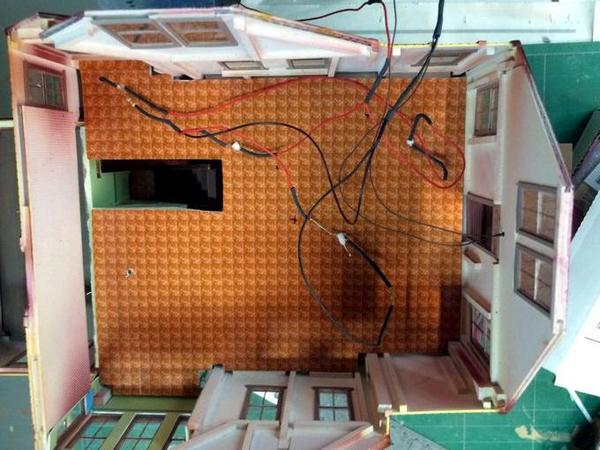
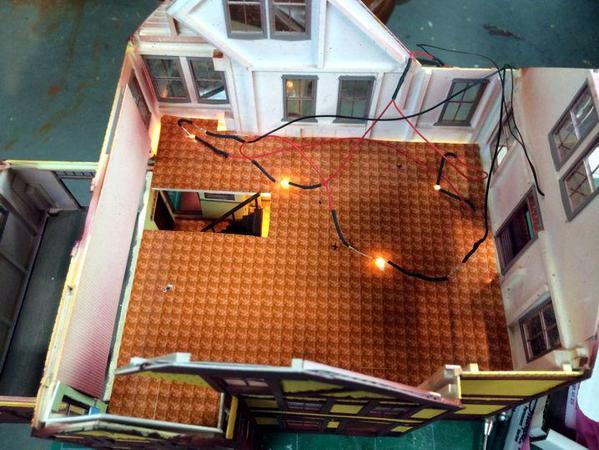
I fitted the second floor (1st story ceiling?) and then installed the LEDs. They're quite bright, but that's okay since people will be several feet away from the model and this will help them see inside.


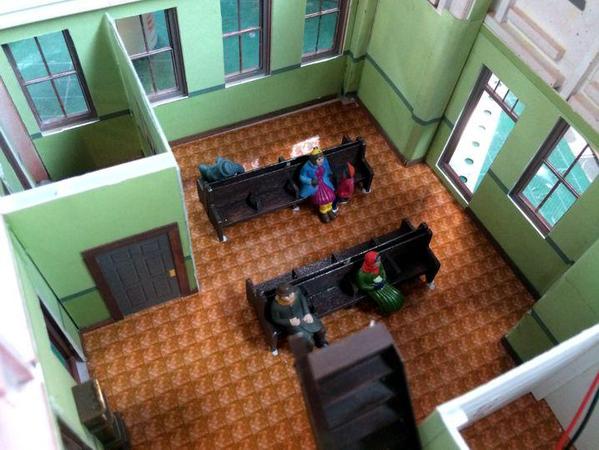
I also spent time painting and installing the figures into the station.


To fit the floor I first cut apart the floor plan drawing and used it as a starting point. I then kept trimming until it just dropped in. 


2nd Floor Fit 1

When it seemed right, I transferred the outline to some 3/16" foam core which would make the floor. This then needed some more trimming until it dropped in and settled onto the partition walls and the side brackets.


2nd Floor Fit 2


The main adjustment was around the stairwell. While it fits snugly and you have to kind of pop it loose to get it out, it does lay flat and will not have to be glued.


After fitting, I removed the floor, sprayed it and the flooring print with Krylon Spray Adhesive and then glued them together. I trimmed around the edges with the Xacto.


I then started to install the LEDs. In the main room I'm using the 3mm warm whites, and for the office and over the back porch door, I'm using the 1.6mm warm whites. I wired them in series-pairs with pair having a 330 ohm current limiting resistor.


I wired the 1.6mm's and then tested them with my 12VDC source and they worked fine. Then I hooked up the 3mm pairs and tied their two leads into the mains in parallel and tried it again. The 3mm got bright, greenish and then went PSSFFTT! Gone! In my haste to make light I forgot to install the current limiting resistor. I removed the blown ones, installed two new ones and this time wired them correctly.

  2nd Floor Fit 3


The LEDs are secured to the foam core with a blob of Aleen's Tacky Glue. All leads are protected with shrink tubing. As I noted when wiring the control panel, the Radio Shack Shrink Tubing heat gun really comes in handy when wanting to shrink tubing in confined or delicate spaces.


Here's the lighting from above.


Lighting 1


And here's the lighting from below.


Lighting 2


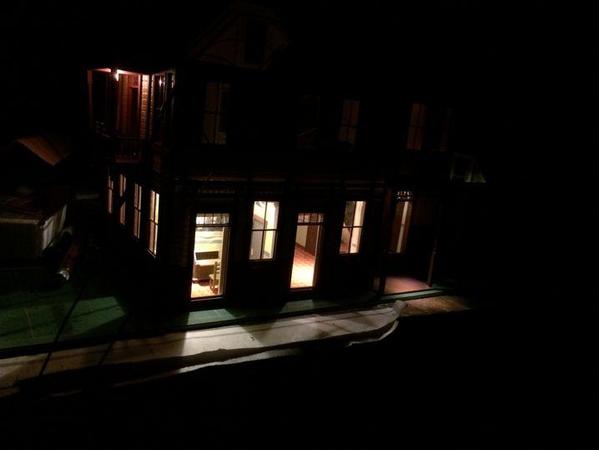
And here it is with the lights off.


Lighting 3


After I took the lighting pictures I glued the waiting room benches along with some patrons. In this case I used the Formula 560 Canopy Glue which is strong and dries clear.  


Patrons


I'm not sure what I want to do with the second floor. I may just put some light blocks in it and leave it in the dark. I chose not to make a double-deck floor and bury the wiring within. I thought it was overkill. The light over the second floor balcony is an incandescent grain of rice bulb that was installed 8 years ago before warm white LEDs were on the market. It works okay on 12 VDC. I'm glad that chose LEDs since they'll last longer than I will and produce no heat.

Attachments

Images (7)
  • 2nd Floor Fit 1
  • 2nd Floor Fit 2
  • Lighting 1
  • 2nd Floor Fit 3
  • Lighting 2
  • Lighting 3
  • Patrons

Like building real houses, the finishing details and punch list items on the model seem to take too long.


I added the walls to the second floor, added "liquid electrical tape" to the tops of the LEDs so their light wouldn't leak into the second story since I decided I want that dark.


I traced the 2nd floor onto some fresh foam core and cut that out to be the attic floor. After minor trimming, it fits snugly between the walls and won't need adhesive. 


I then built some partition walls to act as light blocks for the 2nd story. For the cross-wise on I papered the walls with the same material I used on the first floor. But when I decided to not illuminate the second floor, I covered the longitudinal pieces with black construction paper.


2nd Floor partitions


I also covered the attic floor with black paper on both sides so it won't reflect any light. I put some trim wood around the upper portion of the stair well since you could see it from the back door side. I think that's more AMS* coming out.


*Advanced Modeler's Syndrome


Attic Floor


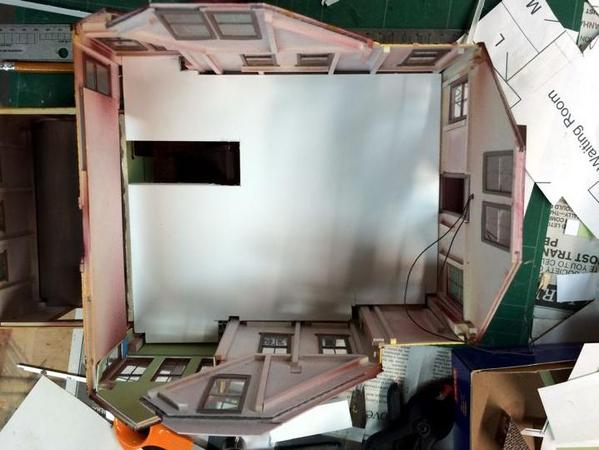
What's with the image engine on this site. It turned that picture upside down. Oh well... Not seen in the above is some more Bristol Board to fully block light from the waiting room from leaking into the freight room area which I want to remain dark.


I decided I better do another roof fitting and promptly broke off the small roof appendage on the back door side. It no longer fit properly when all the interior walls were in place. I proceeded to cut this roof down so it fits and will add it at the end of construction.


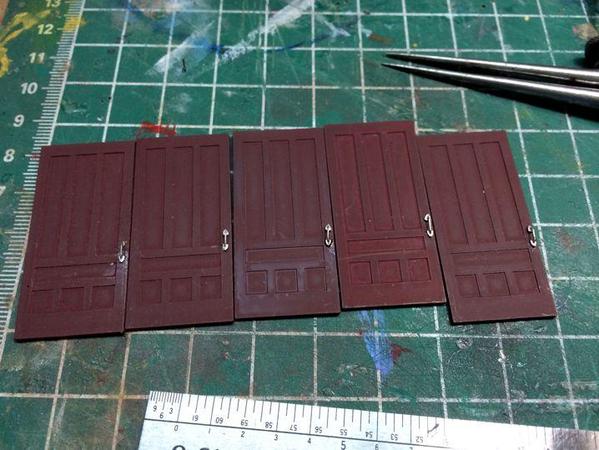
I was going to add all the doors and then realized they didn't have any handles. I was sure I had a small bag of door knob castings from Beaver Valley. For the life of me I couldn't find them,  but I did find some different styled ones. I measured what was the nominal size of the little cast pins and came up with .015", I measured the spacing with a divider and noted the location 30 scale inches from the bottom. One pin fit, the other didn't. These white metal castings are not precise.


Doors with Handles


I used a bigger drill and made the holes .020", dropped three on the floor and had to use the dust brush to find them and finally got them glued in with thin CA. After the picture was taken I painted them a bronze color. Looking at the doors, they probably need some touch up paint as well.


Tomorrow all the doors will get glued in and then I'll start working on getting the shed roofs in place. 

Attachments

Images (3)
  • 2nd Floor partitions
  • Attic Floor
  • Doors with Handles

Shed roofs are in! Roof detail painting begun, and re-glued two windows that I knocked out.


Because of the way the shed roofs are fit to the diagonal braces, you can't simply glue the braces to the roof and then glue the whole thing to the building. The roof rafters rest on a longitudinal purlin and the purlin fits into a notch on the brace. It only contacts the brace at that point so there's nothing to really glue to.


I held the roof to the building at the angle it should lie and then held the brace up to the roof and marked the location of the brace on the building wall. I then scraped the paint off the appropriate wall areas. I had made a design error when originally building the walls. I had the second story bump-out over the rear porch door moved to the left one wall timber. This occluded the very corner that the brace was to be fastened so I had to add another plastic strip adjacent to the corner as an attachment point for the brace.
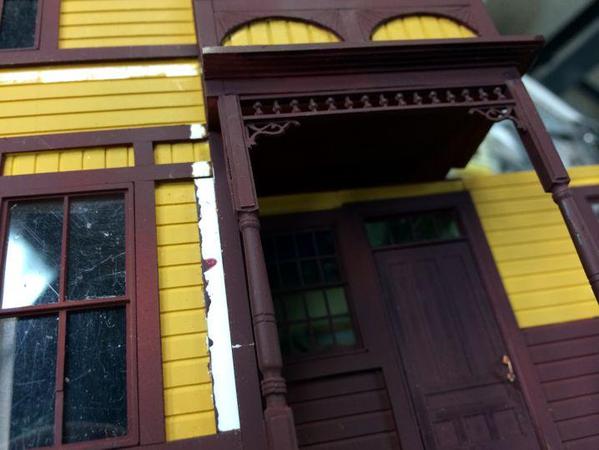
 

Shed Installation 5


Here're the three mounting points on the street-side shed roof. I did this roof first since it was the easier of the two having three same-sized braces.


Shed Installation 4

I then carefully glued the three brackets to the wall in their specific locations and aligned them to each other. I then tried to fit the roof in place and something wasn't right. There was no place for the roof purlin to rest on the brace. That's because I glued the wrong leg of the brace to the wall. Whoops!


Luckily, the glue hadn't really set so I quickly ripped them all off, sanded the paint on the correct mount side, and re-glued them to the wall. Whew! Close call.


Here they are mounted wrongly.
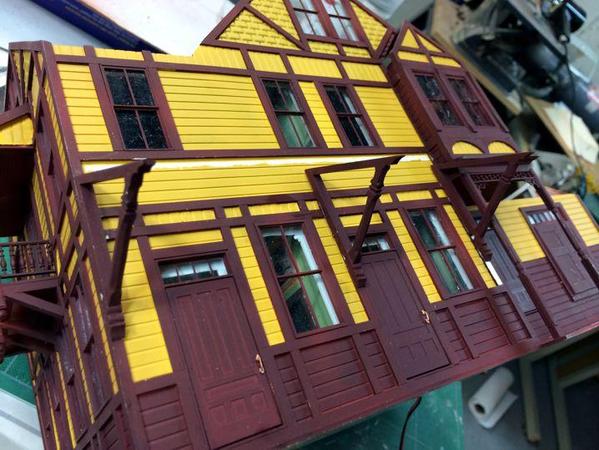
 

Shed Installation 3


Here's the roof in place.


Shed Installation 2


There was a lot of touch-up painting to do, but the end result was pretty good.


I then worked on the track side. This side was much, much more difficult for several reasons not withstanding that the various bump-outs are not absolutely square—although I really tried to glue the building up square, but there were too many moving parts.


I had to add material on the rear mounting edge and then sand these additions to tapers so they more closely matched the wall's contour. I then held and marked the right-hand bracket (the longest one) in place as before, and marked its location. I scraped its contact area free of paint and glued it in place. This allowed me to rest the roof on this bracket so I could position the next smaller one. I repeated this four times until the brackets were fixed. Even so, the left-hand bracket didn't line up too well with the purlin, but at this point, it was going to be what it was going to be.
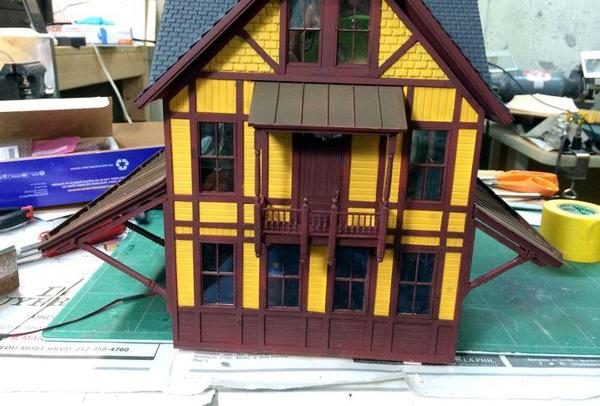


Shed Installation 6


While messing around with the fitting my finger put pressure on a window and POP, the glazing dropped inside the building. 
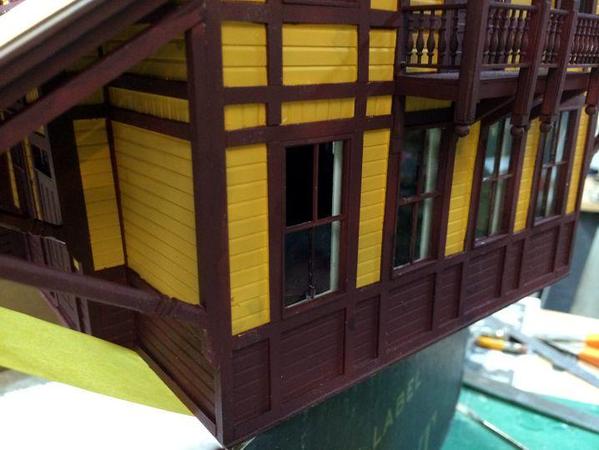
 

Window Whoops 2


This was exactly the reason why I didn't want to glue the 2nd floor into the building. Even so, getting the floor out was complicated by the second story wall panels bearing down on the floor and holding it place. But I did get it out without damage. Here's where the window pane was lying.
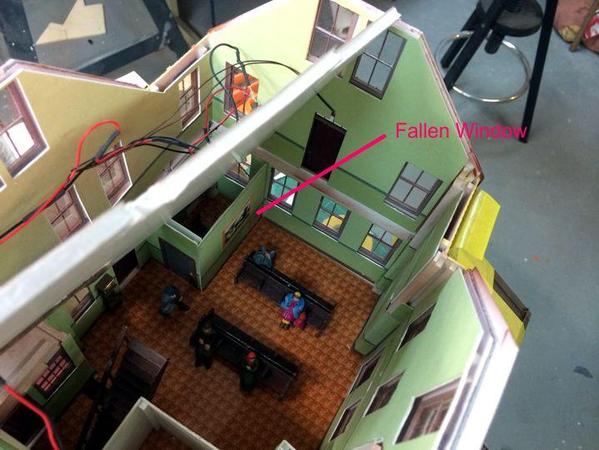
 

Window Whoops 1


I also knocked out another small window on the left end that I was able to re-glue at the same time. I buttoned everything back together.


I added some paper counter-flashing at the base of the chimney and am getting ready to glue it in place. I also started detail painting the "slate" roof to pick out individual shingles and painting them different shades of gray to make it more natural. I'll finish that tomorrow and then do some mild weathering.
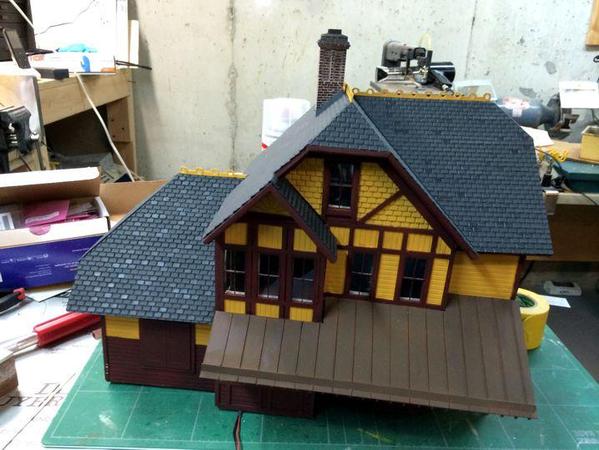
 

Roof Finishing 2


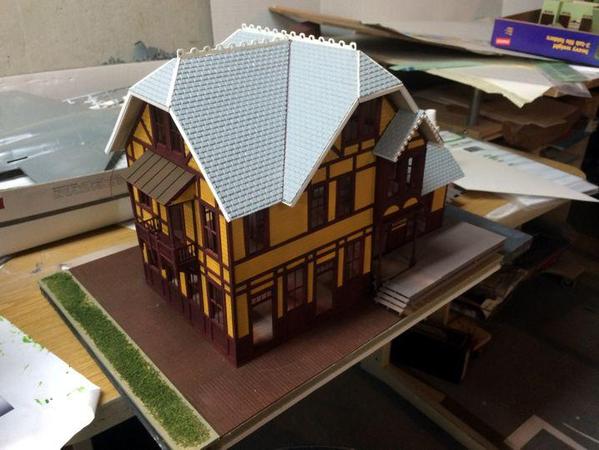
I couldn't help myself... and placed the almost-finished station back on the layout for some progress shots.
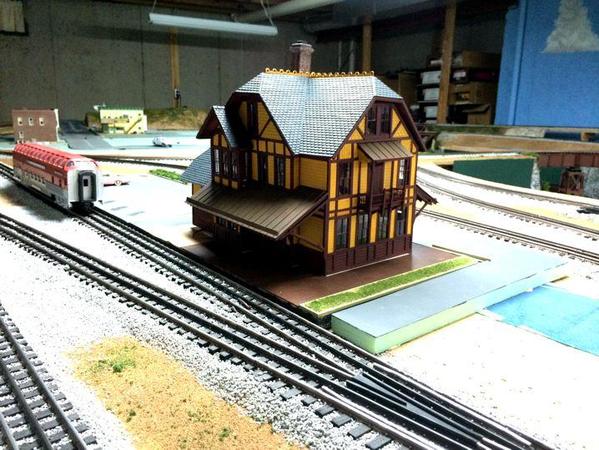
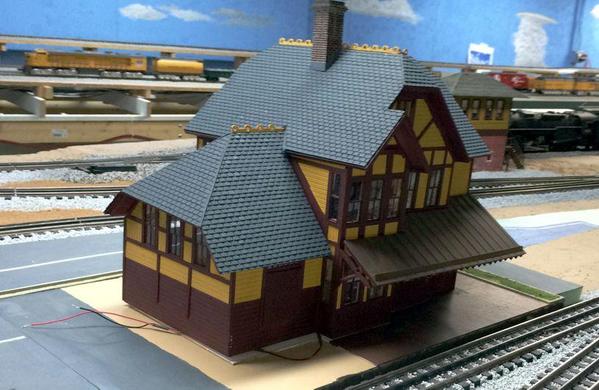
 

Progress Shot 4

Progress Shot 1


We're getting really close now. Tomorrow I'll put on the loading dock, do some weathering, add some exterior accessories (and two downspouts) and folks, and mount it to its base plate and drop it onto the layout. At that point I'm going to start wiring up some DC to get this building illuminated.

Attachments

Images (10)
  • Shed Installation 5
  • Shed Installation 4
  • Shed Installation 3
  • Shed Installation 2
  • Shed Installation 6
  • Window Whoops 2
  • Window Whoops 1
  • Roof Finishing 2
  • Progress Shot 4
  • Progress Shot 1

Trainman,

The station looks great!!  So I am not the only one who knowing parts are not symmetrical, still clues them in backwards, up side down, backwards, what have you.

It has been a great ride, following the construction of the station.  Looking forward to the absolute finished product and then moving on to one of you other thousand projects on the layout.

Thanks Guys! It's always been my philosophy to include the good, bad and very ugly. I'm learning as I go.


My lessons learned so far are:

  1. Use SketchUp to build a three dimensional drawing of the actual project and then use the actual roof areas to make the roof patterns. I'm doing this for the plan of the current house we live in.
  2. Build said roofs directly on the building to assure they're aligned. Hip roofs in general are more complicated to build and layout.
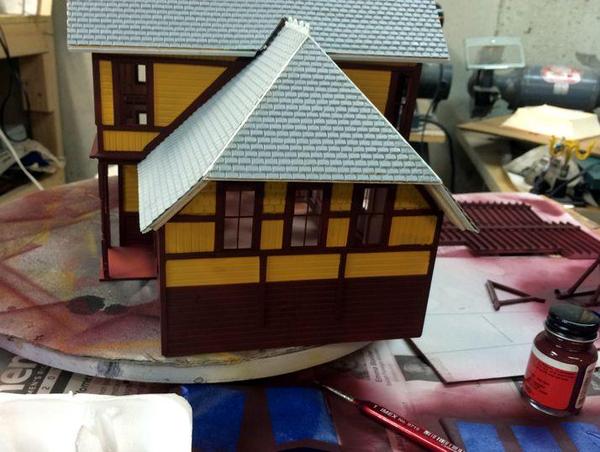
  3. Build the full wall thickness as part of the wall building process. This would really help to make nice looking interior window-well profiles which this building does not have.
  4. Work out track clearances during the design phase. I almost had a heart attack today before I actually placed the model on the layout, that the shed roof overhangs would be hit by trains. They were not, but that was not due to design, it was due to dumb luck.
  5. Don't put on a base plate AND then add a base plate on the mounting board. This double base plate is an added complication I didn't need. Having a base plate on the building made laying in the interior easier and stabilized the structure.
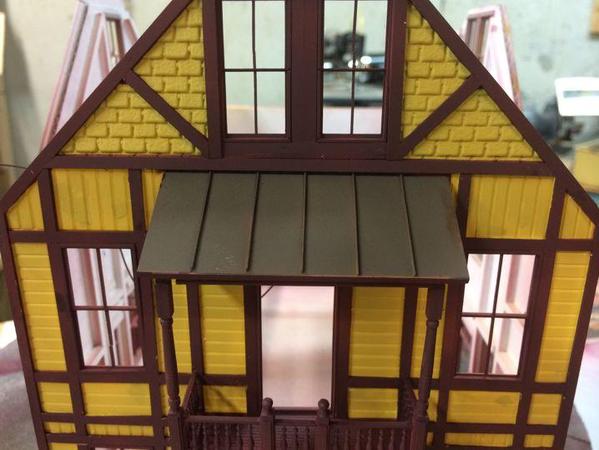
  6. Use copper foil tape for internal lighting wires.
  7. I'm sure I'll come up with a #7.


Add Reply

Post

OGR Publishing, Inc., 1310 Eastside Centre Ct, Suite 6, Mountain Home, AR 72653
800-980-OGRR (6477)
www.ogaugerr.com

×
×
×
×
Link copied to your clipboard.
×
×