Can anyone give any advice on how to lay cork roadbed? I have tried but it is more of a headache than anything. Any advice would be greatly appreciated. Thanks
Bruce
Original Post


|
|
Replies sorted oldest to newest
I lay it and pin it in place, then run a bead of white glue along the outside edge. The glue dries clear and disappears. Also, you can peel it up if necessary if you just glue the outer edge. Finally, don't match up the seams, stagger them for best results.
I just put in under the track and screw the track down. It has held for years this way.
Howard
I've tried different ways of laying it, but have come to the conclusion that, for me, the easiest method is track first, then roadbed under it, as woogie mentioned. I recently put in a short siding and was pleased and amazed at how quick and easy it was that way.
I use double stick carpet tape, found at Home Depot and Lowe's. Draw my contour lines and place the tape on the cork first then just press in place. Ease to take up as well, if you desire..and I agree with Gunner stager the joints...
I've done it the way woogie does it for two three layouts and it hold for years. Don
I just put in under the track and screw the track down. It has held for years this way.
Howard
I find it tends to come out on the corners if you don't have something keeping it in place, especially the butt ends.
bag09 I used 1/2 inch tacks that I held with needle nose pliers and drove in with A small hammer. My first layout was up for 7 or 8 years and nothing ever moved. Choo Choo Kenny
I use screws long enough to go through both the track & the cork and a good ways into the table.
At the TMB club we just completed laying a few thousand feet of cork road bed and track. As our curves are all custom radii we create the sub-roadbed using special protractors to scribe the center lines of our curves. Once in place, lay the cork lining the inside edge with the scribed line and staple in place. The benefit here is that the center line of the cork lines up with the center rail of the track.
Steve
Instead of a cork roadbed, I put an entire sheet of cork on the platform. Since I have traditional 0 gauge and 027 tubular track for 2/3's of my layout, I really don't care about a raised road bed. I get two benefits from this: First, the train noise is significantly reduced. Two, I can use small nails, brads, and staples to affix lights, signs, billboards, and other accessories without drilling or using glues. This way, I can change things quite easily as the cork will repair itself once the pins are removed. As for tracks, I use small screws that will not penetrate below the cork that are also cushioned against the track with a small amount of flexible caulk. This seems to hold the track down quite nicely without penetrating into the platform to create vibration and noise.
With the cork, I can cut green felt and pin it down where I want grass, cutting around the track about an inch from the outer rails. Some double-faced tape can be laid in that gap to which some fish aquarium stones are placed and then glued with a mixture of white glue, water, and a drop or two of dishwashing liquid. I realize that the stones are larger than scale. But when running traditional toy trains with accessories that are not truly scale to begin with, it really doesn't matter to me that much, especially with tubular track. The illusion is still there.
I'm just in the process of doing this on my new layout. My base is 1/2" QuietBoard over 3/8" plywood (the QB is painted earth brown). I am laying Midwest cork roadbed down by pushing 1/2" 19 gauge brads through it into the QB with a pair of needle nose pliers. The brads push in fairly easily and I can pull up the cork any time I want and reuse it, since it's not glued down. Works really well. BTW, I laid out my track and I'm now putting the cork under it, following the track. Works very well. With the pliers, I can reach between ties and bury the brads so they are not visible. No wetting of the cork either - I did O31 curves with no problem using the split pieces.
Tom
I lay the track out, than with a pencil I mark each side of the track. Next I remove the track in large sections and place it out of the way. Track marking can go very fast depending on the size of the layout. You than mark a dash paten ------ in the middle of the two outside lines. You than work off the dash marks with half a piece of cork at a time. I use staples to secure the cork to your wood or whatever you are using for your table top. Any staples that are not driven all the way in can be tap in lightly with a hammer. This is fast,easy. The staples are easy to remove so you can reuse the cork over and over. Even if you ballast your track the cork can be used again.
I place the track where I want it, then use a sharp pencil or marking pen and trace a mark on the table top surface under the center rail between ties, using the center rail as a ruler. I only do it every 3 or 4 ties, and it goes quickly.
Then I remove the rail and line up the inside straight edge of the cork with the trace marks I made and staple the pieces in place. I have a plug in power stapler that I bought at the local home store, which was reasonably priced. I use 3/8ths inch staples. It holds the cork in place until I lay the track on top of it. Very easily removed if you want to tweak your design. I use a light hammer on any staples that are sticking up.
Mike
First of all, my wife and I have taken down more than a dozen layouts for clients for whom we've helped dispose of their estates. The idea that used cork is recoverable is, well, ....unknown to us. Staples, nails, drips and drabs of any adhesive....it doesn't matter. More often than not, 'old age' of cork....it dries out and gets very brittle and crumbly with time. The binder in the cork...that gives the ground cork its flexibility...has volatiles that simply lose their mojo after awhile. Give a fresh box/piece of cork the nose test sometime. Then, if you have a very old piece of cork roadbed lying about, give it the nose test.
That said, we (LHS) tell our customers to put the cork down with contact cement...THIS stuff:
Here's what we say...
1. Lay out your track on the subroadbed...plywood, homosote, etc.
2. Mark the outer edges of the ties....it's faster and easier than getting under the center rail with a pencil, Sharpie, ....whatever.
3. Take the track up and mark the center line...a point between the tie edge marks. A simple piece of cardboard the width of the ties and a center mark on it makes the job go fast....and is even something the kids can get involved with!!
4. Connect the centerline dots/marks to make a continuous smooth line. THIS SHOULD BE DONE WITH A BLACK SHARPIE ON SIMILAR PEN BECAUSE IT IS CRITICAL TO LAYING THE CORK.
5. Take your cork strips and separate them along the center cut. Lay them out UPSIDE DOWN on sheets of newspaper. Lay out enough to do several feet of track at a time.
6. Get some of the Weldwood green-can contact cement linked above. It's the NON-stinky stuff. It's water-based. You can do this job in your basement/attic/...railroad room, and you don't have to put on a respirator mask! Yes, it's not as 'gippy' as the red-can, usual contact cement, but for cork roadbed it's the cat's meow!
7. Using a cheapie brush, coat the bottom of the corks strips and the sub roadbed on either side of the center line (to just beyond the tie edge marks....not necessary to be fussy about this). The dark black centerline should show through the cement coating.
8. As per the cement instructions, let it all dry until it's tacky to the touch (about 20 minutes or so) and no 'wetness' remains.
9. Pick up a half-strip of the cork and, starting at one end, lay the squared edge along the centerline, lightly pressing as you go. I say 'lightly', because if you EVER want to re-adjust your cork, NOW is the time to do it, and the green-can stuff is not so grippy at this point that you can carefully pull the strip back up to re-align it.
10. After you've laid a few half-strips on one side of the centerline, lay the half-strips on the other side, simply putting the squared edges together as you lay the second set. STAGGER THE JOINTS...as others above have instructed/suggested. This is especially important on curves.
11. And, regarding laying cork on curves.... We suggest laying the INSIDE half-strips along the centerline first. Two reasons: They will require the sharpest bending, and, once down, will simplify laying the outer half-strips against them. You may have to apply a bit more pressure initially as you lay the cork on a curve.
12. Once both sides of the cork are down....and you're happy, happy, happy so far!...follow with rolling the top of the cork with some sort of roller to ensure a good bond. You can buy laminating rollers at hardware, home improvement stores. A rubber roller artist's brayer (inking roller...Speedball brand) is what we sell and use.
13. When laying cork under switches, the easy way is to get cork sheets and cut and lay them separately. If you prefer to cut and blend the cork strips through the switch zone, first lay down the outer strips for the diverging routes. Then cut, fit, and glue filler piece(s) afterwards.
That may sound complicated, but believe me, it goes really fast once you do the first few feet.
BTW, if you insist on trying this with the regular 'red-can' contact cement, all bets are off, you're on your own, and rots-o-ruck, pal.
FWIW.
KD![]()
White or yellow glue.
I just use screws.
I have always found cork roadbed or Woodland Scenics foam roadbed to be very easy to work with. It easily follows whatever path you choose and can held in place by nails, screws, glue, spray adhesive, or whatever your favorite method might be. I also agree that reusing it is not impossible, but only if it is not too old and become hard and brittle. I wouldn't plan or reusing it, but if you are consider it a bonus.
Art
On the subject of cork roadbed, I picked up a couple of strips from a local hobby shop, only to discover it wasn't 100% cork like it used to be. It seemed to be infused with rubber, and gave off a strong rubber odor. Anyone else notice this? ![]()
I haven't noticed what you described but I wonder if it is meant to improve the flexibility of the product or just less expensive to make? I know what my first hunch is, but would like to give them the benefit of the doubt.
Art
Used to glue it down which works well. Now I just use carpet tacks to nail it down to the sub-roadbed (can get it done a lot faster with comparable results). As said above, stagger the joints, especially in cures.
Go to McMaster Carr McMaster.com and look for rolls of adhesive back cork strips. That's what I did. Worked great.
13. When laying cork under switches, the easy way is to get cork sheets and cut and lay them separately. If you prefer to cut and blend the cork strips through the switch zone, first lay down the outer strips for the diverging routes. Then cut, fit, and glue filler piece(s) afterwards.
Thank you KD. I would add that Atlas track can be temporarily screwed in place with the outside edge of a curve for example along the Sharpie center line. This makes a good backstop for the first cork piece. Remove the track and then lay the second piece.
On cork under switches, would love to see that done right in detail the way you describe. The way(s) I've been doing it are a PIA and every one seems to come out a little different.
Or all of the above! LOL ![]()
On cork under switches, would love to see that done right in detail the way you describe. The way(s) I've been doing it are a PIA and every one seems to come out a little different.
If you are referring to the blended-strips technique, it's easy to show,...but hard to put into words. (I just tried....I even started to confuse myself!) Unfortunately, I'm not currently laying cork, or I'd have my wife take some photos as I go, and, as the saying goes, the pictures would, indeed, be worth 'a thousand words'....as well as clarify the whole process.
So, in lieu of that, let me just offer a simple Band-Aid remedy for imperfections that might ease your dissatisfaction: Spray paint the cork in the switch region flat black before re-laying the switch. Yep, the switch assembly with its complexity of ties, rails, guardrails, frog, point pivot/throw-bar, etc. does a pretty good job of hiding cork gaps. But giving a quick coat of black paint to the cork surface will blend the black shadows of gaps right into everything else. Of course, if you plan to eventually ballast the track/switch, gapped cork is almost a moot point.
Blended strips, BTW, is much less expensive than the cork waste of cutting sheet cork to the profile of a switch. It's just a bit more fussy, as you may be alluding to.
Oh, another tip on filling in the area under switches with cork... If you lay a filler piece upside down so that its beveled edge mates to the beveled edge of the piece already down, it REALLY helps in eliminated gaps....BIG time.![]()
So, again, FWIW...
KD![]()
Thanks KD,
Was redoing a previous sloppy job last night and basically used that approach. The most important visual -- to me -- is how well the cork follows the outside edge track contours. After I got that right I cut a couple of additional pieces and pressed into the gaps under the track. Not perfect but once the switch is on top you would never know of course. The blended strips technique is more of a curiosity at this point. One of those things that they make look really easy in the "how to" books but not so much in practice.
S
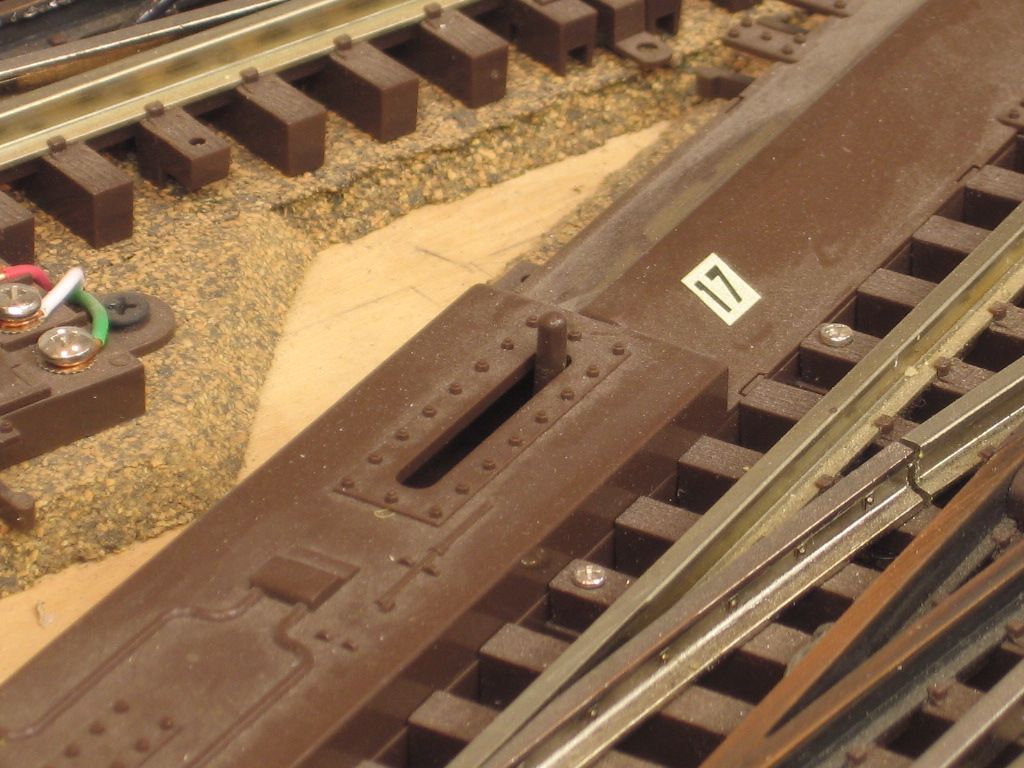
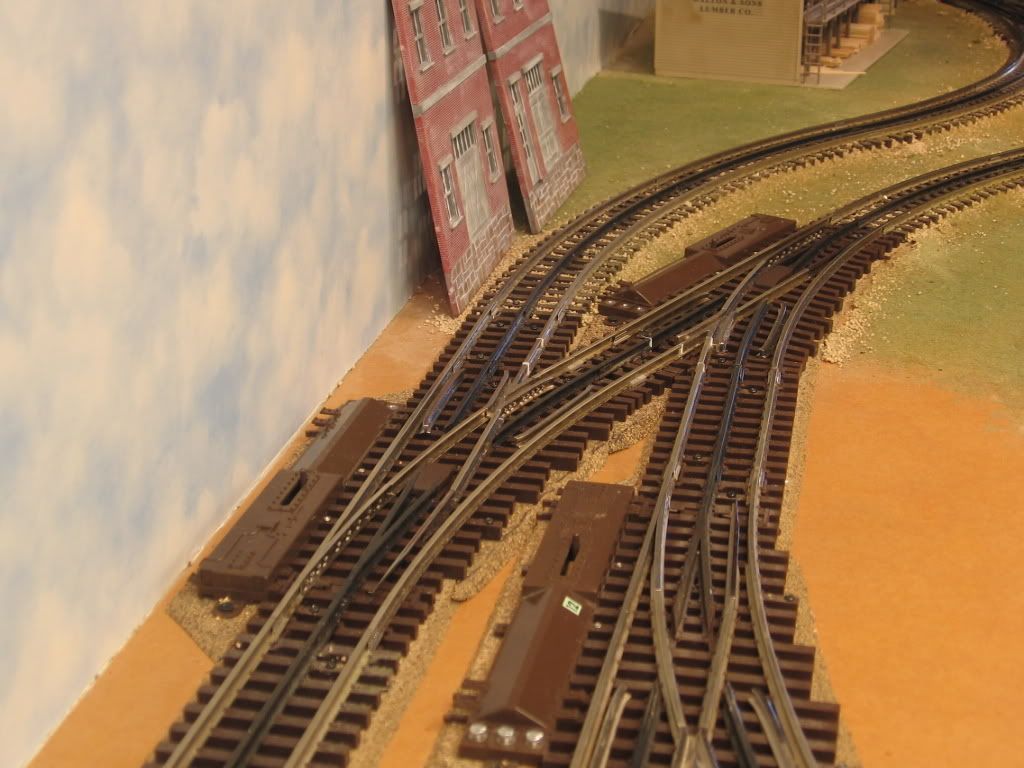
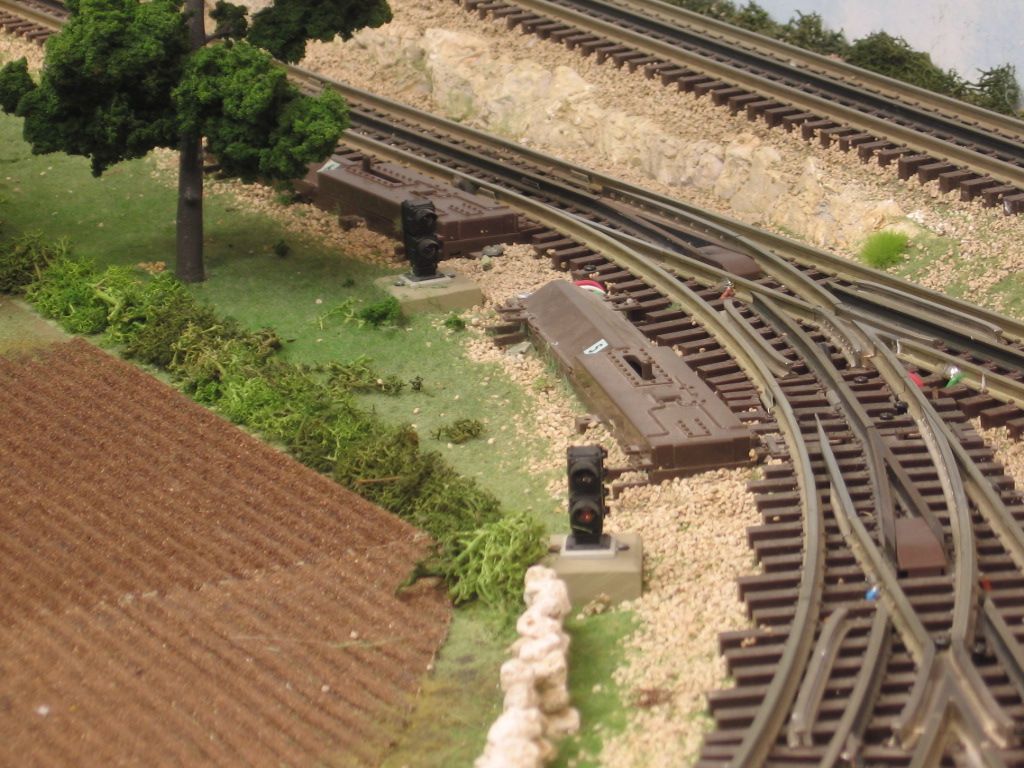
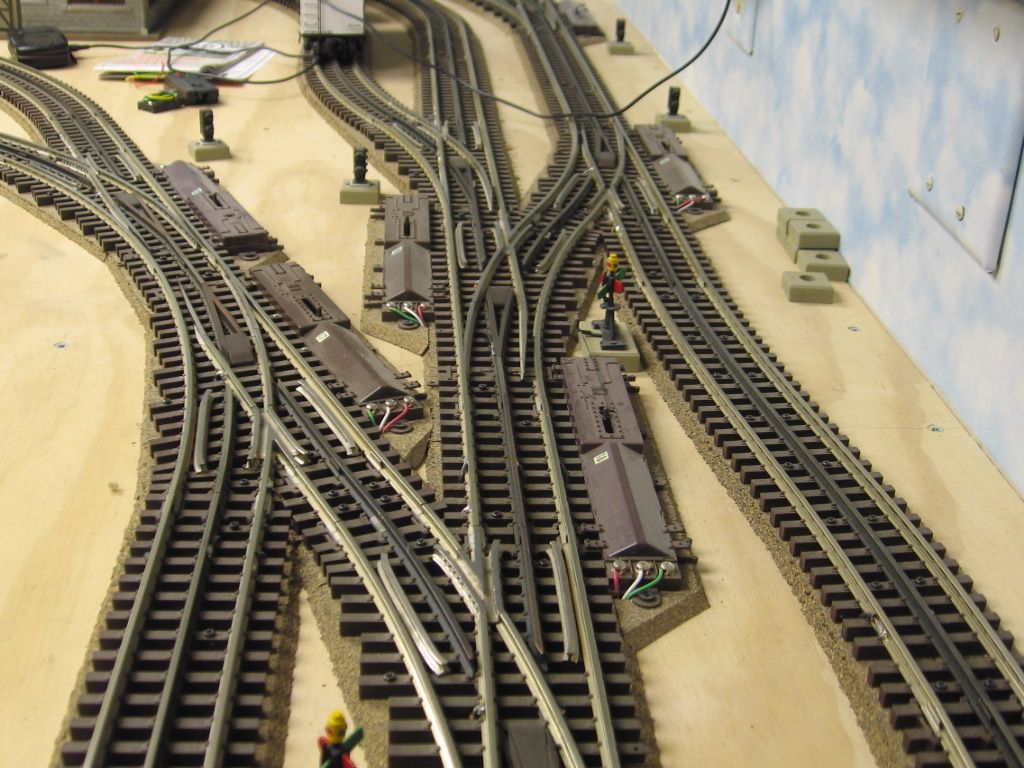 I also cut and fit pieces as needed with a utility knife and touch up the cuts with a small bench disk sander. Note the small pieces installed under the Atlas switch motors.
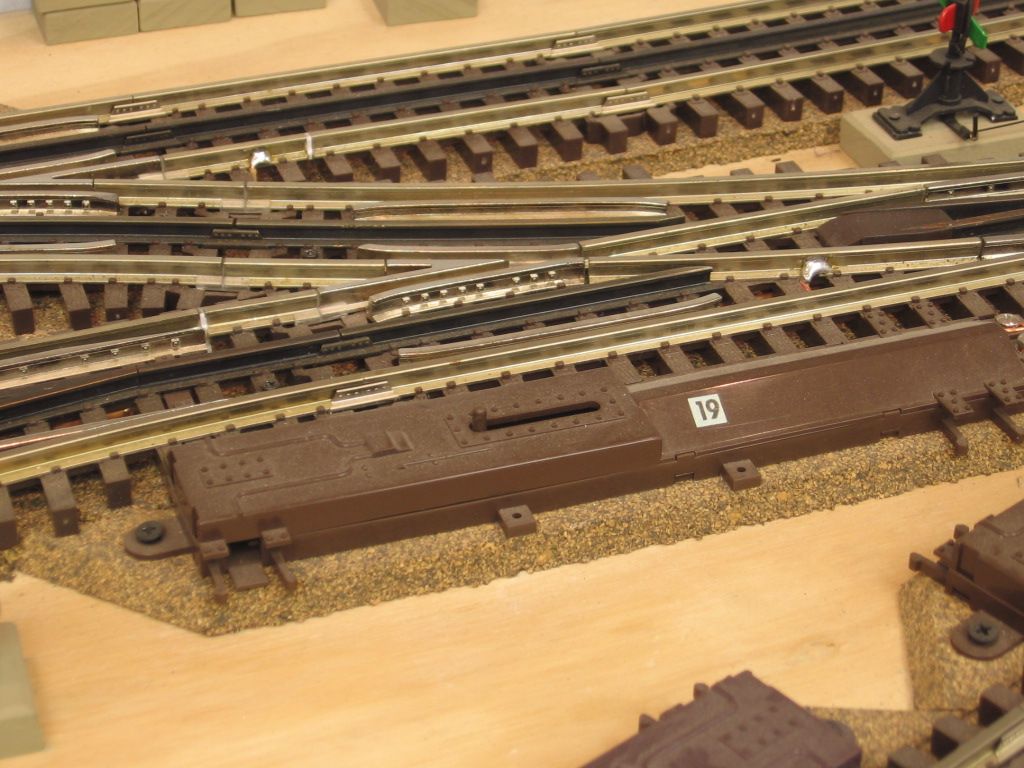
Once ballasted with a liberal application of a 50% water/white glue mix there would be little movement. IMO.
has any one used a product called easy mat for road bed,home depot sells it
Access to this requires an OGR Forum Supporting Membership
