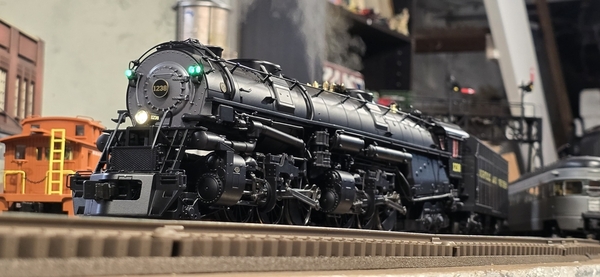
Looks like it is coming along mike
Thanks guys, a long way to go! LOL
@mike g. posted:20' X 16' train room and a 20' X 20' shop to use to build things for the layout and still work on cars and trucks!
I hope you all have a good week and find time to have fun with your trains and layouts!
Great news Mike! That’s a nice combination and size of the 2 rooms. You can guarantee I’ll be following your progress.
Gene
@mike g. posted:Morning guys I hope you are all doing well with this heat that's going on! I know it's been a while since you have seen me post on here. I have been busy with the new house!
@chris a , Chris it sure was great that your son came over to help you with the ceiling, it sure looks good and should be an easy finish for the AC lines!
I have to say you are killing the Chemical Business! It really looks perfect and is going to be amazing on your layout! Sure is nice that @luvindemtrains Dave shared the information about the Moss Green color and for you to share it with the rest of us! It sure looks perfect!
@Mayor Magoo Steve looks great! You just have to love Even Designs!
@myles, Myles the pond looks wonderful, I bet the river is going to look Outstanding! The trees look Perfect and I am with @PRR8976 Tom if you could give a little more information on your tree construction!
@Putnam Division Peter you are just nonstop when it comes to buildings! I love watching you build them and the step by step which is something I need! LOL I hope you can post an updated photo of your layout when you get this one on it!
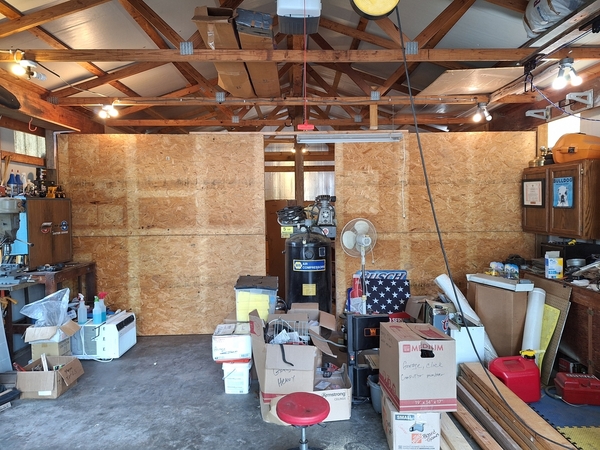
Well buys as I stated before I have been busy with the new house, but the good news is it also came with a 20' X 36' shop. I was able to take down one existing wall and move it out towards the front, so now I have a 20' X 16' train room and a 20' X 20' shop to use to build things for the layout and still work on cars and trucks!
To the left where the bench and cabinet is located with move and I will have a hidden staging yard the sneaks into the shop area, if I build it correct, I will be able to use the top for a light work bench!
At least it's a start! LOL
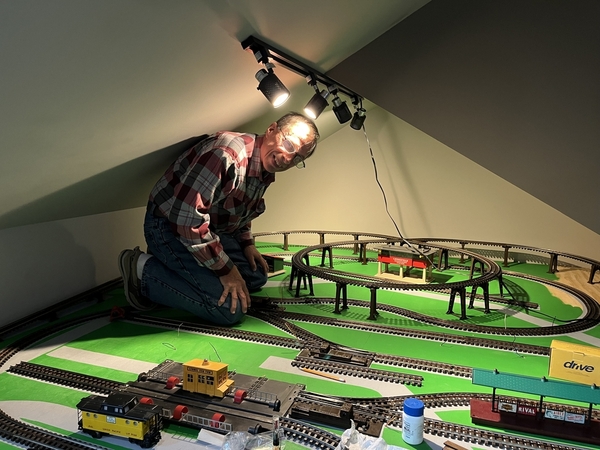
This photo below is taken from the corner where the hidden staging yard will be located!
I hope you all have a good week and find time to have fun with your trains and layouts!
That's great news Mike!
Semper Fidelis!
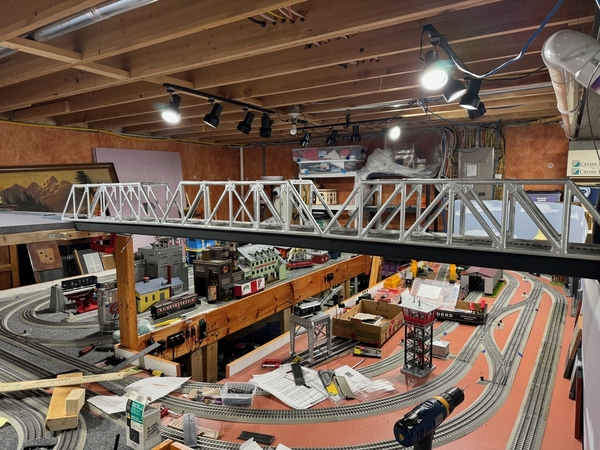
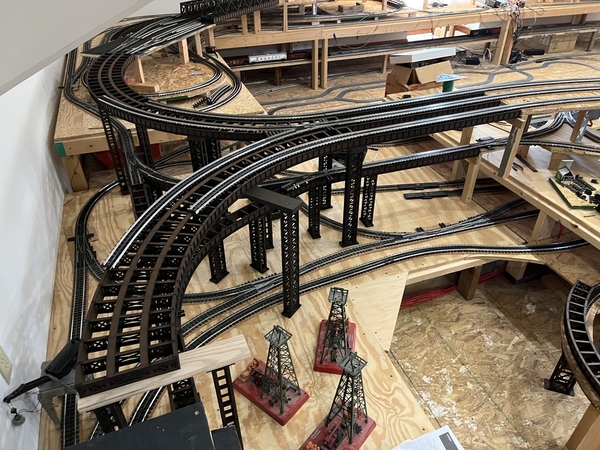
the progress on the elevated loop is going well. I forgot how long it takes to work with Erector sets. Been about two months but I’ve been learning a lot and having a lot of fun building all of this. I have two bridges to fill out the back stretch. So I’m hoping after I get bents built to hold the bridges up I’ll have S gauge trains running on the Super-O layout.
Attachments
@GojirasTrains posted:
This shot of 90 is awesome!!! Love a good low angle shot. Hope everything goes well.
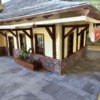
To follow up on my earlier post, here's the completed scratch built model of the Cambridge (MD) train station, ready to be incorporated into the RFC train garden:
The station is illuminated with some 28 small warm white LEDs, and each window and door is backed by an illuminated shadowbox that displays a picture taken in the prototype structure, which has been nicely renovated with touches from its railroad past. The net effect is a pretty compelling simulation of looking into the actual openings, without having to actually do all that pesky interior modelling!:
.
Attachments
Wow Steve, that looks fantastic. The level of detail, and the shadow boxes, are amazing. How long did that take? Excellent job.
Jay
@Steve Tyler posted:To follow up on my earlier post, here's the completed scratch built model of the Cambridge (MD) train station, ready to be incorporated into the RFC train garden:
The station is illuminated with some 28 small warm white LEDs, and each window and door is backed by an illuminated shadowbox that displays a picture taken in the prototype structure, which has been nicely renovated with touches from its railroad past. The net effect is a pretty compelling simulation of looking into the actual openings, without having to actually do all that pesky interior modelling!:
.
Steve- the station looks great. Love to see some still shots of the shadowboxes and some details on how you did them.
@Berkshirelover726- My fingers are soar from just looking at all that Erector stuff. I had a large set when I was a kid and fumbling will the nuts and bolts was time consuming.
@GojirasTrains Strasburg # 90 plus matching coaches....sweet!
Happy 4th!
Bob
Steve, the station looks great! Excellent idea to make the shadow boxes for interior. Even discounting that, the exterior would be enough to appeal to viewers.
@Tranquil Hollow RR posted:Wow Steve, that looks fantastic. The level of detail, and the shadow boxes, are amazing. How long did that take? Excellent job.
Thanks, Jay!
One of the fun parts of the project was trying some new materials and techniques that I'd never had occasion to dabble in before. Consequently, there was a *whole* lot of thinking and tinkering time that I could now avoid if I were to recreate the process, plus there was a lot of starting and stopping as I tried to envision the next steps and/or figure my way out of creative cul-de-sacs. Consequently, I suspect I could have logged well in excess of a hundred hours on the project, but a lot of that was in self-training overhead!
@RSJB18 posted:Steve- the station looks great. Love to see some still shots of the shadowboxes and some details on how you did them.
Thanks, Bob!
After some initial head-scratching, the shadowboxes turned out to be fairly easy to do. Envisioning time aside, the first step was to visit the prototype structure, where the new occupants (a real estate agency) were kind enough to give me full access. Once allowed inside, I just took a series of wide-angle shots (landscape orientation on my smartphone) of the interior from the POV of each window and door. Then, I roughly scaled the photos (ended up with four per sheet of letter-sized paper) and printed them on cardstock. After gluing wood coffee stirrer sections (vertically and end-on) in place inside between the windows and doors to act as stops, I trimmed and curved the cardstock photos to fit between the stops. Voila!:
The simple roughly semi-circular shape behind the window/door openings creates a fairly realistic shift of the interior view as you move from side to side. In the overhead shot above, you can also see the buck converter in the center, which will take any AC or DC low-voltage input (5-30 volts or so) and dial it back to a bit under 3 VDC for the string of 28 small warm white LEDs that illuminate both the individual shadowboxes and the exterior lanterns over the four doors.
Usually, I model with an eye to pass the potential viewers' "six foot test", but in this case I think it might even pass the "six inch test"! What do you think? ![]()
Attachments
@Mark Boyce posted:Steve, the station looks great! Excellent idea to make the shadow boxes for interior. Even discounting that, the exterior would be enough to appeal to viewers.
Thanks, Mark! It's a lot more detail than I usually shoot for, but once a project like this gets its teeth into me, it's sometimes hard to say, "Enough!" As long as the results being produced are somewhat commensurate with the effort expended, it's usually easier to just give the obsession its head . . .
Now, on to scratch-building and animating the nearby fixed trunnion bascule bridge over Cambridge Creek (the edge of the prototype train station roof is barely visible in the distance at the far right margin):
Attachments
@Steve Tyler posted:Thanks, Bob!
After some initial head-scratching, the shadowboxes turned out to be fairly easy to do. Envisioning time aside, the first step was to visit the prototype structure, where the new occupants (a real estate agency) were kind enough to give me full access. Once allowed inside, I just took a series of wide-angle shots (landscape orientation on my smartphone) of the interior from the POV of each window and door. Then, I roughly scaled the photos (ended up with four per sheet of letter-sized paper) and printed them on cardstock. After gluing wood coffee stirrer sections (vertically and end-on) in place inside between the windows and doors to act as stops, I trimmed and curved the cardstock photos to fit between the stops. Voila!:
The simple roughly semi-circular shape behind the window/door openings creates a fairly realistic shift of the interior view as you move from side to side. In the overhead shot above, you can also see the buck converter in the center, which will take any AC or DC low-voltage input (5-30 volts or so) and dial it back to a bit under 3 VDC for the string of 28 small warm white LEDs that illuminate both the individual shadowboxes and the exterior lanterns over the four doors.
Usually, I model with an eye to pass the potential viewers' "six foot test", but in this case I think it might even pass the "six inch test"! What do you think?
I'd concur on the 6" test Steve. Curling the images was a great idea.
Can't wait to see the bridge.
Bob
Steve, given the detail, and your explanation, this magnificent creation should be an article in OGR.
Jay
I agree with Bob, curving the images worked out great! Jay is right, an article is a good idea.
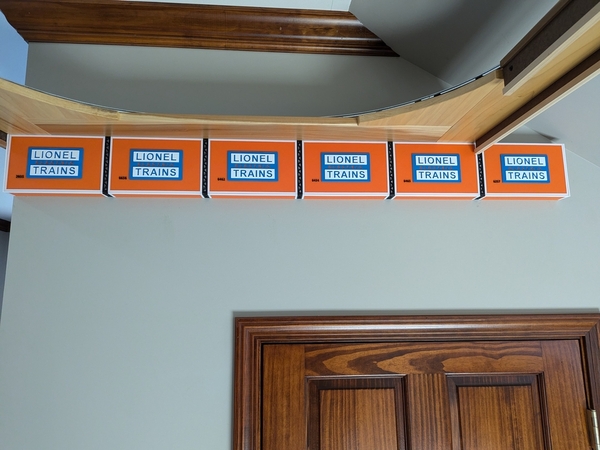
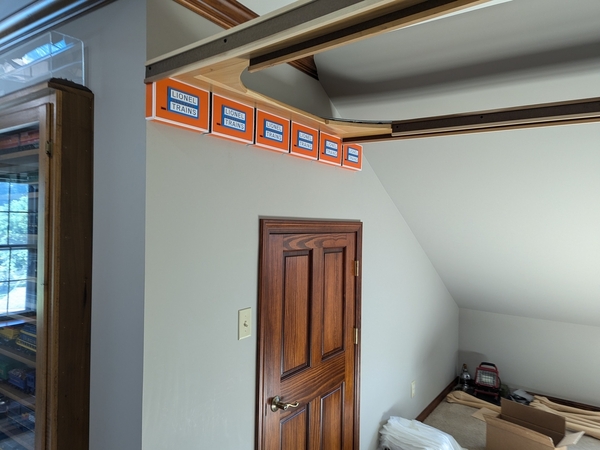
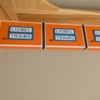
I recently posted an photo of a 3D printed Lionel box face which I planned to attach to a board that is used to hold up my overhead train on top of some of my display cases. I finally finished mounting all these to the board on the wall to hide it. As you can see this is the support for all of my display cases and for a train to run on top of my display cases.
idea-thinker
Attachments
@RSJB18 posted:I'd concur on the 6" test Steve. Curling the images was a great idea.
@Tranquil Hollow RR posted:Steve, given the detail, and your explanation, this magnificent creation should be an article in OGR.
@Mark Boyce posted:I agree with Bob, curving the images worked out great! Jay is right, an article is a good idea.
Thanks for the kind words, Bob, Jay and Mark!
Although I can't recall the specific source, I'm sure putting curved prints behind the openings was not entirely original on my part -- I suspect I just picked it up somewhere, and certainly don't want to claim undue credit. However, if you think an account of the development process for the project might spur some creativity on the part of others with their projects, I wouldn't mind writing it up for publication, but haven't a clue as to how to submit or determine if there's any interest. Any suggestions?
Contact Allan Miller and he will give you the guidance for publication. This is such a unique project it really needs to be documented for everyone to appreciate and learn.
Jay
@idea-thinker posted:I recently posted an photo of a 3D printed Lionel box face which I planned to attach to a board that is used to hold up my overhead train on top of some of my display cases. I finally finished mounting all these to the board on the wall to hide it. As you can see this is the support for all of my display cases and for a train to run on top of my display cases.
idea-thinker
Ideathinker, that is a very unique idea and perfect for the space.
Jay
Ideathinker, that is superb!
@Tranquil Hollow RR posted:Contact Allan Miller and he will give you the guidance for publication. This is such a unique project it really needs to be documented for everyone to appreciate and learn.
Jay
Agree!
Peter
@Tranquil Hollow RR posted:Contact Allan Miller and he will give you the guidance for publication. This is such a unique project it really needs to be documented for everyone to appreciate and learn.
@Putnam Division posted:Agree!
Thanks! I found Allan's member listing, but when I went to send him a PM, I got a "red signal" and was told I didn't have permission to send him a message. What am I missing? Is there an email address?
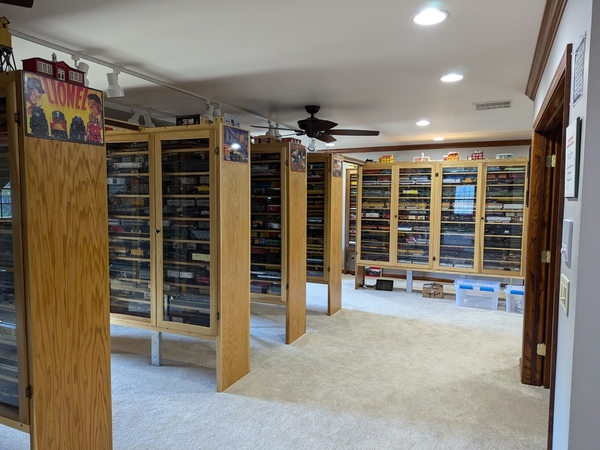
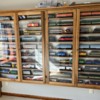
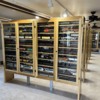
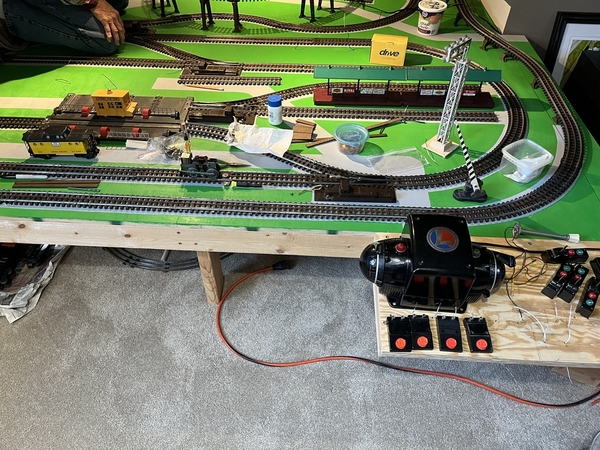
Wow, it’s so nice to see Idea-Thinkers home made shelving, he is so creative and his wife is Equally an Idea-Thinker. I’ve seen this teams work and all I can say it’s simply amazing. I love their thinking….Heres some of my pictures for your review of their workmanship…I took these pictures awhile back and the displays are completely full of beautiful Lionel Trains, Lots of them. We will be meeting with these nice folks soon. Happy Railroading Everyone 




Attachments
Hope you all saw Alan's thread post.
1250 pages and 50,000 replies. WhooHoo! ![]()
Who says model trains are a dying hobby!
@Steve Tyler posted:Thanks! I found Allan's member listing, but when I went to send him a PM, I got a "red signal" and was told I didn't have permission to send him a message. What am I missing? Is there an email address?
Steve- Email him
editor@ogaugerr.com
@RSJB18 posted:Steve- Email him
editor@ogaugerr.com
Thanks -- done! ![]()
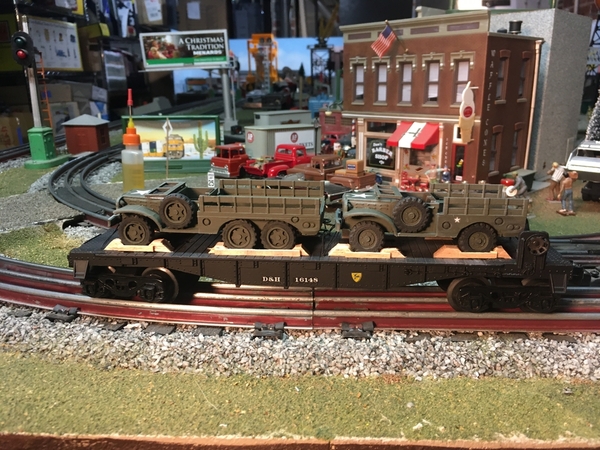
another busy day around the layout...
Attachments
@gandydancer1950 posted:another busy day around the layout...
Howard, I grew up with HO trains and only switched to O gauge 3-rail 12 years ago when I was in my mid 50s. I was interested in scale modeling and still am. Therefore, postwar, MPC, and even today's semi-scale trains and accessories weren't of interest to me. Now that I am retired and in my late '60s, I am finding I am pinching pennies to continue finishing buildings and scenery on my modest size 8'x11' layout. Besides that, I find I am breaking a lot of the great details off my highly detailed scale engines and cars. ![]()
All that to say, you are one of several modelers who have become an inspiration to me as to the realism that can be accomplished with semi-scale and less detailed scale models. Your scenery compliments them to such a degree, I don't miss the details of higher priced models. I find I may be switching gears a bit to replace detailed models with less expensive, less detailed models, and using them as is or enhancing their looks. Thank you for all the great photographs you post here and send in to be printed in the OGR magazine!! ![]()
@Mark Boyce posted:Howard, I grew up with HO trains and only switched to O gauge 3-rail 12 years ago when I was in my mid 50s. I was interested in scale modeling and still am. Therefore, postwar, MPC, and even today's semi-scale trains and accessories weren't of interest to me. Now that I am retired and in my late '60s, I am finding I am pinching pennies to continue finishing buildings and scenery on my modest size 8'x11' layout. Besides that, I find I am breaking a lot of the great details off my highly detailed scale engines and cars.
All that to say, you are one of several modelers who have become an inspiration to me as to the realism that can be accomplished with semi-scale and less detailed scale models. Your scenery compliments them to such a degree, I don't miss the details of higher priced models. I find I may be switching gears a bit to replace detailed models with less expensive, less detailed models, and using them as is or enhancing their looks. Thank you for all the great photographs you post here and send in to be printed in the OGR magazine!!
Thank you for the kind words Mark. I enjoy attempting to display common postwar trains into believable settings. For me that's the challenge that I strive for
Attachments
@mike g. posted:Thanks guys, a long way to go! LOL
Mike - it appears an OGR-team work weekend is called for here ! I'm 13 hrs away but perhaps some retired members are closer ? You buy the beer !
@trestleking posted:Mike - it appears an OGR-team work weekend is called for here ! I'm 13 hrs away but perhaps some retired members are closer ? You buy the beer !
I’m retired and 14 hours away, but thats a full day closer than I was to Mike before he moved! 😄 I would love to be close enough to help; as long as it isn’t in the brutal Midwest summer. 😎
Decided while I had the entire West End table top dismantled for the Ceiling project, I'd just address all the issues down there filling in missing "eye sores" in the back drop, covering the window blinds etc.
I hope to finish that up, then start building some custom light fixtures to house some 6 inch Halo ultra-thin LED lights for this area. Purchased a set of 6 which should be the right amount of light for the area that's basically 10 x 14 feet.
Didn't realize this lighting has gotten so flexible that you can choose between 5 light temperature settings and have almost complete dimming control as well.
My daughter decided to completely repaint the clouds on the large end wall... I way pretty happy with what she did for me the first time around, but she wasn't satisfied... It's great having an artist for a daughter, who likes to help Dad out. I am 'blessed"
Attachments
I have been working on adding a second level to my layout. Eventually most of my city buildings will go here, along with a trolley line. The trolley line will run in front of the buildings across a series of Lionel 317 bridges that were originally my dad's.
Attachments
 Just checking my track work, etc. Wasn’t happy with some crossover connections so I tweaked them for smoother passage. Then after the Train Master had sailed over all my newly laid track I found the Mohawk said “not so fast” ! The lead truck was derailing coming out of an 072 curve….more tweaks, and it’s all better now 😊.
Rich, working on the RR
Attachments
@chris a posted:
Chris,
Please tell your daughter those clouds are amazing. You are right, she has the talent.


