Hello everyone,
Thanks gentlemen I hope to be an active member very soon. ![]()


|
|
Hello everyone,
Thanks gentlemen I hope to be an active member very soon. ![]()
M. Mitchell Marmel posted:I miss my 253 consist...
And so does Norma Bates Kitteh!
Finances, alas, dictated that I had to deaccession the consist...

Mitch
I'm so sorry to read that you don't have it any more, Mitch.
ThomasT posted:Hello everyone,
Thanks gentlemen I hope to be an active member very soon.
Welcome to the party ThomasT.
Love to see what your plans are. Feel free to share a track plan, space you have, etc, etc.
Bob
Welcome to the party ThomasT.
Love to see what your plans are. Feel free to share a track plan, space you have, etc, etc.
Bob
Hello Bob,
Thank you. I do have a thread started about my Layout design and have received a lot of really good help with improving the final design. @DOUBLEDAZ has spent a bunch of time showing me various layouts and drawings with the tracks.
Guys...this is not a Ham Operator discussion thread....keep on topic! Those comments and references have been deleted....
Lionelski posted:As someone who loves doing things on the layout I love this thread. As evidenced by well over half a million views, so do a lot of others here.
That being said, dare I suggest a change? Perhaps this thread could be for things done on/to our layouts, and a spin off thread called "What have you run on your layout today?" be set up. It appears that many of the posts here, being pics of engines and rolling stock, would better fit such a spin off.
I know that I would enjoy both threads.
Hi gang,
Before this thread is closed, I'd like to again suggest the above.
Thoughts?
Lionelski posted:Lionelski posted:As someone who loves doing things on the layout I love this thread. As evidenced by well over half a million views, so do a lot of others here.
That being said, dare I suggest a change? Perhaps this thread could be for things done on/to our layouts, and a spin off thread called "What have you run on your layout today?" be set up. It appears that many of the posts here, being pics of engines and rolling stock, would better fit such a spin off.
I know that I would enjoy both threads.
Hi gang,
Before this thread is closed, I'd like to again suggest the above.
Thoughts?
@MELGAR started a thread "what trains did you run today". Makes sense to me to go there as suggested.
Personally- I'm keeping my fat fingers off the keyboard from now on unless I have something "on topic" to add.
Bye!
I enjoy this thread and have been learning a lot from it.
This morning I finished up the scenery module. Placed some fishermen around the waterfall area and put two canoes going downstream from the falls. Then I glued the supports for the roof on the building flat on. Now I just have to drill some holes along the track on the table module for telephone poles and it is ready for Sunday at Kirkland Toy and train show. And I think Bryan is still working on his so I crossed the finish lne first LOL. Pics.......Paul 2


working on the Christmas layout...

have a great day everyone !!


briansilvermustang posted:
working on the Christmas layout...
have a great day everyone !!
Very nice Brian
Paul. Great progress and looking great keep up the good work
lee drennen posted:Sorry for not posting guys I’ve been sick this week with strep throat I went back to work today maybe I can get some work on the layout this weekend. Lots of great looking progress here this week guys
hope you are feeling better Lee... get some train time in, that always helps ![]()
briansilvermustang posted:lee drennen posted:Sorry for not posting guys I’ve been sick this week with strep throat I went back to work today maybe I can get some work on the layout this weekend. Lots of great looking progress here this week guys
hope you are feeling better Lee... get some train time in, that always helps
Thanks Brian
I need to get my second half of my layout table done I just have to put the top on it and then start painting maybe I can get some pics of it soon
RSJB18 posted:Lionelski posted:Lionelski posted:As someone who loves doing things on the layout I love this thread. As evidenced by well over half a million views, so do a lot of others here.
That being said, dare I suggest a change? Perhaps this thread could be for things done on/to our layouts, and a spin off thread called "What have you run on your layout today?" be set up. It appears that many of the posts here, being pics of engines and rolling stock, would better fit such a spin off.
I know that I would enjoy both threads.
Hi gang,
Before this thread is closed, I'd like to again suggest the above.
Thoughts?
@MELGAR started a thread "what trains did you run today". Makes sense to me to go there as suggested.
Personally- I'm keeping my fat fingers off the keyboard from now on unless I have something "on topic" to add.
Bye!
Thanks for pointing out MELGAR's thread, RSJB18
What'd I do? I do a lot of low-light running on the PER and have been finding the lights in the CA-4 Crummy blinding so I set out to tone them down. First I removed the center of the three interior lights and now the cupola is [correctly!!] dark so a crew-member watching the train isn't night-blind. Then I constructed hoods (from aluminum tape-the stuff you actually use on ductwork) over the remaining two lights to decrease their brightness:

Much better. I may remove a second light leaving one to cook by.
lee drennen posted:briansilvermustang posted:lee drennen posted:Sorry for not posting guys I’ve been sick this week with strep throat I went back to work today maybe I can get some work on the layout this weekend. Lots of great looking progress here this week guys
hope you are feeling better Lee... get some train time in, that always helps
Thanks Brian
I need to get my second half of my layout table done I just have to put the top on it and then start painting maybe I can get some pics of it soon
Lee, lots of chicken soup! Feel better soonest.
geysergazer posted:What'd I do? I do a lot of low-light running on the PER and have been finding the lights in the CA-4 Crummy blinding so I set out to tone them down. First I removed the center of the three interior lights and now the cupola is [correctly!!] dark so a crew-member watching the train isn't night-blind. Then I constructed hoods (from aluminum tape-the stuff you actually use on ductwork) over the remaining two lights to decrease their brightness:
Much better. I may remove a second light leaving one to cook by.
Nice!! Do you by chance have a picture of the inside??
Woodson posted:geysergazer posted:What'd I do? I do a lot of low-light running on the PER and have been finding the lights in the CA-4 Crummy blinding so I set out to tone them down. First I removed the center of the three interior lights and now the cupola is [correctly!!] dark so a crew-member watching the train isn't night-blind. Then I constructed hoods (from aluminum tape-the stuff you actually use on ductwork) over the remaining two lights to decrease their brightness:
Much better. I may remove a second light leaving one to cook by.
Nice!! Do you by chance have a picture of the inside??
I was going to while I had it apart to show my simple lamp-hoods but got caught up in the moment and suddenly it was back together. These Lionel CA-4s are a bit pesky to take apart as the end ladders are glued to the frame and inserted into holes in the body. If I take it apart again to remove one of the remaining lights I'll get a pic.
geysergazer posted:lee drennen posted:briansilvermustang posted:lee drennen posted:Sorry for not posting guys I’ve been sick this week with strep throat I went back to work today maybe I can get some work on the layout this weekend. Lots of great looking progress here this week guys
hope you are feeling better Lee... get some train time in, that always helps
Thanks Brian
I need to get my second half of my layout table done I just have to put the top on it and then start painting maybe I can get some pics of it soon
Lee, are you talking about a second payout, an O27 setup, or are you expanding the present Pike?
Installed chain link fence around the ice depot. (Great looking scratch built stuff from a seller on the big auction site.)

I just finished my 1/43 scale Chevy 1.5 ton. I removed the Russian markings for this model only marketed in Eastern Europe (I assume because they didn't get rights from Chevrolet). Then, I did weathering with overlapping layers of dry brushing.


This model was tough to get and not cheap. But it was worth it to have on the layout.

geysergazer posted:geysergazer posted:lee drennen posted:briansilvermustang posted:lee drennen posted:Sorry for not posting guys I’ve been sick this week with strep throat I went back to work today maybe I can get some work on the layout this weekend. Lots of great looking progress here this week guys
hope you are feeling better Lee... get some train time in, that always helps
Thanks Brian
I need to get my second half of my layout table done I just have to put the top on it and then start painting maybe I can get some pics of it soon
Lee, are you talking about a second payout, an O27 setup, or are you expanding the present Pike?
I’m expanding the pike in the garage but I am tossing around the thought of a 4x8 layout in my work/old dining room that will be my O27 traditional Lionel type one. Thanks for the well wish I’ve eaten lots of soup I think I have it whipped
Ahah! Expanding the garage pike. How? Curious minds want to know. ![]()

I opened moving boxes and put my trains on proper shelving. My wife's comment "it's looks like a train store in there". ![]()
")
")
Cleaned the track for the Christmas tree loop.
Now I need to evict the current land owner from the ROW. ![]()


working at the scrapyard...


 Bob I know what you mean about land owners on the Christmas layout this guy has been evicted many times already
lee drennen posted:
Bob I know what you mean about land owners on the Christmas layout this guy has beenevicted many times already
Don't even think about it until the sun moves away.....LOL
Dan Padova posted:lee drennen posted:
Don't even think about it until the sun moves away.....LOL
![]()
![]()

Now Folks, this photo is interesting, well-done, and unusual. It's sure to get attention when you show off your lay-out.

RickO posted:Installed chain link fence around the ice depot. (Great looking scratch built stuff from a seller on the big auction site.)
Great looking scene, Rick!
John
Set up my module for our 2nd show. Added a few more items to mine but not even close to being done yet. Best news yet is even though Paul is done with his my don't drink and drive scene is getting all the attention. Paul is now pouting lol.


Finally getting started on the layout that the very talented Ken Hoganson designed for me! See this thread for details: https://ogrforum.ogaugerr.com/...railroad-layout-plan
Due to budgetary constraints I decided not to undergo any major basement finishing, and get rolling on the benchwork etc. The walls will have a simple backdrop installed to improve appearance, the floor will get a cushy, interlocking, foam tile type covering, and the studded walls around the central staircase will also be covered for a more finished look. Lighting is nice and bright with LED shop lights providing illumination. The attached photos follow the benchwork as it proceeds around the perimeter of the basement. There are no duck-unders needed as the stairs come down away from the walls. The open area in the benchwork, near pictured the door, will be home to three bridges that will lift out for access to that exterior door on the rare occasion we need to use it. The long stretch of brenchwork with the elevated line will be widened to provide more layout space as required.
The last photo shows my roadbed and track- 1/2" plywood, 1/2" homasote under the track only, with Woodland Scenics foam roadbed, Gargraves track, and Ross switches. Using only adhesive caulk to attach roadbed and track- no screws. Preliminary tests have shown this to be very quiet and stable.
I have a long way to go, but as an old friend once told me, "Just get started, do it before you get too old and can't". There was a much longer, philosophical conversation revolving around that subject, but that was sound advice to someone who tends to have "paralysis by overanalysis".
He has since passed on, but his words still inspire me. This layout is dedicated to him. Rest in peace, CSM Paul Rausch, you are missed.


Worked on some little scenery things.
My daughter opened her tree lot:

Built a cypress tree (we live among them):

Weathered a couple of my propane tanks:


Painted some fountains:

Bird bath and ducks:

And lit the fireplaces in the station:

Gearing up for the holidays. Happy Sunday everyone.
Finished the yard lights, they light up a large area like I was hoping, the top and bottom were designed and 3D printed and 3/16 hollow aluminum tubing for the pole.


Shortly after the RR Police cleared the ROW, and the MOW crew finished laying the track......
SIGH.......![]()


ricka1 posted:Finally getting started on the layout that the very talented Ken Hoganson designed for me! See this thread for details: https://ogrforum.ogaugerr.com/...railroad-layout-plan
Due to budgetary constraints I decided not to undergo any major basement finishing, and get rolling on the benchwork etc. The walls will have a simple backdrop installed to improve appearance, the floor will get a cushy, interlocking, foam tile type covering, and the studded walls around the central staircase will also be covered for a more finished look. Lighting is nice and bright with LED shop lights providing illumination. The attached photos follow the benchwork as it proceeds around the perimeter of the basement. There are no duck-unders needed as the stairs come down away from the walls. The open area in the benchwork, near pictured the door, will be home to three bridges that will lift out for access to that exterior door on the rare occasion we need to use it. The long stretch of brenchwork with the elevated line will be widened to provide more layout space as required.
The last photo shows my roadbed and track- 1/2" plywood, 1/2" homasote under the track only, with Woodland Scenics foam roadbed, Gargraves track, and Ross switches. Using only adhesive caulk to attach roadbed and track- no screws. Preliminary tests have shown this to be very quiet and stable.
I have a long way to go, but as an old friend once told me, "Just get started, do it before you get too old and can't". There was a much longer, philosophical conversation revolving around that subject, but that was sound advice to someone who tends to have "paralysis by overanalysis".
He has since passed on, but his words still inspire me. This layout is dedicated to him. Rest in peace, CSM Paul Rausch, you are missed.
Great work Ricka1, a good foundation is most important.
Looking forward to update pics as things progress
RSJB18 posted:Shortly after the RR Police cleared the ROW, and the MOW crew finished laying the track......
SIGH.......
He/she needs the caption, "This is my railroad and I own everything in it".
Today I One - changed some vehicles within my Brewtown neighborhood in Patsburg. 2 - charged the battery on my MTH Aerotrian loco. 3 - reattached the pantograph to one of my Williams scale GG1s #4876. 4. Added some shrubbery to some areas. 5 - got one of my Miller Engineering H&C Coffee signs working. 6. - Ran trains and enjoyed the time with my trains immensely!! ![]()
![]()
Here's a video I took today - Williams brass scale Camelback ( with MTH work caboose containing a digital air whistle - replicating those PW Lionel whistles ) pulling a 17 car freight, and MTH Ma&Pa SW 1 with short freight.

RSJB18 posted:Shortly after the RR Police cleared the ROW, and the MOW crew finished laying the track......
SIGH.......
Bob;
I think you need to post the right-of-way. Might I suggest...


I let my cat into the train room one time...

Dan Padova posted:RSJB18 posted:Shortly after the RR Police cleared the ROW, and the MOW crew finished laying the track......
SIGH.......
He/she needs the caption, "This is my railroad and I own everything in it".
Correction- This is my HOUSE and I own everything in it. ![]()
She did move long enough for me to get the trains on the rails. The PE Berk and cars along with my PRR A-5 shifter at the lead on the Yuengling Holiday Train.
Set up my new MTH Z-1000 too. BIG improvement over my Lionel CW-80.
I'll post some photos asap.
Bob
Still chipping away! Had a little time today to construct a prototype trash dumpster for the scrap yard. I plan to add a couple more. Made it out of .010 x 4 x 10” brass stock. Also completed the access road to the scrapyard area. Still need to add signage to the yard officer trailer in order to discourage potential renters and vacationers.
RickA1: Like your bench work, great start and look forward to viewing your progress!
Lee-P51: As always, I am so impressed with your attention to historical detail.
RICKO: I would like to know more about your chain link fence. Kit or scratch built - source? I may want to add some fencing.
All others: Keep on posting - always fun to follow!
Cheers to all, Dave


RSJB18 posted:Dan Padova posted:RSJB18 posted:Shortly after the RR Police cleared the ROW, and the MOW crew finished laying the track......
SIGH.......
He/she needs the caption, "This is my railroad and I own everything in it".
Correction- This is my HOUSE and I own everything in it.
She did move long enough for me to get the trains on the rails. The PE Berk and cars along with my PRR A-5 shifter at the lead on the Yuengling Holiday Train.
Set up my new MTH Z-1000 too. BIG improvement over my Lionel CW-80.
I'll post some photos asap.
Bob
Yes, that's the quote I was quoting. We were in the flower shop at Peddler's Village and there was a wooden sign with those words painted on it. Being cat people we got a big kick out of it.
Lou1985 posted:Got the windows installed in the engine house along with wiring up 20 3mm warm white LEDs to run on 12v AC for lighting. Almost done. Need to finish the roof, add some doors, and some touch up here and there and it can go on the layout.
Wow Lou, that looks fantastic, great job!
john
Lou
I agree looks awesome


RSJB18 posted:Shortly after the RR Police cleared the ROW, and the MOW crew finished laying the track......
SIGH.......
More like the MEOW crew! ![]()
 On the Christmas Layout I’ve set up Patrol where the hobo has been seen Trespassing on RR property so far do good
lee drennen posted:
On the Christmas Layout I’ve set up Patrol where the hobo has been seen Trespassing on RR property so far do good
Despite the many treasures I have located in yard sales, open-air markets, etc., I cannot find an antique police car anywhere.
Bryan in Ohio posted:Set up my module for our 2nd show. Added a few more items to mine but not even close to being done yet. Best news yet is even though Paul is done with his my don't drink and drive scene is getting all the attention. Paul is now pouting lol.
Bryan, that is well done and an attention grabber for sure! Quite a contrast to Paul’s serene scenic module!
Lionelski posted:ricka1 posted:Finally getting started on the layout that the very talented Ken Hoganson designed for me! See this thread for details: https://ogrforum.ogaugerr.com/...railroad-layout-plan
Due to budgetary constraints I decided not to undergo any major basement finishing, and get rolling on the benchwork etc. The walls will have a simple backdrop installed to improve appearance, the floor will get a cushy, interlocking, foam tile type covering, and the studded walls around the central staircase will also be covered for a more finished look. Lighting is nice and bright with LED shop lights providing illumination. The attached photos follow the benchwork as it proceeds around the perimeter of the basement. There are no duck-unders needed as the stairs come down away from the walls. The open area in the benchwork, near pictured the door, will be home to three bridges that will lift out for access to that exterior door on the rare occasion we need to use it. The long stretch of brenchwork with the elevated line will be widened to provide more layout space as required.
The last photo shows my roadbed and track- 1/2" plywood, 1/2" homasote under the track only, with Woodland Scenics foam roadbed, Gargraves track, and Ross switches. Using only adhesive caulk to attach roadbed and track- no screws. Preliminary tests have shown this to be very quiet and stable.
I have a long way to go, but as an old friend once told me, "Just get started, do it before you get too old and can't". There was a much longer, philosophical conversation revolving around that subject, but that was sound advice to someone who tends to have "paralysis by overanalysis".
He has since passed on, but his words still inspire me. This layout is dedicated to him. Rest in peace, CSM Paul Rausch, you are missed.
Great work Ricka1, a good foundation is most important.
Looking forward to update pics as things progress
Rick, I second that! The plan looks great! I am with you, I wouldn’t have funds to finish the room beyond what you have and plan to do! I’ll look forward to seeing the progress


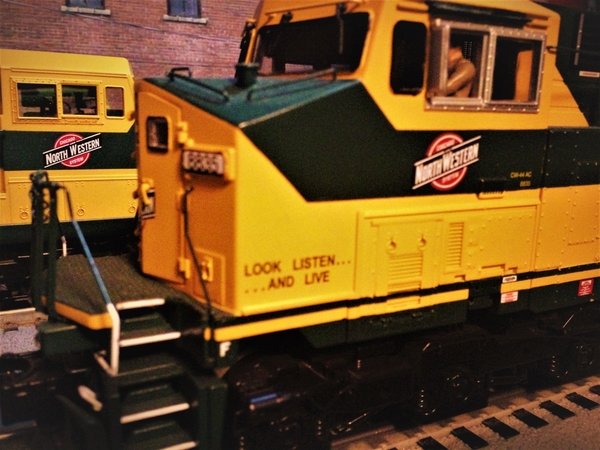


BAR GP7 #63 posted:
What a nice potato hauler!
decoynh posted:BAR GP7 #63 posted:
What a nice potato hauler!
Matt. I agree. 🥔 🤝
Johan
I spent a pleasant one hour assembling this $1 card stock building for my Disney Christmas display.
Me been busy taking happy snaps!
Decided to make it an "Under The Hood". ![]()
https://ogrforum.ogaugerr.com/...trolley-size-comparo
Mitch
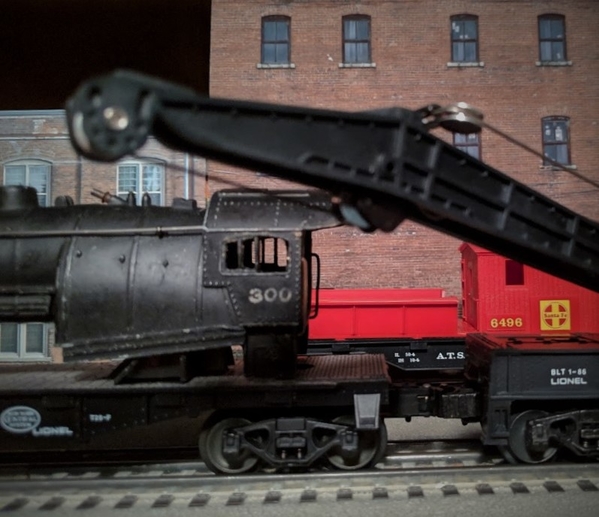
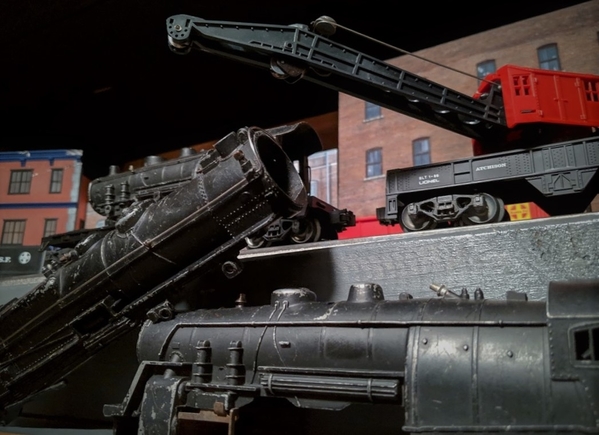
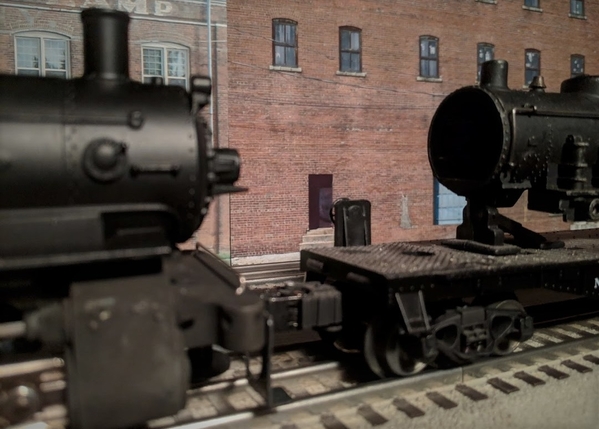
Great work everyone! Maybe one day I will get back to the train room, I have my track in and plan for my new crane/scrap yard!
Mike, ![]()
![]()
Today I rewired the second level and finished up by painting the wire sky blue.

Laid-down some newsprint and prepared the paint.

Let the painting begin.

Mission accomplished.
🎄 Gary 🎅🏻


mike g. posted:Great work everyone! Maybe one day I will get back to the train room, I have my track in and plan for my new crane/scrap yard!
I agree, Mike. Great work, and hopefully I can get back at it. I did find the Christmas backdrop and snow blanket! 👍🏻👍🏻

cleaned some track...


and ran some trains...


Great pictures Brian.

The last couple of days I have kitbashed pieces of an engine house I got about 20 years ago, to make a Yankee Stadium entrance.
About 1 month ago, Leroof visited me and taught me the basics for using a Dremel tool my son gave me for Christmas 2 years ago. I got a lot of practice using that Dremel tool to make this Yankee Stadium entrance:


I used the Dremel tool to shape plastic parts from the kitbashed engine house and cardboard, painted them, and glued them together.
This is a work in progress. I believe my Yankee Stadium entrance will improve over time. Such projects require patience and careful attention to details.
After several hours using the Dremel tool, I am a lot more confident working with it. IMO, it very helpful in making model railroad structures. Arnold
that is COOL Arnold !! looks GREAT ![]()
It is looking good thus far, Arnold!! Congratulations on getting uses to the Dremel. Being a National League fan, I am not that familiar with the Yankee Stadium entrance, but I know you will work it out. The Longines clock reminds me of seeing the one at Forbes Field!! In fact the name Longines is synonymous to Forbes Field to me. Maybe you have similar thoughts of Yankee Stadium!
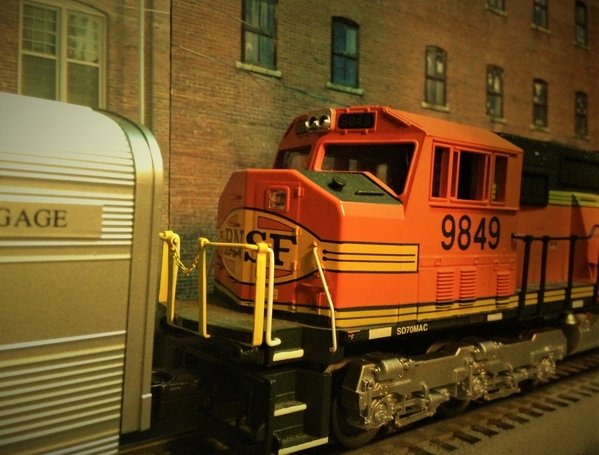
I should of taken a few pics but I forgot to show Bryan I take stuff out of the box. Today I had a chance to run the BNSF engine from the tank car set just released. Turning it on and running it blew my mind. Nice running and sounding engine. So out of the four mainlines in the attic I now have three newer Lionel engines running. The Lionel Legacy Niagara, the CP 4 unit Fa's and the BNSF. .........Paul 2
Installing Legacy (which I've had sitting in the box since 2015) in combination with TMCC
while printing new couplers for B&M F Units
Looks great! Nice work Arnold! Glad your dremmel is getting the workout!
leroof.
sidehack posted:Installing Legacy (which I've had sitting in the box since 2015) in combination with TMCC
while printing new couplers for B&M F Units
Your on my timeline Ray. I like your couplers can you show installed photos please.


put more shelves up on the shelves to get more storage room ...


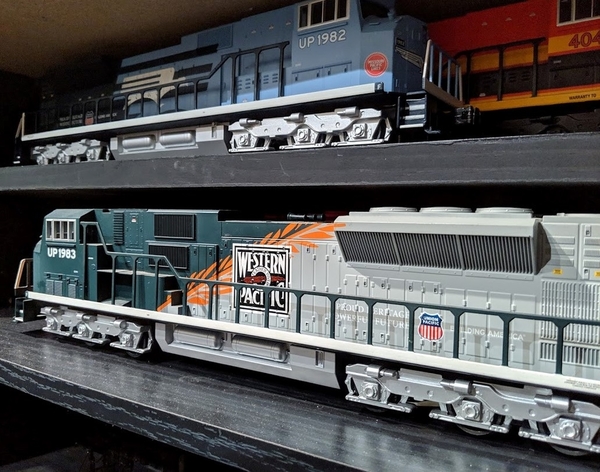
Brian, I really like the MoPac diesels especially the weathered one. Nice photos as always.
Arnold D. Cribari posted:The last couple of days I have kitbashed pieces of an engine house I got about 20 years ago, to make a Yankee Stadium entrance.
About 1 month ago, Leroof visited me and taught me the basics for using a Dremel tool my son gave me for Christmas 2 years ago. I got a lot of practice using that Dremel tool to make this Yankee Stadium entrance:
I used the Dremel tool to shape plastic parts from the kitbashed engine house and cardboard, painted them, and glued them together.
This is a work in progress. I believe my Yankee Stadium entrance will improve over time. Such projects require patience and careful attention to details.
After several hours using the Dremel tool, I am a lot more confident working with it. IMO, it very helpful in making model railroad structures. Arnold
Super work Arnold, thanks for sharing the pica.
As to use of a Dremel tool, I don't know what I'd do without mine. Trimming, track cutting, scenery work, wheel cleaning, part polishing, rust cleaning, etc, etc.
This tool and my Hot Glue gun (wireless Ryobi) are the most used on Warrenville, next to screwdrivers and paint brushes
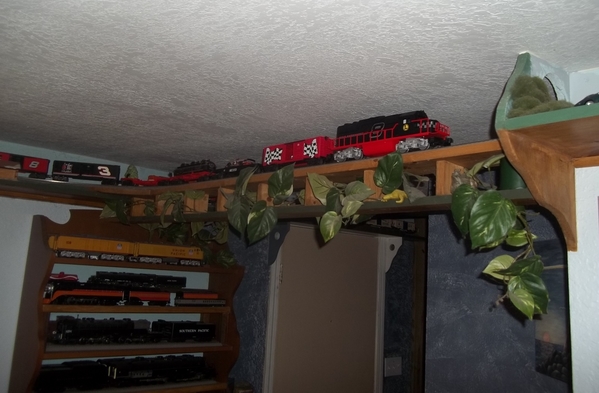
Brian, I thought you would have run out of walls to hang shelves by now. ![]()
Andy, the cars and their contents look great!

Mark Boyce posted:Brian, I thought you would have run out of walls to hang shelves by now.
if that were to happen...
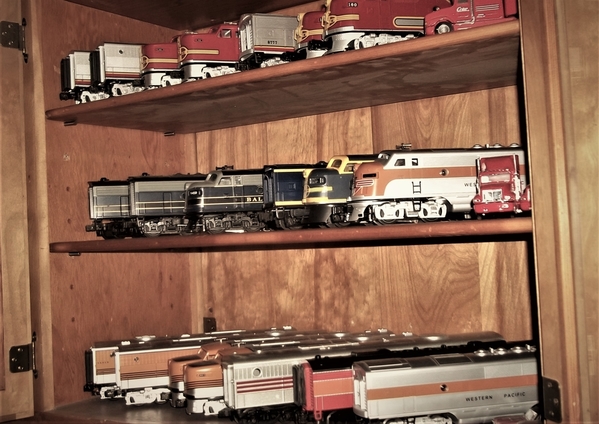
no worries, still have the kitchen cabinets and drawers to use... ![]()

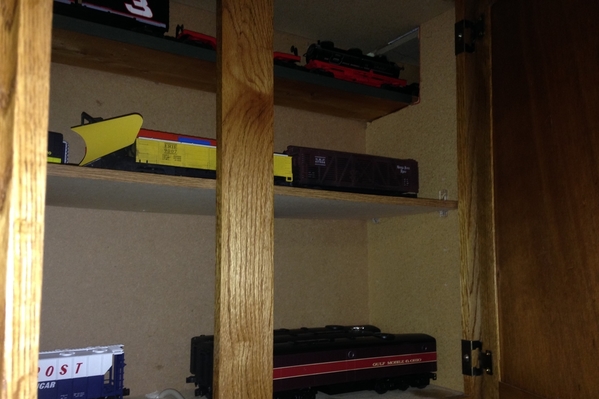
top level is part of the ceiling layout, going thru all the cabinets ...
still room for another shelf in there... ![]()


briansilvermustang posted:Mark Boyce posted:Brian, I thought you would have run out of walls to hang shelves by now.
if that were to happen...
no worries, still have the kitchen cabinets and drawers to use...
Brian,
My guess is that you are not married (LOL). If I'm correct, it would be cool to replace the cabinet doors with glass or plexiglass.
A single friend of mine has trains all over the house, so much so that the entire dining room table is covered except for a place for a single place setting.
Ski, Your friend may have a lot of trains, but it would be hard to beat what Brian has displayed! ![]()
I had mentioned missing my old 253 consist earlier, when I got an extraordinary email on Monday: "Santa", who lives in New Hampshire, offered me a set of prewar cars in need of some TLC...
The cars arrived today. One was missing a coupler, another had no light or power pickup.
I set to work, and here are the results!

The front car now sports an MPC era dummy knuckle coupler (since I no longer have any locos with latch couplers) and a third rail pickup modified from a box-coupler truck pickup...

The lamp bracket, barely visible here, consists of a screw-type base soldered to a bracket fabricated from an old Fastrack grounding strap and held down by a screw salvaged from a junked MTH bump and go trolley shell...

All three cars light up fine!

My New Haven EF-4 has been sitting in the corner of my layout gathering dust for a couple of years, now, so I figured it was past due to be dusted off and given some exercise...

Thanks to "Santa", this Christmas will be even merrier than ever!
To quote Tiny Tim, "God bless us every one!" ![]()
Mitch
Lionelski posted:briansilvermustang posted:
A single friend of mine has trains all over the house, so much so that the entire dining room table is covered except for a place for a single place setting.
That man has room for improvement!
Yes, room for improvement!
Ski, Brian shared what could be a photo album of all his trains a while back. When you thought there couldn’t be more, there were more!!
will update soon... ![]()


Designed and 3D printed couplers for the Atlas B&M F Units and dummy. All 6 of the dummy couplers dissolved like sugar cubes. Sent in a request to Atlas but haven't got a response yet so decided to make my own. Did find a factory design flaw on the adapter so added reinforcement walls each side. Seems to work fine. Now just paint and powder coat..haha
 As designed on CAD with reinforced adapter plate
 Test fit 3D printed couplers
 Long test run with heavy consist, no problems

sidehack posted:Designed and 3D printed couplers for the Atlas B&M F Units and dummy.
Test fit 3D printed couplers
very cool Ray, they look great ! I am doing the similar thing to replace couplers that I do not want to
worry about coming open on me while running trains... like long heavy passenger trains, sets of engines
that I will always keep together, & long unit trains that I will not be breaking up, switching out single cars...
I am going to make mine out of aluminum, cutting out rows of blanks in a " wire EDM ", machining, then
anodizing the couplers when done. You're couplers turned out great, very nice !!
M. Mitchell Marmel posted:I had mentioned missing my old 253 consist earlier, when I got an extraordinary email on Monday: "Santa", who lives in New Hampshire, offered me a set of prewar cars in need of some TLC...
The cars arrived today. One was missing a coupler, another had no light or power pickup.
I set to work, and here are the results!
The front car now sports an MPC era dummy knuckle coupler (since I no longer have any locos with latch couplers) and a third rail pickup modified from a box-coupler truck pickup...
The lamp bracket, barely visible here, consists of a screw-type base soldered to a bracket fabricated from an old Fastrack grounding strap and held down by a screw salvaged from a junked MTH bump and go trolley shell...
All three cars light up fine!
My New Haven EF-4 has been sitting in the corner of my layout gathering dust for a couple of years, now, so I figured it was past due to be dusted off and given some exercise...
Thanks to "Santa", this Christmas will be even merrier than ever!
To quote Tiny Tim, "God bless us every one!"
Mitch
Mitch you did a great job. I’m glad you chose an NH engine to pull them. At least for Christmas, let that stand for New Hampshire instead of New Haven. LOL
MERRY CHRISTMAS TO ALL & TO ALL A GOOD WEEKEND!


briansilvermustang posted:sidehack posted:Designed and 3D printed couplers for the Atlas B&M F Units and dummy.
Test fit 3D printed couplers
very cool Ray, they look great ! I am doing the similar thing to replace couplers that I do not want to
worry about coming open on me while running trains... like long heavy passenger trains, sets of engines
that I will always keep together, & long unit trains that I will not be breaking up, switching out single cars...
I am going to make mine out of aluminum, cutting out rows of blanks in a " wire EDM ", machining, then
anodizing the couplers when done. You're couplers turned out great, very nice !!
Brian
That sounds like a great idea, we used to have forging trimmers made from Wire EDM at one time, does a nice job
I'd like to have one of those printers that deposits metal in layers, would make life easier although a little poorer I suppose.
Ray
Access to this requires an OGR Forum Supporting Membership


