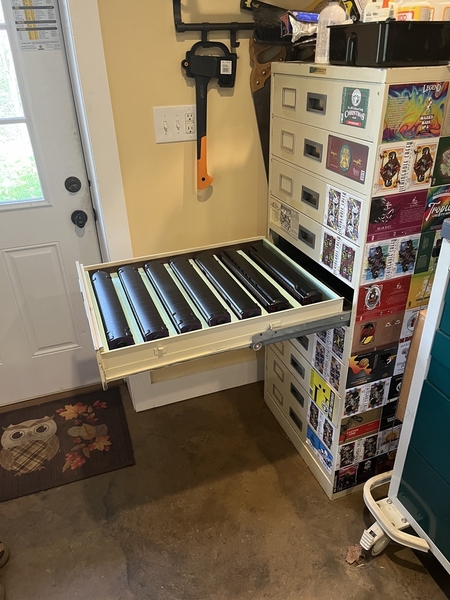
Created some passenger car storage out of an old microfiche cabinet from work. Fits 7 cars per drawer with 1/2” foam between them. Half the drawers converted so far. Nice not to have to store them in their boxes anymore.
@jstraw124 posted:
UGHHHH! Our campus library tossed about 2 dozen old cabinets last year. I would have taken a few but I don't have room for them in the basement. We had that style and vertical ones with 5 drawers with 4 shelves/ drawer. They had heavy duty glides and could handle decent weight.
Nice to know my idea would have worked.
Bob
@RSJB18 posted:UGHHHH! Our campus library tossed about 2 dozen old cabinets last year. I would have taken a few but I don't have room for them in the basement. We had that style and vertical ones with 5 drawers with 4 shelves/ drawer. They had heavy duty glides and could handle decent weight.
Nice to know my idea would have worked.
Bob
Those cabinets are really heavy. I moved this one, but decided I wouldn’t take another.
@jstraw124 posted:Those cabinets are really heavy. I moved this one, but decided I wouldn’t take another.
Yes they are. So were the hundreds of rolls of microfilm they got rid of.......
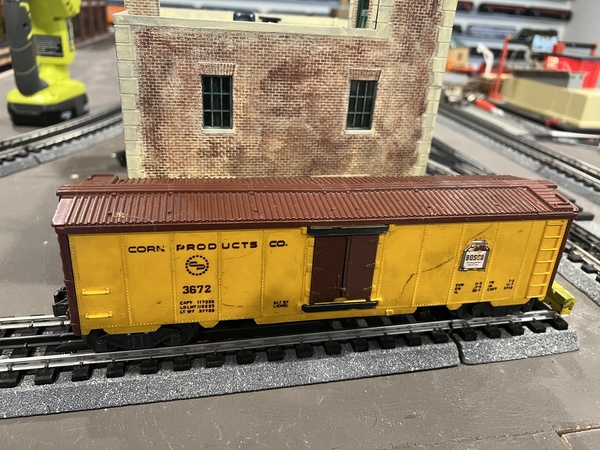
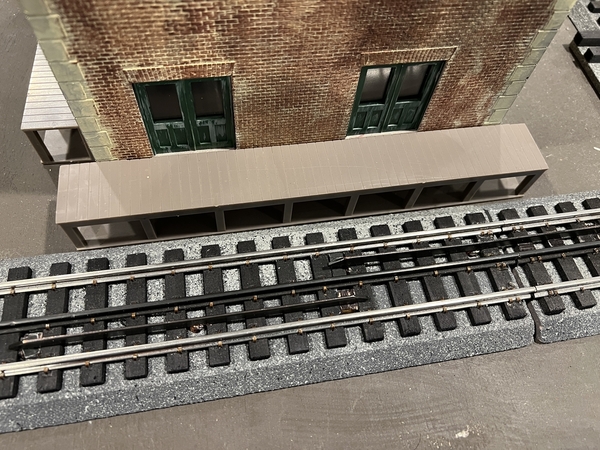
Wired up my PostWar Bosco car……..Atlas operating rails are not made for Ross track…….I improvised some places for the operating rails to be positioned.
Have a great week.
Peter
Attachments
Unfortunately just a little track work is all I've been doing when I'm up to it. Both my wife and I needed surgeries done these last two months, she needed Carpal Tunnel Release Surgery and Elbow Surgery to move a pinched nerve in mid February, and I needed Prostrate Cancer Removal Surgery in mid March, they feel they got all the Cancer out with the surgery so I wont need any chemo or radiation. We're trying to help each other cover the basics for now. We're both coming along slowly and hoping to get back to doing more fun things soon again.😊🙏
I'm hoping you both are on the upswing, Gary, and can get more than just a little track done.
Though not work on the layout directly, I work more on cleaning the Aegean Stables, aka my work area, so that once organized, Layout work can be given the highball and we can attack the layout full steam ahead.
My electrical genius friend Rick and my making a mountain out of a mole hill friend Jack were over for a productive five hours. Controllers and wiring for the RCS and sculpting the mountain side.
Jay
Attachments
@Gary P posted:Unfortunately just a little track work is all I've been doing when I'm up to it. Both my wife and I needed surgeries done these last two months, she needed Carpal Tunnel Release Surgery and Elbow Surgery to move a pinched nerve in mid February, and I needed Prostrate Cancer Removal Surgery in mid March, they feel they got all the Cancer out with the surgery so I wont need any chemo or radiation. We're trying to help each other cover the basics for now. We're both coming along slowly and hoping to get back to doing more fun things soon again.😊🙏
Wish you well Gary; do a little every day. When they knocked me down in 2017; I found solace and strength up at the layout.
🙏🙏
@Tranquil Hollow RR posted:My electrical genius friend Rick and my making a mountain out of a mole hill friend Jack were over for a productive five hours. Controllers and wiring for the RCS and sculpting the mountain side.
Jay
Rick and Jack do nice work! Isn’t it great to have good friends! 😊
@Mark Boyce posted:Rick and Jack do nice work! Isn’t it great to have good friends! 😊
Indeed I’m very fortunate. Plus I would never have the ability to wire the layout in the up to date manner in which it is being done. Plus, the mountain is more sensational than I would have created. In addition, I’m much further ahead than doing it on my own.
I just got my first mainline track running around the room. I have two more mainlines to go but at least I have one so for. I have posted a private YouTube link.
idea-thinker
@idea-thinker posted:I just got my first mainline track running around the room. I have two more mainlines to go but at least I have one so for. I have posted a private YouTube link.
idea-thinker
Excellent run! Of course I have commented on the tremendous bridges before, and am always impressed. I do have a question about your lowest track level. Looking at the doors and staircase, it appears that the lowest level is on the floor. Is that true? Nothing wrong with it if it is or isn't, I'm just wondering about the height differences between different levels. Thank you!
@idea-thinker posted:I just got my first mainline track running around the room. I have two more mainlines to go but at least I have one so for. I have posted a private YouTube link.
idea-thinker
Wow! You are building quite an empire.
Looks great.
Bob
Evening y'all,
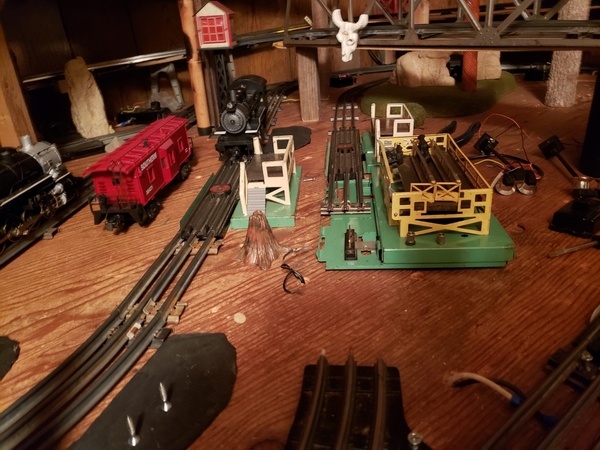
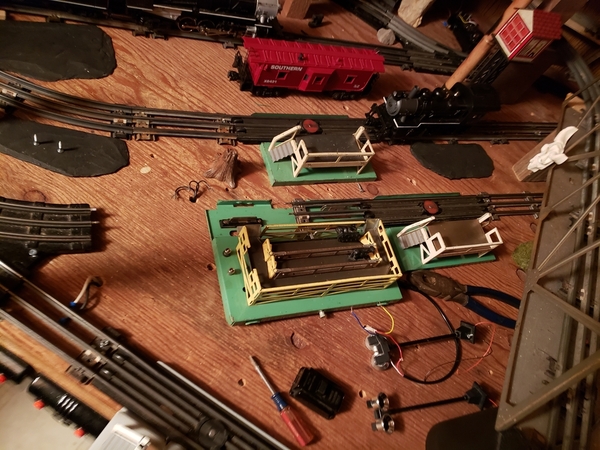
I bought a Lionel 3656 cattle car and corral recently. I've had trouble finding a good spot on my layout for the Corral. Today I decided to remove a switch and spur. Here is a good spot. Well in reach of the operators position. I'll finish installation and testing in the morning.
Bill
Attachments
@idea-thinker posted:I just got my first mainline track running around the room. I have two more mainlines to go but at least I have one so for.
idea-thinker
Aw....... come on I-T......whatever happened to the simple ole circle of track. ![]()
THIS layout so far is really wild. ![]() OK , how long has this incredible work ( play ) been going on with this layout ?
OK , how long has this incredible work ( play ) been going on with this layout ? ![]() Nice .
Nice .
@Gary P posted:Unfortunately just a little track work is all I've been doing when I'm up to it. Both my wife and I needed surgeries done these last two months, she needed Carpal Tunnel Release Surgery and Elbow Surgery to move a pinched nerve in mid February, and I needed Prostrate Cancer Removal Surgery in mid March, they feel they got all the Cancer out with the surgery so I wont need any chemo or radiation. We're trying to help each other cover the basics for now. We're both coming along slowly and hoping to get back to doing more fun things soon again.😊🙏
Best wishes for a speedy recovery to you both.
Peter
Mark- The lower level of track is on the floor and the lower level track is cut into the hardwood floor so you walk across it. The height between track is about 12 inches for each.
RSJB18 Thanks for the nice comment.
Dallas - Actually it is a loop around the room. The loop length is about 300 feet. The train takes about 3 minutes to make a loop. I have been working on it for about 5 years, we mostly work on it during the winter months only.
idea-thinker
@idea-thinker posted:I just got my first mainline track running around the room. I have two more mainlines to go but at least I have one so for. I have posted a private YouTube link.
idea-thinker
Impressive!
Peter
@idea-thinker posted:Mark- The lower level of track is on the floor and the lower level track is cut into the hardwood floor so you walk across it. The height between track is about 12 inches for each.
RSJB18 Thanks for the nice comment.
Dallas - Actually it is a loop around the room. The loop length is about 300 feet. The train takes about 3 minutes to make a loop. I have been working on it for about 5 years, we mostly work on it during the winter months only.
idea-thinker
I never noticed that the track was on the floor until this last post. I was always admiring the custom bridges in the past, I guess. Cutting the track into floor sounds like a lot o work, but a great idea so you can walk across it!!!
Test fit the main level track and made a successful run on the outer loop. Cut some plywood to install as the permanent sub roadbed. My kids and wife enjoyed the test run.
Attachments
JStewart204,
Congratulations, this is a milestone moment.
@idea-thinker posted:Mark- The lower level of track is on the floor and the lower level track is cut into the hardwood floor so you walk across it. The height between track is about 12 inches for each.
RSJB18 Thanks for the nice comment.
Dallas - Actually it is a loop around the room. The loop length is about 300 feet. The train takes about 3 minutes to make a loop. I have been working on it for about 5 years, we mostly work on it during the winter months only.
idea-thinker
I have never heard of such an endeavor; very unique. Now that’s thinking outside the box.
Jay
Here's how I spent Friday and Saturday!
https://ogrforum.ogaugerr.com/...c/184297498075524849
Thanks to @CBS072 for the writeup! ![]()
Mitch
Idea Thinker, I wanted to compliment you on such an aggressive model railroad. I had to watch your Big Boy run around several times to try an digest all you have done so far. I have a 25'x45' 3 level layout with a loop like you have of sorts. The difference is I started mine 35 years ago, I can not imagine the amount of work you have put in getting that much done in 5 years. Most impressive and such great bridges. I look forward to seeing more as time progresses. Bill
Morning guys, It have been a long time from my last visit! I have to say you all have been doing some AMAZING work!
@idea-thinker WOW what a great amount of track and design! My mind just goes numb watching your train running and the amount of track you have!
@Jstewart204 Congrats on the run around your layout, I hope to be there one day again. But its is going to be awhile!
@chris a Chris wonderful work on the building and great idea on saving the side walls for other buildings!
Well guys I and the CEO have made the big move to Missouri and are now on the hunt for a nice train room with an attached house! We are hoping to find something soon as we both have projects we want to start before winter!
I hope you all had a great weekend and fround time to have fun with your layouts and trains!![]()
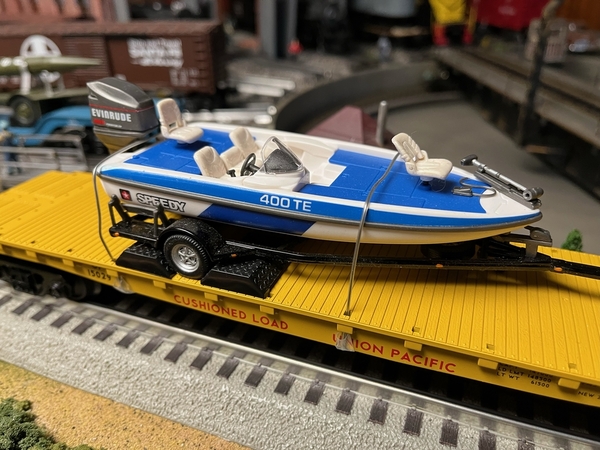
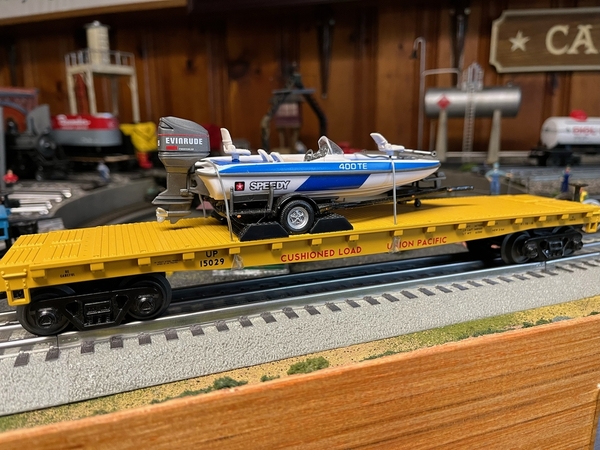
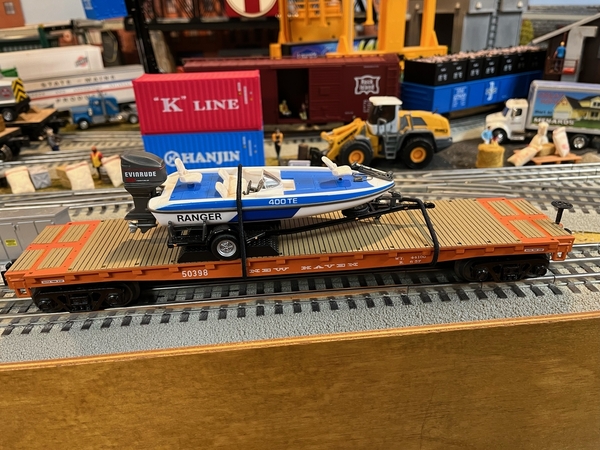
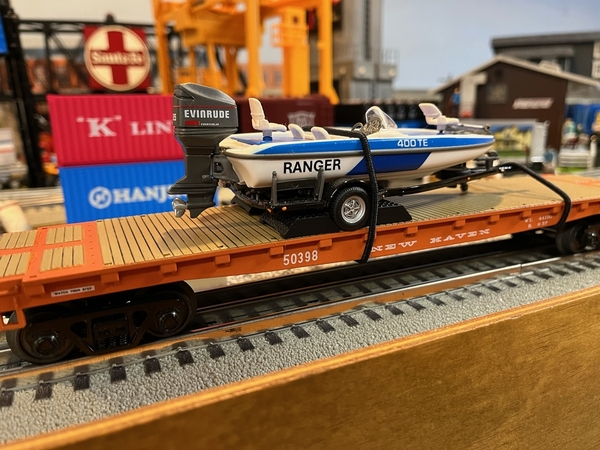
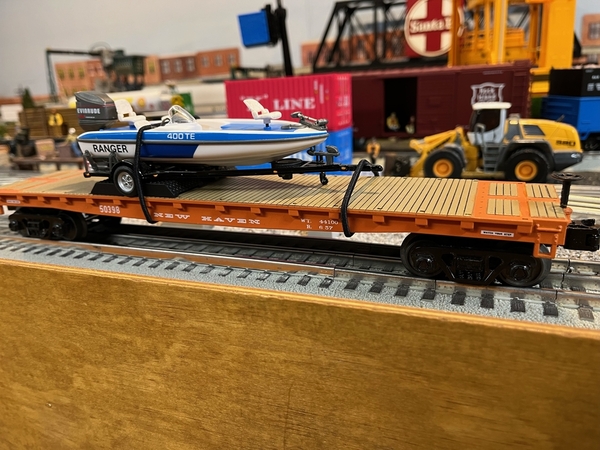
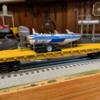
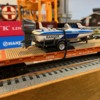
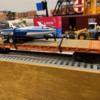
Detailed and re-painted this uncatalogued but "plain Jane" UP flat car with boat into a New Haven paint scheme. Removed the "SPEEDY" decal from the bass boat and replaced it with a more appropriate homemade water slide "RANGER" decal on a white background.
Next, I painted the wooden deck areas on the flat car in Krylon Saddle Brown paint and sealed with gloss clear and then masked those areas off in order to paint the rest of the flat car in New Haven orange. I used Krylon Gloss Popsicle Orange, which is a decent match. Applied decals from K-4, which I had left over from a previous project, using the tried and true process.
Usually, I make the lines between the wooden boards using an ultra-fine tip black Sharpie, but the spacing on these boards was too small even for that to work, so I made up a light wash of black watercolor paint and applied it. After about 10 seconds, I wiped the excess off, leaving the gaps covered and the board surfaces with a very light weathering. Final coat of Krylon Matte Clear.
The tie downs are inexpensive black, elastic hair bands from the local pharmacy. If anybody can use some "RANGER" boat decals on a white background, let me know and I'd be happy to send some out.
Attachments
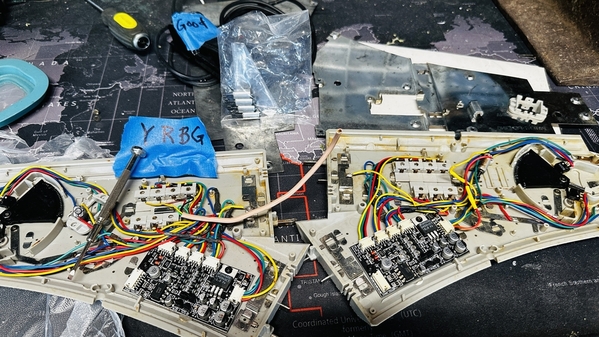
Working on Lionel Fastrack turnouts with water damage, LH and RH O36 remotes, they were submerged in rain water.
These were cleaned up 3 years ago and then "lost" along with with the replacement switch motors I ordered.
Found them yesterday and also found the perfect use for them on my "2024 or bust" layout!
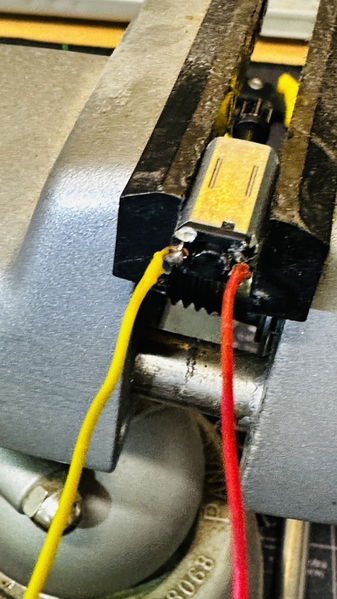
Only problem is my eyesight for soldering wire to that tiny DC motor ainʻt what it used to be...
Got it done but concerned that I overheated the motors doing it.
I tinned the wires and used a small magnifying glass, but I think a magnifying headset and a finer soldering tip are needed.
Attachments
@Kelunaboy posted:Working on Lionel Fastrack turnouts with water damage, LH and RH O36 remotes, they were submerged in rain water.
These were cleaned up 3 years ago and then "lost" along with with the replacement switch motors I ordered.
Found them yesterday and also found the perfect use for them on my "2024 or bust" layout!Only problem is my eyesight for soldering wire to that tiny DC motor ainʻt what it used to be...
Got it done but concerned that I overheated the motors doing it.
I tinned the wires and used a small magnifying glass, but I think a magnifying headset and a finer soldering tip are needed.
I have a needle point tip for my Weller gun. Makes soldering in tight spots easier.
Also a lighted magnifier work lamp on the bench.
Still amazed at how much stuff is crammed into FT switches.
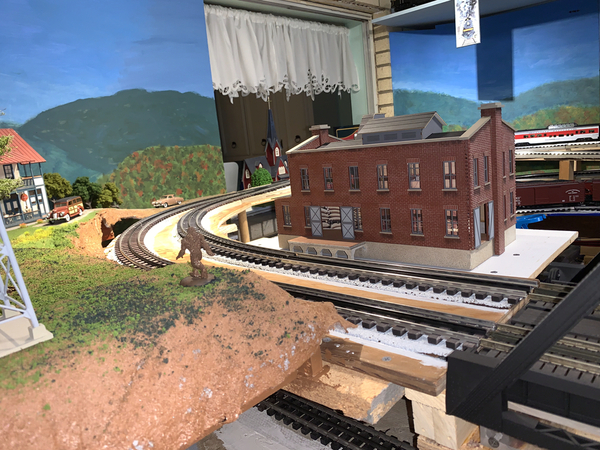
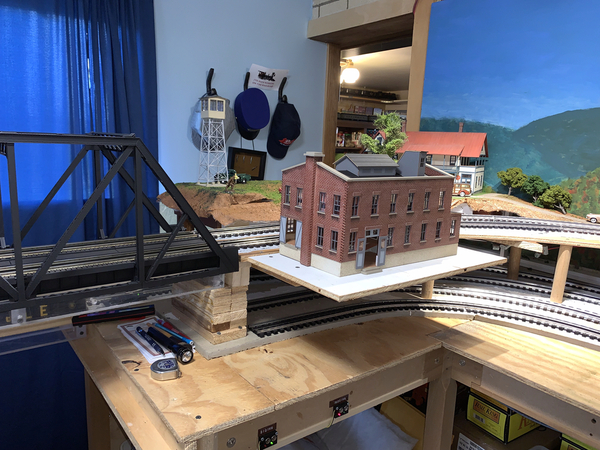
A little of this and a little of that but still working. Mostly scenery related. Buildings and dioramas pulled out to do the work. It's funny how you plan to do one thing but in order to do it you find out you have to do something else first. The goal here is to try and stop that from happening in the future. No "I'll do it later" during this sweep.
Dave
Attachments
As usual Dave it looks great. Let us know how you make out with achieving your goal; we could all use a lesson in how to prevent that.
Jay
Oh Come On Dave! I thrive on "I'll do it later"........![]()
You do make a good point though. We'd probably all accomplish a lot more if we worked more methodically and didn't rush to finish one project and leave 3 or 4 behind. ![]()
Bob
@Tranquil Hollow RR posted:As usual Dave it looks great. Let us know how you make out with achieving your goal; we could all use a lesson in how to prevent that.
Jay
Jay, I'm going in. So far, the layout is still a mess because I keep finding things to do. I'll keep you posted.
@RSJB18 posted:Oh Come On Dave! I thrive on "I'll do it later"........
You do make a good point though. We'd probably all accomplish a lot more if we worked more methodically and didn't rush to finish one project and leave 3 or 4 behind.
Bob
I know Bob. I agree with your last statement. I for whatever reason decided that I needed to move on after completing a project and procrastinated when I knew what had to be done. In some cases stepping away or waiting is necessary. The types of things I am talking about could have been done initially with a little more patience. It's just another way of thinking about things.
Dave
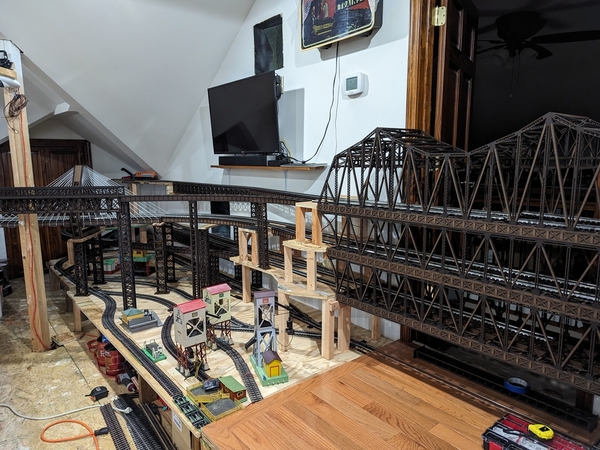
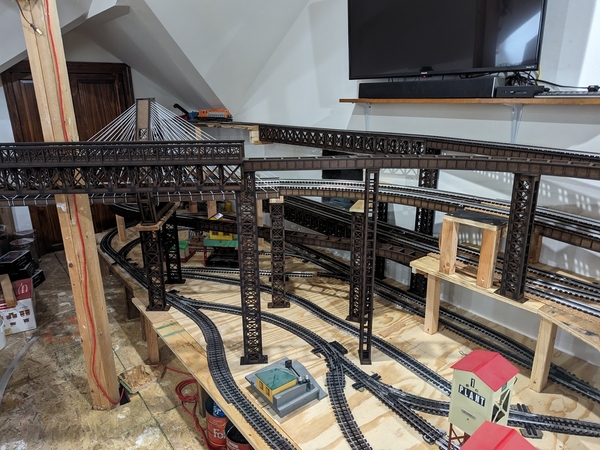
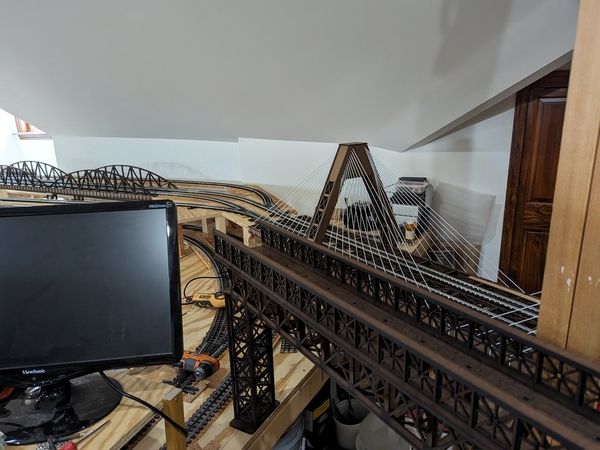
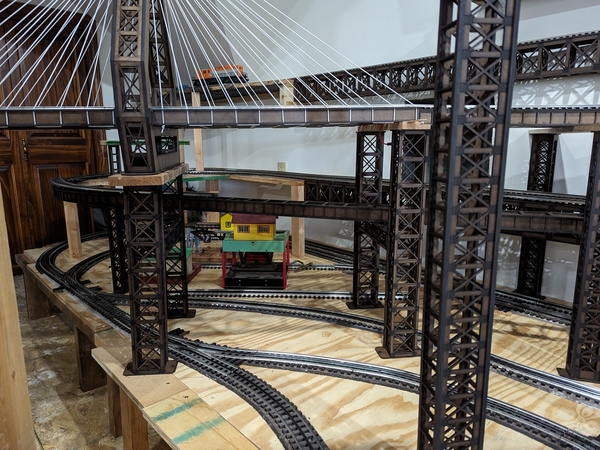
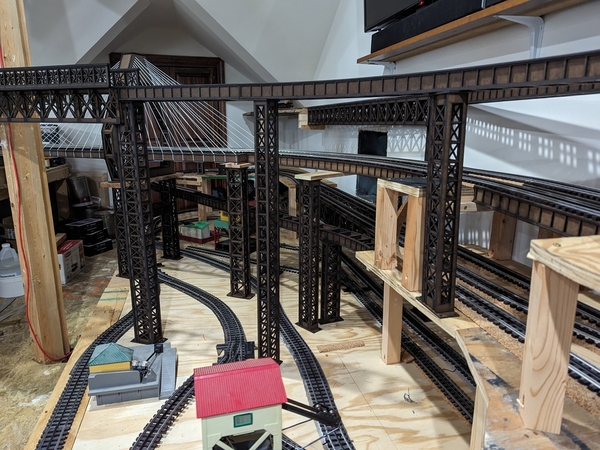
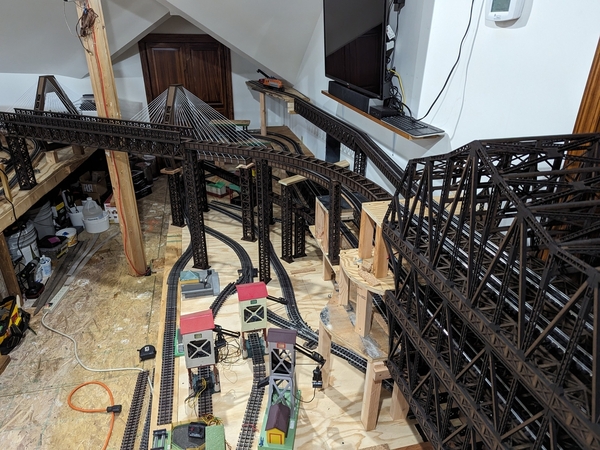
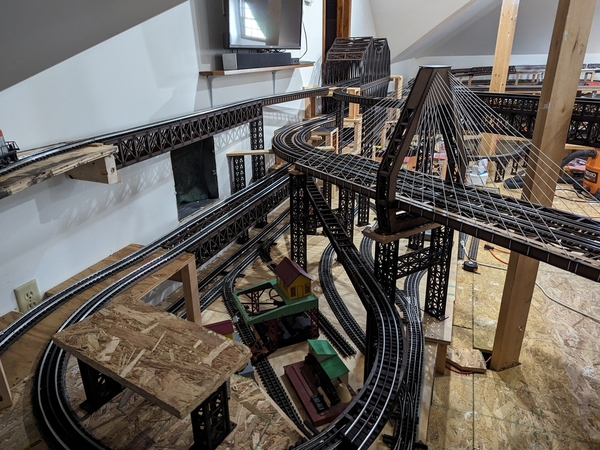
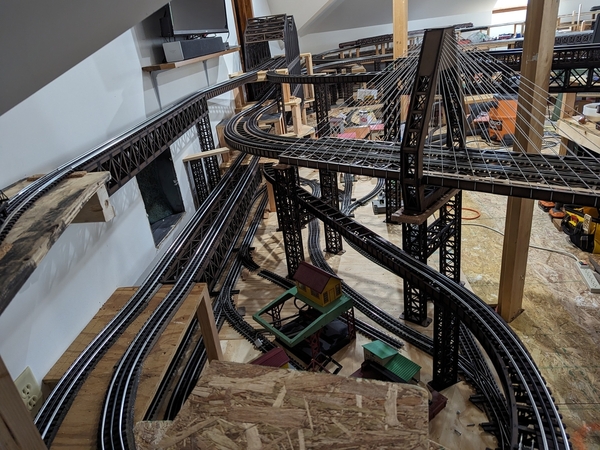
Here are photos of the next section of our layout. This is where I have grouped the American Flyer Accessories that I have into one area. Our collection is primarily Lionel but I have over time accumulated some American Flyer Accessories that are nice. All of the bridge piers support the mainline trains that run above the accessories as you can see. I still have to complete some of the tracks but most are in place. This is also the area that connects to the 3 tiered bridge that I posted some weeks ago that goes across a doorway.
idea-thinker
Attachments
Hey y'all,
We're having an all day rain. Seems like a good time to work on my new-to-me Lionel cattle car and corral. I had to make some minor adjustments. So, I present my most recent Lionel postwar accessory.
I need a second #3656 cattle car now.
Bill
Attachments
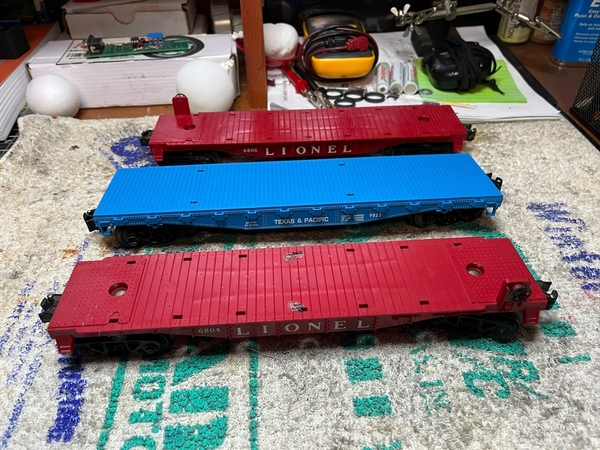
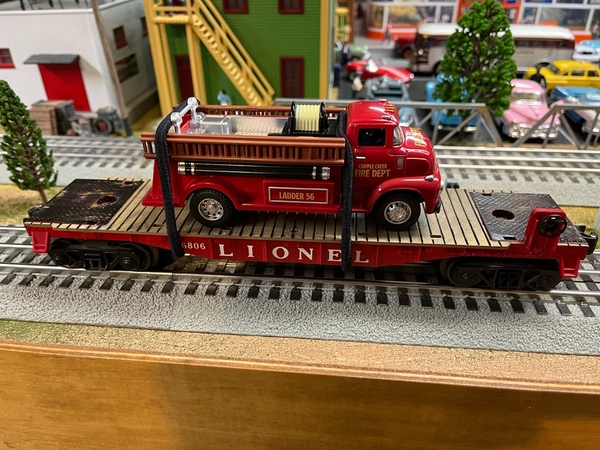
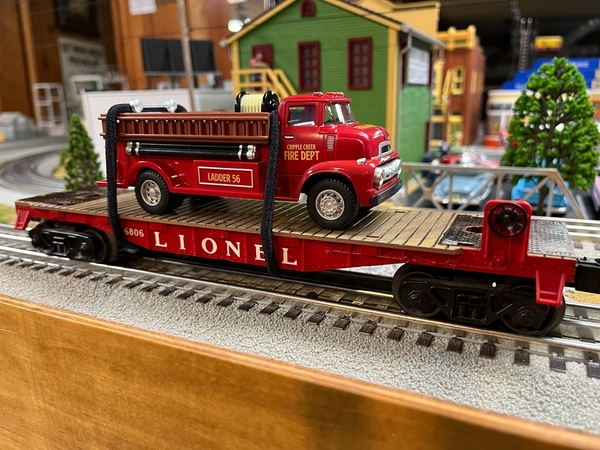
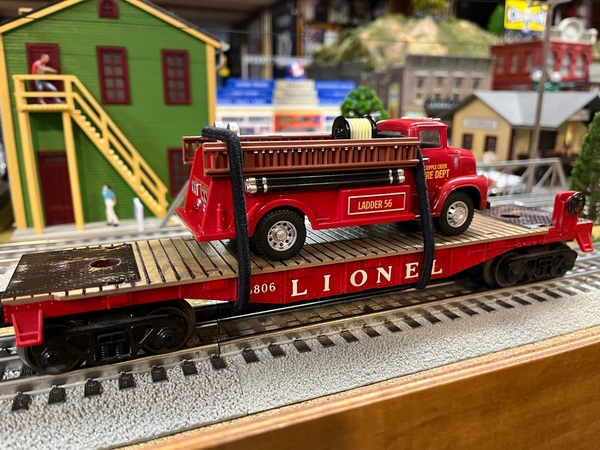
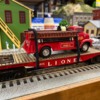
Picked up these three (3) flat cars for next to nothing at a local show. First one up is one of the red Lionel flats that I detailed, weathered and added the Menards fire truck load.
Attachments
Dave and Bob, I have occasionally pondered whether all of us would get more done if we weren't on the Forum as much. ![]() Blasphemy, I know!
Blasphemy, I know! ![]() I finally decided that my initial statement isn't true. If I am like others, which I suspect I am, I gain new insight, motivation, learn better techniques, lean about better tools for the job at, hand, you get the idea. Bob's suggestion for a fine soldering tip and lit magnifier is just one case in point.
I finally decided that my initial statement isn't true. If I am like others, which I suspect I am, I gain new insight, motivation, learn better techniques, lean about better tools for the job at, hand, you get the idea. Bob's suggestion for a fine soldering tip and lit magnifier is just one case in point.
Idea-thinker, that's great you have a lot of operating accessories to add to the layout.
Mike, As you and I talked elsewhere, it is good to see you commenting here again after your cross half country move. I'm praying you find the right train room soon and the CEO approves!
Bill, working on the cattle loader is a good task for a rainy day. We had dry but cloudy skies the last couple days, but the weatherman predicts it will start raining again tonight.
I took advantage of the dry weather to spray paint two parts I forgot about when I was spray painting parts for my Brennan's Sanky Wanky Coffee Co. I have described the process ad nauseum on my layout build thread, but here are a couple so you can see the project.
Attachments
@Mark Boyce posted:Dave and Bob, I have occasionally pondered whether all of us would get more done if we weren't on the Forum as much.
Blasphemy, I know!
I finally decided that my initial statement isn't true. If I am like others, which I suspect I am, I gain new insight, motivation, learn better techniques, lean about better tools for the job at, hand, you get the idea. Bob's suggestion for a fine soldering tip and lit magnifier is just one case in point.
Mark,
Again your build has turned out very nice. I really appreciate the steps you showed during the process. I agree with your statement above. Sometimes the need to go back comes from a new idea or skill. That has been the case with some of my other projects in the past. Unfortunately, I can't use that for an excuse on the things I am currently working on.
Dave


