
@mike g. posted:

Morning guys, all I can say is wow what wonderful projects everyone is doing and what amazing layouts are being shown! As a lot of you know me, I usually comment on most projects going on. But I have been away for too long and you all have done way too much for me to comment on everyone!

But I did just hand out a train load of likes! LOL I would have done more but today is really the only day I have to work on the layout. I still have track to paint while its dry outside and I want to place some buildings to see if I really like the placement of some of them.

I hope you all have a wonderful Sunday and that you all find time to have fun with your layouts and trains!

P.S. I will try to check in before next Sunday! LOL

Mike, I'm glad to see you checking in on the weekends during your extremely busy (and tiring) summer!!  I think I received one boxcar full of 'likes' on my posts alone! 

I'm sorry I didn't see this on Sunday.  We had a very busy weekend (for us) and I am only getting to posts now.

I am about ready to make some posts about my new lift up scenery base, since I have recovered enough for some light work.

Carry on with all the great projects, folks!!

@Redshirt214 posted:

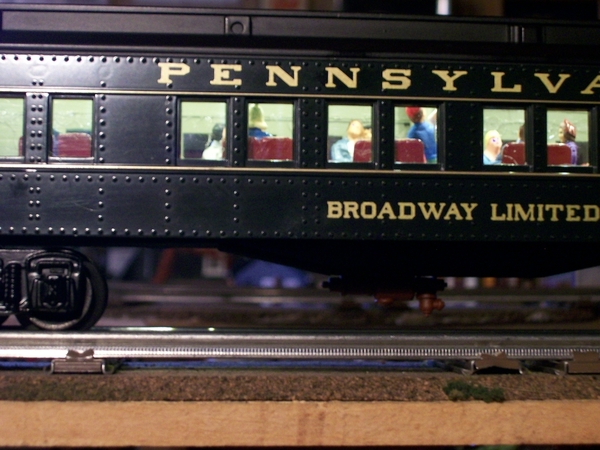
I still want to add window glass to them, but last time I tried that, I couldn't get the plastics to bond together properly. So I may try a different type of plastic at some point or else use tape on the inside to attach windows. And possibly use some LEDs to do lighting!  

Looks good Red.   

I did the same set and using the LEDs works well.   

For the clear window glass I just used the clear stiff stuff from some of the packaging from some of my 'tree ' purchases.    The GOO GLUE I've used worked well.   With that glue I applied a small amount on a toothpick and applied some on either side of the window openings being careful not to let it ' string ' across the opening or on the 'glass'.

A few months ago I saw a YouTube on the Toy Train Tips And Tricks channel about using a small Bluetooth speaker and free apps as an economical way to produce on-board train sounds for trains that are mute. So I ordered the "MOMOHO Mini Bluetooth Speaker" as described on the video for $16.99. It's only 1-3/8" dia. by 1" thick but it produces a volume more than adequate. I paired it to an old phone I had sitting around, then put it in a boxcar behind the engine and play train sounds from various free apps. (The old phone doesn't have any cell service but the Bluetooth is all it needs.) I also had another old phone and a larger Bluetooth speaker, so I set that speaker on the layout and play an app that has a constant loop of ambient station sounds. (I could just play the station sounds from the phone, but the speaker sounds better.) So anyway, the overlapping white noise, squealing flanges and horns from the different speakers make a wonderful cacophony. Great fun, and at $17 a lot more affordable than other options.

Attachments

Videos (1)
bluetooth1

Today, I bought the paint for my newly, redesigned transformer cabinet as well as the lumber and hinges for the frame of the new layout control panel that will have a layout diagram with toggle switches to control track switches.

The layout is undergoing a MAJOR renovation. My son Chris works a job that keeps him too busy to be able to help with the layout. Also, I am disabled and can no longer get under the layout to do wiring or climb onto the platform to add new sidings, etc.

I am VERY fortunate to have other help, a former French horn student from the Maryland Conservatory of Music who eventually went to work for me at the last iteration of my brass instrument repair, customization and sales shop. When I told her that I was closing the shop permanently for retirement, she asked me if I was planning to do any train-related stuff in retirement. I told her that I would like to but, I am very limited in what I can do. Since she really enjoyed working with her hands, she now visits me on Sunday mornings to do layout work. Without further ado, I would like to introduce the OGR Forum to Ms. Zora Maya Keith, our newest partner in the GREAT Northeastern Railway.

0702231101 [4)

Attachments

Images (1)
  • 0702231101 (4)

Randy - what a great help. Another train enthusiast in the fold!  Welcome Zora!

----------------------------------------------------------------

Took a video of the build progress posted on the TPRR link below.

There have been various iterations of the build from this angle. Started laying the permanent track for the upper level. Doing this twice was more time consuming but I needed to get the layout in the space in my head to think about the end product. I was really not happy with the upper level completely covering the lower yard. So I cut it off. I realized I had enough room for a factory area on the lower level for visual interest.  The center will still have a peninsula as shown in my earlier posts. I needed to keep aisle access on two sides of the layout to get to storage and utilities.

TPRR2 Augbuild

Figuring out where to connect the 3 loops has been a back and forth discussion. The double main, along the back wall, will be covered by a city or hill, - I did not want switches covered up. This problem was solved using Ross 096/072 curved turnouts. I had to spend time wiring for conductivity as all the turnouts were not "Ross Ready".  The track leading to the lower right will be an engine service area. I need to add more ply under the turnout floating in space. The area between the wall and track is 12 inches deep and is street scene candidate - slightly elevated as the yard track begins its ascent in this area. The wall outlet will have to go.

TPRR2 Augbuild

Attachments

Images (2)
  • TPRR2 Augbuild
  • TPRR2 Augbuild
Last edited by ScoutingDad

I added four small piles of 12' boards to the racks at the Menards lumber company. Then I added some scraps of lumber and more sawdust behind the building. Previously there was just some sawdust there, but it felt like something was missing. Then I realized that the guys would just sweep the dust along with the cutoffs from the floor and let them pile up out back by the railroad tracks "where nobody's gonna care." Also added tall yellow grass around the grade crossing.

lumbercompanytallgrass

Attachments

Images (2)
  • lumbercompany
  • tallgrass

With the passenger cars finished (save for windows and touch-up) the ABA F-3 Lionel cabs will now be painted in the NP North Coast Limited Loewy livery.  But a relatively simple replacement for the rear roof of the observation car that is a better representation of the prototype is a fairly simple project requiring only the removal of the taillight housing. With a sanding drum attached to the Dremel the rough removal was accomplished. Now the fill, sand and repeat begins.

Obs car 5 [2)Obs car 1 [2)

Attachments

Images (6)
  • Obs car 6 (2)
  • Obs car 4 (2)
  • Obs car 3 (2)
  • Obs car 2 (2)
  • Obs car 1 (2)
  • Obs car 5 (2)

I started new project today. Don’t ask how many unfinished ones are in the cooler.

I’m creating a set of passenger cars to go with the NH&I steam engine I have on order. The NH&I has an open air car; so in addition to a set of Williams cars; I picked up an extra observation car. Im modifying it to simulate their car. I removed all the window silhouettes  with the intention of adding figures in the cars. Im curious what anyone has done to create seating in these cars. I also need advice on how to correctly remove the wheel sets from the trucks.
Thanks for looking and for any advice you may offer. The pictures show the modified car, the car body and the chassis with truck. IMG_9346

IMG_9347

IMG_9345

Attachments

Images (3)
  • IMG_9346
  • IMG_9347
  • IMG_9345

Today, I bought the paint for my newly, redesigned transformer cabinet as well as the lumber and hinges for the frame of the new layout control panel that will have a layout diagram with toggle switches to control track switches.

The layout is undergoing a MAJOR renovation. My son Chris works a job that keeps him too busy to be able to help with the layout. Also, I am disabled and can no longer get under the layout to do wiring or climb onto the platform to add new sidings, etc.

I am VERY fortunate to have other help, a former French horn student from the Maryland Conservatory of Music who eventually went to work for me at the last iteration of my brass instrument repair, customization and sales shop. When I told her that I was closing the shop permanently for retirement, she asked me if I was planning to do any train-related stuff in retirement. I told her that I would like to but, I am very limited in what I can do. Since she really enjoyed working with her hands, she now visits me on Sunday mornings to do layout work. Without further ado, I would like to introduce the OGR Forum to Ms. Zora Maya Keith, our newest partner in the GREAT Northeastern Railway.

0702231101 [4)

This is great and a very unique story! This has been stated many times, but there is definitely a connection between the railroad(modeling) and music in a few ways. I would imagine it has something to do with the usage of the right side of the brain and other things. I too, went to school for music and you could say I'm passionate about both. I'm sure Zora is and will be a huge part of your layout and continued enjoyment of the hobby. I can only image how she feels to help the person that assisted in giving her the gift and passion of music. Please continue to share you and Ms. Zora's layout progress.

Dave

@luvindemtrains

Dave:

Thank you very much for your kind words as well as your thoughts and observations. Zora Maya has been a Godsend! Without her help at this stage of my life, the improved layout would remain as is, a shamble. As I told her, over and above student and employee, she has become a trusted and cherished friend. Zora Maya is due back this coming Sunday morning. I will definitely try to remember to take my phone downstairs with me and take photos of our slow, but steady progress.

Also, Dave, I have been watching your layout progress. In addition to being a musician, your visual art skills are also outstanding. Bravo sir!


Afternoon guys I hope your all doing well and ready for a good weekend!

I might as well get started and I am sorry I am early for being late this week! LOL

@VinceL Vince looks like good progress on the yard and engine service area! I will keep watching your progress!

@jstraw124 The ballast and trees look great~!

@John's Trains John what a great idea with the speaker and it really sounds good! I also love the addition of the extra lumber and the Menards Lumber company! The scraps and saw dust is really going the extra mile! Nice work!

@Randy Harrison Randy good luck on the new renovation of your layout and it is nice to see you have such a great young lady helping you! Also Welcome to Ms. Zora Maya Keith to OGR!

@ScoutingDad Jeff I really like how things are coming along! I sure hope you are going to be ready for your grandsons visit, It will be interesting to see what is next!

@pennsyfan Bob wow that is quite the undertaking! Good luck and I hope it goes well! Please keep us posted!

Well guys I did get out to the train room last Sunday and finished painting and installing the siding track. I also set some building on the layout for your thoughts. I am thinking I need to finish wiring in the switches and get around to ballasting before I get to carried away! LOL    20230730_15173520230730_15174920230730_15180520230730_151814

I hope you all have a great weekend and find time to have fun with your layouts and trains!

Attachments

Images (4)
  • 20230730_151735
  • 20230730_151749
  • 20230730_151805
  • 20230730_151814
@pennsyfan posted:

. I also need advice on how to correctly remove the wheel sets from the trucks.

Thanks for looking and for any advice you may offer. The pictures show the modified car, the car body and the chassis with truck.


IMG_9345

The wheel sets appear to be the type that can just be pulled up out of those slots.  They were none conductive delrin plastic if I remember Bob.

I've seen this type of arraingment on some trailing trucks on steam engines.

Last edited by Dallas Joseph

Hi guys and gals, I hope you all had a wonderful Sunday!

I was able to get out to the train room today and worked on getting some of my switch motors wired up. But it didn't go as smooth as I thought it would, as I couldn't remember where I put my switch motors and it took me a while to find them! LOL but I was able to get 5 wired up and just need to run power to them! I also have to ask @Mark Boyce how he wired the motors to work both with buttons and AIU!

Here are a couple photos just because as they say no proof it never happened! LOL

20230806_153152

It's hard to believe that there is 5 switches in such a small area! LOL

20230806_153143

Attachments

Images (2)
  • 20230806_153152
  • 20230806_153143
@mike g. posted:

Hi guys and gals, I hope you all had a wonderful Sunday!

I was able to get out to the train room today and worked on getting some of my switch motors wired up. But it didn't go as smooth as I thought it would, as I couldn't remember where I put my switch motors and it took me a while to find them! LOL but I was able to get 5 wired up and just need to run power to them! I also have to ask @Mark Boyce how he wired the motors to work both with buttons and AIU!

Here are a couple photos just because as they say no proof it never happened! LOL

20230806_153152

It's hard to believe that there is 5 switches in such a small area! LOL

20230806_153143

Good deal, Mike!  I’ll have to dig that information out for you.  👍🏻  That’s why we document, I couldn’t remember circuits when I was in my 20s…. I don’t remember from one day to the next now.  😄😄😄

I did work to improve the Menards "Halls of Handsome" barbershop. Since the first time I turned out the room lights and noticed the building's radioactive glow, I've had a mind to pull it apart and paint the inside. An old forum post reported that another Menards resin building was secured to the plastic base with hot glue. I thought I'd just stick a putty knife between the structure and base and pop it right off. But nothing is that easy! In the process of putty knife-and-hammer prying I accidentally broke off three of the figures standing outside. Eventually I got the inside painted black, and that fixed the light leak except for a couple spots I couldn't reach. While I had access, another thing that had bothered me was that even though the barbershop's front window was cheerfully lit, the doorway remained dark. Electricity isn't my thing, but I managed to solder leads to a single LED from a tape strip and route the wires through the doorway's ceiling to splice into the existing wire. In that process I learned that drilling a hole through resin doesn't always work, so I had to plug the extra-large hole around the wire. But now the barbershop doorway looks more inviting, and the building looks less radioactive.

light leak

lightleak fixed

entrance light

Attachments

Images (3)
  • light leak
  • lightleak fixed
  • entrance light

Still trying to get the layout in operating condition. As I am closing in on the goal, I either find problems or decide to change things (to make it better - we used to call this scope creep - projects were not getting completed on time and costs got out of hand).

Why do 5 minute jobs take 3 hours ???

As I was doing a final continuity check, a few Ross switches were looking to have problems. One had a broken slider another had sloppy point movement. On to the repair bench.  I found out the points are mounted two different ways. The newer type has the pins slide through the "slider" holes and then through tiny holes in the points. Pretty simple fix as long as you have a soldering iron that delivers sufficient heat to quickly make the joint. I had to use my butane soldering torch to get this done - first iron did not want to work regardless on how much time I spent coaxing and willing it to do so. In the mean time, I went out an bought a 100 amp gun to make the job a little easier on my second repair. Two minutes of heat, popped a breaker and the new gun does not work properly (regardless of how long I tried to make it heat up). Back to the butane iron and the new discovery. The older point system relies on a solder joint where the side of the point solders to the side of the pin - well it works. Got the first pin attached and went to line up the second pin into the slider hole. NOPE !!!  Ended up drilling a new hole to insert the pin and then soldering the point. Got the point spacing right on the first try. Something actually went right. Re-installed the switch - works like new. YEAH !!!   I cannot figure out how the pin holes are getting so large. I cannot believe there is that much movement to create that kind of wear - but maybe. The slider breaks when the hole gets large enough.

Ross point slider x

TPRR2 as it exists tonight. For now I inserted "pinned" bridge sections (front left). Once I have a better handle on the layout, I'll build drop downs, lift ups or lift off sections. I really wanted to have a river scene below, but the track would obstruct the view, so what's the point?  Mulling this situation over. Span is 36 inches. Duck under is 36 inches high - ducking gets old really quick - crawling under on my hands and knees - I suppose its not a duck under. Maybe I'll just roll under the lower yard section.

Here is where I start envisioning and not making progress.  Pulled out scenery and buildings just for perspective. Back left is 2 sections of stone wall (6 inches tall) just behind the inner loop. The current idea is to elevate a town area covering the main line and the incline track.  There is 24 inches of space at this point to the wall. Plenty of space for a town and streets.  The location where the buildings are currently is screaming out for a transfer freight building with freight doors on both sides. Bummer, there is no room for a proper siding, but tight spaces require compromises. Several DownTown Deco buildings will fit right in as they tend to look a little on the run down side. Thinking First Timer bar at least.  That's all for now folks ...     ideas are still percolating ...

TPRR2 Aug6

Attachments

Images (2)
  • Ross point slider x
  • TPRR2 Aug6

Why do 5 minute jobs take 3 hours ???

Answer:

In the Special Theory of Relativity, Einstein determined that time is relative—in other words, the rate at which time passes depends on your frame of reference.

Simple example:

Kissing a female for an hour seems like a few minutes whereas having your tooth drilled for a few minutes seems like hours!

20230806_202130Good morning to all,  this will be my first contribution to this thread.

Last year this Disney Magic Kingdom station was part of a train donation to our train club in Penny Farms Fl.  There wasn’t any place for to fit.  I agreed to adopt it and give it a good home.  Seeing how  I’m a “Snowbird” I was sure I could find a place for it in my train room in northern Virginia.

Yesterday, I unpacked it and put it on my portable O & S ga. layout.

IMG_6989

Attachments

Images (1)
  • 20230806_202130
Last edited by boomer0622
@ScoutingDad posted:
I cannot figure out how the pin holes are getting so large. I cannot believe there is that much movement to create that kind of wear - but maybe. The slider breaks when the hole gets large enough.


During one period of time, Ross switches used a soldering flux that attacked the plastic throw bars.  On these switches, the chemical reaction gradually eats away at the plastic, making the holes larger, the pins loose and eventually the throw bar gets so thin near the pins that it breaks.

Ross switches manufactured before or after this time period are fine.  They will fix any broken switches for free (if you send them the switch) or will supply replacement throw bars and pins for free.  I've probably fixed over 30 switches on several layouts in the Cincinnati area.  With some work, throw bars can even be replaced without removing the switch from the layout.

@ScoutingDad posted:

Still trying to get the layout in operating condition. As I am closing in on the goal, I either find problems or decide to change things (to make it better - we used to call this scope creep - projects were not getting completed on time and costs got out of hand).

Why do 5 minute jobs take 3 hours ???

Here is where I start envisioning and not making progress.  Pulled out scenery and buildings just for perspective. Back left is 2 sections of stone wall (6 inches tall) just behind the inner loop. The current idea is to elevate a town area covering the main line and the incline track.  There is 24 inches of space at this point to the wall. Plenty of space for a town and streets.  The location where the buildings are currently is screaming out for a transfer freight building with freight doors on both sides. Bummer, there is no room for a proper siding, but tight spaces require compromises. Several DownTown Deco buildings will fit right in as they tend to look a little on the run down side. Thinking First Timer bar at least.  That's all for now folks ...     ideas are still percolating ...

TPRR2 Aug6

Because.......sorry don't have a better explanation......

For your drop downs- have you considered a lift bridge like Mainne offers? We have tons of motorized height adjustable desks at work and I've often thought that one of the bases would make a great base for a lift platform.

So where's the first run video?????

Bob

Bob - still need to add power drops and re-cut a couple of track sections. I'll probably post a first run video by tomorrow but late today is not out of the question.

I've thought about the Mianne lifts but would want it to have at least 5 foot duck under clearance. I have not checked their max height. I thought about a slideout section (floor is tile), but with the 36x20 area, there is not room to put it. Cannot push it in but could pull it out, but there is only a 36" walk access leaving less than 16 inches maneuvering room to pull out and push left.

@Bob Thanks for the update history on the Ross switches. Quite insightful.

@samparfitt Einstein indeed, I was more thinking Chief Engineer Scott in reverse, he always fixed the Enterprise in a fraction of the time he promised. I could do the same, but I worry if I say something will take a week, given my history, it will always take months. So I stick with hours and really expect something longer. Whatever I estimate when making my own repairs it always takes far longer than expected.

@John's Trains  Nice work on reducing the radioactive glow on the barber shop.  Since you are now an electrical whiz, you might consider a Miller Engineering barber-pole   to add to the building.

@ScoutingDad posted:


@samparfitt Einstein indeed, I was more thinking Chief Engineer Scott in reverse, he always fixed the Enterprise in a fraction of the time he promised. I could do the same, but I worry if I say something will take a week, given my history, it will always take months. So I stick with hours and really expect something longer. Whatever I estimate when making my own repairs it always takes far longer than expected.

@John's Trains  Nice work on reducing the radioactive glow on the barber shop.  Since you are now an electrical whiz, you might consider a Miller Engineering barber-pole   to add to the building.

Even a Chief Engineer as brilliant as Scotty faces vexing problems. Remember that time Kirk threatened him, "If you can’t get those warp engines working… you’re fired." But Scotty got hired back because he had to be on next week's episode.

And I like that Miller Engineering barber-pole!

@boomer0622 posted:

Good morning to all,  this will be my first contribution to this thread.

Last year this Disney Magic Kingdom station was part of a train donation to our train club in Penny Farms Fl.  There wasn’t any place for to fit.  I agreed to adopt it and give it a good home.  Seeing how  I’m a “Snowbird” I was sure I could find a place for it in my train room in northern Virginia.

Yesterday, I unpacked it and put it on my portable O & S ga. layout.

IMG_6989

Welcome, boomer0622. Your photo "IMG_6989" didn't post; just an icon for where it belongs. (Unless the problem is just my computer.)

If others also can't see the photo, see the instructions on including photos at

https://ogrforum.ogaugerr.com/...s-from-your-computer

John

@pennsyfan posted:

I started new project today. Don’t ask how many unfinished ones are in the cooler.

I’m creating a set of passenger cars to go with the NH&I steam engine I have on order. The NH&I has an open air car; so in addition to a set of Williams cars; I picked up an extra observation car. Im modifying it to simulate their car. I removed all the window silhouettes  with the intention of adding figures in the cars. Im curious what anyone has done to create seating in these cars. I also need advice on how to correctly remove the wheel sets from the trucks.
Thanks for looking and for any advice you may offer. The pictures show the modified car, the car body and the chassis with truck. IMG_9346

IMG_9347

IMG_9345

I added scale city diecast seats to some williams passenger cars then took out the old lights added LEDs. If that helps you Bob. Mark

Attachments

Images (2)
  • mceclip0
  • mceclip1

Add Reply

Post

OGR Publishing, Inc., 1310 Eastside Centre Ct, Suite 6, Mountain Home, AR 72653
800-980-OGRR (6477)
www.ogaugerr.com

×
×
×
×
Link copied to your clipboard.
×
×