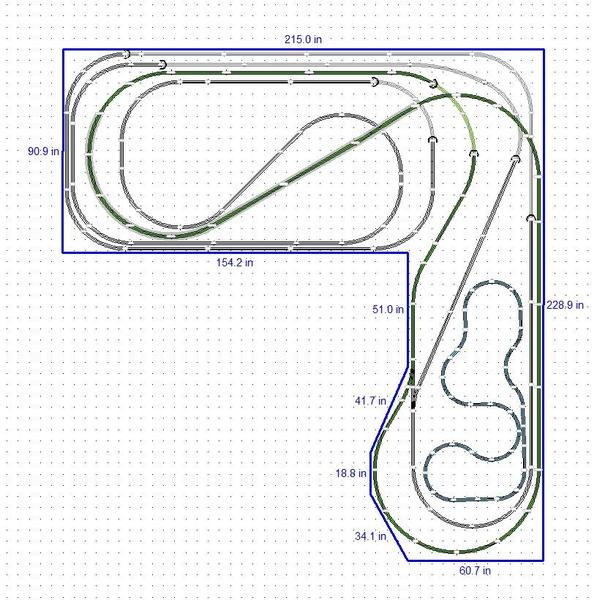
Here is a photo of a layout i drew with a CTT Inc o-gauge track template, 1 inch = 1 foot.  Sorry that the photo distorted the outlines a bit but hopefully it still makes enough sense.  The basement room I'm using has doors along one wall for the water heater, sump pump, etc, and the door out of the room in the fourth wall so I'm pushed up against only two.  I have 17'10" along the top and 18'9" down the right side.  The upper portion is 7'6" deep and the right side has to be 5' deep at the bottom wall to make room for a door.  I will be using Gargraves flextrack (been buying loads of it on ebay, so that decision has been made), and as you see I have to bump out a bit to accommodate the 072 curve.


Oh yes, the curves.  The large radius route is all 072, basically a bent figure-8, with about a 4% grade along the walls so that the middle shaded part is 7" high.  The inner loop uses 054 as its smallest radius.  It wraps around inside the larger radius route to try and get the most out of the space. 


As you can see, there is a lot of open space left.  Of course I'd like a town, but there's room also for a modest switch yard.  At the moment the track plan includes only two switches as a possibility to get from the outside track to the inside.  But for the most part, i want to have two independent runs going.  On top of all this, not drawn in, there will eventually be a third, higher, independent dog bone loop for my Shay on a logging route. 


I'm not sophisticated enough for track plan software, but the measurements work out so far.  If anyone has any input I'd love to hear it.


Thanks!

Dominic Miele

DSCN4665

Attachments

Images (1)
  • DSCN4665: 2 loop track-plan
Original Post

Replies sorted oldest to newest

Hi Domenic,

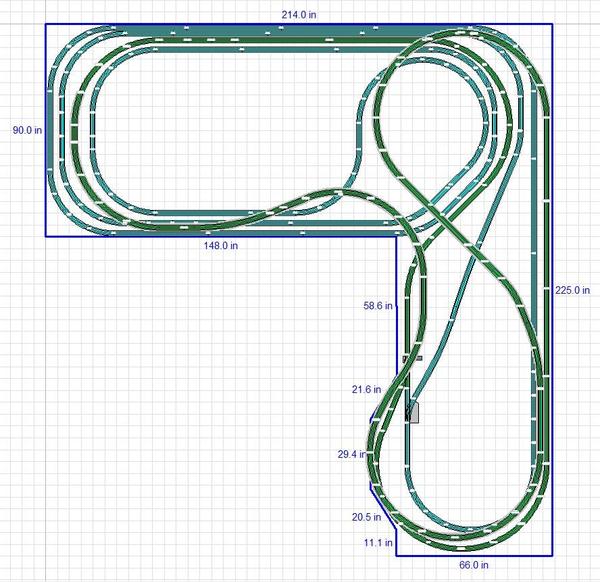
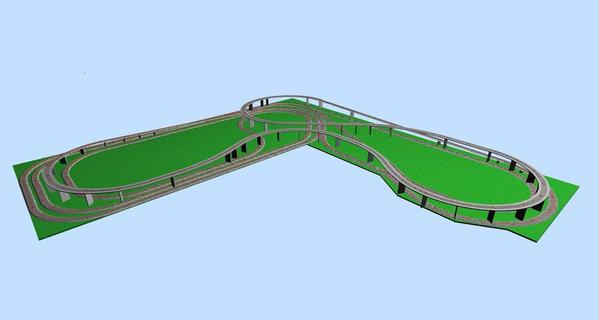
I tossed it together quickly in SCARM. I was able to achieve a 2.4% grade up and down at 7" max height.

3 three things stand out to me:

  1. While my track plan is rough, it is apparent that the corner will present some track center-rail-to-rail spacing challenges. Check what you need for the locos and cars you intend to run. There are a few other areas to check also.
  2. You'll need two or three hatches for access, top, definitely corner and right side.
  3. I have looked at some large layouts being built. I think using sectional track for most of the curves will save you a lot of work time.

I like the way that the trains will present when running. I think gently moving the long runs with flex will enhance the presentation of the train versus a "straight" straight.


I'll work on it some later on. I was copying from your drawing and trying to use all flex track quickly to get a working layout on SCARM.


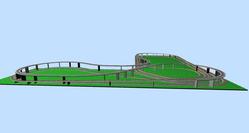
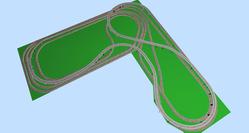
I have attached some 3D's to assist your visualization.


Attachments

Images (5)
  • Dominic Miele 3D 1
  • Dominic Miele 3D 2
  • Dominic Miele 3D No Mountain Back View
  • Dominic Miele 3D No Mountain Front View
  • Dominic Miele 3D No Mountain Track Plan
Last edited by Moonman

Moonman, thank you for the interest and the work.  I agree with you completely about using the flex track to give the direct runs a more flowing feel instead of dead straight, I just drew them straight using the template and figured I'd tweak it later.  I think there is plenty of room for adjustment, again I agree with you on the spacing issue along the top of the layout.


Well I finally caught on to the hubbub about Scarm and downloaded it myself, WONDERFUL!  So I've been kicking together some renderings of my design and realized that I could fit in more elevated track.  I stuck with the steep grade because I want to make sure I have a full 7" clearance by the time I cross over the ground level runs, especially for my GG1's cantilevers.  Again, that is something that I may tweak later.

Scarmlayout

Attachments

Images (2)
  • Scarmlayout: Original with 027 trolley line on bottom right
  • snapshot1: 3d rendering
Last edited by DomMiele

You picked up SCARM quickly!

You may notice on certain switches you can tell a fitter piece is needed on the divergence. These should be in the next update. The flex track tool takes a little to get the hang of it.


I actually like the first version from the paper, where the elevated line comes off of the mountain on that nice angle through the open space. It is visually appealing. it breaks up that space. I was thinking an opening under the mountain to access the trains.


I don't like blocking the view of the rearmost track, but I couldn't find an easy way to elevate that without messing up the whole design.


That's a well thought out display type of layout. Don't let the ease of the software distract you from your design. It's easy to start a spaghetti bowl.


Have fun! I am looking forward to your final design.

Last edited by Moonman

Moonman, you're thinking the same thing I was when I came up with the first design.  I've worked with the idea that I'd be observing from the bottom left corner of the long side, so that first iteration of the elevated run was to give the visual of a train lumbering directly towards me.

I'll tinker a bit more and try to get back to the basic concept a bit.  You're definitely right about the bowl of spaghetti!  I just like nice long runs with enough twists and turns that it won't be repeating itself right away.  Thankfully SCARM is a lot quicker than pencil and eraser.

Post
The Track Planning and Layout Design Forum is sponsored by

AN OGR FORUM CHARTER SPONSOR

OGR Publishing, Inc., 1310 Eastside Centre Ct, Suite 6, Mountain Home, AR 72653
800-980-OGRR (6477)
www.ogaugerr.com

×
×
×
×
Link copied to your clipboard.
×
×