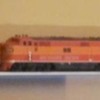
From 1946 until mid 1952 Pennsy passenger diesels were delivered in DGLE with five gold stripes.  In the summer of 1952 the railroad published instructions for most classes of passenger power to be repainted Tuscan red with immitation gold (dulux) lettering and stripes.  From my less than comprehensive photo survey it seems it took about a year for the fleet to be repainted.  Since by that time the Centipedes were largely out of passenger service, they never were painted Tuscan.  Dual service diesels such as the FM Erie builts and all but two ABA sets of FP7's were single stripe DGLE from delivery to scrapping.  Around 1956 the PRR revised the Tuscan red passenger scheme from five stripes to a single wide one with bold lettering.  Some BP20's carried the Tuscan five stripe scheme into the 1960's.  Later in the 1960's up until Penn Central the PRR repainted a number of E7 and E8 in solid Tuscan without stripes, simply applying large PRR keystones on the sides of the bodies.


A more subtle change related to the keystones on the noses of A units.  Initially locomotive numbers were found in the keystone (as with steam locomotives), starting in 1953 the lettering standard was revised to use overlapped PRR letters in the nose keystone, like was the practice with side keystones all along.


 I just got my first MTH DCC diesel, it ran great on plain DC but it was weird to operate.  I had to toggle power off/on to get it to run, its new and annoying so I'm not sure if I will purchase any more PS3 for a while.


That is a safety feature in Proto 2 and Proto 3.  When the locomotive gets conventional AC or DC power and doesn't see a command signal it will sit in neutral until the voltage is dipped below 6.5 volts.  Since most of these locomotives operate on command controlled layouts where full voltage is normally applied to the track turning on a toggle switch to power up a yard or siding with locomotives on it could have dire consequences if the locomotive took off at max speed as soon as full voltage was applied.


Just dip your throttle below 6 volts after initially bringing up track power and you will have normal conventional control .  That way you wont have to fiddle with toggle switches.

Ted are you sure about that?  I don't own a lot of MTH locomotives, maybe only about 40 PS2.0 scale wheel versions. But I run them almost exclusively on DC conventional.  When DC power is applied, the PS2.0 system will start up and the locomotive will accelerate to the speed dictated by the DC voltage applied.  PS3.0 will just start up in neutral much like PS2.0 in AC conventional but then won't move until voltage/power is cycled off and on.  My first example of this is a CSX 8-40CW, I am due to receive another 8-40CW tomorrow in Conrail and will have to test it out.   
 
Originally Posted by TedHikel:

That is a safety feature in Proto 2 and Proto 3.  When the locomotive gets conventional AC or DC power and doesn't see a command signal it will sit in neutral until the voltage is dipped below 6.5 volts.  

Originally Posted by Kerrigan:
Interested in learning how you re-wired the MARS and Headlight; like to do the same on ours!
Thanks!
Originally Posted by ecd15:

Here is another short video of a pair of 3rd Rail SP E7s on the Morning Daylight.  I re-wired the headlight and Mars light so that they are in the proper positions.  I was also able to get all 16 cars in the consist.  Enjoy.


http://youtu.be/0Eb0uFGz8vY

Basically, I swapped the wires between the two lights.  Since the number boards and marker lights share the same power source as the headlight, I couldn't just swap the plugs between the two lights.  Eventually, I'm going to have to also re-wire the marker lights, so they can be turned off, and the number boards, so they can stay lit while the headlight is dimmed or turned off. 


Also to be done, clean the orange paint off of the engine room windows and replace the nose herald with a proper one.  The herald on the engine now does not have the proper colors.

Originally Posted by ecd15:

Here is another short video of a pair of 3rd Rail SP E7s on the Morning Daylight.  I re-wired the headlight and Mars light so that they are in the proper positions.  I was also able to get all 16 cars in the consist.  Enjoy.


http://youtu.be/0Eb0uFGz8vY

Very nice! Now I'm a bit confused; the SP purchased their E7 units in A-B-B sets. Did NOT Sunset/3rd Rail offer their E7 models for SP in the correct A-B-B sets?

Originally Posted by Hot Water:
Originally Posted by ecd15:

Here is another short video of a pair of 3rd Rail SP E7s on the Morning Daylight.  I re-wired the headlight and Mars light so that they are in the proper positions.  I was also able to get all 16 cars in the consist.  Enjoy.


http://youtu.be/0Eb0uFGz8vY

Very nice! Now I'm a bit confused; the SP purchased their E7 units in A-B-B sets. Did NOT Sunset/3rd Rail offer their E7 models for SP in the correct A-B-B sets?

No.  Since the B-unit is tethered to an A-unit, the best you could do is an A-B set. 

While SP ordered the E-7s in A-B-B sets, they were not always operated that way, especially when assigned to the Daylight.  Once it became dieselized, that train typically featured triple unit diesels, almost always in an A-B-A configuration (whether ALCO PAs or EMD Es, or a mix of the two).  Presumably this made for easier turn around on this daily end-point to end-point train.


I purchased an A-B-A set of 2r SP E-7s to display with the GGD Daylight consist, and am pleased with the appearance, now that I have cleared the windows in the two A units of the orange epoxe resin paint (which was a very tedious undertaking).  Hopefully 

Scott M. will ensure these windows are not painted (or are painted black) in the second phase of E-7 production.

IMG_1162_2_2

IMG_1172

IMG_1163

Attachments

Images (3)
  • IMG_1162_2_2
  • IMG_1172
  • IMG_1163

I used Scalecoat Wash Away paint stripper for plastic.  Once removing the chassis from the  body shell, I laid the shell on its side, working on 5 windows at a time. In some cases the paint would loosen up on a particular window in about an hour; some windows took 10 hours (!) for the paint to loosen. So the whole project - two engines, 4 sides took a whole week-end. Have no idea why some windows were so difficult, but they were.

And I should add that I did not leave the windows in the A units clear, because the internals in the A units are shiny and would reflect light.  So I placed black paper over the interior window surface, held in place with electrician (vinyl) tape.  Totally reversible/removable if desired. Thought I would have to treat the B unit similarly, but the visual appearance of the 3 units together didn’t warrant the effort.

As reported by others the exceedingly bright cab light detracts from the model’s prototype appearance.  On my trailing A unit I’ll remove the crew and cut the light leads (B unit interior LEDS as well).  On the lead A unit I’d like to keep the cab light but dim it considerably. (the cab light goes off soon after the unit begins to move).  Has anyone dimmed the cab light using a resistor in series with the LED? If so what value did you find worked?


Side note: One of my A units would only run forward under DCC control, while the sound functioned in both directions! With responsive telephone assistance by Sunset technician Danny, we trouble shot the issue and concluded the decoder was defective. Note the 2 rail Sunset E7 does not use a QSI Solutions Titan DCC decoder - but a physically different/functionally similar licensed QSI Industries board which interfaces with TMCC boards. Rather than ship the unit to Sunset, Danny sent me a replacement control module which I received in 2 days. With care - but minimal difficulty - I removed the old board and plugged in the new one – problem solved…


Ed Rappe

Post

OGR Publishing, Inc., 1310 Eastside Centre Ct, Suite 6, Mountain Home, AR 72653
800-980-OGRR (6477)
www.ogaugerr.com

×
×
×
×
Link copied to your clipboard.
×
×